Managing Points of Presence (PoP) in Cloud Secure Edge
How to add or remove PoPs in Cloud Secure Edge (CSE) orgs
- Updated on
- 10 minutes to read
-
Contributors

- Points of Presence (PoP) Overview
- Impact of Selecting PoPs
- PoP Provisioning Statuses
- Steps to Add a PoP
- Steps to Remove a PoP
Points of Presence (PoP) Overview
Cloud Secure Edge (CSE) uses Points of Presence (PoP) to streamline users’ connections to resources while helping admins maintain control over data residency. In the CSE ecosystem, a PoP is essentially a CSE-managed Access Tier: while Access Tiers are self-hosted in Private Edge deployments, PoPs are fully hosted and maintained by CSE in a Global Edge deployment.
PoP provisioning is integrated directly into the initial org setup and ongoing management phases within a Secure Private Access (SPA) org: New SPA orgs are guided through a mandatory selection of at least 1 PoP. This ensures the environment is functional before the admin enters their console.
Once onboarded, admins retain the flexibility to modify their PoPs list. If the initial selection no longer meets the org’s needs, locations can be added or removed. Admins can provision additional PoPs as long as they adhere to their current maximum limit.
Note: The PoP selection feature is only available for Global Edge deployments in orgs created after the March 2026 release. PoP editing is available for all orgs.
Impact of Selecting PoPs
The management of PoPs is designed to balance security with operational simplicity. Admins have total control over which PoPs are used: Connectors, clients, and egress IPs are tethered specifically to the selected PoP locations, which ensures that data never traverses a region or country deemed out-of-scope, allowing for adherence to regional compliance. By narrowing the PoP selection, the complexity of egress IP whitelisting is drastically reduced. Instead of managing hundreds of potential IP addresses, admins only need to allowlist a small handful, simplifying the security workflow.
While admins must select at least 1 PoP on a Global Edge deployment with SPA licensing, it is recommended that admins select 2 PoPs to create high availability in their infrastructure.
PoP Provisioning Statuses
| PoP Provisioning Status | Definition |
|---|---|
| In Progress | Your org is starting the PoP provisioning process. CSE is spinning up the infrastructure components required to secure your private resources. |
| Partial Success | Users in your org can access some of the requested PoPs, but some are still waiting to be connected. |
| Success | All users in your org can access all of your selected PoP locations. |
| Failed | There was an issue with provisioning your PoPs and we’re currently working to remediate it. This issue should be resolved soon. |
Temporarily disabled: Editing and removing PoPs (including the retirement of unused PoPs) is temporarily disabled while we resolve connectivity issues that some customers experienced when swapping PoPs. Your existing PoP assignments remain active and unchanged, and no action is required. See Known Issues for details. If you require a PoP change in the interim, please contact SonicWall Support.
Steps to Add a PoP
New org with SPA Licensing during onboarding
1. Use single sign-on (SSO) to log into the CSE admin console via MySonicWall.
2. Choose a deployment model based on your needs: CSE offers a Global Edge deployment or a Private Edge deployment. If you require a Global Edge deployment, then select your PoP locations; if you require a Private Edge deployment, select Skip to Private Edge in the console.
Note: The default is a Global Edge deployment, so this will be your starting point.
3. If you select a Global Edge deployment, you must select a minimum of 1 and up to 2 PoPs before you can proceed to the CSE console.
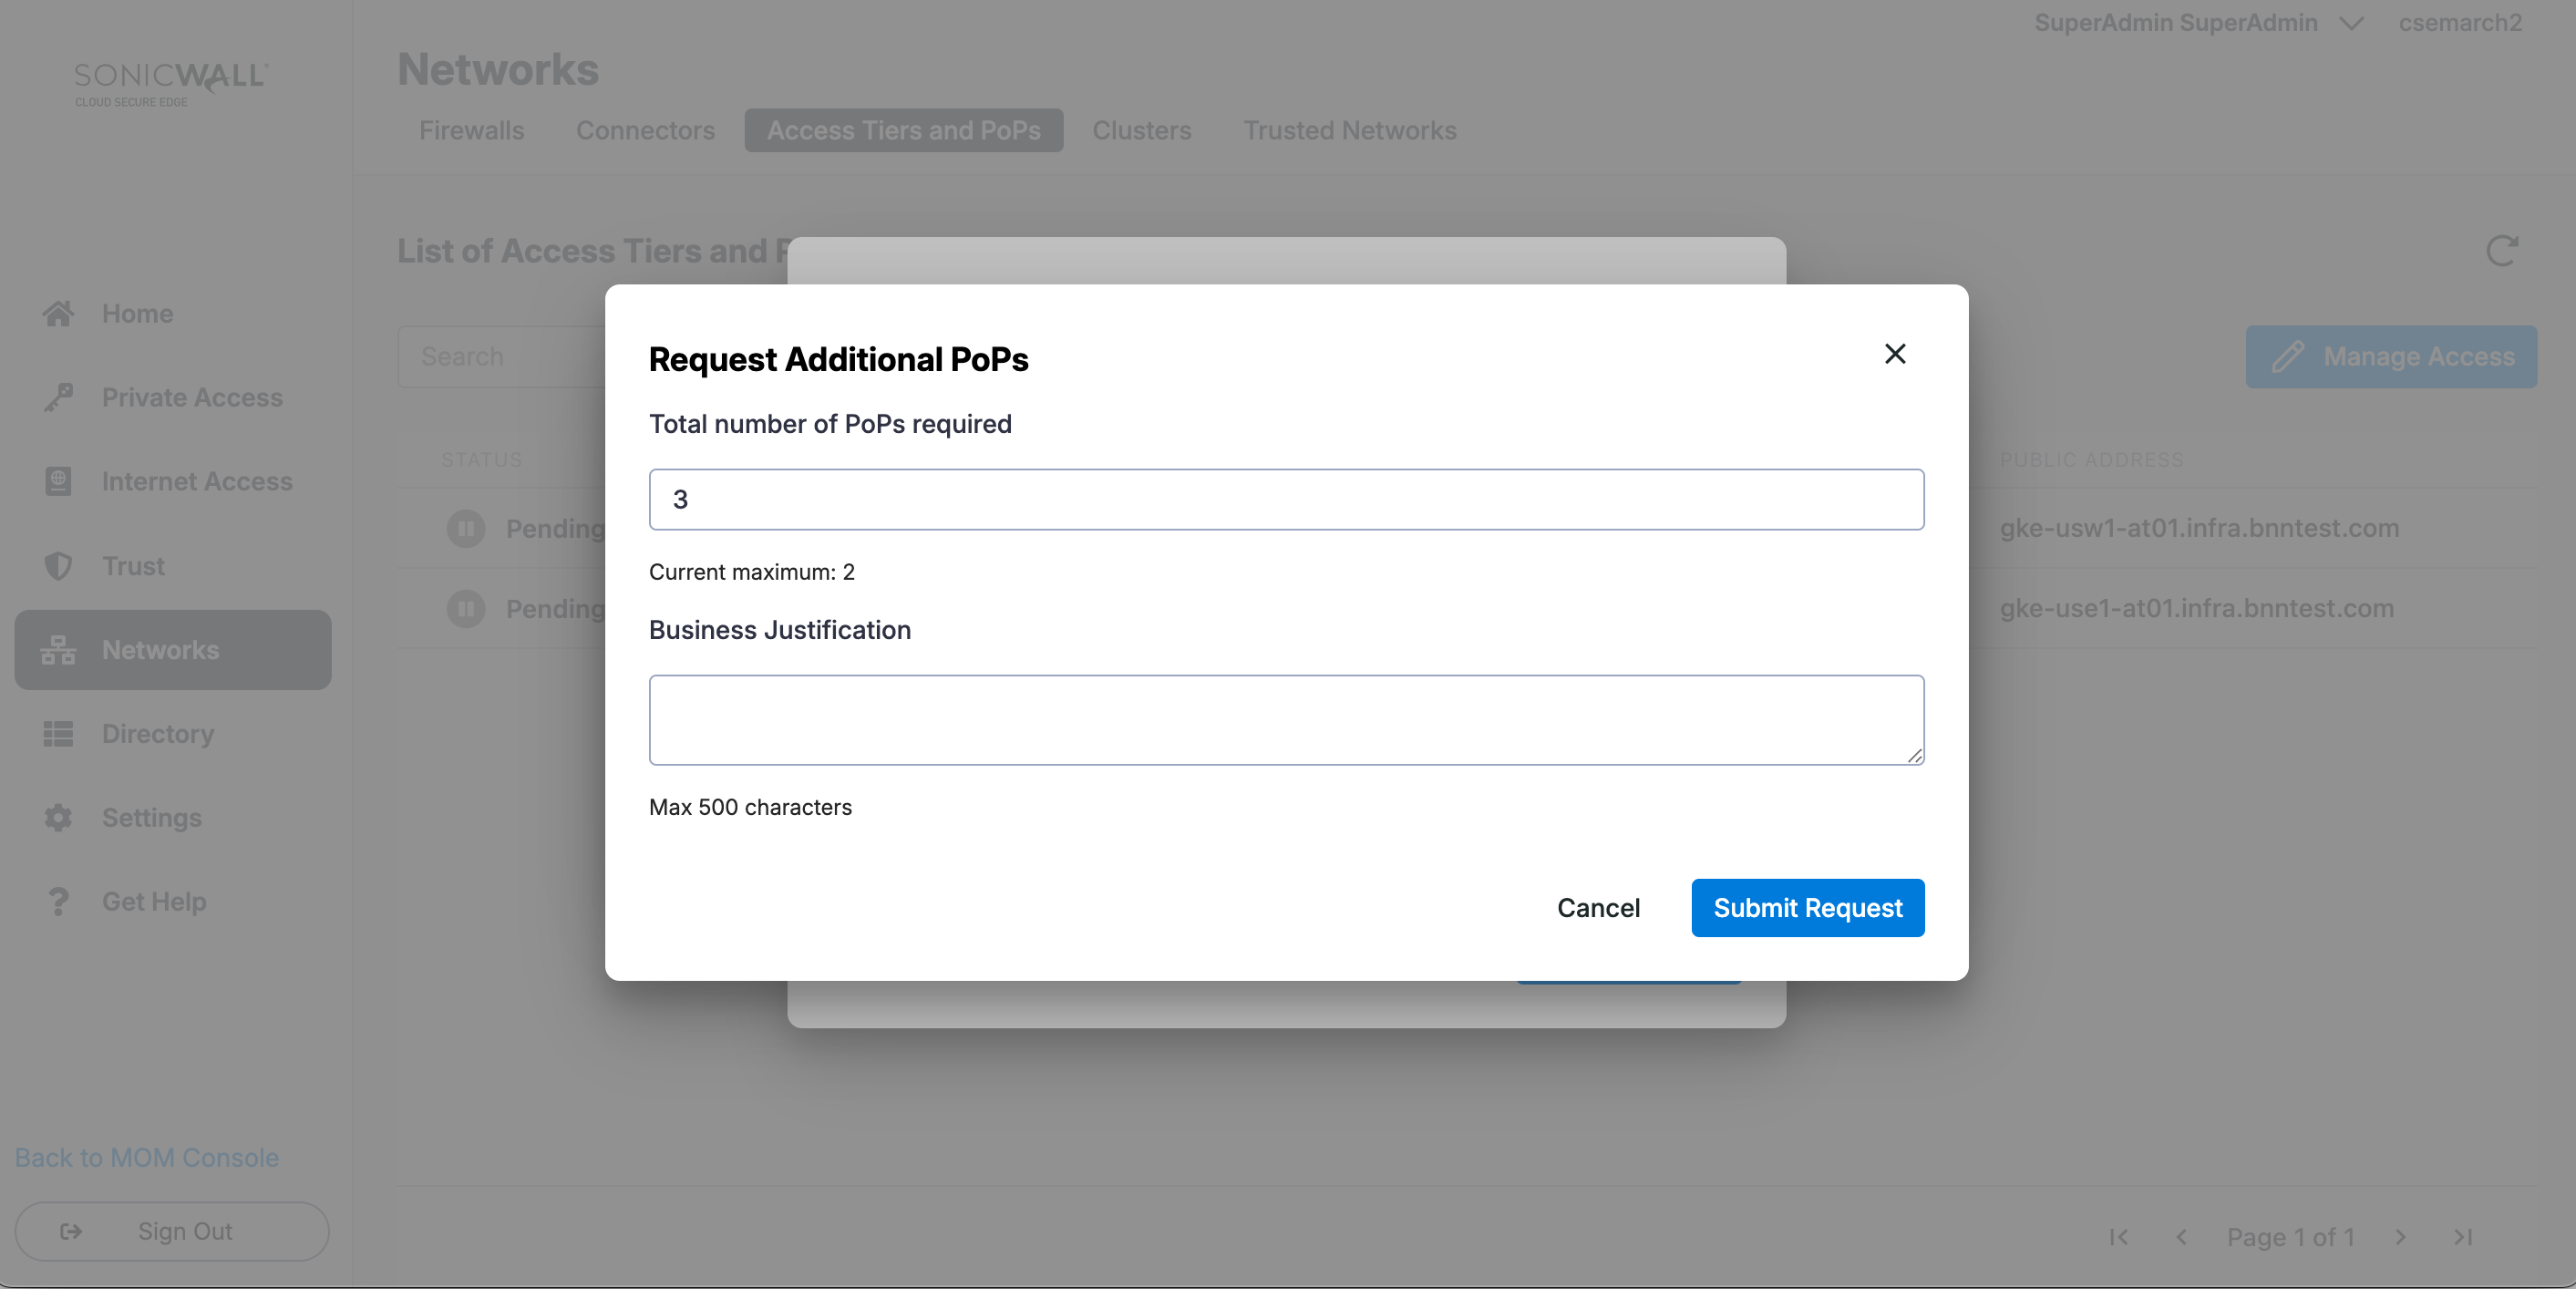
4. If you require more PoPs, select Need More?. This will open a modal that will allow you to select additional PoPs: Enter your total number of required PoPs and your Business Justification for requesting these; CSE formally review this request for approval.
Note: Approval of additional PoPs (i.e., 5+ PoPs) usually takes 1 business day, but it can take up to 5 business days to complete.
New org with SPA Licensing after onboarding
1. In the CSE console, navigate from Networks > Access Tiers and PoPs.
2. Select Manage Access, and then select Edit Global Edge Points of Presence.
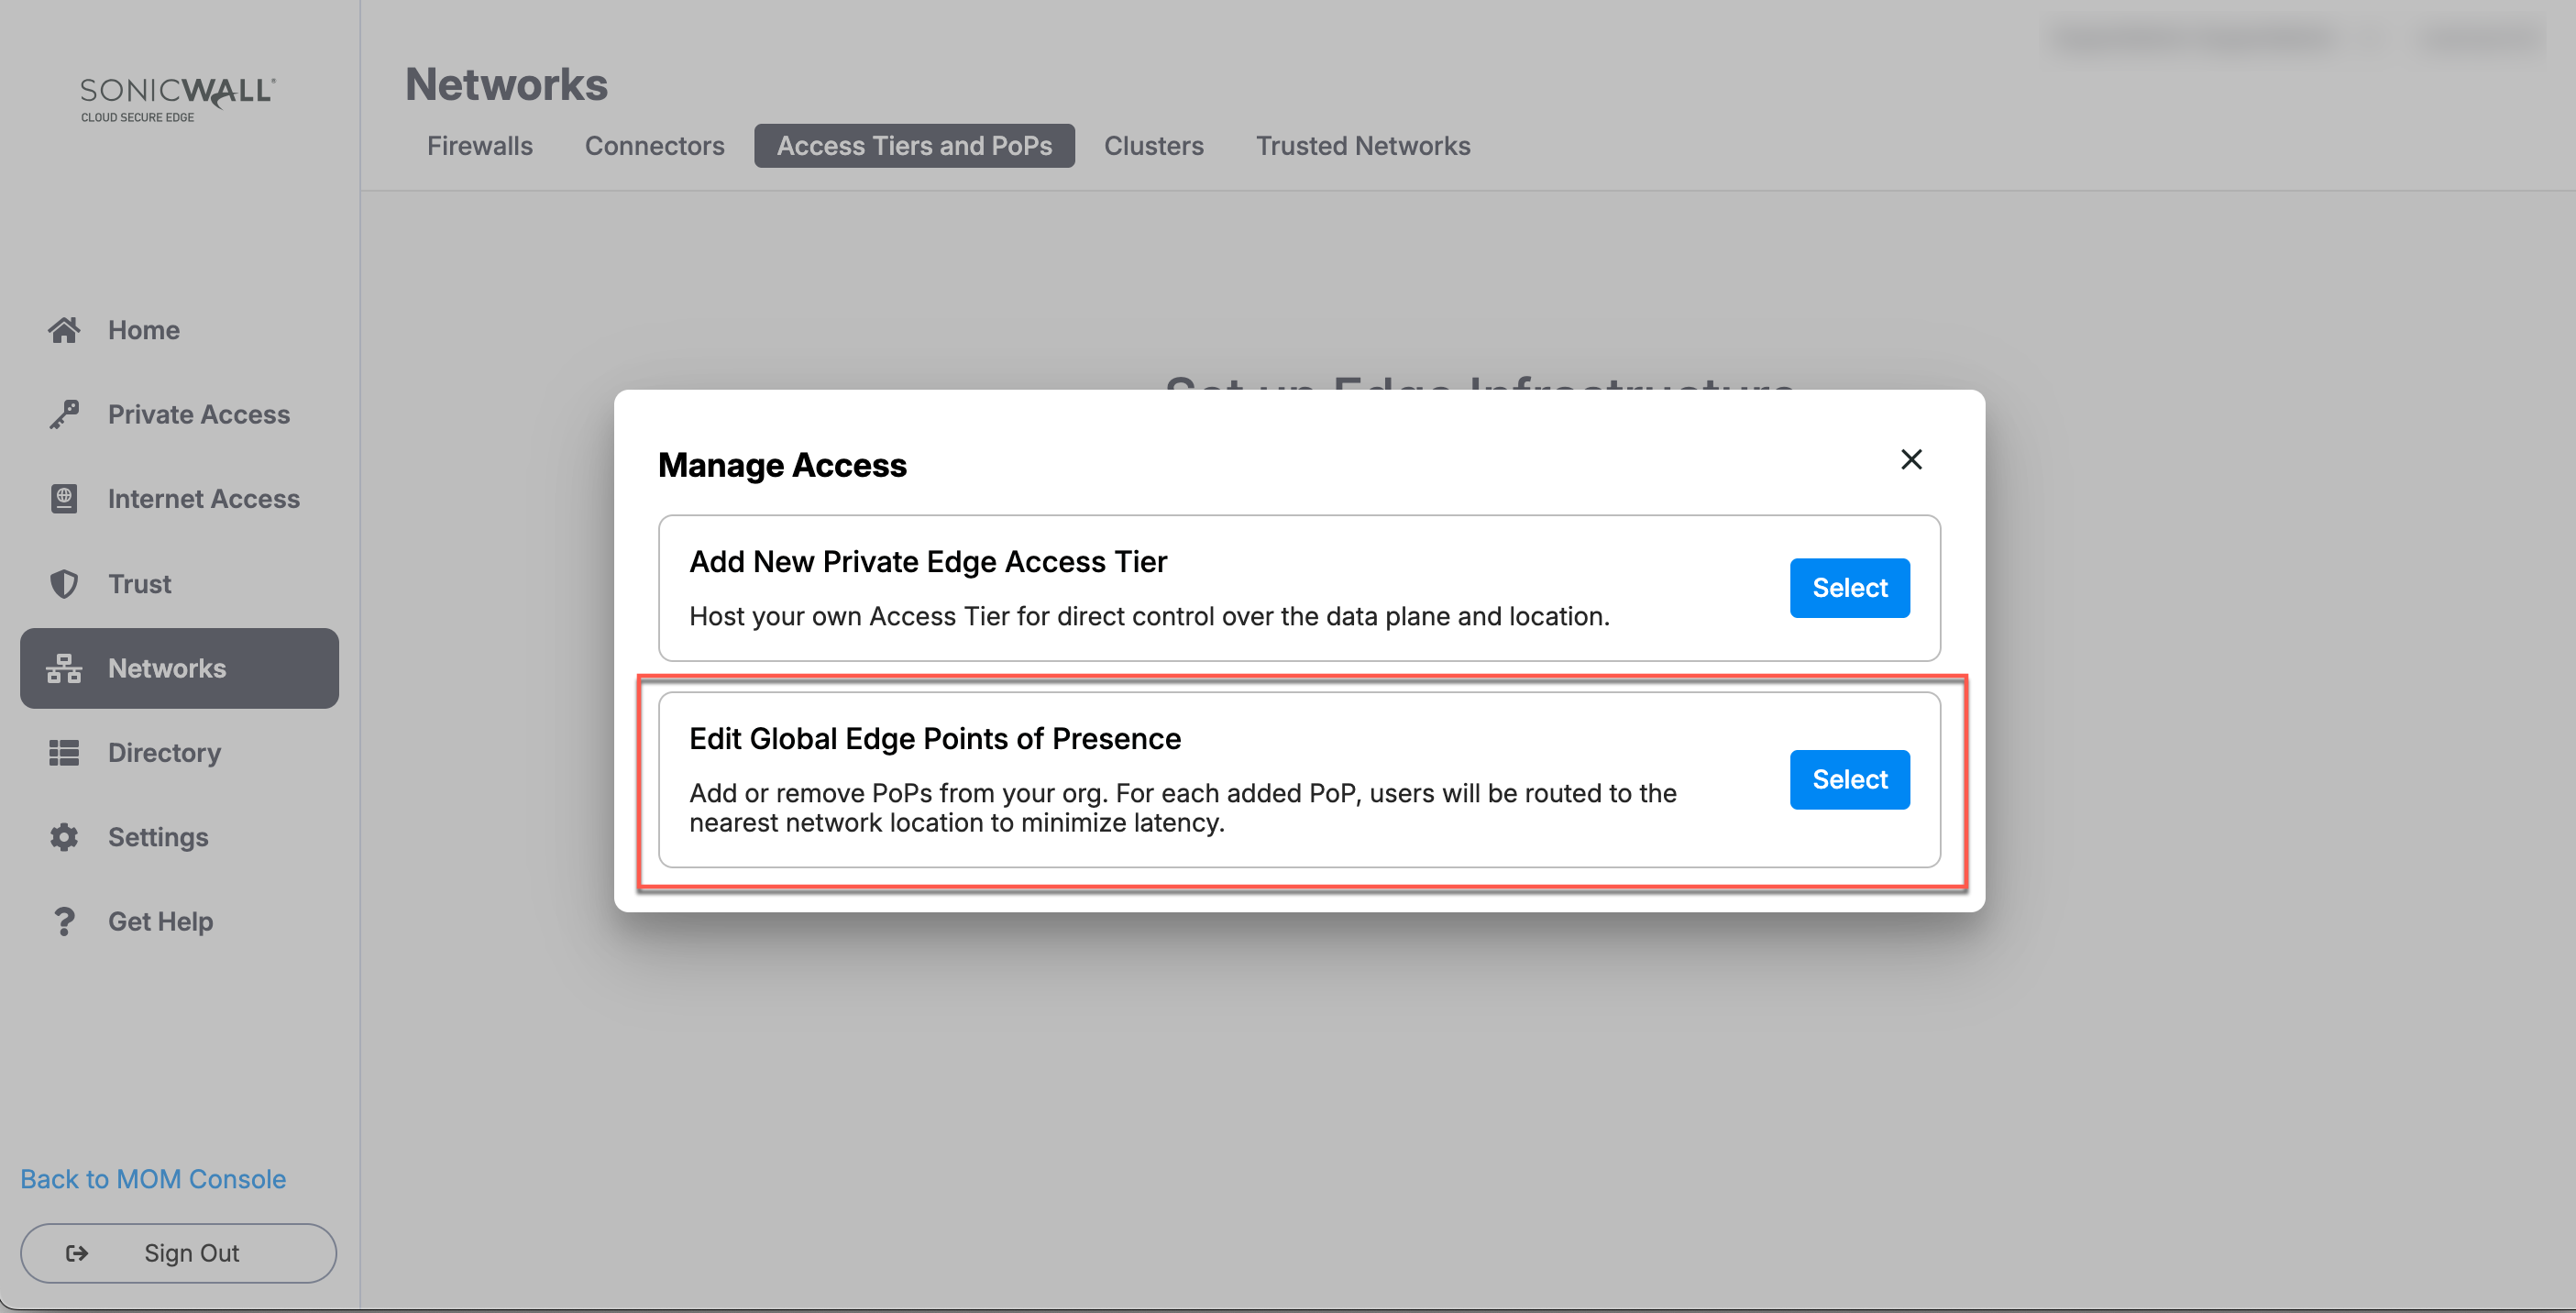
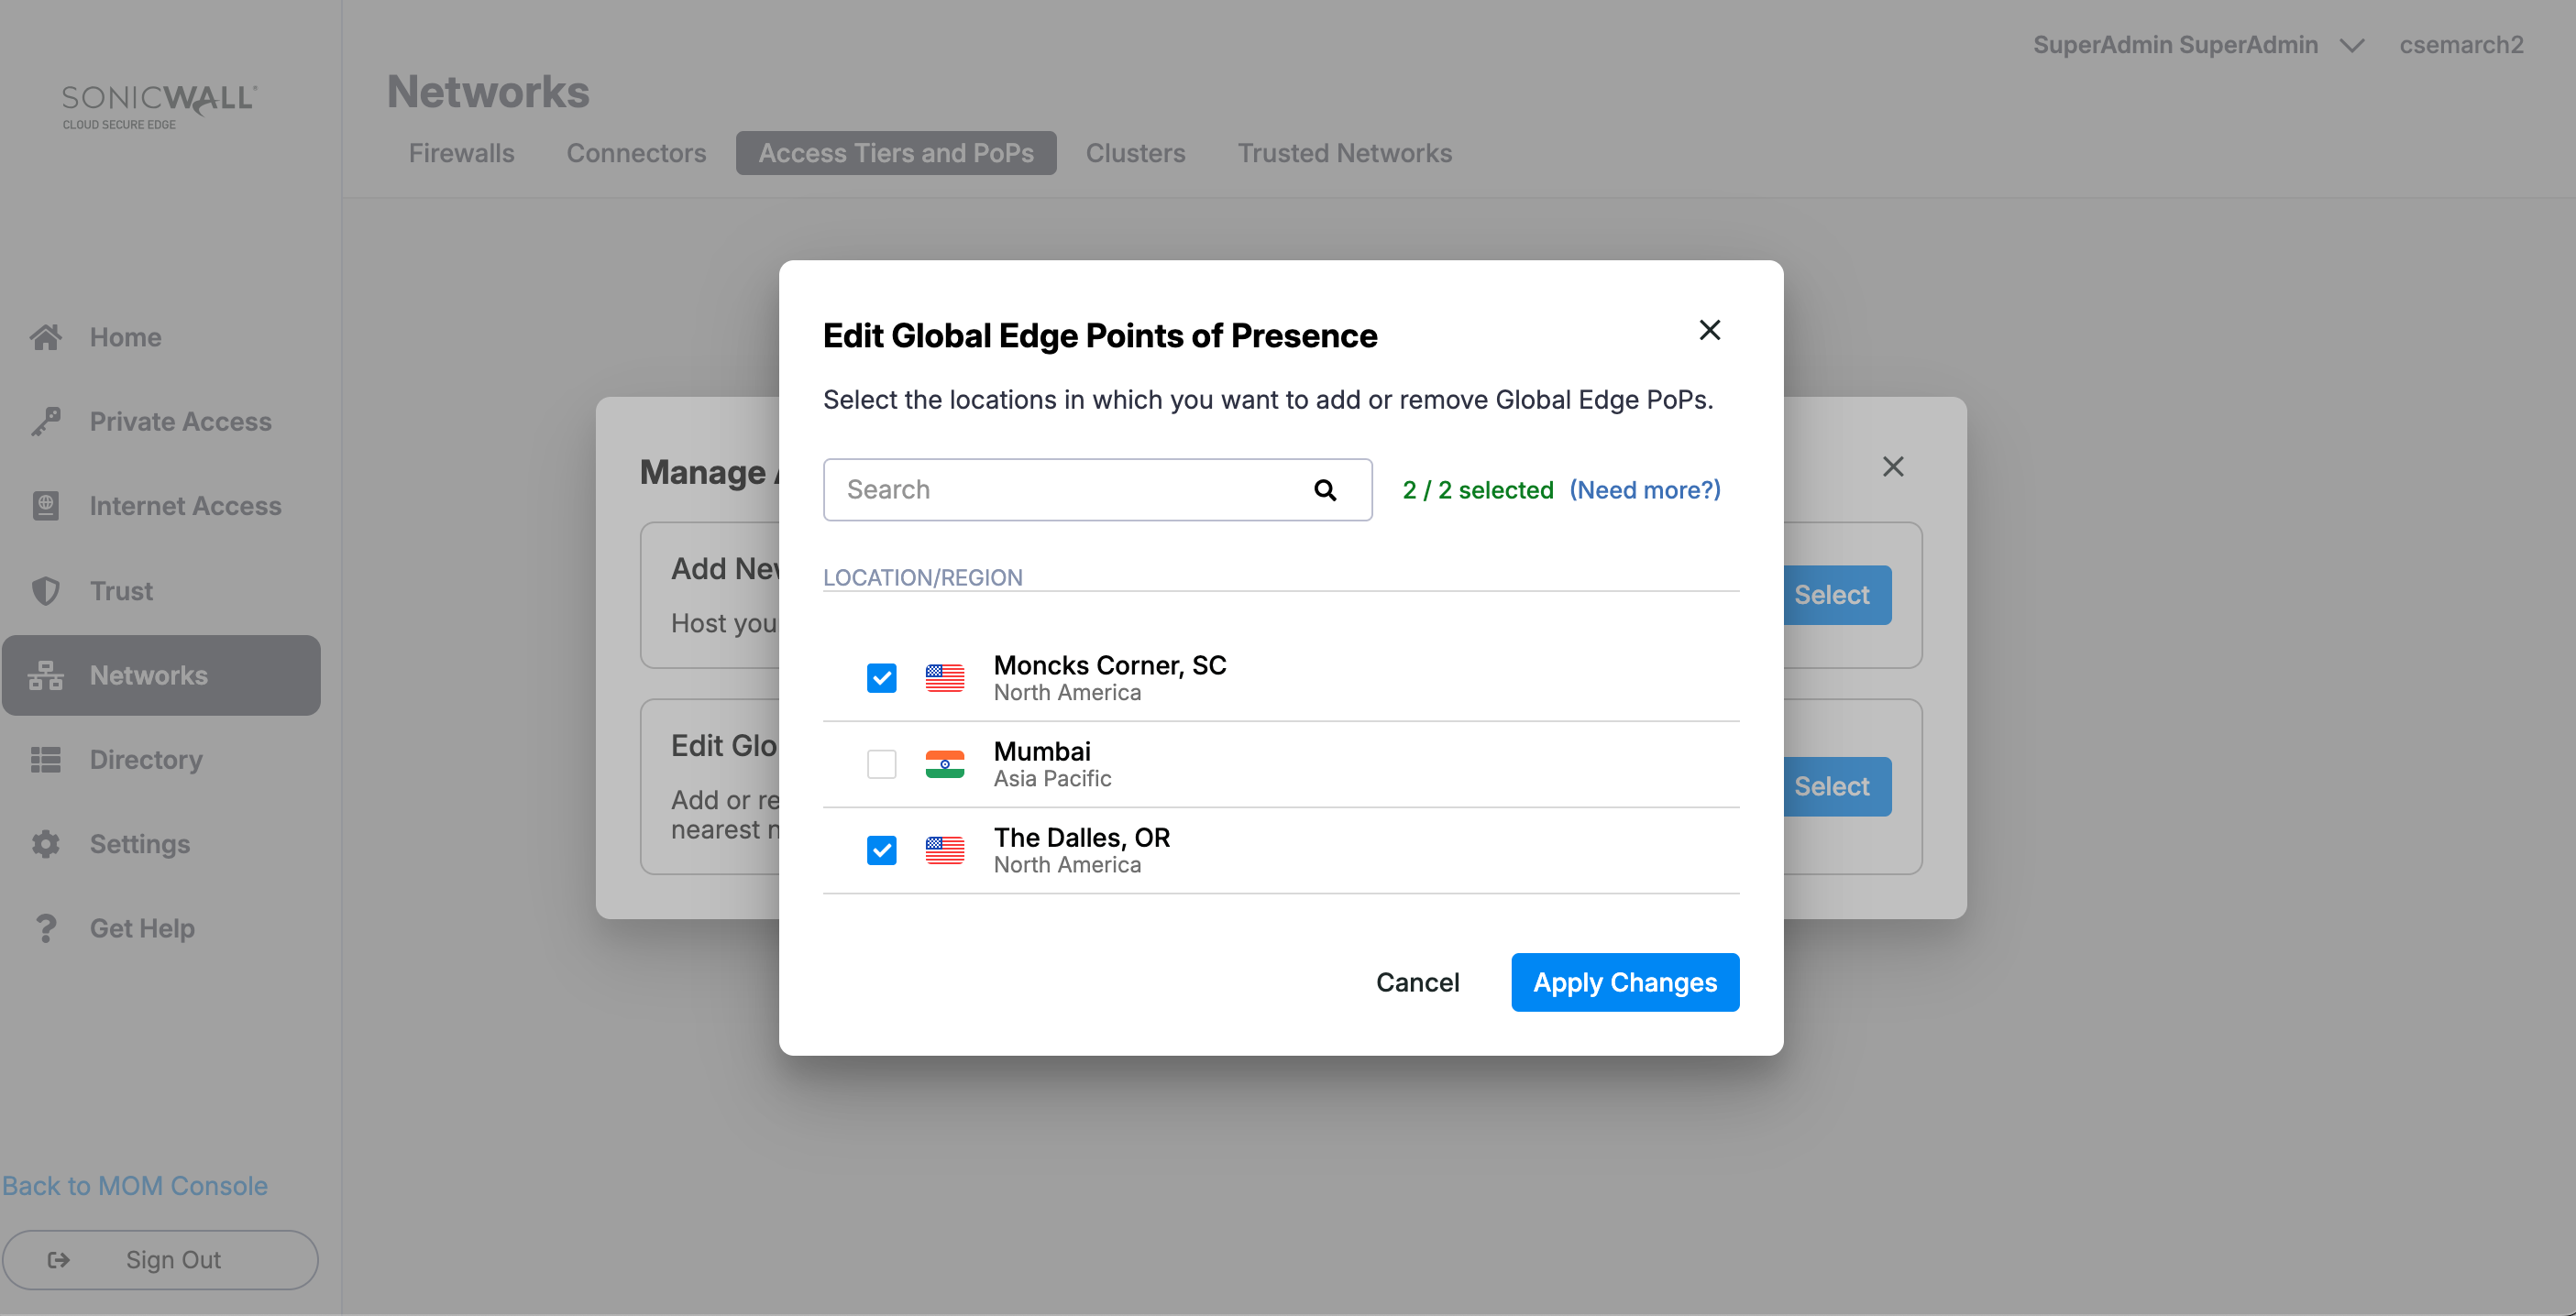
3. Select new PoP locations from the menu.
4. If you require additional PoPs (i.e., more than 2), select Need more?.
5. On the Request Additional PoPs modal, enter your total number of required PoPs and your Business Justification for requesting these; CSE formally review this request for approval.
New SIA org upgrades to SPA+SIA licensing later
An admin adds SPA licensing to a newly provisioned SIA org.
1. Next time a CSE admin navigates to the CSE console via MySonicWall, they will be prompted to select a minimum of 1 and up to 2 PoPs before they can proceed.
2. If you require more PoPs, select Need More?. This will open a modal that will allow you to select additional PoPs: Enter your total number of required PoPs and your Business Justification for requesting these; CSE formally review this request for approval.
Steps to Remove a PoP
Any org (created before or after March 2026) with SPA Licensing after onboarding
1. In the CSE console, navigate from Networks > Access Tiers and PoPs.
2. Select Manage Access, and then select Edit Global Edge Points of Presence.
3. De-select one or multiple pre-selected PoPs, and apply your changes.
Note: Orgs created before March 2026 will be grandfathered into their current PoP assignments; if PoPs in such orgs are edited, the new selectable maximum will be 4 PoPs.