Register a Hosted Website to Users
How to create a Hosted Web Service so end users can access a web app located in your private network
- Last validated: Jul 15, 2026
Overview
SonicWall Cloud Secure Edge (CSE) authenticates your end users so that they can securely access select websites via their web browsers. Registering a hosted web service allows you to enforce a zero-trust policy when users try to access your internal website or web application.
The assumption is that your end users have been added to your CSE directory and that their devices hold a CSE-trusted Device Certificate. The certificate can be installed by registering with the desktop or mobile app, or distributed clientlessly by your Device Manager (see Device Identity Using Certificates Installed by a Device Manager). No app is required for browser access from a certificated desktop; on mobile, the CSE mobile app brokers Device Trust Verification. To allow devices with no certificate at all, see Managed, Registered, and Unregistered Devices.
New to hosted websites? To understand how publishing and name resolution work before you configure — including why the domain you enter is called a public name even though the resource behind it is private — see DNS and Routing for Published Services. To publish several subdomains of one domain with a single service (for example separate prod, test, and dev sites), see Multi-domain (Wildcard) Web Services.
Steps to create a hosted website
Securely expose your web application by completing the following three steps:
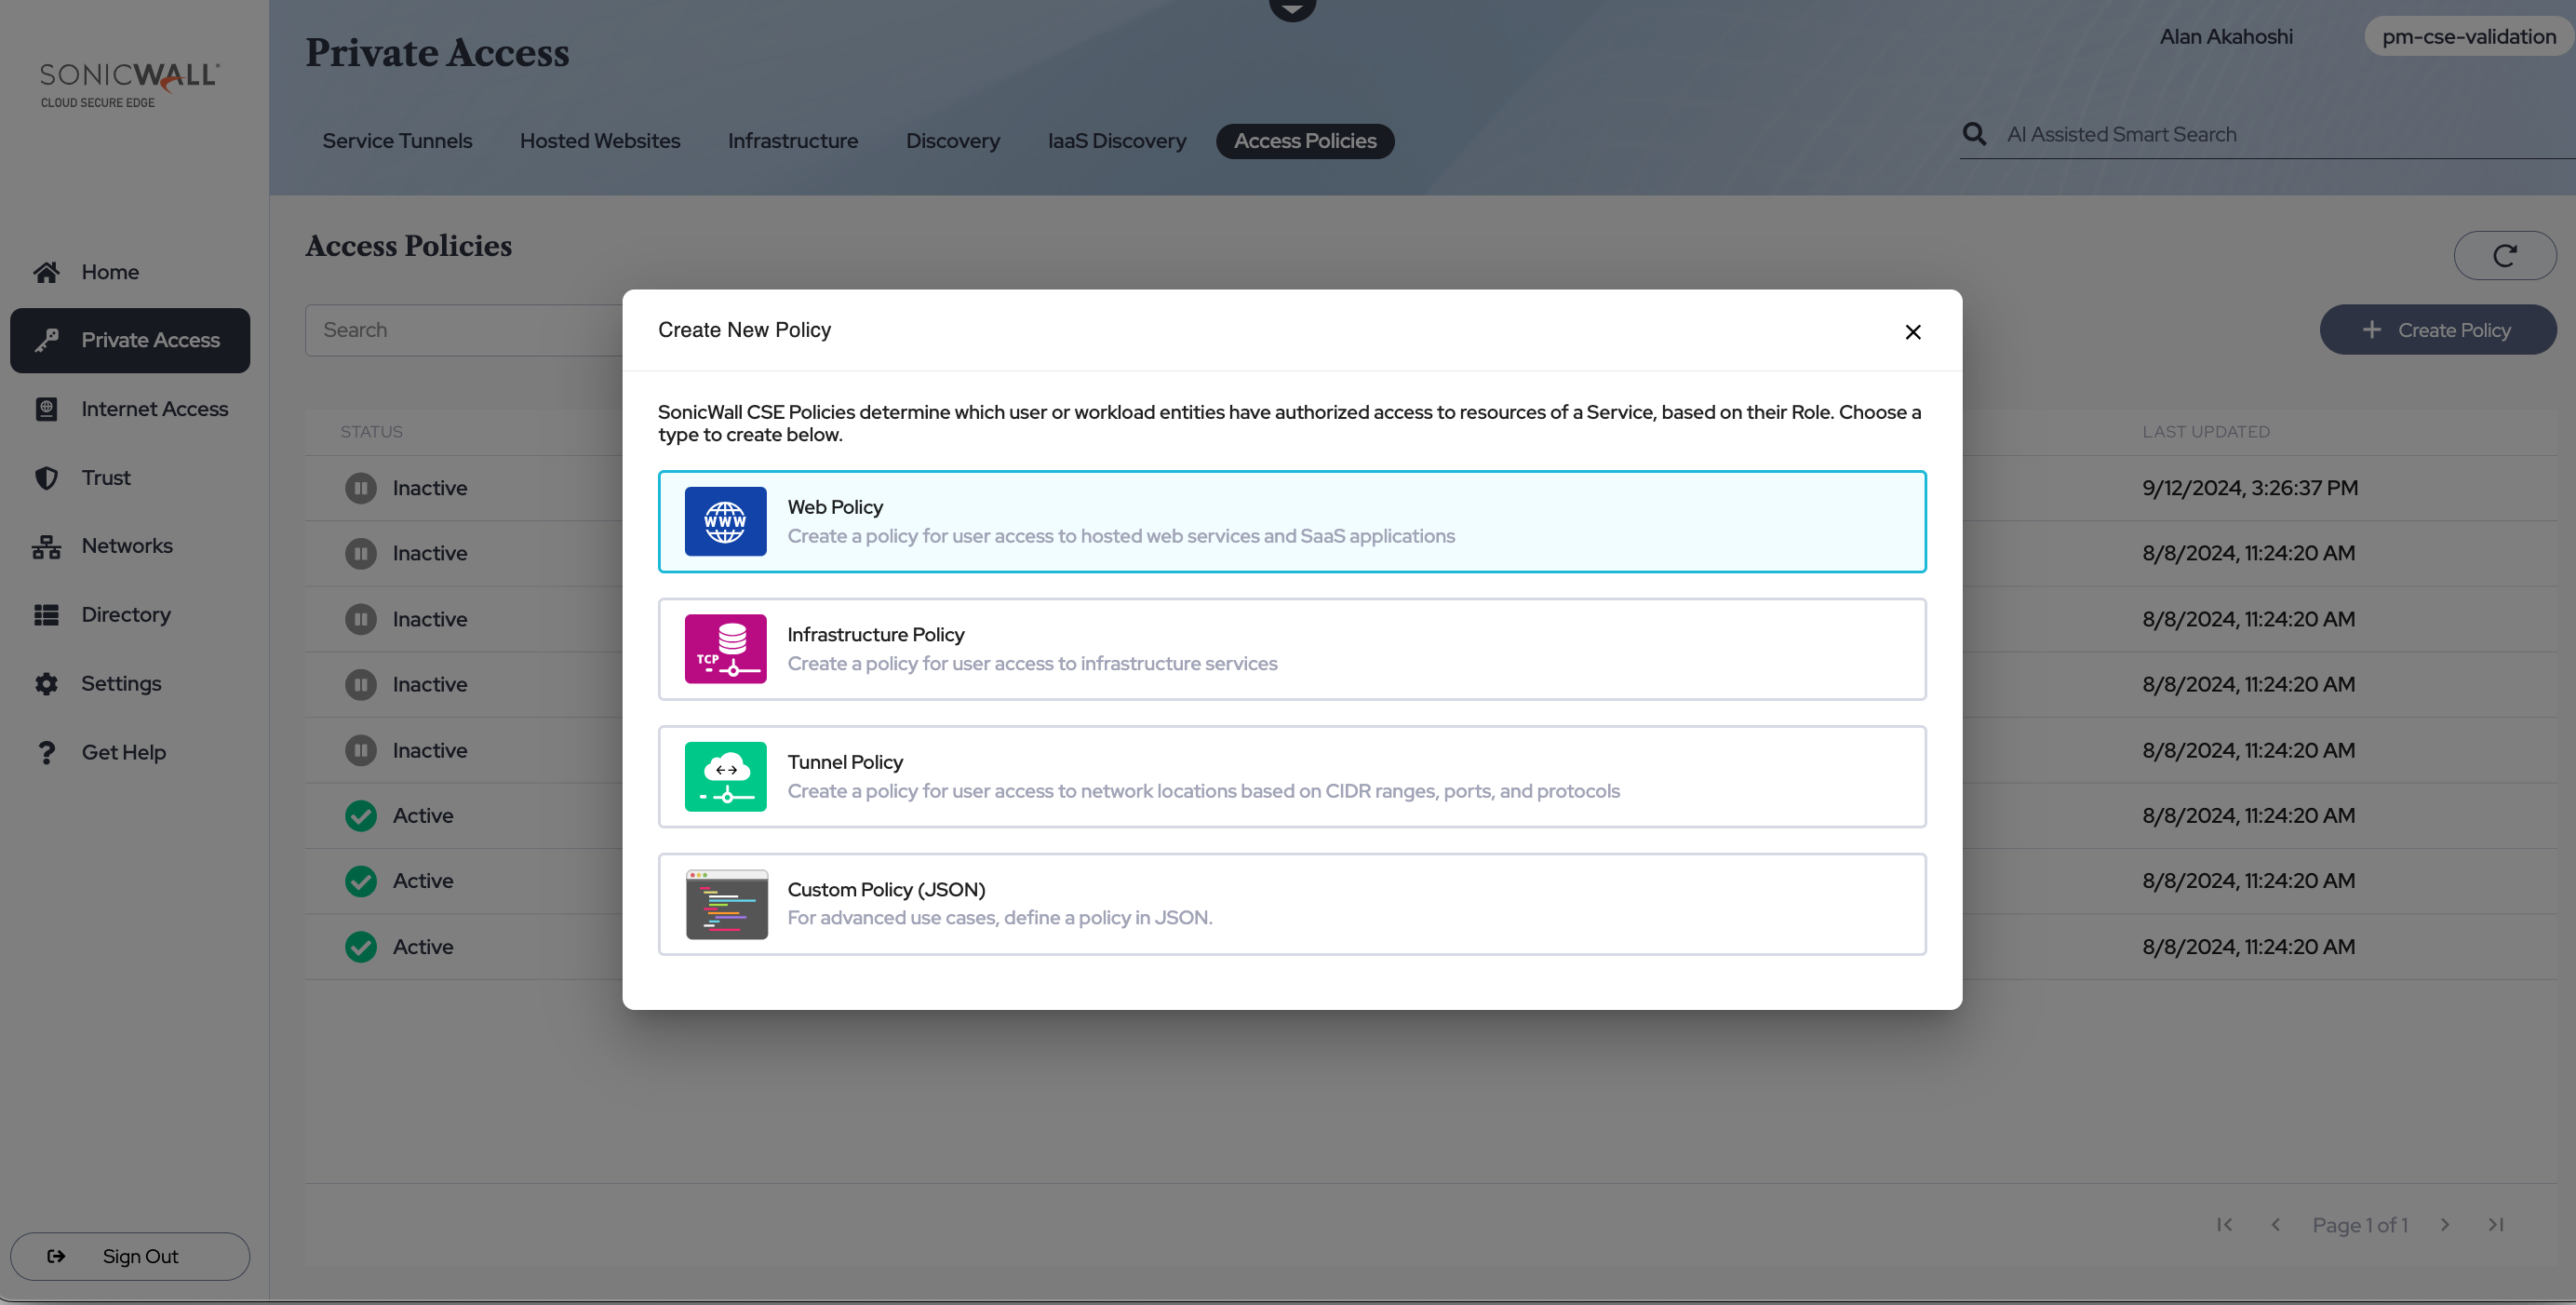
Step 1: Create a policy for web access
1.1 Navigate from Private Access > Access Policies, and select + Create Policy.
1.2 Select the Web Policy template.
1.3 Add a Policy Name, set a Trust Level, and select a Role for the Access Group.
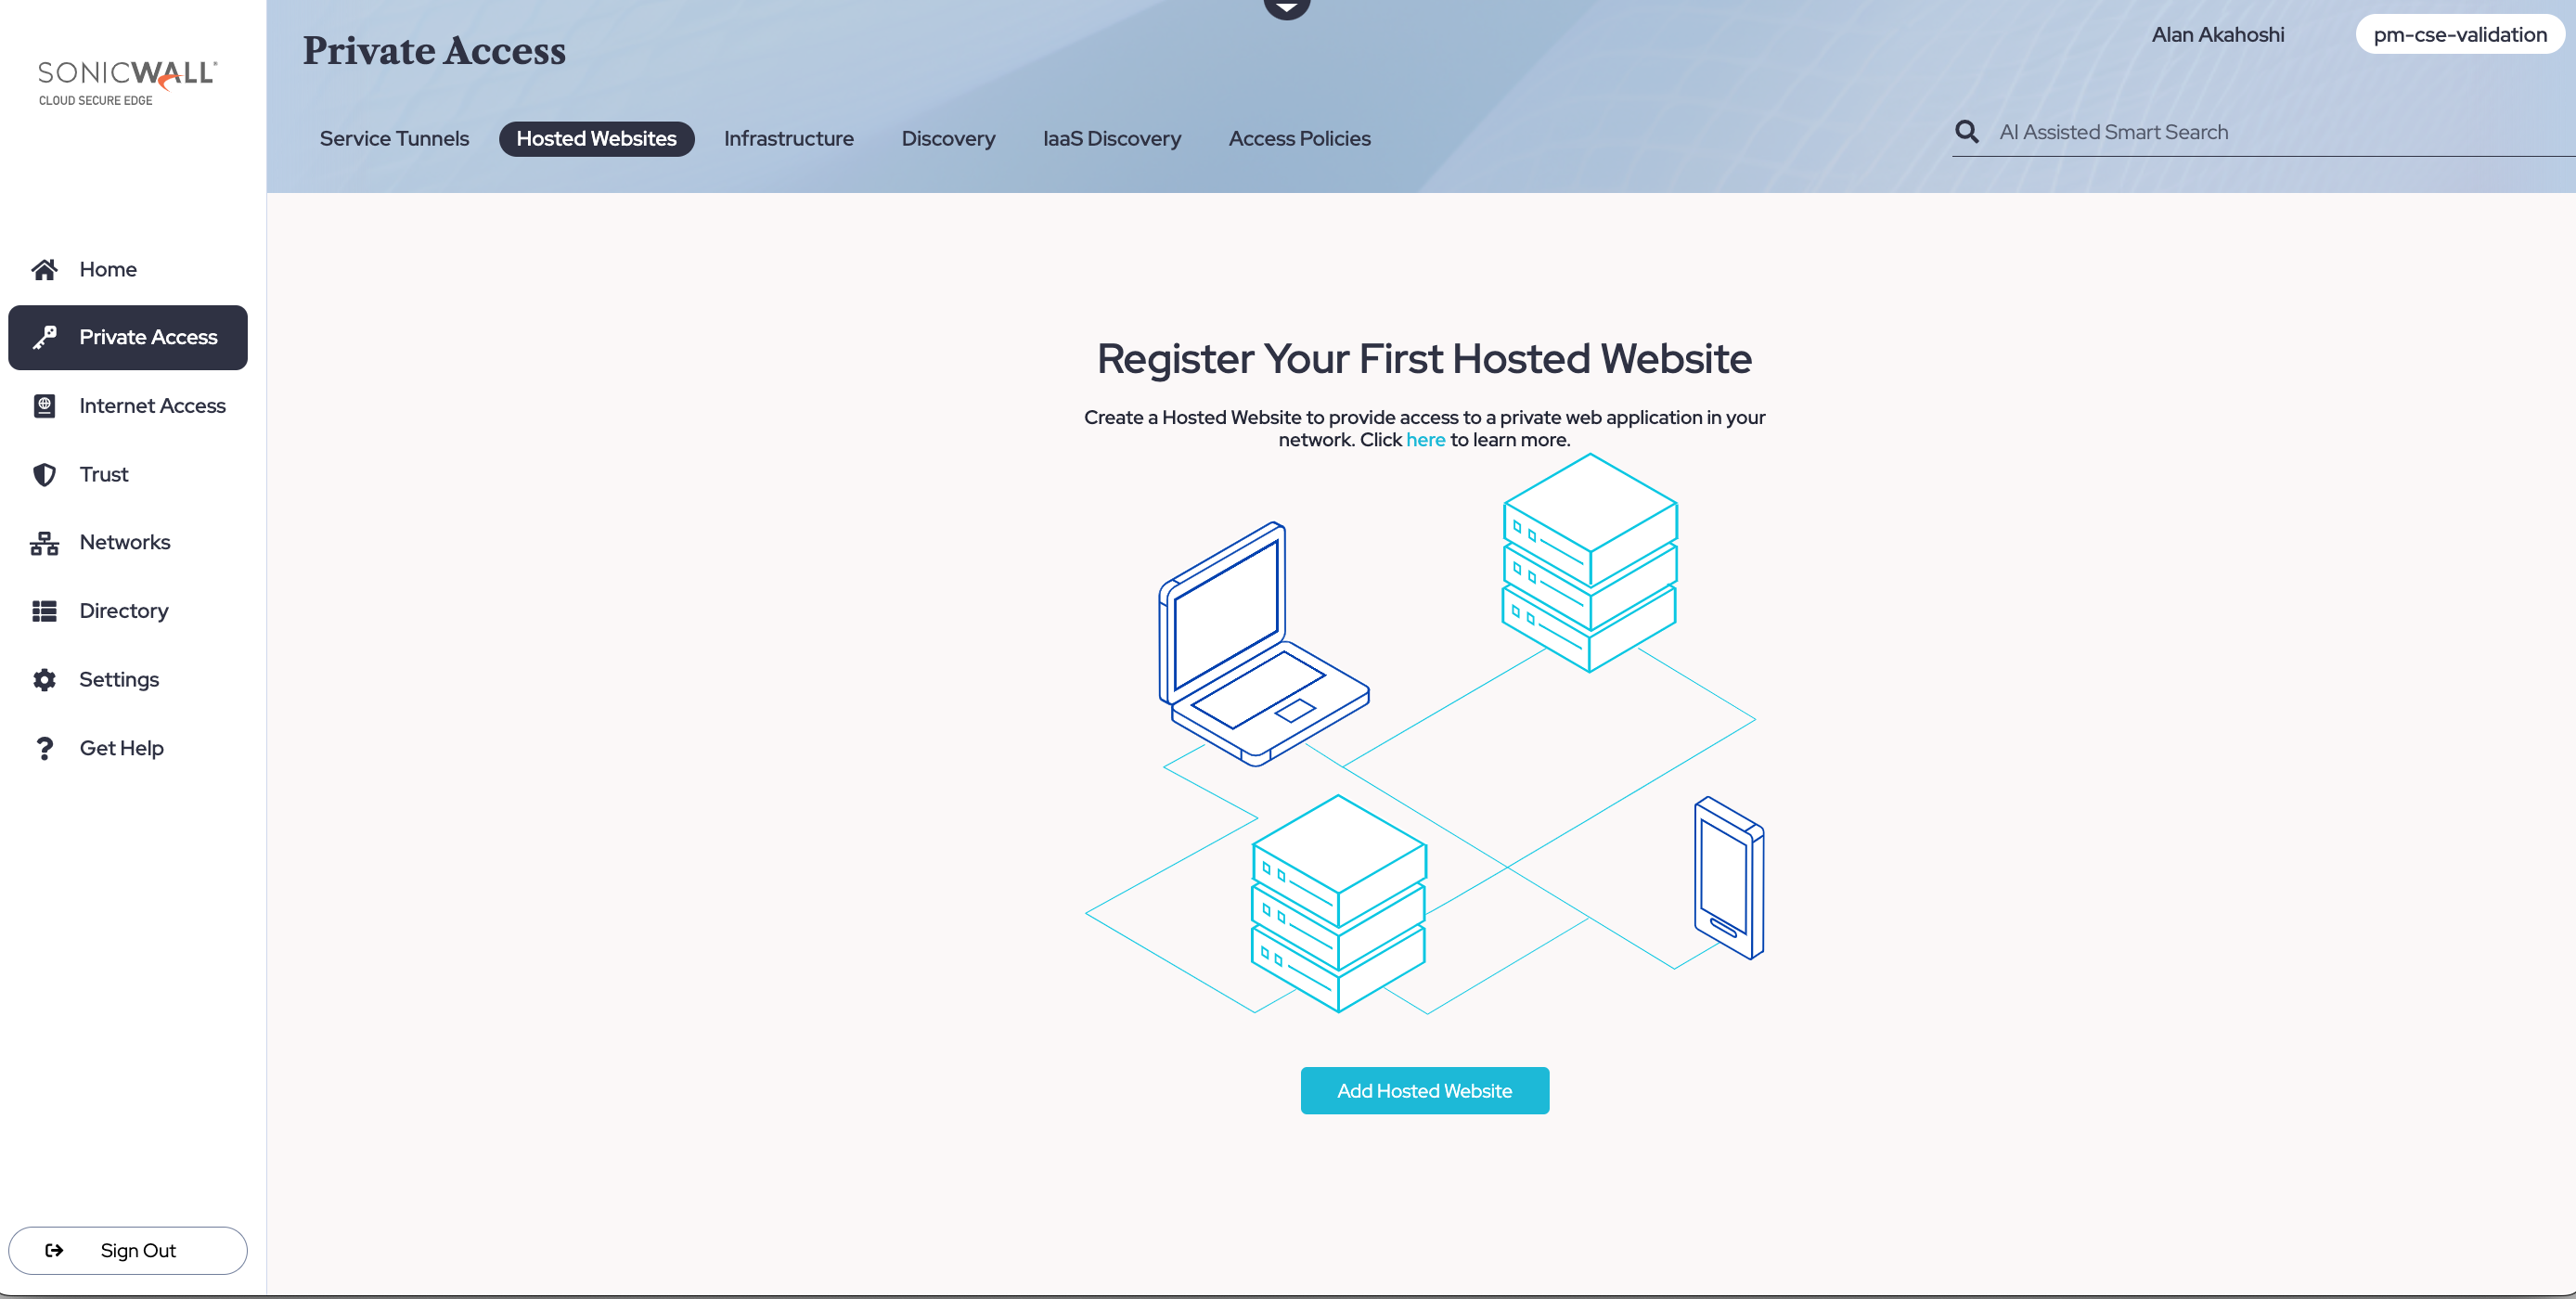
Step 2: Register the web application as a hosted website
2.1 Navigate from Private Access > Hosted Websites, and then select + Add Hosted Website.
Configuration
2.2 Enter a Service Name and optionally a description (this is the description displayed in the app for end users).
2.3 Configure your backend access details. Select the private network that will protect your web service. If you’re on a private edge deployment model, you’ll select an Access Tier; if you’re on the global edge deployment model, you’ll select a Connector.
2.4 Enter (i) the private hostname or IP and (ii) the port of the backend server (i.e., the web service) you’re protecting access to.
2.5 Select a front end domain to use. CSE recommends using a registered domain, since these are validated by CSE.
2.6 If you select a registered domain, choose whether you want to use a Let’s Encrypt certificate. CSE can secure your website with either Let’s Encrypt certificates or by using CSE (formerly Banyan) PKI.
2.7 Configure a public URL for your service. This is the URL end users will type in the browser to access the web service. It is called a public URL because it is a publicly resolvable DNS name — a registered domain that you control — while the resource behind it remains private and reachable only through CSE.
2.8 Review your Summary to ensure that you have the correct public URL, private hostname, and private network configured. Select Next.

Access permissions
2.9 Attach your policy (that you created in Step 1), and set the enforcement mode (i.e., Enforcing or Permissive).
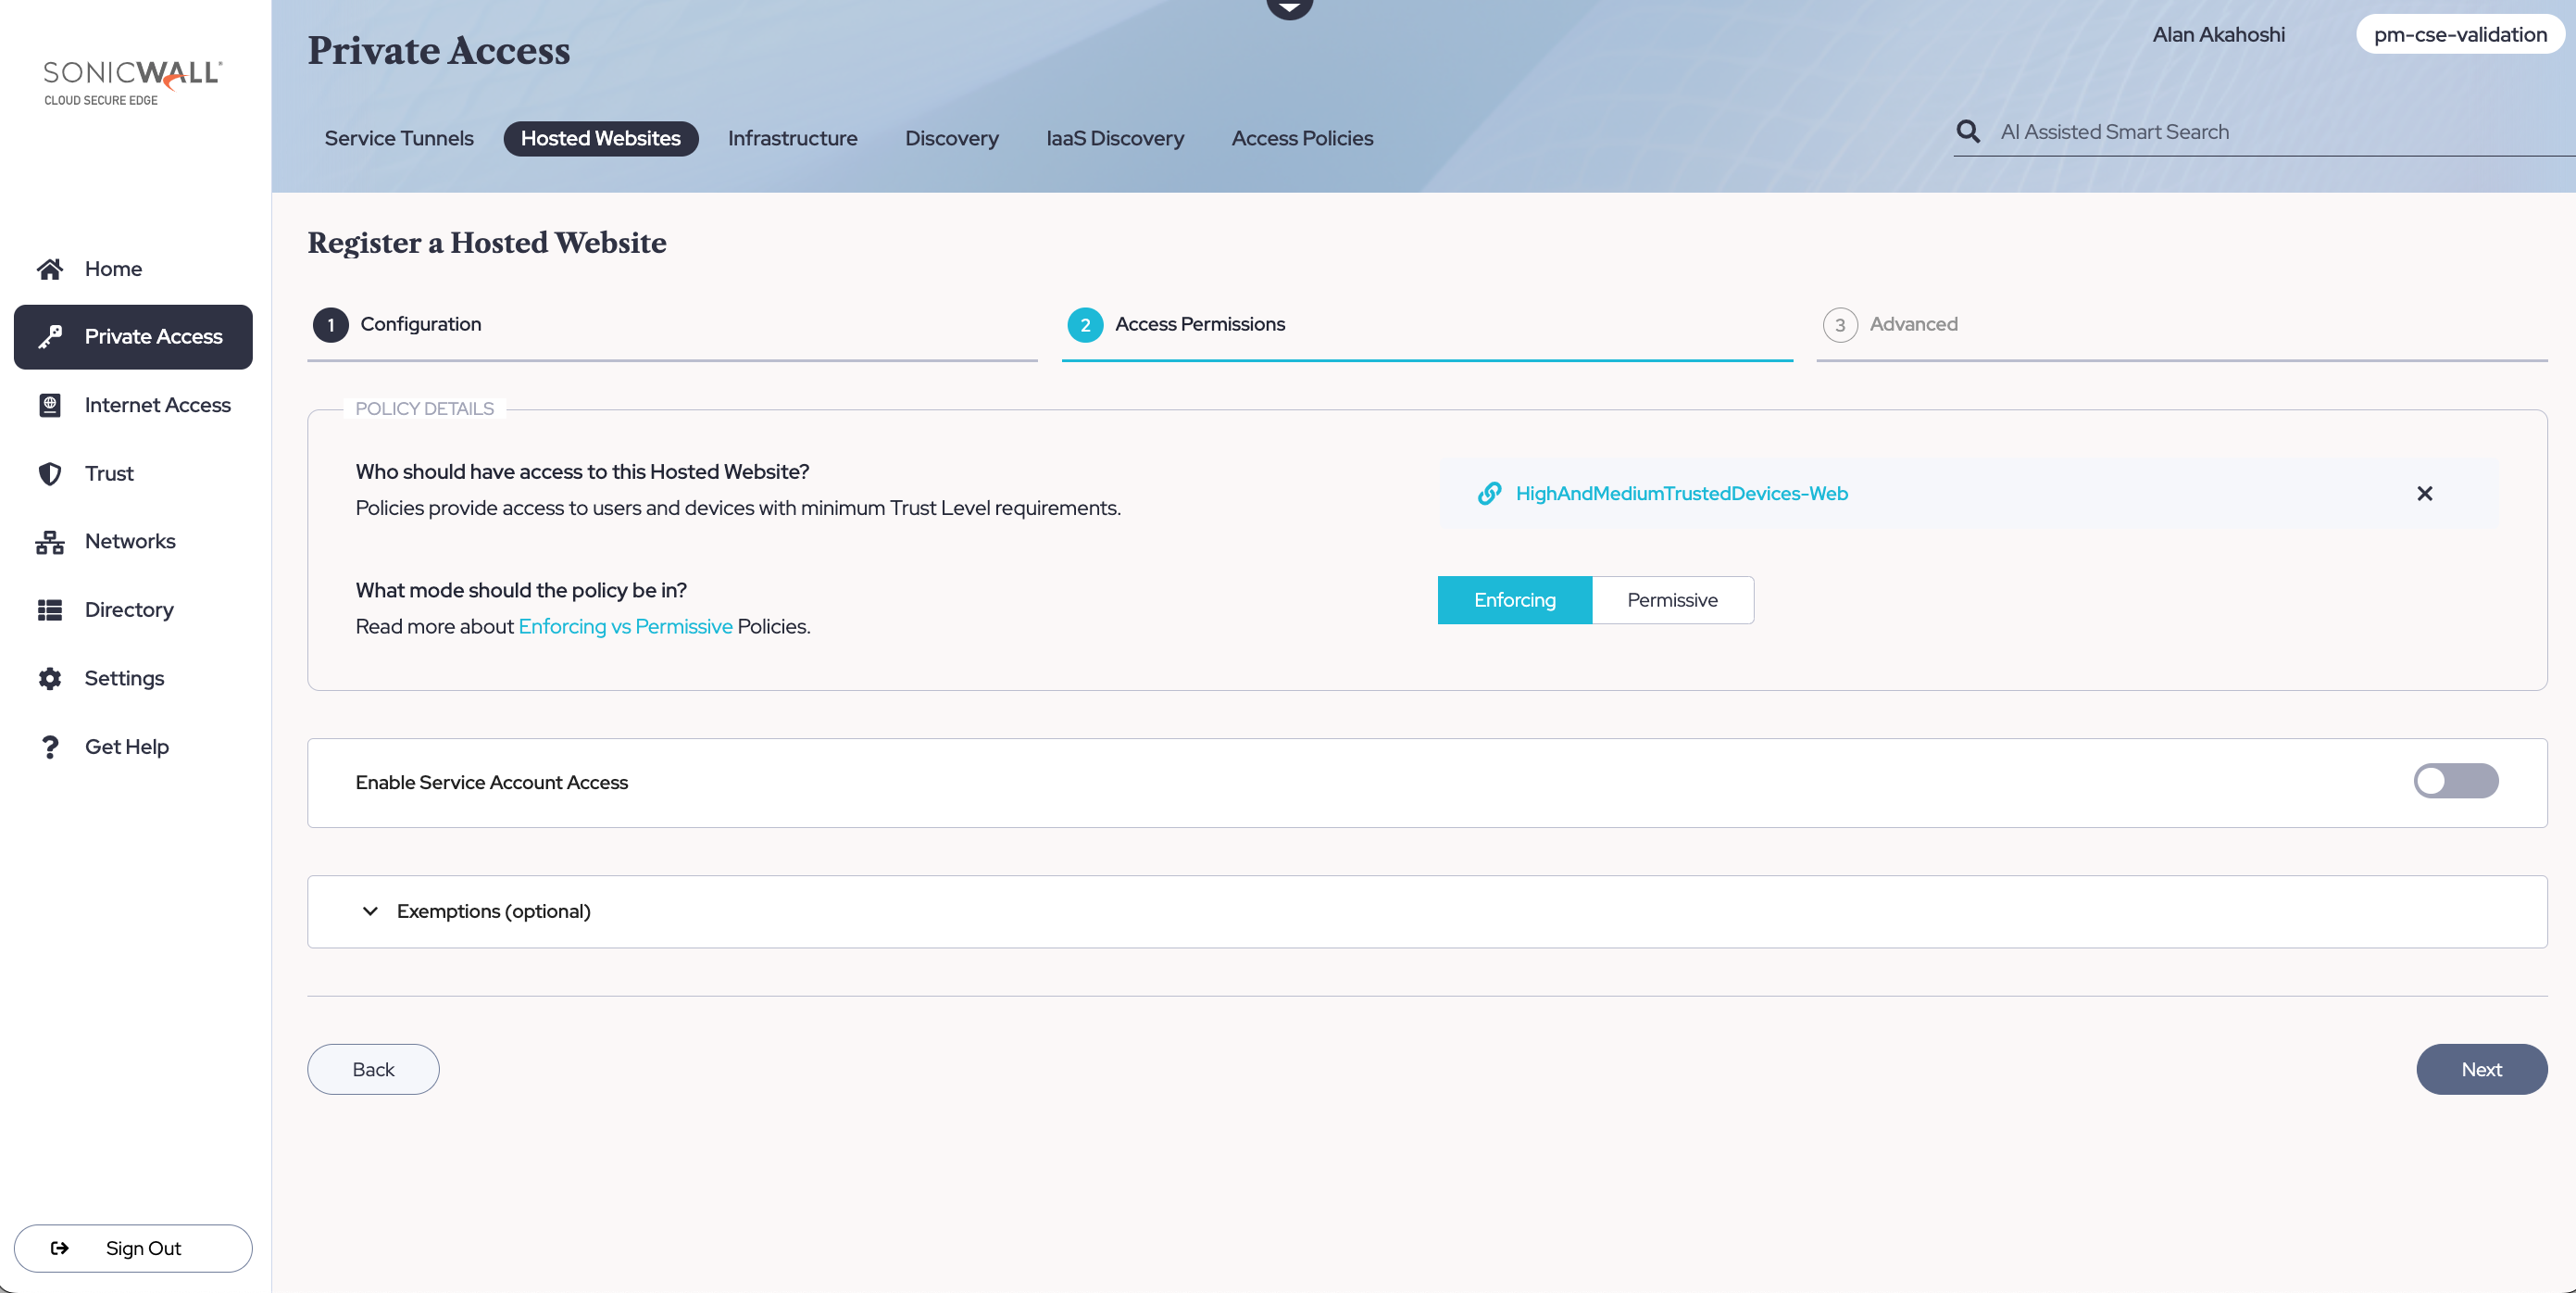
2.10 Optional: If programmatic access is required, Enable Service Account Access. If enabled, you’ll need to specify how Service Account credentials are sent by selecting an option from the dropdown menu. See the Service Accounts doc for more detailed information on how Service Accounts work.
2.11 Optional: Configure exemptions to access permissions to your web service. Exemptions can include source CIDRs, target domains, paths, request methods, and request headers. See the Exemptions doc for more detailed information on how Exemptions work in CSE.
2.12 Select Next.
Advanced
2.13 Optional: Under CSE (formerly Banyan) App Settings, configure how the web service will appear on end users’ desktop apps.
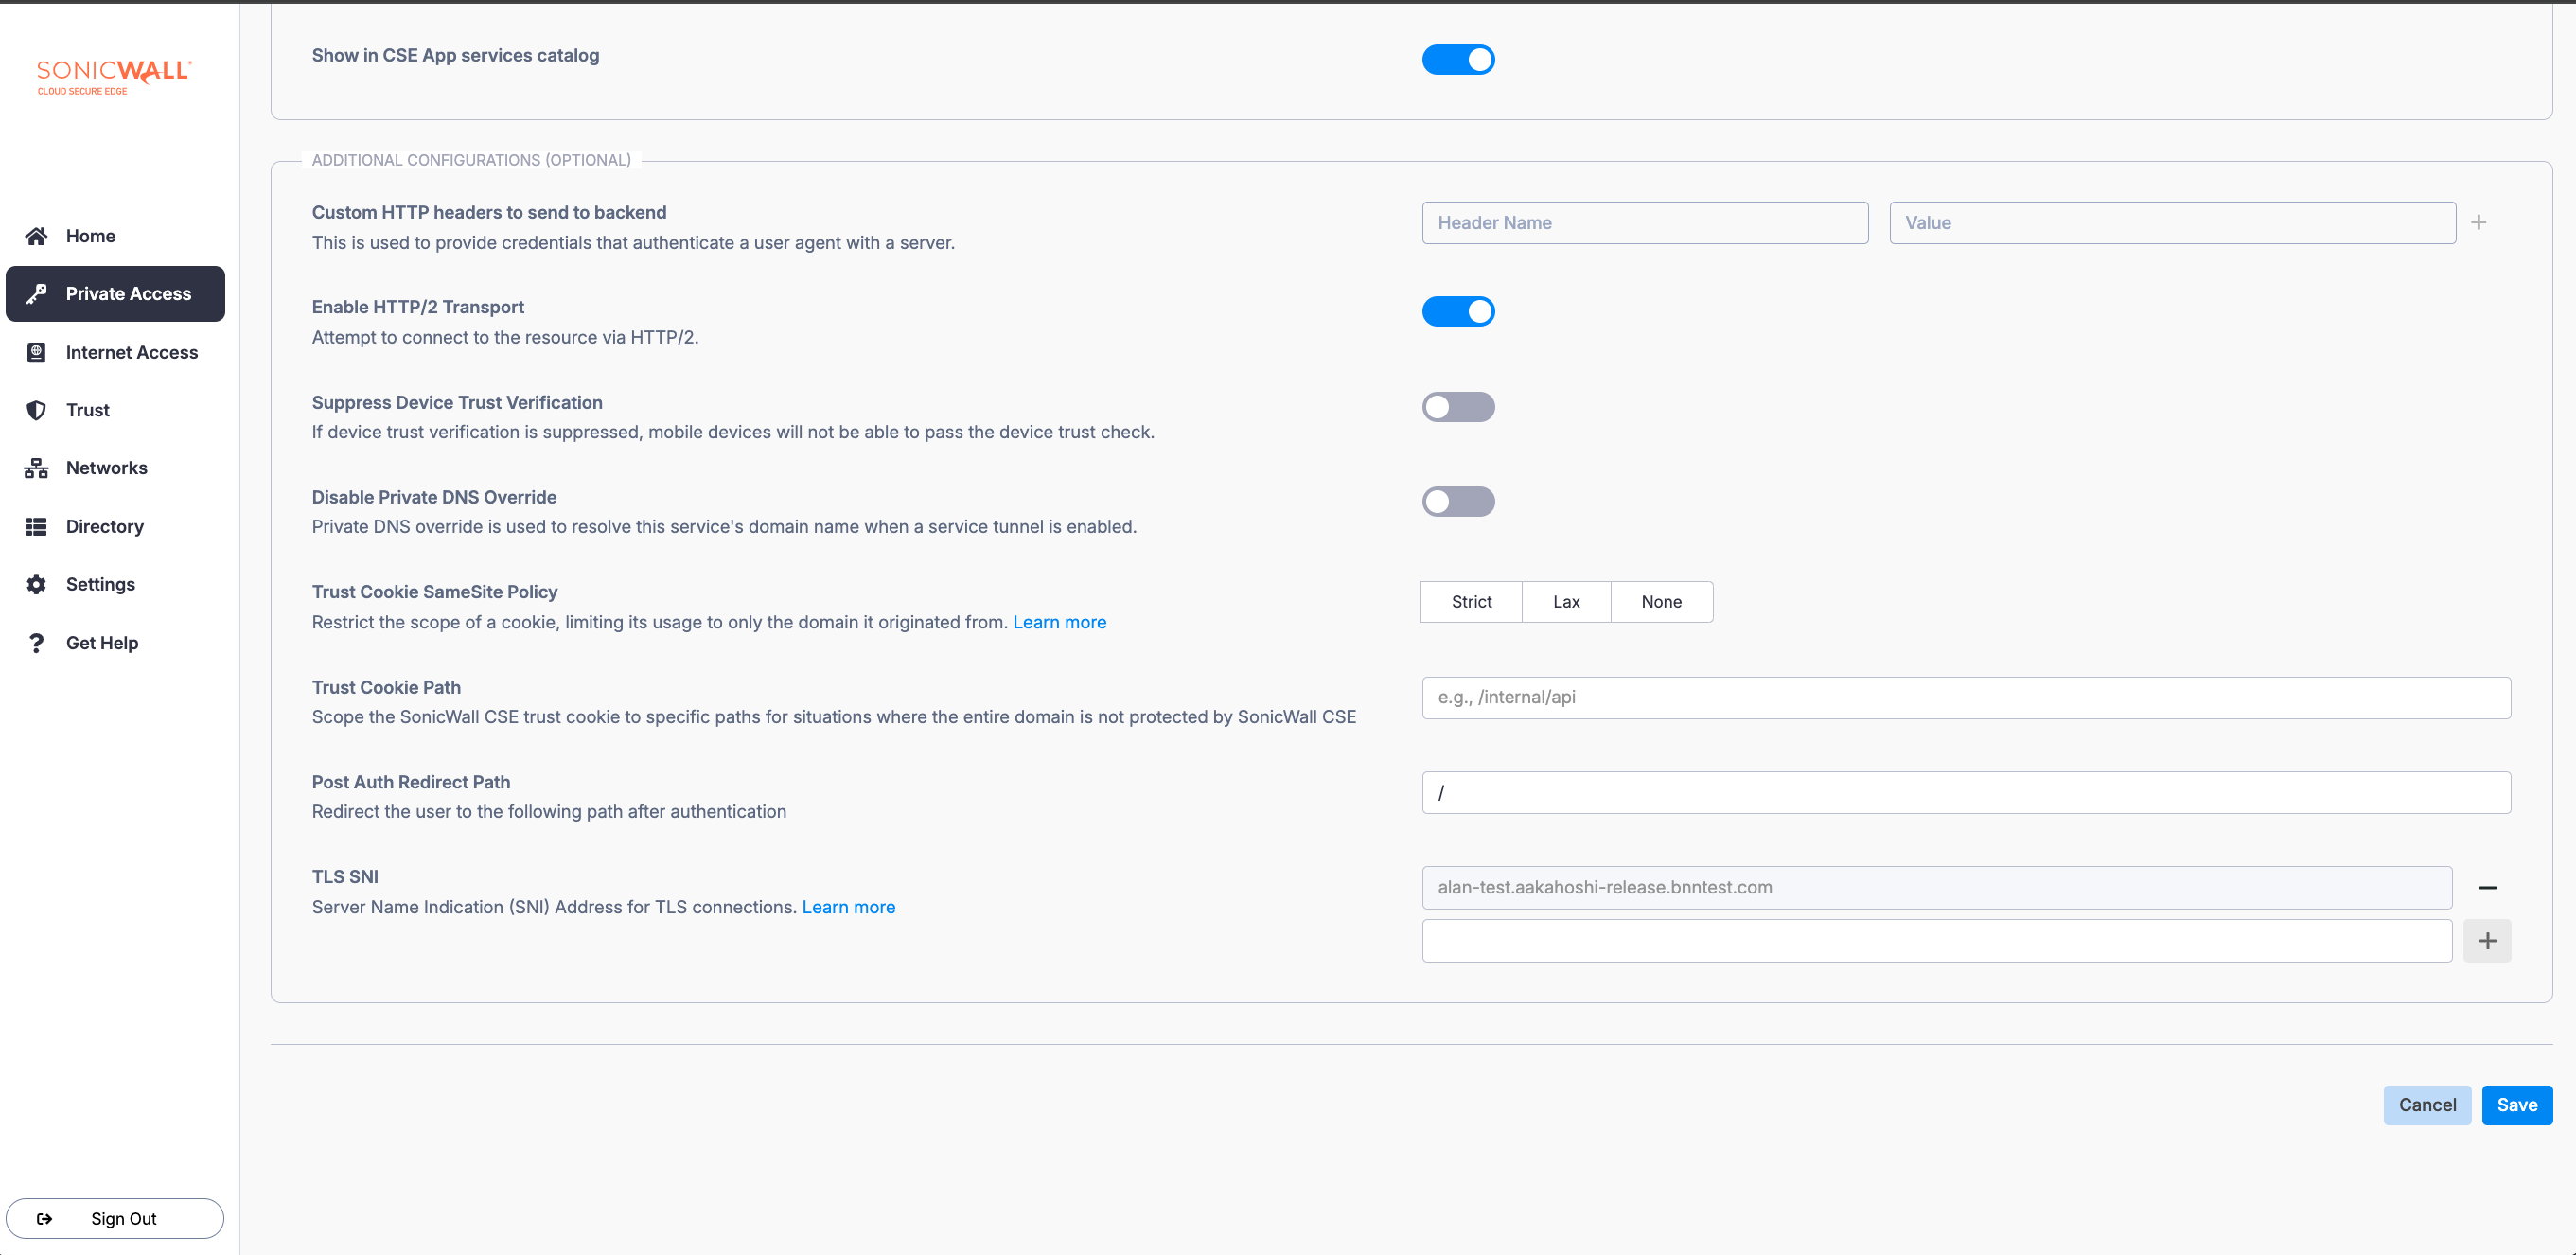
2.14 Optional: Under Additional Configurations, enter custom HTTP headers (enter a key in the first field and enter a value in the adjacent field).
2.15 Optional: Enable Secure CORS Requests; when enabled, this setting adds headers to users’ CORS requests to secure authorization attempts.
Note: The Secure CORS Requests is an early preview feature.
2.16 Optional: Enable HTTP-2 Transport; enabling HTTP-2 allows for multiplexing, more efficient throughput, and simultaneous connections to the backend service from a single browser.
2.17 Optional: Determine whether you want to suppress Device Trust Verification by toggling this option on or off. Note that if you suppress Device Trust Verification, devices without certificates installed will have no alternative way to be verified for device trust. Mobile devices, for example, will not be able to access your hosted web service.
2.18 Optional: If your Hosted Website is published on a domain that resolves over Service Tunnel, and you wish to disable Private DNS so that it resolves instead through the Access Tier, enable the Disable Private DNS toggle (this will turn off the default setting for this specific domain name).
Note: The Disable Private DNS toggle allows admins to resolve a specific domain name via the Access Tier. Admins can then manually set up DNS entries to ensure that such domain names resolve properly. This functionality may be useful in cases where an admin is using a wildcard domain name in their service spec, and they want only some domain names within this subset to resolve over Service Tunnel while others resolve to private addresses over the Access Tier.
2.19 Select Save & Validate.
Step 3: Securely access the hosted website via your device
3.1 From your registered device, use a browser to navigate to the website you just created: https://jenkins.corp.example.com
3.2 You will be prompted to confirm your Device Certificate and then to log in via your Identity Provider. Once device and user trust have been established, the user will be allowed to access the Jenkins application.

Test the connection
In the event that you cannot access the published service, leverage the test connection functionality to diagnose any connection issues.
Note: If you have configured User Attributes in your backend domain (in Step 2.4 above), testing the connection is not currently supported. Support for testing the connection with User Attributes will be available in an upcoming release.
In the Command Center, navigate from Private Access > Hosted Websites, then select a Service Name. In your service, select Test Connection (the check icon in the upper right corner of the page). This will show you the status of your connection, detailing whether your domain name or hostname are resolvable and whether the Access Tier and backend port are reachable.
