Programmatic Access for Hosted Websites
Provide programmatic access to third-party applications accessing Cloud Secure Edge (CSE) hosted websites
- Last validated: Oct 16, 2026
- 5 minutes to read
-
Contributors


Currently, we only support Service Accounts for Hosted Websites. Support for Service Accounts in Infrastructure Services is on the roadmap — please contact us with your use case.
Overview
Users who authenticate with their org’s identity provider and have trusted devices registered with Cloud Secure Edge (CSE) can access protected services. Often, however, third-party apps will need to access your CSE-protected services, without a physical user to authenticate or the app running (e.g., when Slack needs access to GitLab).
Instead of bypassing authentication, admins can create Service Accounts in CSE. This way, you can authenticate third-party applications to your CSE-protected services via an API key or JWT token.
Use cases
Service Accounts fit anywhere a non-human caller needs an identity of its own — one that Roles and policies can authorize, audit, and revoke independently of any human user:
- AI agents. An AI agent needs access to an internal application or API, and an identity to tie to Roles for authorization, so its access can be scoped and revoked without affecting any person’s account. For the patterns to choose between, see Secure Private Access for AI Agents.
- Cloud platform integrations. A cloud platform (for example, Salesforce or GitHub) needs programmatic access to an on-prem API published as a Hosted Website so it can query it. Store the Service Account key in the platform (in Salesforce, as a Named Credential custom header, or via
setHeaderin Apex); the platform sends the key as an HTTP header on every callout to the hosted website’s public URL, and CSE validates the credential at the edge and forwards the request through the Connector to your API. - Other non-human access. CI/CD pipelines, monitoring systems, and scheduled scripts — any programmatic caller that must reach a CSE-protected service without an interactive sign-in.
No Unregistered Devices allowlist is required. The Service Account credential authenticates the request itself — you do not need to add the calling platform’s IP ranges to the Unregistered Devices CIDR allowlist for Service Account access to work. Hosted Websites are also served with a publicly trusted TLS certificate, so the calling platform does not need to import any certificate.
Steps
Step 1: Create a CSE Service Account
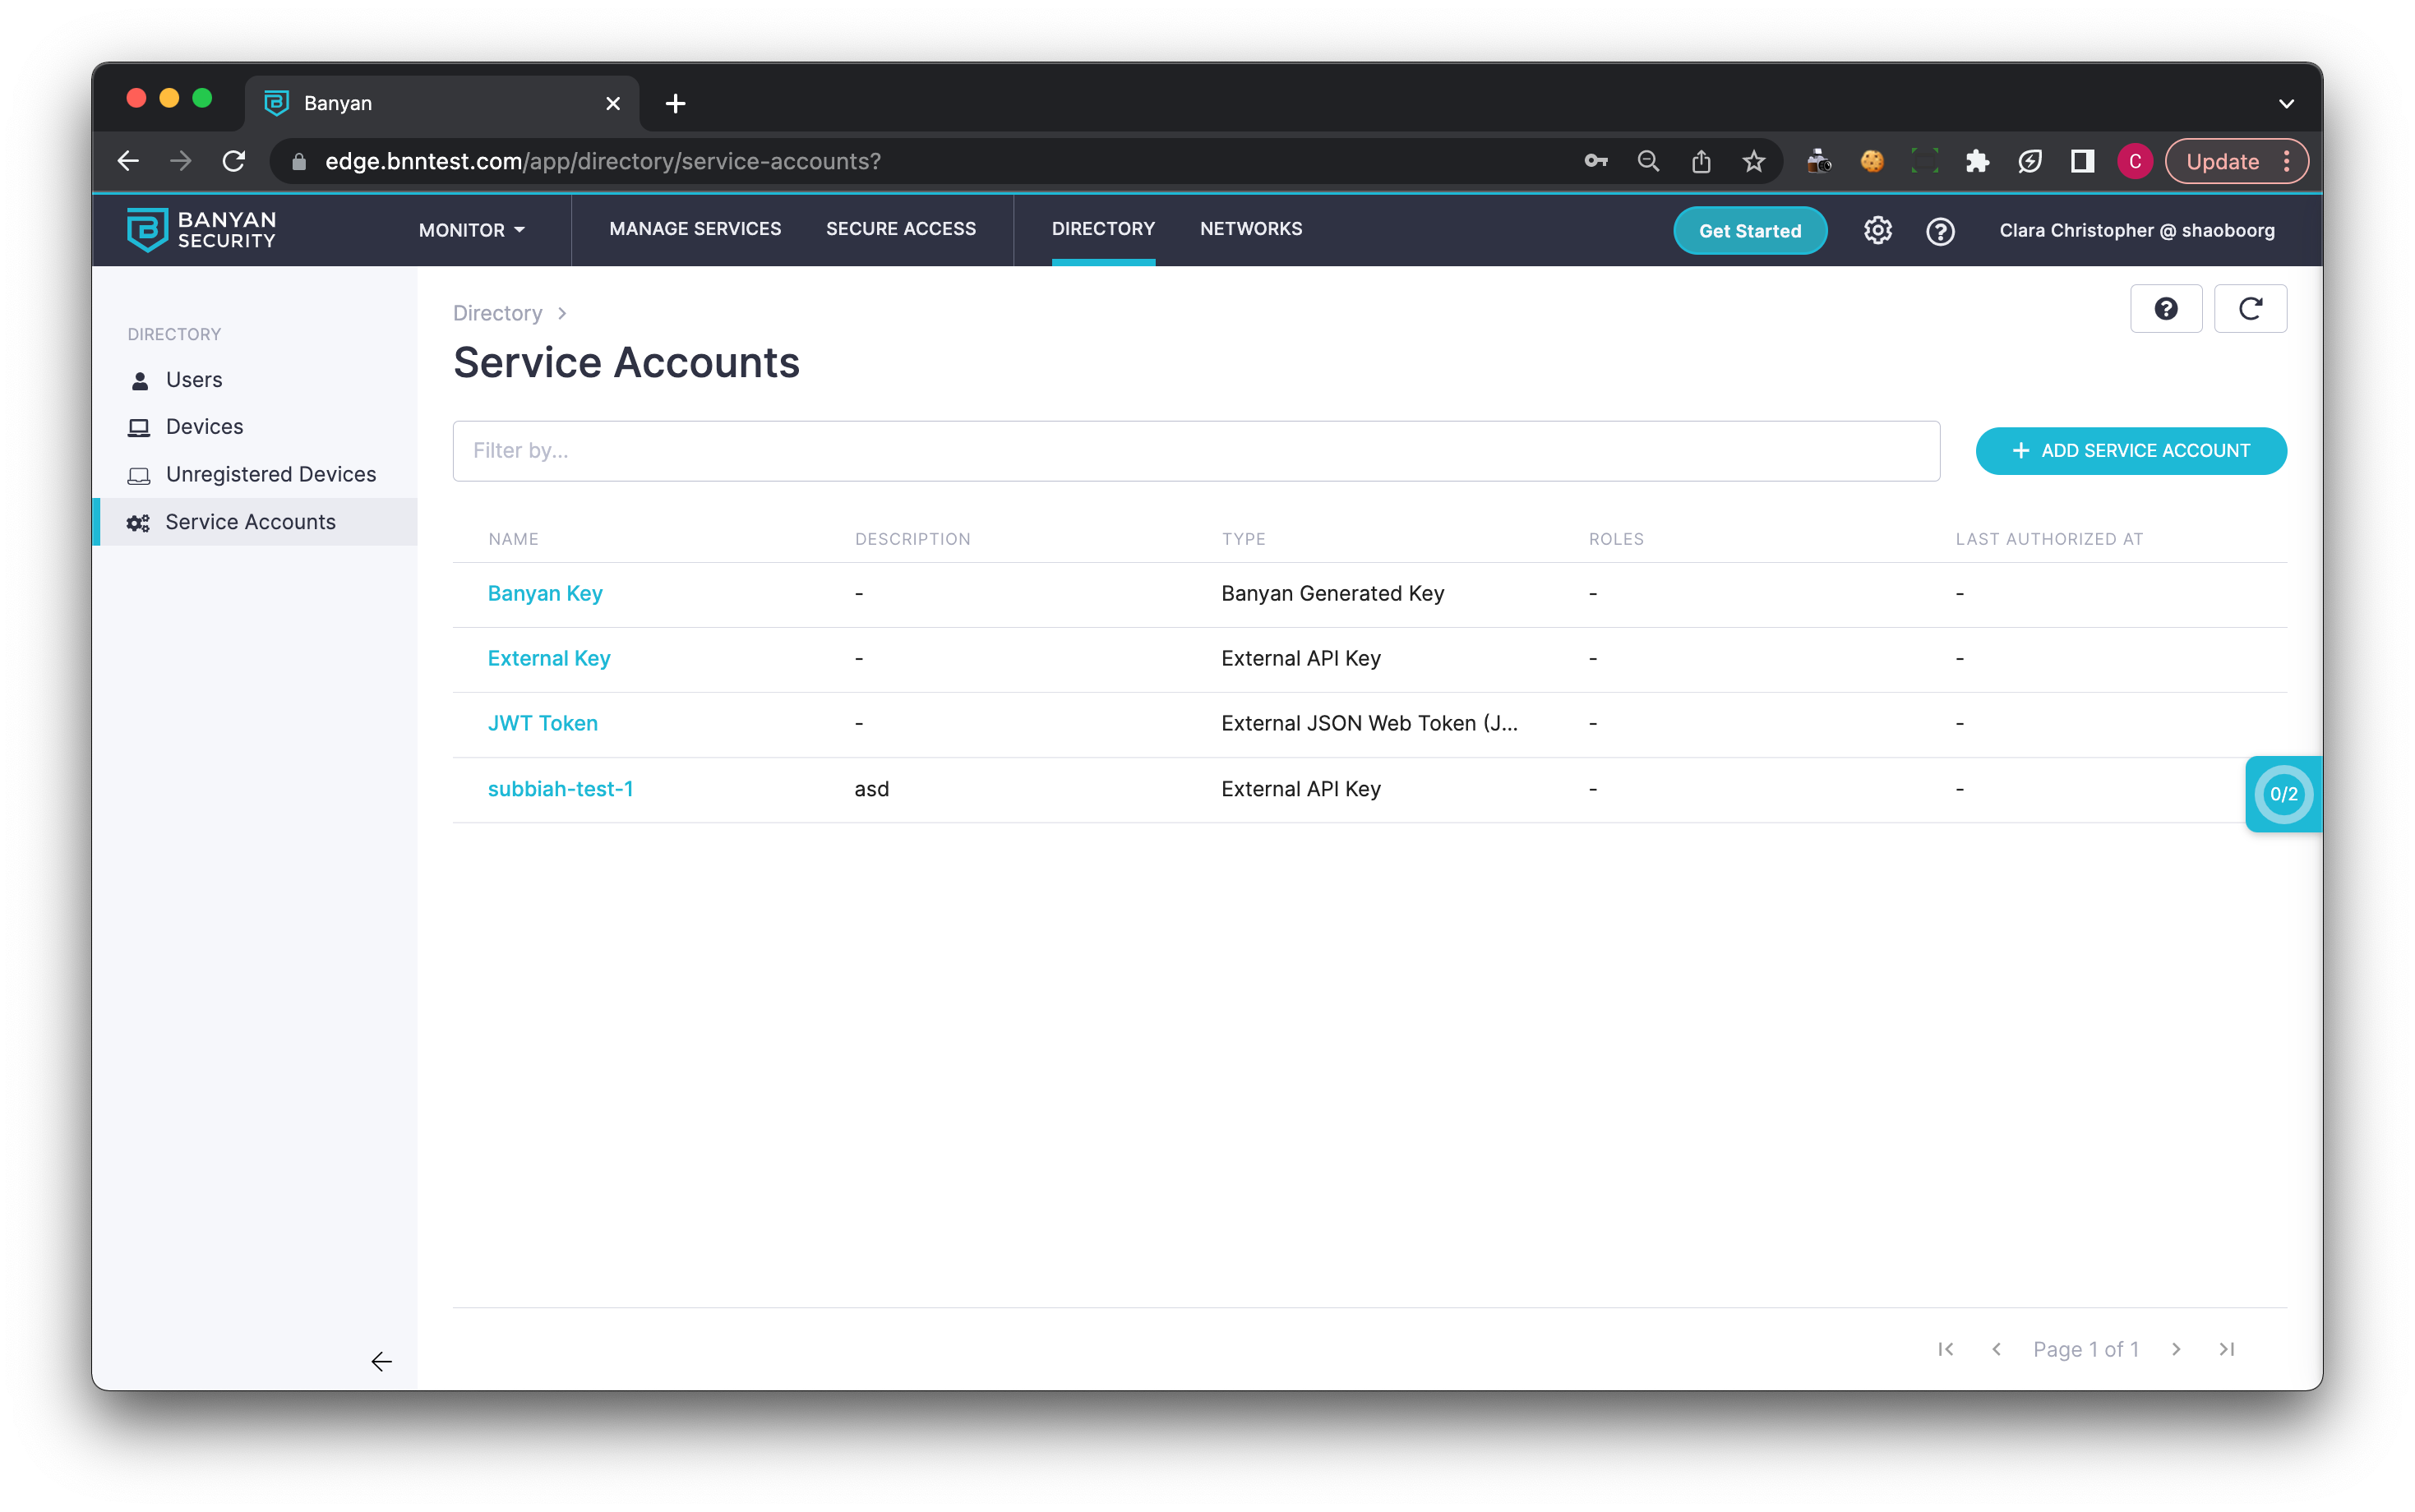
1.1 Navigate from Directory > Service Accounts, and select + Add Service Account.
1.2 Select a Service Account Type.
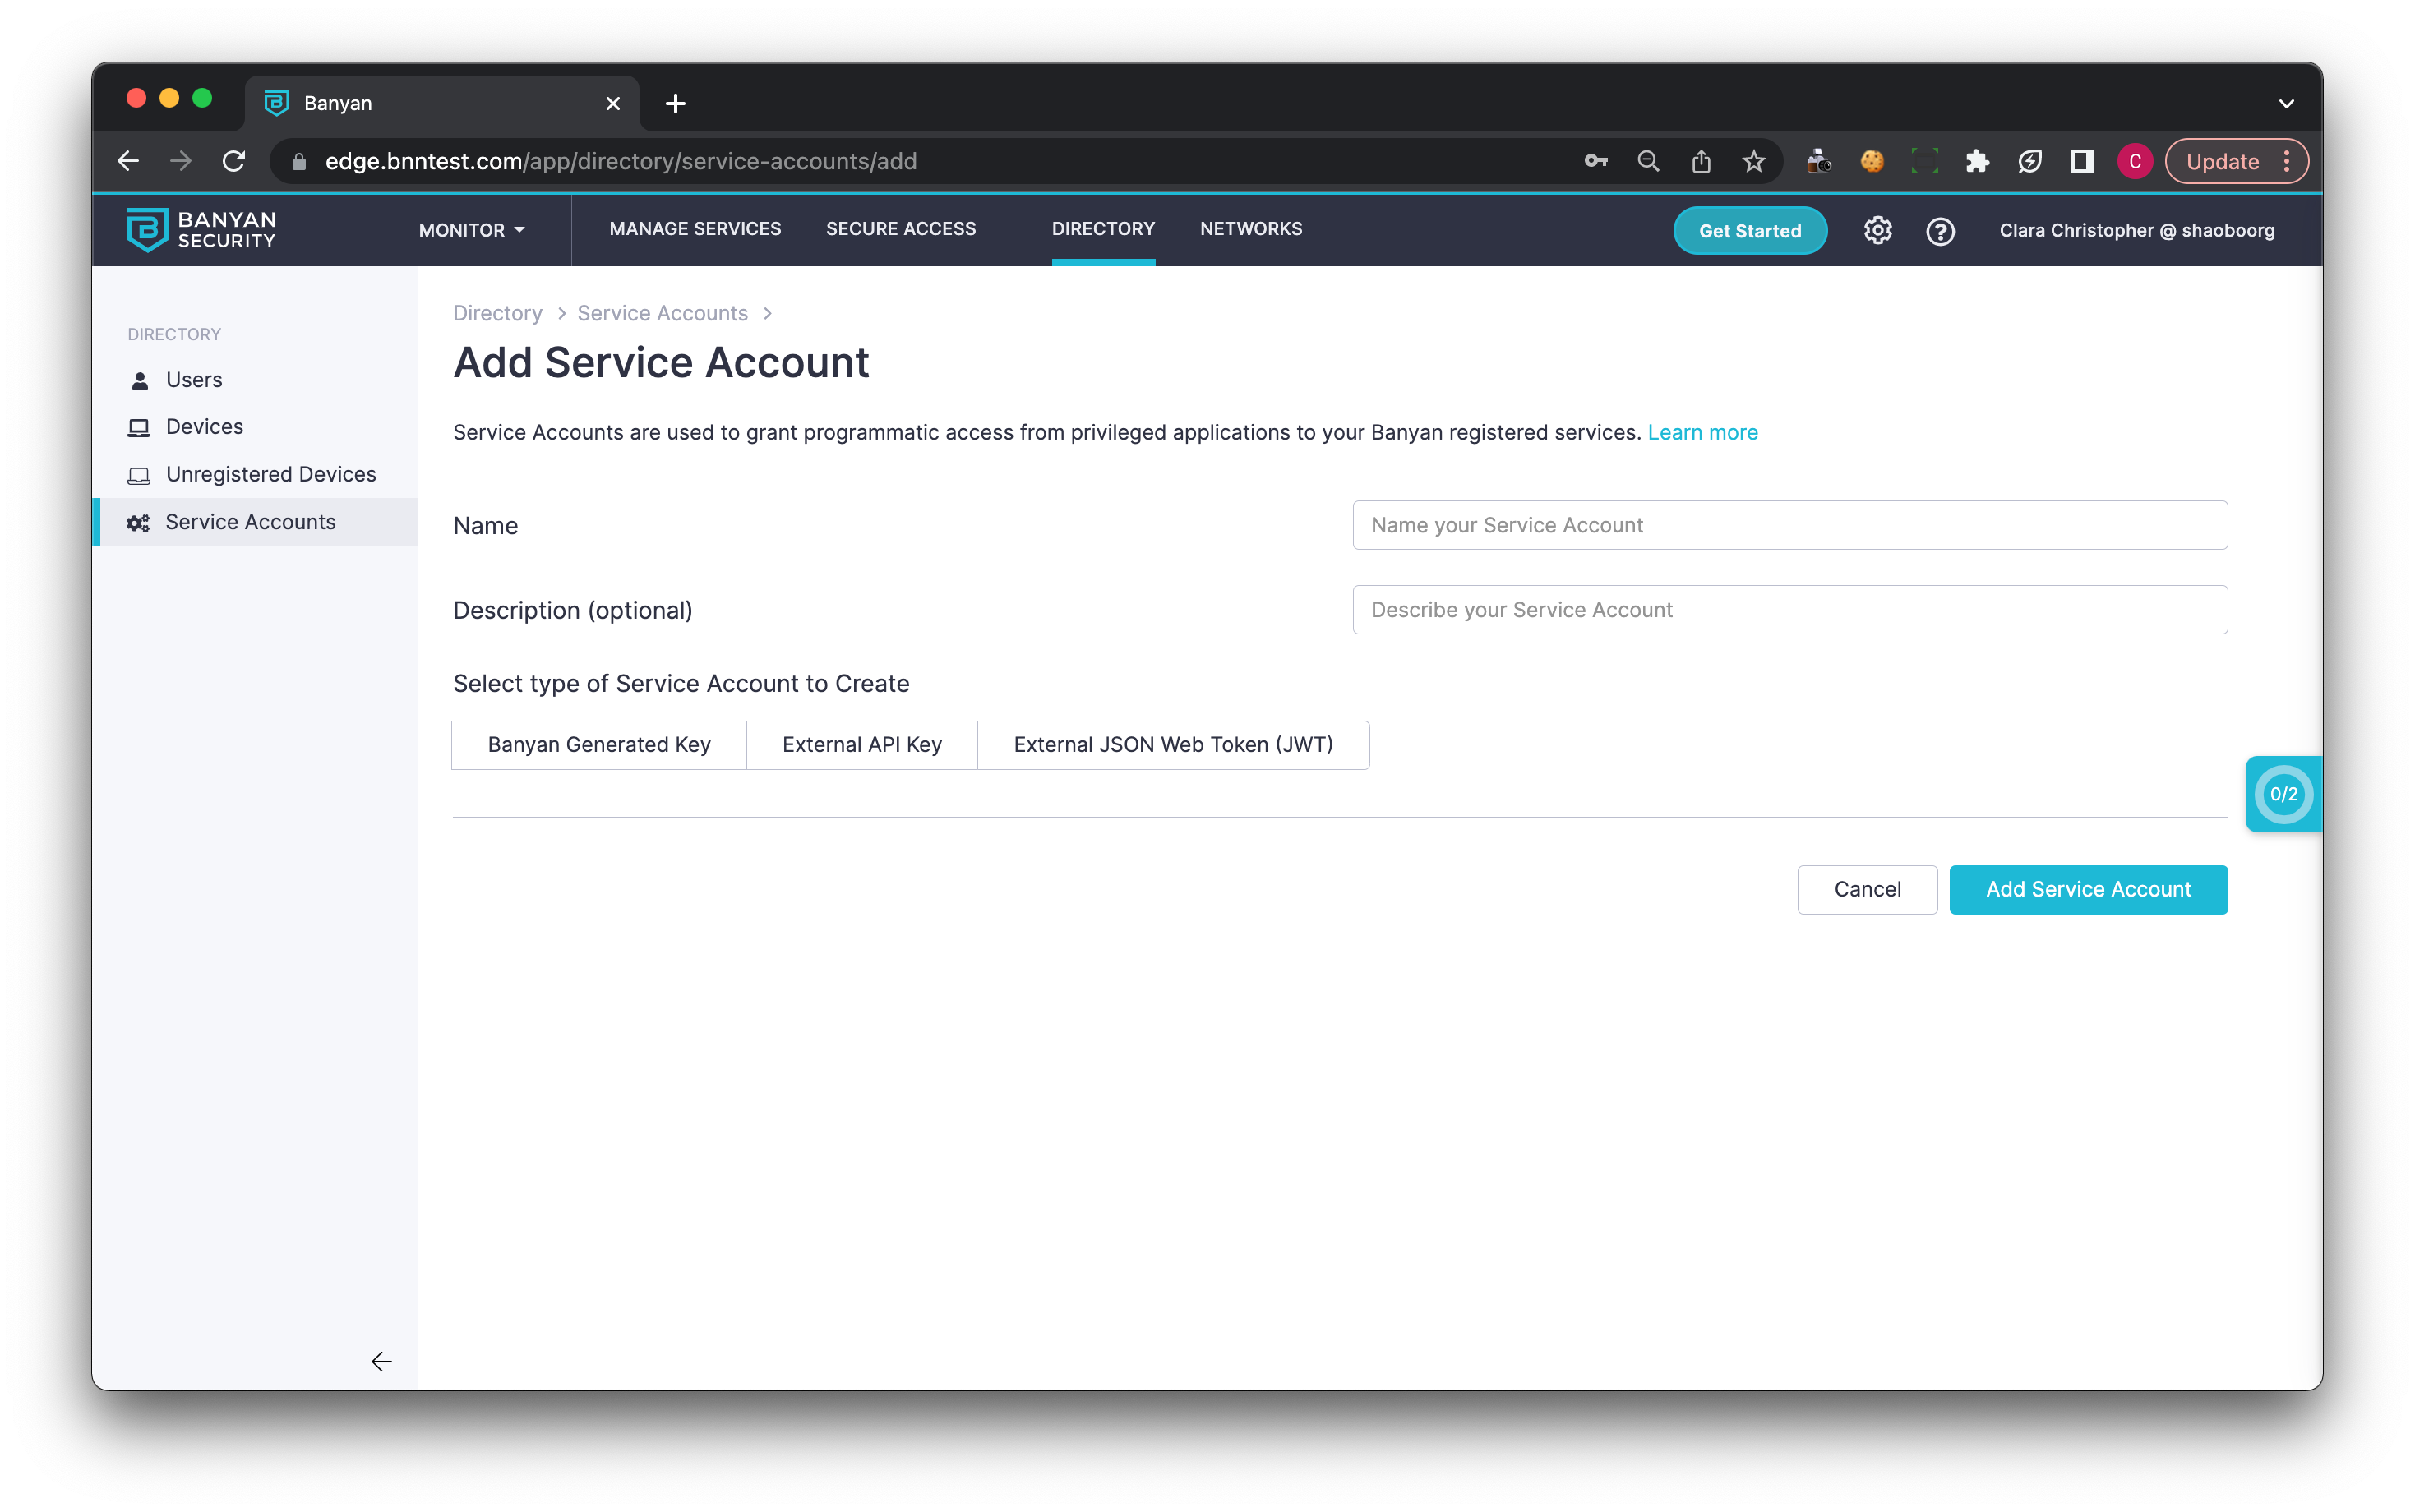
CSE supports three Service Account types. Choose based on where the credential originates:
| Type | Choose it when | You provide |
|---|---|---|
| SonicWall CSE Generated Key | You control the calling application and can configure an arbitrary secret in it | A name; CSE generates the API key secret |
| External API Key | The third-party application already issues its own static API key | The application’s existing key value |
| External OIDC JSON Web Token (JWT) | The caller already has an identity with an OIDC provider and can present that provider’s JWT | The issuer URL, and the audience and subject pairs CSE should accept |
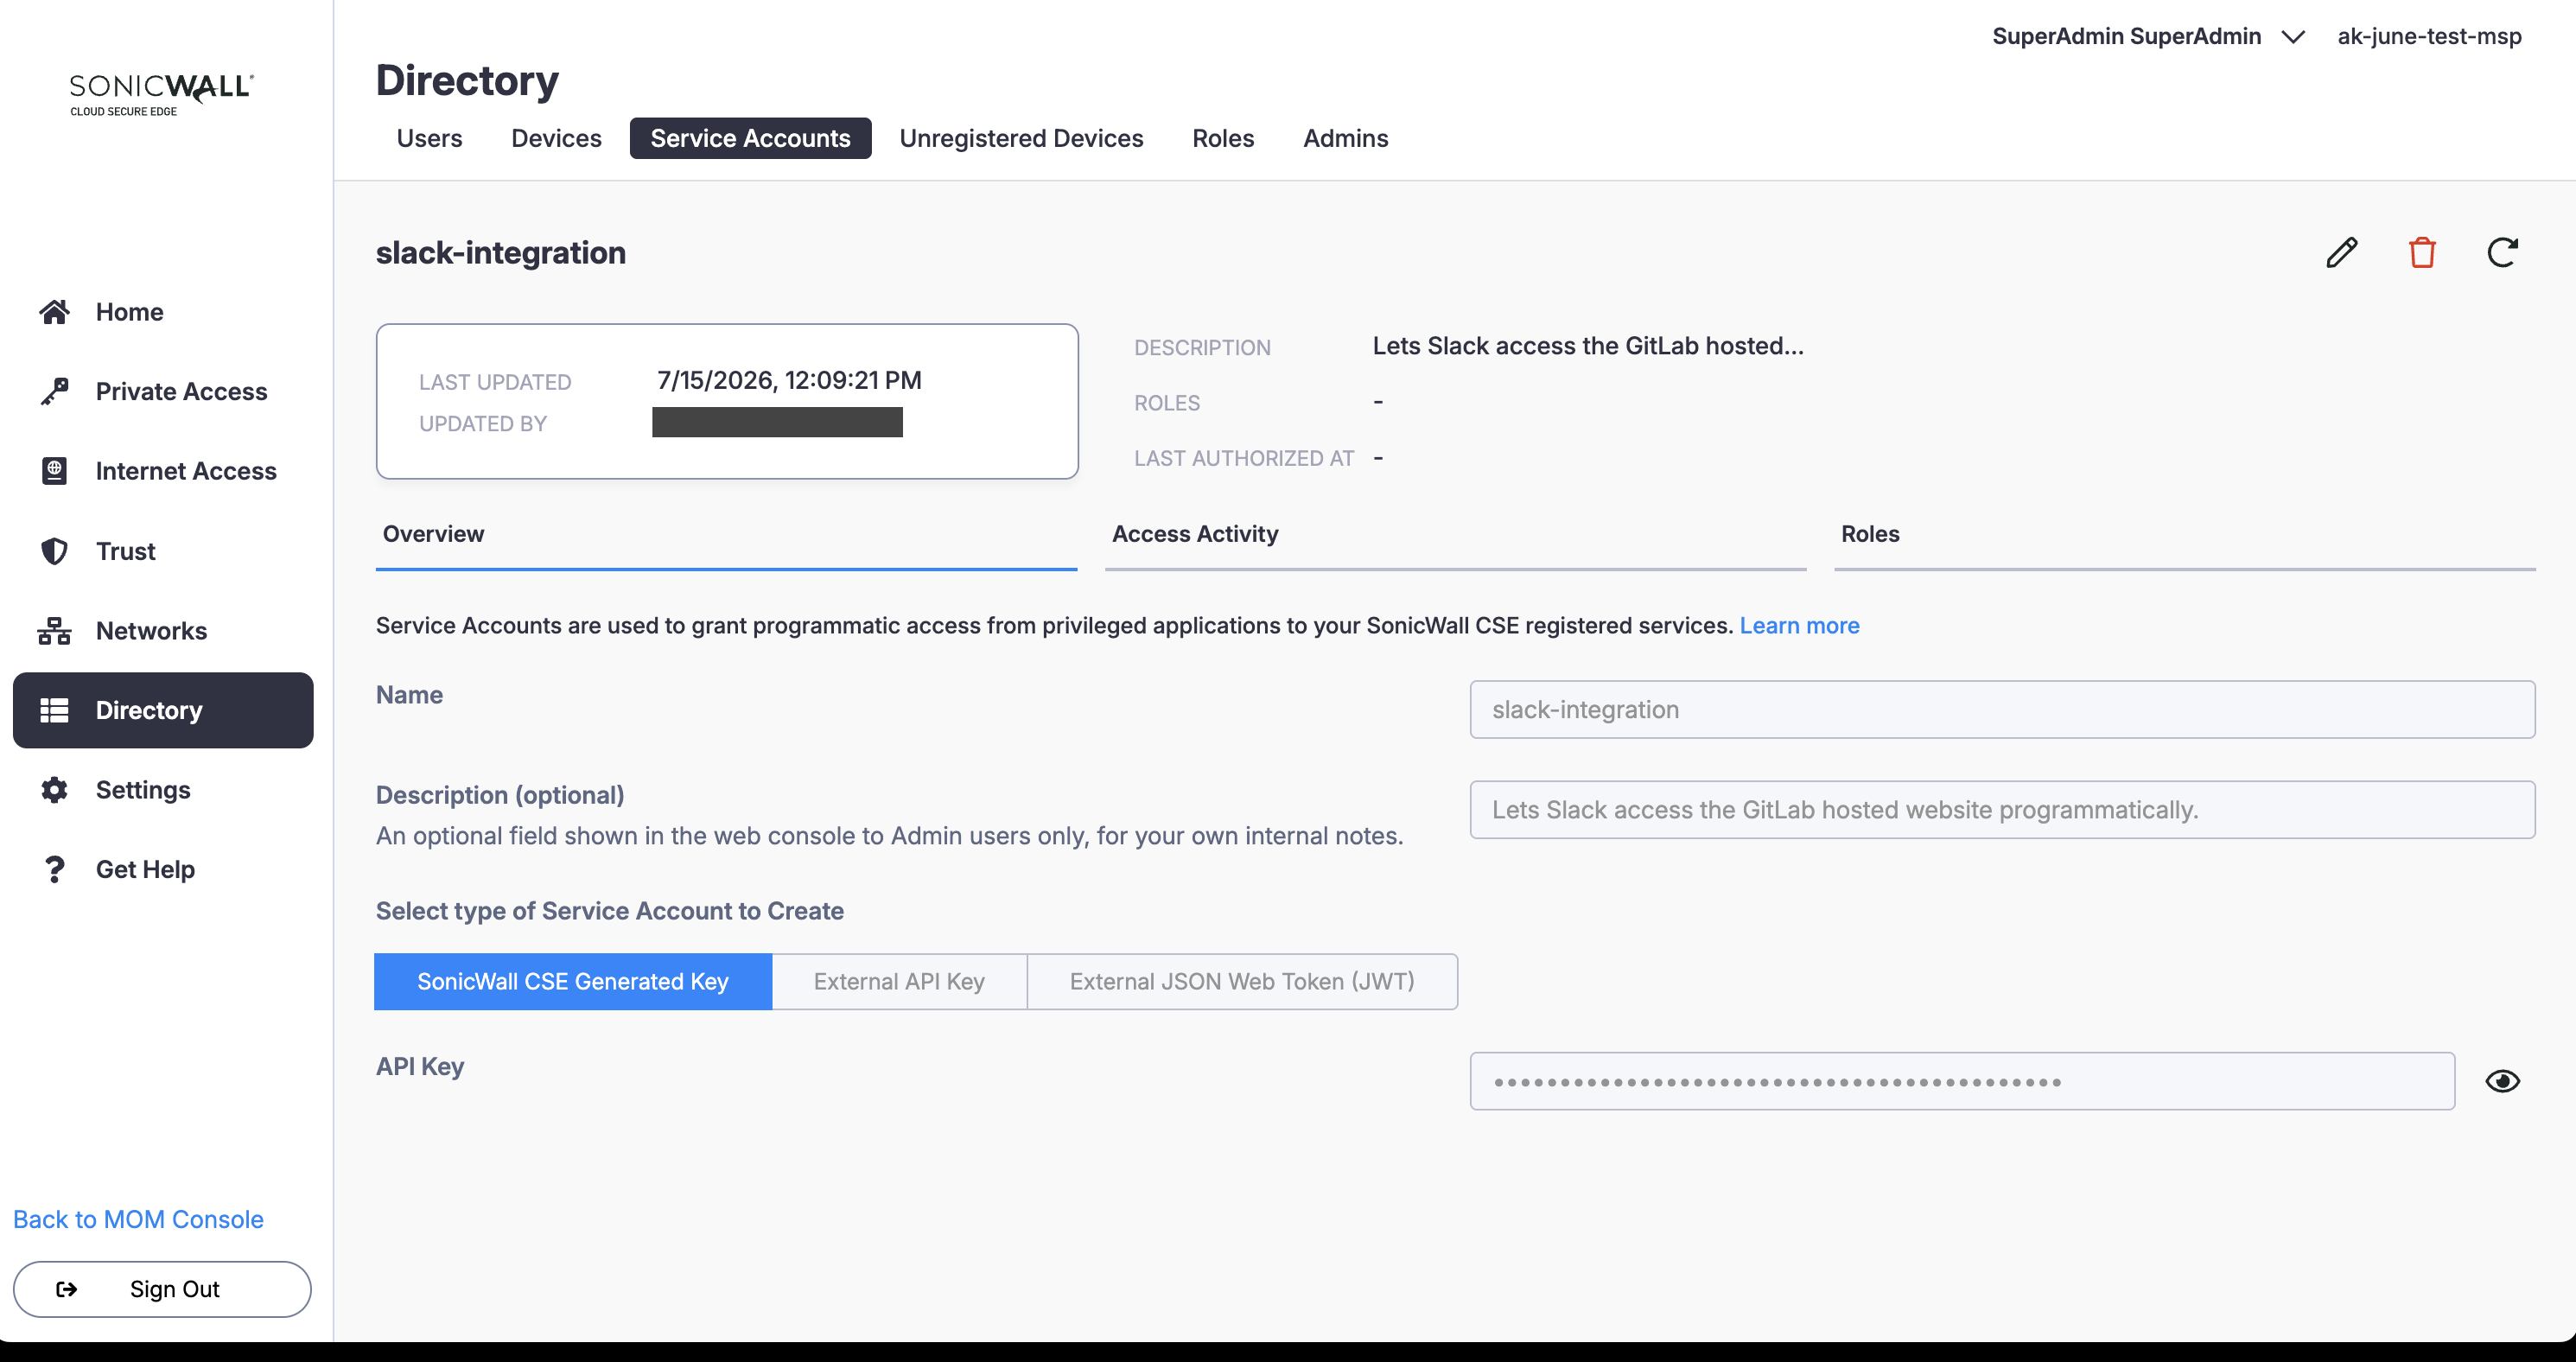
(a) SonicWall CSE Generated Key — a CSE-generated key that can be sent from the third-party application.
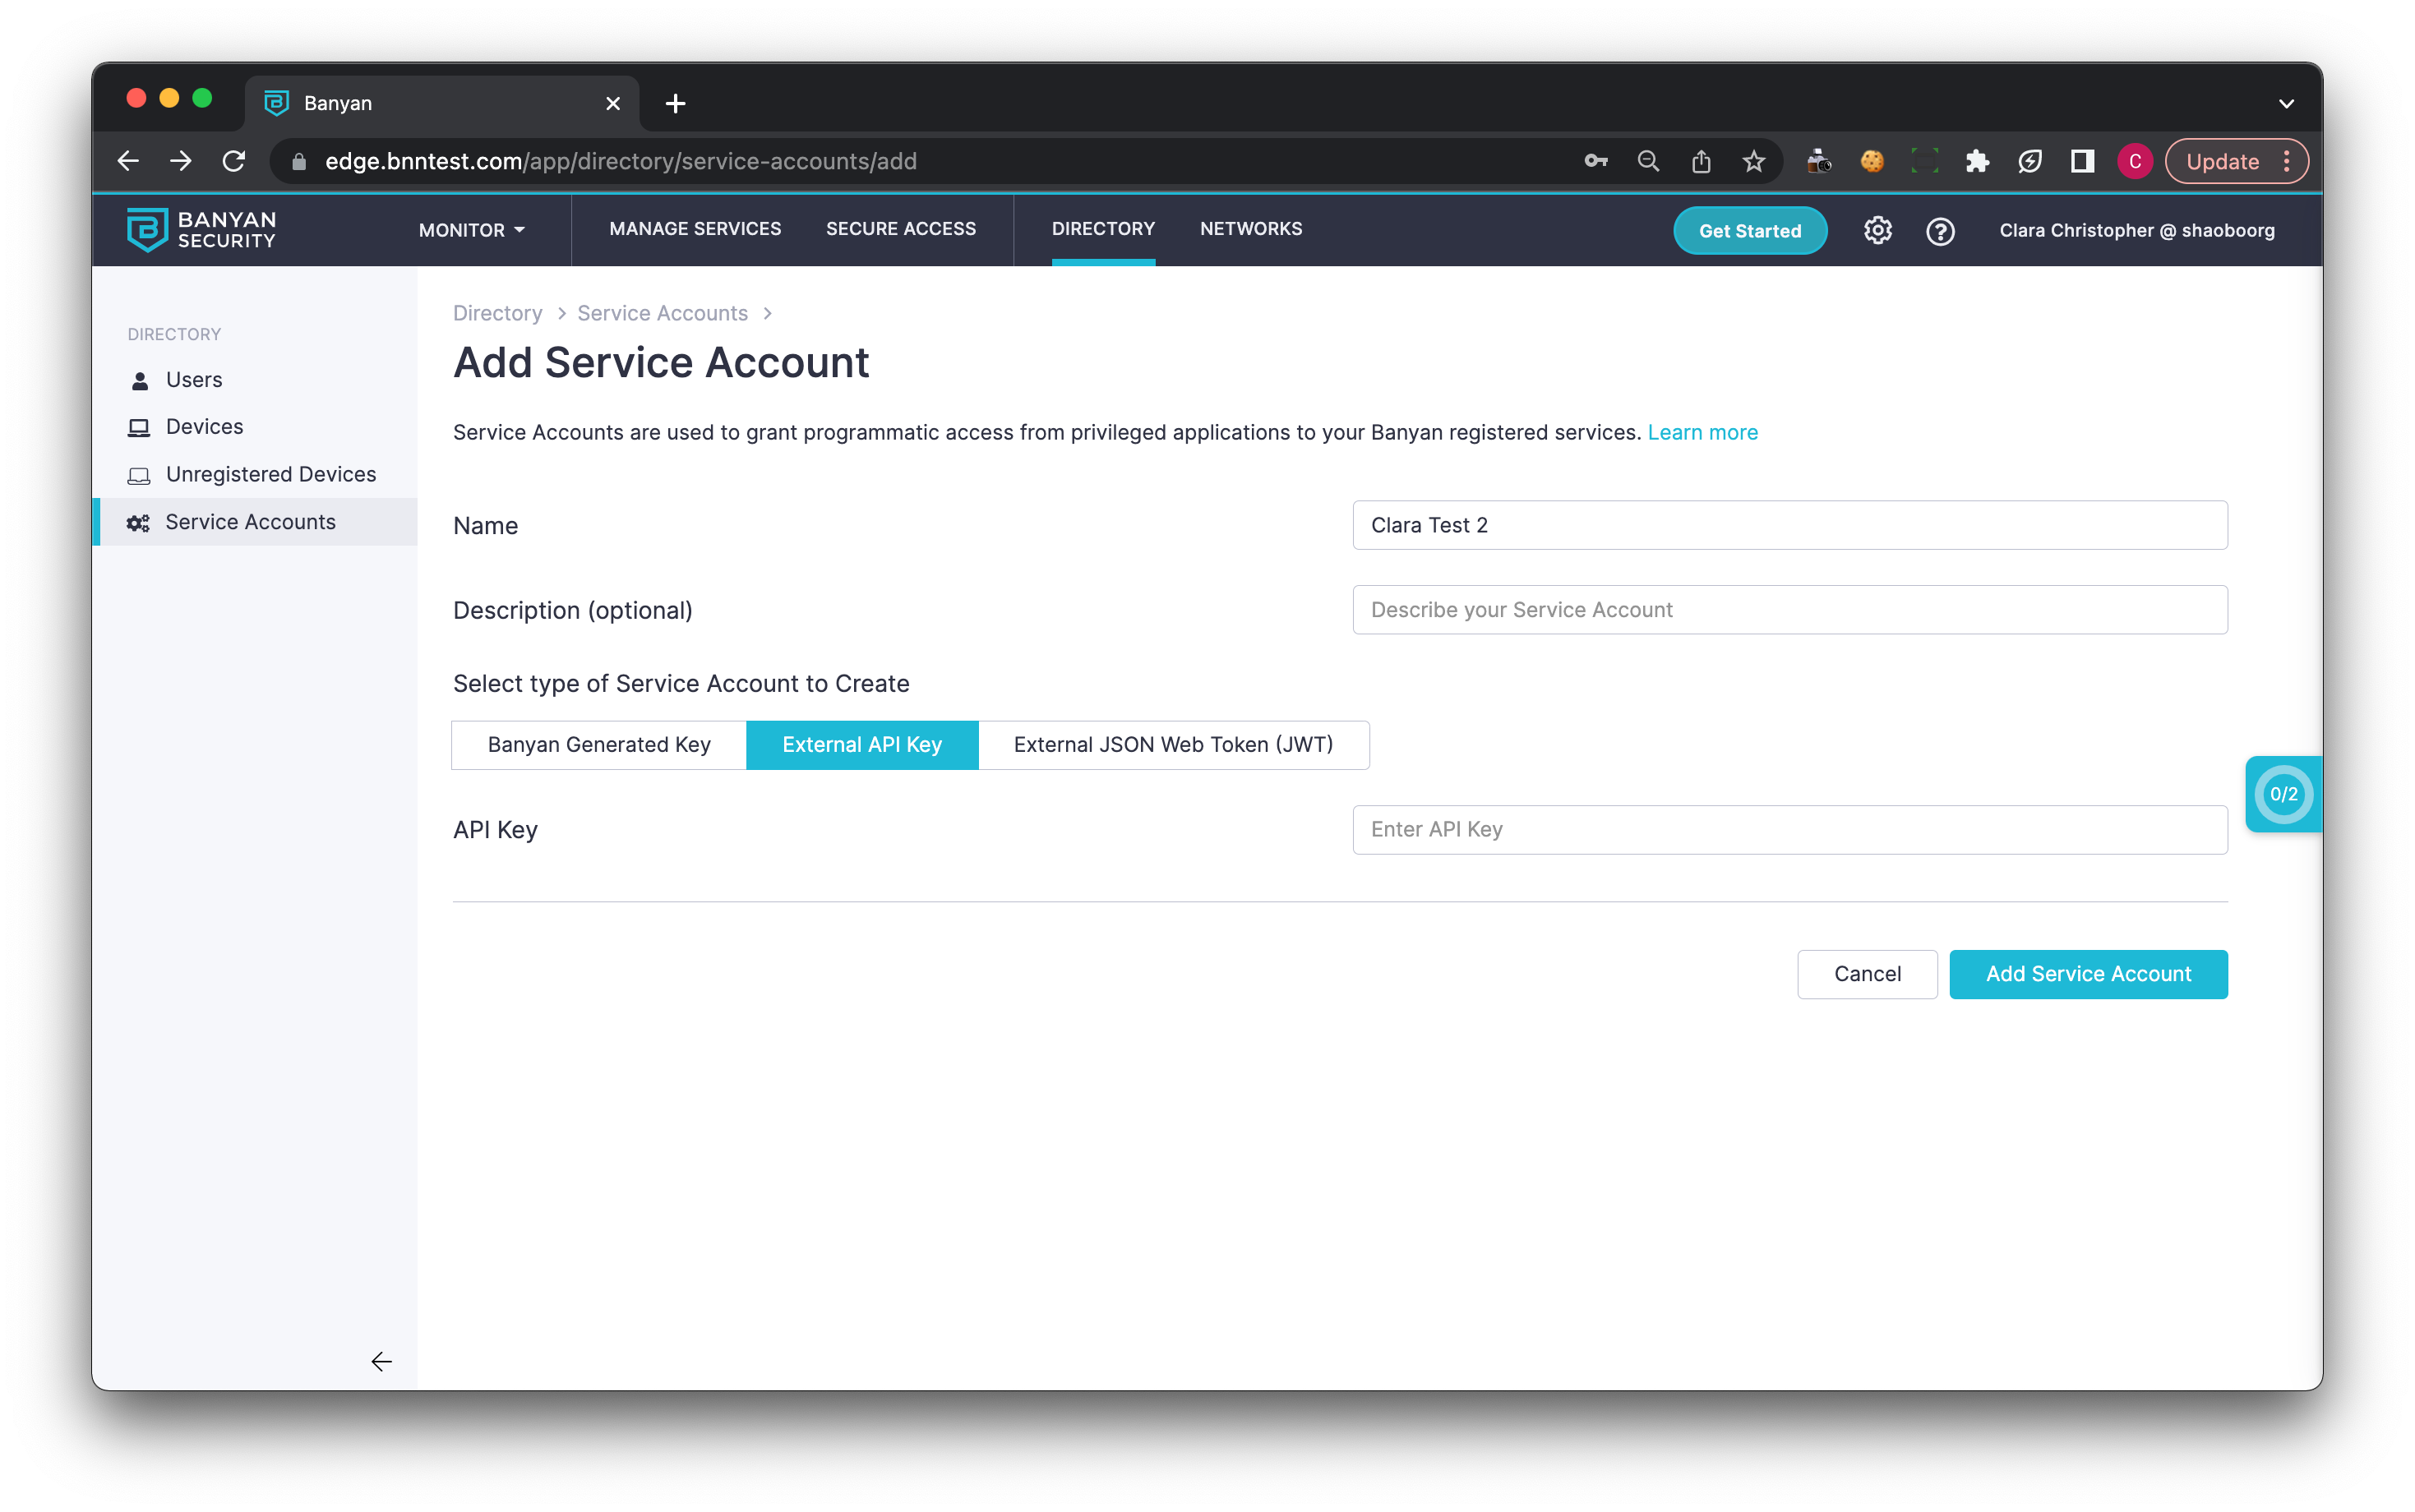
(b) External API Key — allows entering an External API Key generated by the third-party application.
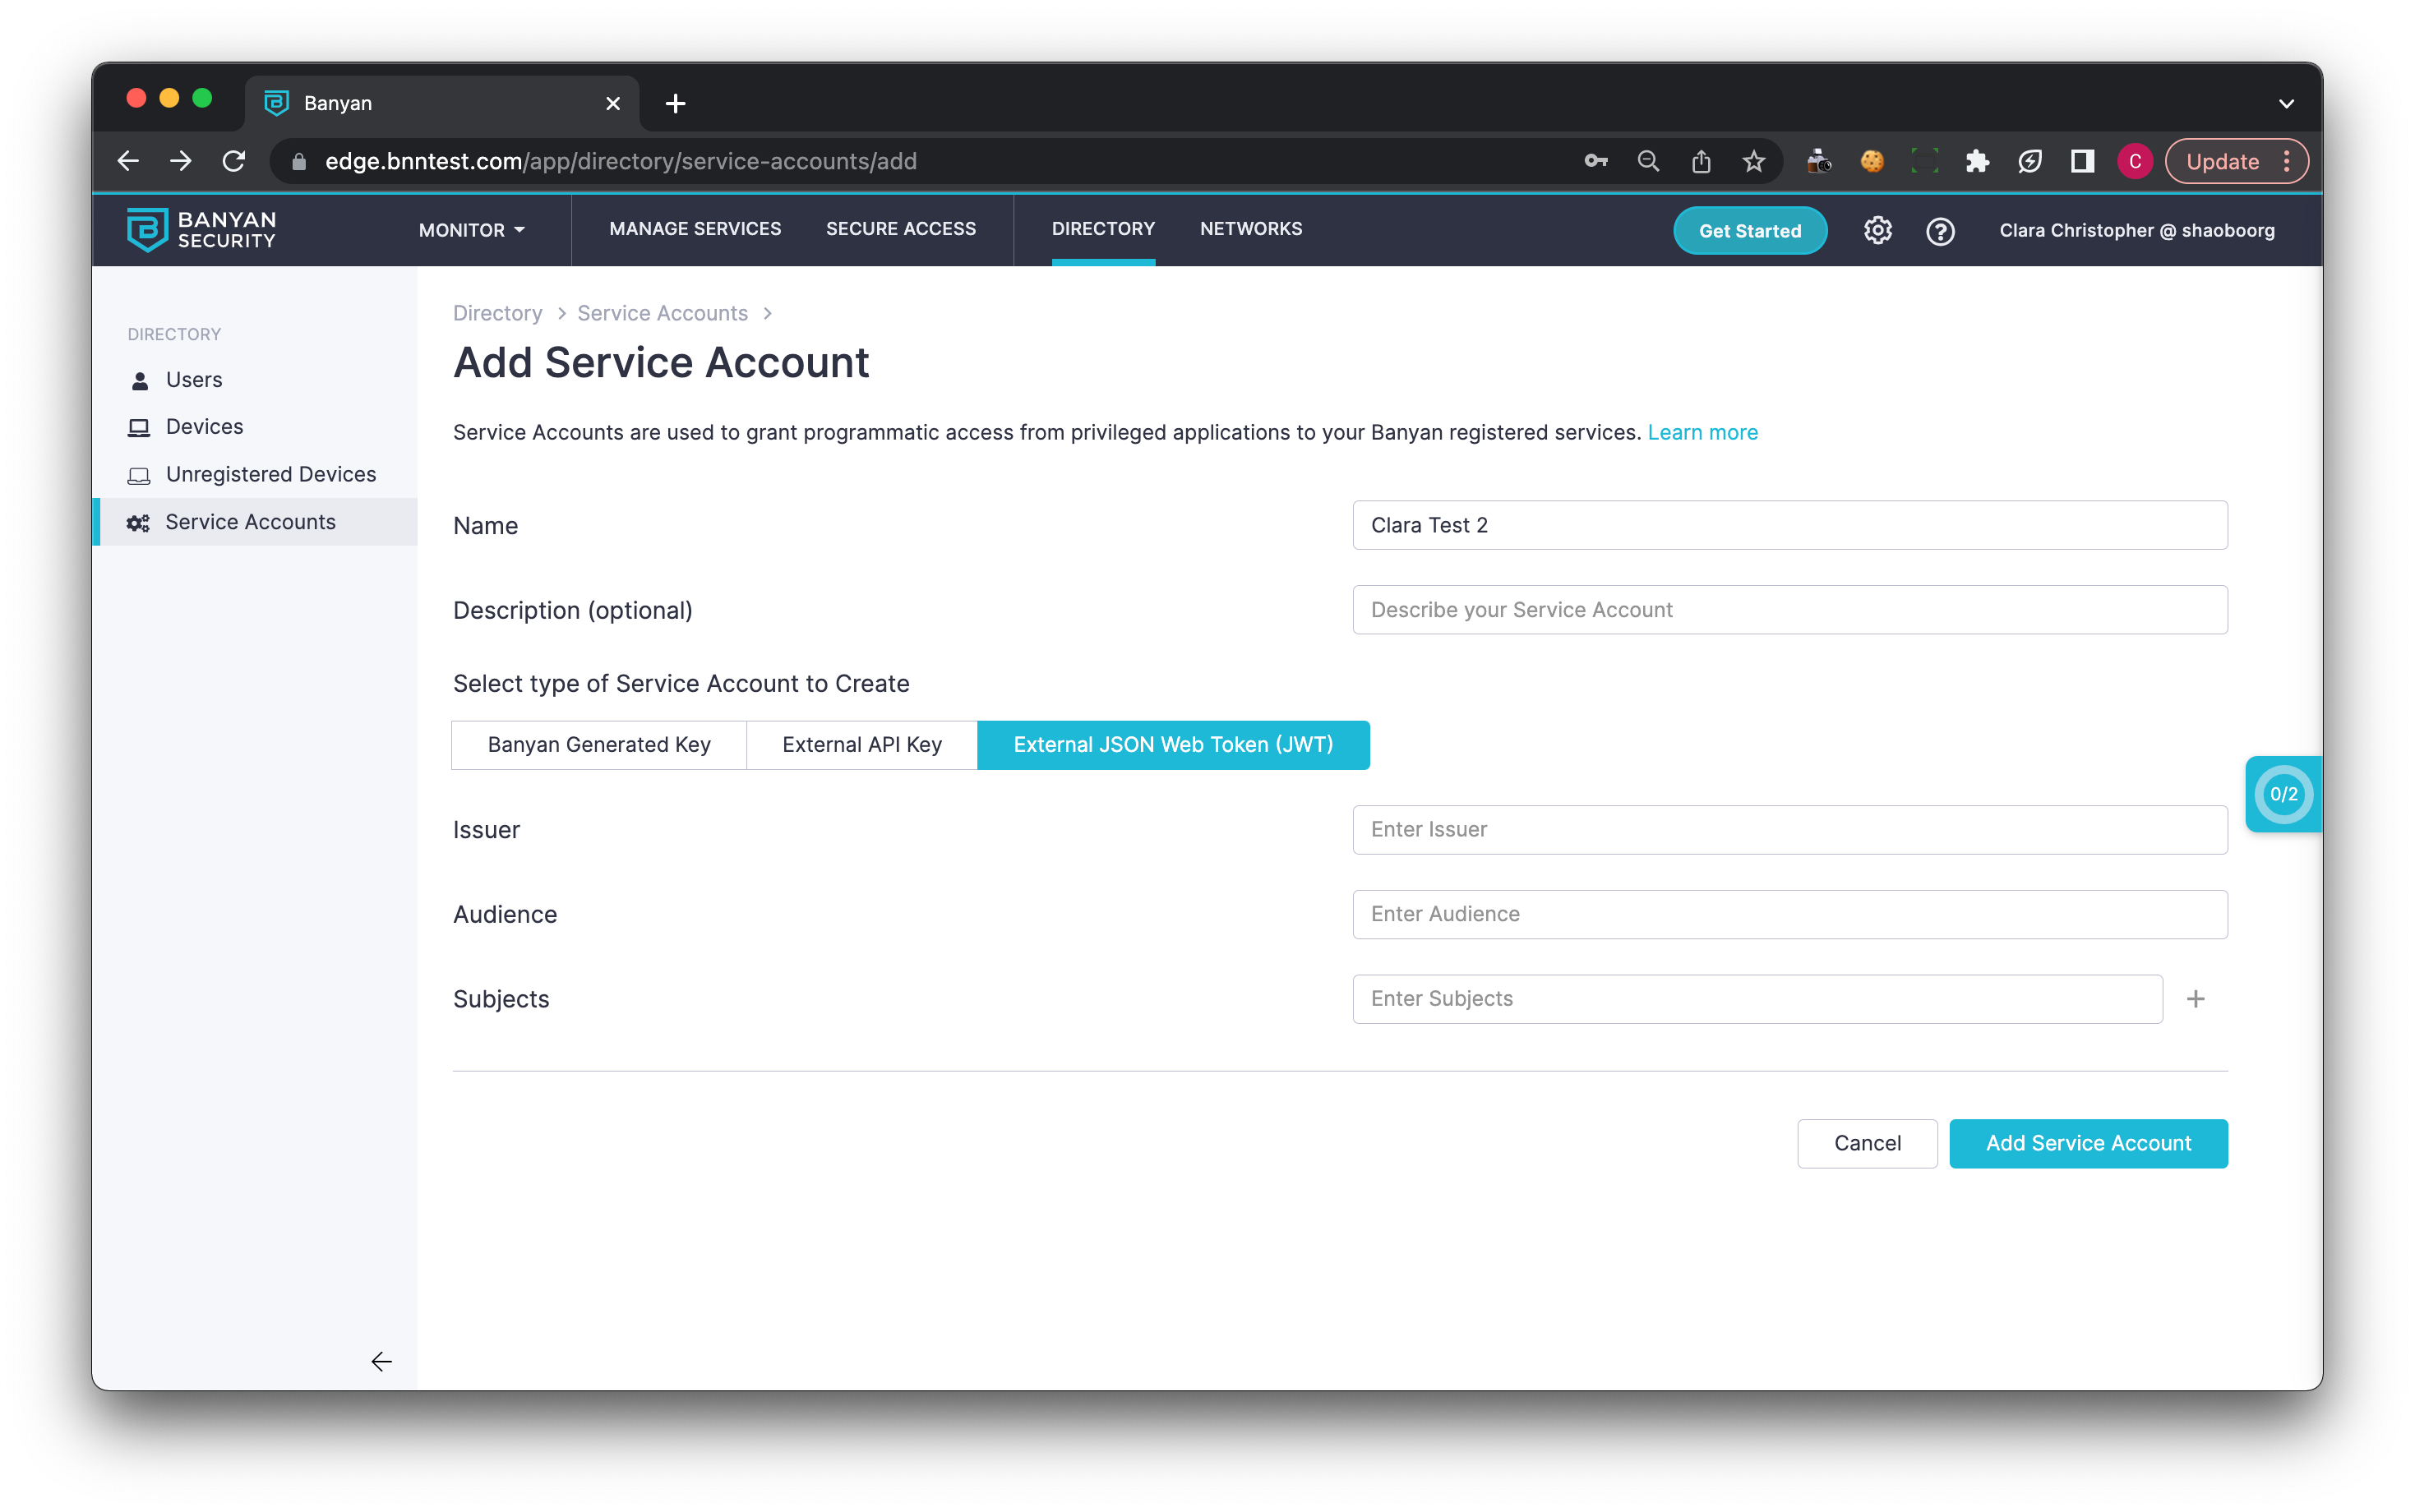
(c) External OIDC JSON Web Token (JWT) — CSE validates a JWT the caller got from its own identity provider, so the caller holds no secret from CSE. This is the stronger of the two credential models. See JWT compared with API keys. Selecting this type sets Type to Generic OIDC, because CSE accepts any OIDC-compliant issuer.
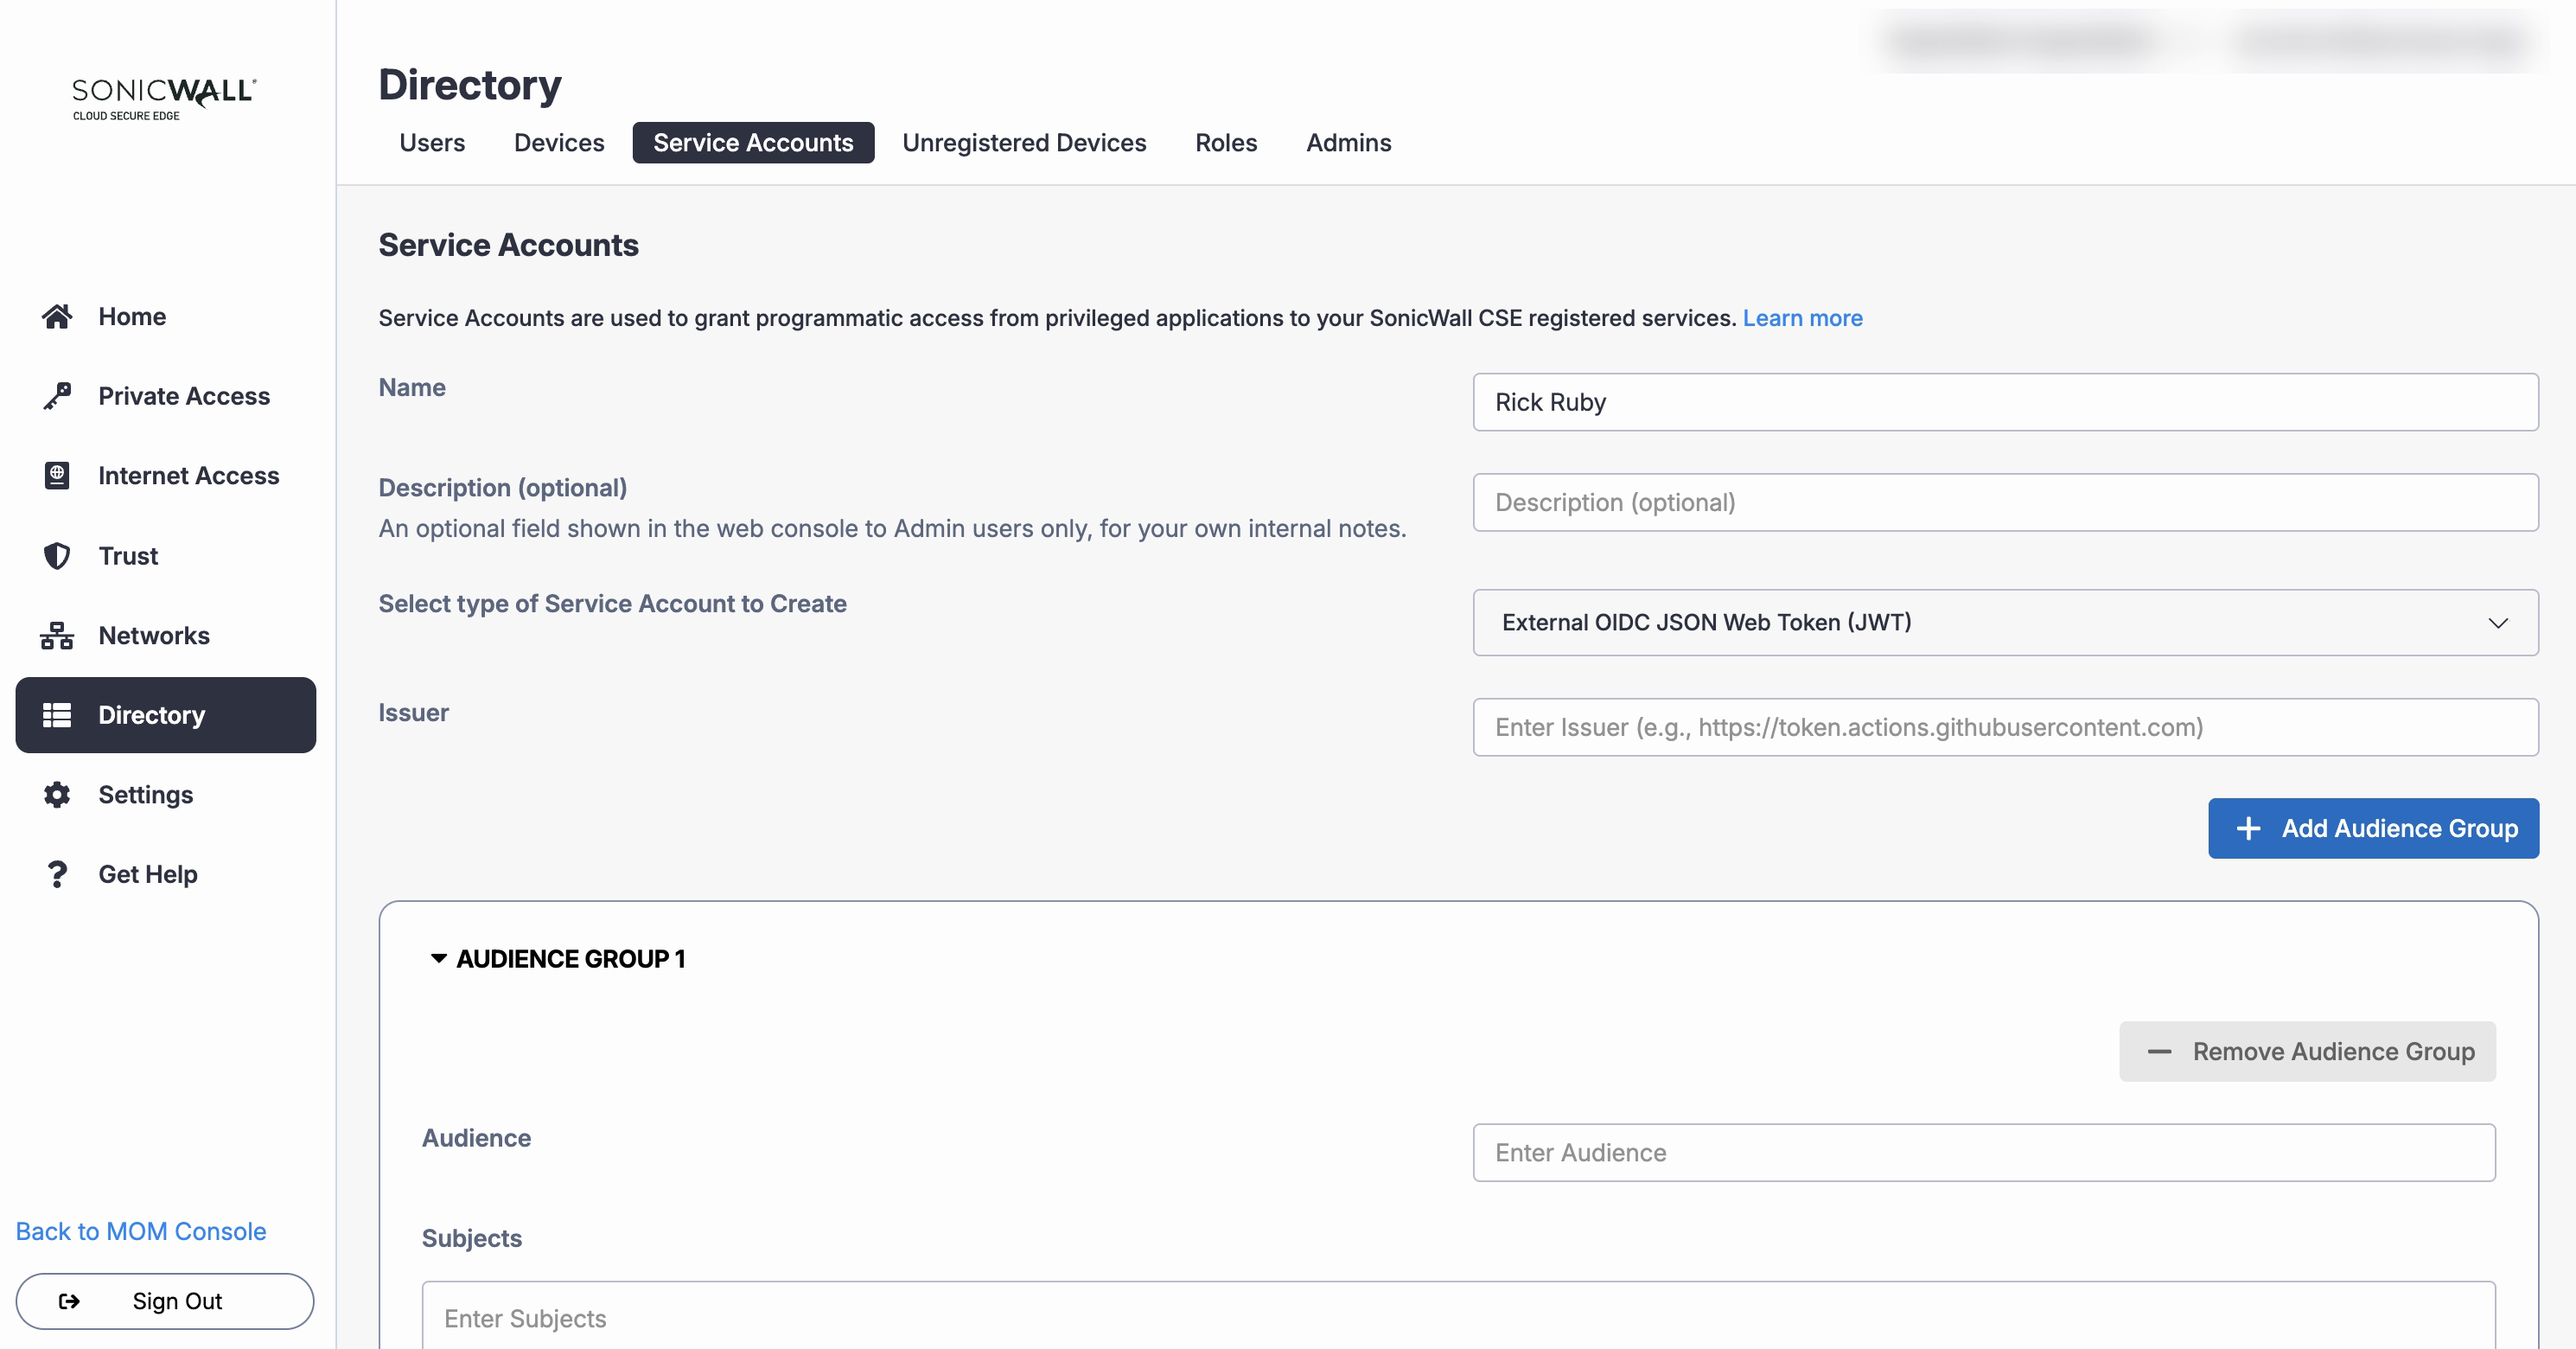
Configure two things:
| Field | What to enter |
|---|---|
| Issuer | The full URL of the OIDC issuer, including https://. For example, https://token.actions.githubusercontent.com for GitHub Actions, or https://accounts.google.com for Google. CSE fetches the issuer’s public keys from this URL to verify the JWT signature |
| Audience and subject pairs | The audience and subject values CSE accepts. The caller sends both on every request, and CSE admits the request only if they match a pair you configured. Select Add Audience Group to allow more than one combination |
An audience identifies the calling program. A subject identifies what it is doing. If you run an automation named cse-bot that updates knowledge base articles, the audience might be cse-bot and the subject task-kb-update. The values are yours to choose. What matters is that the caller’s JWT presents the same values you configured here, because that pair is what scopes the Service Account.
Each audience group holds one audience and one or more subjects. A request matches the group when it presents that audience and any one of its subjects.
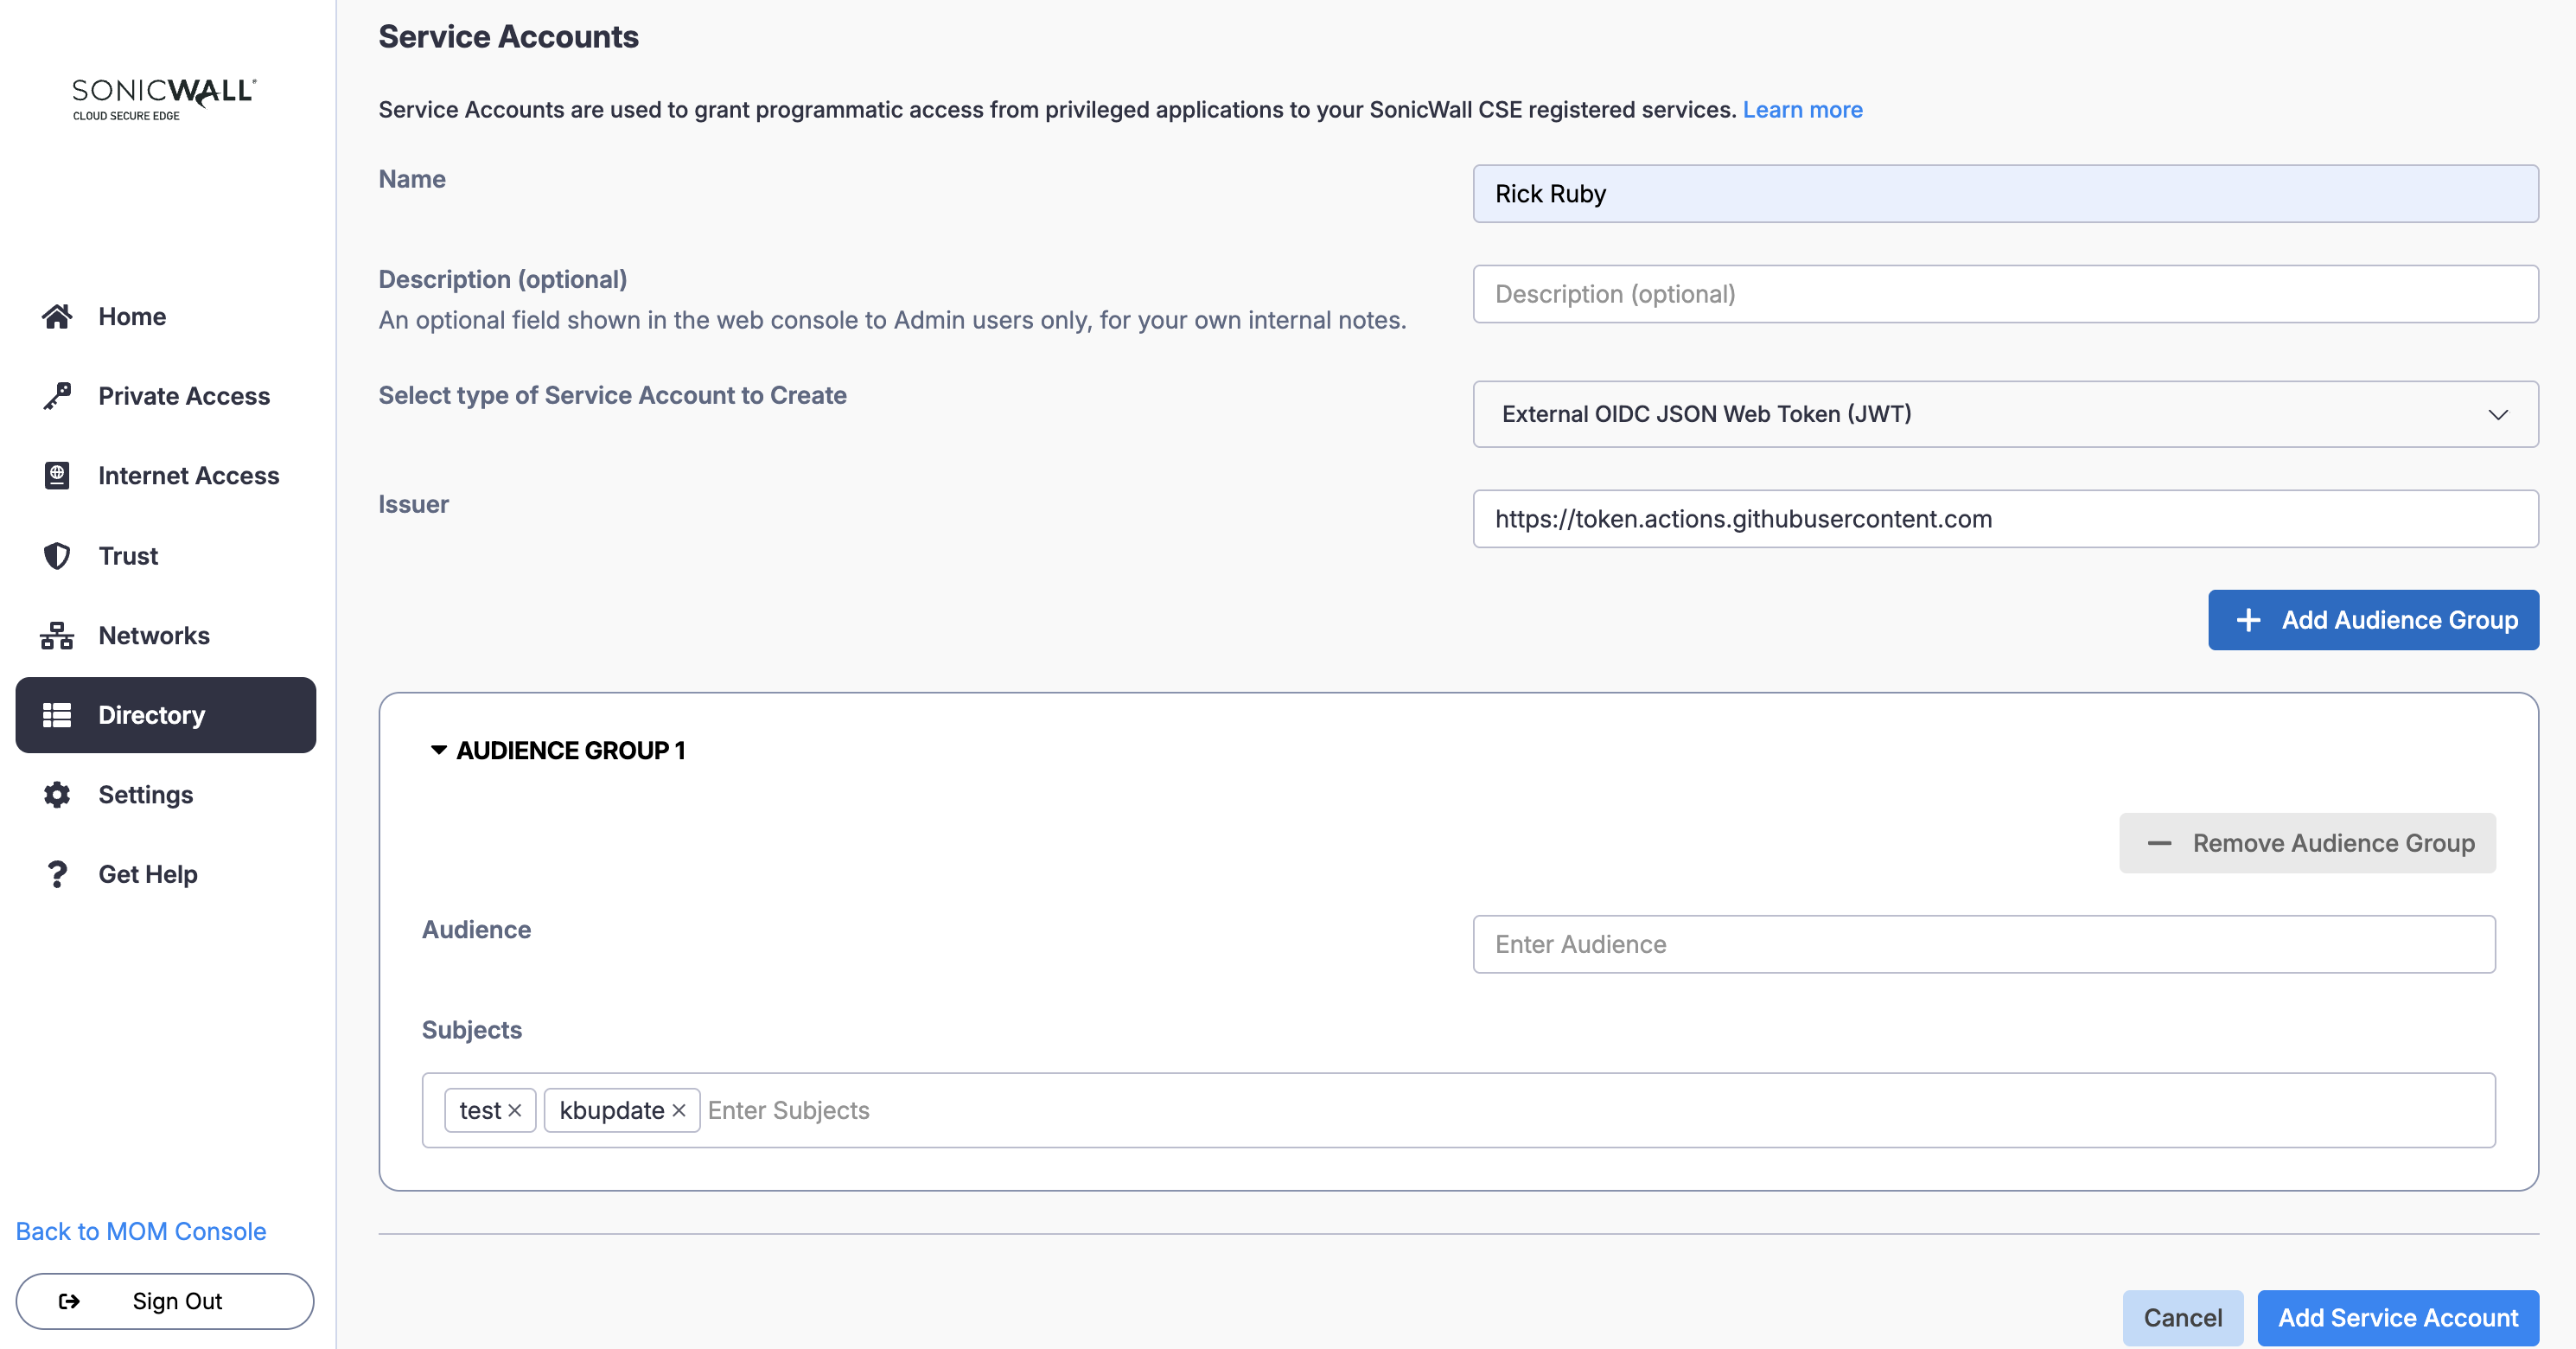
CSE supports any OIDC-compliant issuer, more than one audience and subject pair per Service Account, and regular expressions in the Subject field.
Use a regular expression when one caller sends many subjects, such as a workflow that runs from several branches. Anchor it to the full value and keep it narrow, because anything it matches is admitted. For a GitHub Actions workflow allowed to run from two branches, the subject would be ^repo:example-org/inventory-agent:ref:refs/heads/(main|release)$.
Token validation
CSE retrieves the issuer’s signing keys through OIDC Discovery at <Issuer URL>/.well-known/openid-configuration, verifies the token signature, and then checks the issuer, audience, and subject claims against the Service Account. Two consequences follow:
- Group, role, and other custom claims in the token are not evaluated. If your authorization depends on a claim other than issuer, audience, or subject, CSE cannot enforce it. Put that distinction in the subject, or use separate Service Accounts.
- A custom JWKS URL cannot be entered. If CSE cannot reach your issuer’s discovery document, the Service Account cannot validate tokens.
JWT compared with API keys
An API key is a static secret. It is not insecure if you store it properly, but CSE is the only place it lives, so revoking it means deleting the Service Account.
An external JWT puts that control in your identity provider. The caller presents a token, CSE validates it against the issuer on every request, and the token expires on its own. Disable the identity at your provider and CSE stops admitting it at the next request, with no change in CSE. Where a caller can get a JWT, use one.
1.3 Save the Service Account. For SonicWall CSE Generated Key accounts, the generated API key secret is available on the Service Account after saving (Directory > Service Accounts > select the account). Copy it and store it in a secrets manager — it is the credential the calling application will present, and anyone holding it can reach the websites you enable in Step 3.
Step 2: Add a Service Account to a Role and a Policy
2.1 Create a Role.
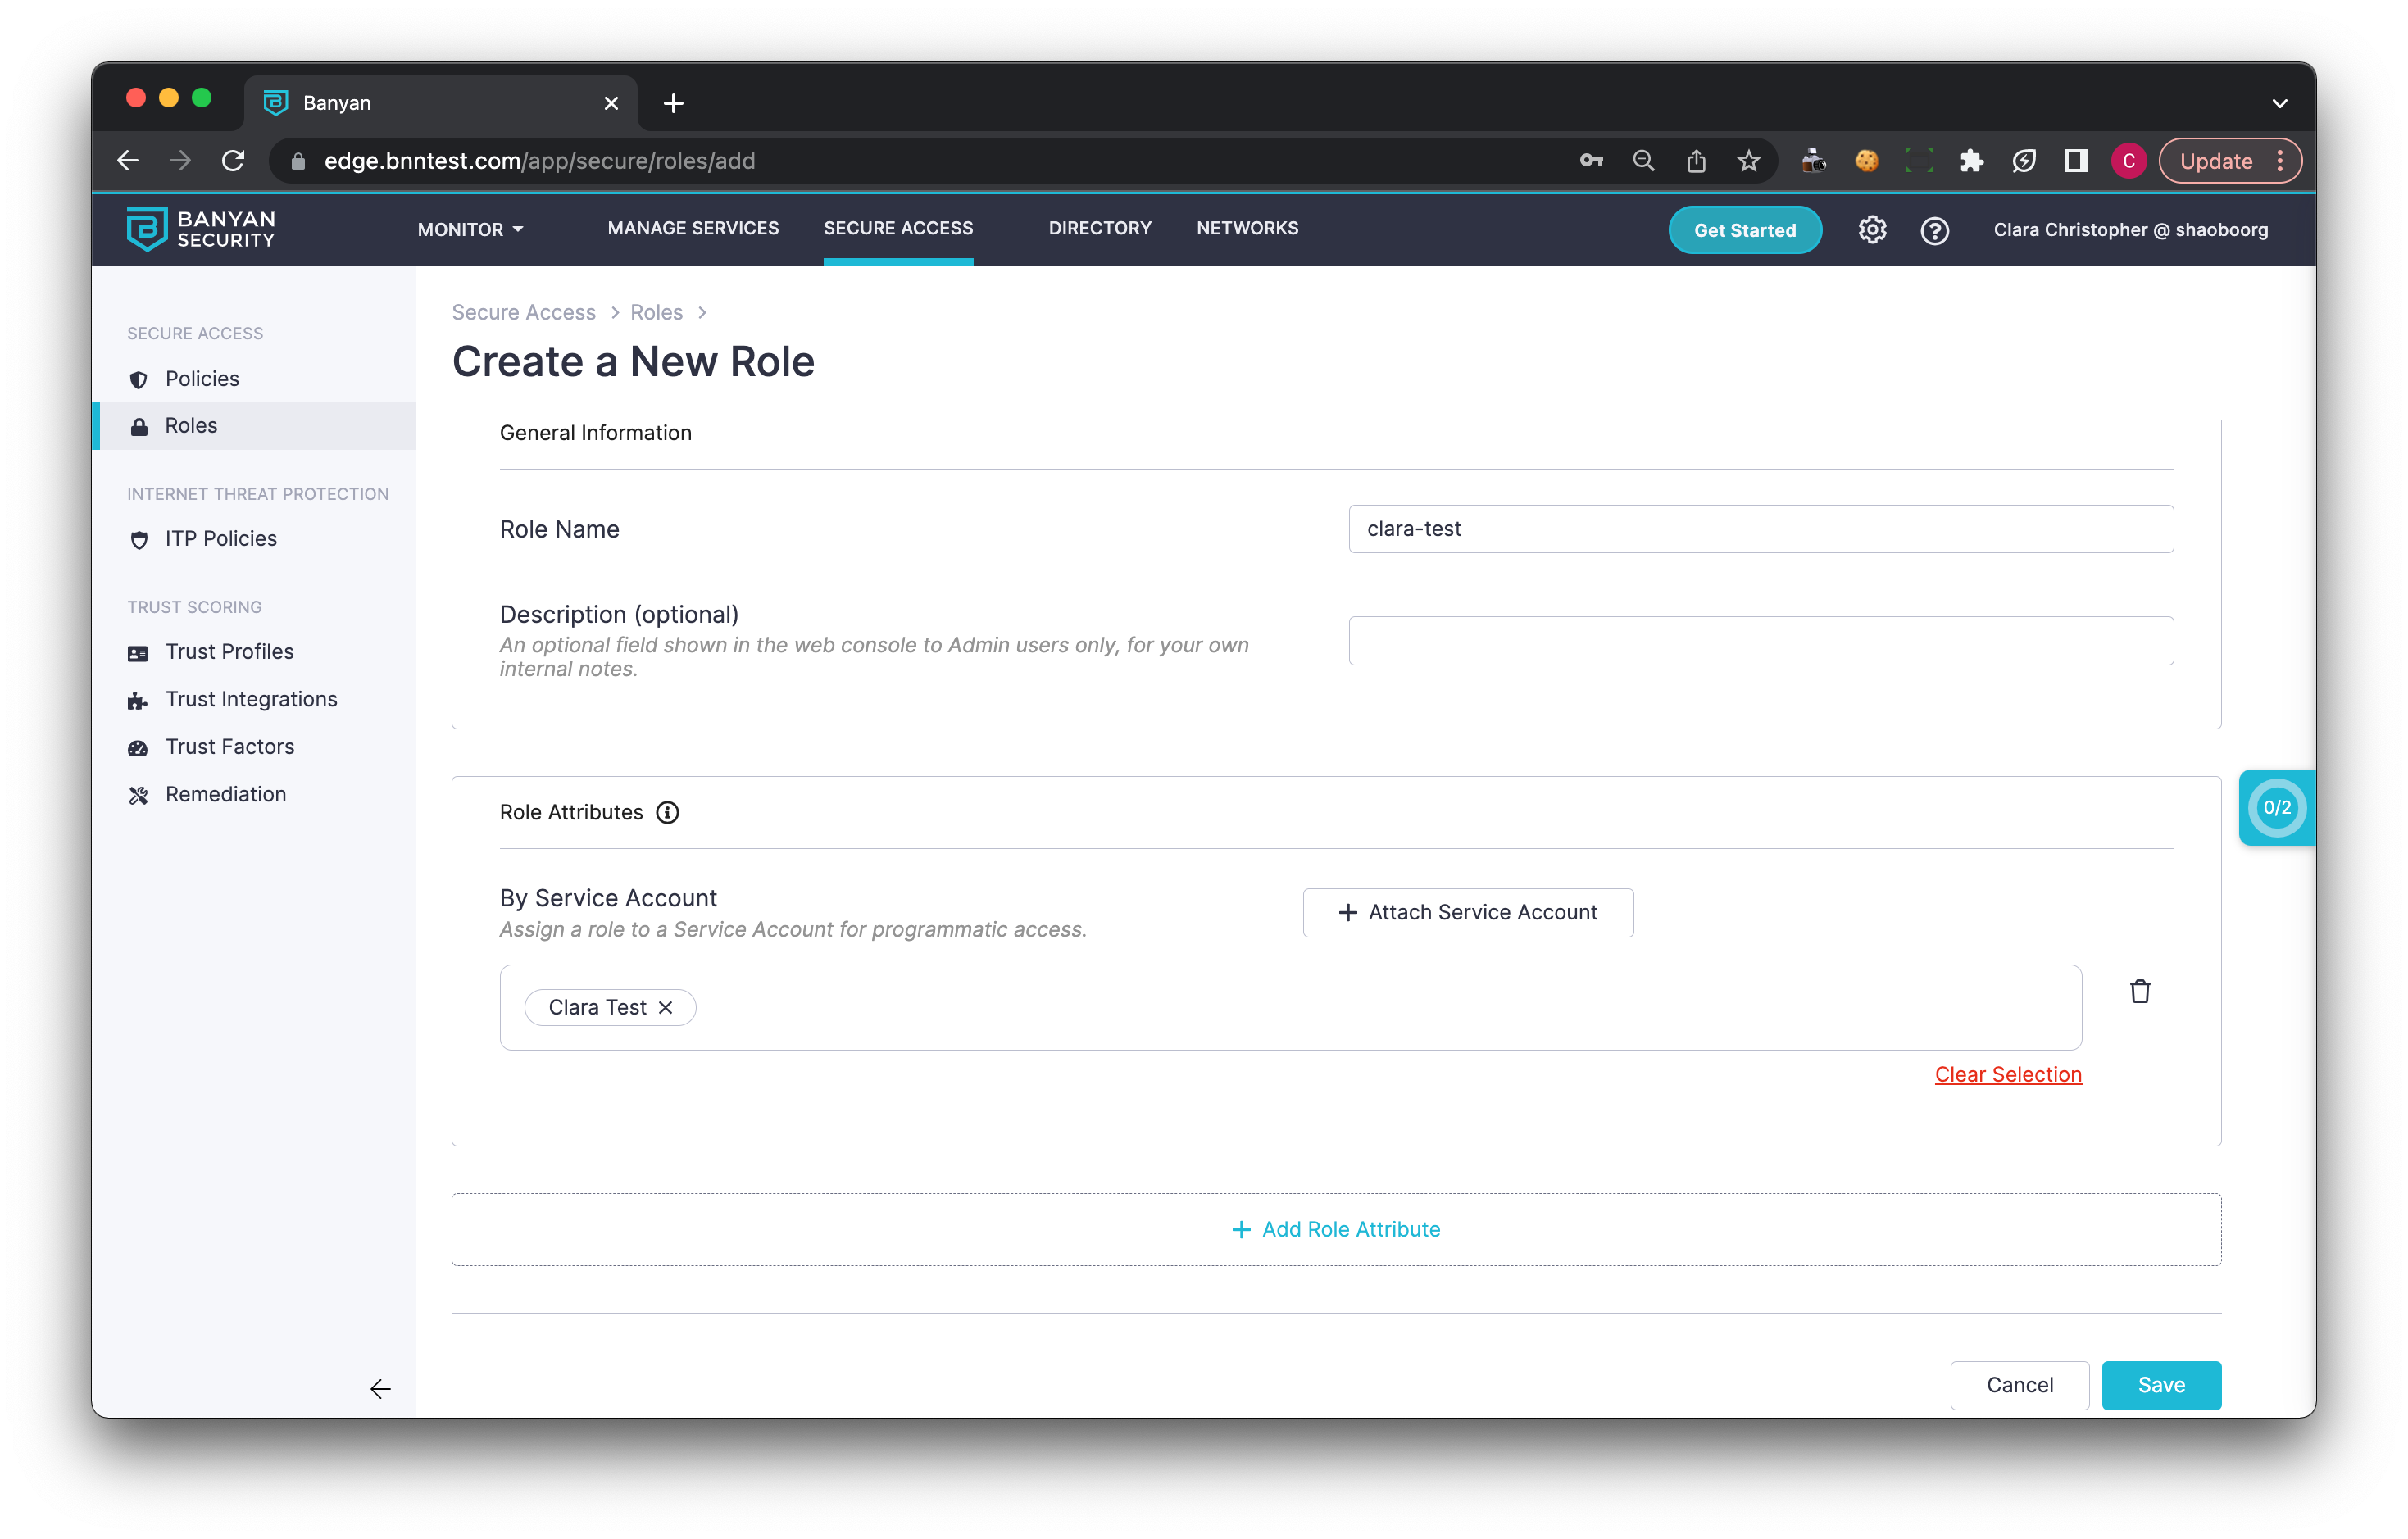
2.2 Under the Role’s Role Attributes, add the By Service Account attribute, select + Attach Service Account, and choose the Service Account you created in Step 1.
Note: You can add multiple Service Accounts to a single role.
2.3 Add the Role to a Web Policy (Private Access > Access Policies).
Service Accounts will not adhere to any Trust Scoring requirements within a policy — a minimum Trust Level set in the policy is not evaluated for Service Account access.
Step 3: Allow the Service Account to access your CSE Service
3.1 Navigate from Private Access > Hosted Websites, then select + Add Hosted Website or select an existing Hosted Website to edit (see Register a Hosted Website to Users).
3.2 On the website’s Access Permissions step, turn on Enable Service Account Access.
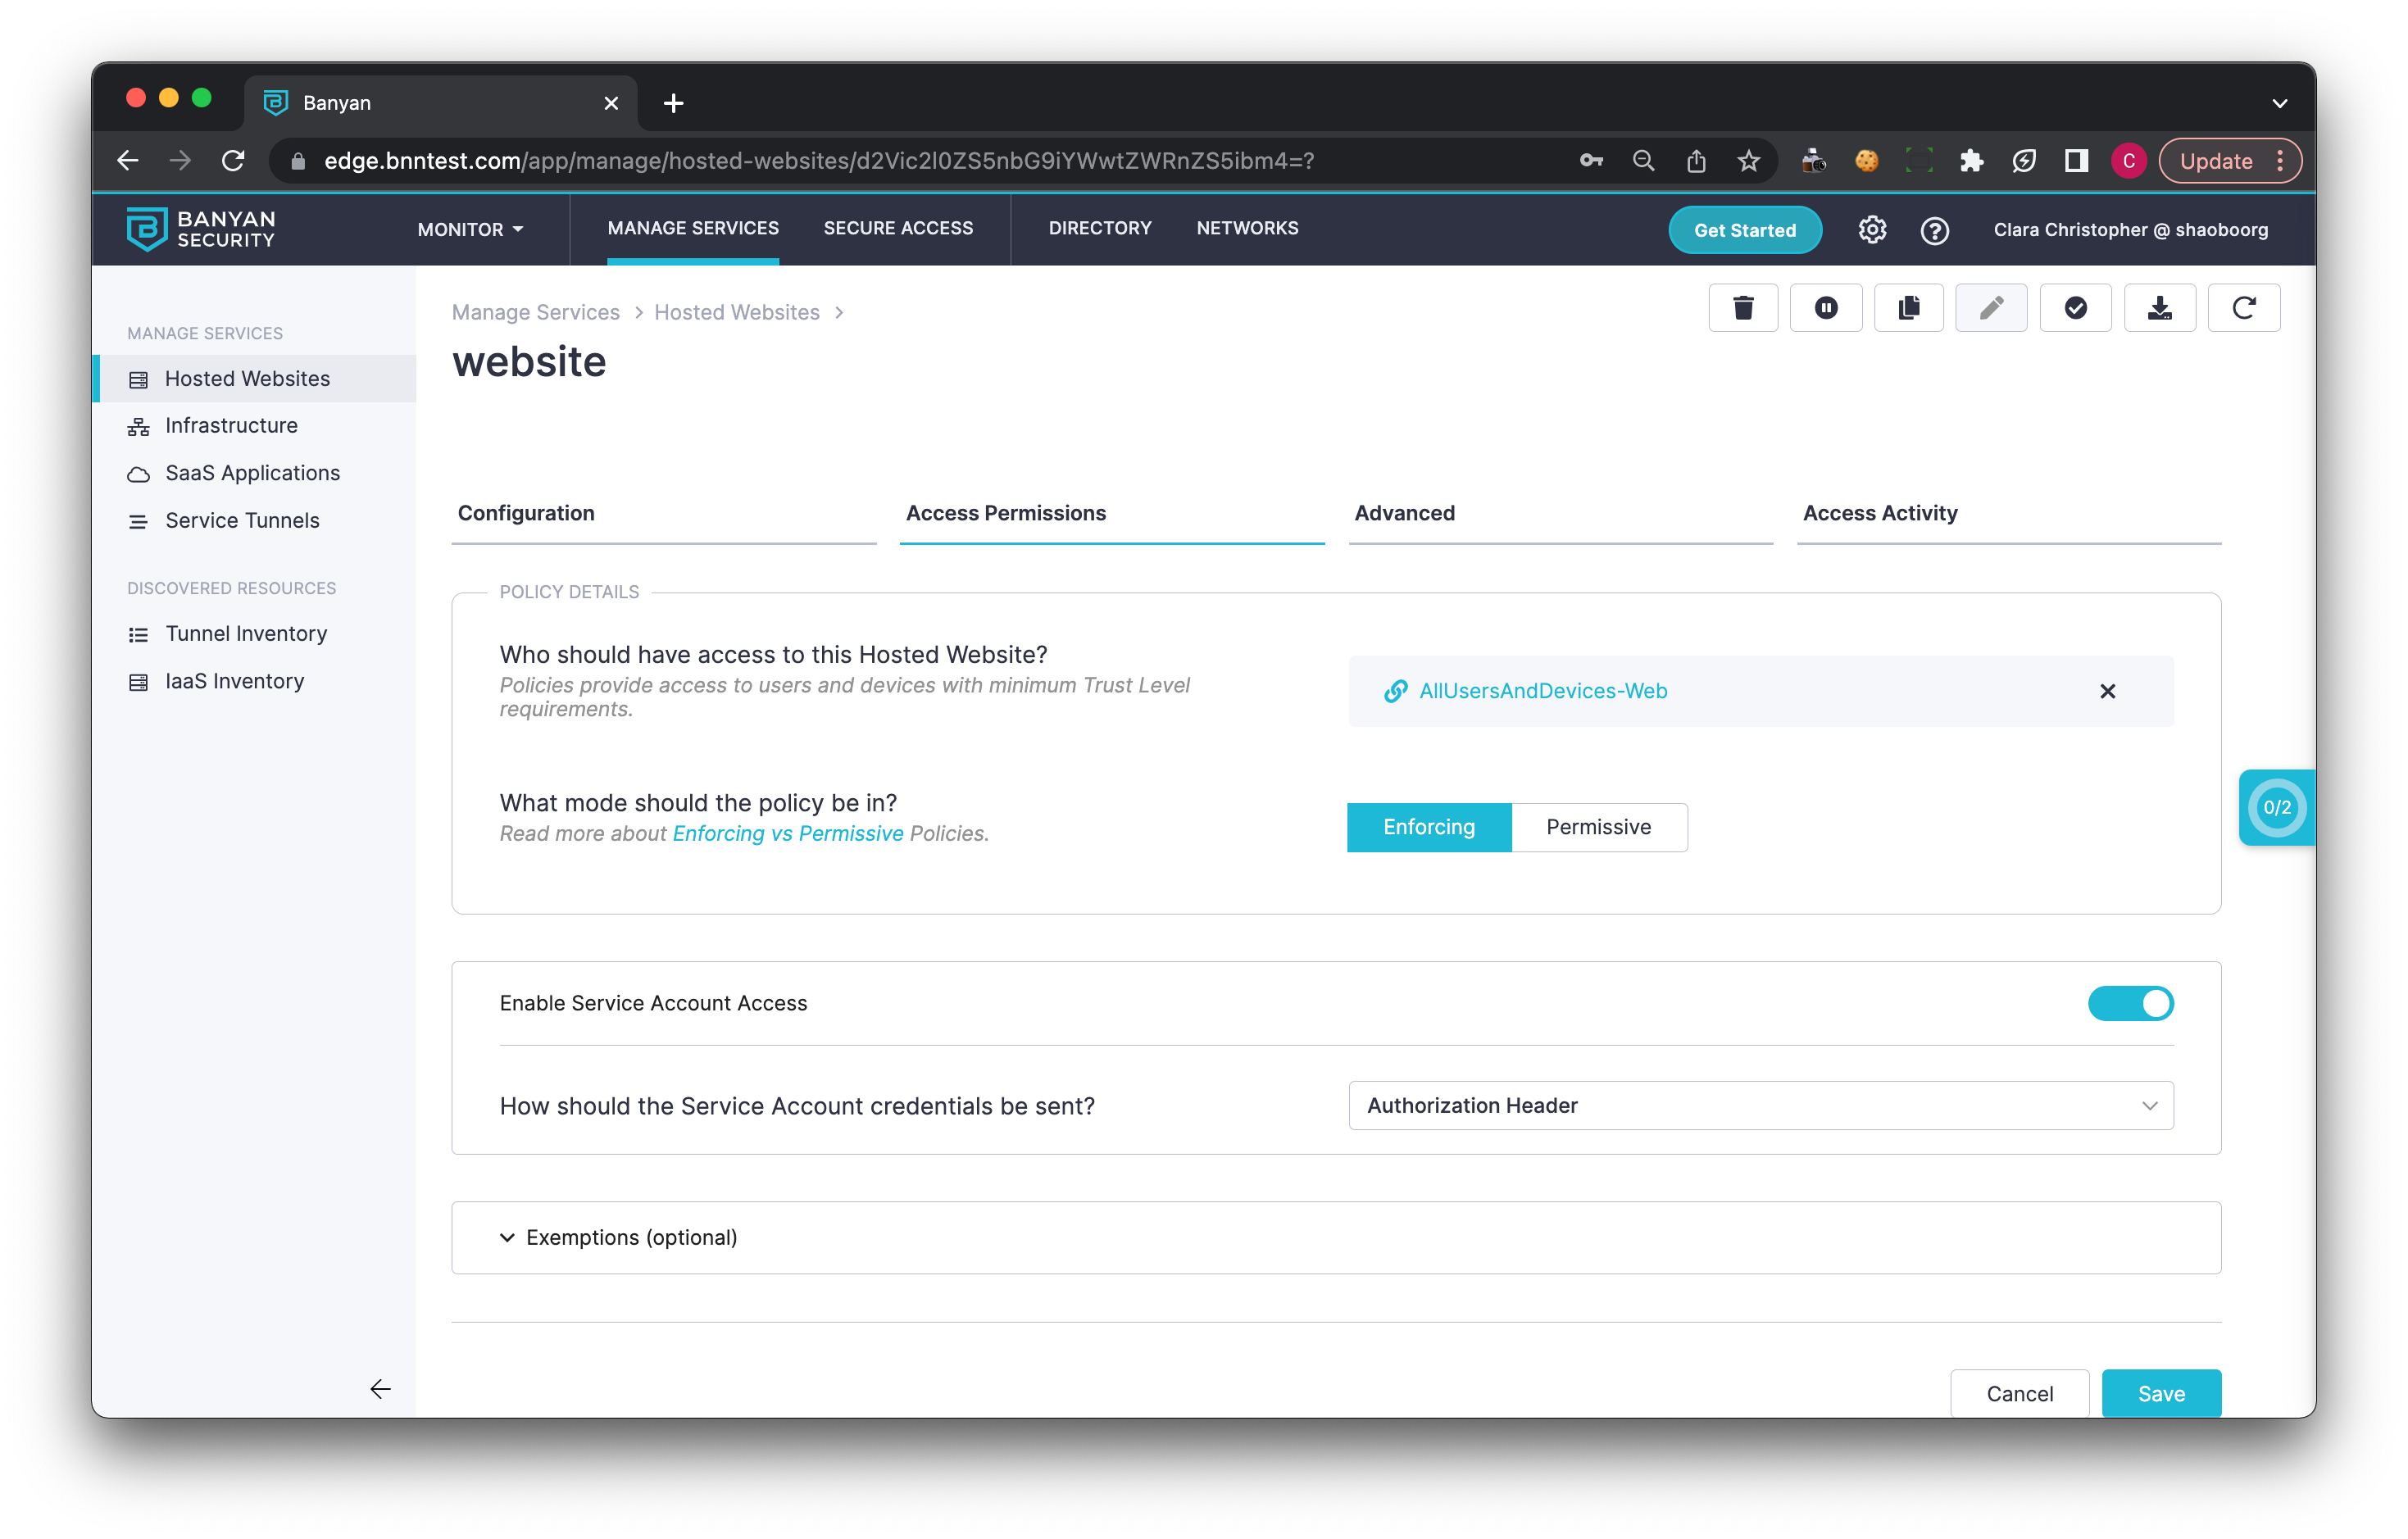
3.3 Enabling Service Account Access reveals the How should the Service Account credentials be sent? setting, which controls the token location — how every service account sends its credential to this hosted website. The calling application must send the credential in exactly the location you configure:
| Token Location | Type | Description | Example |
|---|---|---|---|
| Authorization Header | String | The Authorization request header is a standard HTTP header used to provide credentials that authenticate a user agent with a server | curl --header "Authorization: Bearer <Your_API_Secret>" "https://gitlab.example.com/api/v4/projects" |
| Custom Header | String | A Custom HTTP header that can be used to provide credentials that authenticate a user agent with a server. Enter the header name | curl --header "X-BNN-SVCACNT: <Your_API_Secret>" "https://gitlab.example.com/api/v4/projects" |
| Query Parameter | String | Query Parameters are attached to the end of a URL. Enter the parameter name. | curl "https://gitlab.example.com/api/v4/projects?service_account=<Your_API_Secret>" |
Prefer a header over a query parameter. A secret sent as a query parameter is recorded in URLs — proxy logs, access logs, and browser history — wherever the request travels. Use the Authorization or a custom header unless the calling application cannot set headers.
3.4 On the same Access Permissions step, ensure the Policy from Step 2 is attached (Attach a Policy, under Policy Details).
Test the Connection
To test whether your service account works, send the credential from your CLI using the token location you configured in Step 3.3:
Authorization header:
curl -i https://<your-hosted-website-domain> -H "Authorization: Bearer <Your_API_Secret>"
Custom header (use the header name you configured):
curl -i https://<your-hosted-website-domain> -H "X-BNN-SVCACNT: <Your_API_Secret>"
Query parameter (use the parameter name you configured):
curl -i "https://<your-hosted-website-domain>/?service_account=<Your_API_Secret>"
On success, the response is the web page you are attempting to access (HTTP 200). If the credential is missing, wrong, or sent in a different location than configured, the request is denied and does not reach the protected website.
In the console, navigate from Home > Events (Private Access view). You should see your latest Service Account access activity, and you can view further details in the JSON log of the Events Viewer. Denied attempts also appear here, which is the first place to look when an integration stops working. You can also open the Service Account itself (Directory > Service Accounts > select the account) and review its Access Activity tab.
Limitations
- Service Accounts apply to Hosted Websites only. Infrastructure Services are not available to them. To reach a database, a server, or another non-HTTP resource, publish a narrow HTTP interface in front of it. See Secure Private Access for AI Agents.
- Trust Scoring is not evaluated for Service Account access, because there is no device to evaluate.
- Beyond the signature, External JWT validation matches the issuer, audience, and subject claims. Group, role, and other custom claims are not evaluated.
- CSE finds signing keys through OIDC Discovery at the Issuer URL. A custom JWKS URL cannot be entered.
Rotate a credential
To rotate a compromised or expiring credential without downtime:
- Create a replacement Service Account (Step 1) and add it to the same Role (Step 2) — a role can hold multiple Service Accounts.
- Update the calling application to present the new credential.
- After confirming the new credential works in the Events Viewer, delete the old Service Account from Directory > Service Accounts.