Use SAML proxy to secure a single SaaS Application in Okta
Use a SAML proxy technique in Okta to enforce device posture checks on specific SaaS applications
- Last validated: Aug 3, 2026
- 15 minutes to read
-
Contributors

Overview
This guide details the steps required to use SonicWall Cloud Secure Edge (CSE) SAML Proxy to secure a single Okta SaaS application. These steps cover securing IdP initiated as well as SP initiated flows for an application.
How It Works
sequenceDiagram
    autonumber
    participant UA as Web Browser
    participant SP as SaaS Application
    participant MAIN as IdP SSO - Main
    participant SHADOW as IdP SSO - Shadow
    participant BANYAN as CSE (Federated IdP)
    UA->>SP: Access application
    SP->>SHADOW: Updated SAML SSO URL
    SHADOW->>UA: Authentication request
    UA->>UA: User authentication
    UA->>UA: MFA
    UA->>BANYAN: Federated authentication
    BANYAN->>BANYAN: Device and policy check
    BANYAN->>MAIN: Issue Trust Token
    MAIN->>SP: Issue SSO Token
    SP->>SP: Create user session
    SP->>UA: Set app session cookie
    UA->>SP: Access application
Prerequisites
Before proceeding through the Steps sections below, please ensure you have:
- Configure Okta for CSE Service Access to create a directory of users for accessing CSE services
- Configure Okta for CSE Device Registration to enable device registration with Okta
Steps
1. Create a SaaS application in the Cloud Secure Edge (CSE)
1.1 In the Command Center, navigate from Internet Access > SaaS Apps, then select + Publish SaaS Application.
1.2 Select IdP Routed.
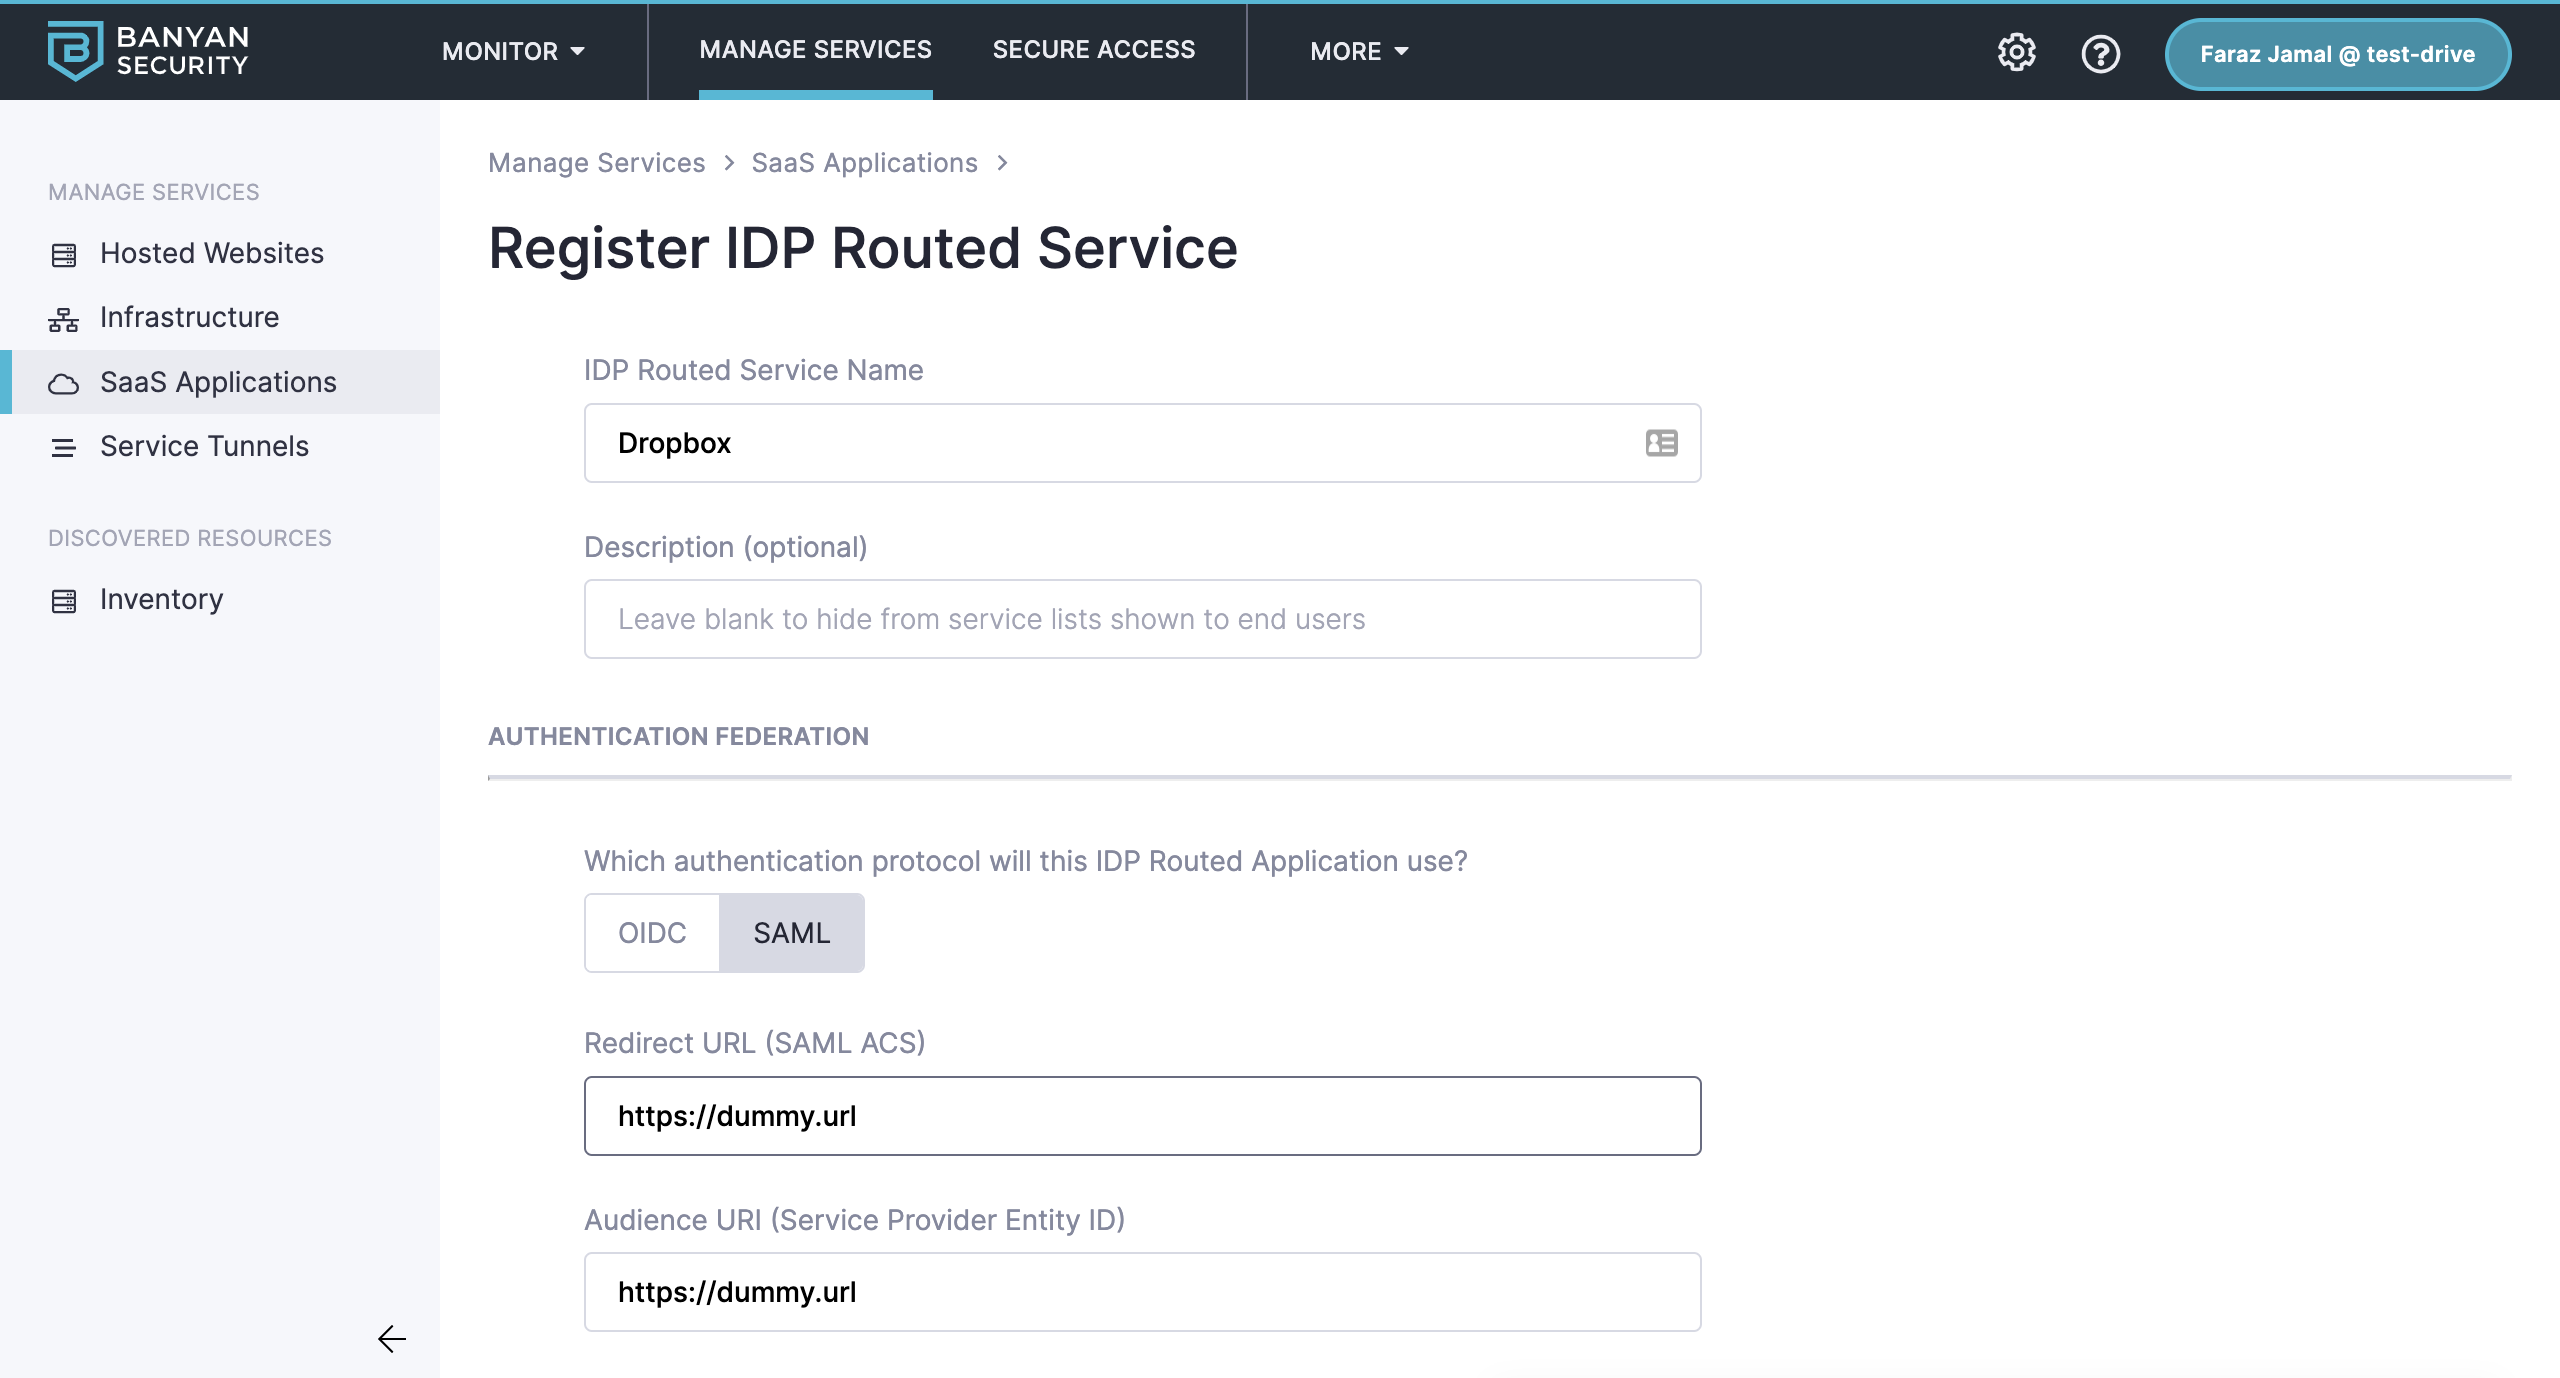
1.3 In the IdP Routed Service Name field, enter your service name (e.g., the name of your app).
1.4 Under Authentication Federation, select SAML as your authentication protocol.
1.5 Enter any placeholder text Redirect URL and Audience URI (e.g., https://dummy.url).
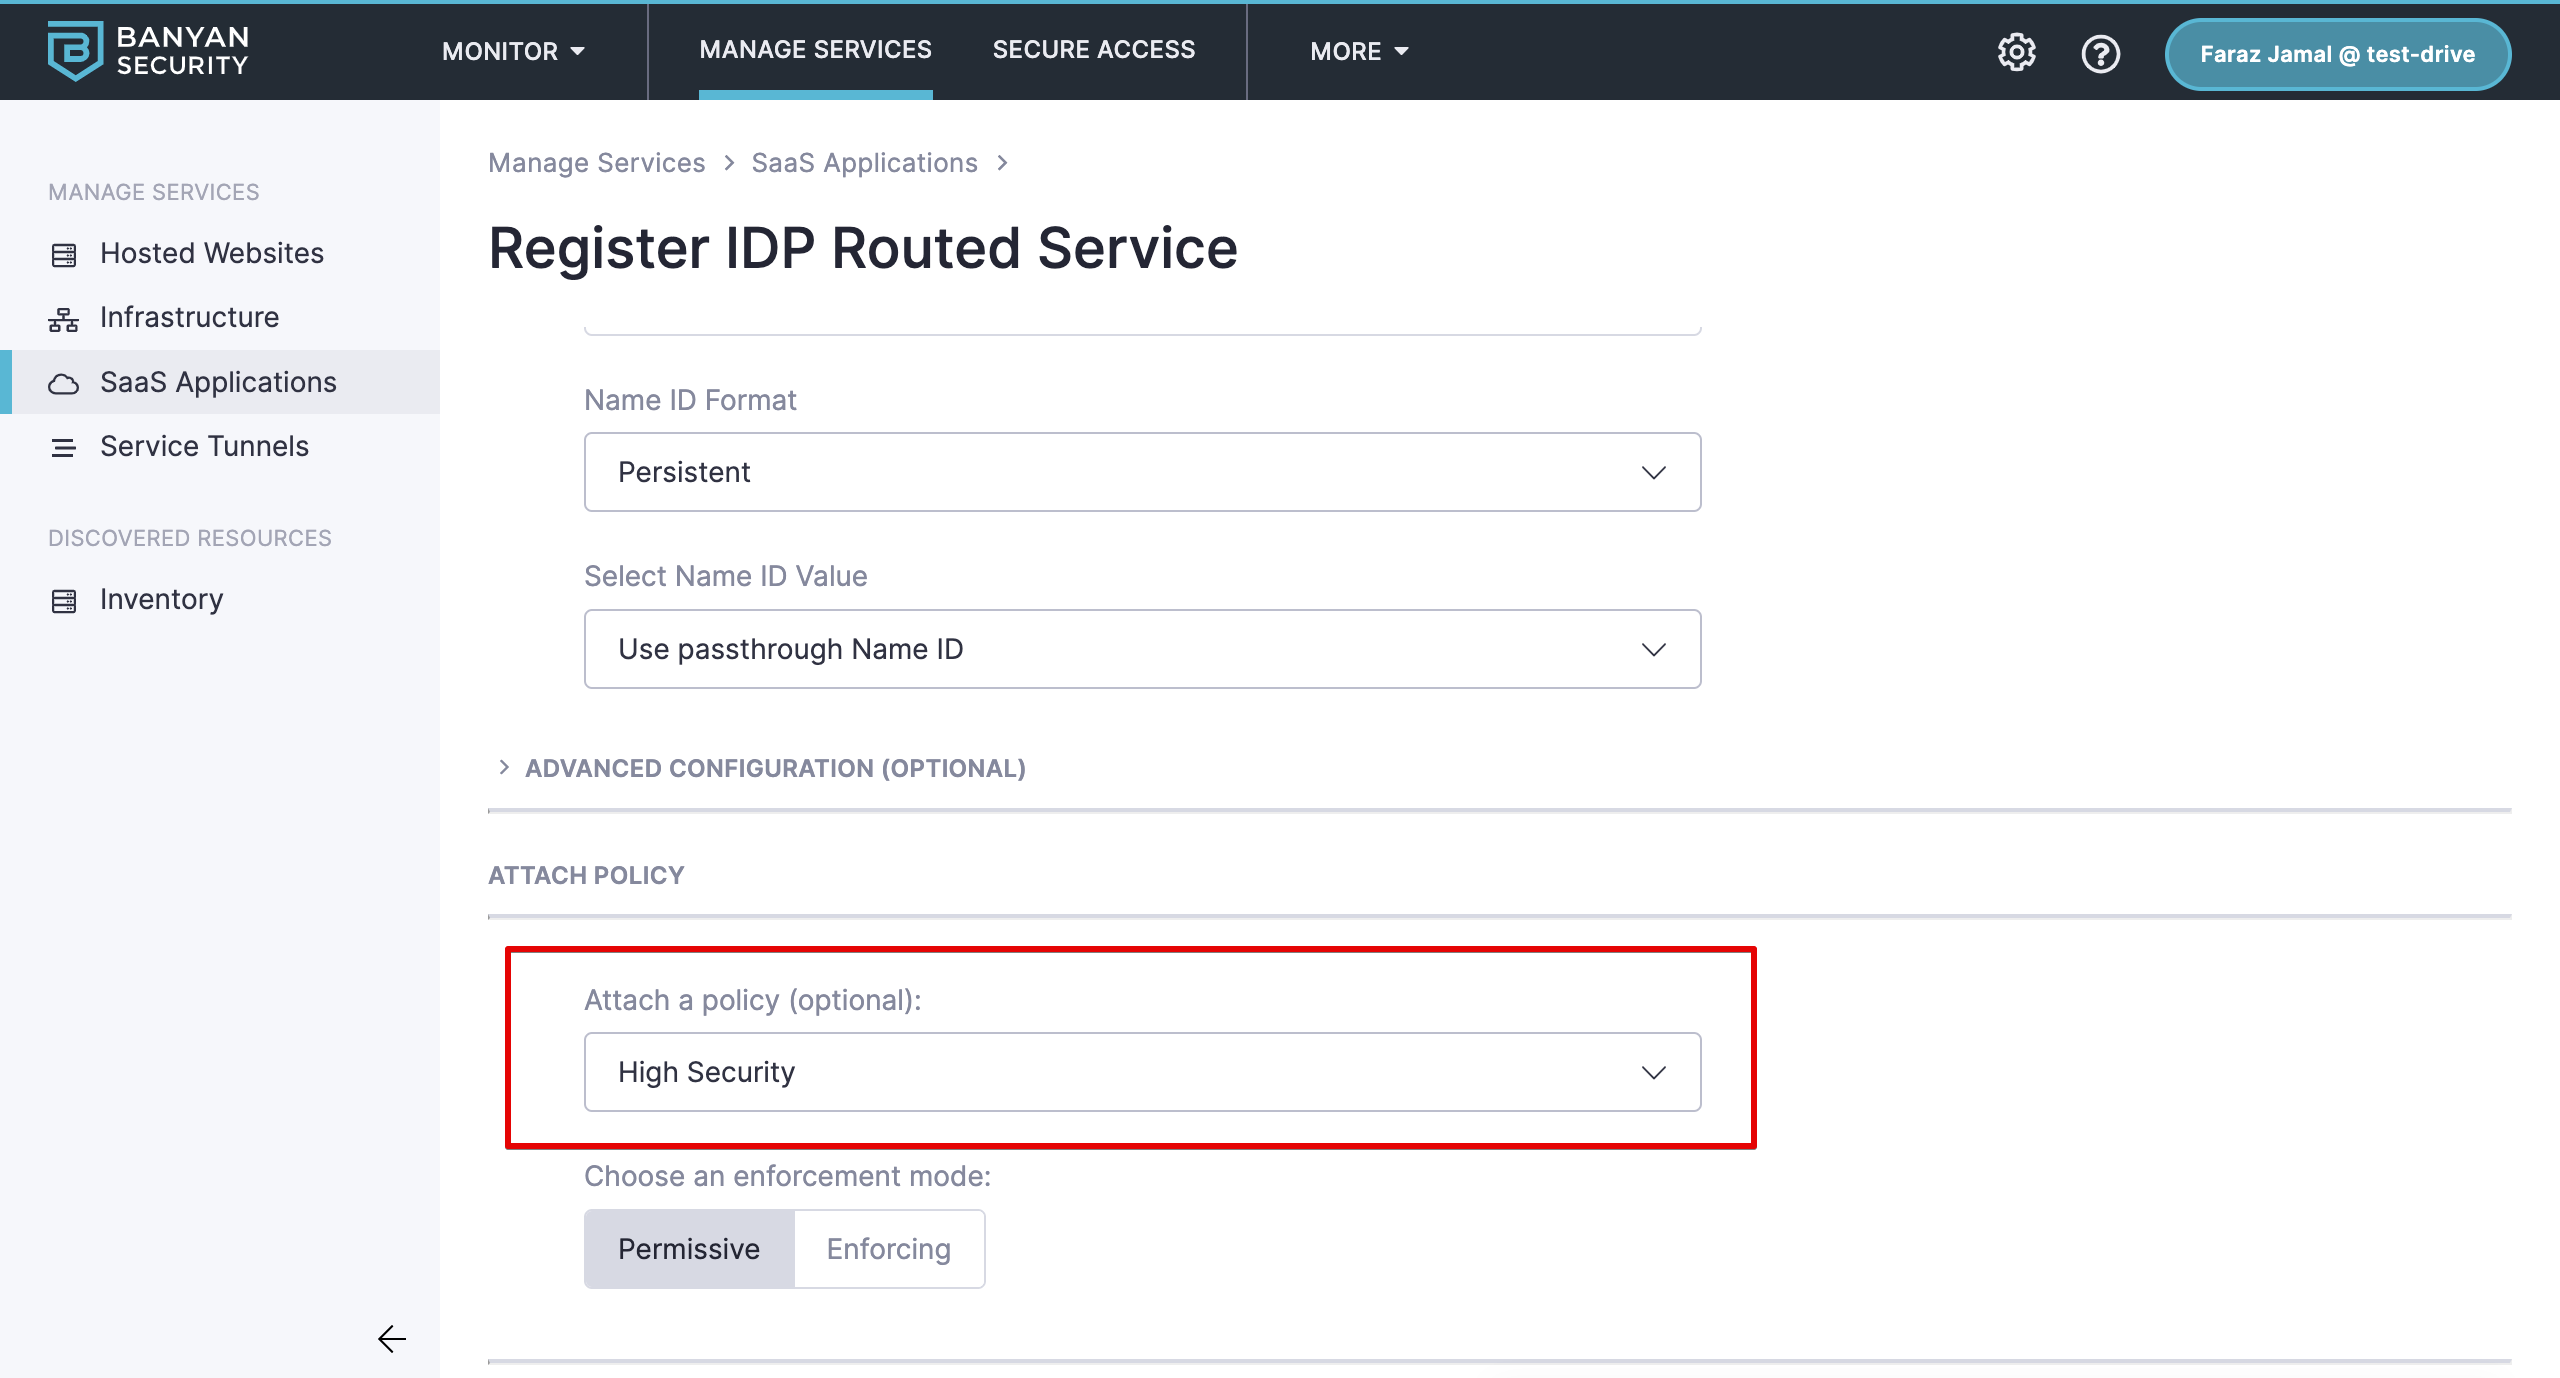
1.6 Attach a Policy of your choice (e.g., High Security).
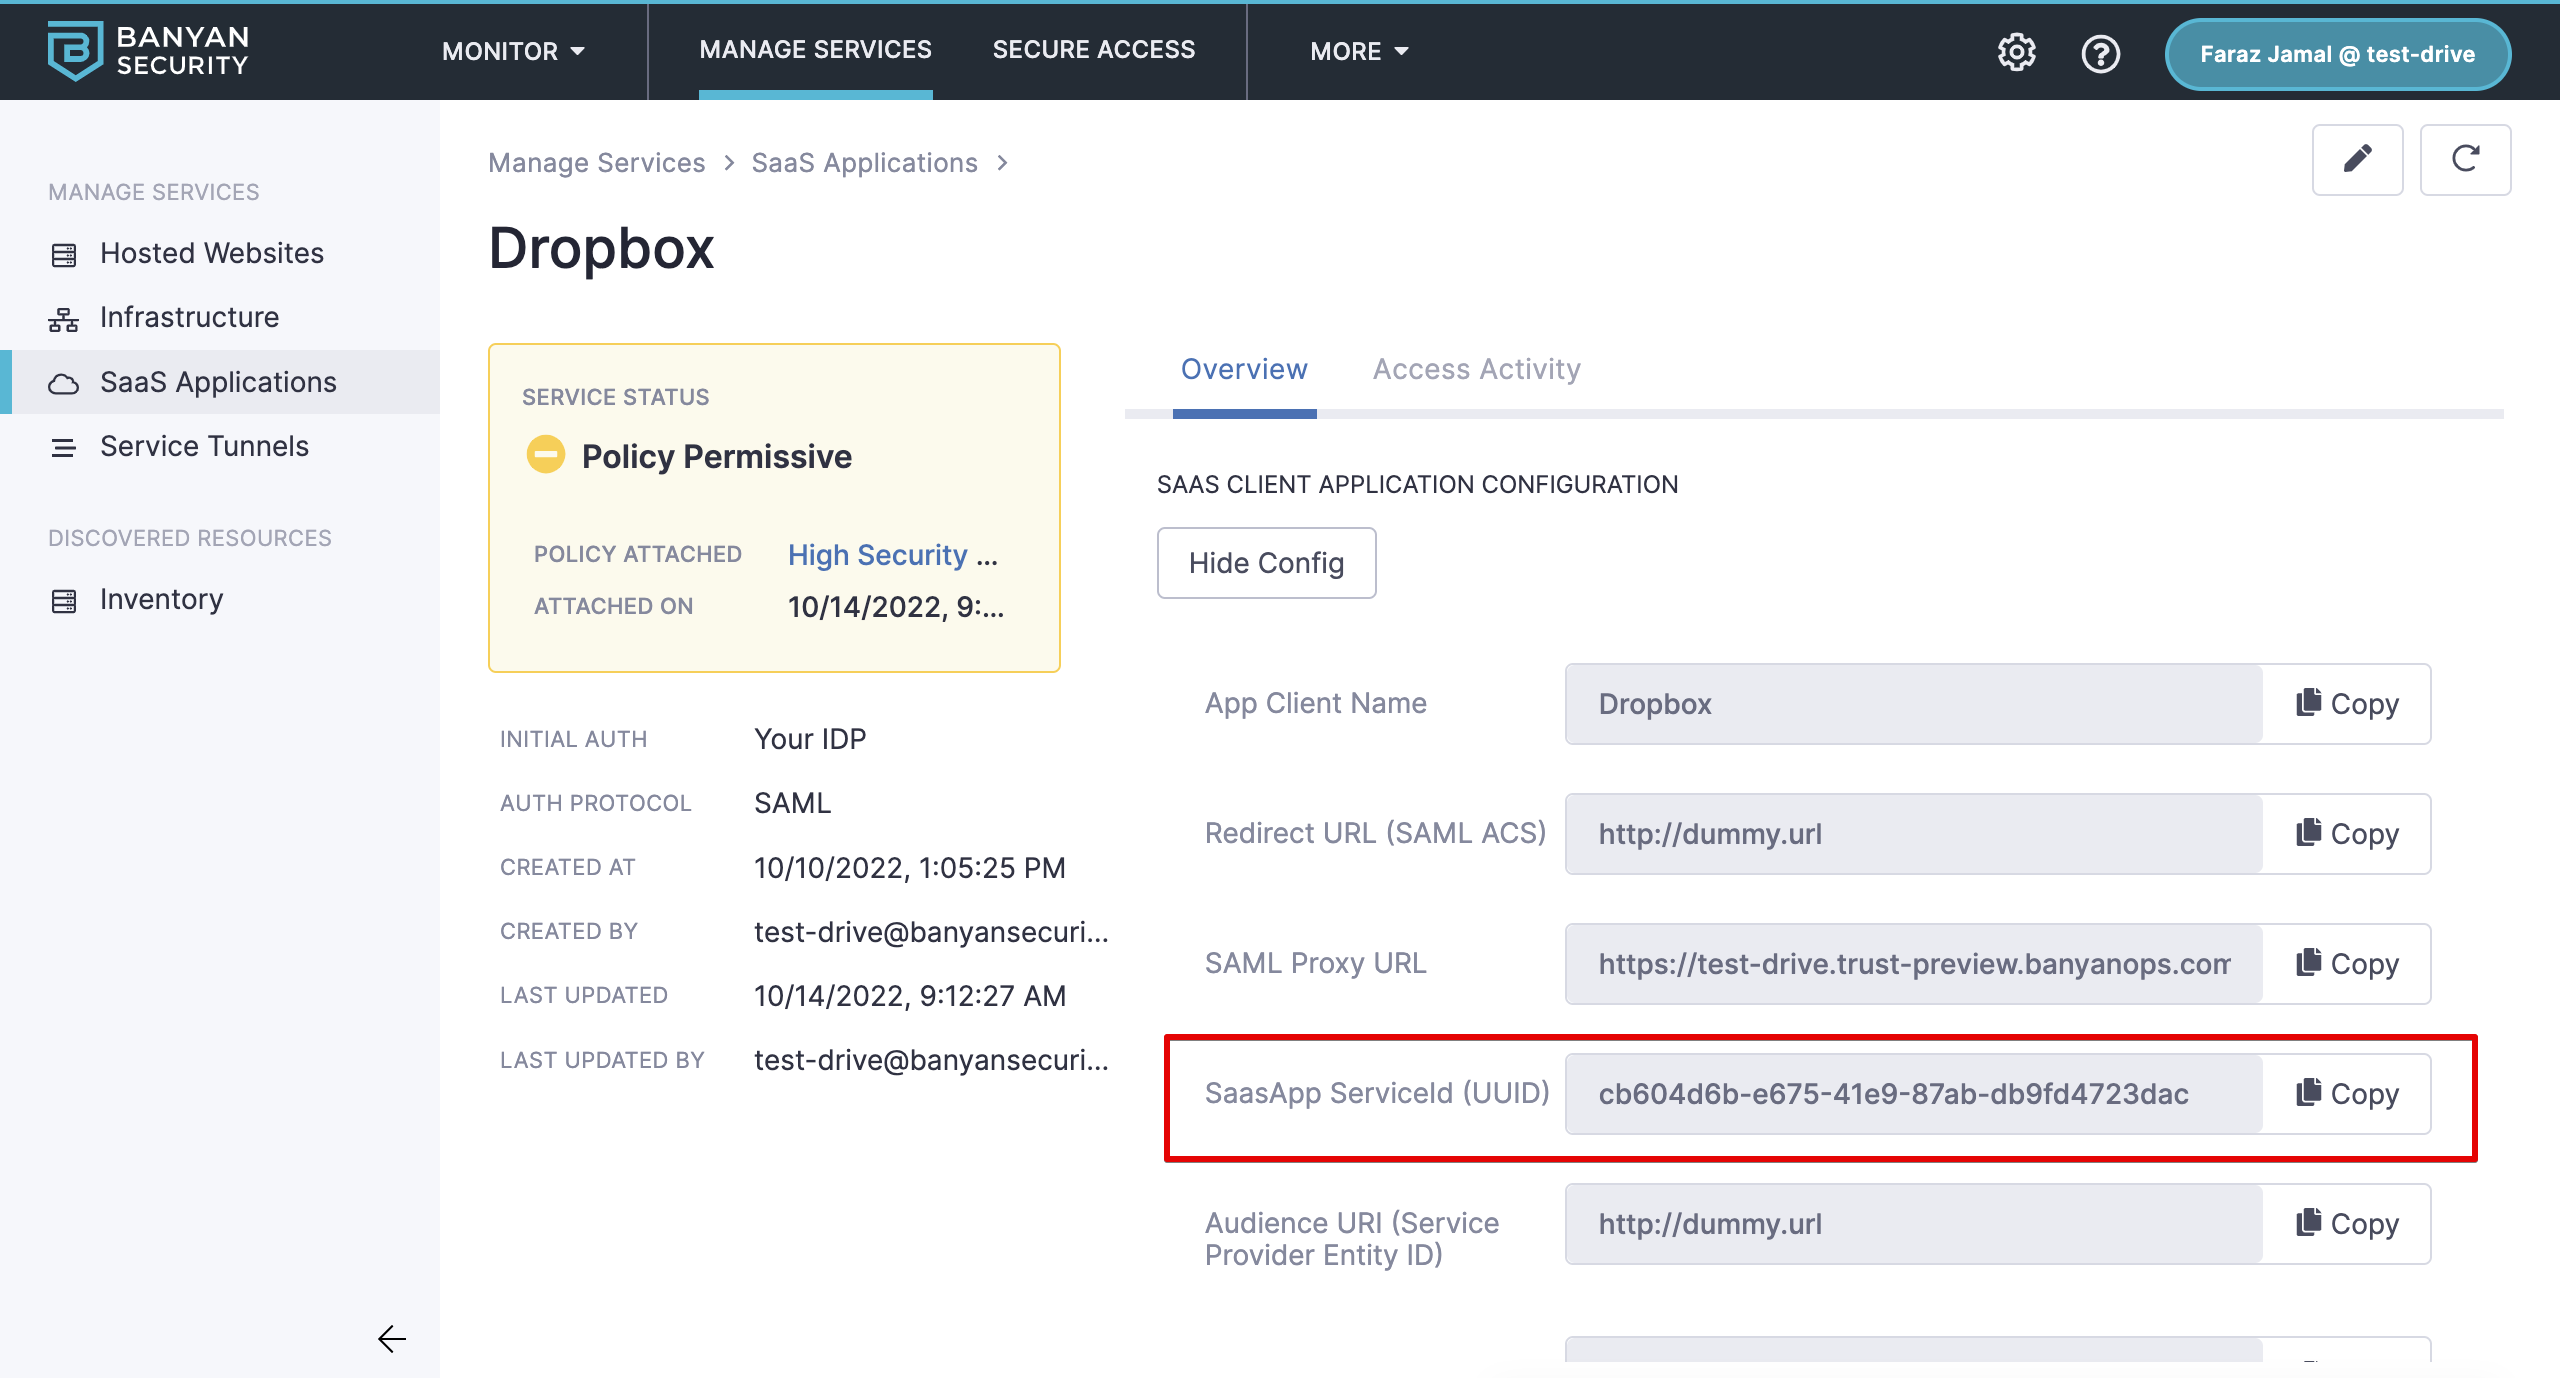
1.7 Select Register and then Continue. Take note of the SaaSApp Service ID as you will need that in a later step.
2. Create a Shadow Application for IdP Initiated SSO
The shadow application will show up in the Okta catalog and ensure that a CSE device trust check is complete regardless of an existing Okta session. For these steps, we will use Dropbox as the example SaaS application.
2.1 In Okta, navigate from Applications > Applications.
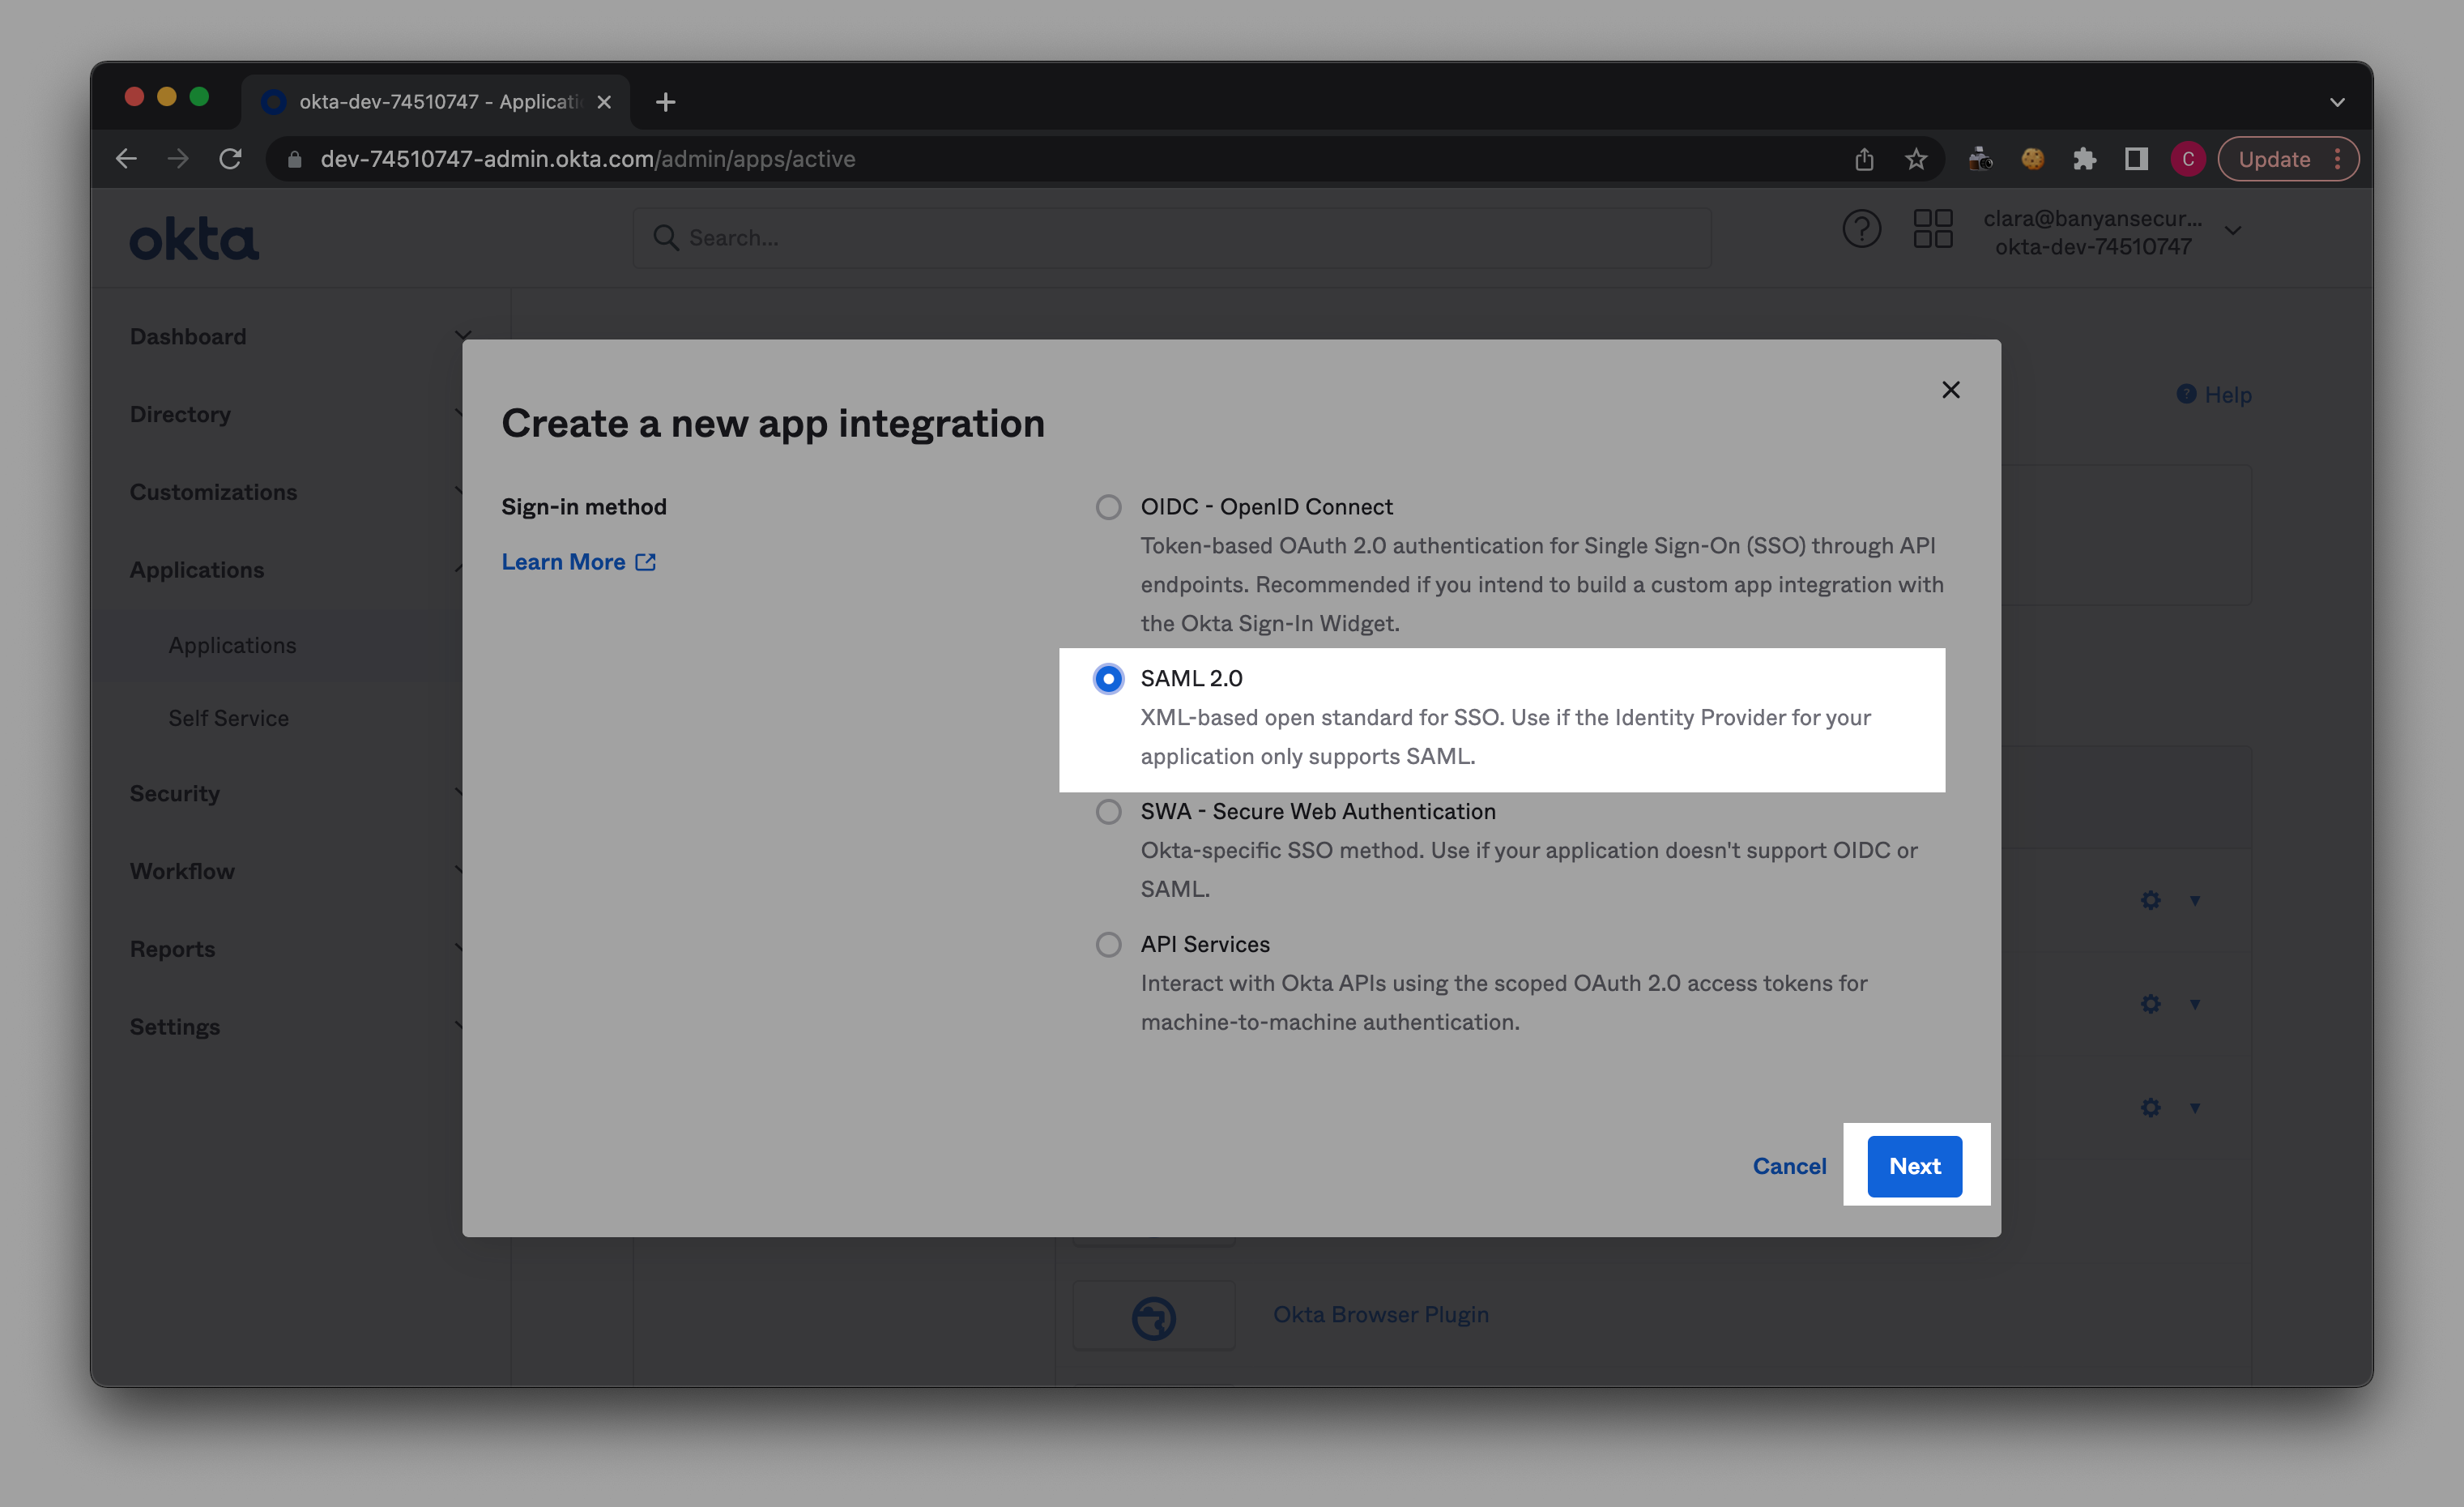
2.2 Select Create App Integration and choose SAML 2.0.
2.3 In General Settings, name your app (e.g., Dropbox) and upload the relevant app logo.
2.4 In the Configure SAML section, set the following configurations:
- Single sign on URL : https://{ORGNAME}.trust.banyanops.com/v2/saml/proxy
- Audience URI : https://{ORGNAME}.trust.banyanops.com/v2/saml/proxy
2.5 Set the following Attribute Statements:
- Email: user.email
- Username: user.login
- redirectUrl: Fetch SSO URL from your main SaaS app (e.g., Dropbox).
- serviceid: Copy Saas App Service ID from your newly published SaaS app’s service spec in CSE, and paste in adjacent field.
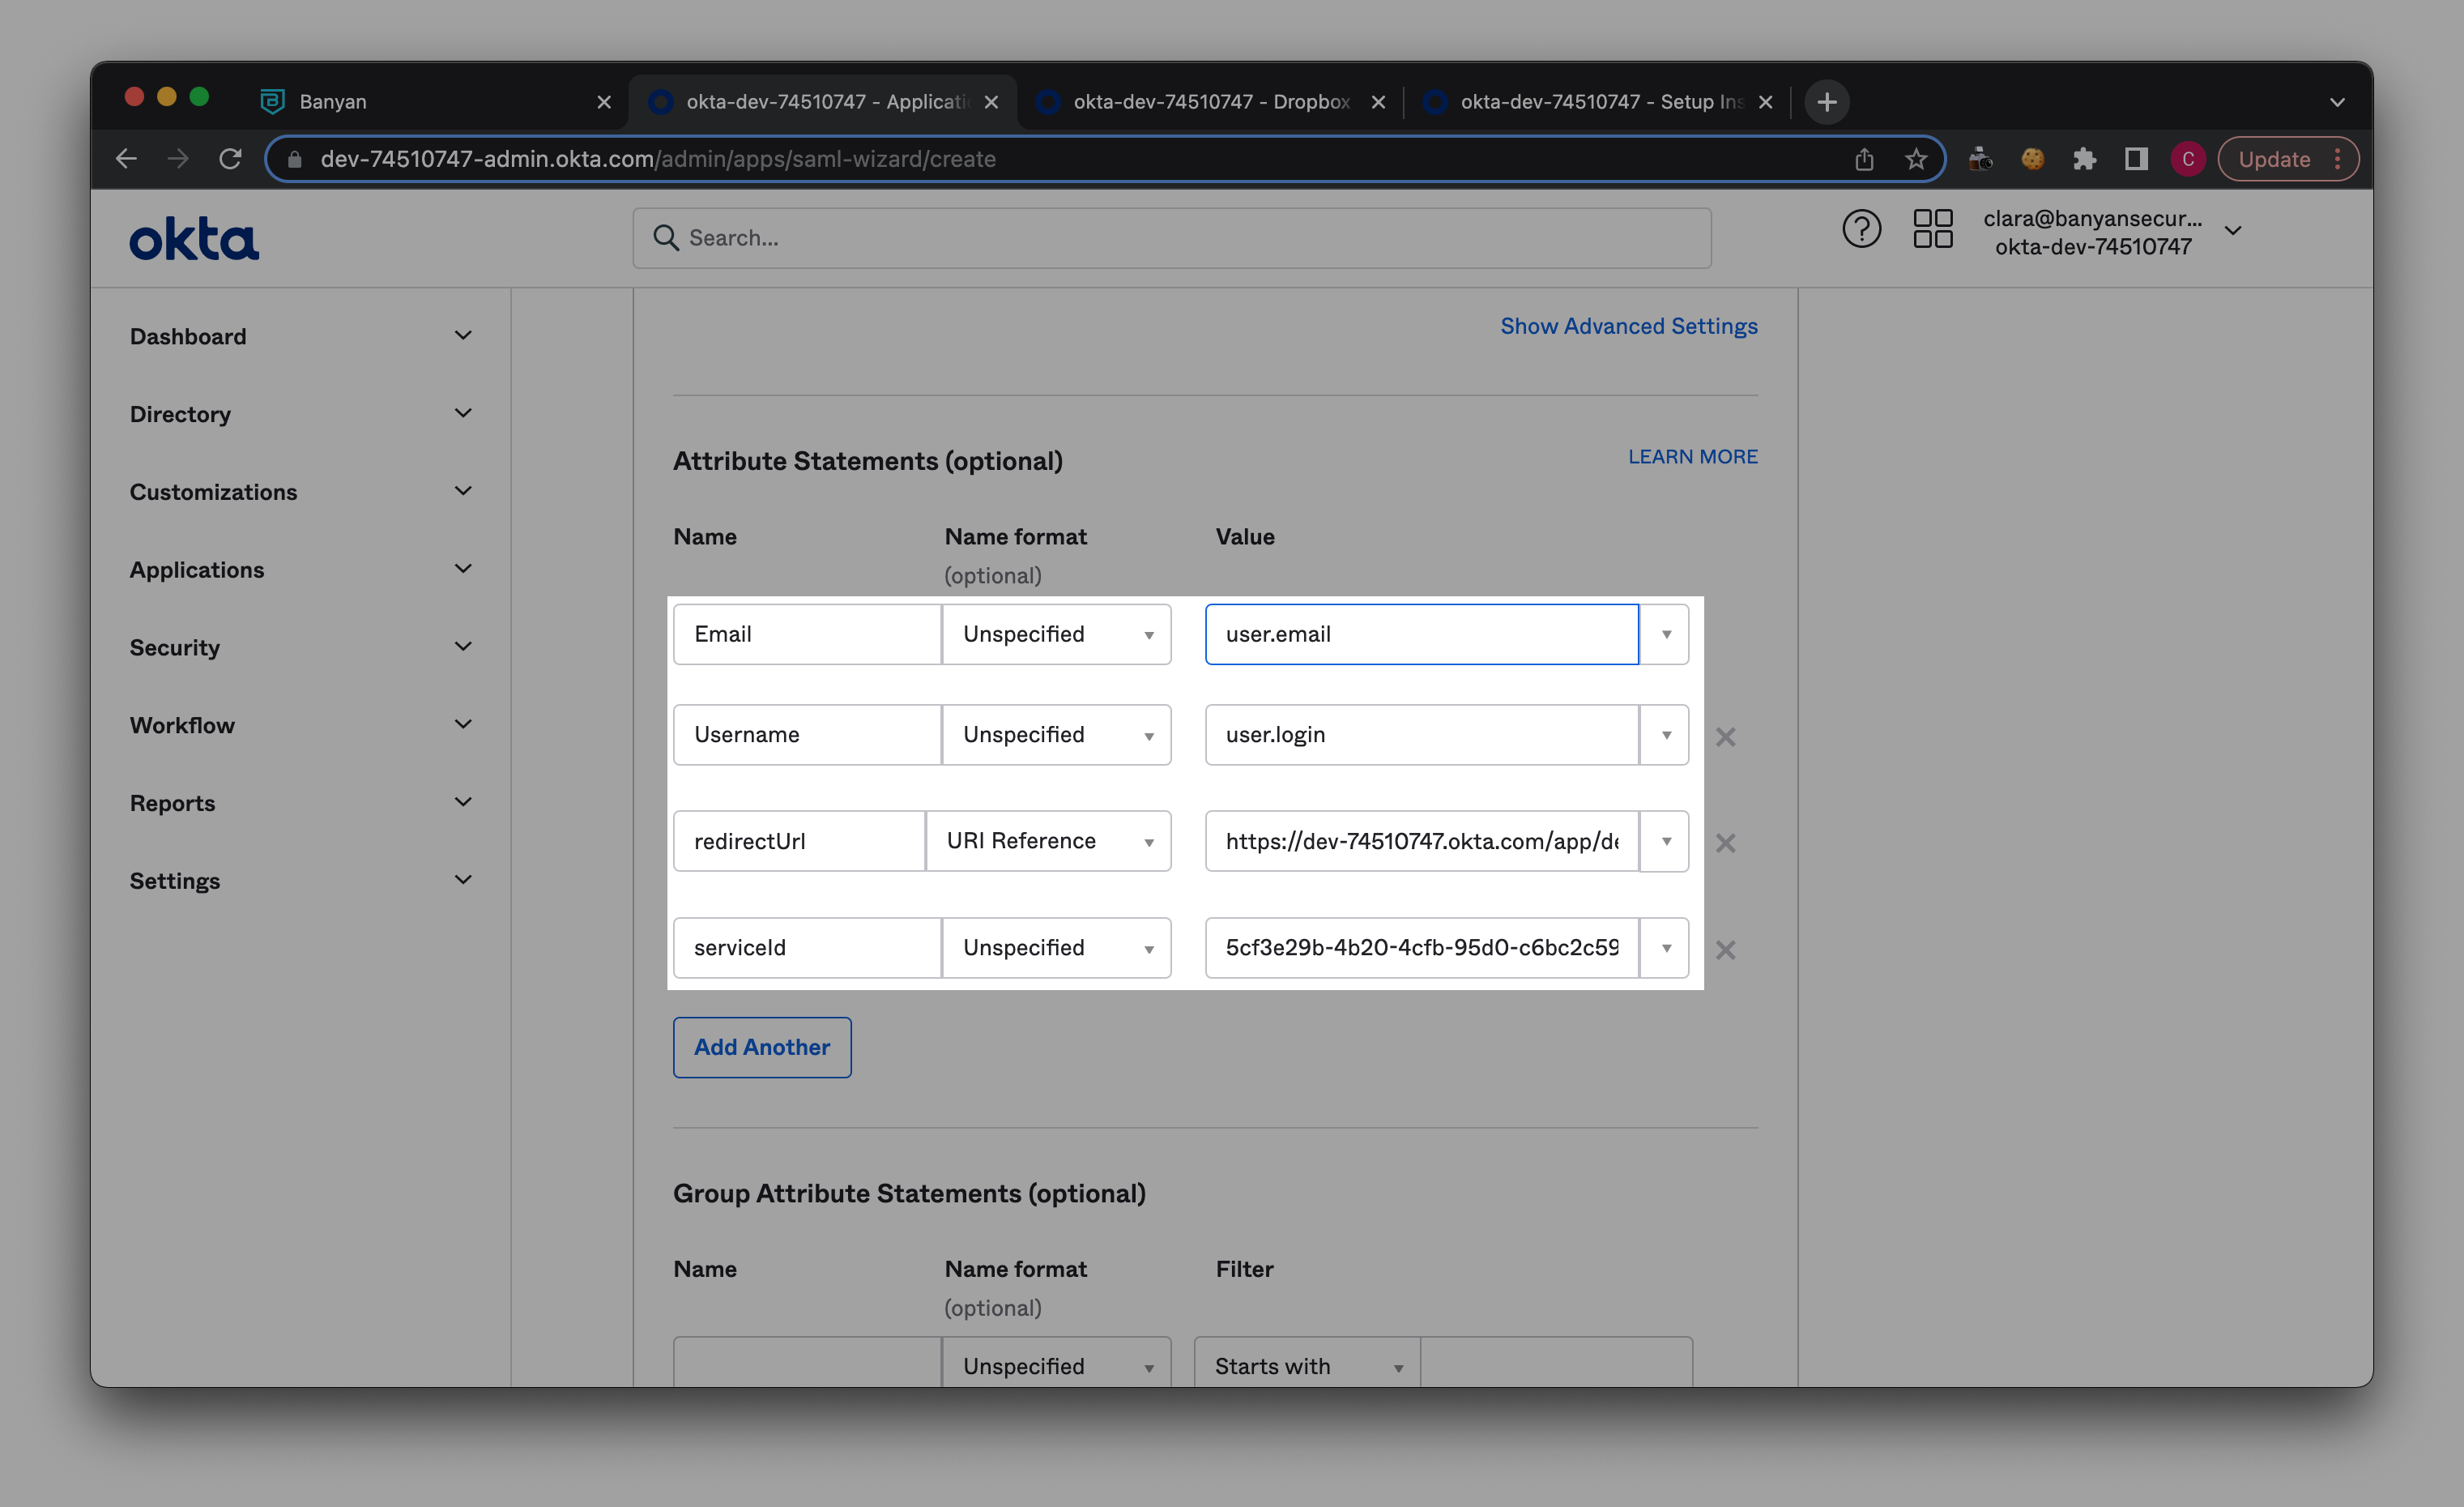
2.6 In Group Attributes Statements, enter ‘Groups’ under Name, and select Matches regex as the Filter. Then add ‘ .* ‘ in the field adjacent to the Filter.
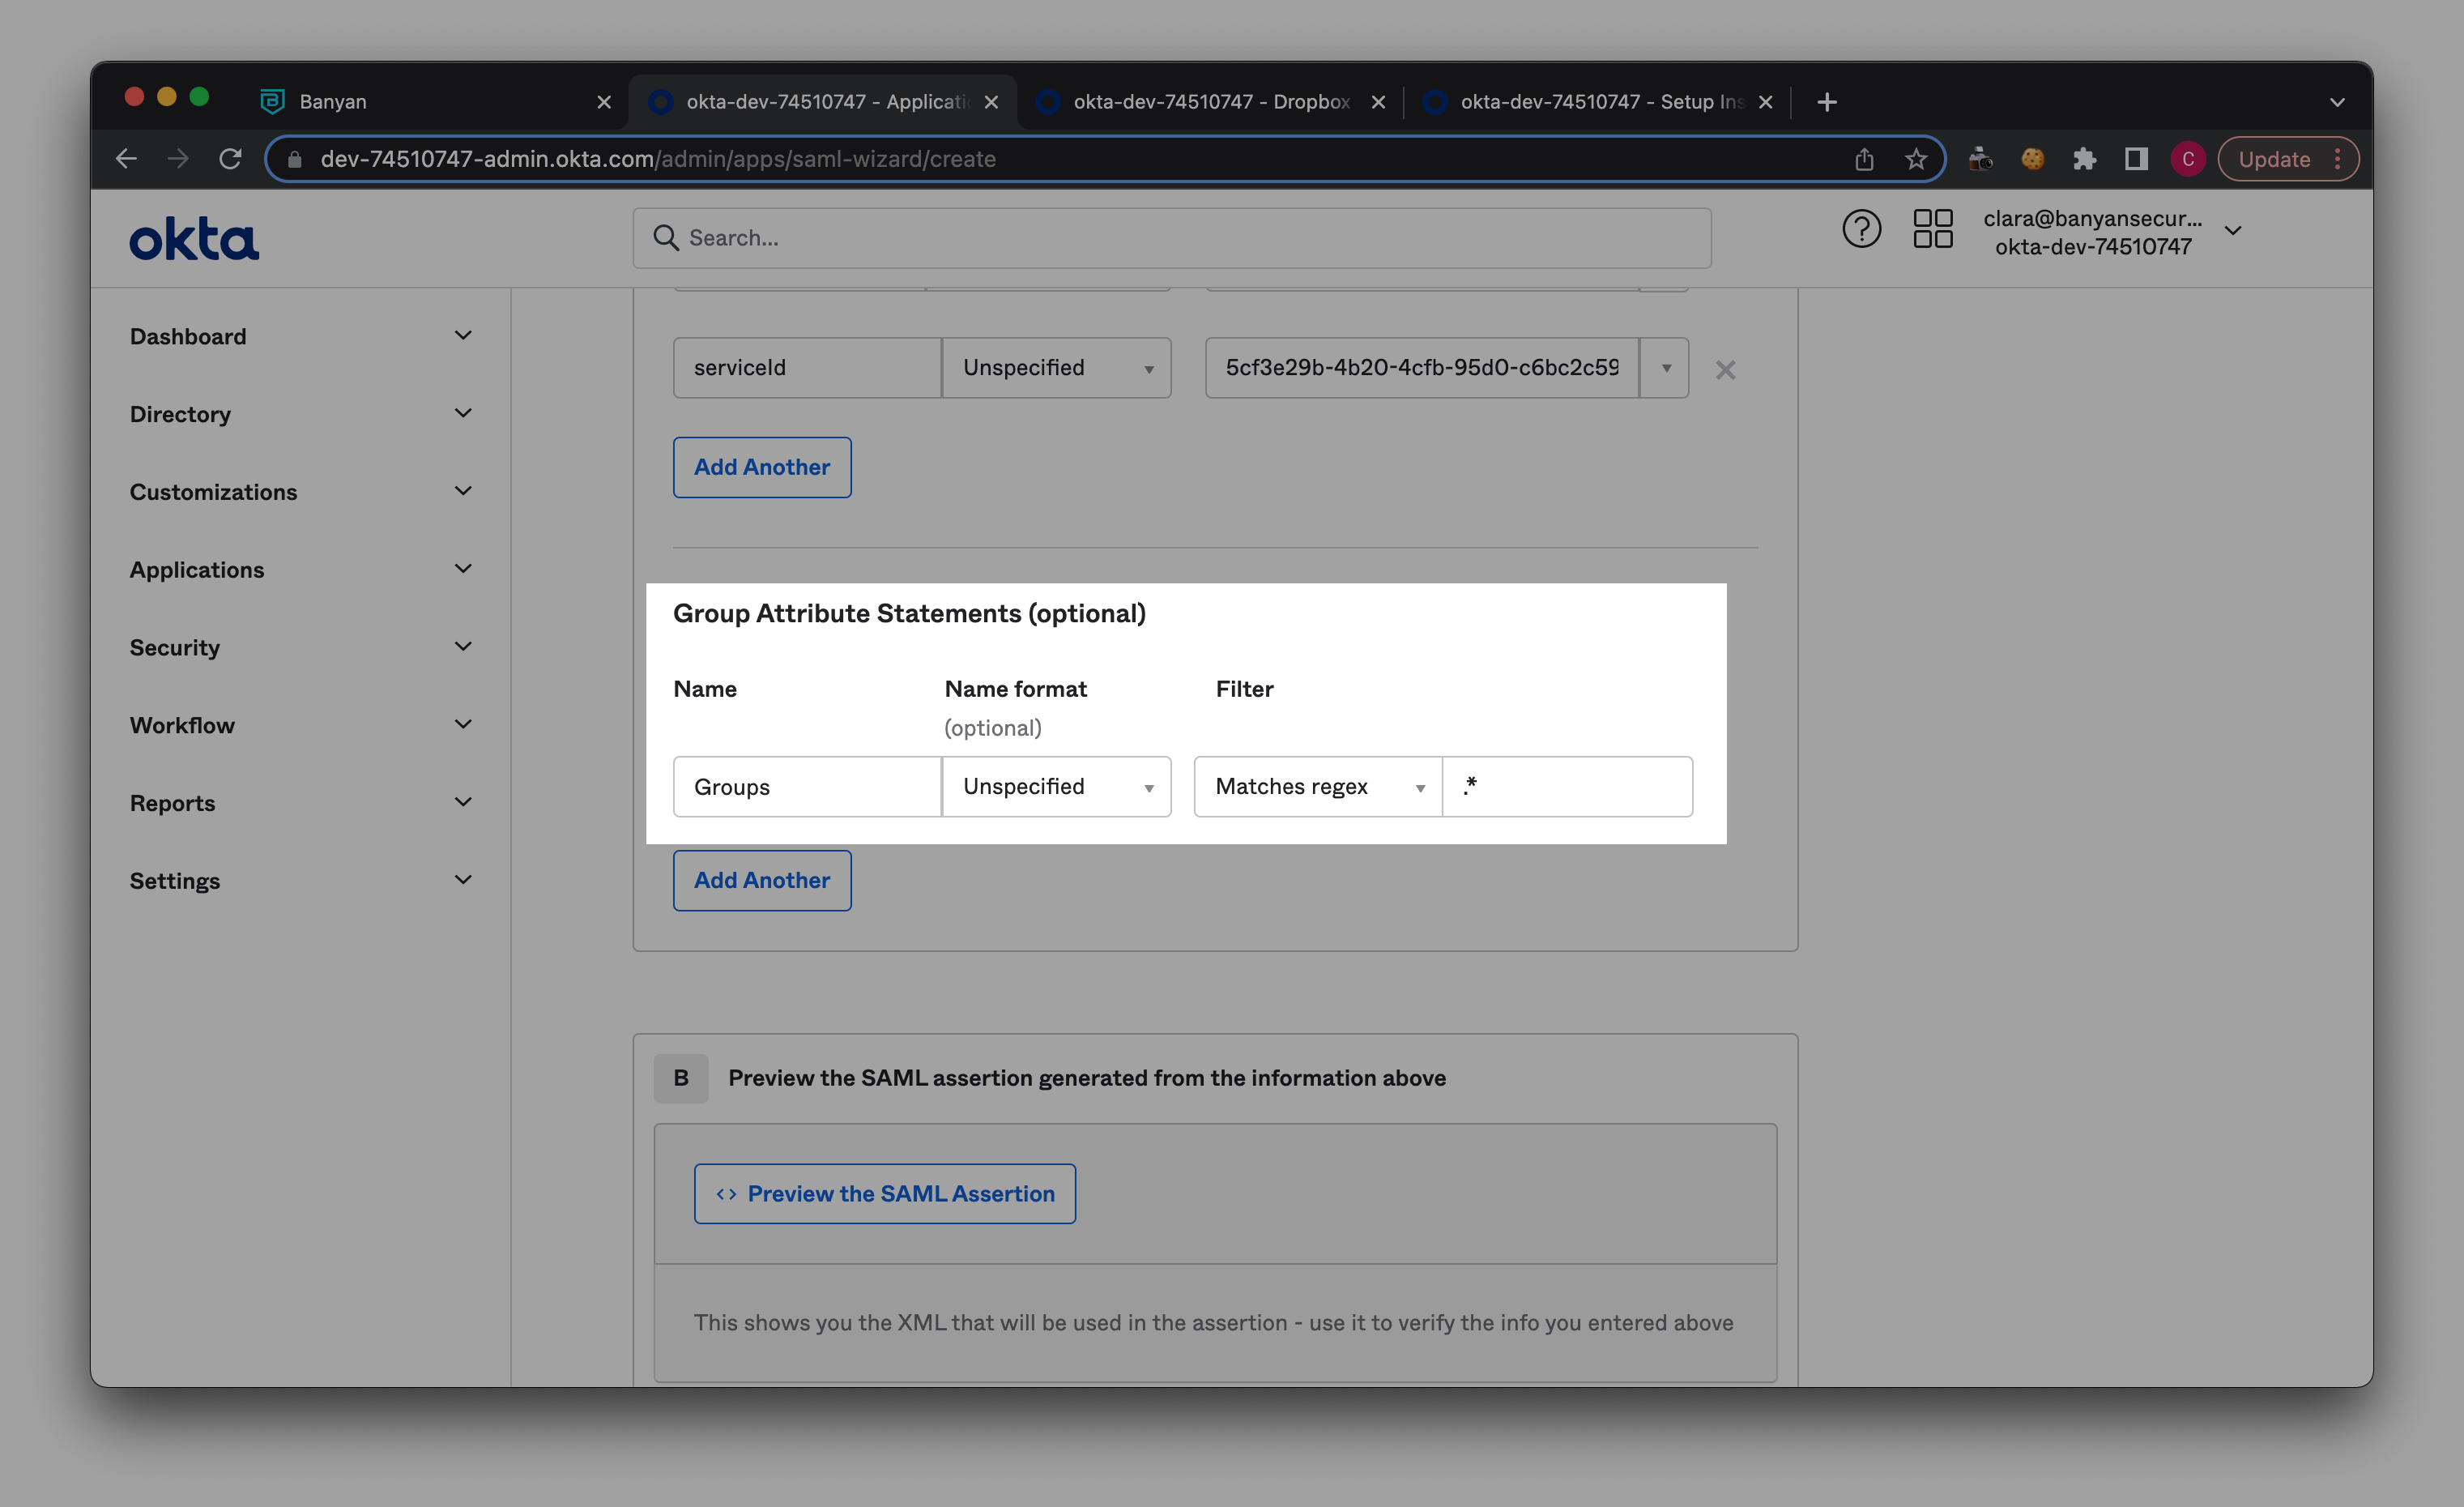
2.7 Select Next -> I’m an Okta customer adding an internal app -> Finish
3. Setup Application’s SP-Initiated Authentication with CSE
This step is to ensure SP-initiated flows get routed to CSE post authentication with Okta.
3.1 Obtain the Single Sign-On URL from the Shadow App
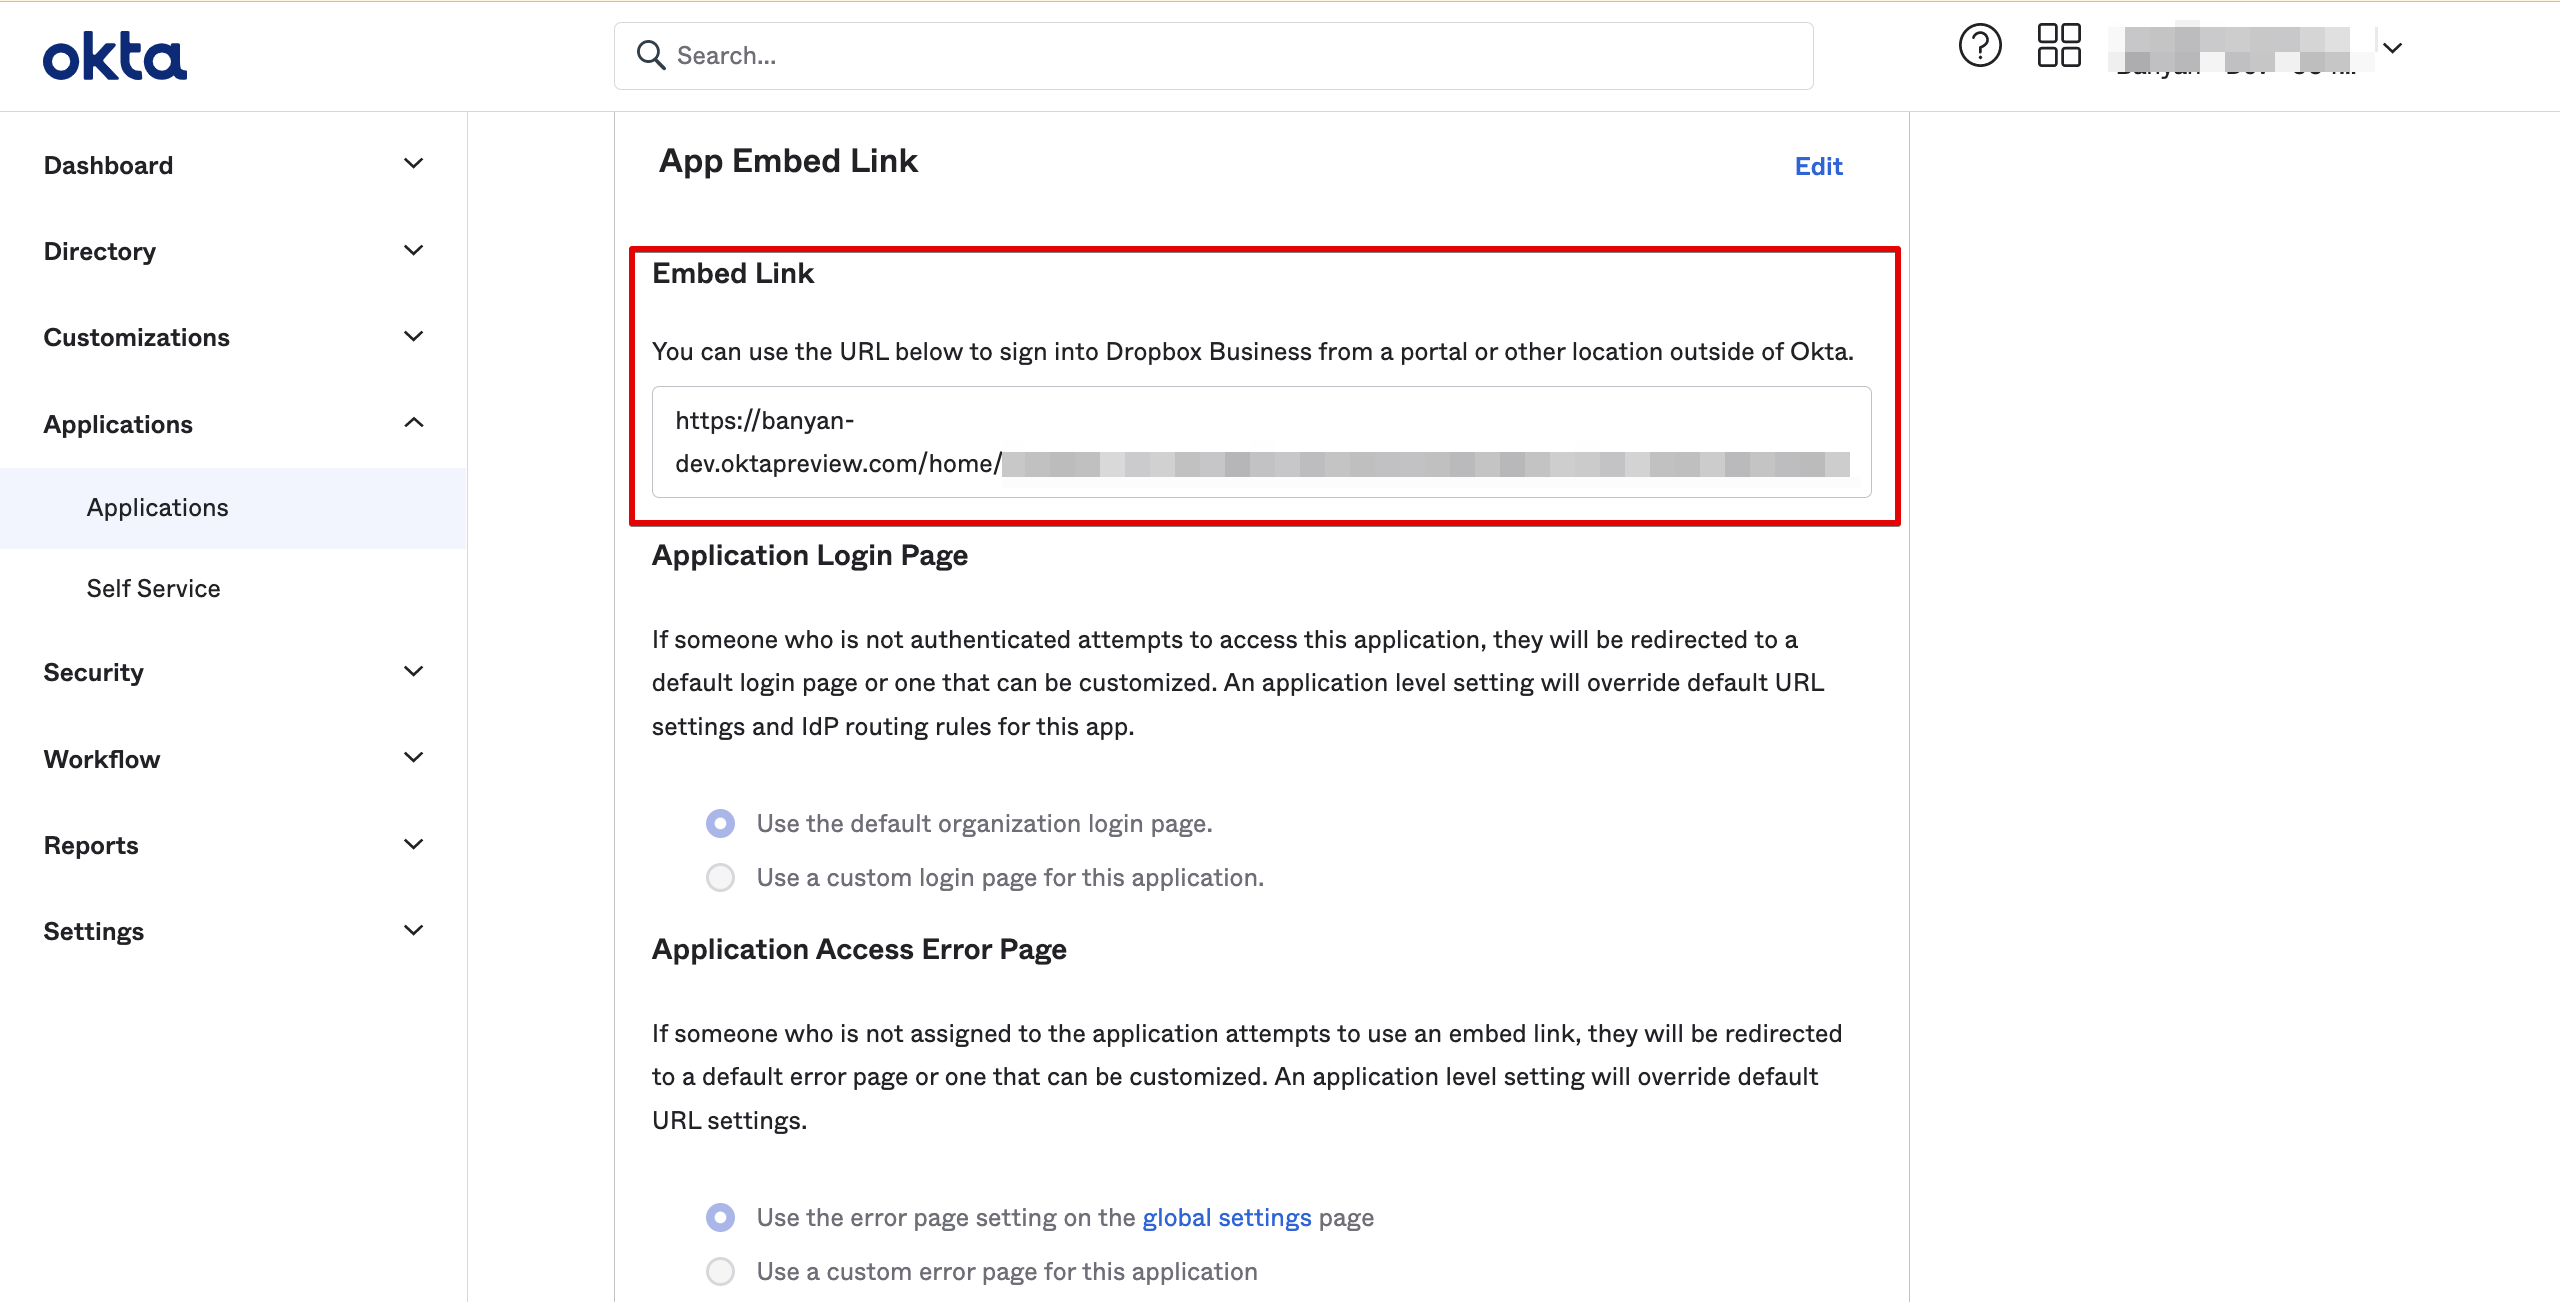
3.2 Replace the Identity Provider Single Sign-in URL from the original SaaS App with the SSO URL from the Shadow App