Creating Network-level (Layer-4) policies for Service Tunnels
- Last validated: Apr 24, 2026
- 5 minutes to read
-
Contributors

Overview
SonicWall Cloud Secure Edge (CSE) Service Tunnel policies (i.e., Tunnel Policies) provide Network-level (Layer-4) access controls so that admins can allow or deny access down to specific protocols, CIDRs, ports, and FQDNs (Fully-Qualified Domain Names).
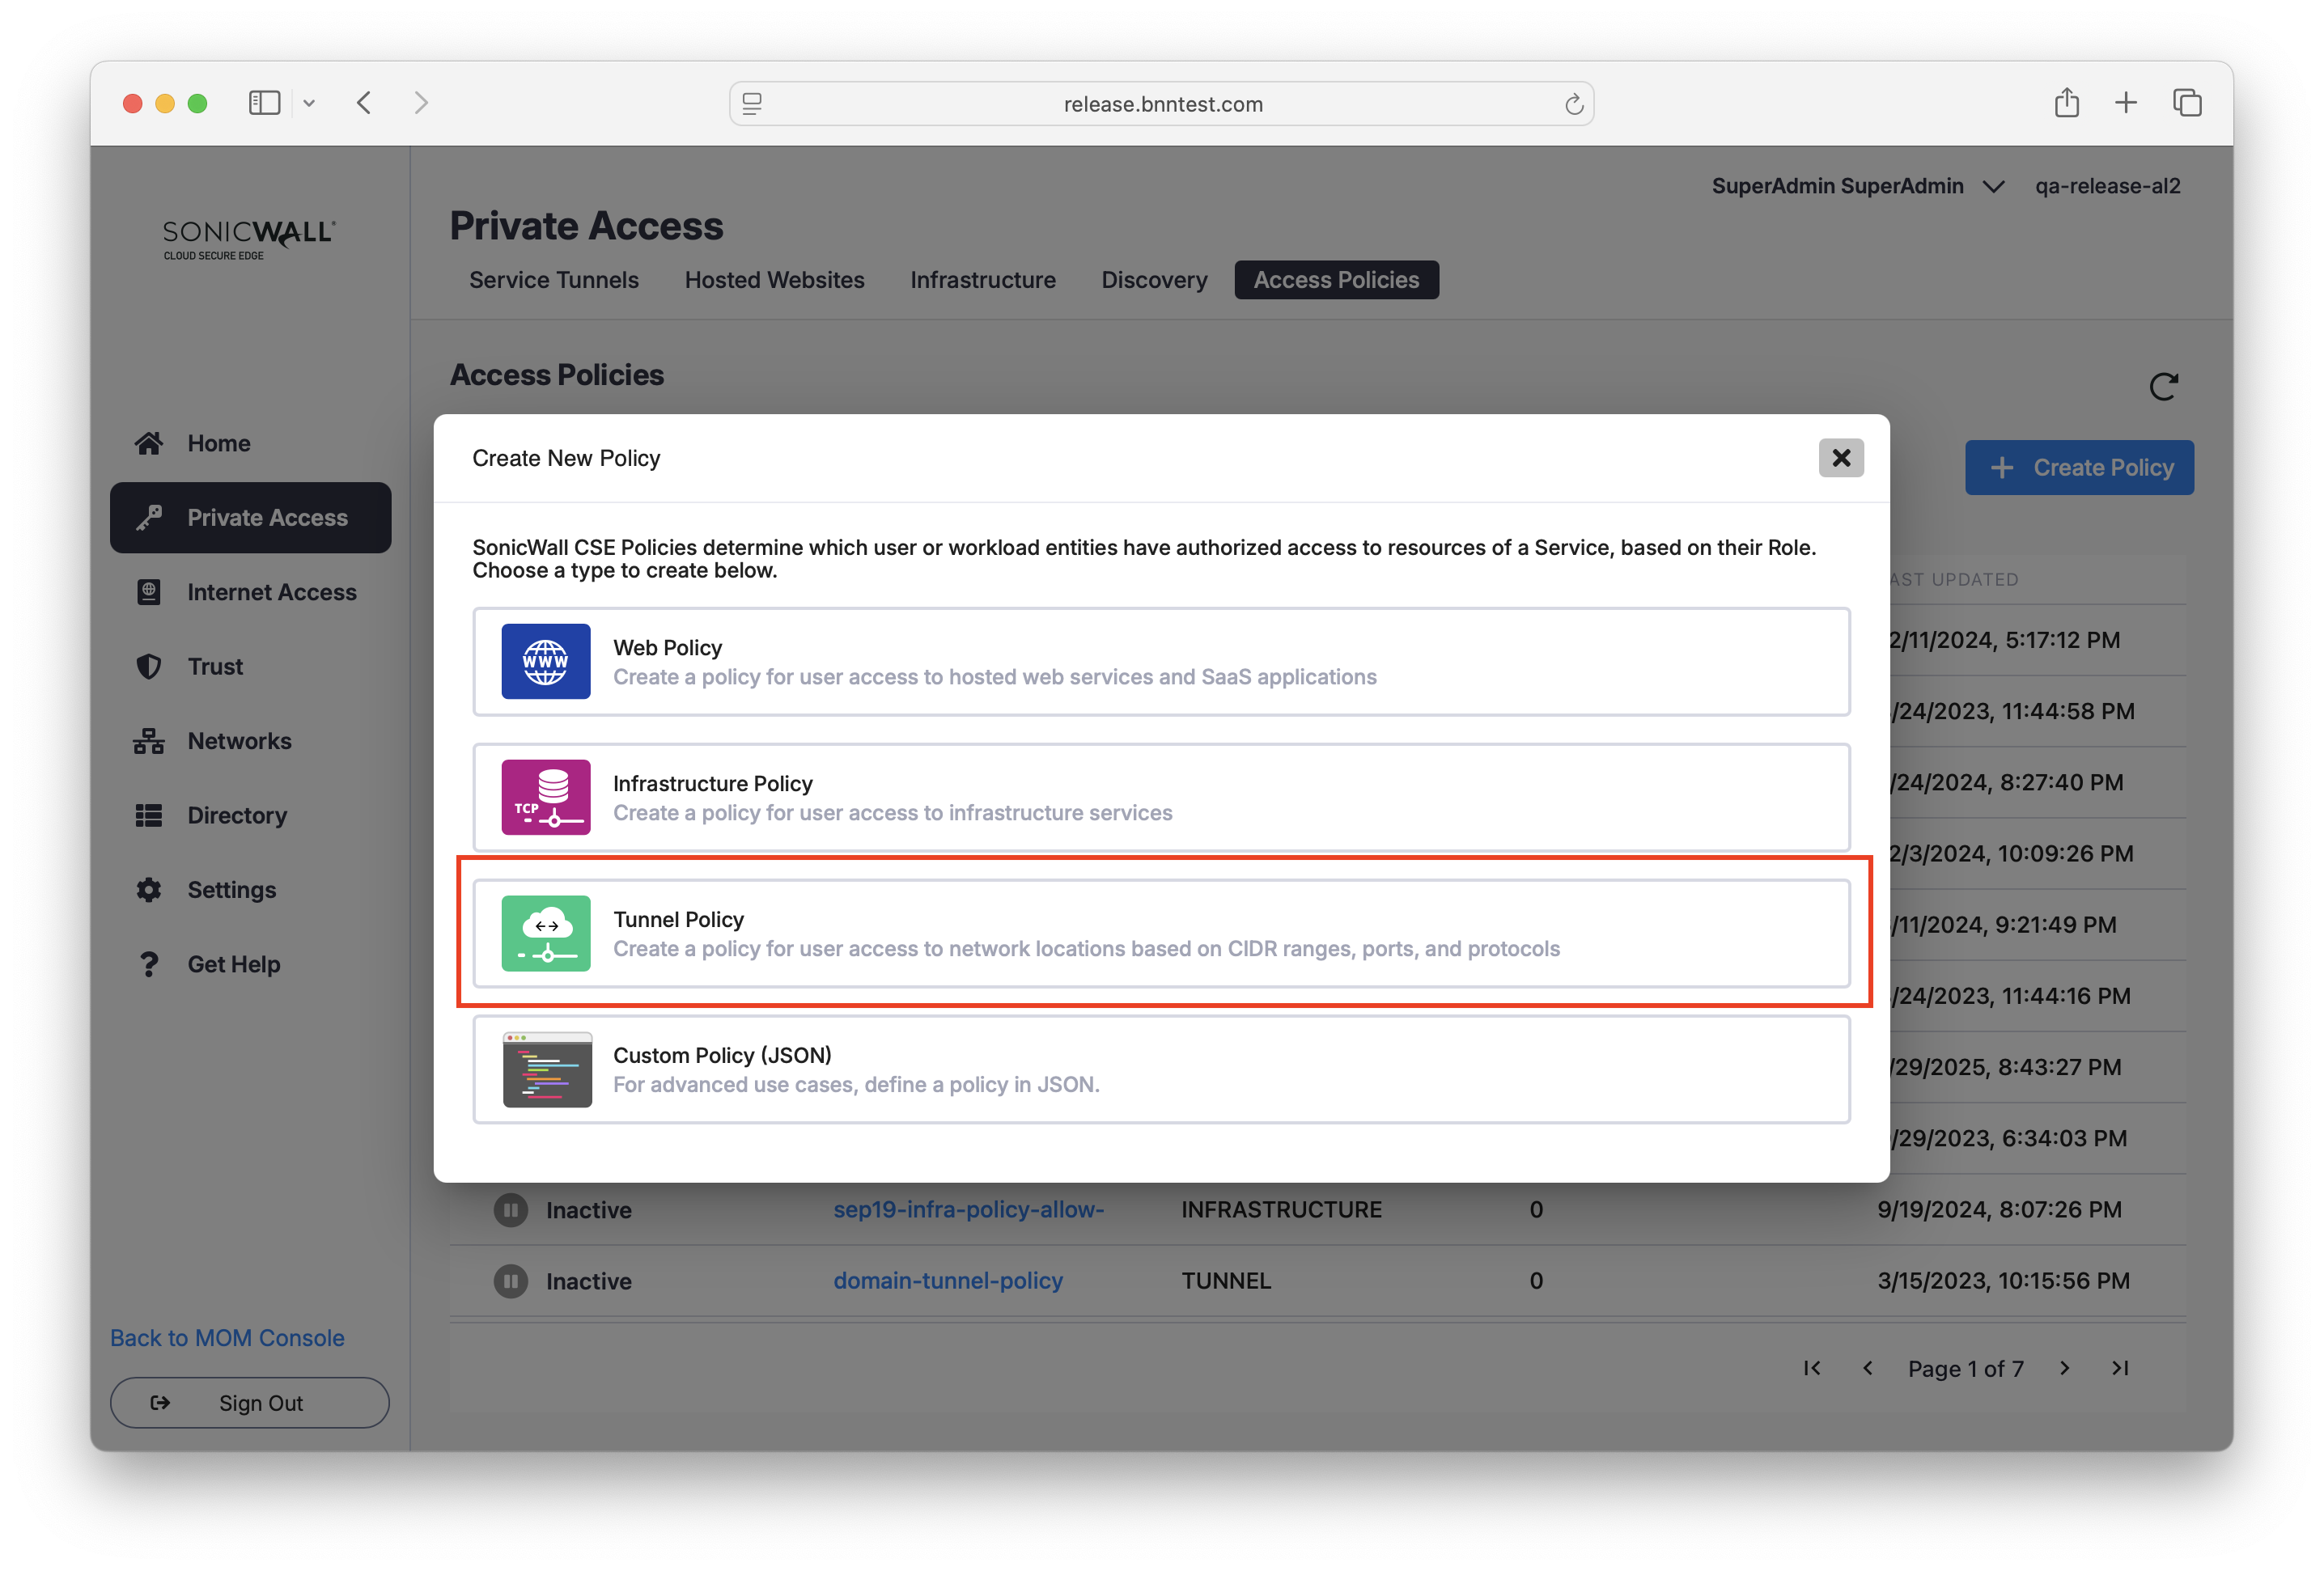
Steps to Create a Service Tunnel Policy
1. Navigate from Private Access > Access Policies > + Create Policy, and select the Tunnel Policy template.
General Information
2. Enter a Tunnel Policy Name and a Description.
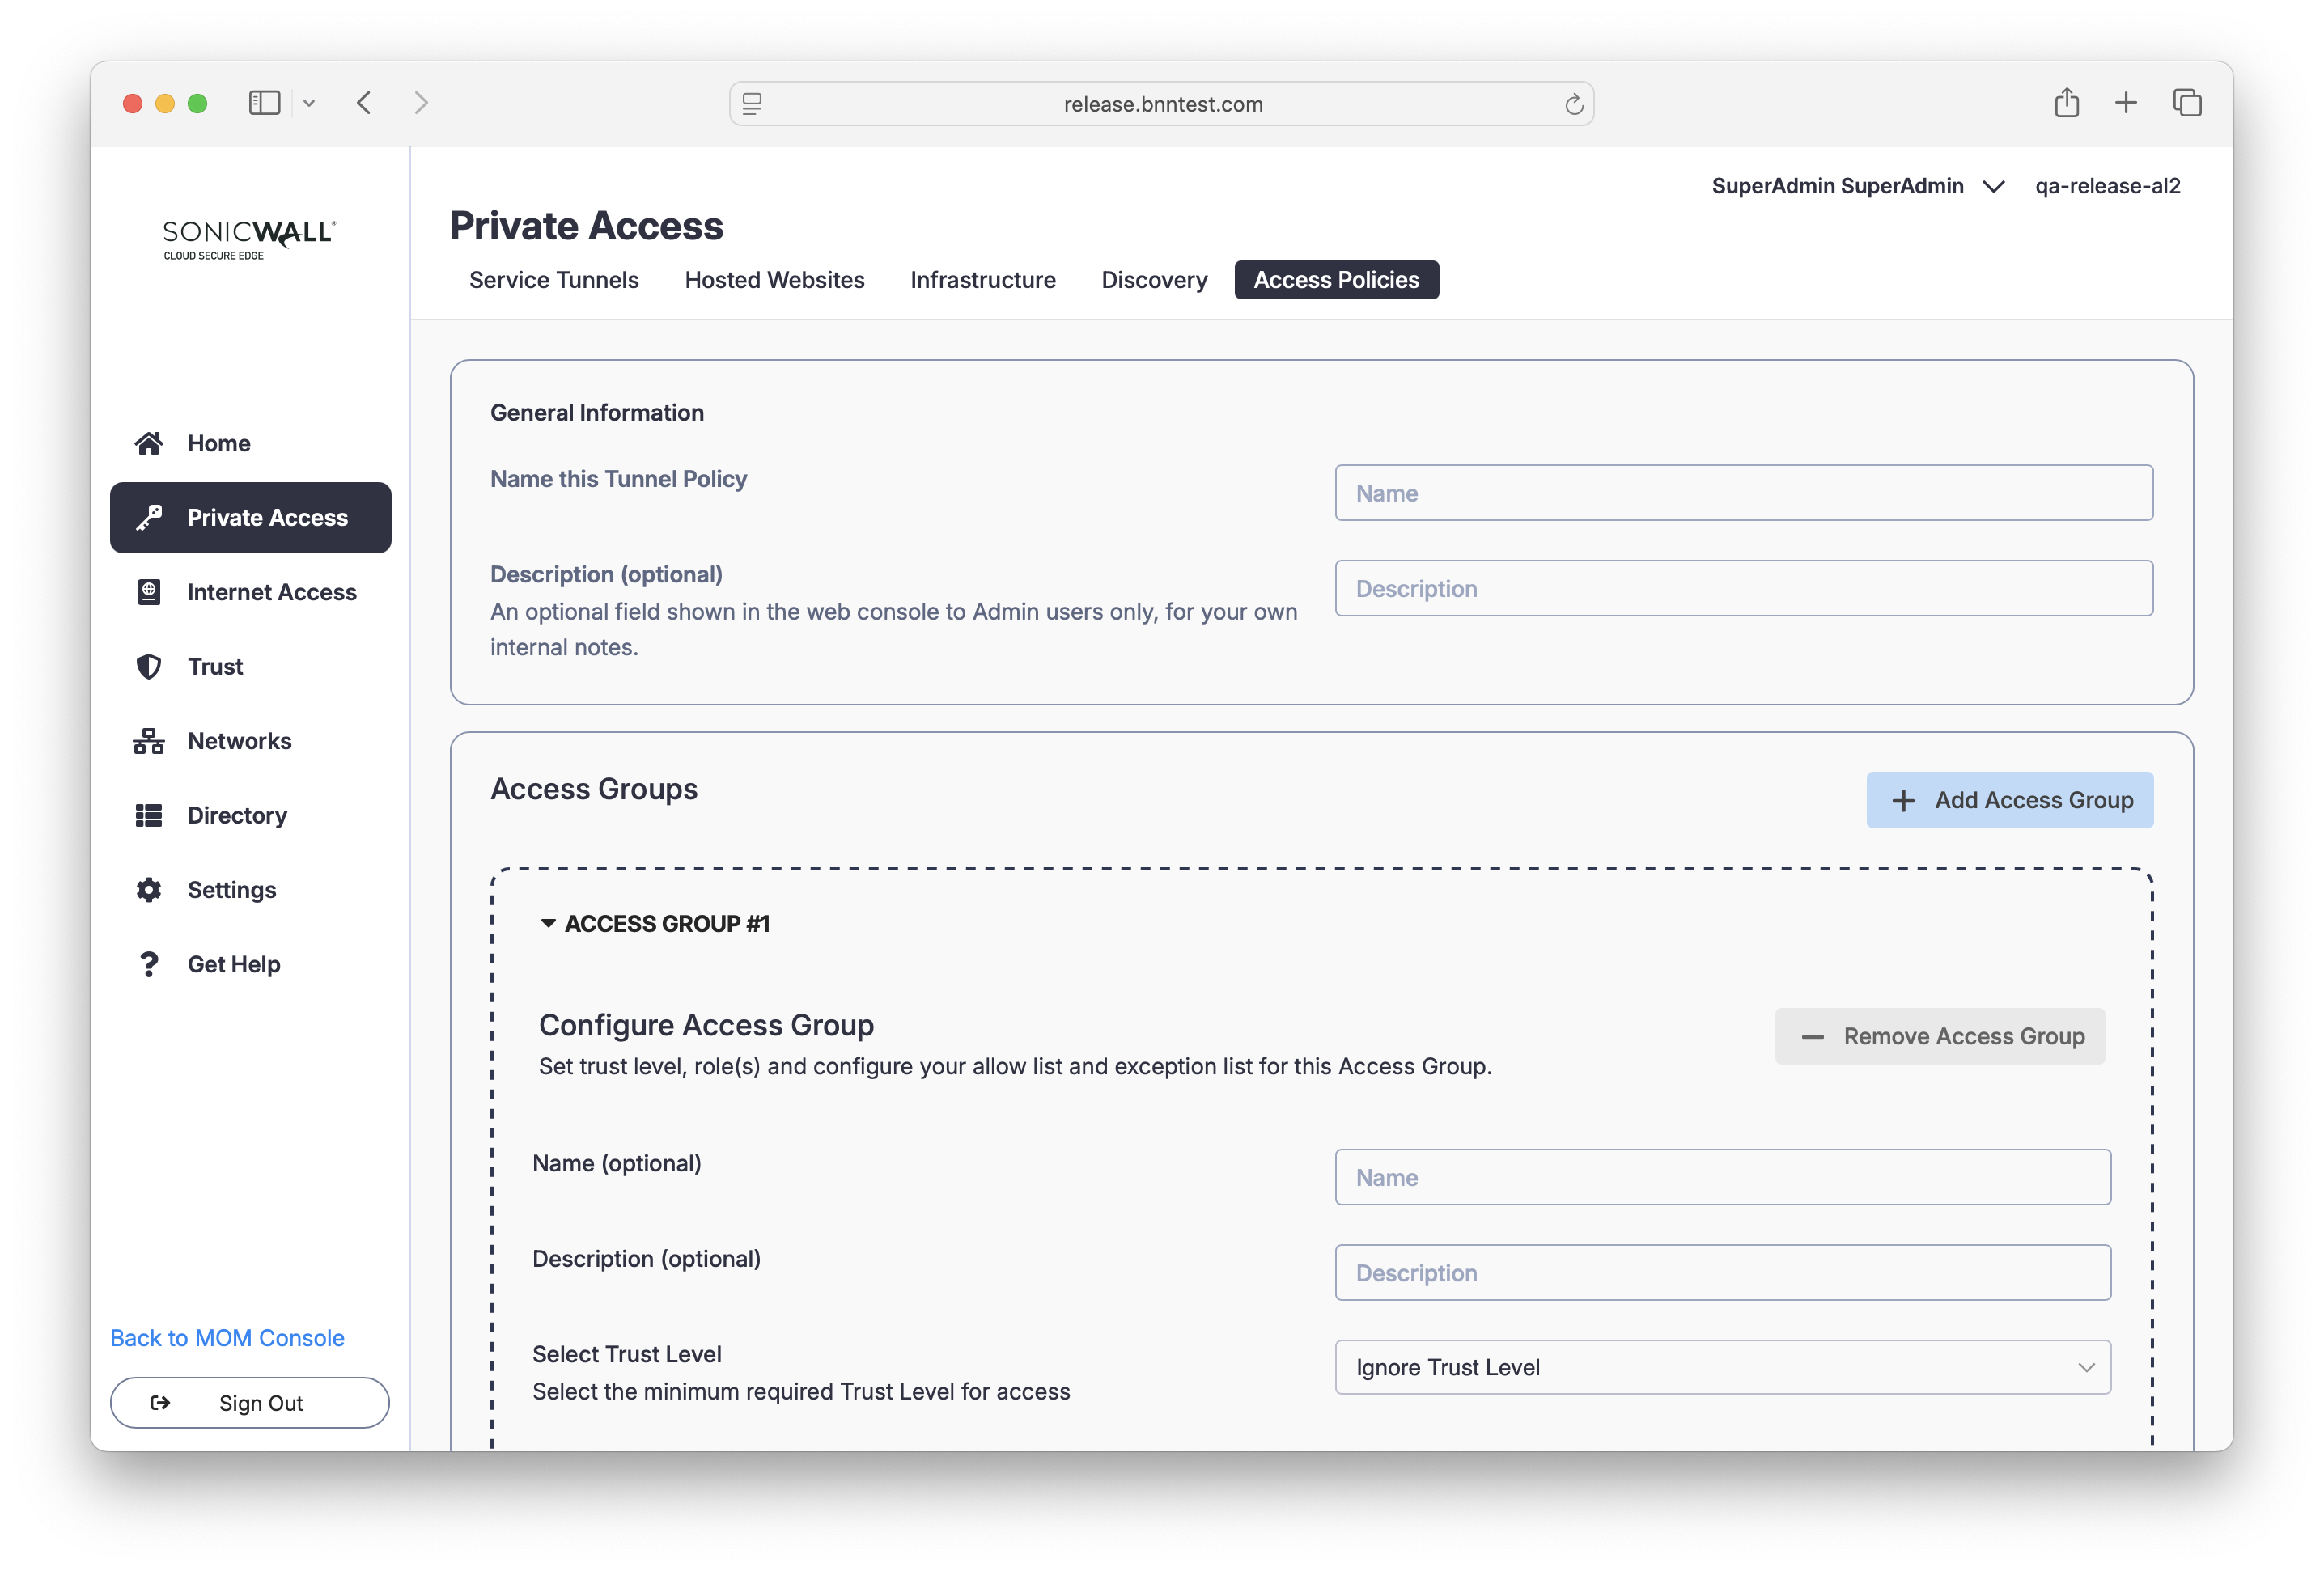
Configure Access Groups
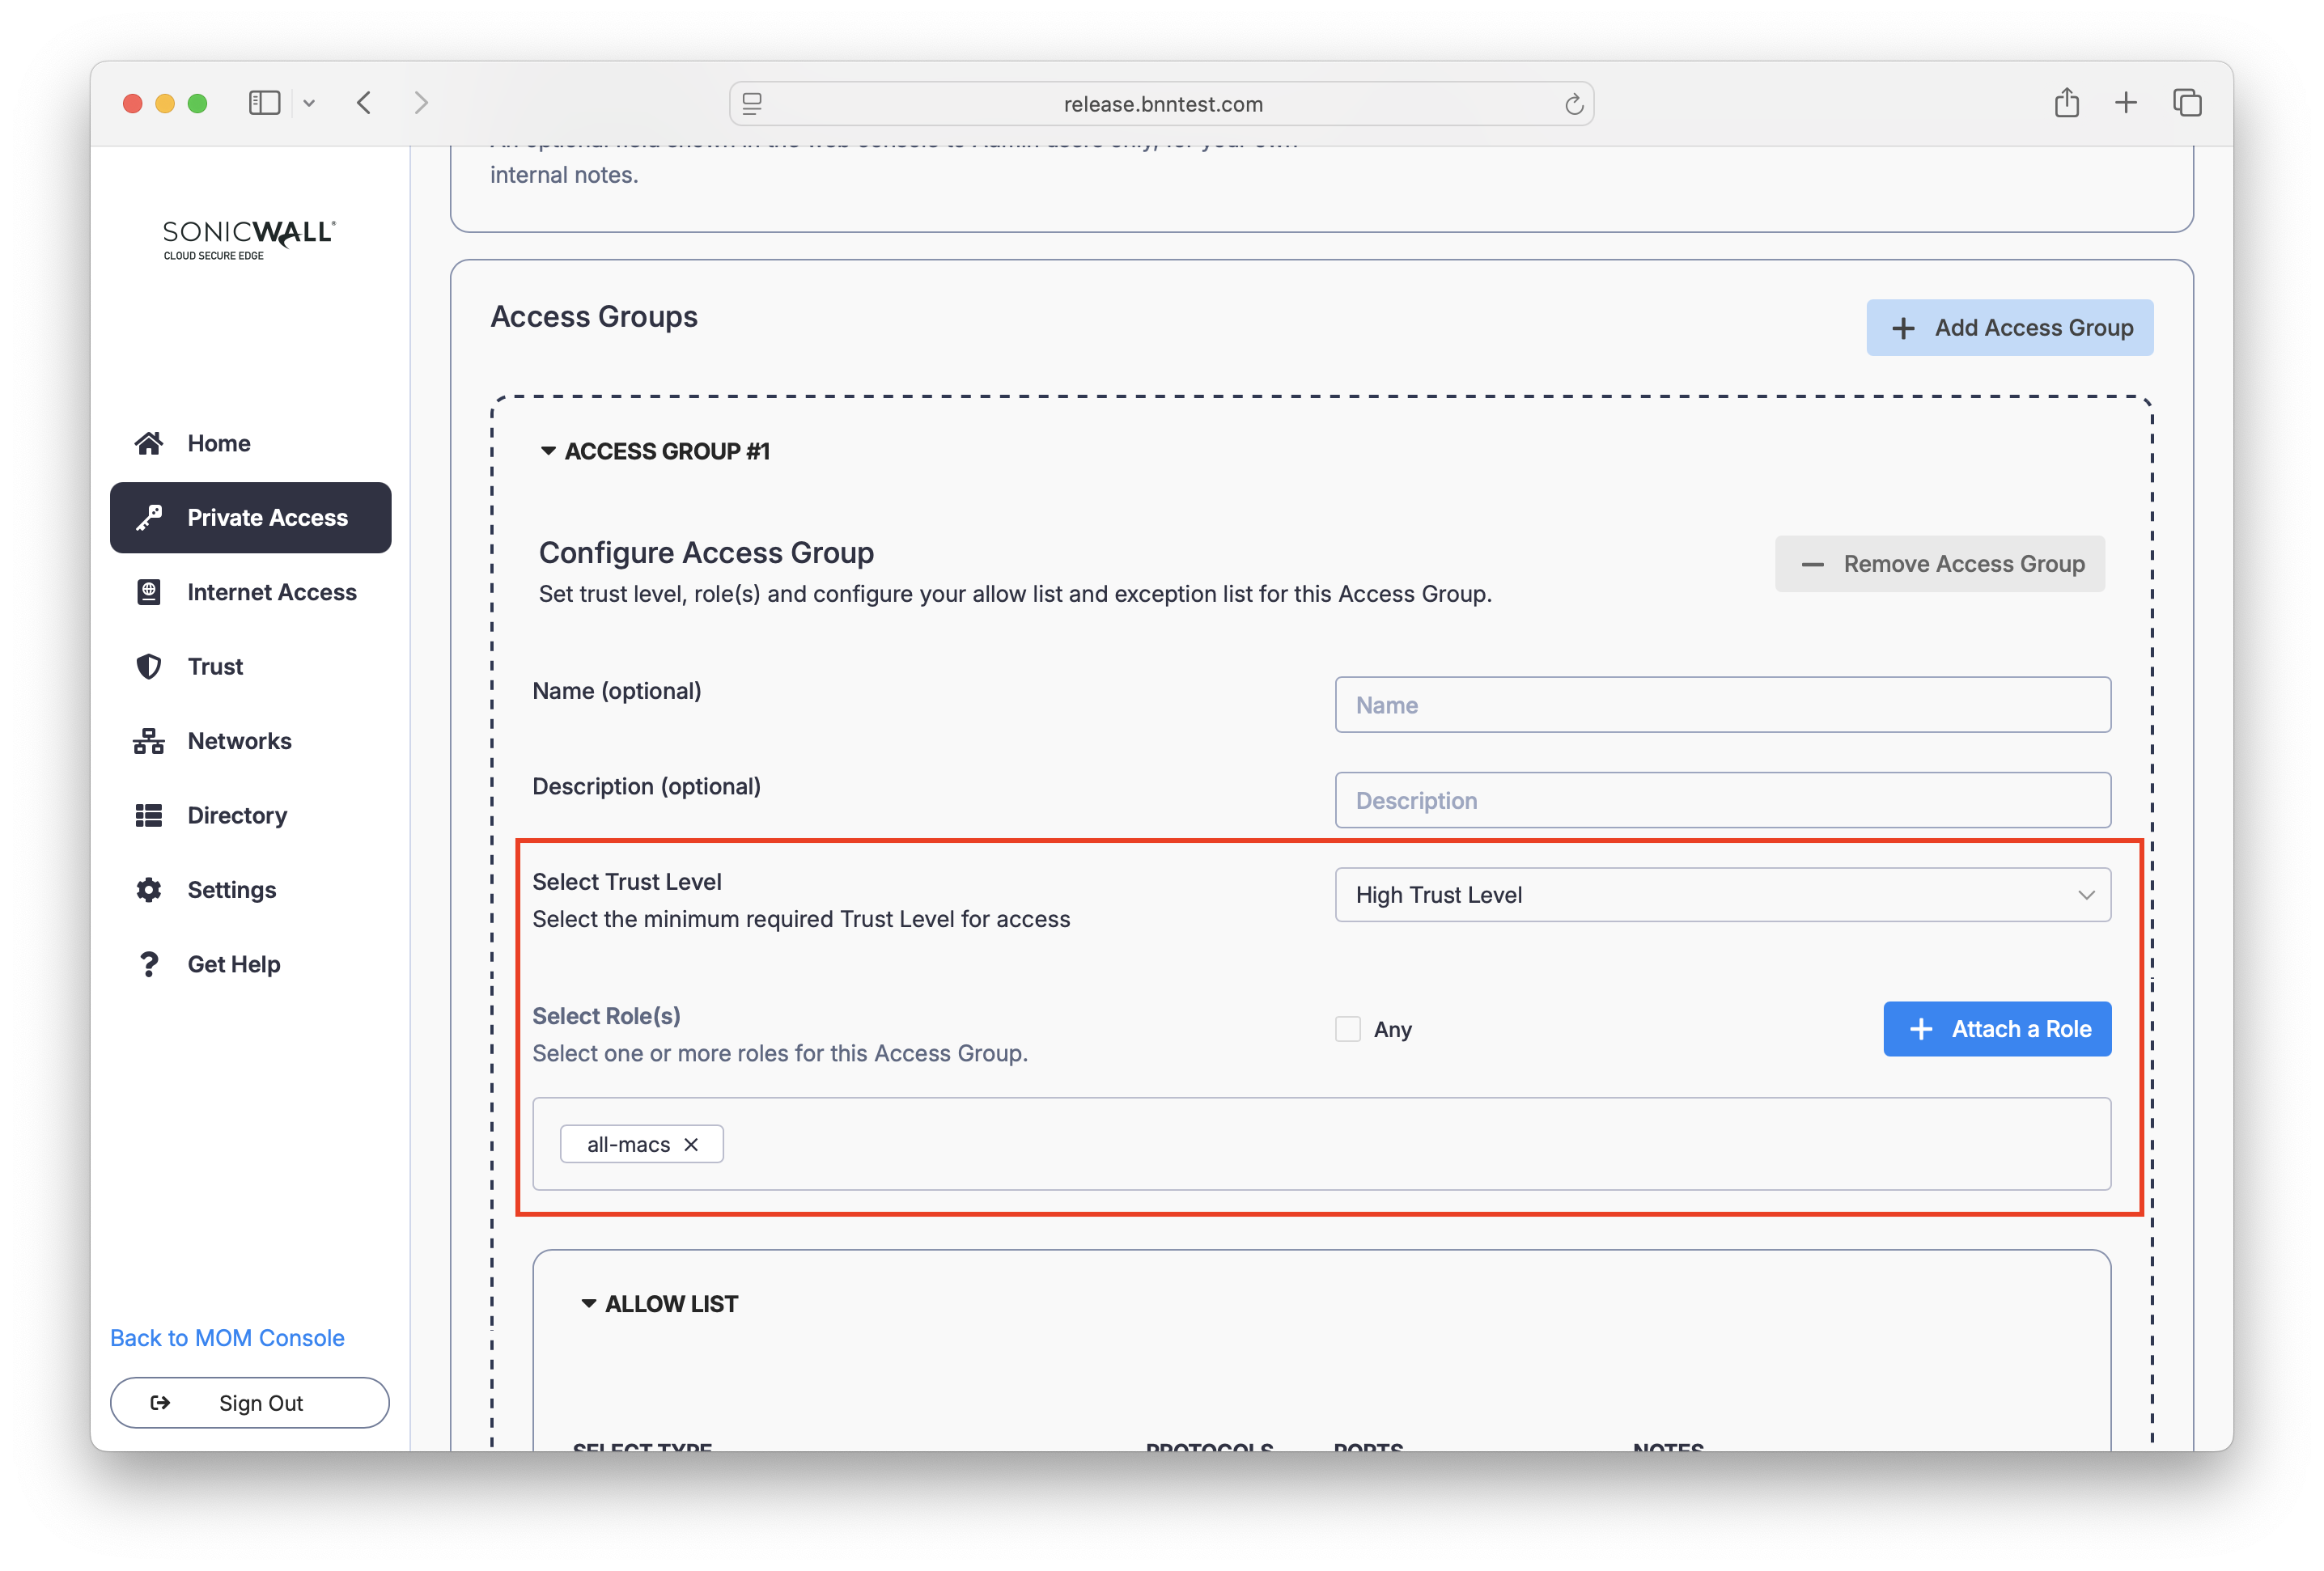
3. Configure your first Access Group. Specify the Trust Level and Role(s) required for users to use this access policy to gain access to protected resources.
4. Select the allowed CIDR ranges / IP addresses or FQDNs.
Note: We strongly recommend FQDN(s) that resolve to the same addresses from different geolocations and do not change very frequently. Wildcard domains are not allowed.
5. Select the Protocols, and then the Ports in one Allow List. Note that you can create multiple Allow Lists for the set of users defined in Step 3 by selecting +Add Another Row.
Note: If you select ALL Protocols, then ANY ports will be pre-selected in your configuration.
6. Optional: Create an Exception List. This outlines a subset of reachable destinations from your Allow List that you want to specifically deny access to. Note that you can create multiple Exception Lists for the set of users defined in Step 3 by selecting +Add Another Row..

7. Select Save.