Register an SSH Service for a Collection of SSH Servers
- Last validated: Jul 15, 2026
Overview
Though SonicWall Cloud Secure Edge (CSE) allows security policies to be applied at the granularity of a single SSH Server, organizations often manage multiple SSH servers, sometimes thousands, at a time. While some SSH servers require a unique set of access restrictions, many of them require identical access restrictions. Rather than configure each SSH server individually, you can group them and configure via a single service definition.
CSE uses standards-compliant HTTP Connect Tunnelling to enable connectivity to multiple services via a single SSH service definition.
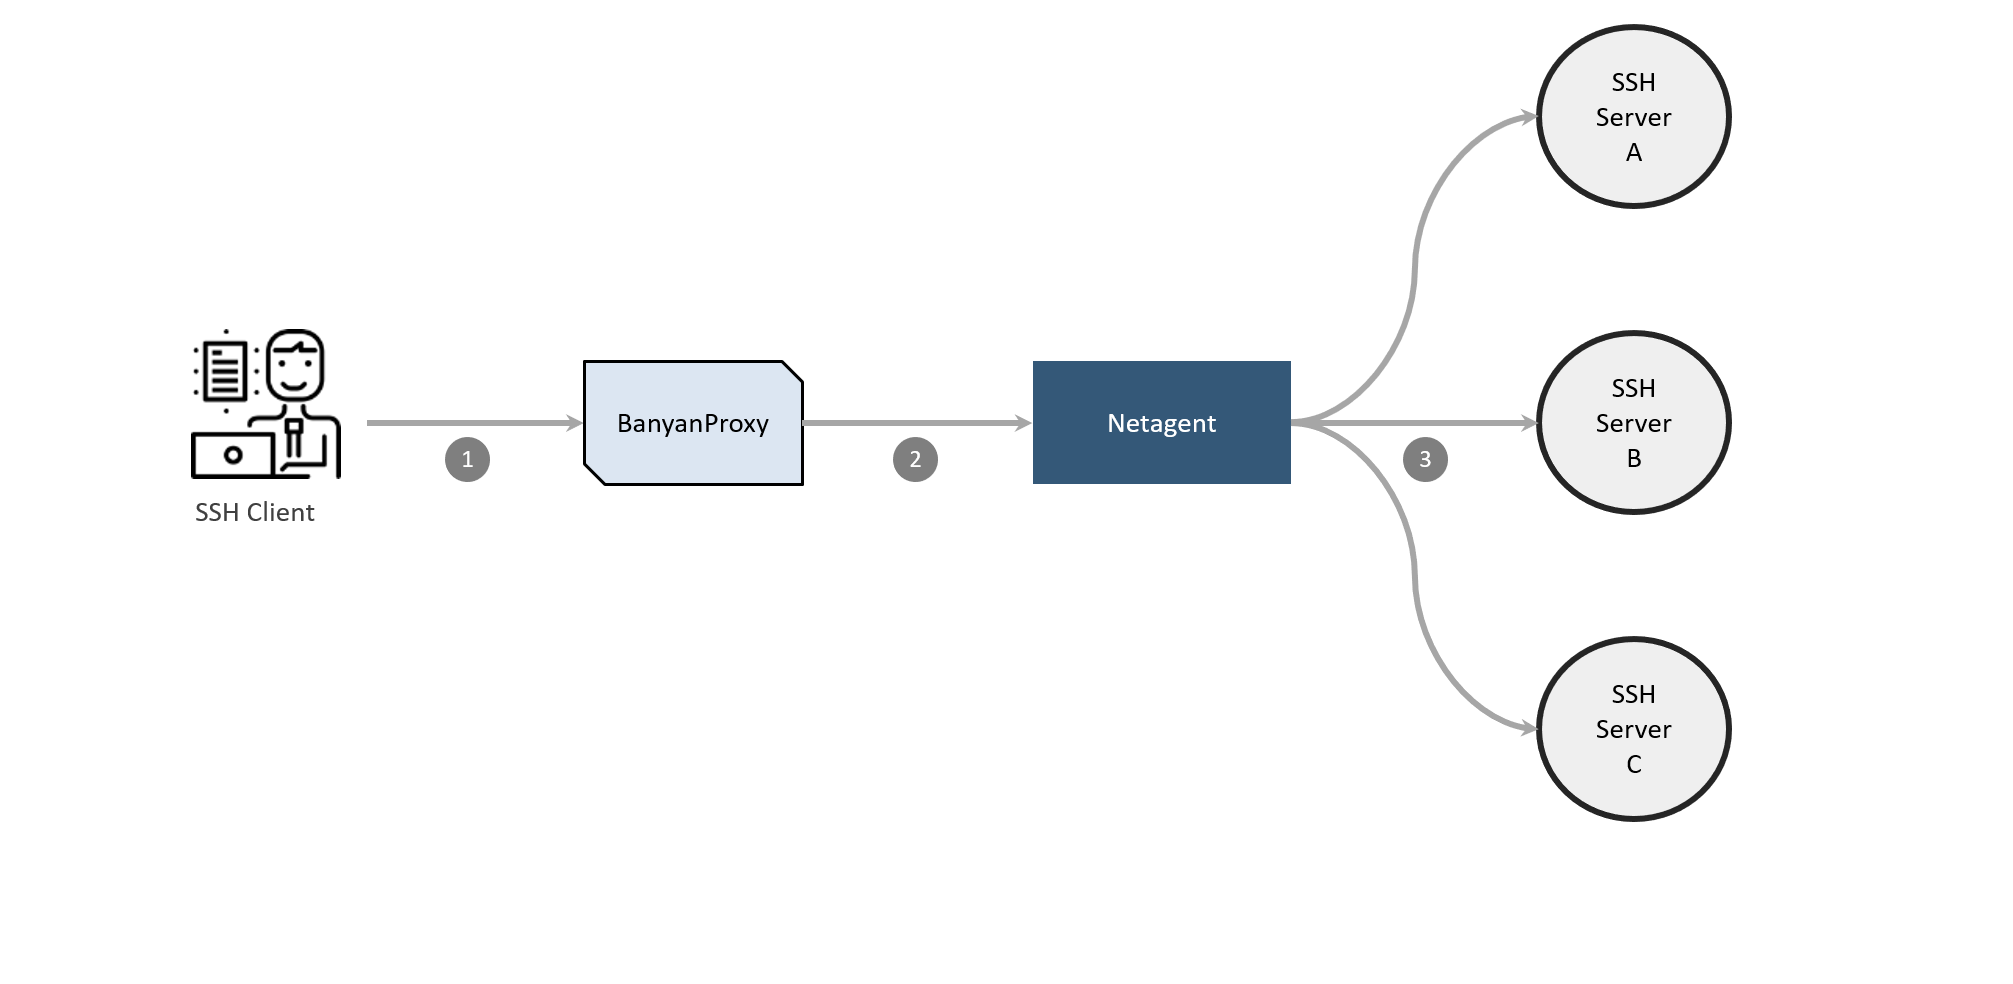
In the desktop app, the end user selects Connect, which adds an entry to the SSH config file with an SSH ProxyCommand to direct traffic to banyanproxy.
-
When the user runs
ssh user@host, traffic is automatically sent by the SSH client tobanyanproxyrunning in HTTP Connect mode. -
banyanproxyinitiates an MTLS connection with the CSE service on the Netagent side atsshcollection.example.com:8443. Netagent checks the device posture and identity and, if successful, establishes the MTLS session.banyanproxythen uses HTTP Connect to specify the actual destination of the SSH request. -
Netagent checks the Service Backend configurations for the
httpconnectandallow_patternsettings. If the connection request matches, Netagent makes the connection to the backend.
Once the connection is established, communication from the SSH client is as if it were directly connected to SSH server.
Prerequisites
- A registered Access Tier or Connector, behind which your SSH server exists
- A registered domain that resolves to this Access Tier
Steps
In this doc, we lay out how to secure access to a collection of SSH servers, using the following steps:
Step 1: Create a Role and a Policy
Step 2. Register a Service
Step 3. Connect to the service through CSE’s desktop app
Step 1: Create a Role and a Policy
1.1 Follow the steps to create a Role and a Policy, as outlined here.
Step 2: Register a Service
2.1 Navigate from Private Access > Infrastructure, and then select + Register Service. Select the option SSH Service.
2.2 Under Service Details, enter a Service Name. Optionally, enter a Description and a Link.
2.3 Select a Cluster. Ensure that you select the Cluster (a logical grouping of Access Tiers, managed together) that contains the Access Tier or the Connector your SSH server sits behind.
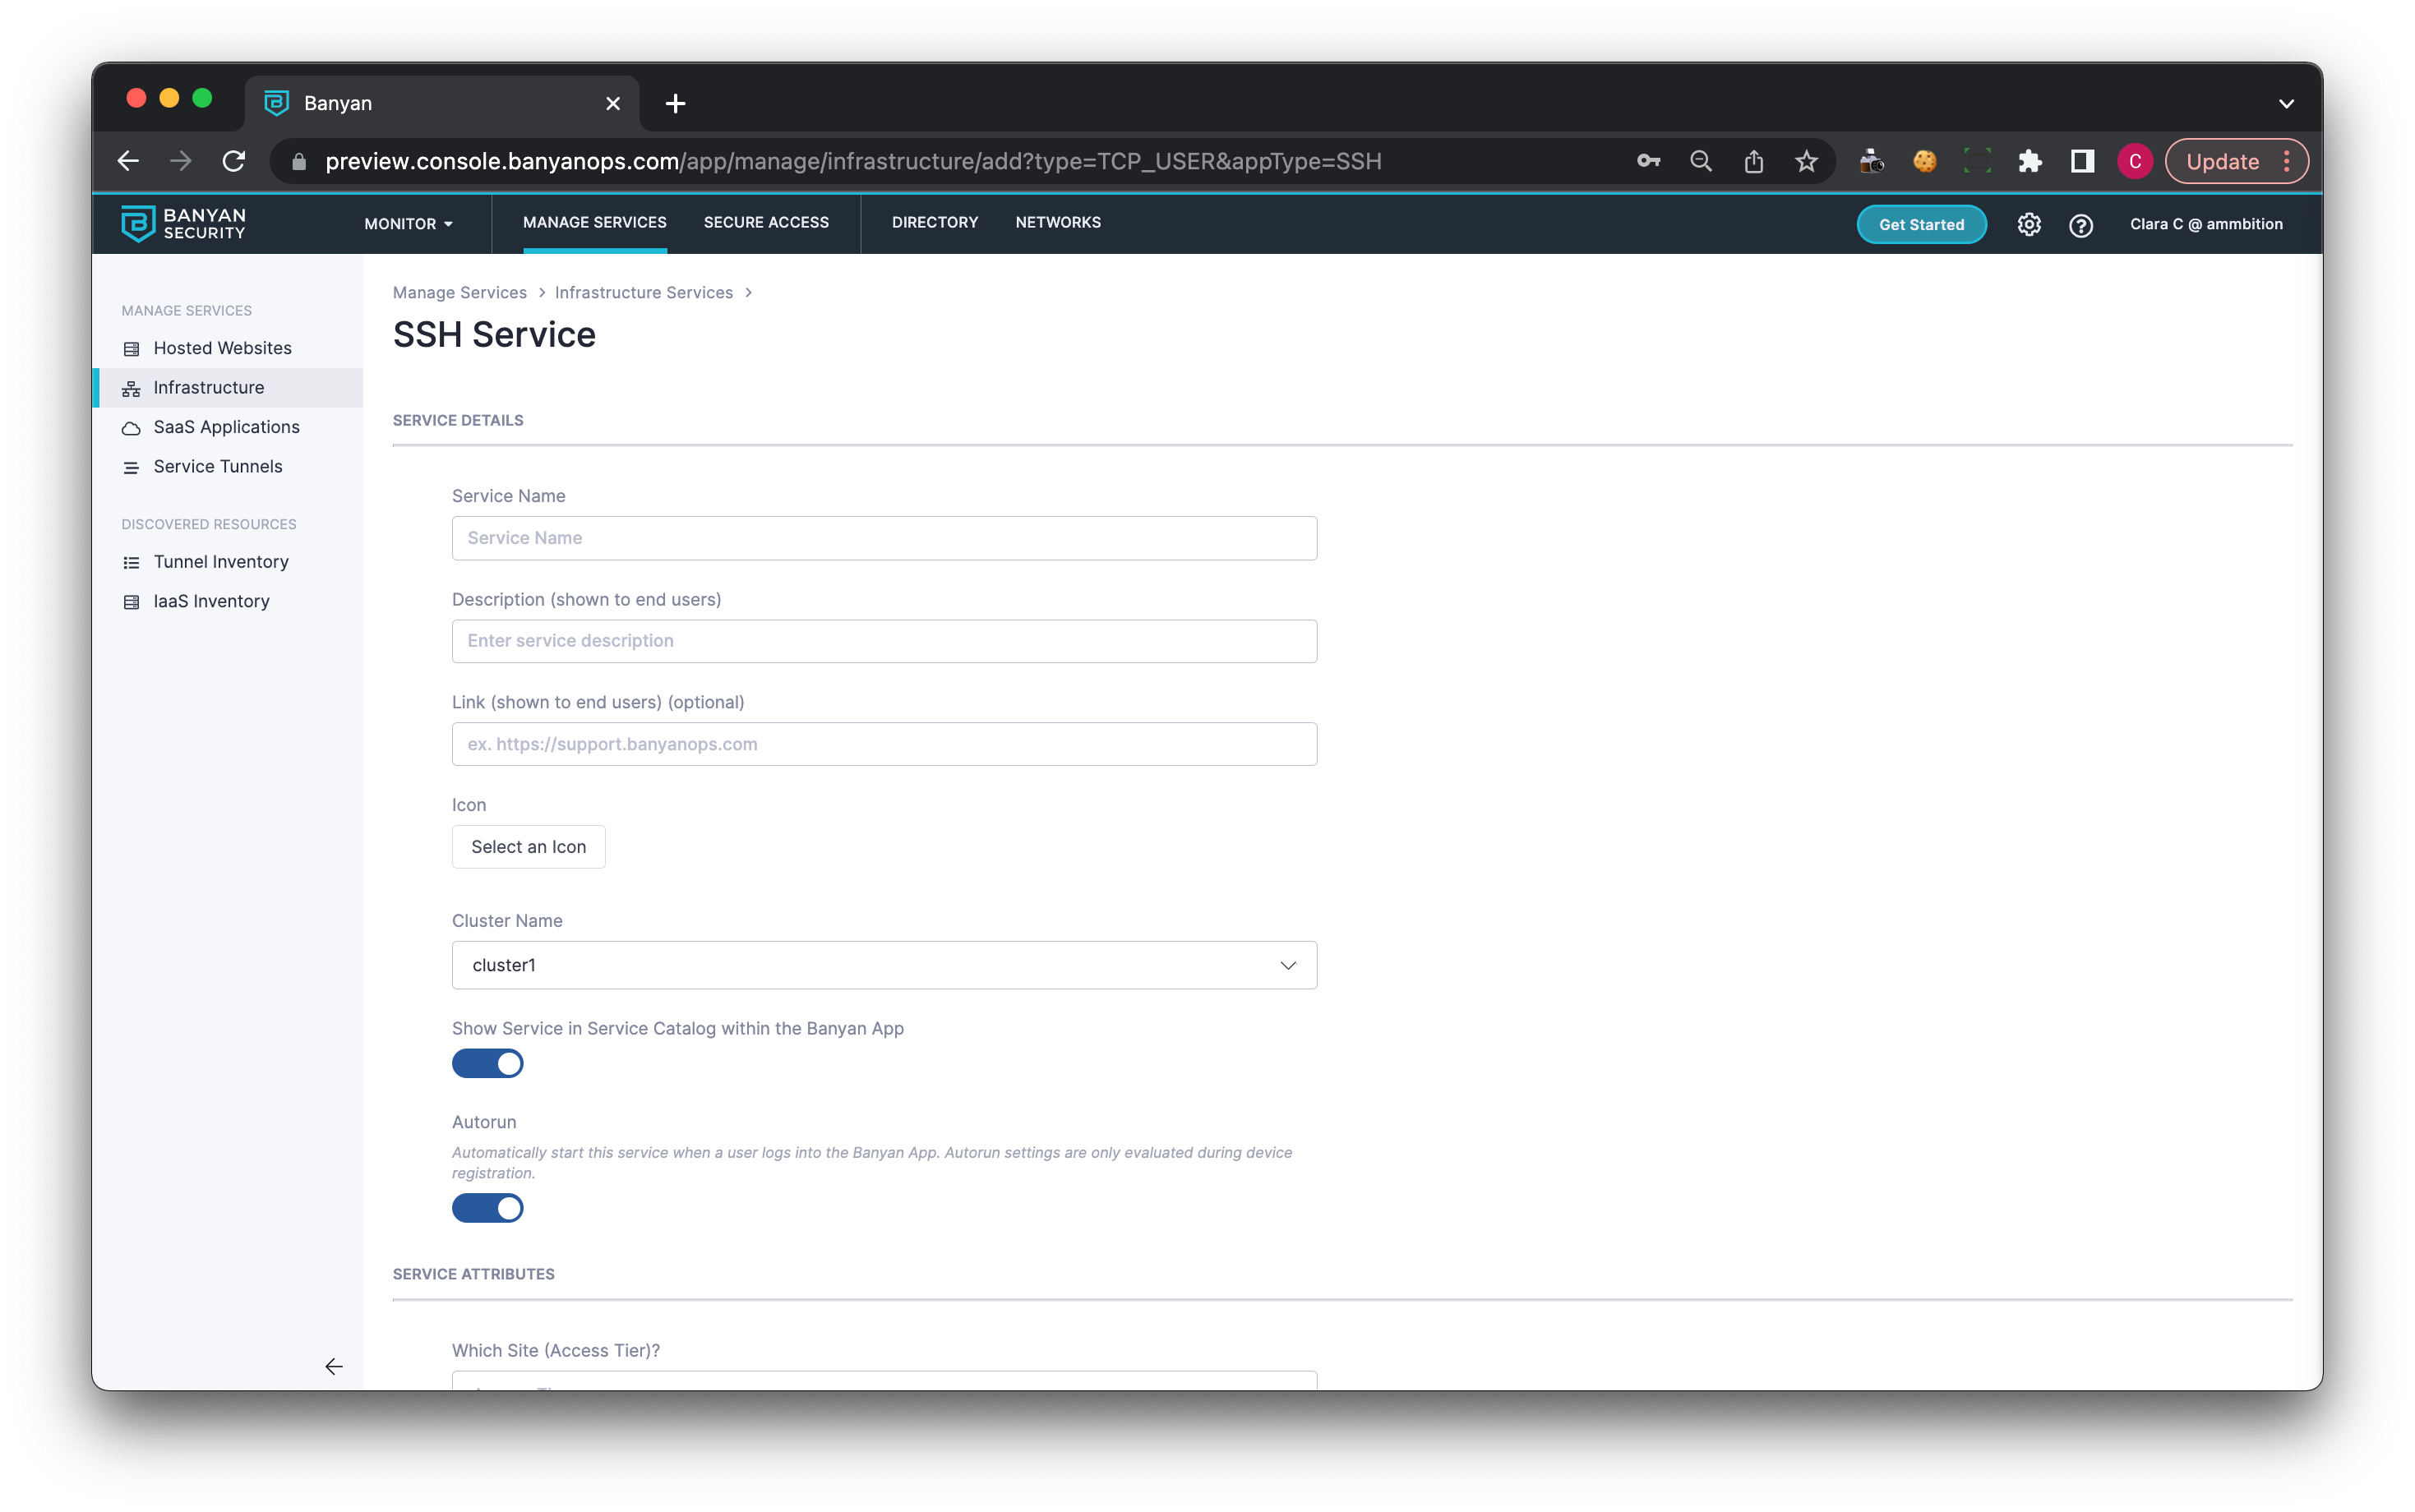
2.4 Under Service Attributes, select an Access Tier. Ensure that this is the Access Tier that your SSH server sits behind.
2.5 Assign a Service Domain Name for this service. Optionally, leave the port as 8443.
Note: the Service Domain Name must be a registered domain or a sub-domain of a registered domain that contains a wildcard (e.g.,mysshserver.corp.example.com, which is a sub-domain of *.corp.example.com).
2.6 To secure access to an collection of SSH servers, select Client specifies using HTTP Connect.
2.7 Specify which Hostnames and CIDR ranges this SSH service is allowed to connect to.
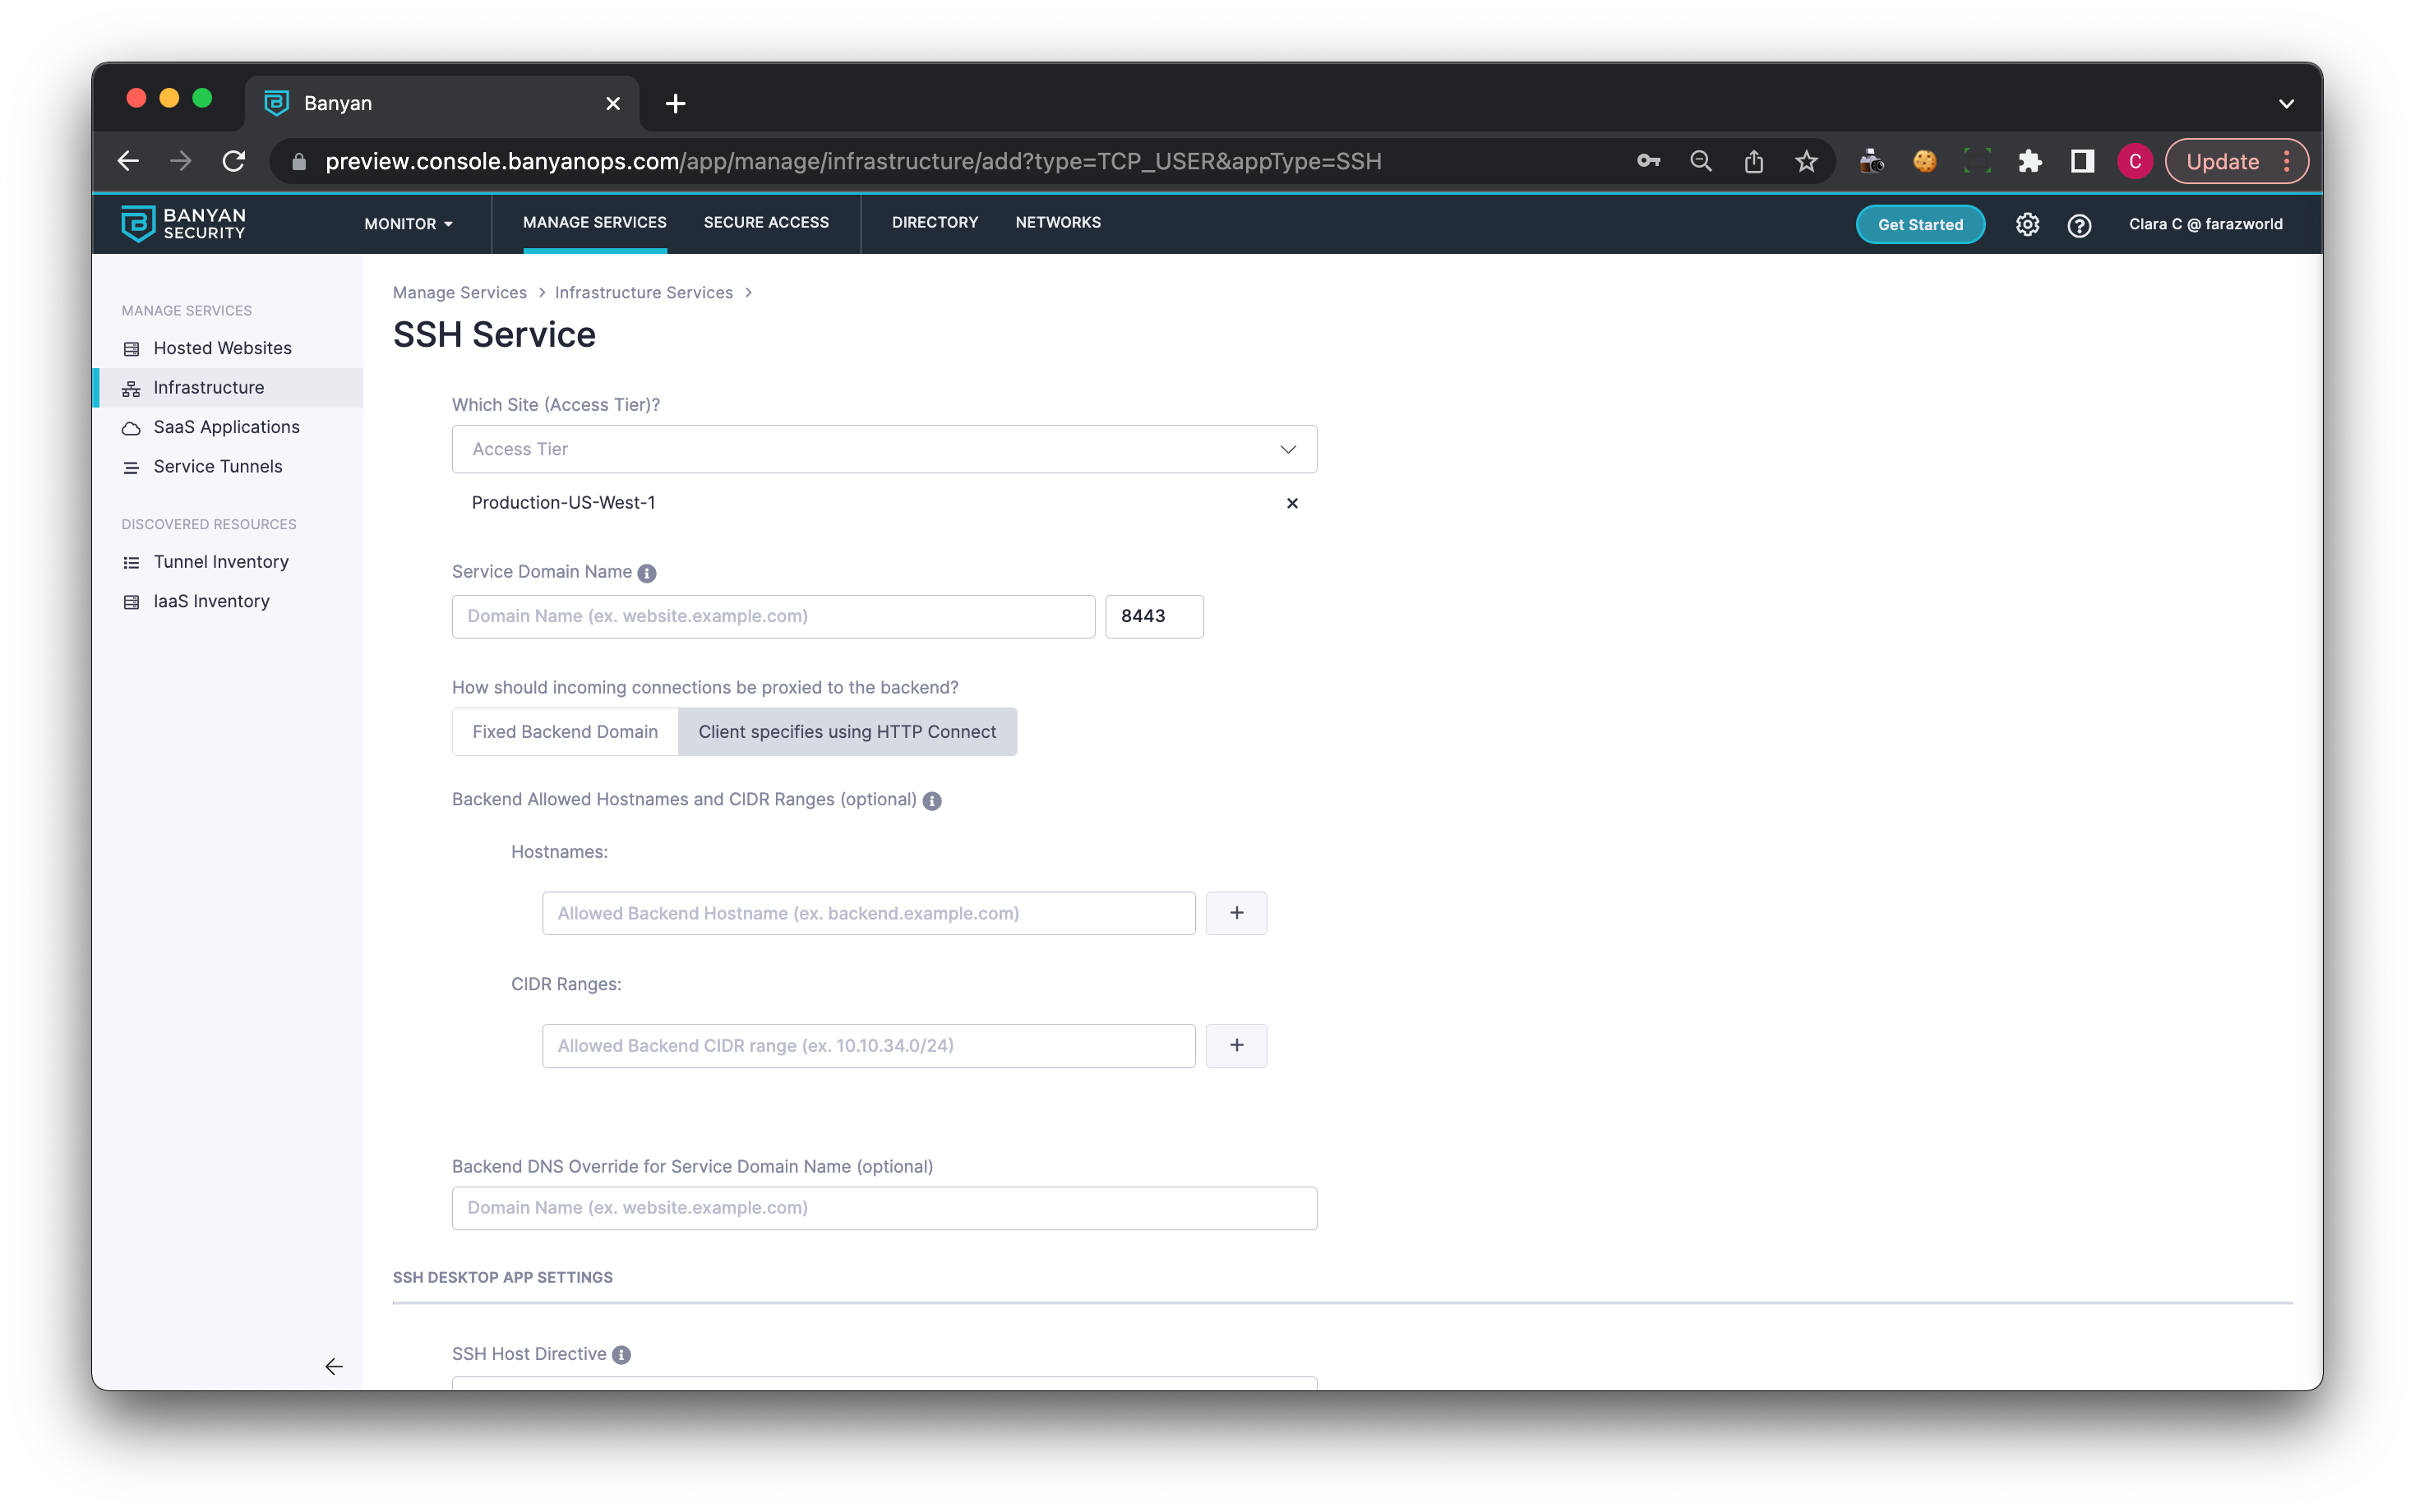
2.8 Optional: enter a Backend DNS Override.
2.9 Optional: In the SSH Desktop App Settings section, enter an SSH Host Directive. This is a short-cut name that can be used in SSH commands.
2.10 Select Only use the TrustCert (CSE’s Trust certificate) or select Use both the TrustCert and the SSHCert, if your SSH server already requires certificate authentication.
2.11 Select whether the desktop app should update the SSH config file on the device.
Admins should select Yes, unless they prefer to update the SSH config file themselves. Note that independent management of the SSH config file may create difficulty in using the desktop app, which is configured to update the SSH config file. Contact CSE for further support.
2.12 Optional: Attach the policy created in Step 2, and then choose an Enforcement Mode (i.e., Permissive or Enforcing).

Step 3: Connect to the service in the desktop app
3.1 Ensure your end users install the latest desktop app and register their device.
3.2 Once the service is registered (i.e., Step 3 is completed), your end users will see it in their desktop app. End users must then select Connect, and the desktop app will add an entry to the SSH config file (typically located in ~/.ssh/config).
3.3 End users can now access any SSH server in the collection based on the SSH Hostname or IP address of the specific server you want to connect to, using the following command:
ssh username@hostdirective -o "Hostname=ssh-server-1.corp.example.com"
OR
ssh username@hostdirective -o "Hostname=ssh-server-2.corp.example.com"
Enter the specific host name (or IP address) that you want to reach in the suffix of the command.
The SSH client will use banyanproxy to automatically tunnel the SSH session over a Mutual-Auth TLS channel using HTTP Connect Tunneling.
Notes
Role-based Authorization
To enable role-based authorization for your SSH servers, review our SSH Certificate Authentication capability, which leverages SSH’s native AuthorizedPrincipals capability.
Include & Exclude Backends in your Collection
Advanced Use Cases with Complex Patterns
For advanced use cases that require complex patterns, you can create a custom Hosted Service JSON to specify CIDRs and IP Ranges in an “allow list” in the service spec. This lets you manage allow lists that include and exclude specific backends in your collection.
For example, you can define the pattern for the allowed backends using hostnames (via allow_patterns). In the example below, connections are allowed only the service destination is in the CIDR range 10.10.34.0/24.
"backend": {
  "target": {},
  "allow_patterns": [
    {
      "cidrs": [
        "10.10.34.0/24"
      ]
    }
  ]
}