Configure a SAML 2.0 Identity Provider to manage your directory of users in SonicWall Cloud Secure Edge
- Updated on
- Pre-requisites
- Steps
- 1. In the Command Center, configure your User Identity Provider
- 2. In your SAML Identity Provider, create a new App called “CSE TrustProvider”
- 3. In your SAML Identity Provider, set up Attribute Mappings
- 4. Assign the “CSE TrustProvider” SAML App to be accessed by everyone
- 5. From the CSE TrustProvider app in your SAML IDP, take note your SSO URL and download the Certificate
- 6. Save the SAML 2.0 IDP fields in the Command Center
SAML 2.0 is the leading standard to implement single sign-on. Cloud Secure Edge (CSE) integrates with your SAML Identity Provider, via the SAML 2.0 HTTP POST binding, to authenticate enterprise users that need access to CSE-secured services.
Pre-requisites
In order to set up this integration, you need will need administrative access to your SAML Identity Provider and the ability to add a new SAML App.
Steps
1. In the Command Center, configure your User Identity Provider
1.1 Navigate from Settings > Identity and Access tab > End User tab, and then set your User Identity Provider to SAML.
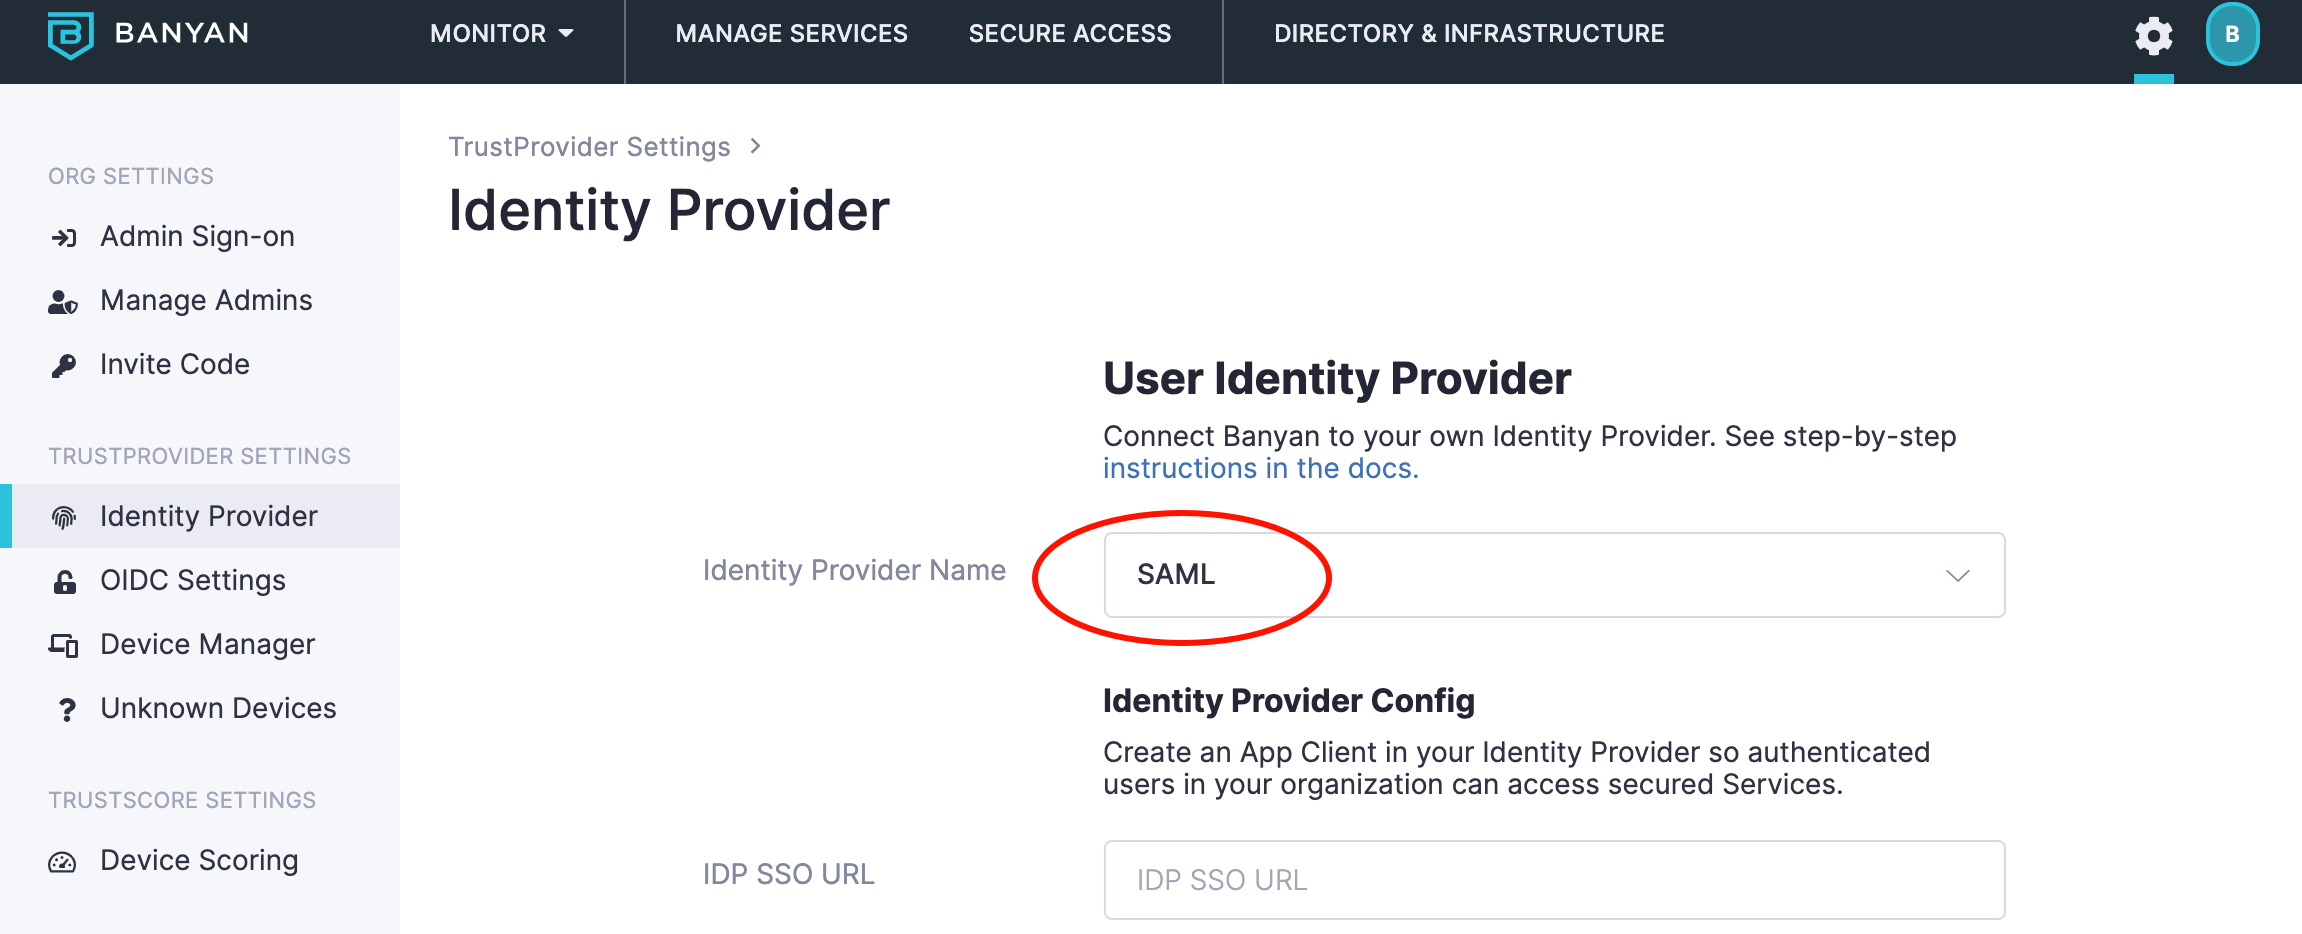
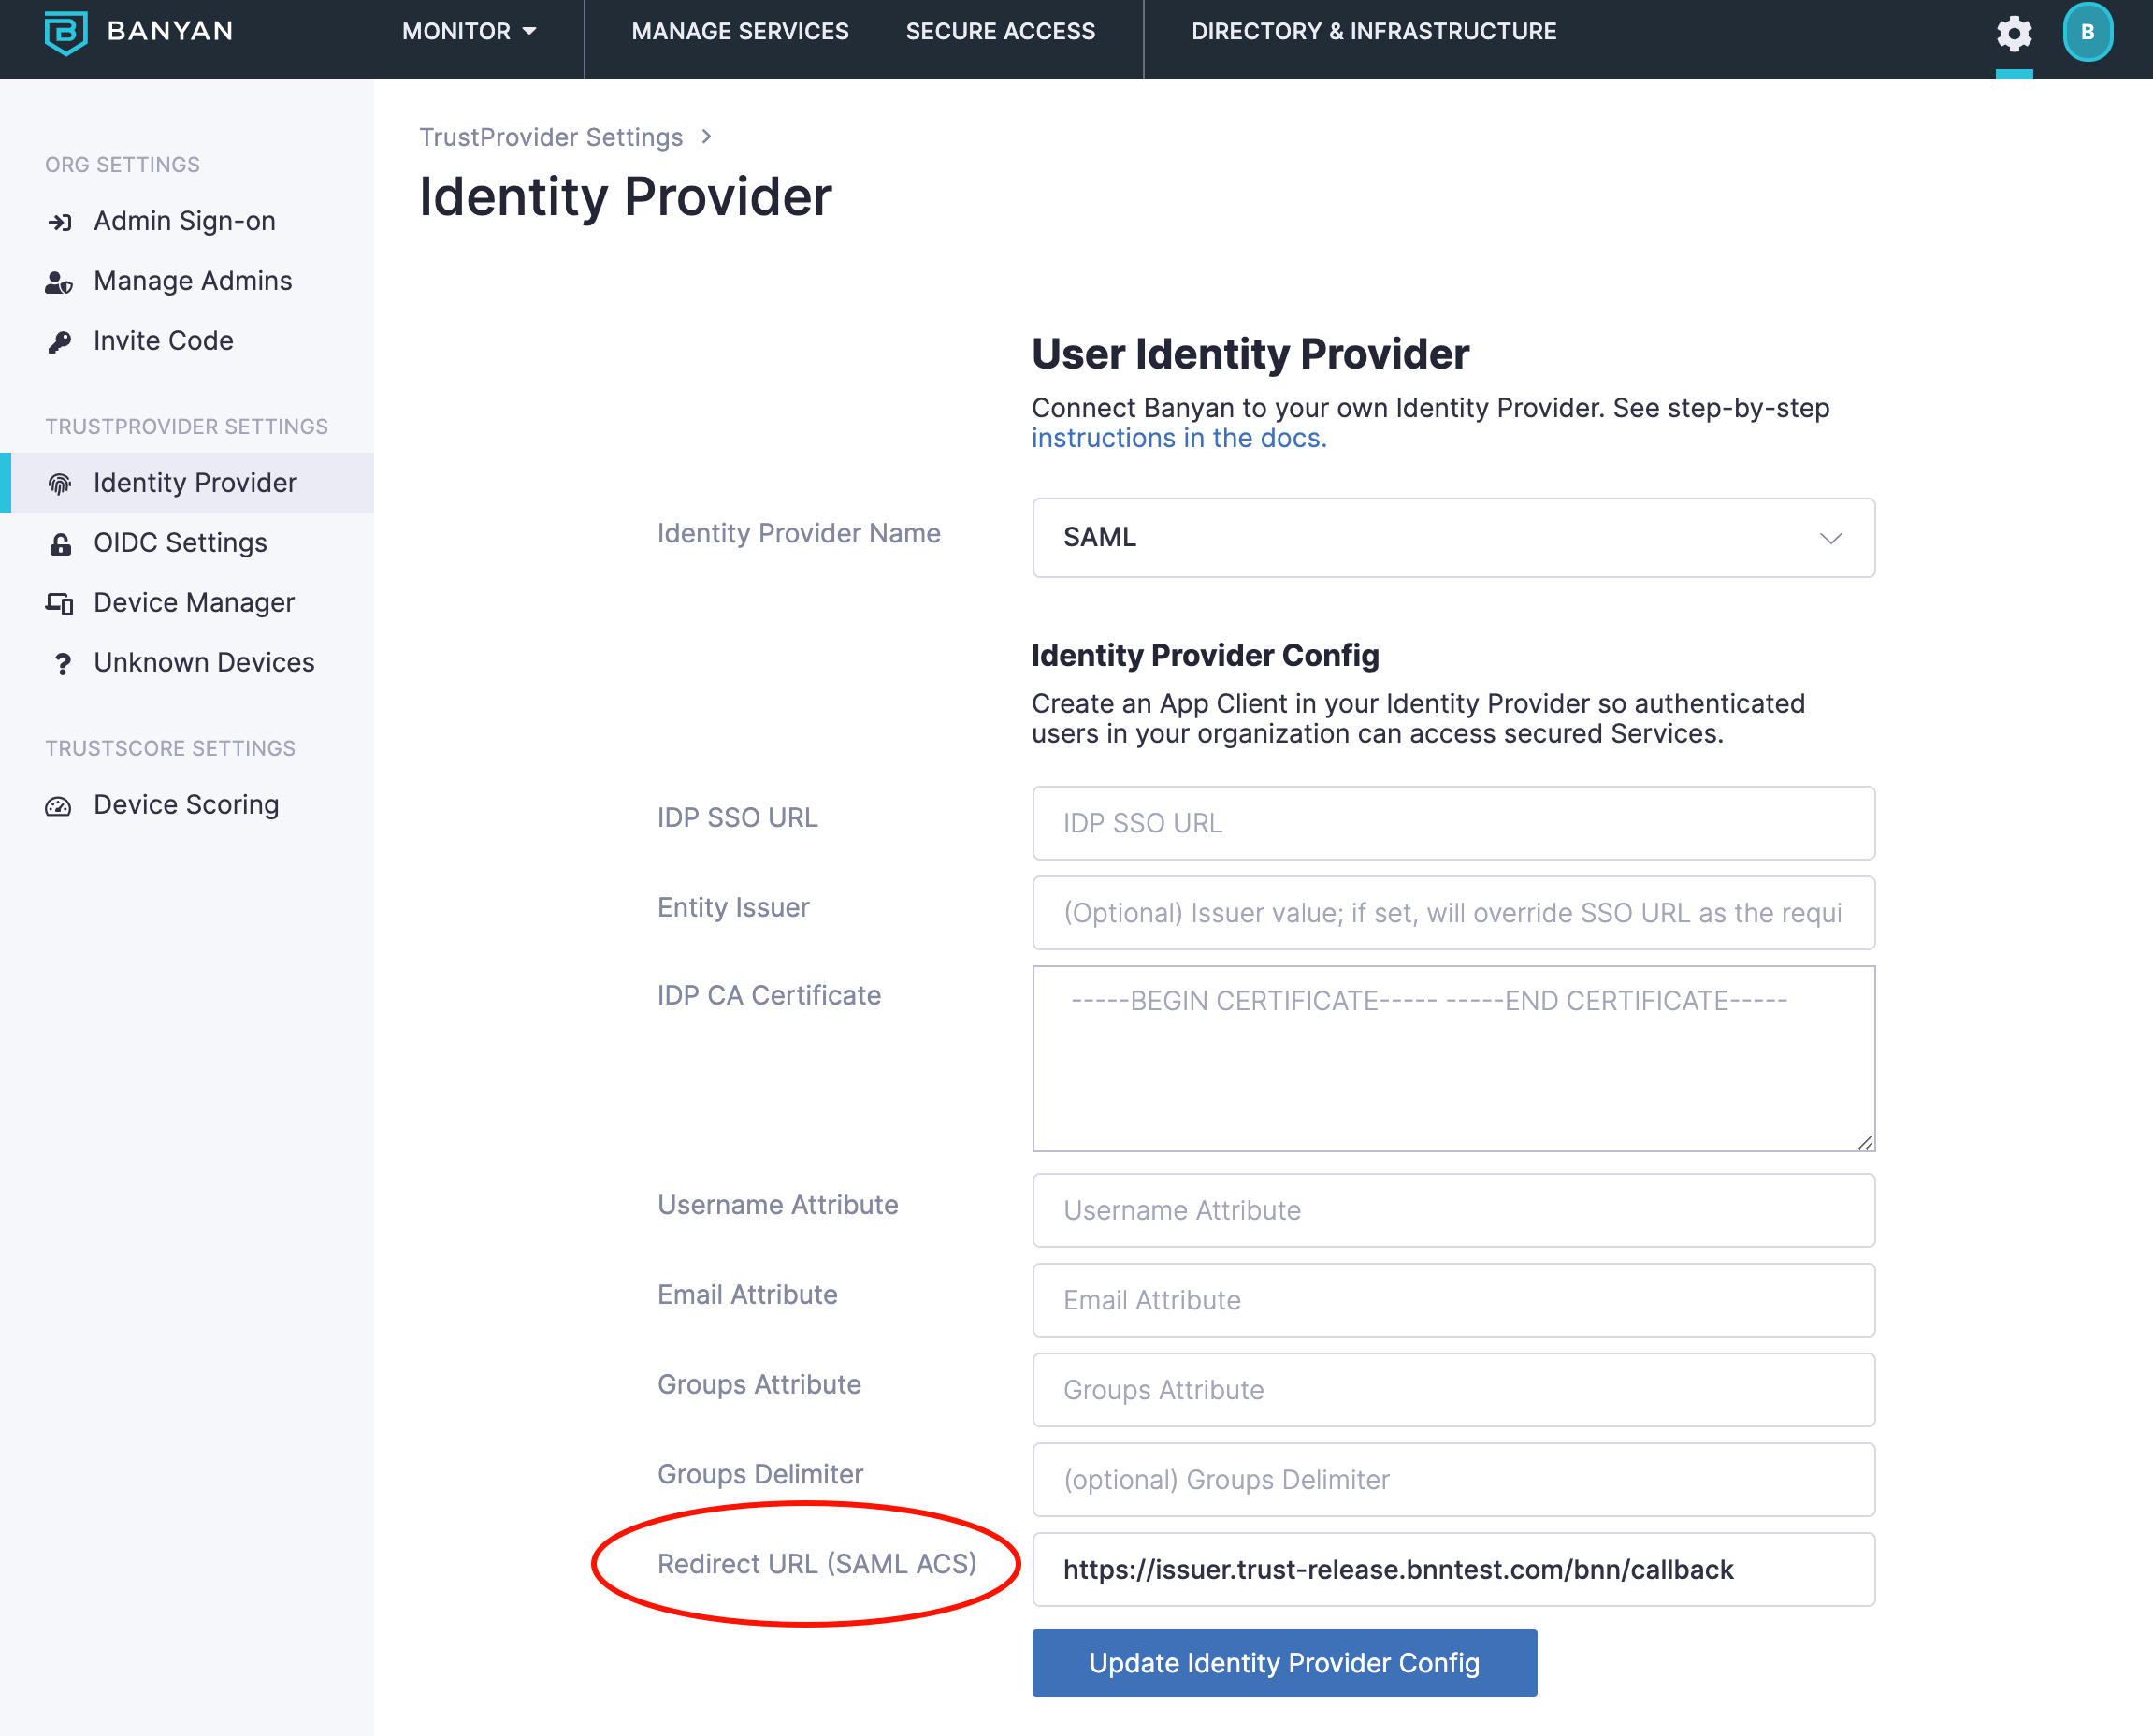
Fill out these Identity Provider configuration fields after you set up the new application integration.
1.2 Take note of the Redirect URL (ACS) provided in the configuration field.
2. In your SAML Identity Provider, create a new App called “CSE TrustProvider”
When asked for Callback URL, Assertion Consumer Service (ACS) URL, SP SSO URL, or Recipient SSO URL in the SAML Identity Provider, use the Redirect URL you obtained in Step 1b above.
If you’re asked for the RP/SP Entity ID, use the Redirect URL as well.
Ensure the NameID format in your IDP is set to Persistent; CSE TrustProvider does not support other formats right now.
3. In your SAML Identity Provider, set up Attribute Mappings
CSE requires your IDP’s returned SAML assertion to contain attributes can be mapped to a user’s Email, Username, and Groups.
Configure that mapping in this step, and take note of the names for the Email Attribute, Username Attribute, and Groups Attribute.
Every user must have an email address. CSE uses the email as a key user identifier. If a user has no email value populated in your IdP, the SAML assertion’s Email Attribute resolves to nothing and that user cannot be authenticated to CSE — sign-in (including one-time-passcode) attempts will fail. Confirm that every user who needs access has an email address populated in your IdP before rolling out.
4. Assign the “CSE TrustProvider” SAML App to be accessed by everyone
Allow CSE to federate authentication of all users in your organization to your SAML IDP.
You still need to apply Policies in the Command Center to manage which users can access specific internal applications.
5. From the CSE TrustProvider app in your SAML IDP, take note your SSO URL and download the Certificate
Note down the data you need to enter in the next step.
6. Save the SAML 2.0 IDP fields in the Command Center
6.1 Return to the Identity Provider page in the Command Center (Settings > Identity and Access tab > End User tab) and enter the CSE TrustProvider App parameters from your SAML IDP:
- IDP SSO URL (from Step 5)
- Entity Issuer (Optional) If set, the entity issuer value will override SSO URL as the required audience.
- IDP CA Certificate (from Step 5)
- Username Attribute (from Step 3)
- Email Attribute (from Step 3)
- Groups Attribute (from Step 3)
- Groups Delimiter – Do not use this field. Entering an incorrect value may lead to configuration errors and behaviour issues. Please contact CSE Support for assistance.
6.2 Select Update Identity Provider Config to save the settings.
That’s it! You have successfully integrated your SAML IDP to manage your directory of users in CSE.