SonicWall Capture Client Integration
- Last validated: Jul 23, 2026
- 7 minutes to read
-
Contributors

- Capture Client Overview
- Prerequisites
- Steps to Set Up Capture Client Integration
- SentinelOne Trust Factors
- Configuring Factors
Capture Client Overview
SonicWall Capture Client (CC) is an Endpoint Detection and Response (EDR) platform that collects device telemetry data to determine if a device is in a compromised state. SonicWall integrates with Capture Client to obtain device information unique to the EDR platform.
Prerequisites
-
A Capture Client license.
-
Desktop app version 3.3 or greater.
-
Capture Client Agent sensor must be present on the device.
Steps to Set Up Capture Client Integration
Step 1: Add the integration
1.1 Navigate from Trust > Integrations.
1.2 Select Add Integration.
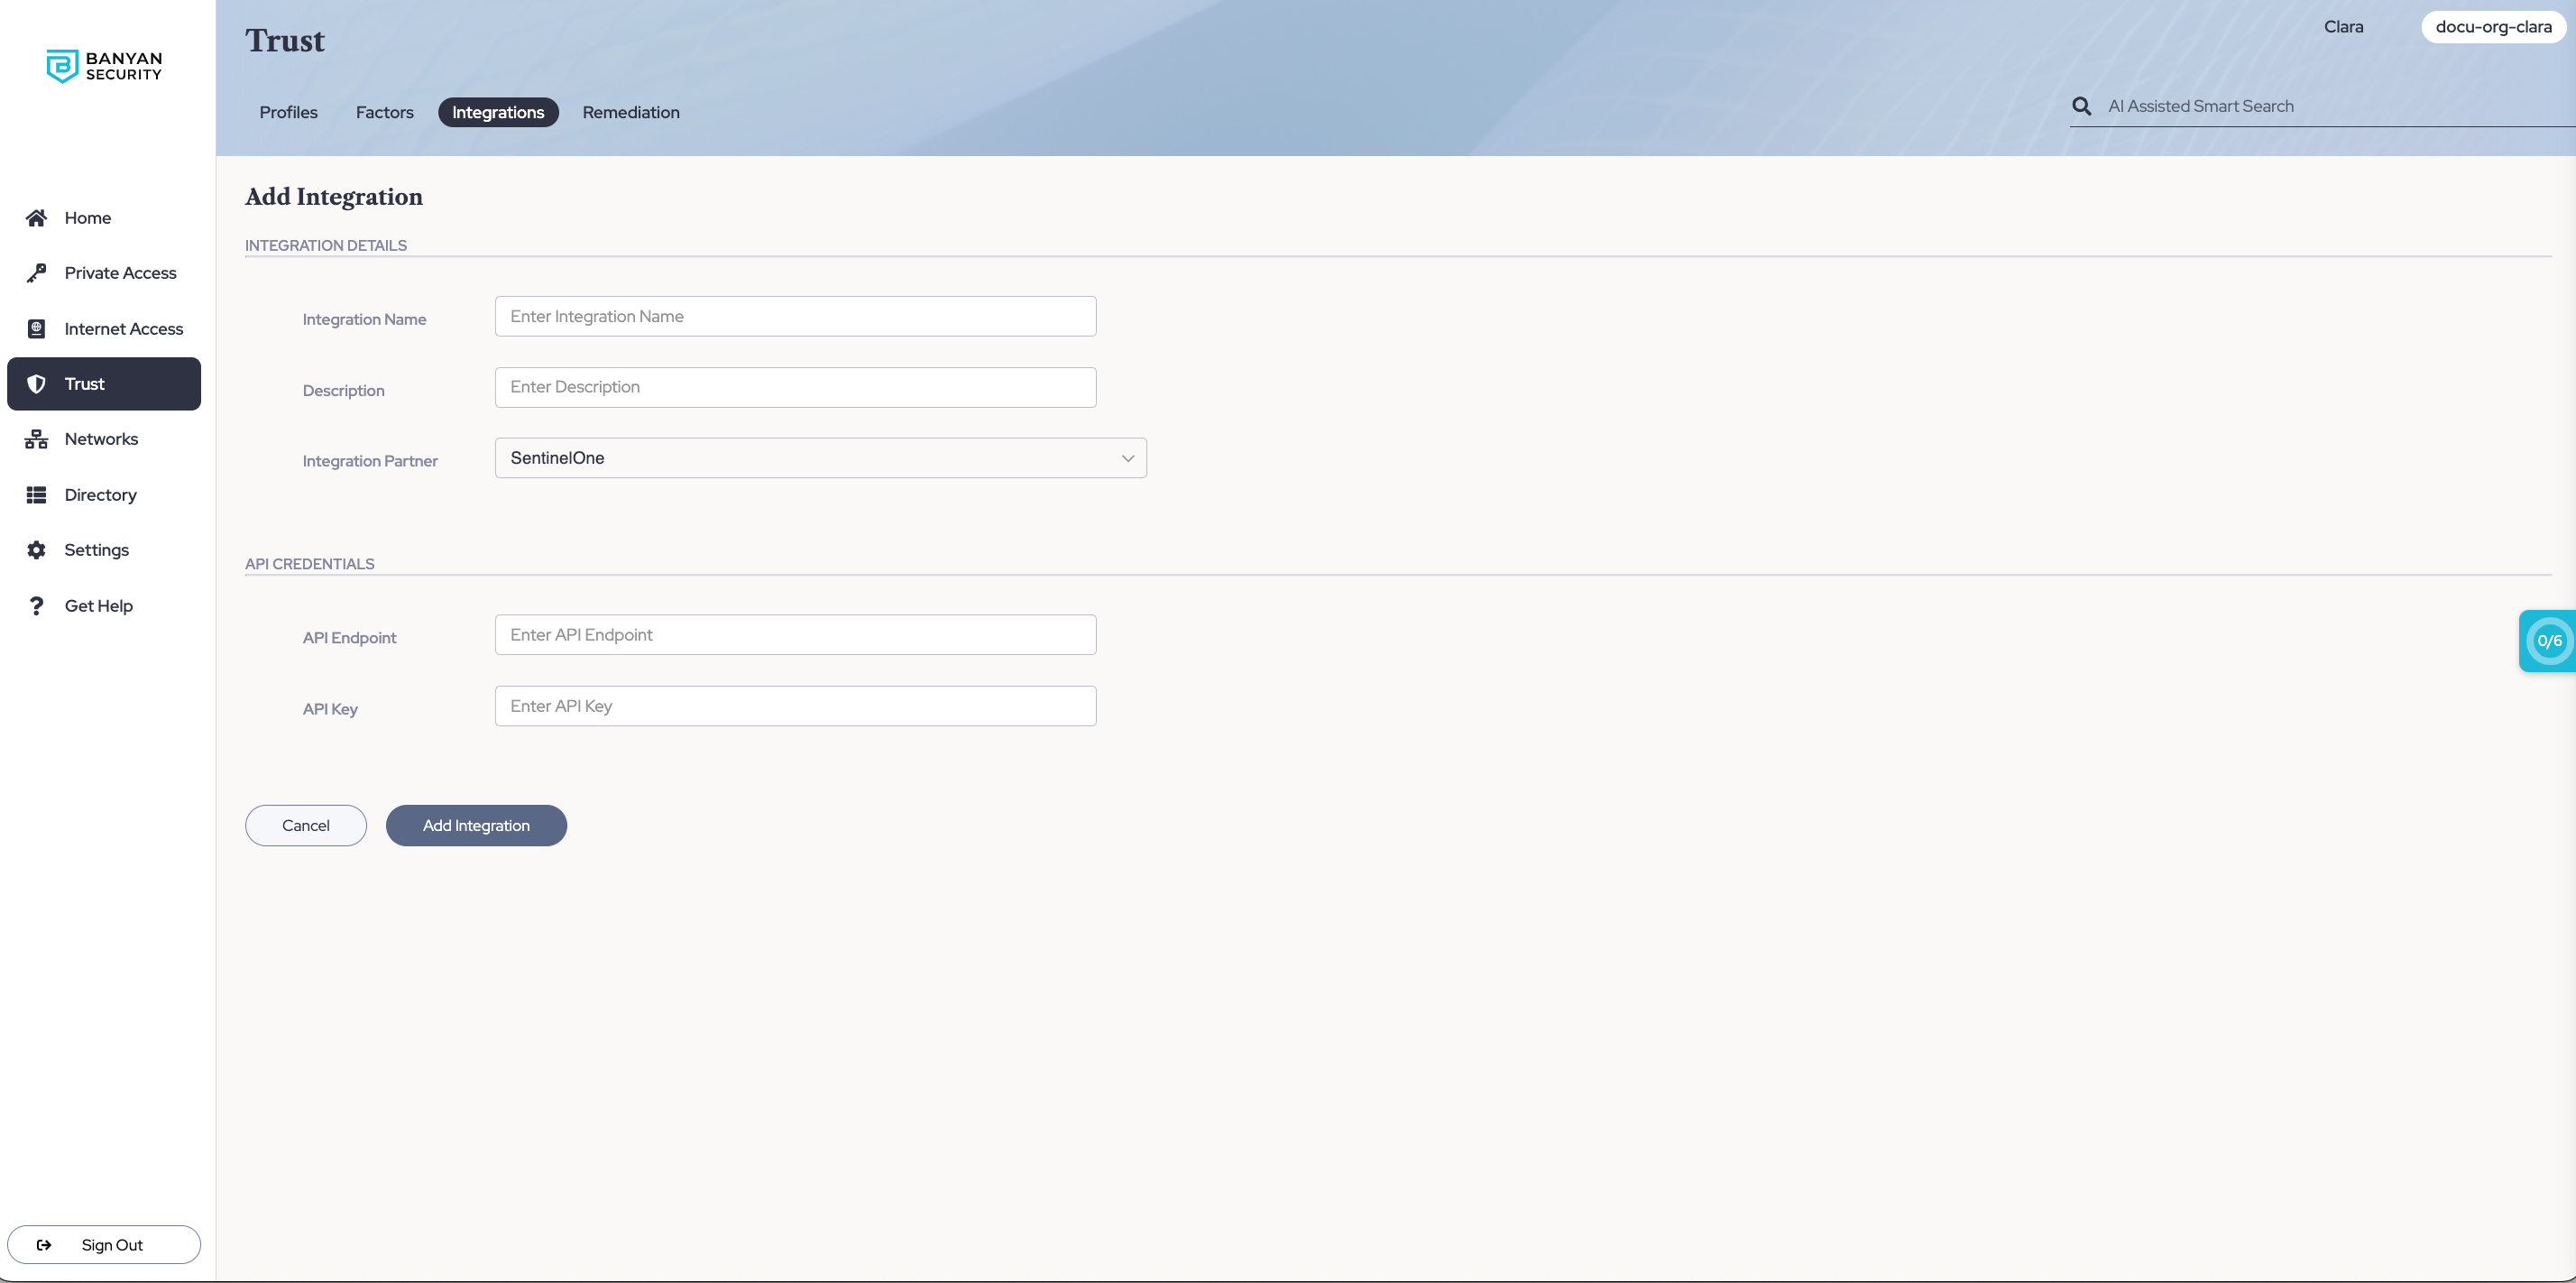
1.3 Select SentinelOne as your Integration Partner.
Note: Capture Client integration relies on the SentinelOne Integration partner selection.
Step 2: Enter integration details
2.1 Enter a recognizable name in the Integration Name field.
2.2 Optional: Provide a description of the Capture Client tenant being integrated.
Step 3: Enter API details
3.1 Enter the API endpoint that applies to you:
NOAM - https://sonicWall.sentinelone.net
NOAM MDR - https://sonicwall-mdr.sentinelone.net
EMEA - https://euce1-sonicwall.sentinelone.net
EMEA MDR - https://euce1-sonicwall-mdr.sentinelone.net
3.2 Enter the API Key. Obtain this from your SonicWall rep.
Step 4: Test the connection to add the integration
In order for an integration to be added in SonicWall, a successful test connection must be completed. At least one operating system (per factor) must be selected in order to save the integration.
4.1 After a successful test connection, the Add Integration button will become available.
4.2 Select Add Integration to save the configuration.
Optional: Editing the Integration
To edit the Capture Client integration, complete the following steps:
1. Select the Integration Name that matches the integration you need to change.
2. Select the pencil icon in the top corner of the integration details page.
3. Make any desired changes in the configuration fields.
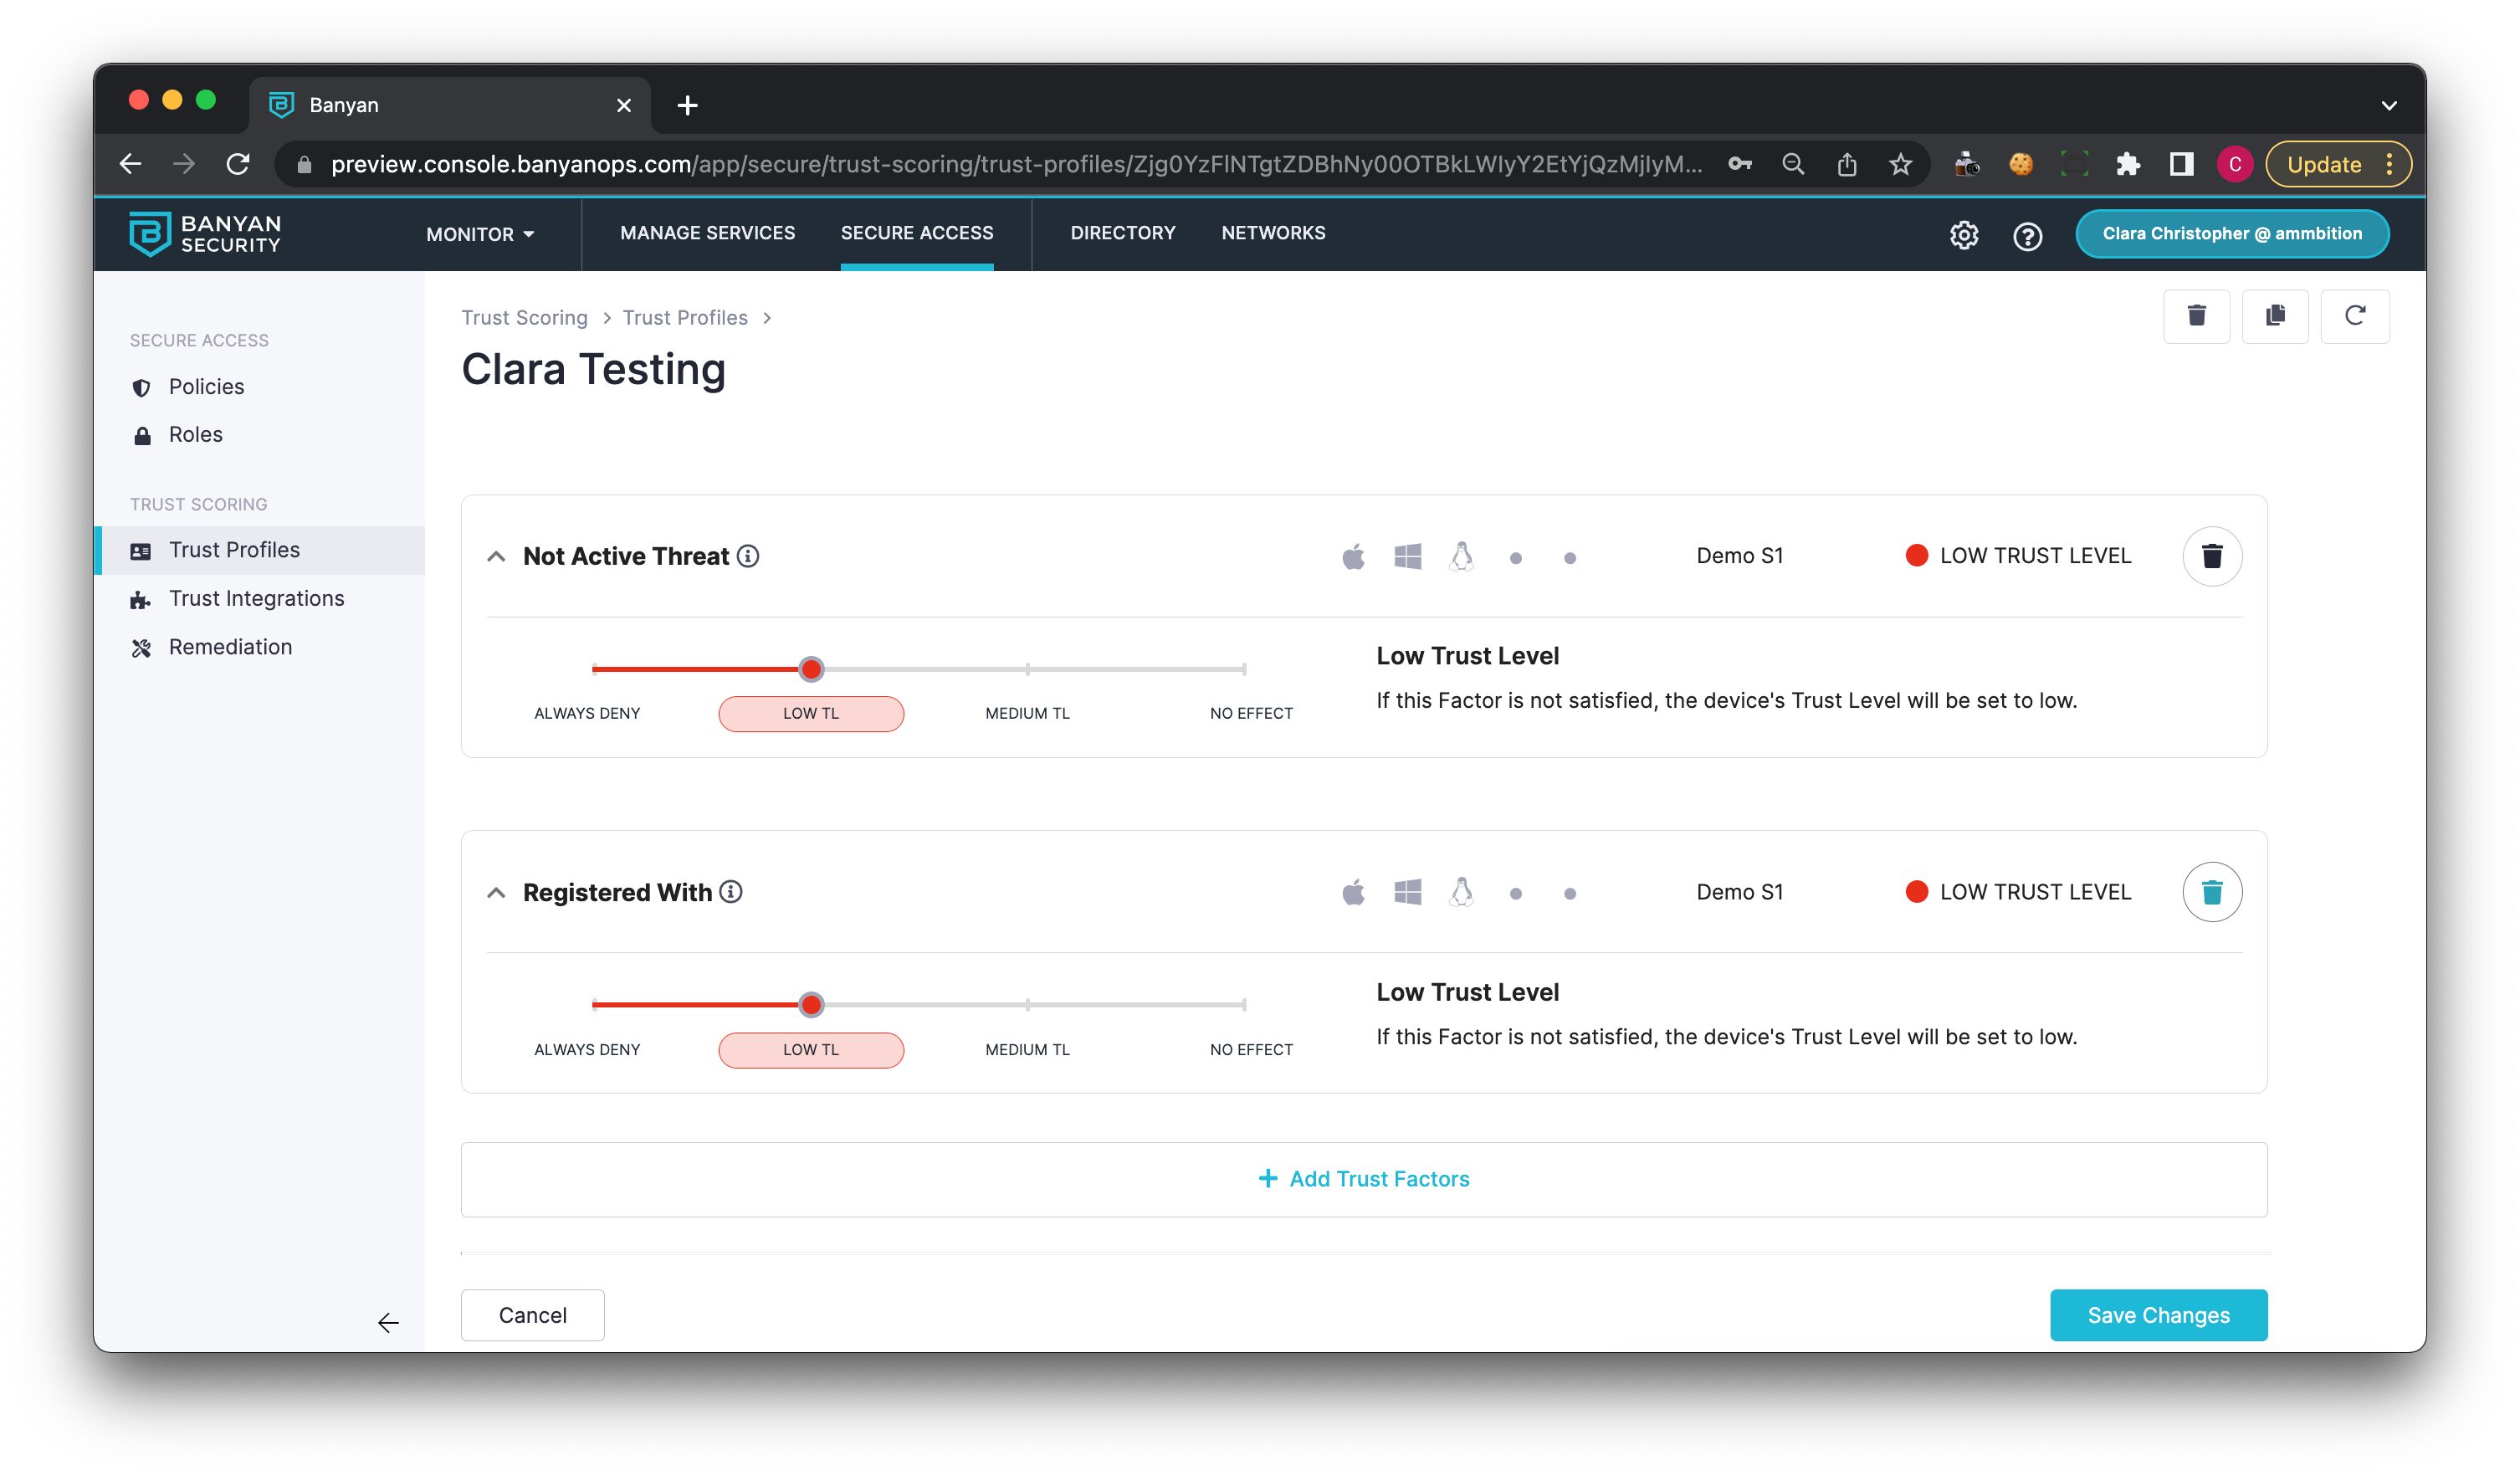
SentinelOne Trust Factors
Registered With
The Registered With factor validates that the device is registered with the SentinelOne environment. Registered With is a boolean (true/false) factor and is derived from the following SentinelOne API endpoint:
/web/api/v2.1/agents
The Registered With factor is satisfied if CSE receives a valid response from the endpoint above. This response is based on the SentinelOne agentID, which is reflected on the CSE app.
Not Active Threat
The Not Active Threat factor validates that the device does not contain any active threats, as defined by SentinelOne. Not Active Threat is a boolean (true/false) factor and is derived from the following SentinelOne API endpoint:
/web/api/v2.1/agents
The key value CSE reviews to determine Not Active Threat status is activeThreats, as shown below:
...
"externalId": "string",
"threatRebootRequired": "boolean",
"id": "225494730938493804",
"activeThreats": 3,
"serialNumber": "string",
...
Configuring Factors
SentinelOne factors follow CSE’s device Trust Scoring model.
Adding or Removing a SentinelOne Factor
-
To add or remove a SentinelOne factor, navigate to Profiles under Trust.
-
Select the relevant Trust Profile, and add or remove the integration factor.
Configuring Remediation for a SentinelOne Factor
Remediation settings for SentinelOne factors follow CSE’s model for configuring remediation messages.
To see the remediation messages for SentinelOne factors, add the integration first. Given that there can be multiple SentinelOne integrations, each factor listed on the Remediation page contains the name of the SentinelOne instance next to the factor name.