Multi-domain (aka Wildcard) TCP Services
- Updated on
This article describes Cloud Secure Edge’s Multi-domain Services capability, which uses Backend SNI Routing, for managing multiple TCP services. With the release of Netagent v1.27.1 in August-2020, this technique has been superseded by CSE’s Tunnelling to a Collection of Services capability, which uses HTTP Connect Tunnelling.
Overview
Following zero trust principles, Cloud Secure Edge (CSE) enables security policies to be applied at the granularity of a single Service, or even individual Resources (such as APIs) under that Service. This means TCP services are typically defined individually, a single domain at a time. For example, you might configure an individual TCP service at server1.tcp.example.com and server2.tcp.example.com, and define a policy to precisely specify which users and devices that can access those services.
However, organizations often maintain and manage multiple services, sometimes thousands, at a time. While some services require a unique set of access restrictions, many of them require identical access restrictions. Rather than configure each service individually, you can group them and configure via a single service definition.
You can create multi-domain services using the wildcard (“*”) notation to create a single service definition that will apply to all the subdomains of a top-level domain. For example, you can create a wildcard TCP service at *.tcp.example.com, which will include all sub-domains of tcp.example.com, including server1.tcp.example.com, server2.tcp.example.com, etc.
How It Works
Cloud Secure Edge (CSE) seamlessly extends its existing standards-compliant Mutually Authenticated TLS (MTLS) for individual TCP services to multi-domain TCP services.
There are three additional standards-compliant technologies CSE leverages to enable multi-domain services:
CSE leverages standard Domain Name System (DNS) wildcarding features to simplify network settings needed for multi-domain services. To route traffic for your multi-domain service, you need create a wildcard DNS A Record or CNAME pointing to your CSE Enforcement Component.
For example, if you need to serve two multi-domain services at *.web.example.com and *.tcp.example.com via a CSE Netagent with IP address 1.2.3.4, you only need to configure a DNS A Record for *.example.com, pointing to 1.2.3.4.
CSE automatically generates a wildcard server certificate for the wildcard domain when you define a multi-domain service. Since wildcard certificates are prone to misuse it is important to use stringent security measures when issuing and storing them. CSE automatically rotates the wildcard server certificate every 24 hours. Further, Netagent only stores the server certificate in memory so it cannot be extracted even if a host is compromised.
CSE leverages the standard Server Name Indication (SNI) extension to TLS to identify which individual domain within a multi-domain service definition a client needs to connect to.
Netagent parses the “frontend” domain name it receives in the SNI request, and uses a simple templating system to map it to individal “backend” service it needs to route the traffic to.
When you define a multi-domain service (such as, *.tcp.example.com), you also need to configure specific routing rules in the HostedService Spec. The BackendTarget section in the Spec specifies how Netagent should route the traffic to the specific individual service the client needs to access.
{{ .Name }} and {{ .Domain }} variables when you specify the Backend location for your multi-domain service, and Netagent will automatically populate those fields based on the incoming frontend connection. For more advanced use cases, you can set a NameDelimiter and use the generated {{ .Parts }} array. For example, if you have a multi-domain service *.web.example.com, with the BackendTarget.Name set to {{ .Name }}.internal. Then, a client request to site1.web.example.com will get automatically routed to site1.internal.
Steps
To configure multi-domain TCP services in the Command Center:
1. Navigate from Private Access > Infrastructure, and select + Register Service. Select the option Other TCP Service.
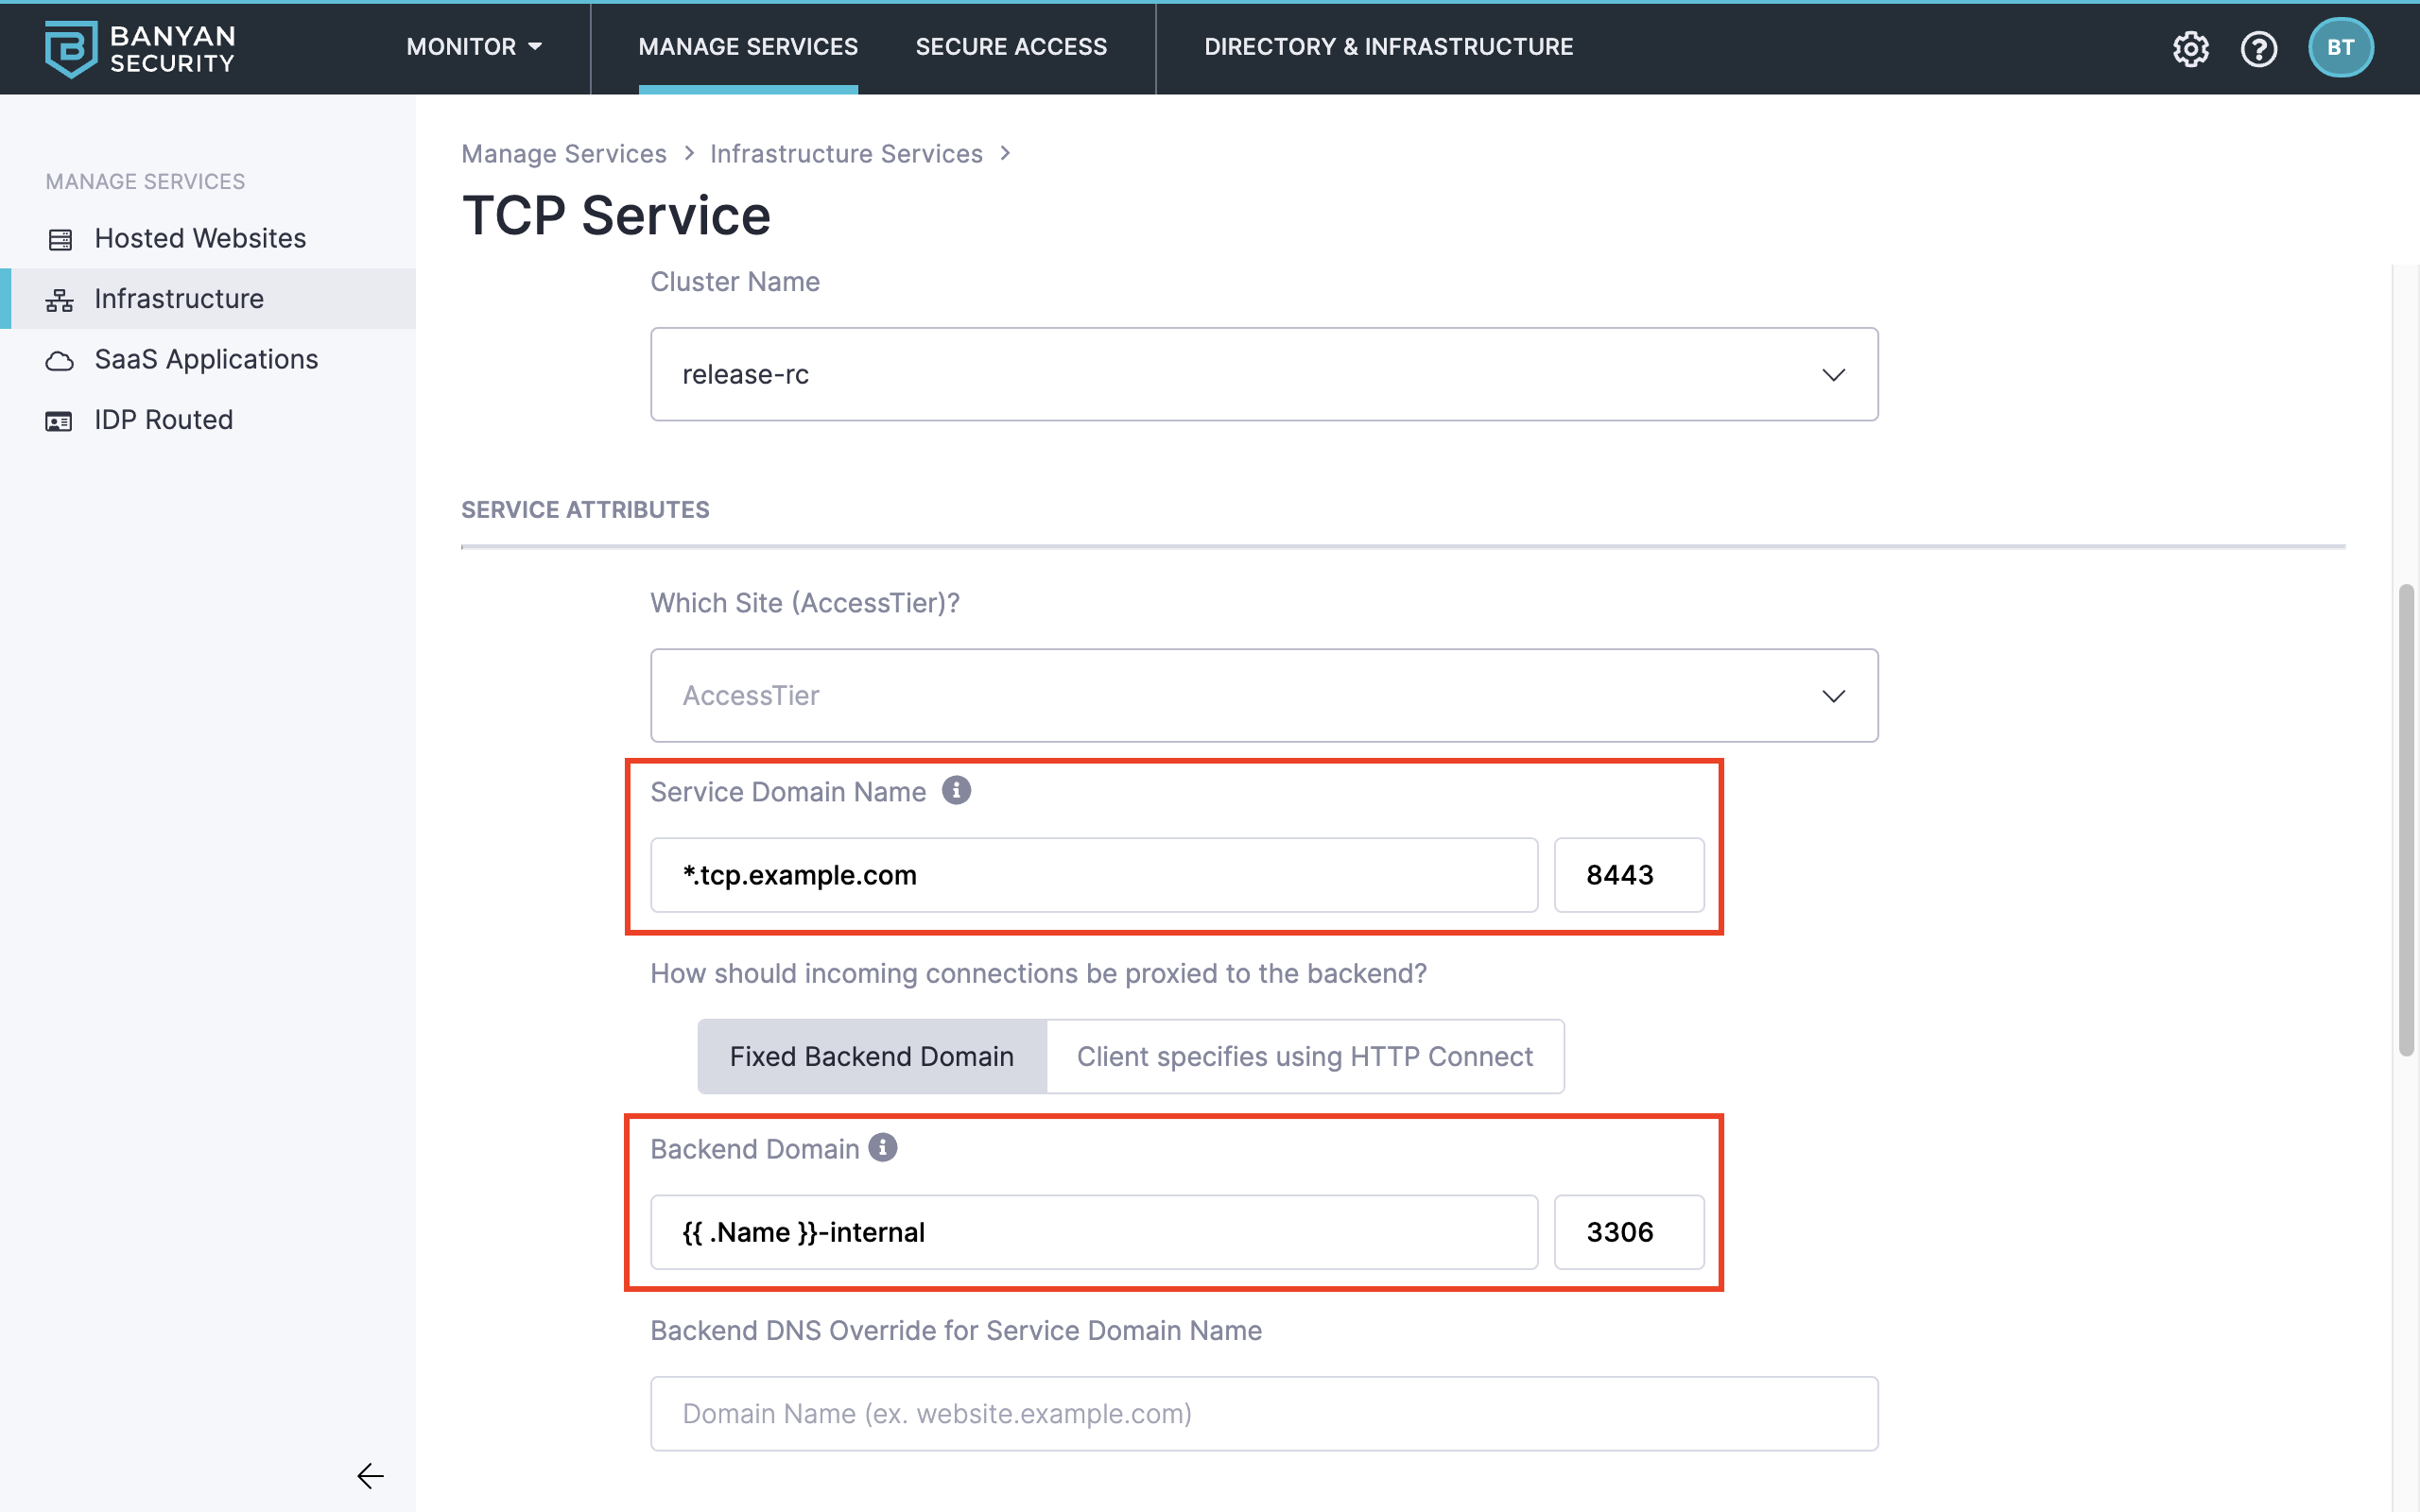
2. On the service registration page, configure all applicable fields and ensure Service Domain Name contains the wildcard subdomain for your organization (such as *.tcp.example.com), and the appropriate Backend Domain with routing as needed.
In the app, end users will see a single entry per wildcard TCP service. Once they click into the Service details view, they can enter the specific Subdomain they wish to access and hit Connect. Selecting Connect will launch banyanproxy and connect to their TCP service.
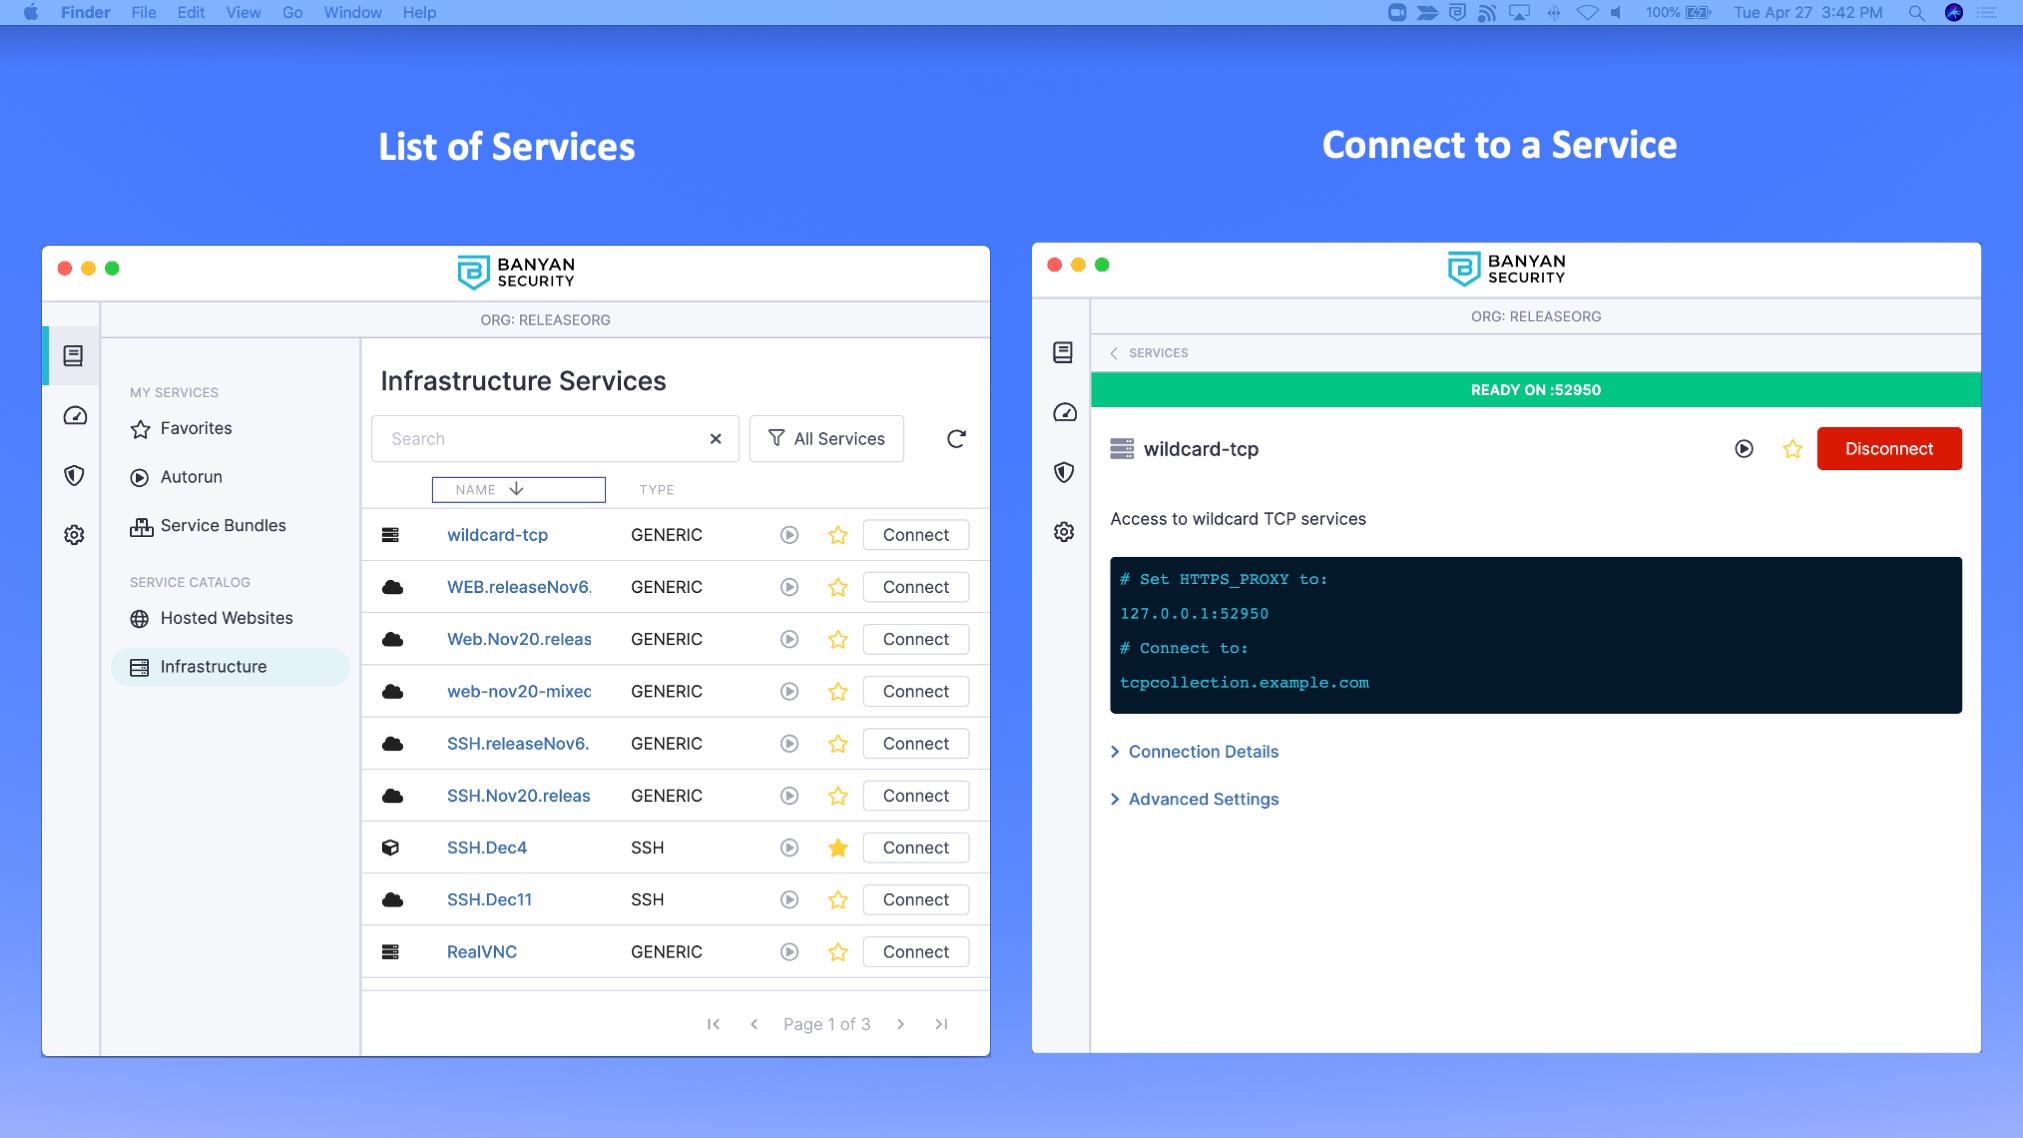
The end user needs to configure their TCP client to connect to the specified address on localhost, and they will be able to securely connect to their service.