Use IP Allowlisting to enforce zero trust policies for specific SaaS Applications integrated with Okta
Use Network Zones and Sign-on Policies in Okta to ensure use of a Service Tunnel when authenticating to a SaaS Application like Salesforce
- Last validated: Aug 3, 2026
- 5 minutes to read
-
Contributors

Overview
These steps outline how to use Network Zones and Sign-on Policies in Okta to require a user to have a Service Tunnel established in order to authenticate to the specified SaaS application(s). The result is that traffic to a protected SaaS application is only honored when it originates from a CSE Access Tier IP, so a user who is not connected through the Service Tunnel cannot reach the application even with valid credentials. This enforces a zero trust posture for applications that Okta federates.
Doc status: CSE-side steps reviewed 2026-06-29. The third-party IdP console steps follow the vendor’s own documentation and should be confirmed against the live admin console, which can change without notice.
Prerequisites
- An Okta admin account with permission to manage Networks and application Sign-On Policies.
- A CSE Service Tunnel that your users connect through.
- The SaaS application(s) you want to protect integrated with Okta.
Values to exchange
This integration does not exchange SAML or OIDC metadata; it coordinates two values between CSE and Okta. Use the values already established in your environment.
| Value | Source | Used in |
|---|---|---|
Okta authentication domain (e.g., CSEsecurity.okta.com) |
Okta | CSE Service Tunnel public-domain configuration (Step 1.2) |
| Access Tier IP address(es) | CSE | Okta IP network zone Gateway IPs (Step 2.4) |
Steps
Step 1: Register a Service Tunnel for Public Domains
This step routes traffic destined for the Okta authentication domain through the CSE Service Tunnel, so that authentication requests egress from a known Access Tier IP address.
1.1 Register a Service Tunnel for Public Domains.
1.2 Configure the Service Tunnel to include the relevant Okta domain used for authentication (e.g., CSEsecurity.okta.com).

Step 2: Create a new network zone in Okta
This step defines, inside Okta, the set of Access Tier IP addresses that represent “connected through the Service Tunnel.” The zone is later referenced by the sign-on policy to permit only this trusted source range. The Okta console screens below are owned by Okta; refer to Okta’s network zone documentation as the source of truth for the current UI.
2.1 Create a network zone for the Access Tier(s).
2.2 In the Okta Admin Console, navigate from Security > Networks. From the Add Zone dialog, select IP Zone.
2.3 In the Zone Name field, enter a name for the IP zone (e.g., CSE Service Tunnel).
2.4 In the Gateway IPs field, enter the IP Address(es) of the relevant Access Tiers
Note: You can separate IPs and IP ranges with a new line or a comma.
2.5 Select Save.
Step 3: Update sign-on policy for all relevant applications
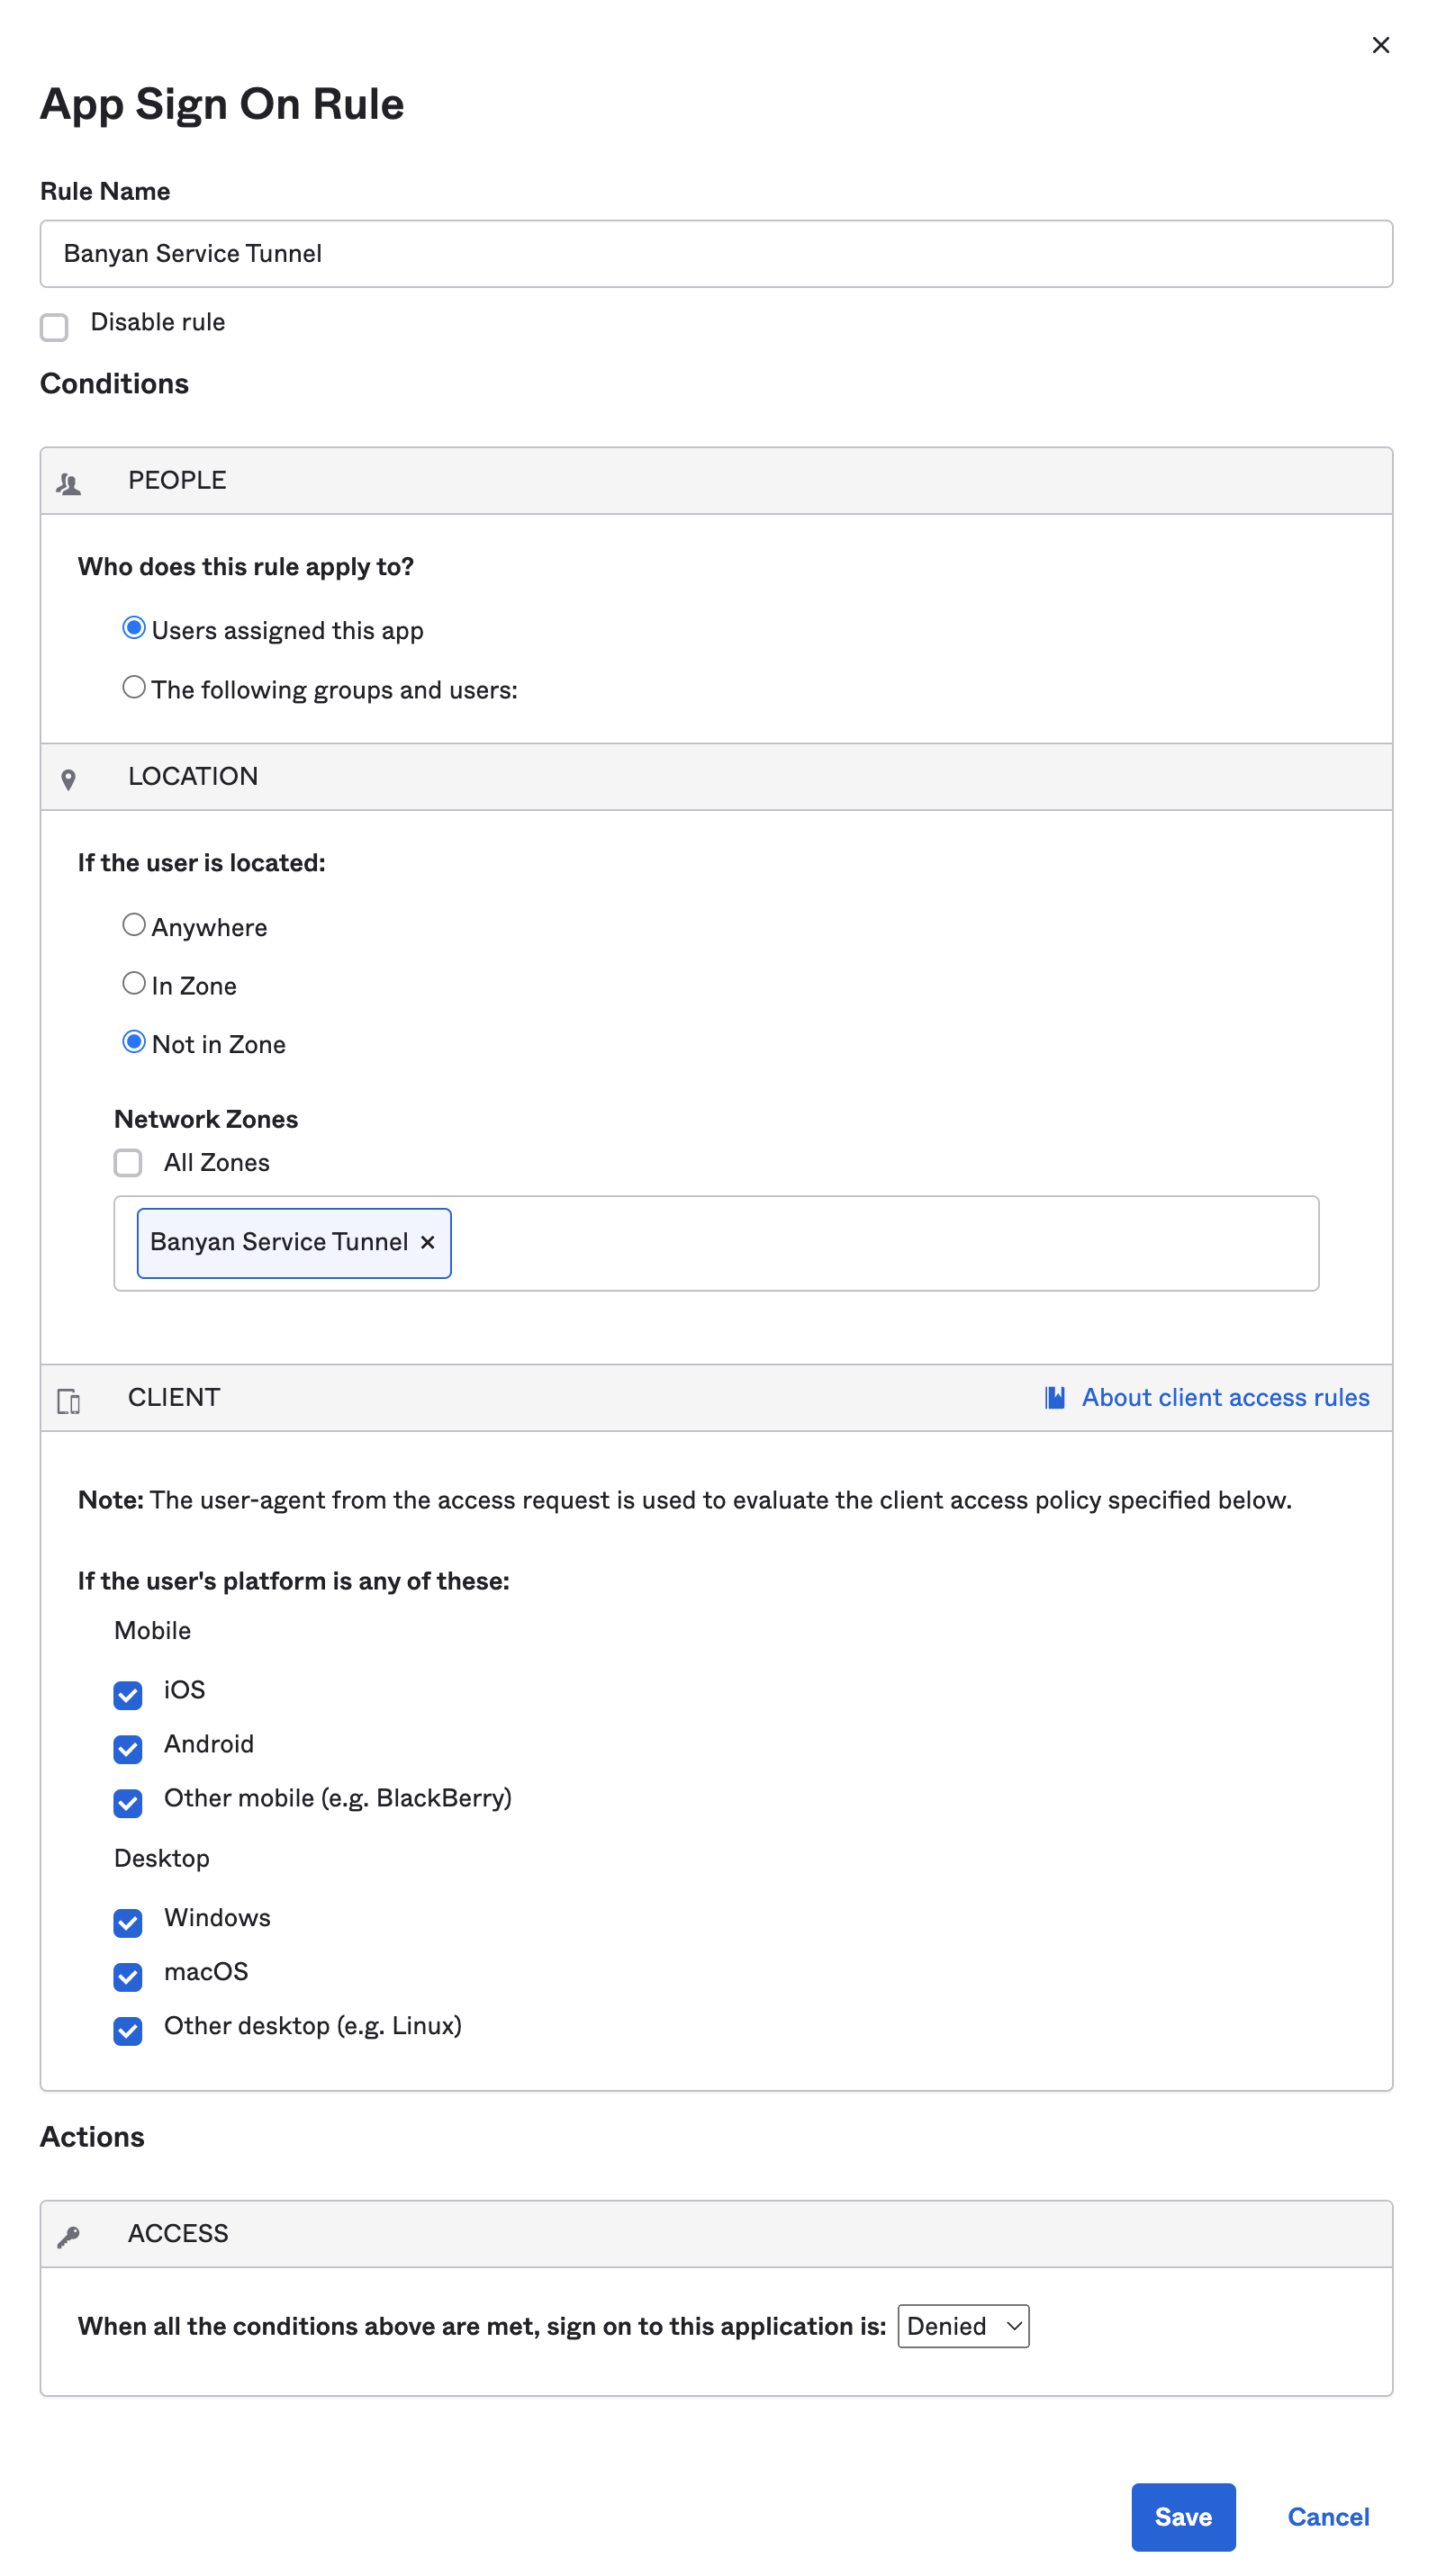
Configure an app sign-on policy to require a Service Tunnel to be registered before authenticating to specific SaaS application(s). This step ties the network zone to the protected application, so that access is denied whenever the request does not originate from the CSE Service Tunnel zone. The sign-on policy screens are owned by Okta; refer to Okta’s app sign-on policy documentation as the source of truth for the current UI.
3.1 In the Okta Admin Console, navigate from Applications > Applications. Select the desired application.
3.2 Select the Sign On tab, and scroll down to the Sign On Policy section.
3.3 Create a Sign On rule, by which sign on to the application is denied if the user is not located in the CSE Service Tunnel zone.
Expected Behaviour
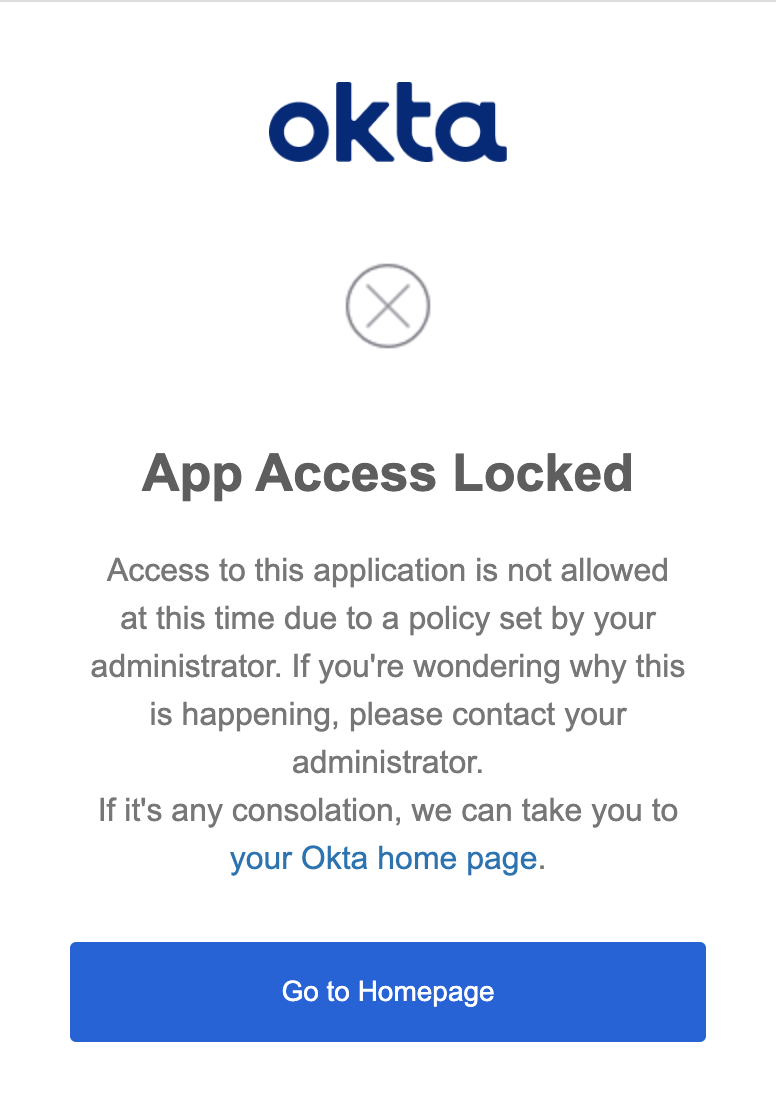
If the user DOES NOT have the Service Tunnel connection established, the user will receive an error message indicating that App Access is Locked. In addition, the user will be denied access from launching the application from the Okta End User Dashboard.
Error during SP-init flow: