Publish a Service Tunnel
How to configure a Service Tunnel and then publish it to end users so that they have connectivity to private network segments
- Last validated: Jul 15, 2026
Service Tunnel Overview
Historically, workers had to be onsite to access resources within a corporate virtual private network (VPN). Workers could be authenticated (i.e., it could be verified that they were who they said they were), and, once authenticated, they could access any of the private resources contained within the corporate network; nothing left the bounds of the network.
Today, with distributed data centres and data in the cloud, anyone can access log-in portals that stand in front of protected resources. Anyone, then, can attempt to gain access to these protected resources; so long as the user is authenticated, they are granted access. But there’s no way to verify that users who have gained access to a VPN are authorized to access (all or a subset of) the private resources within the network.
Service Tunnel accounts for this lost authorization aspect: it offers a built-in continuous authorization functionality. So, users who may be attempting to access protected resources from one IP, and then from another IP, are authorized on each access attempt. In these authorization events, Service Tunnel evaluates whether the user role and device Trust Level align with the Service Tunnel’s pre-defined access policy.
This doc lays out the steps required to configure a Service Tunnel in your organization, so that your end users can securely access protected resources. These configuration steps are applicable to orgs on any deployment model (i.e., the Private Edge or the Global Edge).
Prerequisites
- Private Edge: An Access Tier installed in a network segment which can communicate with the internal subnet you need to connect to
- Global Edge: A registered Connector installed in the private network segment you need to connect to (see Install the Connector)
Set Up
General Information
-
If your org is on a Global Edge deployment, you will see a Global Edge network inside your Service Tunnel configuration (permanently); if you don’t add any configurations to the Global Edge Network, no data will flow through the Global Edge, but it will still appear, since your org is enabled for the Global Edge.
-
If your org is on a Private Edge deployment (i.e., you have a self-hosted Access Tier set up in your private environment), you will be able to select that Access Tier as a network to configure traffic routing through that Access Tier.
-
You can have both Private and Global Edge deployments within the same Service Tunnel: Private Edge is useful when admins need to track the traffic from an end user’s device via their own data center; if admin wants SonicWall Cloud Secure Edge (CSE) to do the tracking (via IP allowing/blocking), Global Edge is useful.
Selecting Networks
-
Admins can select from Access Tiers and/or Connectors as networks.
-
If a Connector is selected, it will be populated within the Global Edge Network container.
-
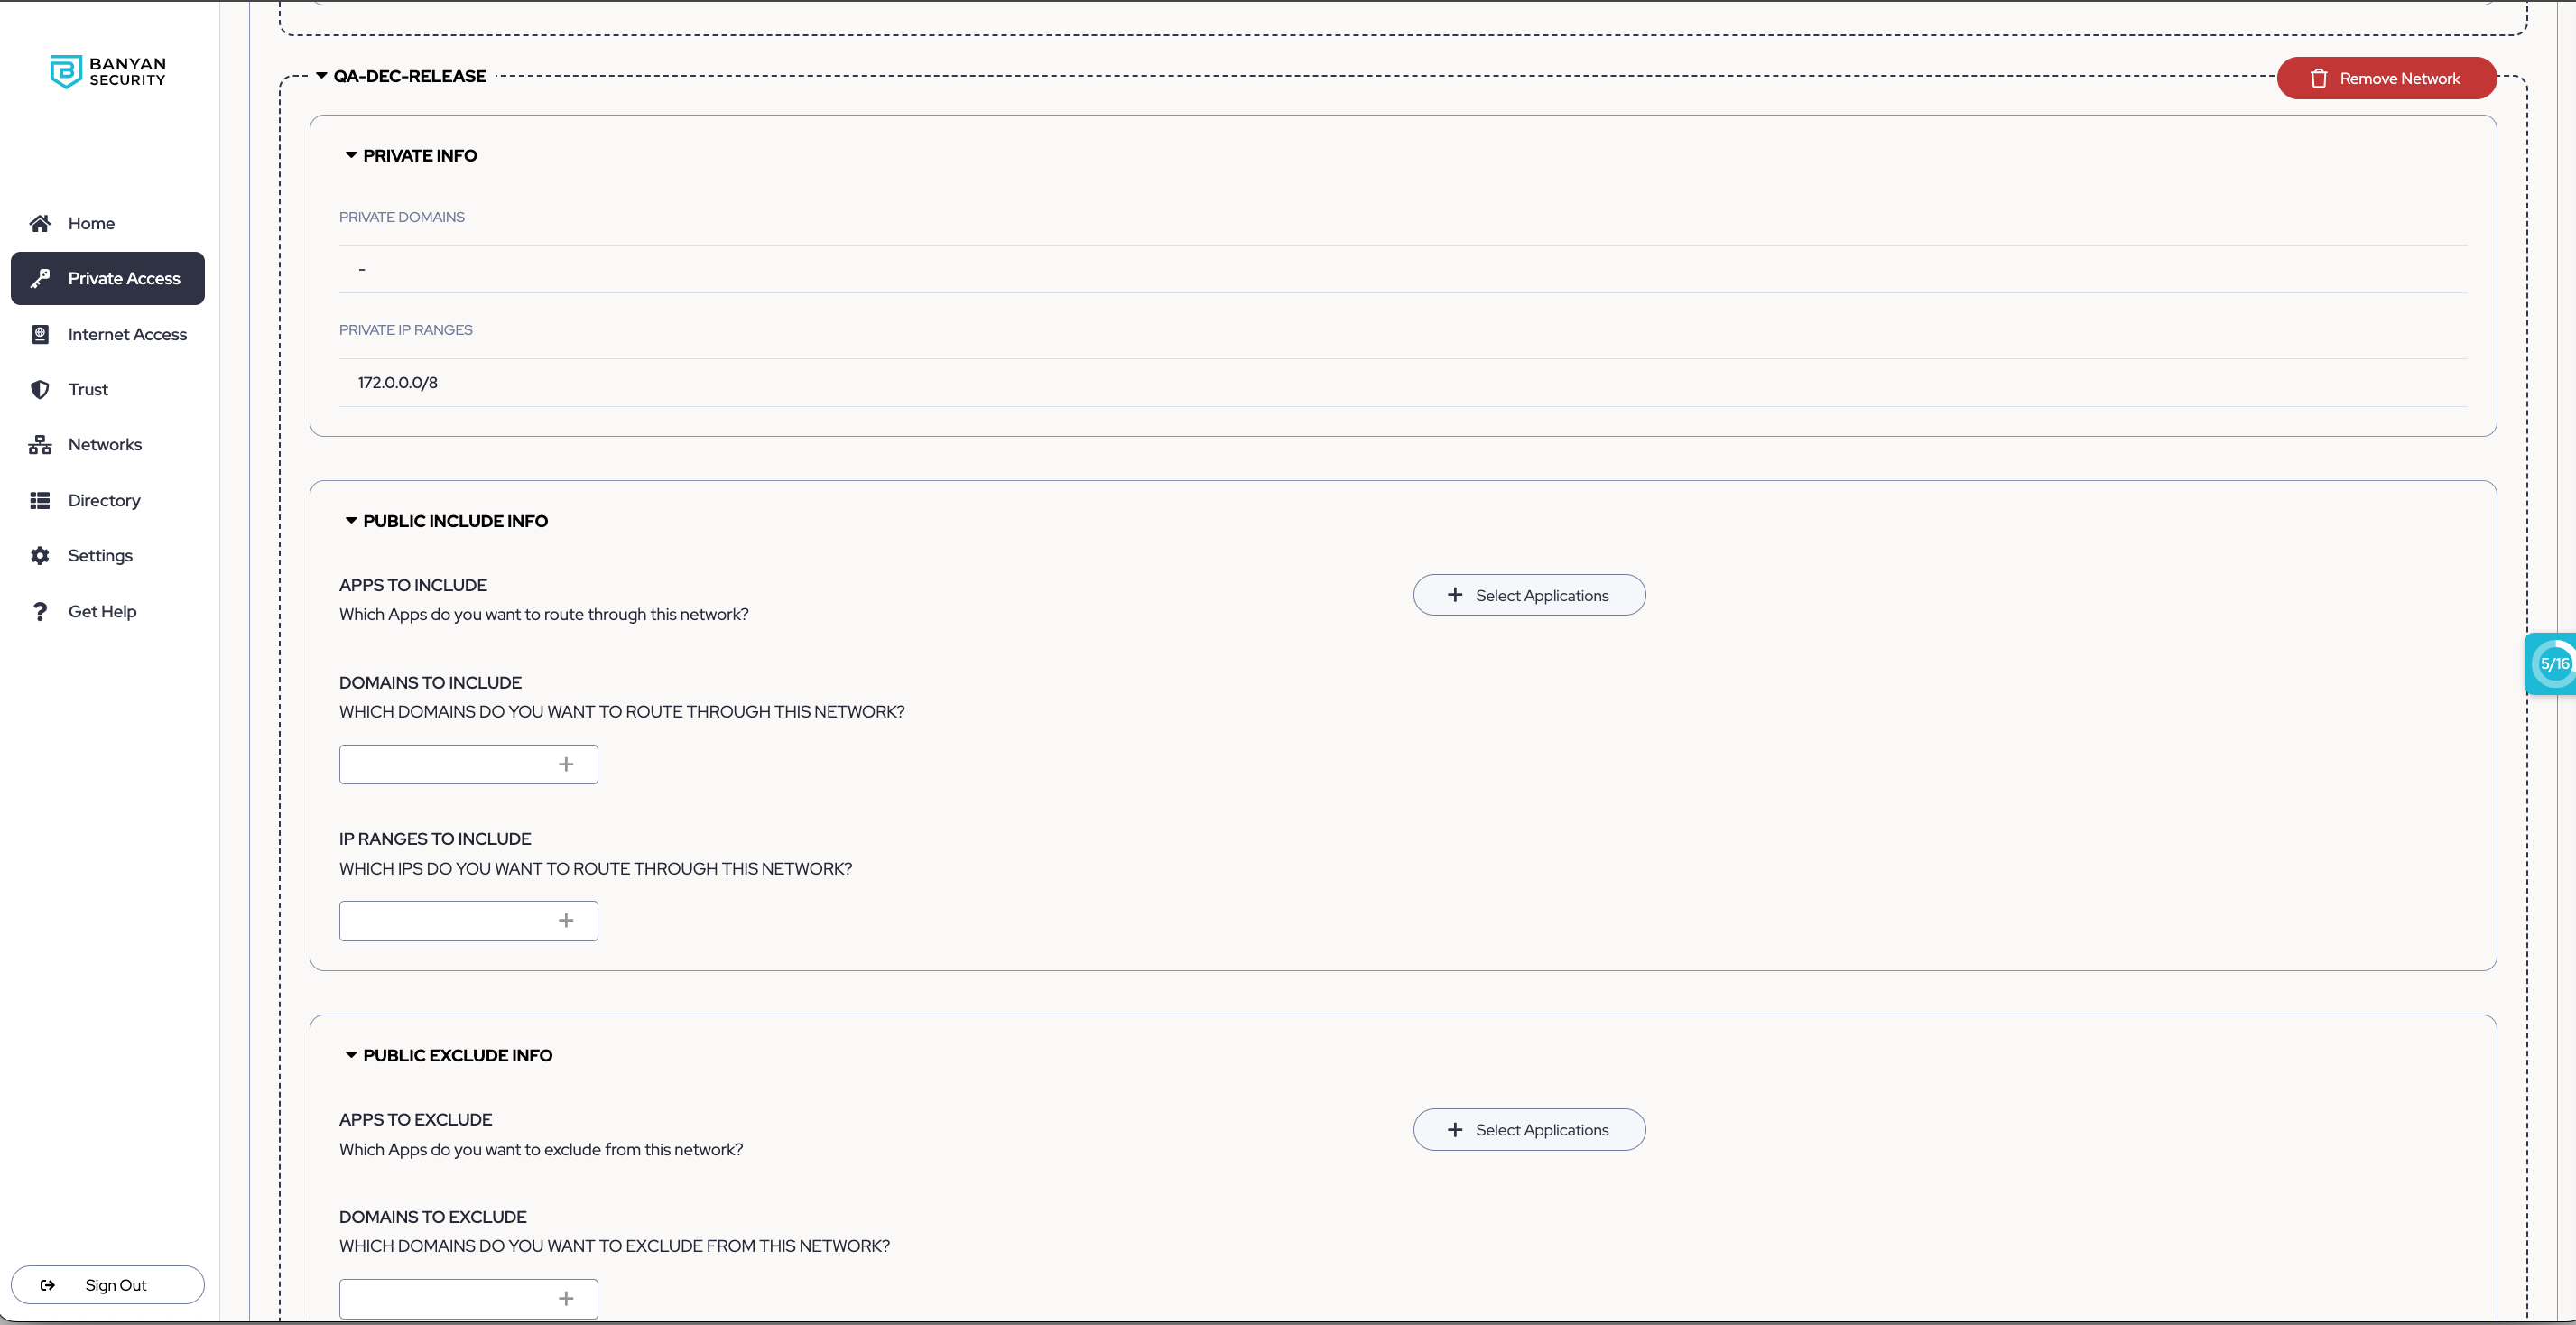
If an Access Tier is selected, it will be populated within its own container named after the selected Access Tier.
Global Edge Routing
-
Any public traffic (e.g., apps, domains, or IPs) will only route through our Global Edge Network or your Connector, if your Connector is configured to route to public IP addresses.
-
When an end user connected to the Service Tunnel tries to access private resources, IPs, or domains, their traffic will be routed to a Connector that services the relevant IP/domain.
-
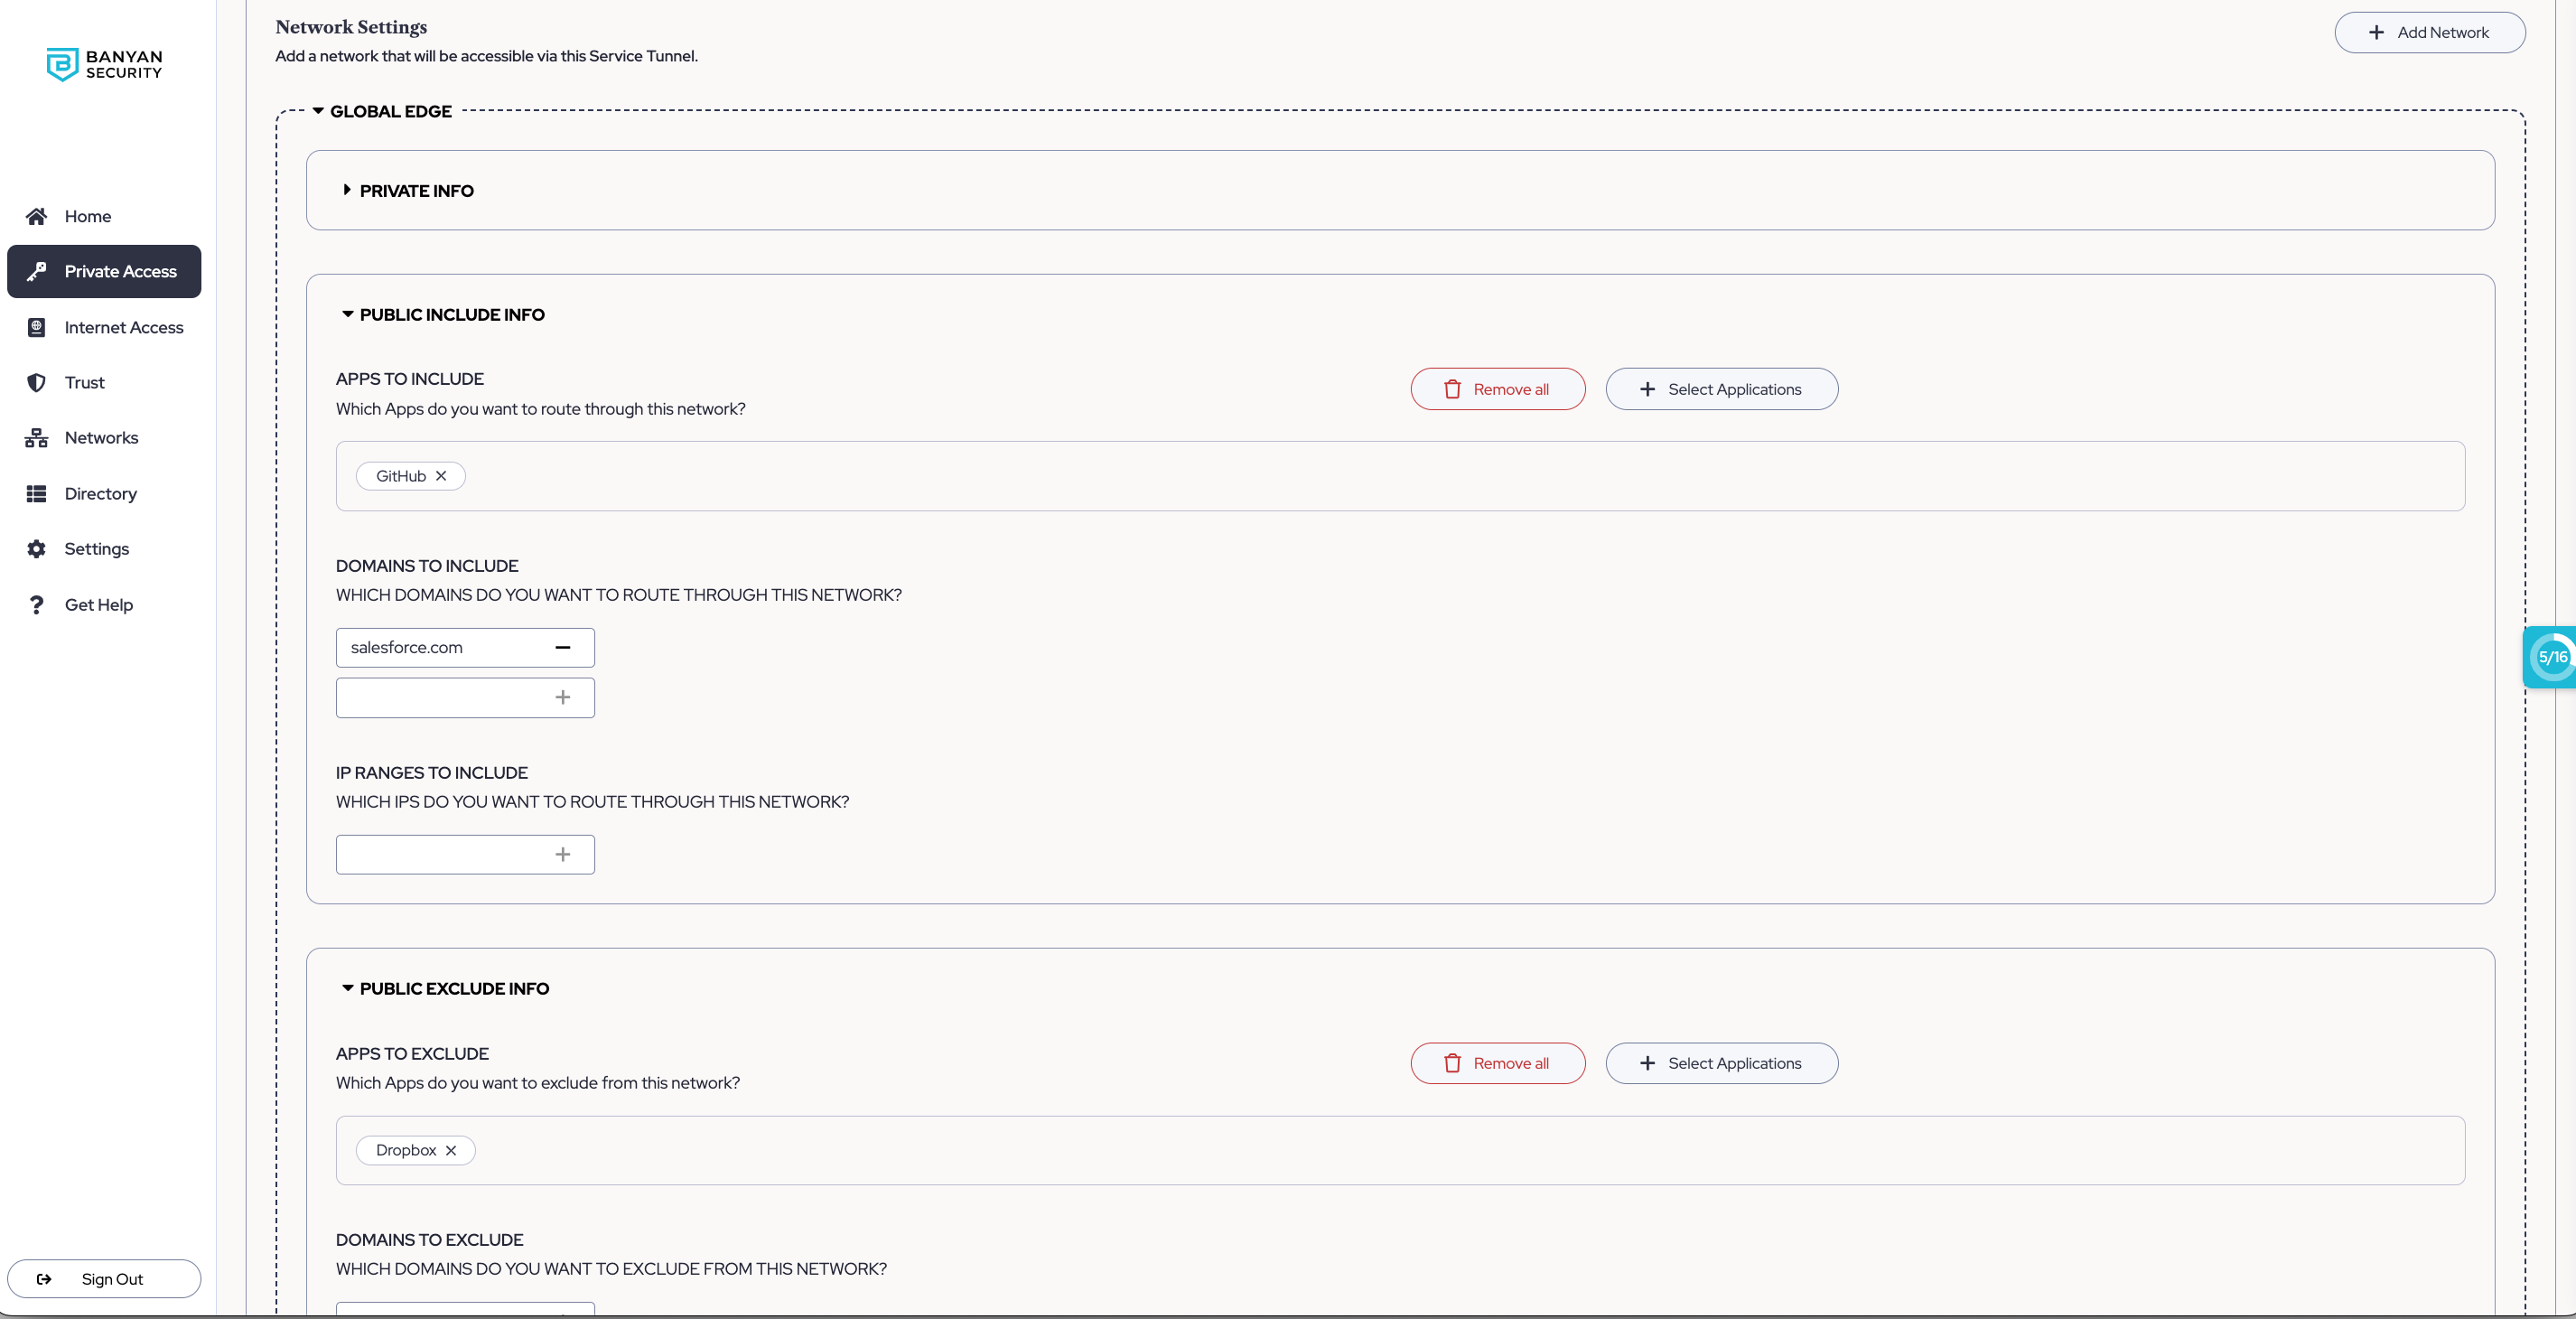
By default, all public traffic is excluded from the Service Tunnel: When public apps, domains, and IP ranges are included, they are routed via the Service Tunnel; when public apps, domains, and IP ranges are excluded, you are delineating a subset of the included public apps, domains, or IP ranges that you want to exclude - or block the Service Tunnel from routing to.
Steps to Publish a Service Tunnel
Set up a Service Tunnel to your private network segment in the following steps.
Step 1: Create a Tunnel Policy
Access Policies can be applied to your Service Tunnel. Access Policies that are applied to Service Tunnels specifically are called Tunnel Policies. When applied, these policies enforce authorization rules that specify which clients and what corresponding Trust Level can access protected corporate resources.
1.1 Navigate from Private Access > Access Policies > + Create Policy.
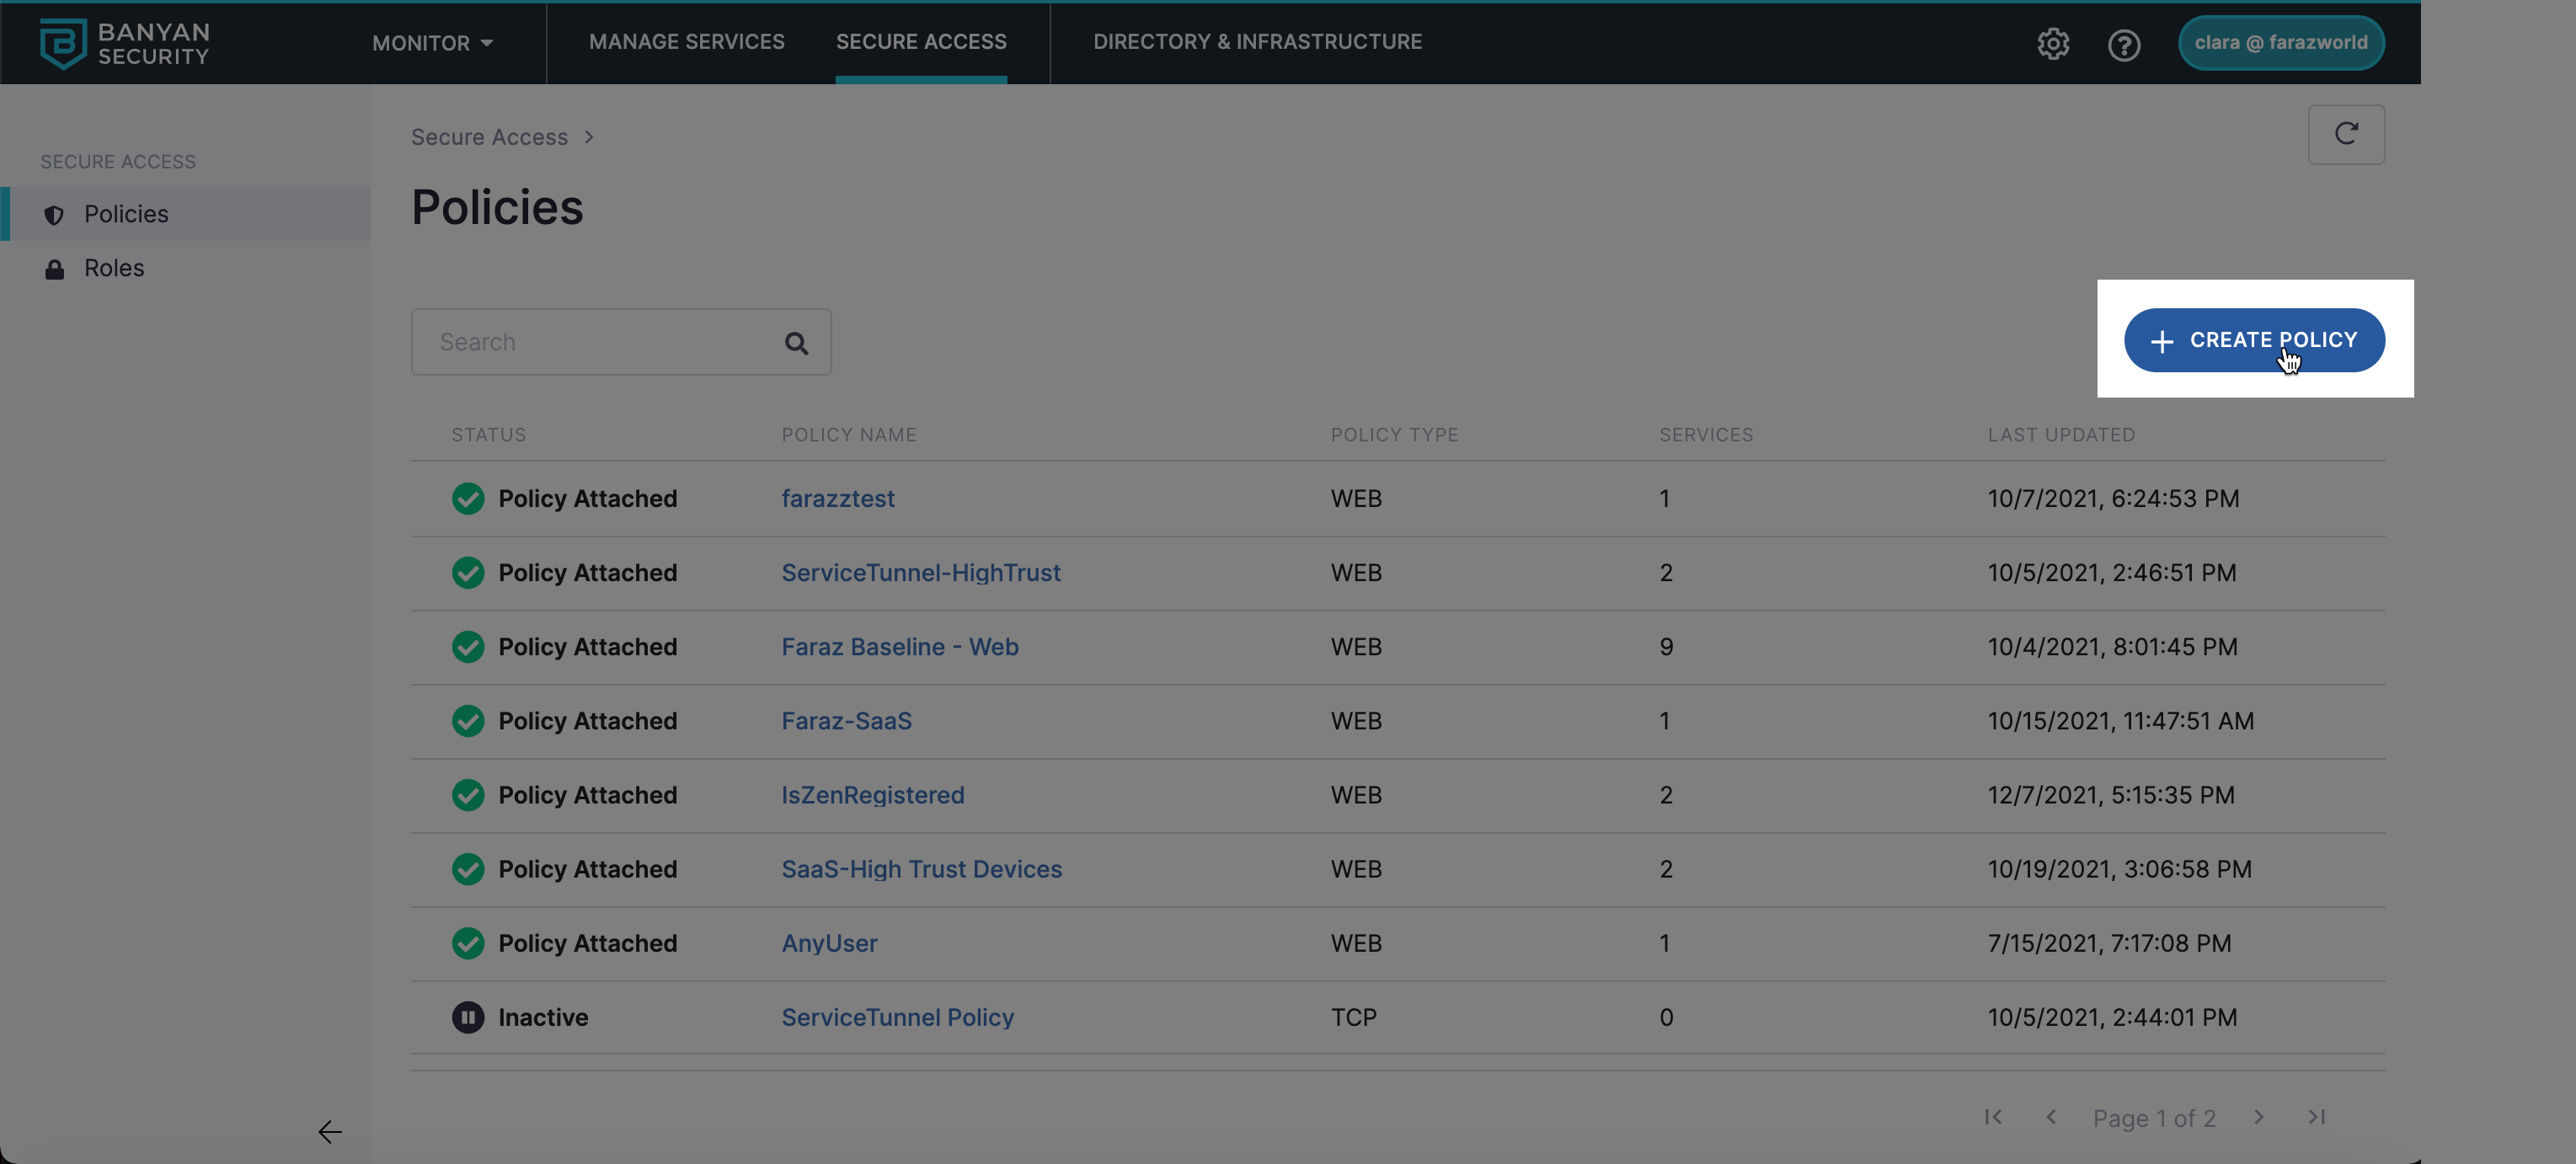
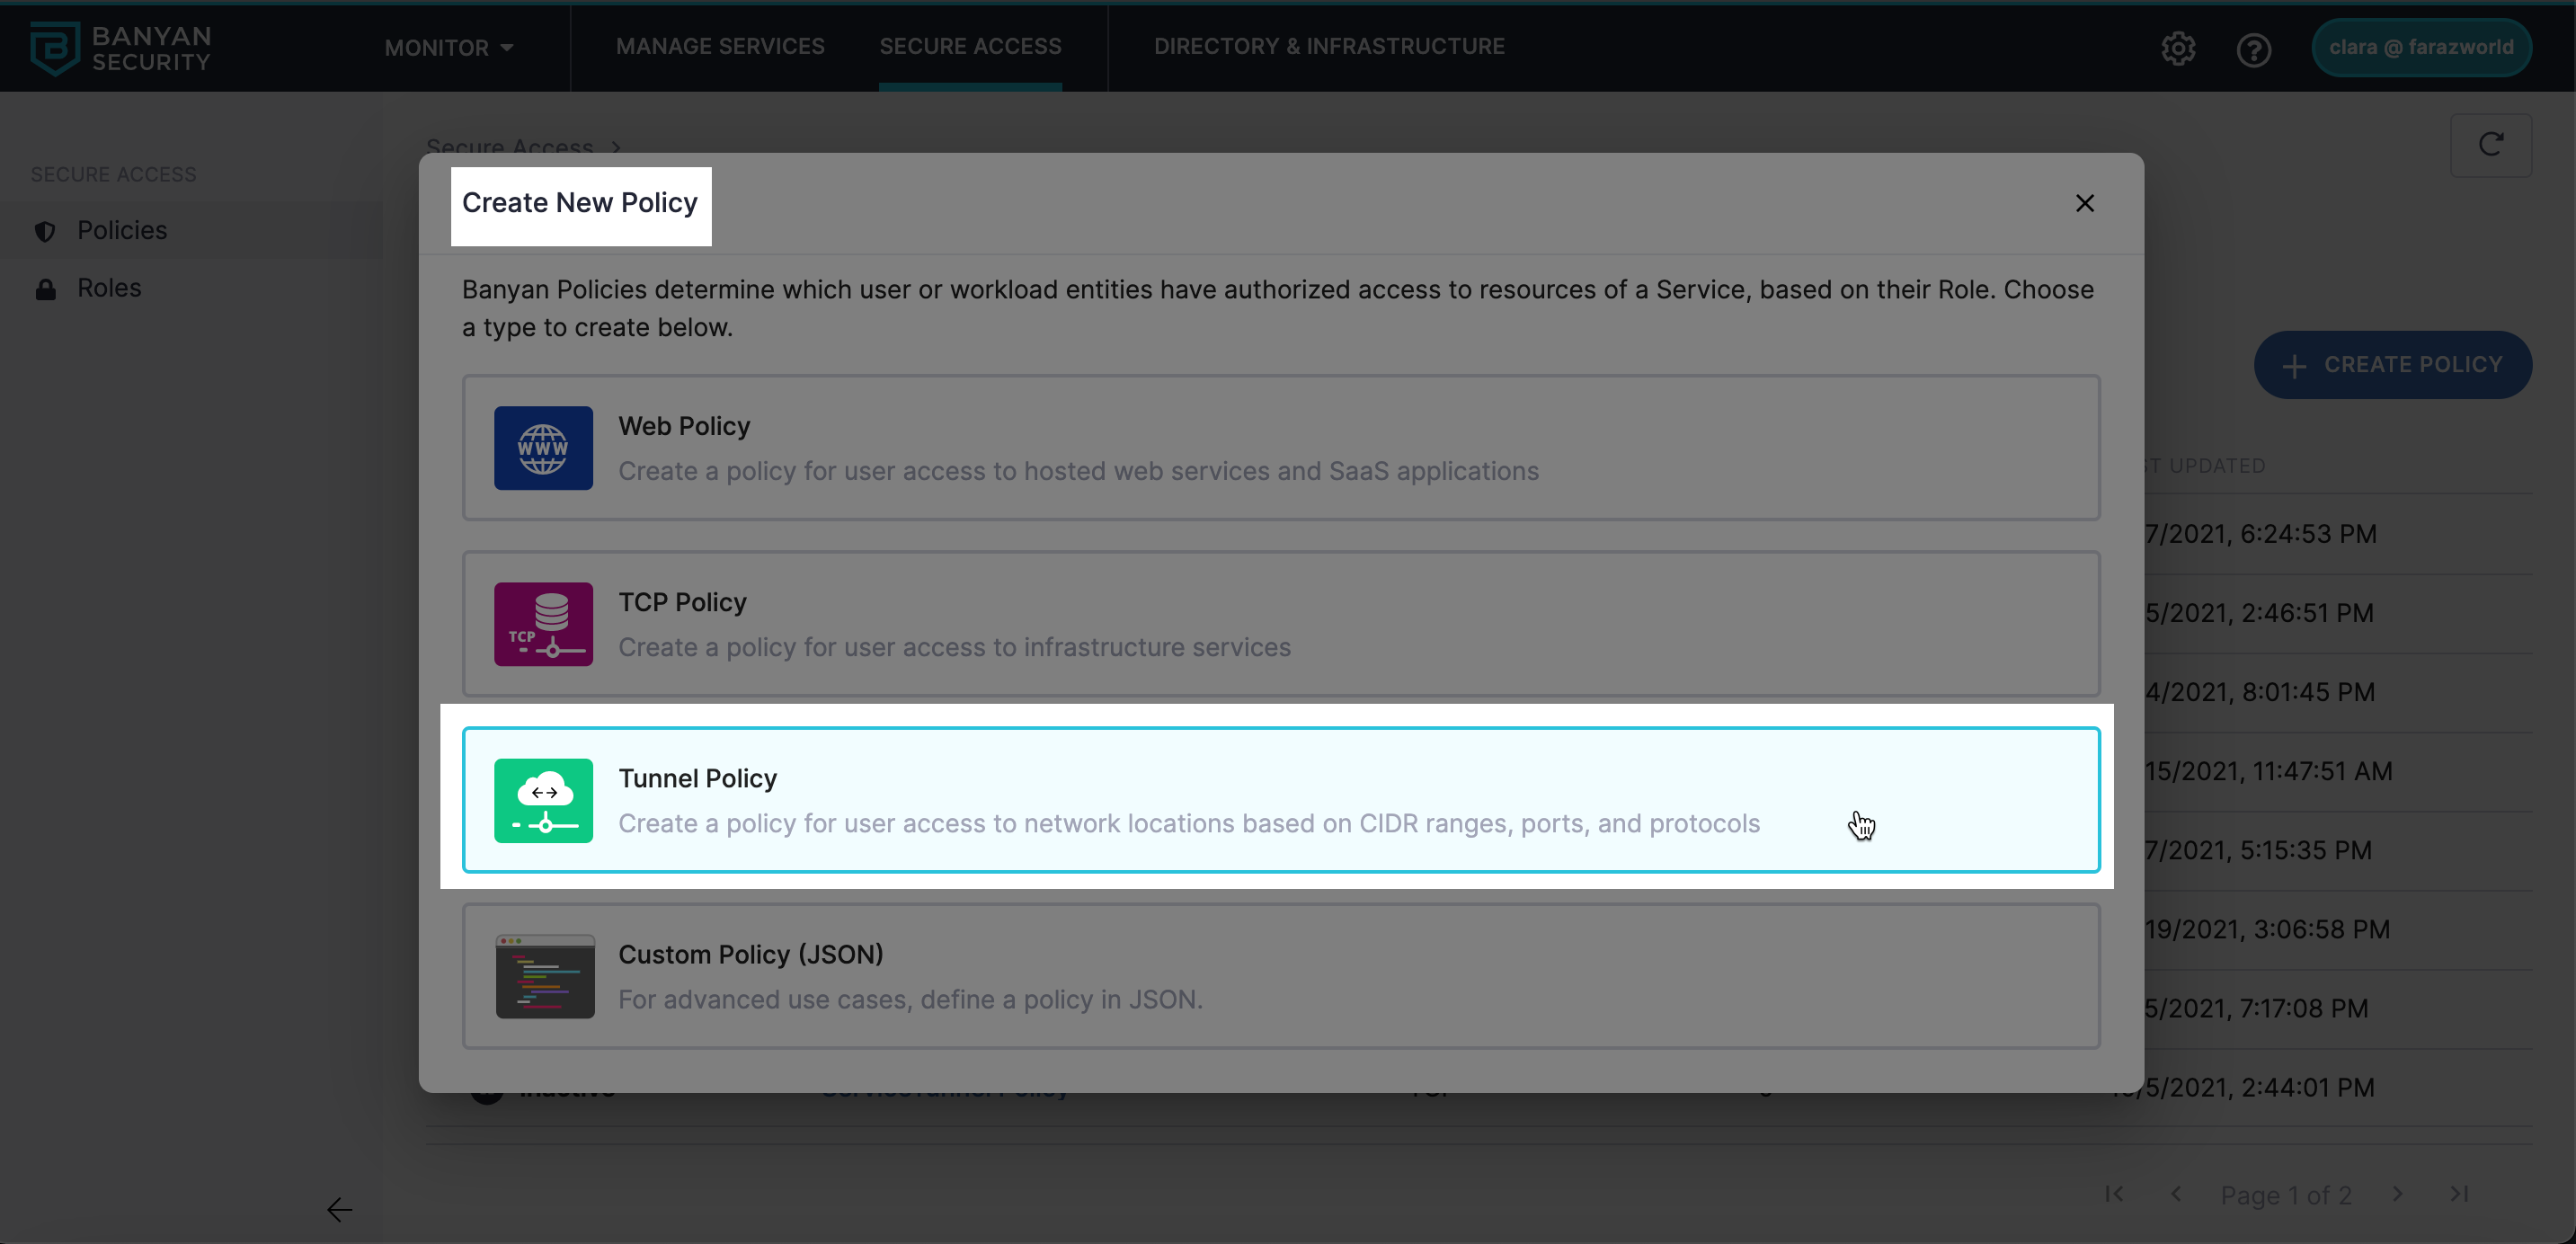
1.2 Select the Tunnel Policy template to create a new policy.
1.3 Name your policy. Optionally, add a description.
1.4 Under Access Group #1 (auto-added Access Group container), configure your Access Group with a name and a description.
1.5 Configure a Trust Level and a Role that apply to this Access Group. These are the required Trust Level and Role users need to have in order for the Tunnel Policy (the access policy) to work for these users.
1.6 Configure the Allow List: this is the allowed range of destinations that users designated above can reach via the Tunnel Policy. To create an additional Allow List for this group of users, select + Add Another Row.
1.7 Optional: Configure an Exception List; these are destinations within the defined range above (the allow list) that you are excepting from the allow list. Users will not be able to reach destinations on the excepted list.
1.8 Select Save.
Step 2: Publish a Service Tunnel
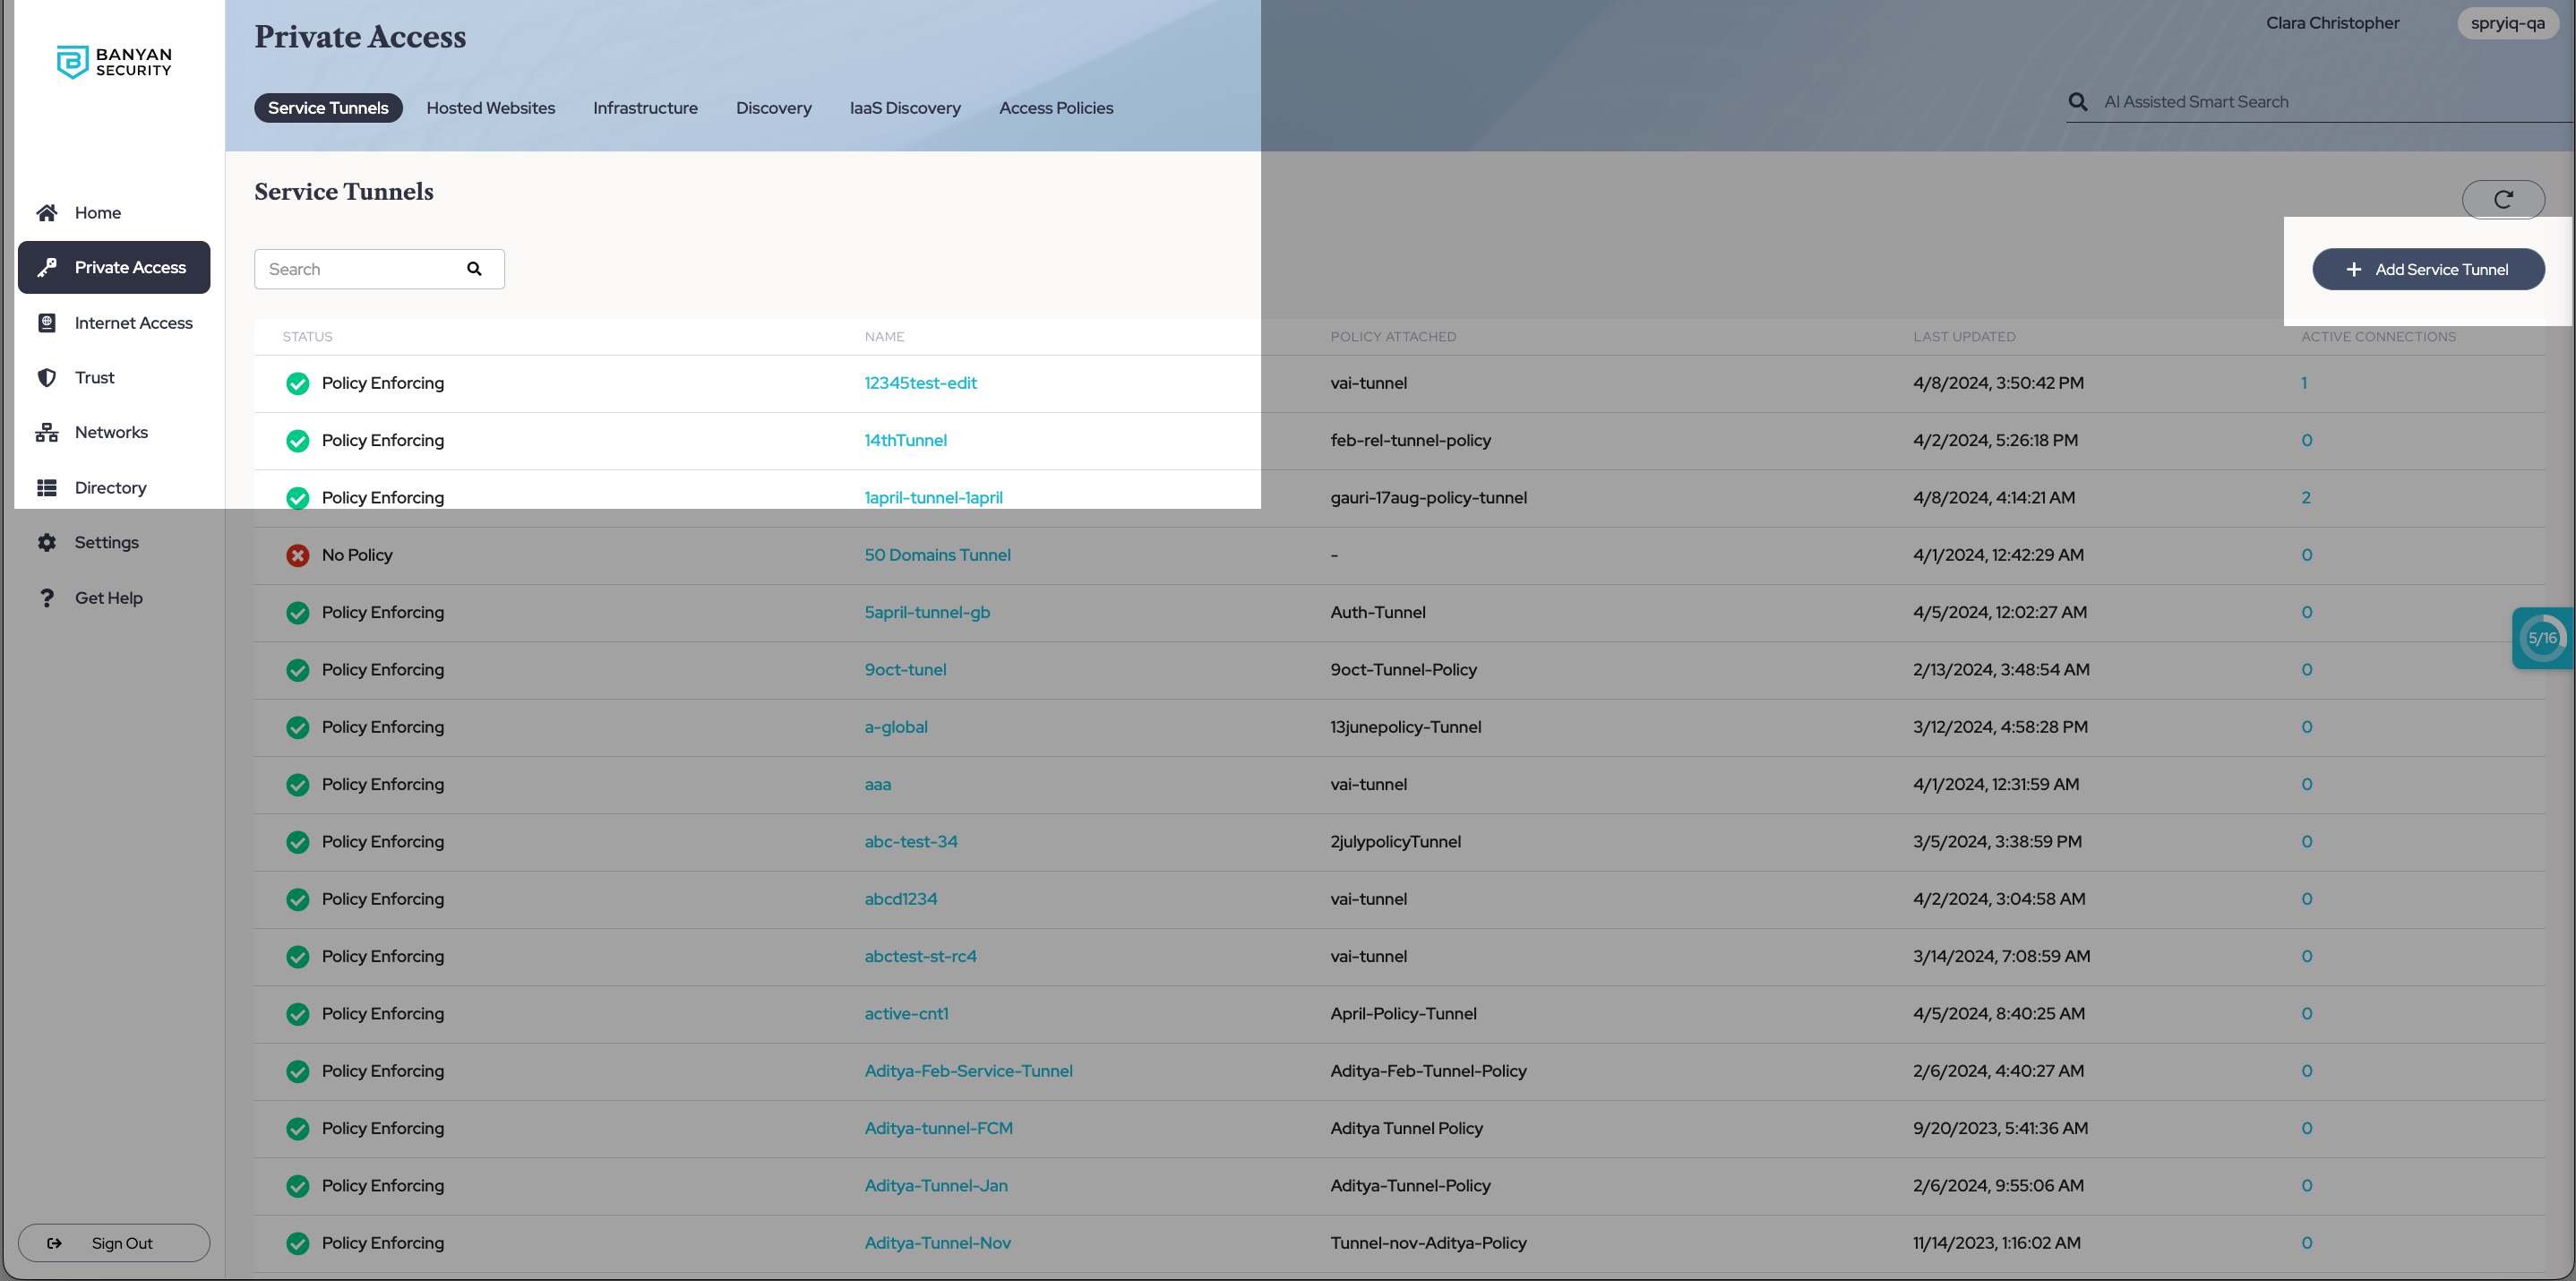
2.1 Navigate from Private Access > Service Tunnels, and then select + Add Service Tunnel.
General Information
2.2 Enter your Service Tunnel Name and a description (e.g., Access to Datacenter).
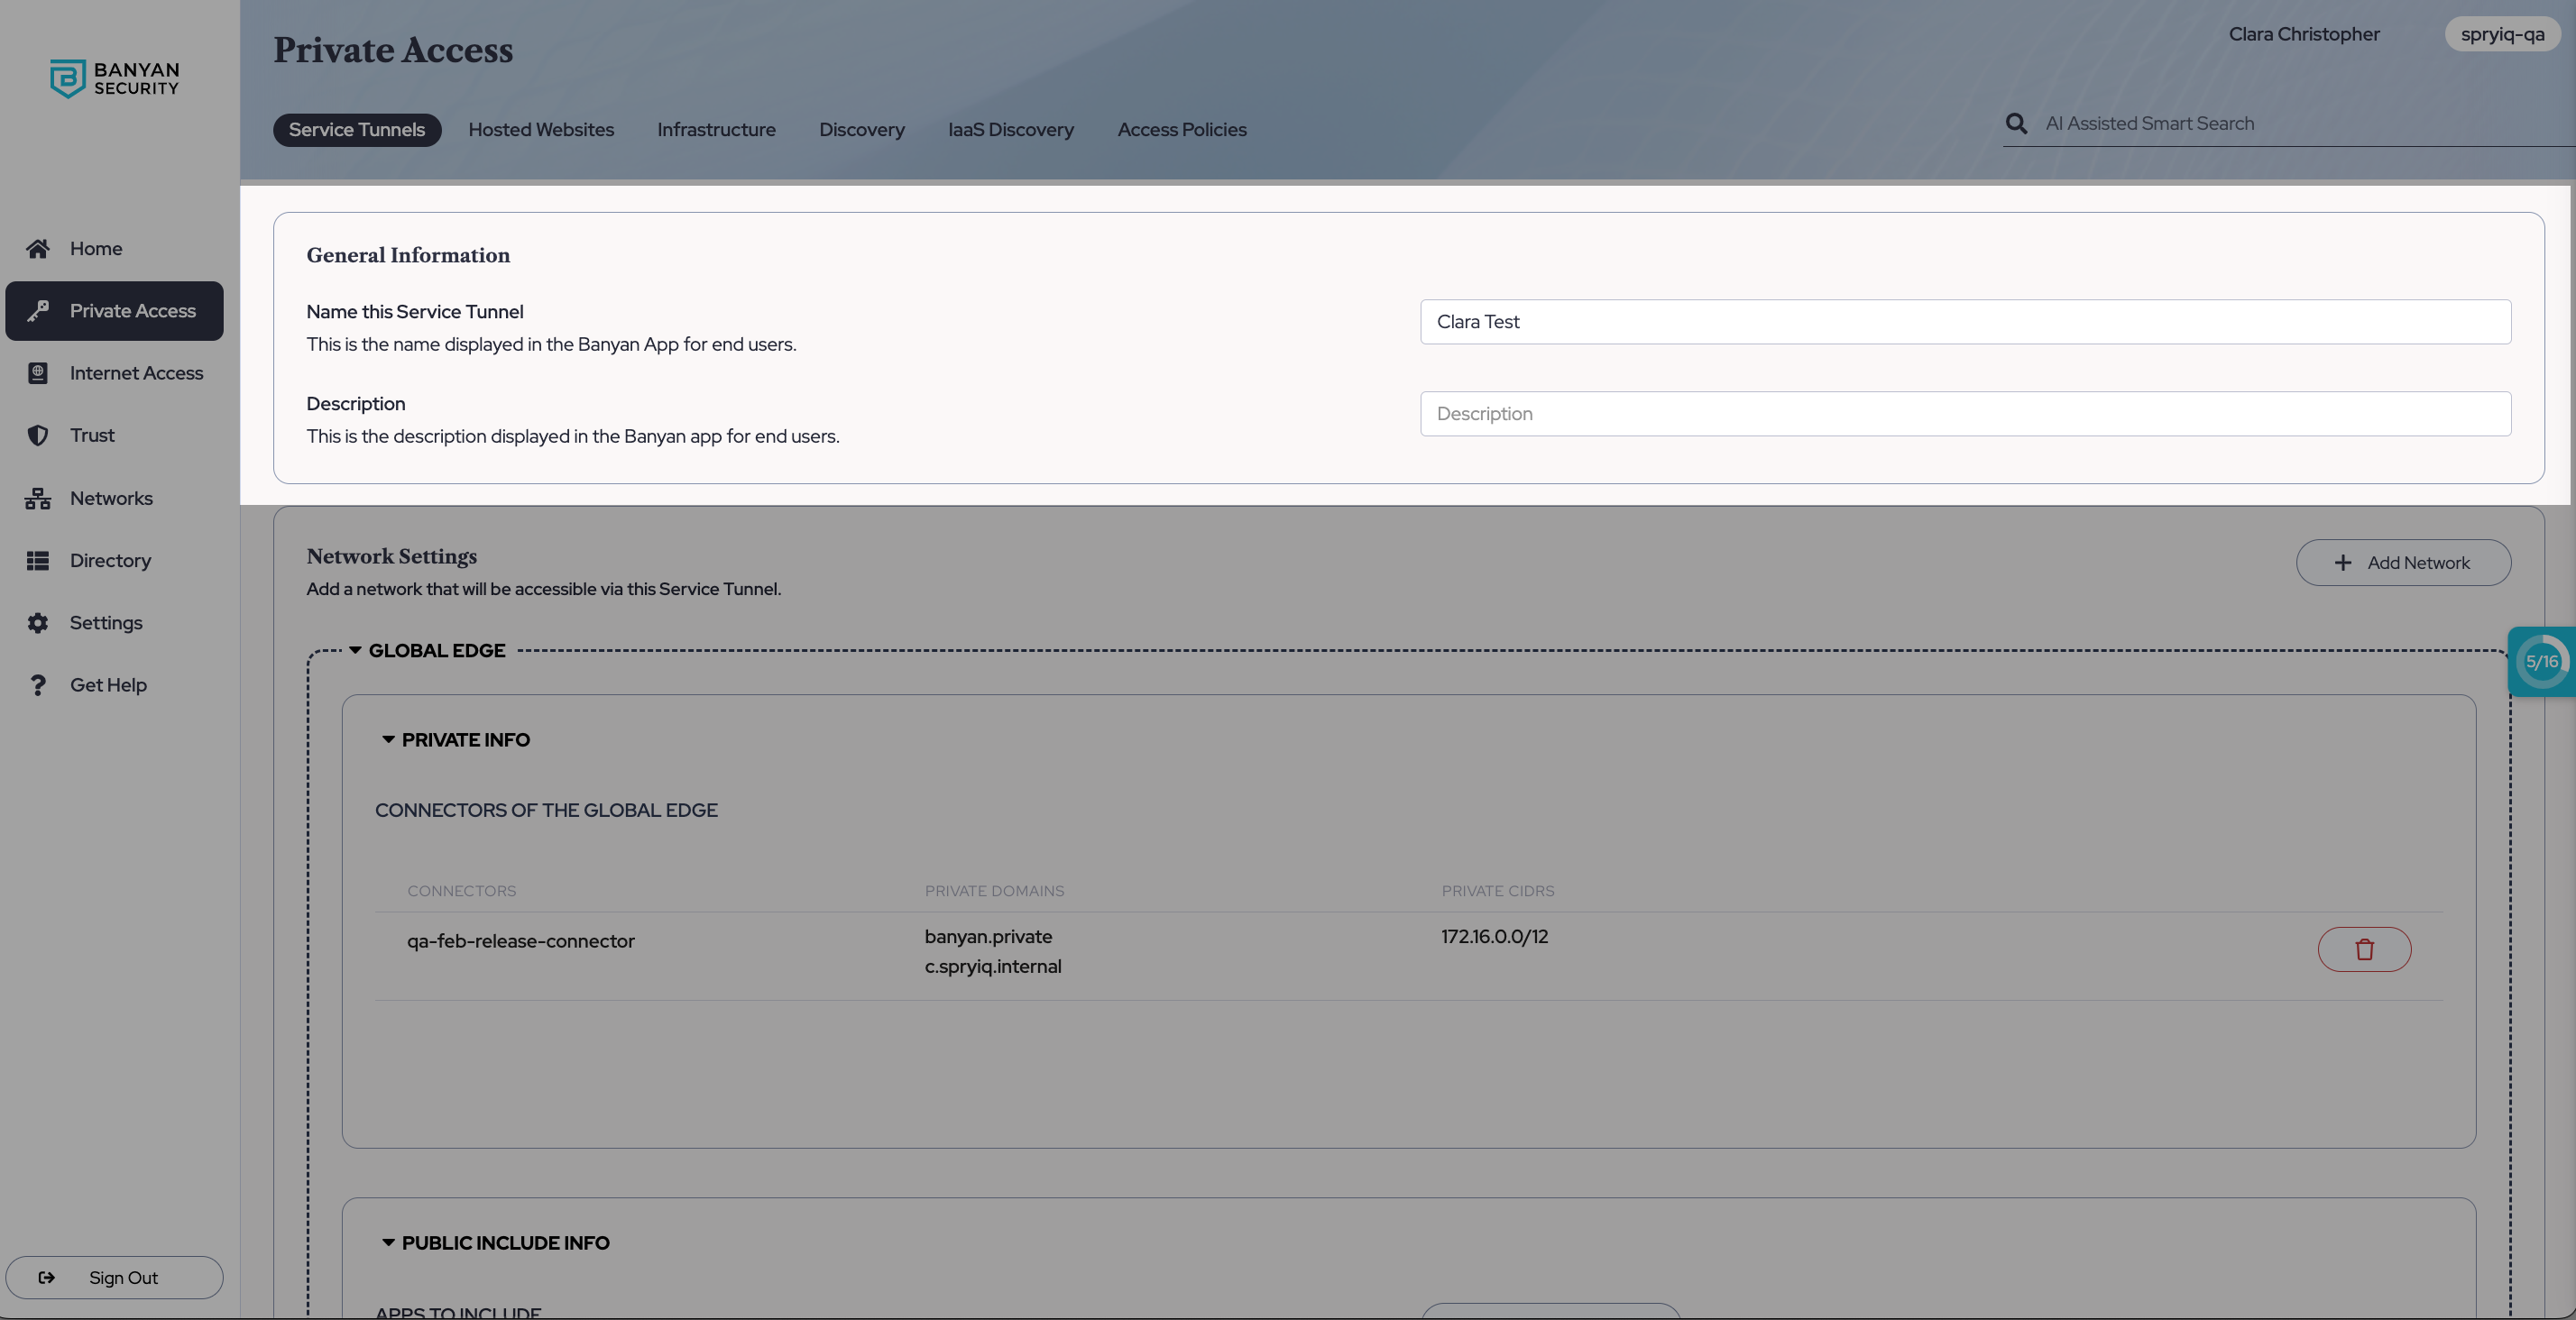
Network Settings
2.3 Select + Add Network, and a dropdown with an Access Tiers category (first) and a Connectors category (second) will appear.
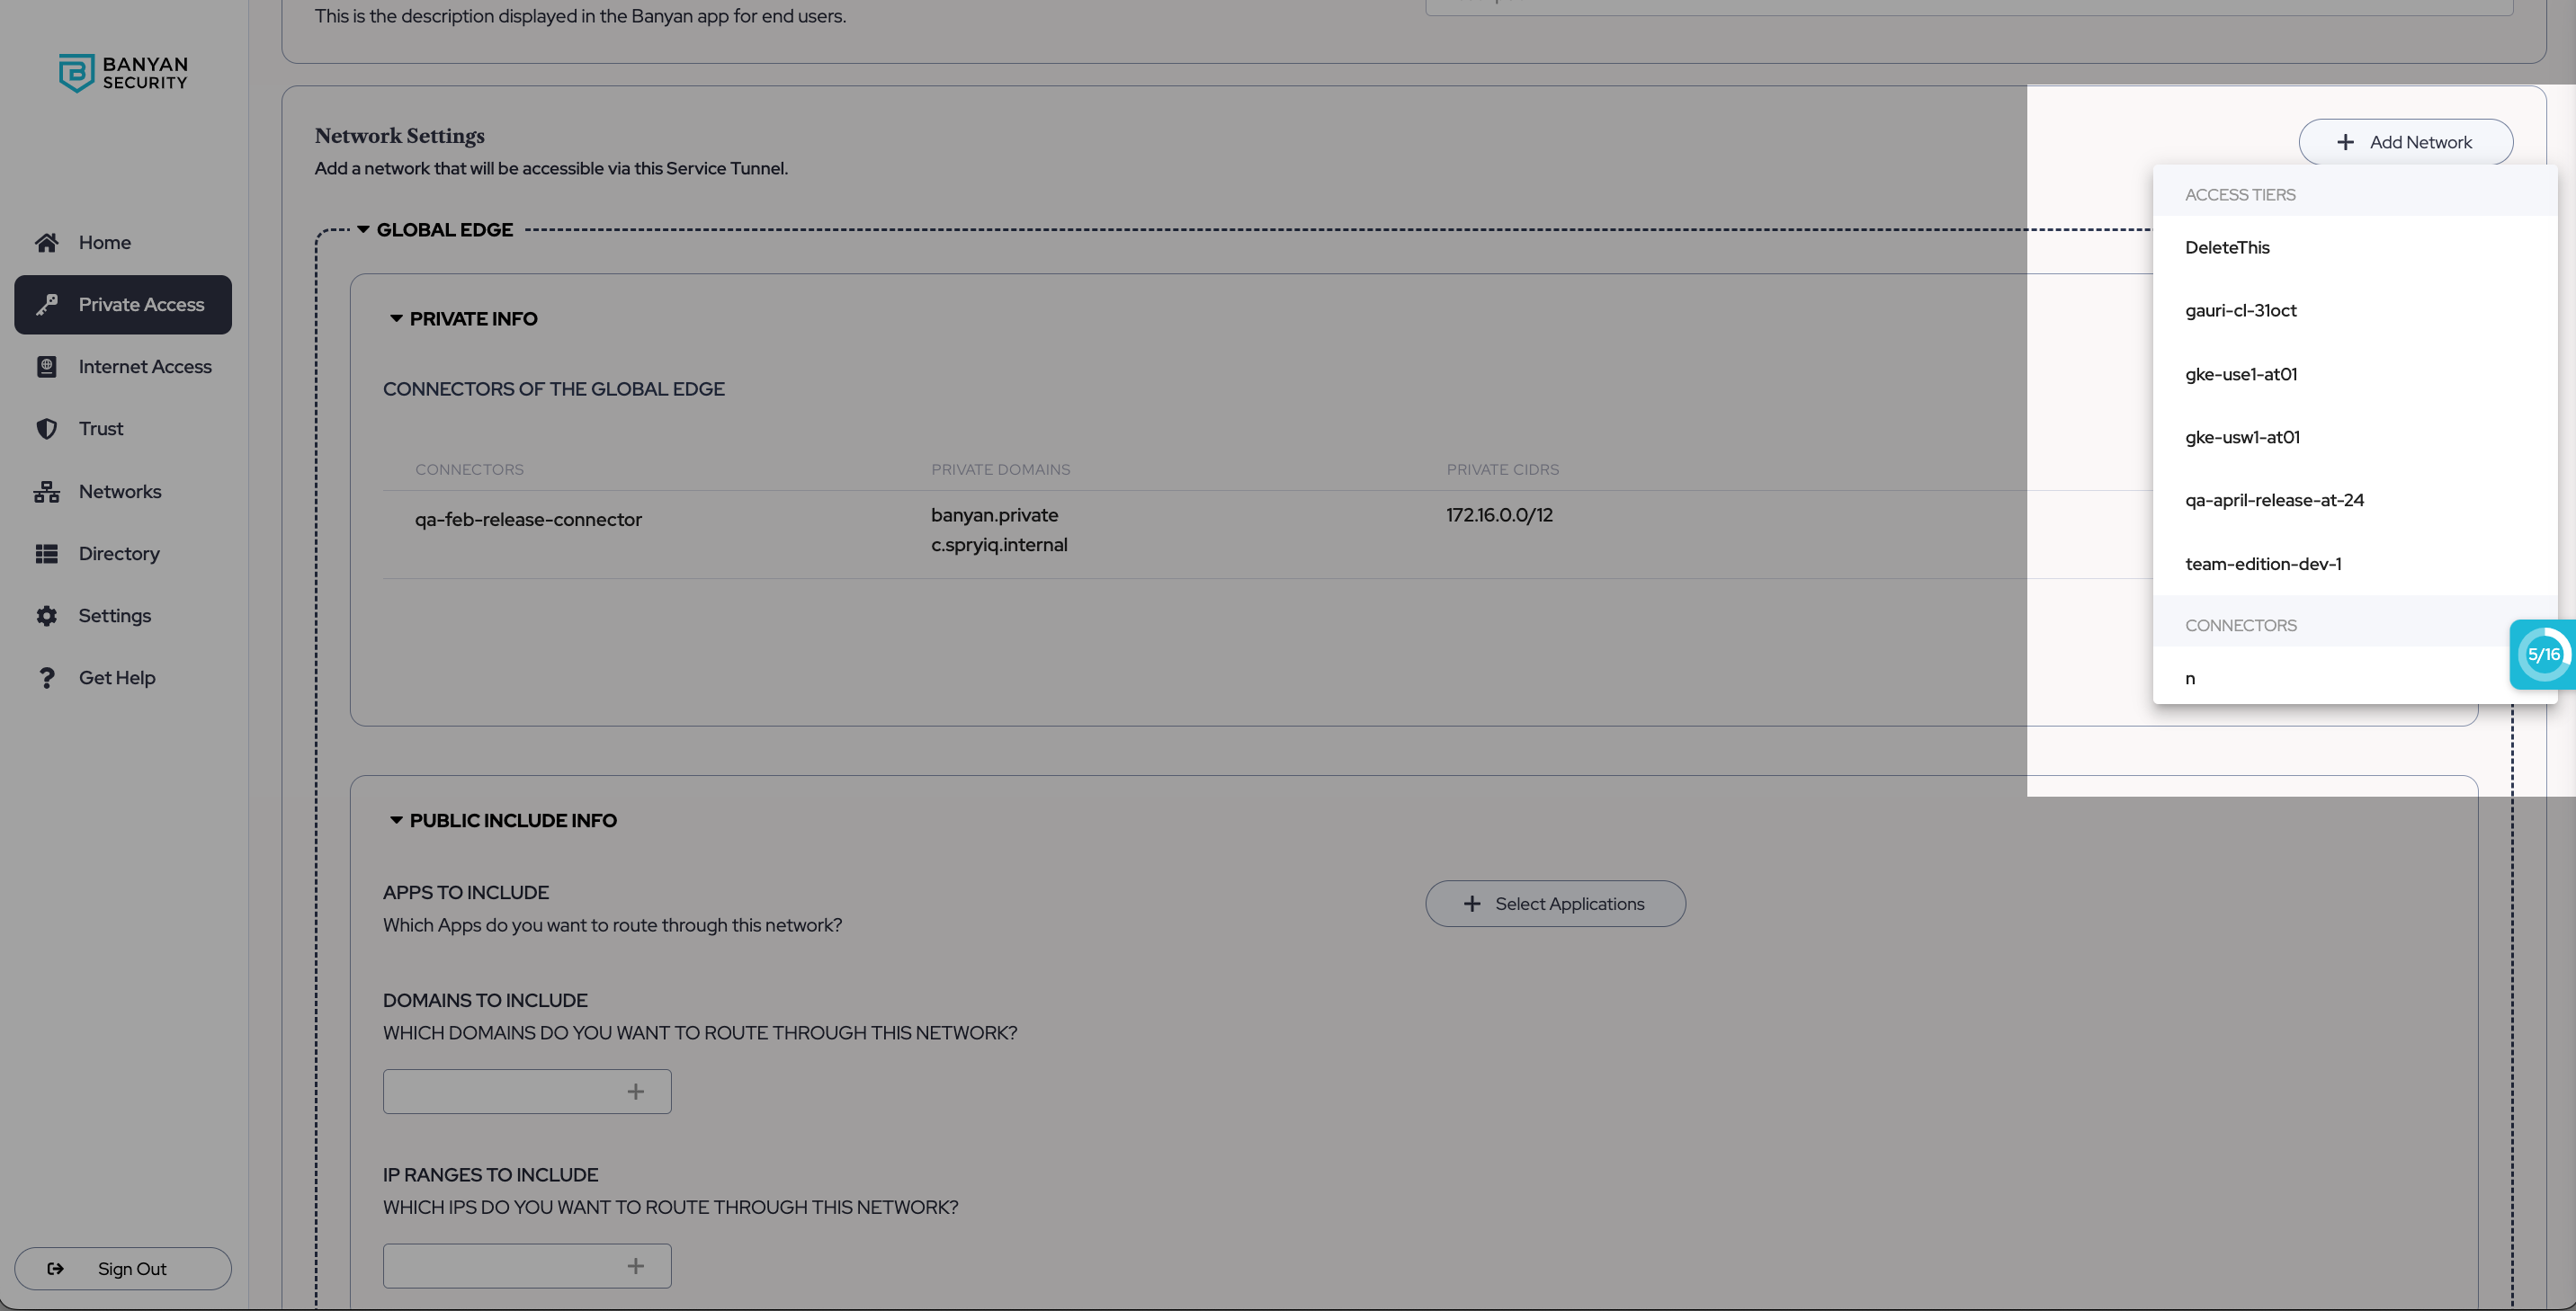
-
If you’re setting up a self-hosted Access Tier (private edge) for your Service Tunnel, select an Access Tier from the dropdown;
-
If you’re using a Global Edge Access Tier for your Service Tunnel, then select a Connector from the dropdown.
Note: Admins can add multiple self-hosted Access Tiers and/or Connectors to one Service Tunnel configuration; each Access Tier selected is considered its own self-contained ‘Network’ within the Service Tunnel; each Connector added is part of the same Global Edge Network. If selecting multiple Access Tiers, ensure that there are no overlapping CIDR ranges amongst them. If your Access Tiers’ CIDR ranges overlap, you’ll need to configure two separate Service Tunnels to accommodate your purposes.
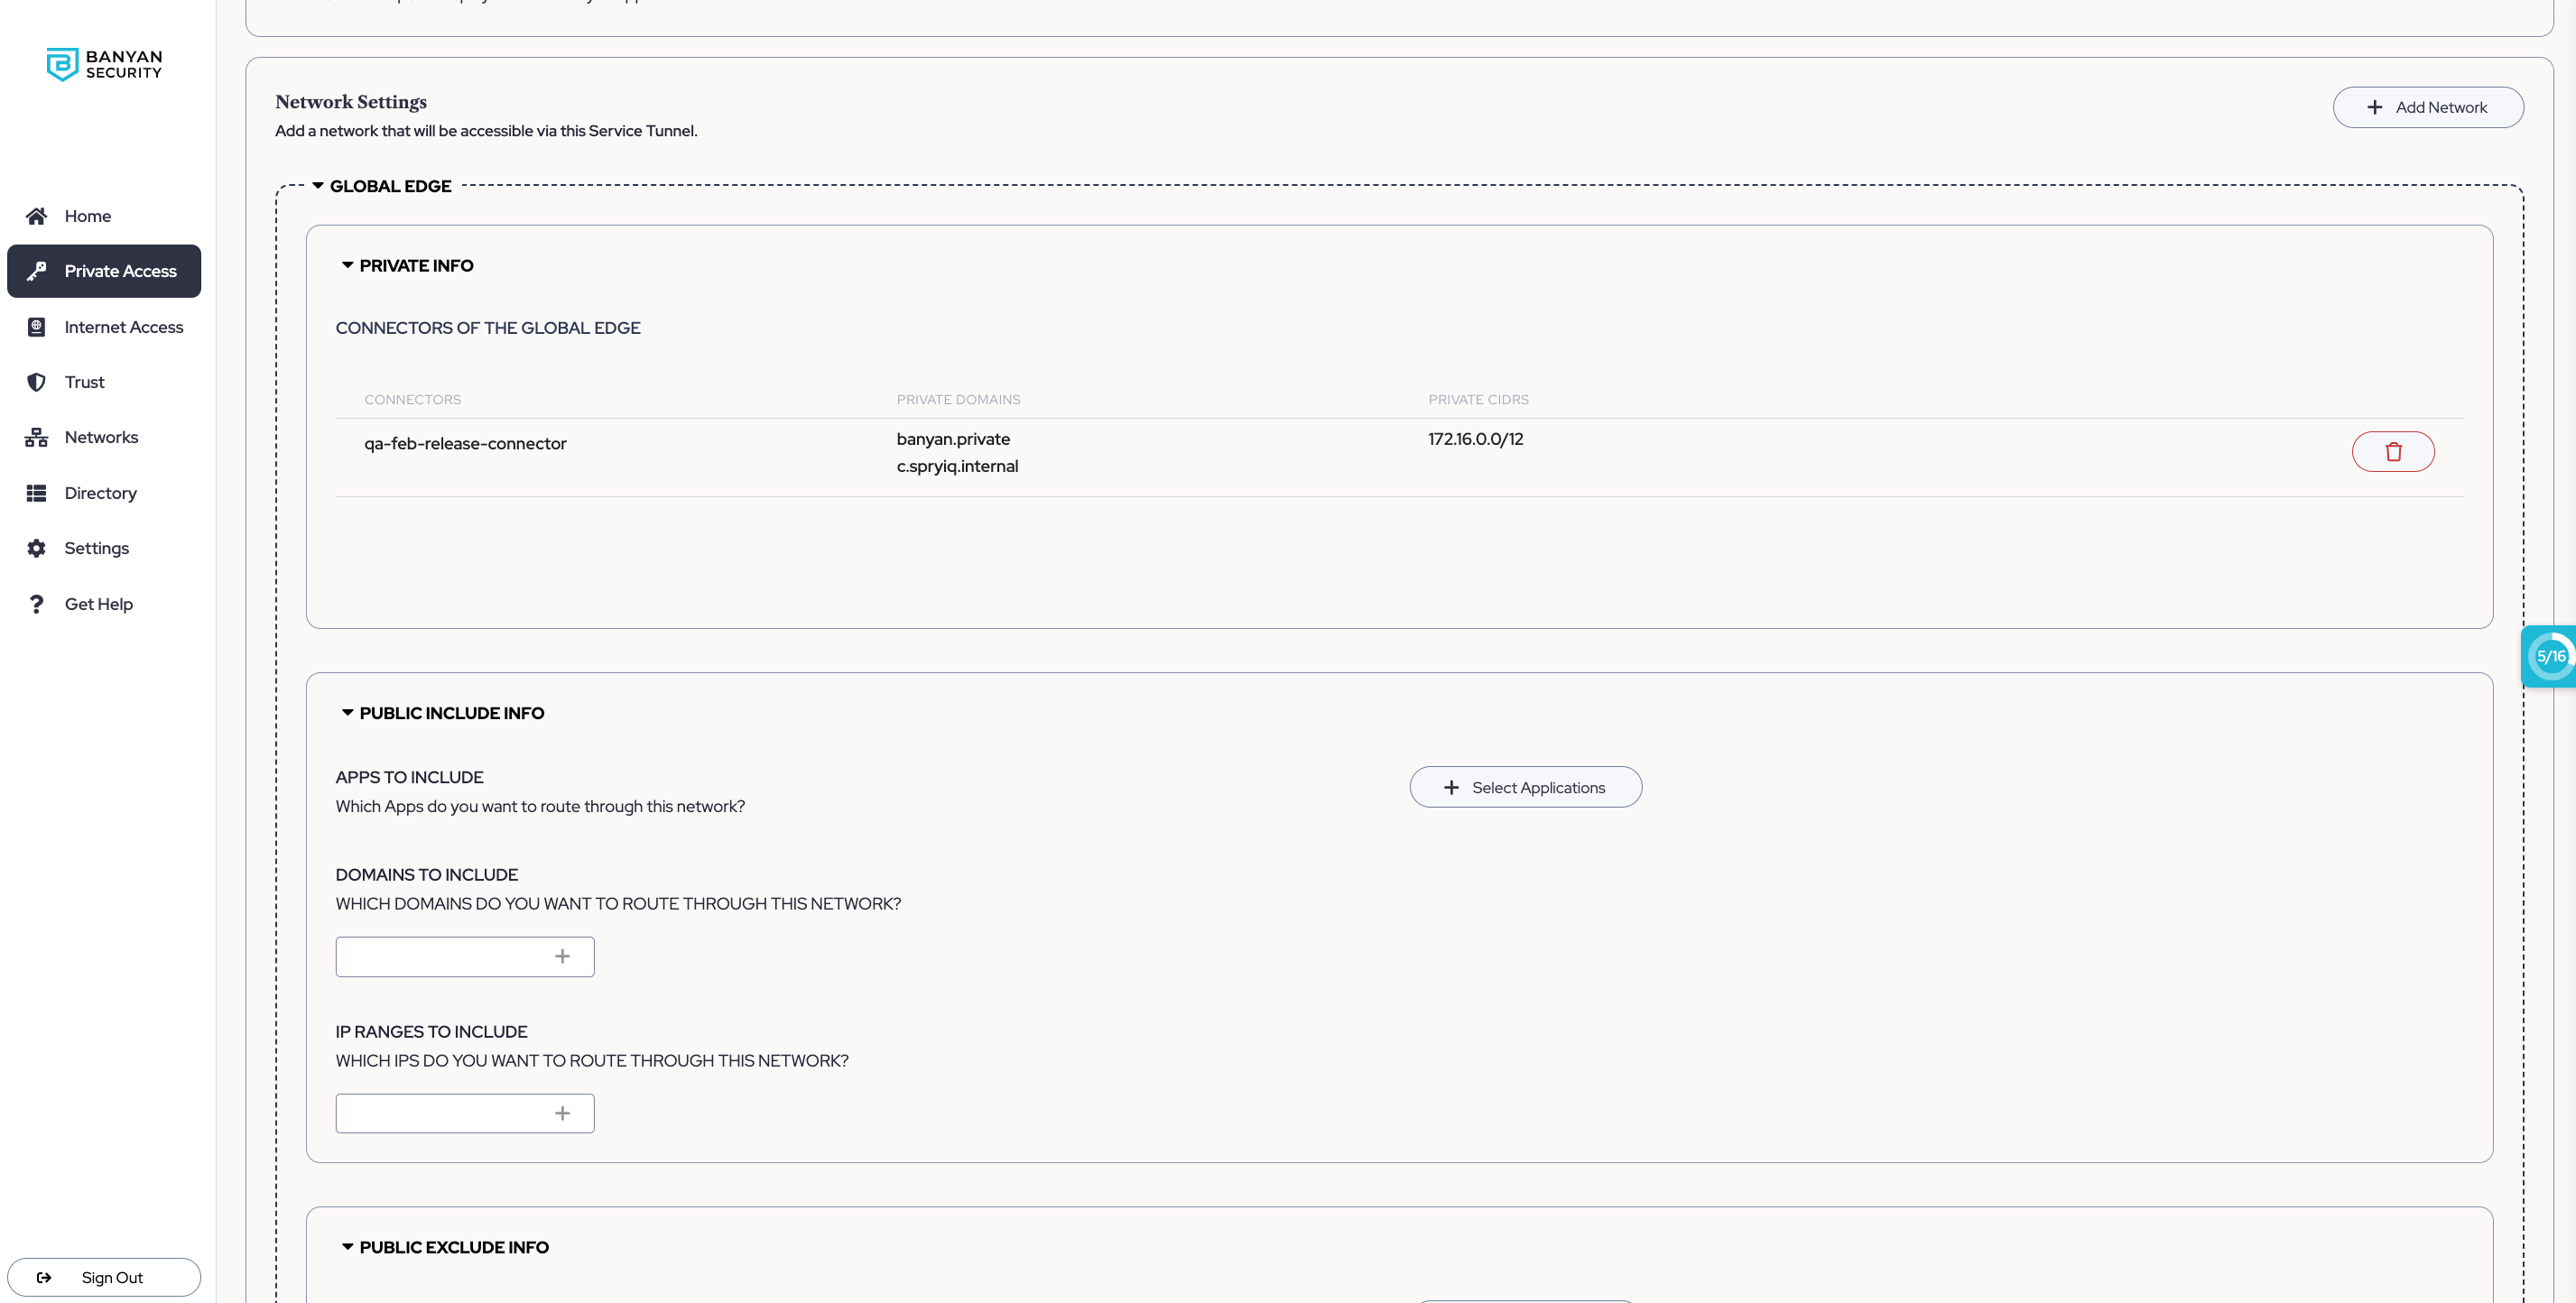
2.4 For each Access Tier (Private Edge) or Connector container (Global Edge), configure which public applications, public domains, and public IP ranges can be reached (Include) or not reached (Exclude) via your Service Tunnel.
Note: If you’re configuring your Global Edge Service Tunnel to route to public IP addresses, ensure that the Connector you select has these same public IP addresses configured as well.
Note: In order to save your Service Tunnel, it must have at least one defined route (an included public app, IP, or domain OR a network is added that contains private routes).
Assignment Settings
2.5 Determine who will have access to this Service Tunnel by selecting a Tunnel Policy from the Attach a Policy dropdown. Instructions on how to create a Tunnel Policy are detailed in Step 1.
2.6 Set the policy to Enforcing mode.
2.7 Optional: Choose whether to enable or disable Connect on Login. This setting, which automatically connects the Service Tunnel when an end user logs into their app, is enabled by default. Toggle off to disable.
Note: If there are more than one Service Tunnel with Connect on Login enabled, no Service Tunnel will be connected on login. Ensure that there is only one Service Tunnel with Connect on Login enabled at a time.