Install an Access Tier Using AWS CloudFormation
Install the Access Tier on an EC2 instance via CloudFormation stack
- Last validated: May 19, 2026
- 9 minutes to read
-
Contributors

- Steps
Note: Netagent v2 has been released, simplifying the process of installing and configuring an Access Tier:
1. Use an API key with the access_tier scope for registration
2. All agent configuration is done via the Command Center API and UI
If you need to install Netagent v1, use the legacy v1 guides.
Steps
Install the Access Tier via the following four steps.
Step 1. Register your Access Tier
Note: Currently, the CloudFormation stack uses the Access Tier Name as the stack name. The AWS CloudFormation stack name (and, therefore, also the Access Tier Name) must be unique within a region, 128 characters or fewer, made up only of alphanumeric characters (case-sensitive) and hyphens (i.e., no underscores), and a name that starts with an alphabetic character. Ensure that your entry in the Access Tier Name field abides by these restrictions.
1.1 Log into the Command Center, and navigate from Networks > Access Tiers.
1.2 Select + Create Access Tier, and configure the required parameters when going through the installation wizard. An existing API key is required; these should appear in the dropdown menu of the API Key field on the Configure tab. If you don’t have an existing API key, navigate from Settings > API Keys and select + Add API Key, then select the access_tier scope.
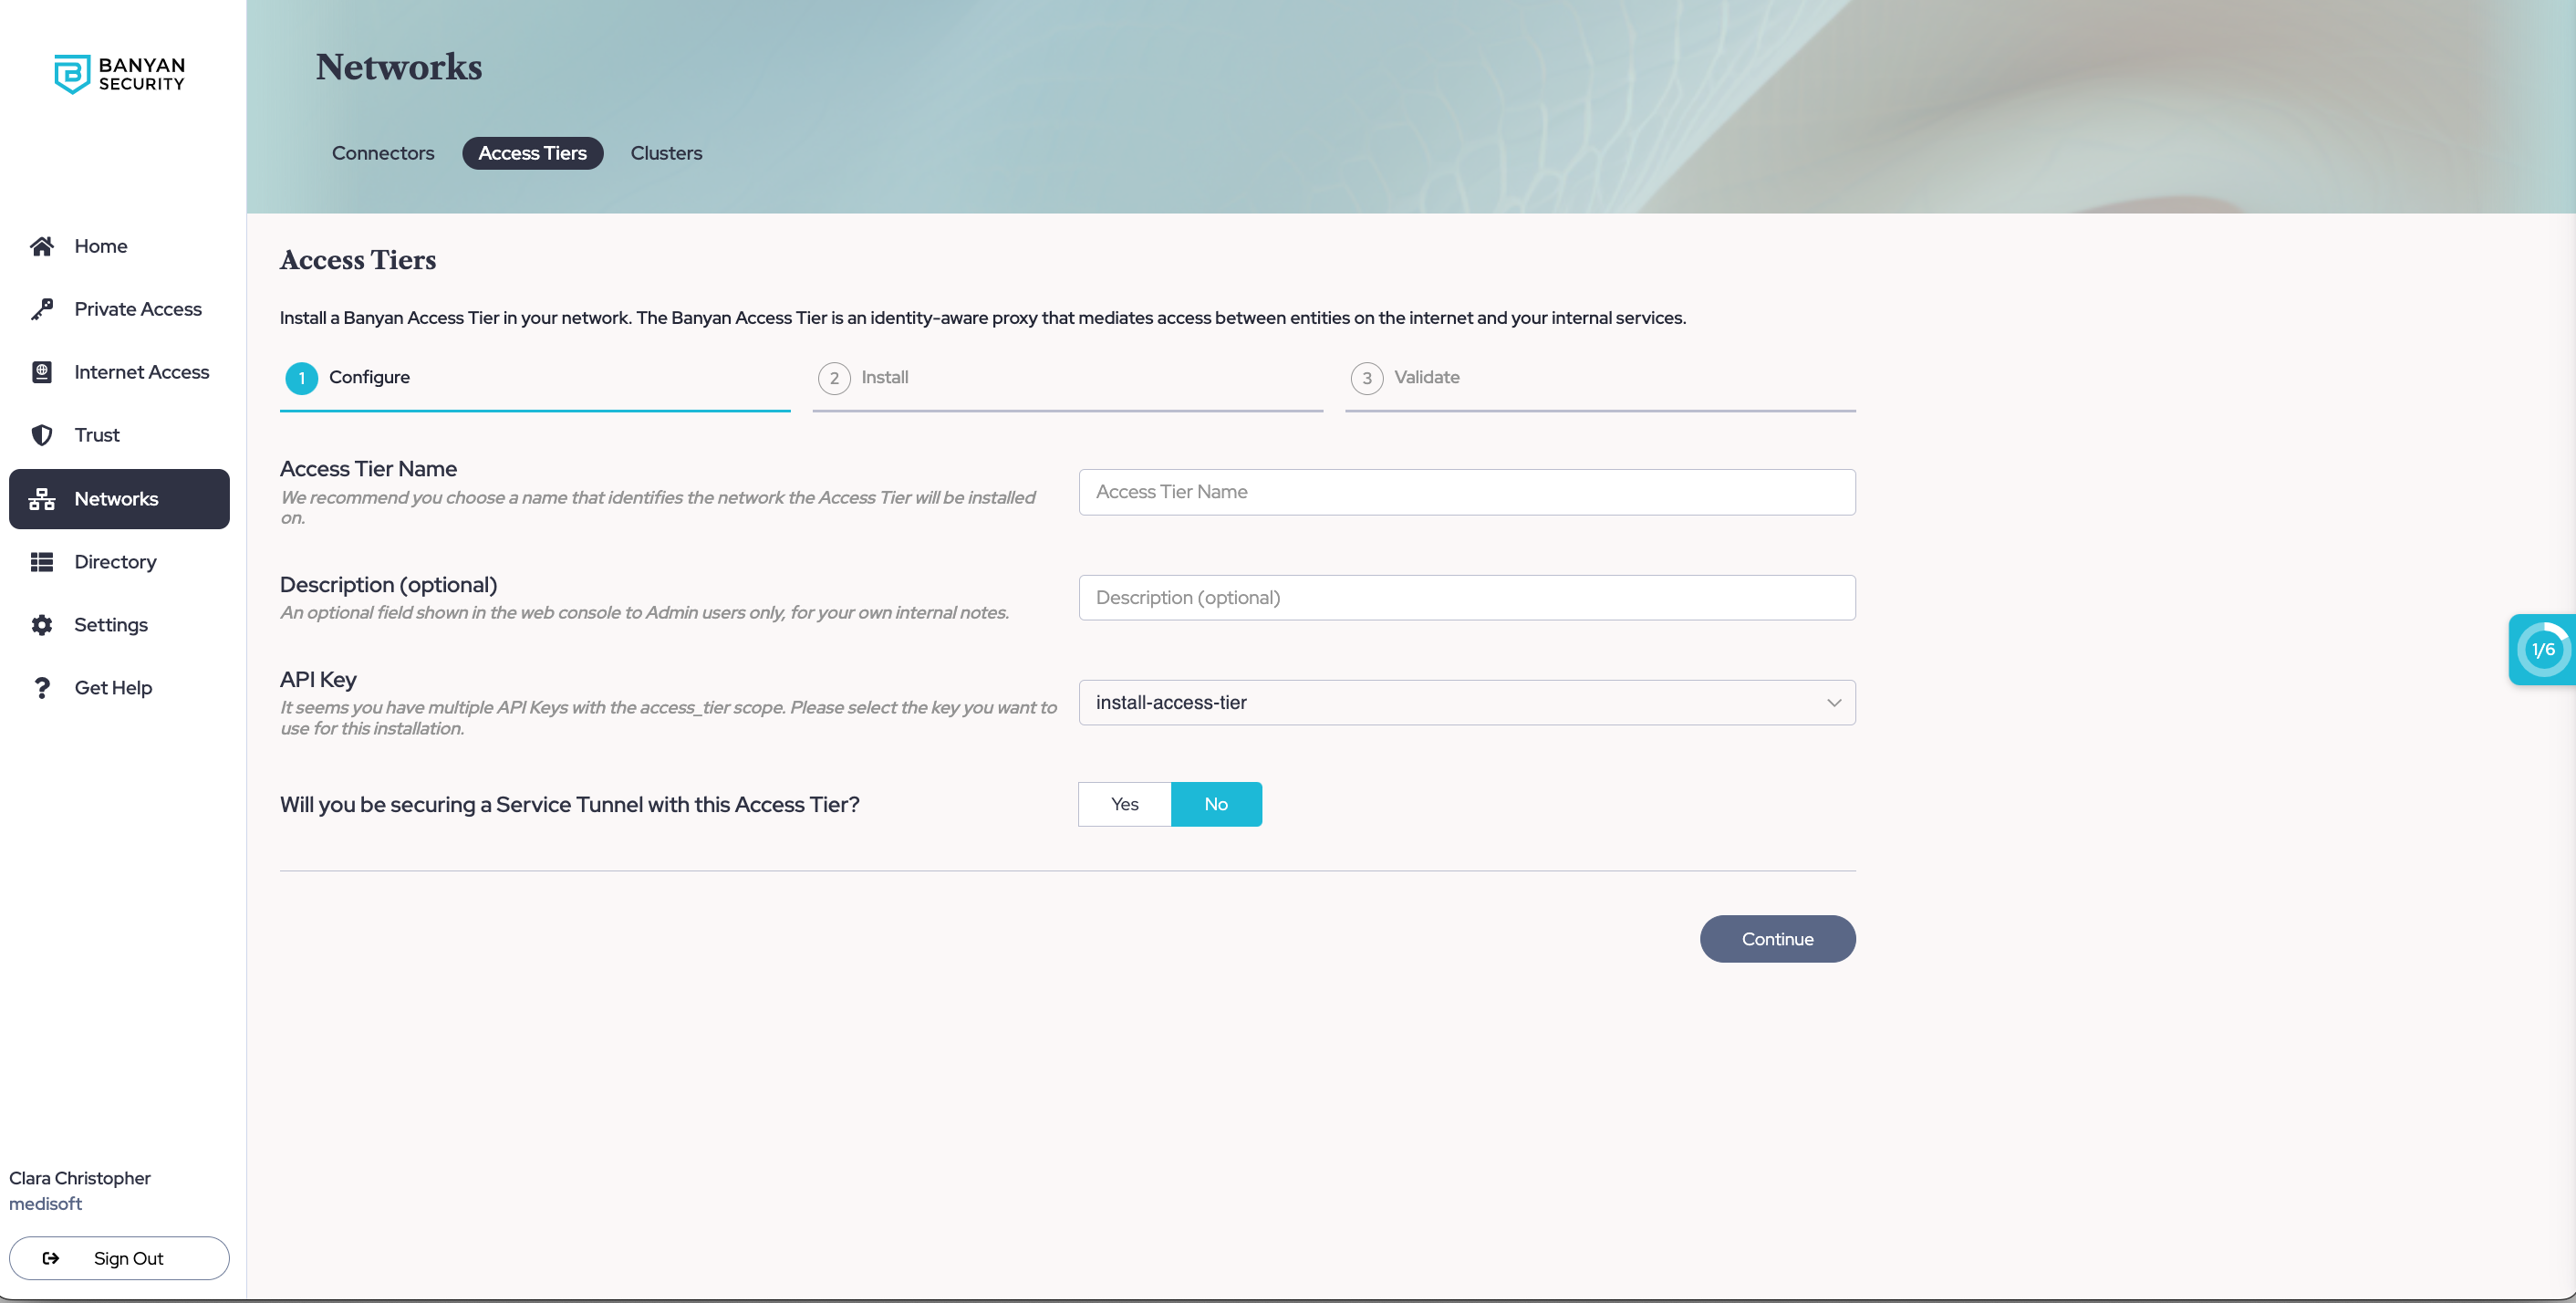
1.3 If you will be using this Access Tier to secure an existing Service Tunnel, enter the required information to set up Service Tunnels.
1.4 Optional: If you want to enable Private Resource Discovery (to view a summary of commonly accessed private resources accessed by end users via Service Tunnels), then, under Advanced Settings, toggle on Enable Private Resource Discovery.
1.5 Select Continue to proceed to the Install tab.
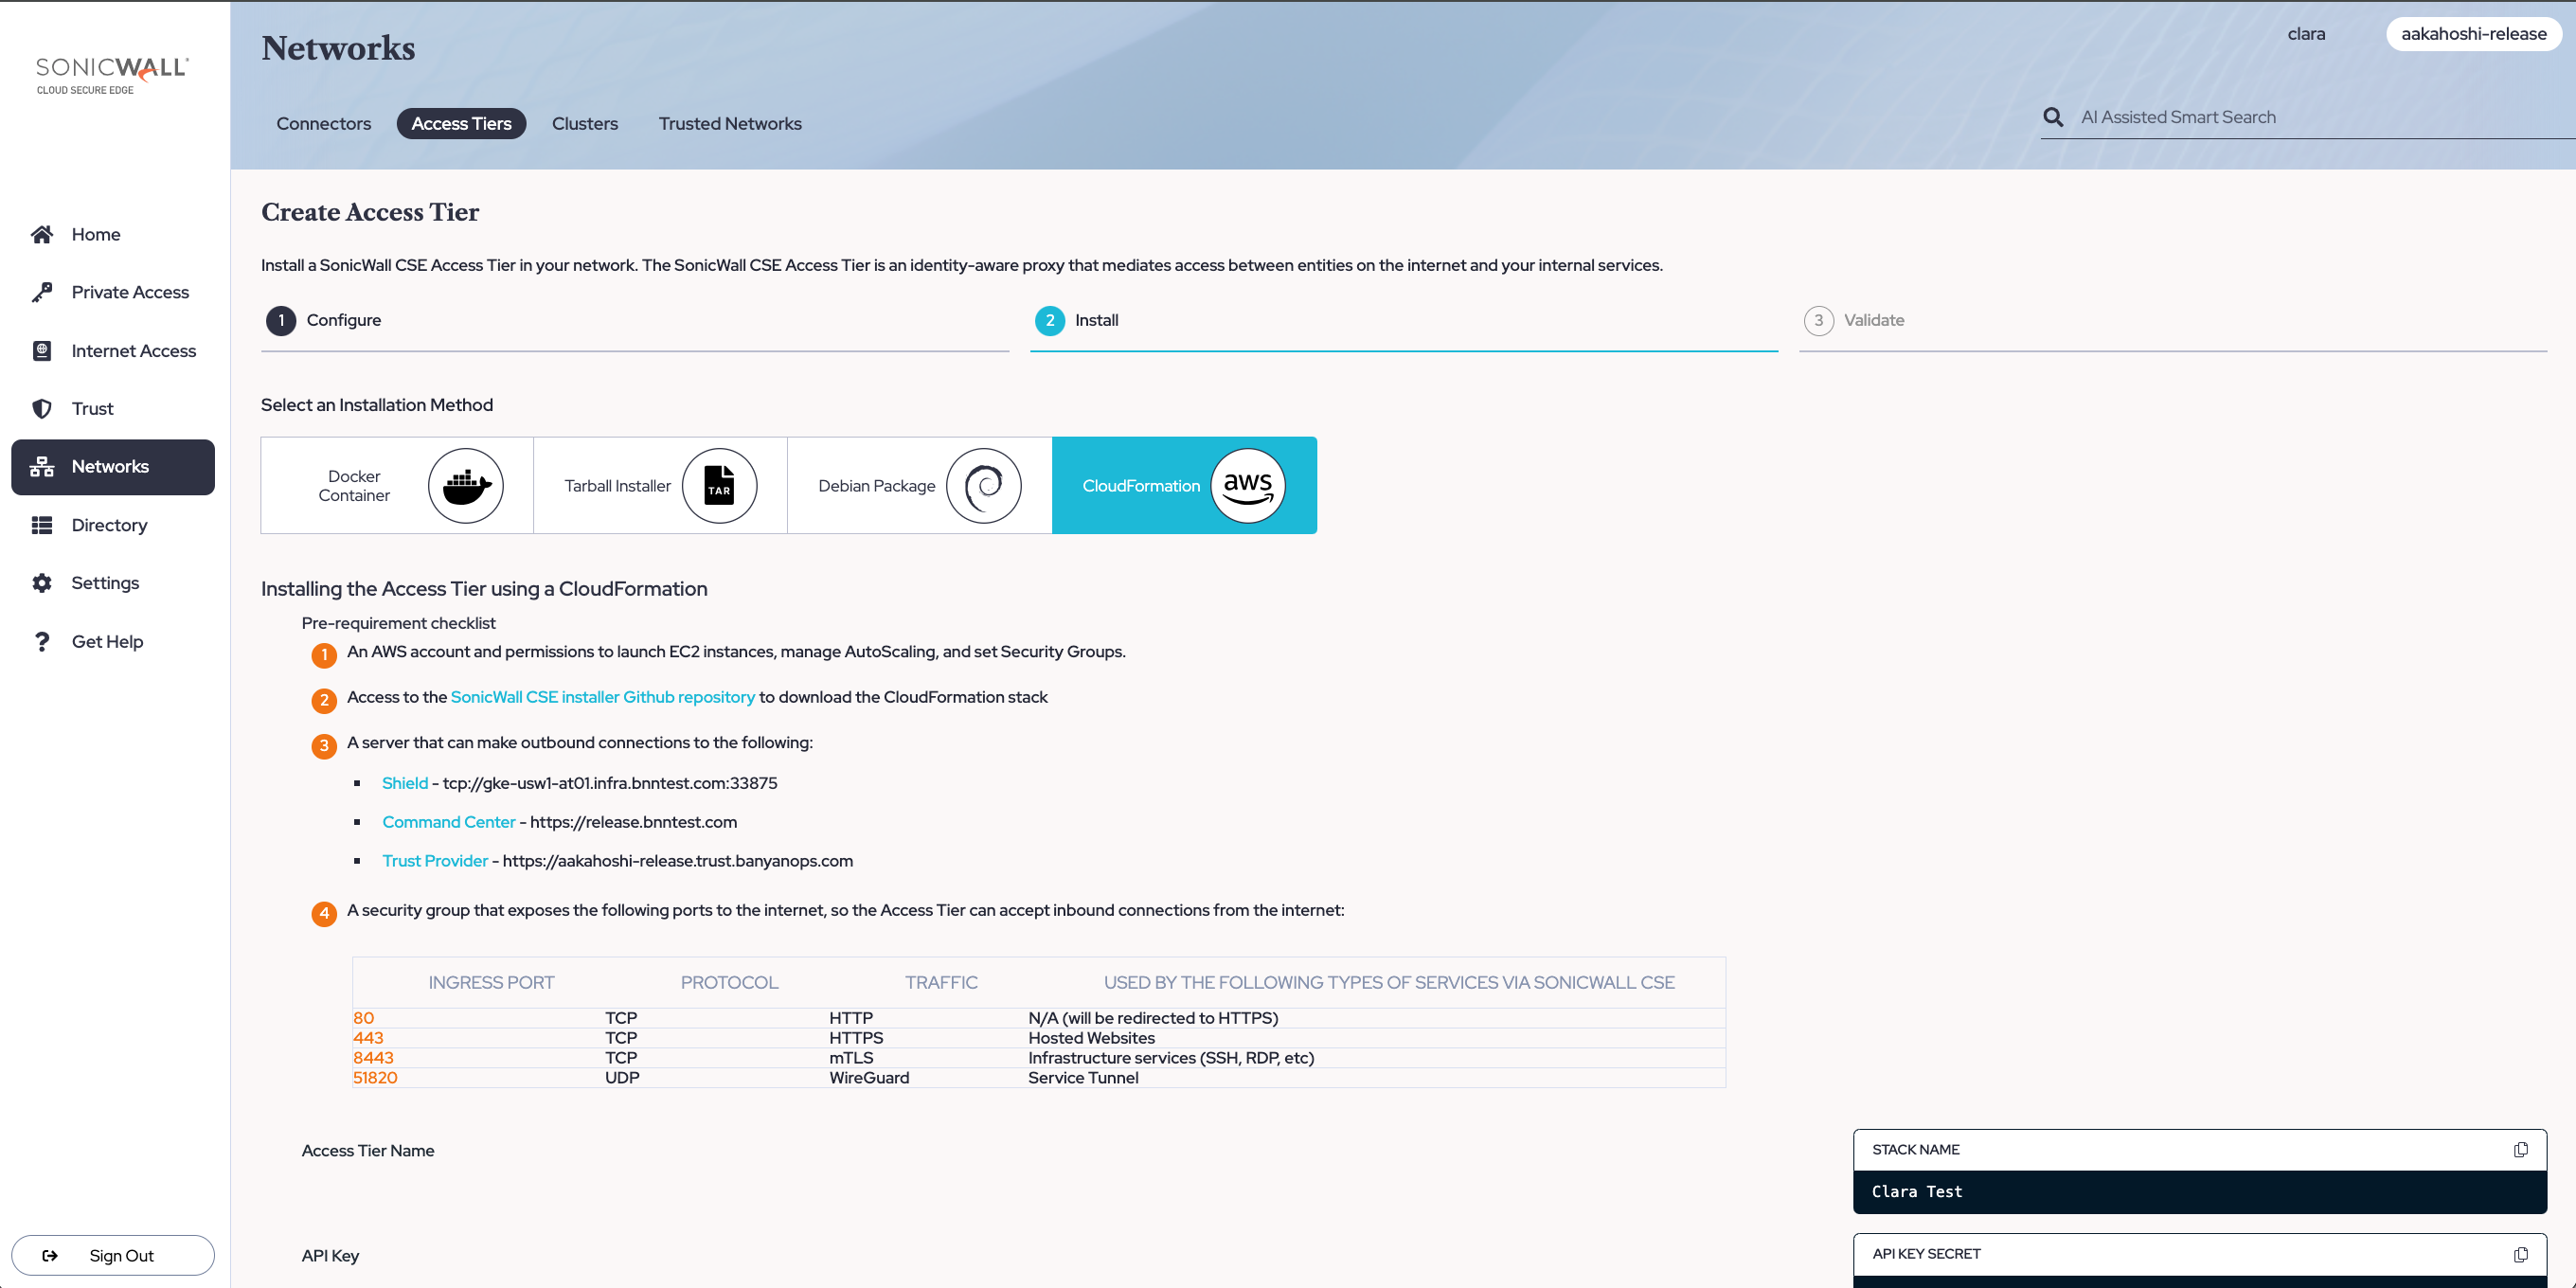
1.6 Take note of the installation parameters for use in subsequent sections.
Step 2. Review the Pre-Install Checklist
2.1 Ensure that you have a VPC with an internet gateway attached and a public or private subnet where you can deploy the Access Tier.
2.2 Ensure your networking policies allow traffic to flow from the Access Tier server to backend machines running the applications and services you need to secure access to.
2.3 An IAM Administrator role is required to deploy an Access Tier on AWS.
Step 3. Download, Configure & Install
3.1 Select your installation location and method in Cloud Secure Edge (CSE)
3.1.1 Select the Amazon Web Service (AWS) environment from the dropdown.
3.1.2 Select CloudFormation as the installation method.
3.2: In AWS, create a stack in CloudFormation
3.2.1 In the AWS Console, navigate to CloudFormation and select Create stack.
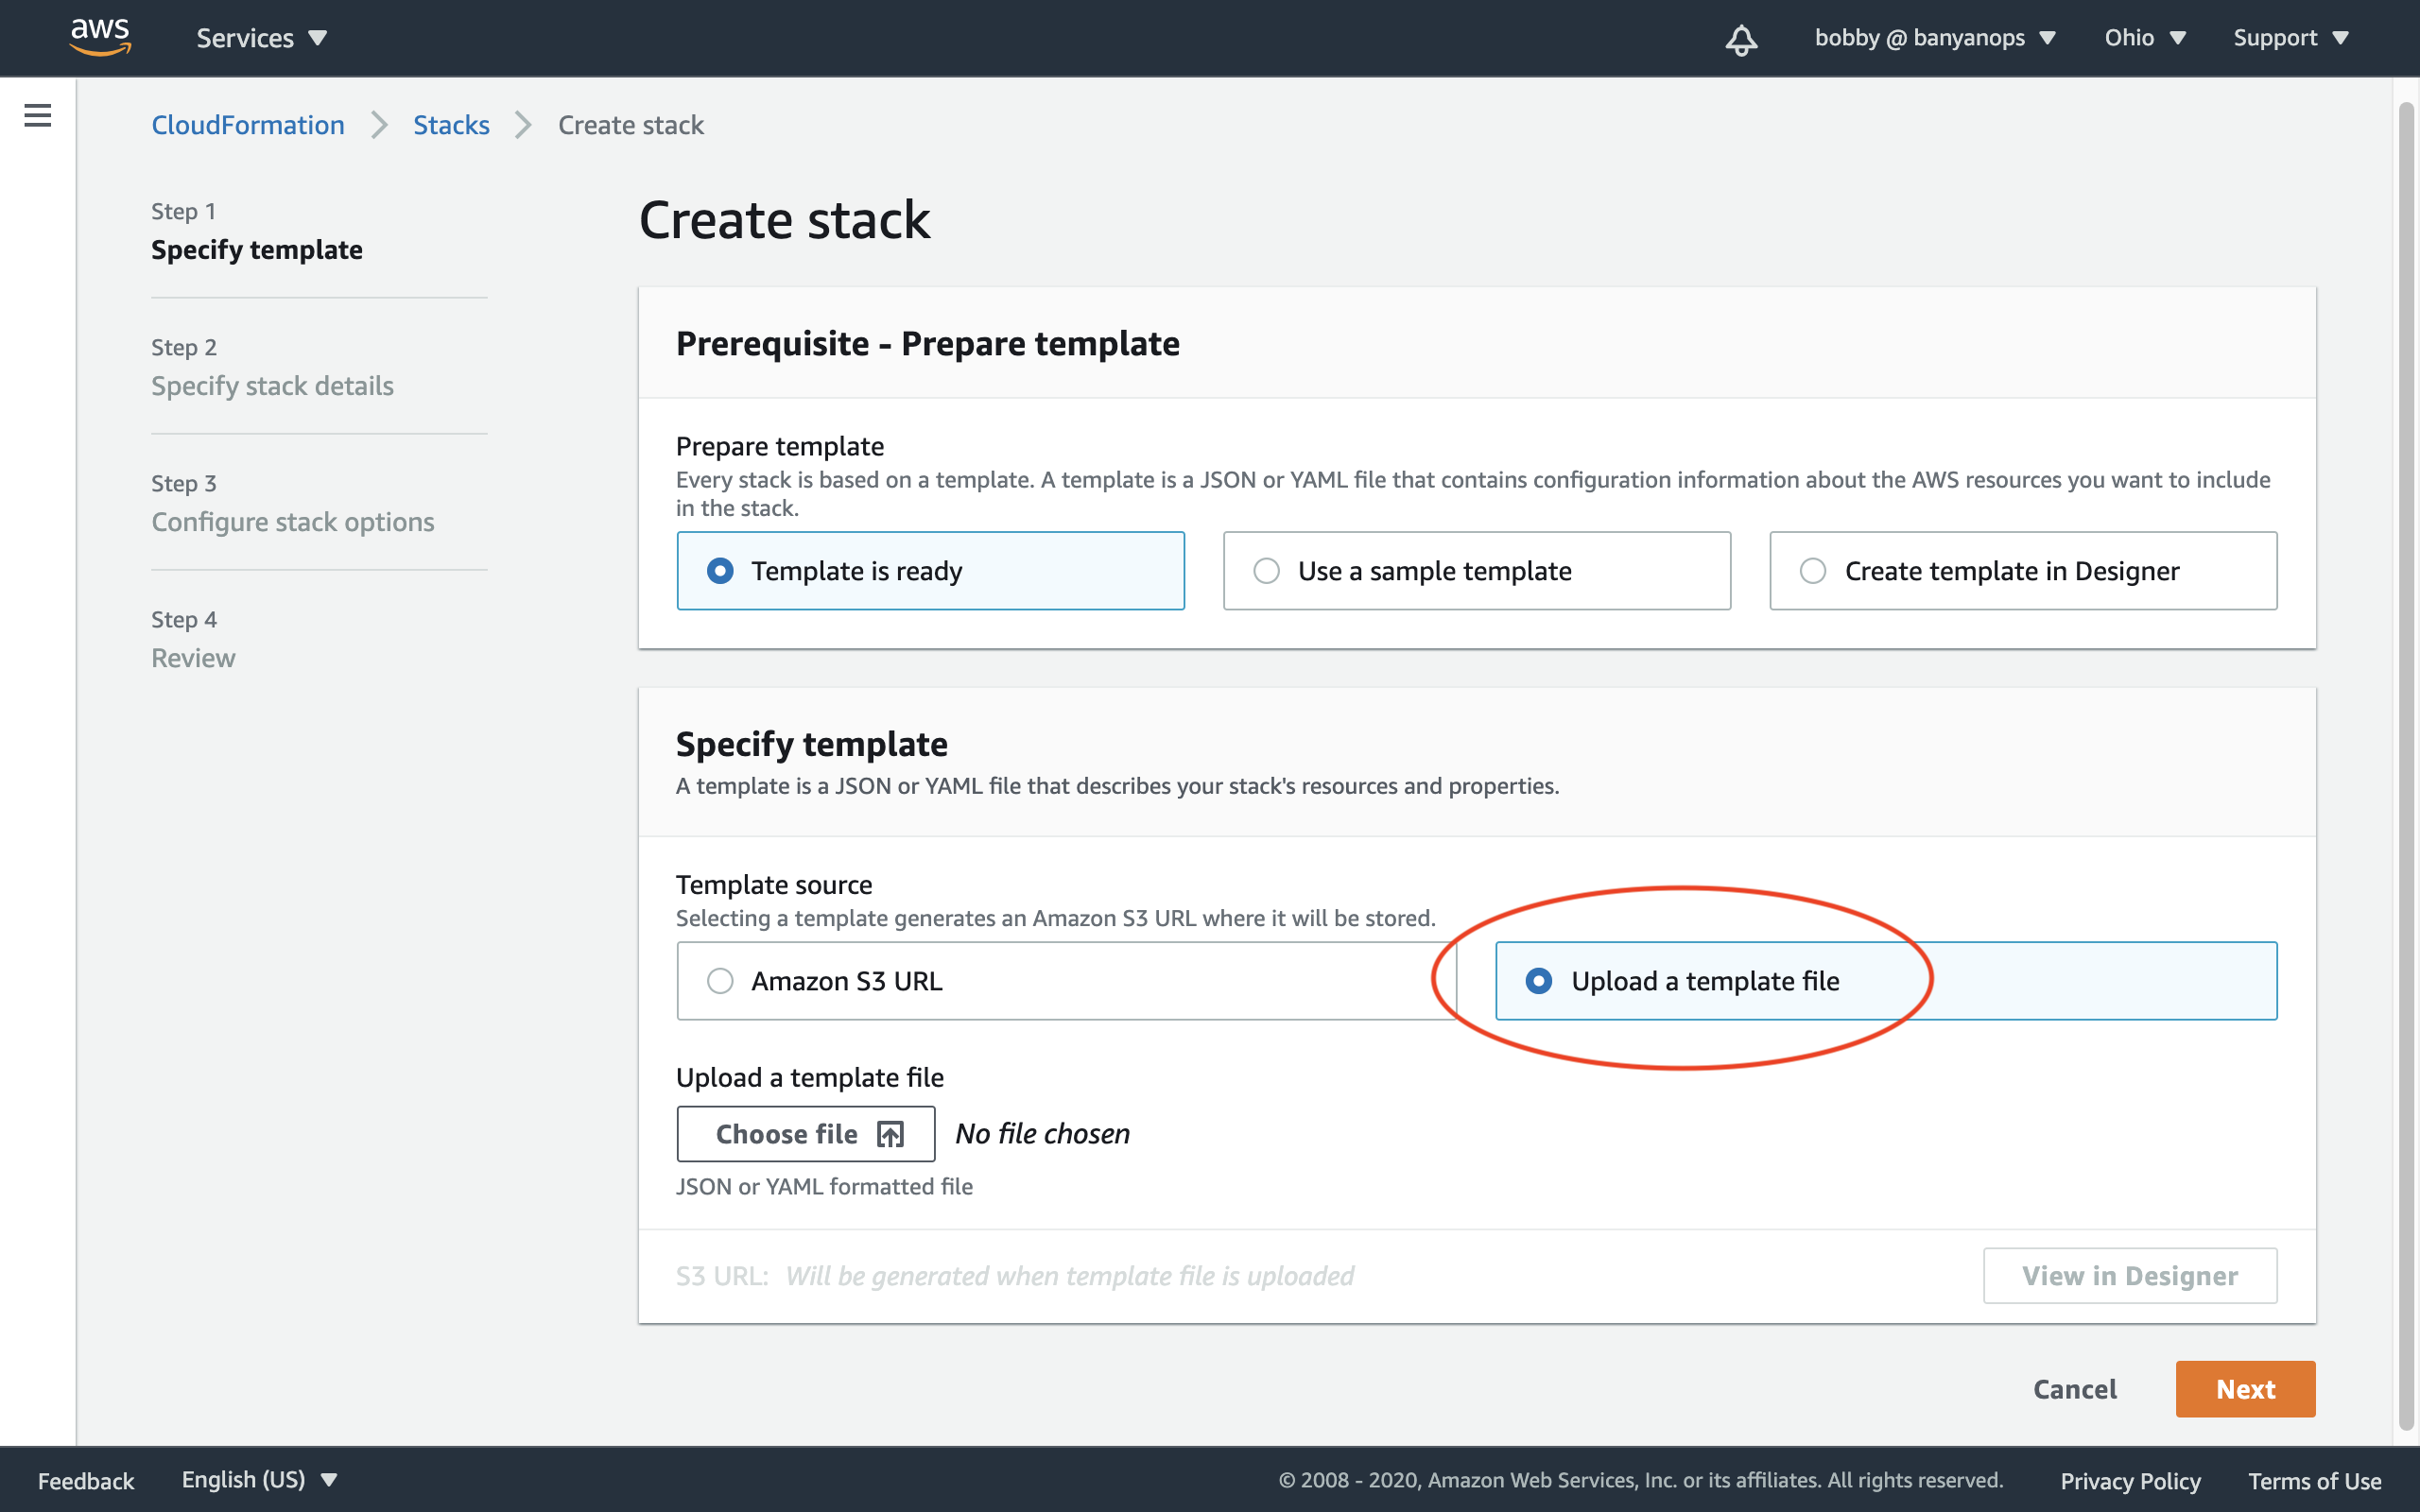
3.2.2 Select the With new resources option. On the Create stack page, select Upload a template file.
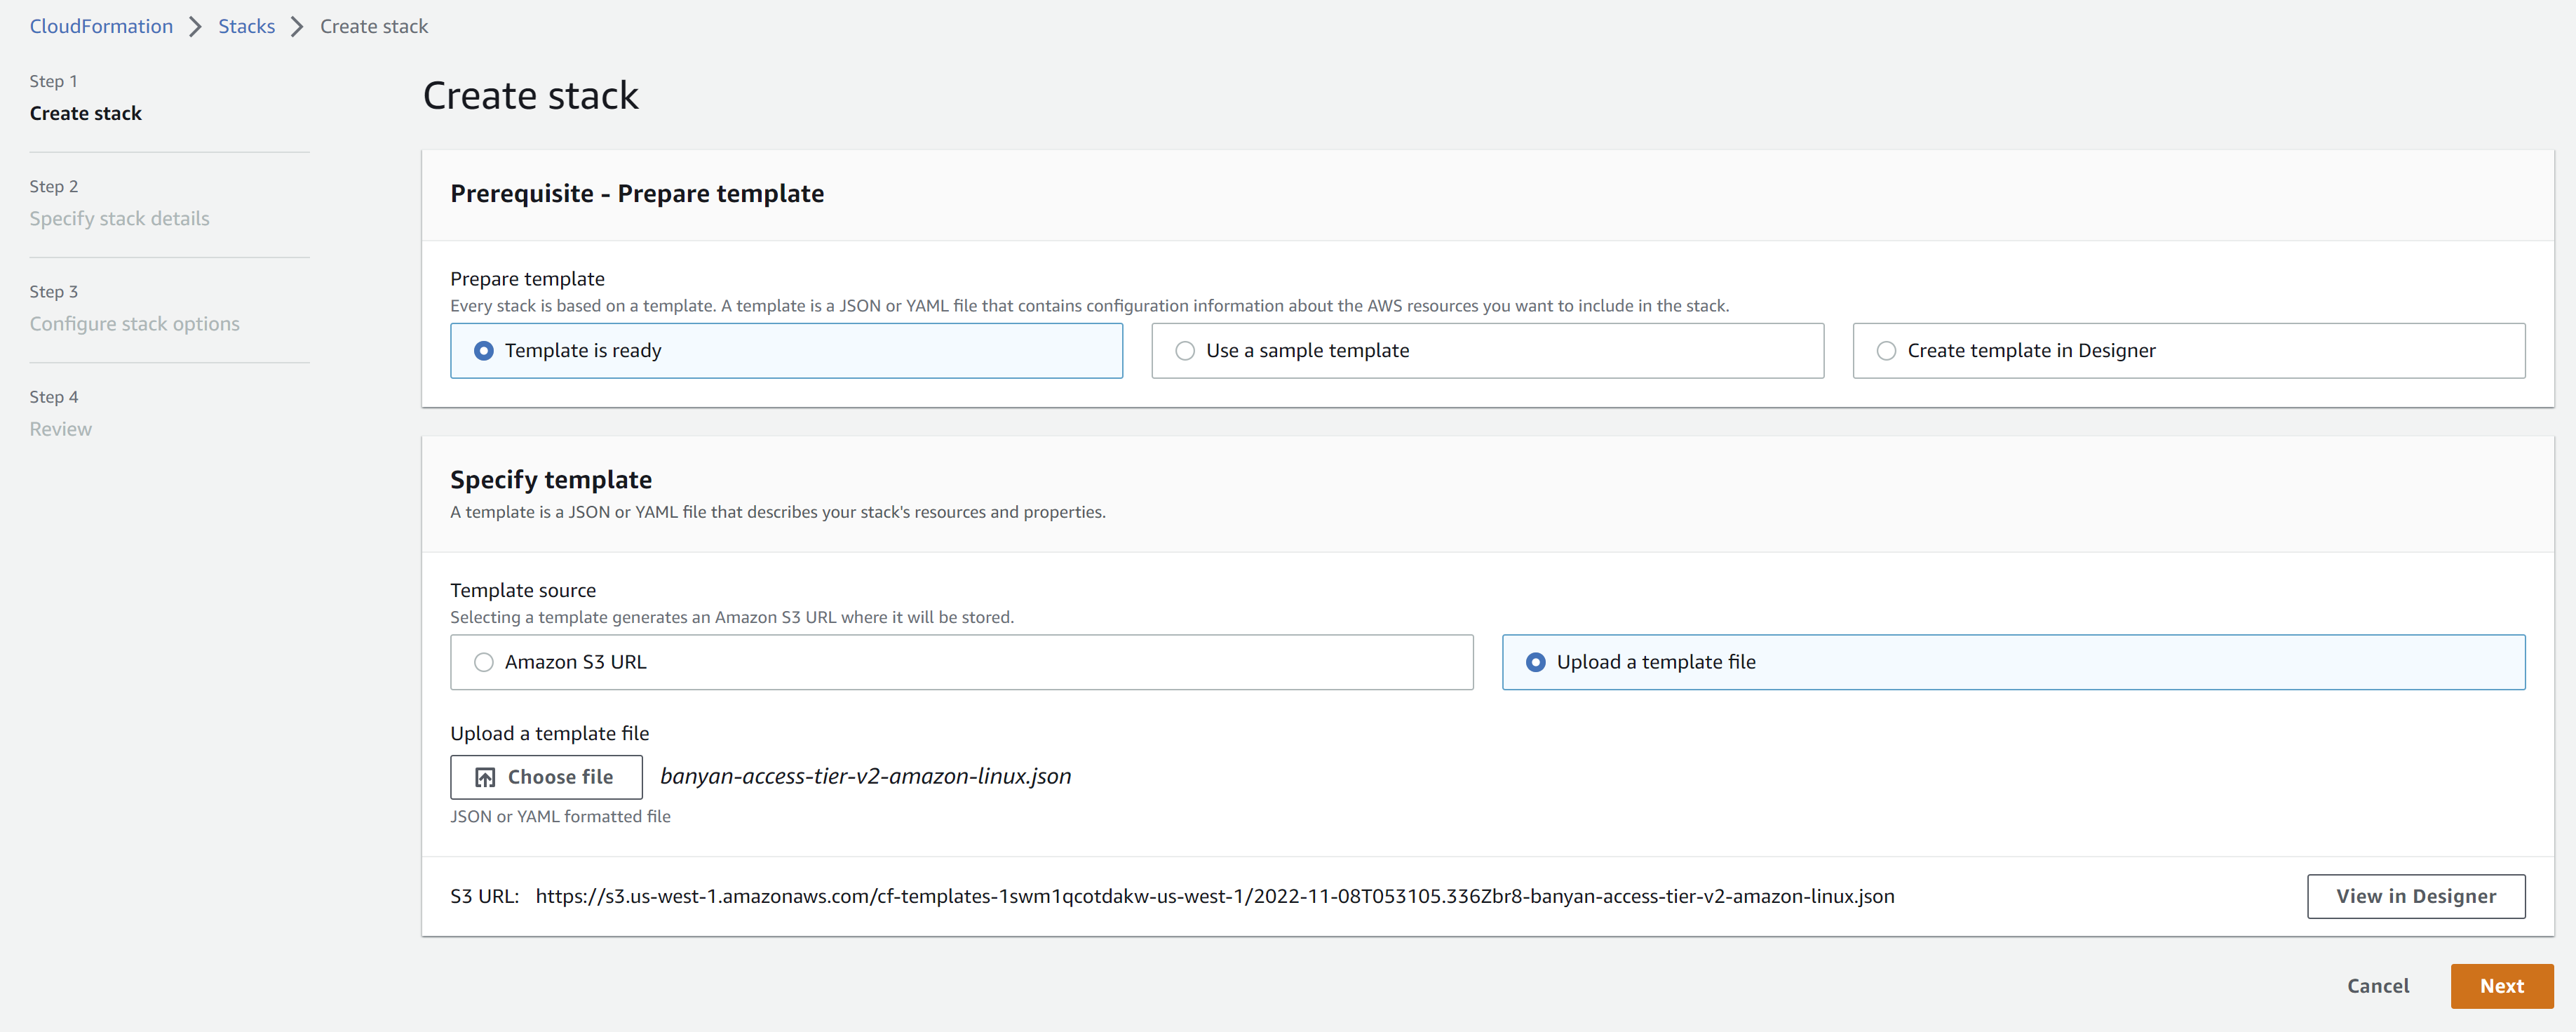
3.2.3 Upload the banyan-access-tier-v2-<os>.json file, and select Next.
3.2.4 Provide a Stack name (as shown in the Command Center), and configure the remaining mandatory parameters that are not pre-populated:
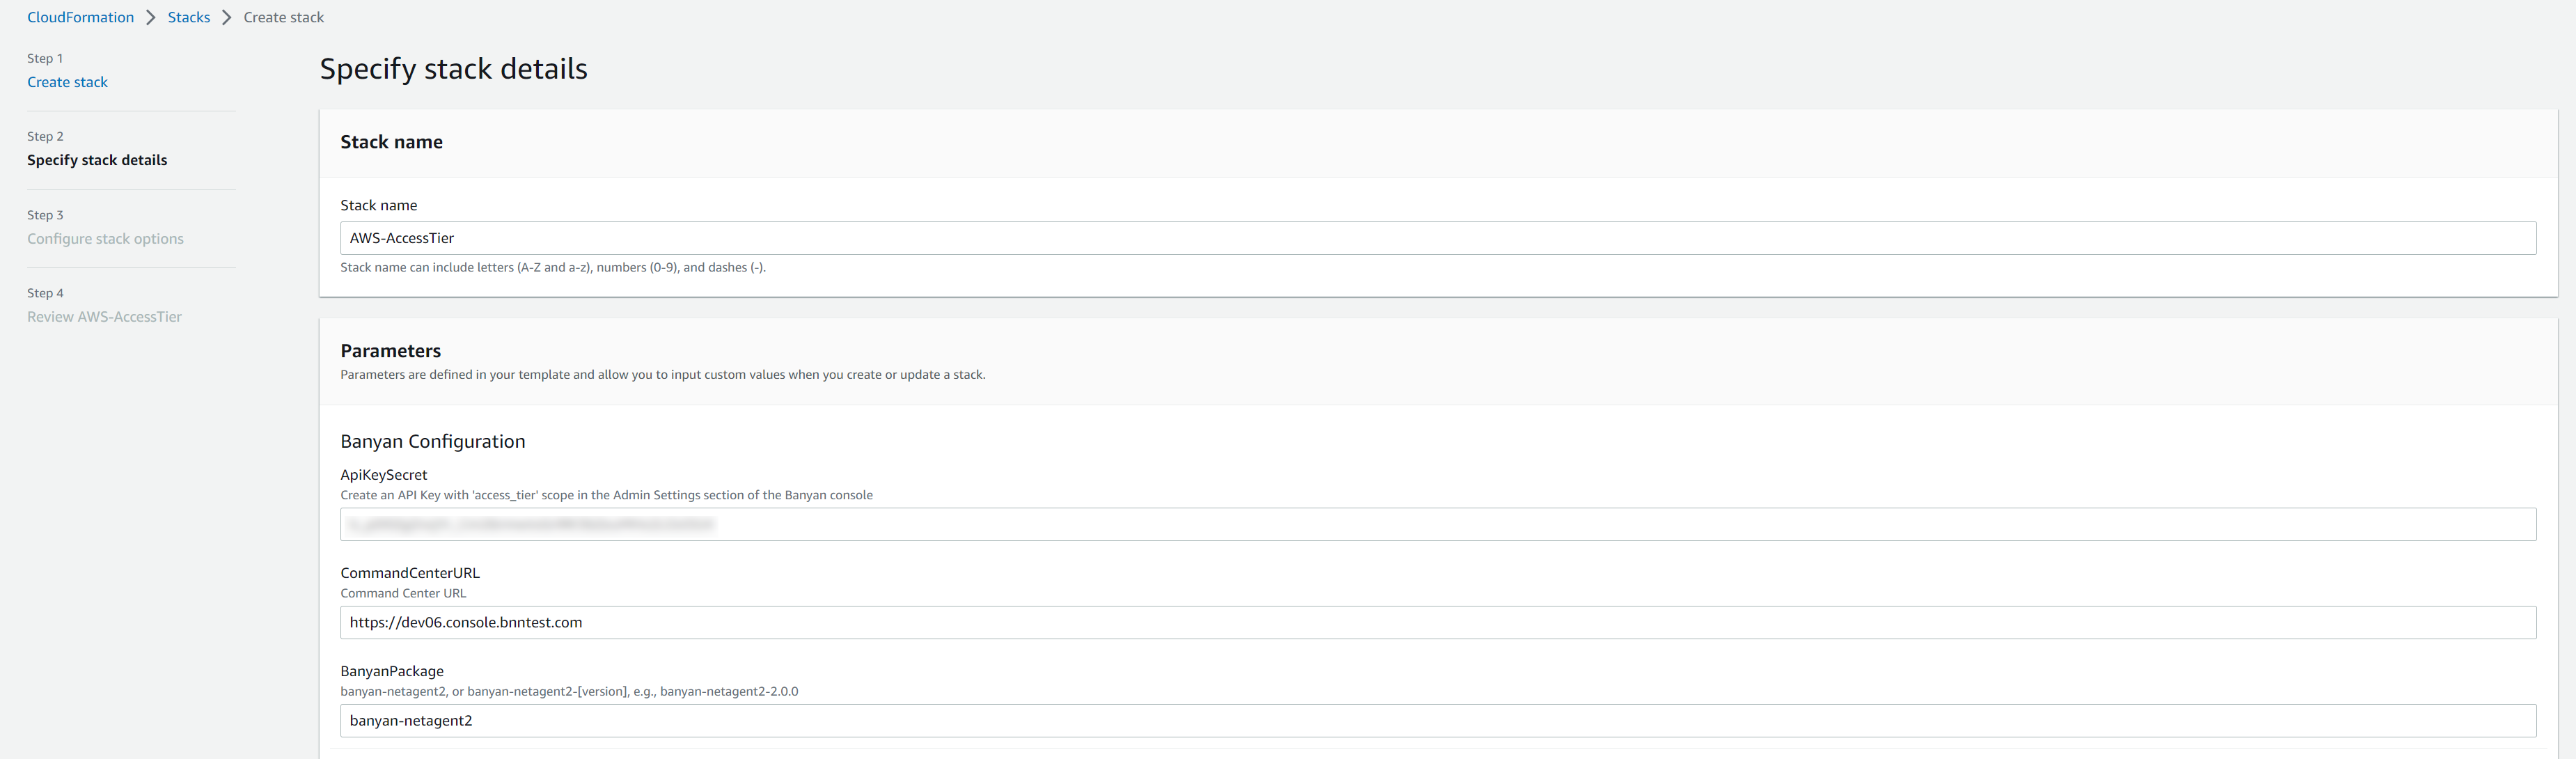
Provide Access Tier registration details:
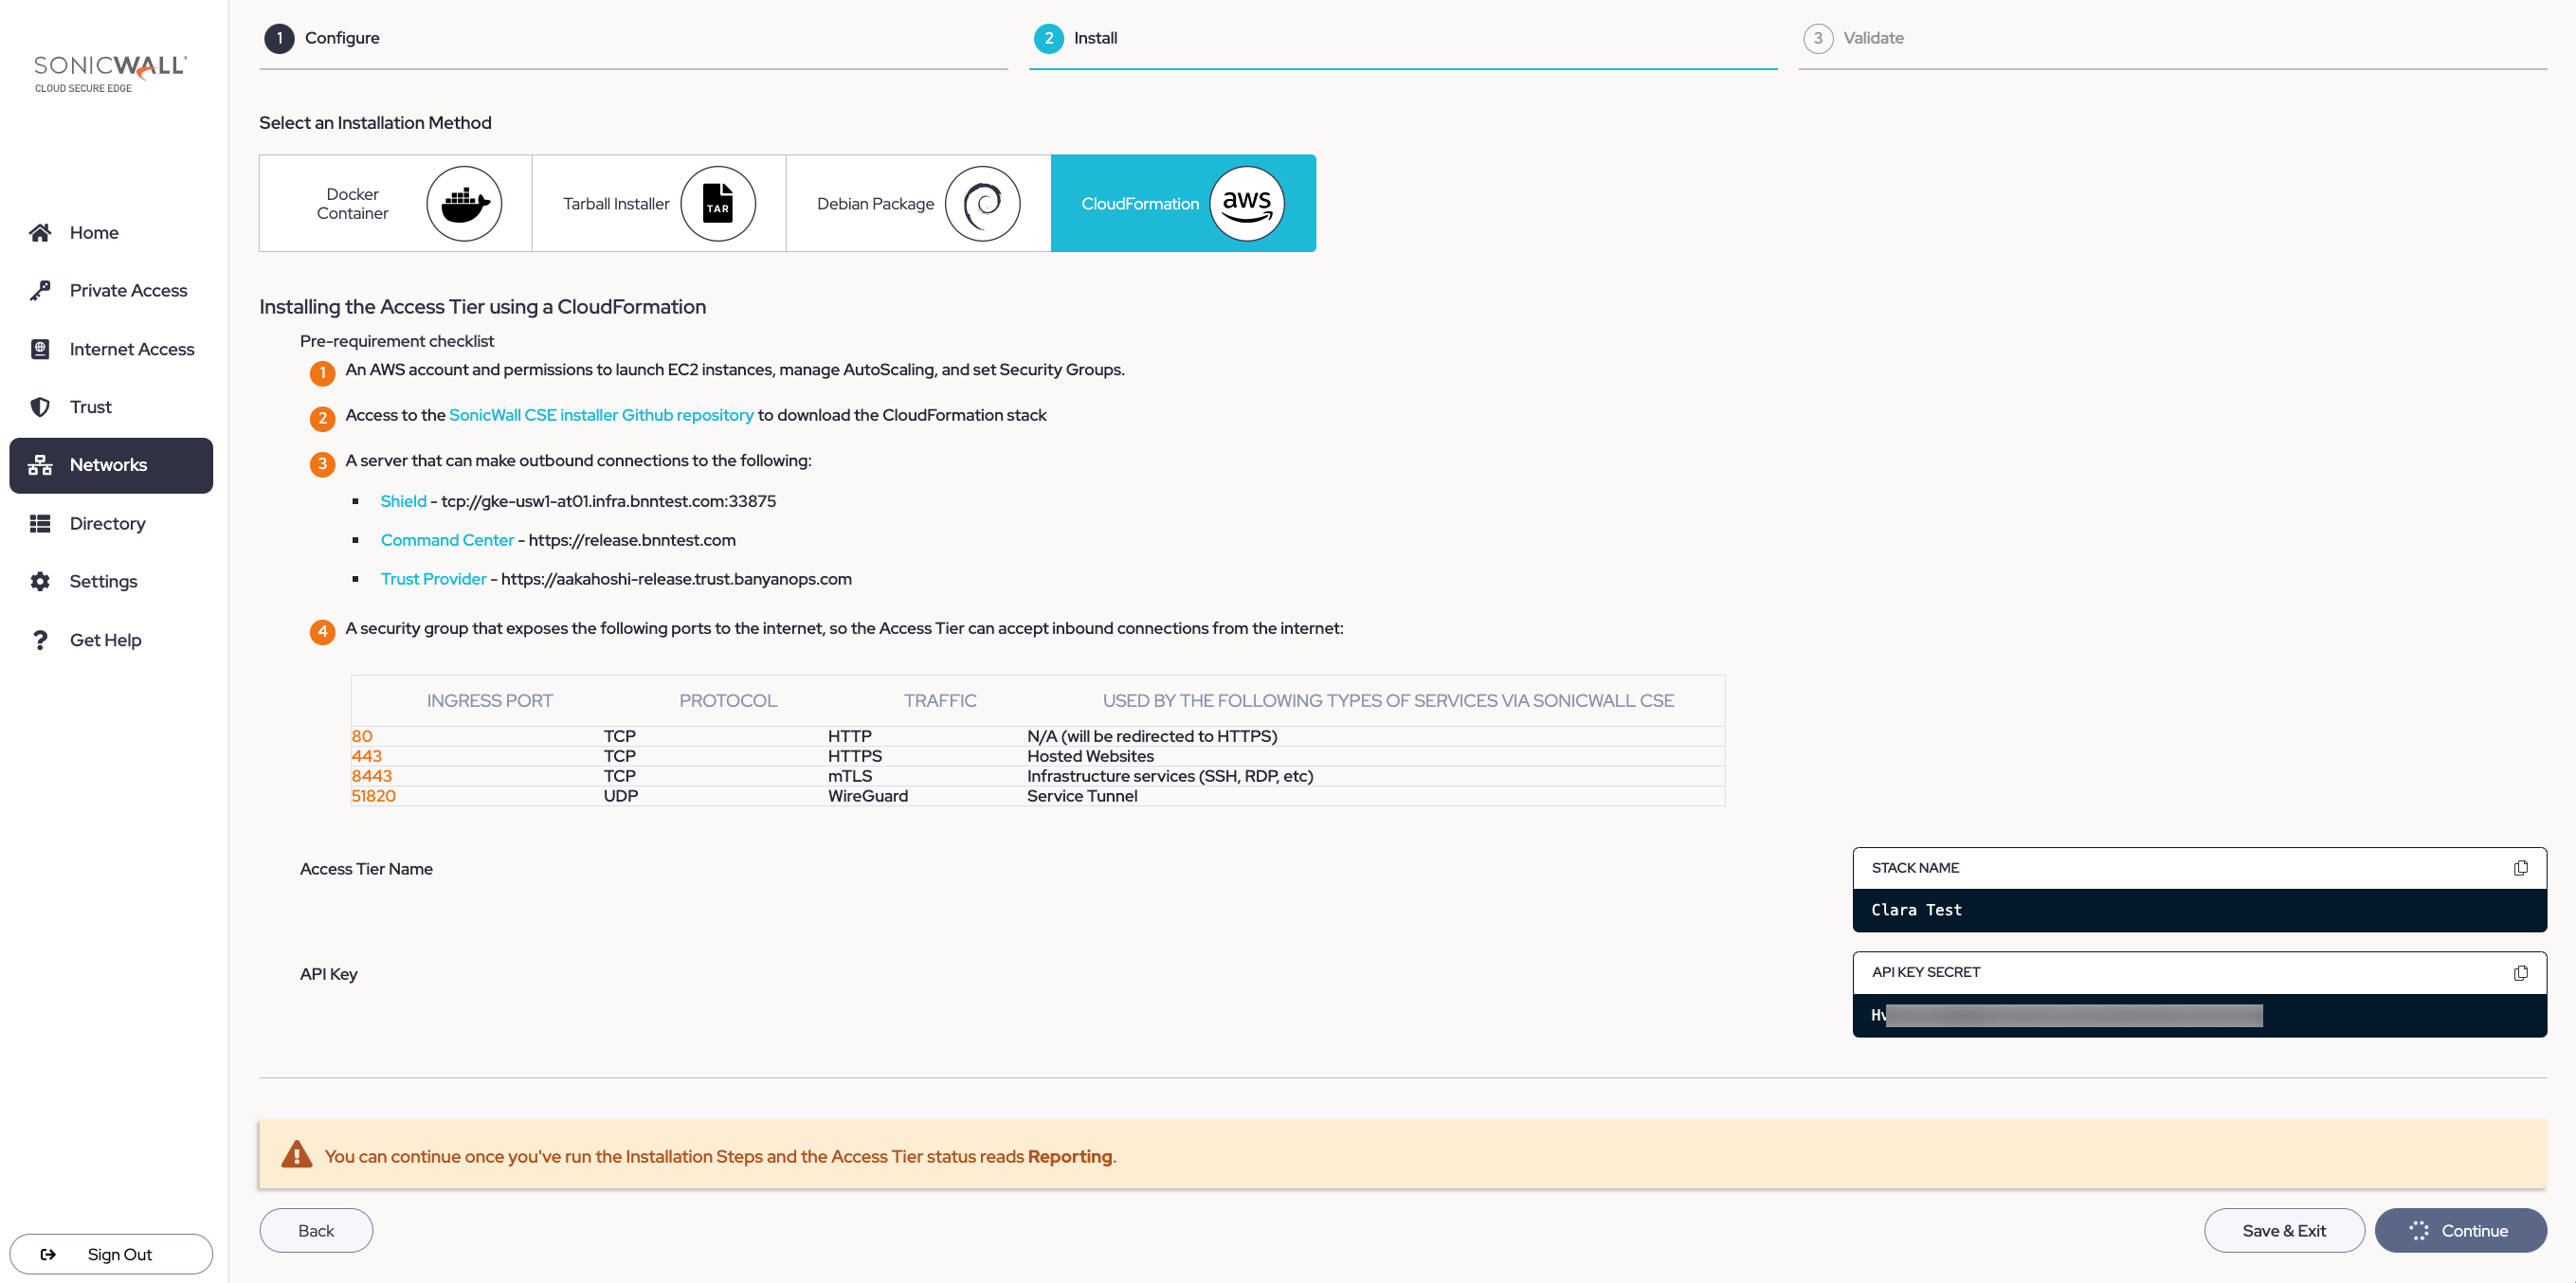
- API Key: Copy this parameter from the Install wizard, shown above.
- Command Center URL: Ensure that this points to the Command Center URL.
- CSE Package: To specify a particular version, use
banyan-netagent2=<version_number>(for Ubuntu) orbanyan-netagent2-<version_number>(for Amazon Linux 2)
Specify the AWS network configuration:
- VPC
- Public subnets
- Private subnets
3.2.5 Select Next, and then configure stack options according to your deployment needs.
3.2.6 Select Next, and then review the configured parameters before selecting Submit for Access Tier creation.
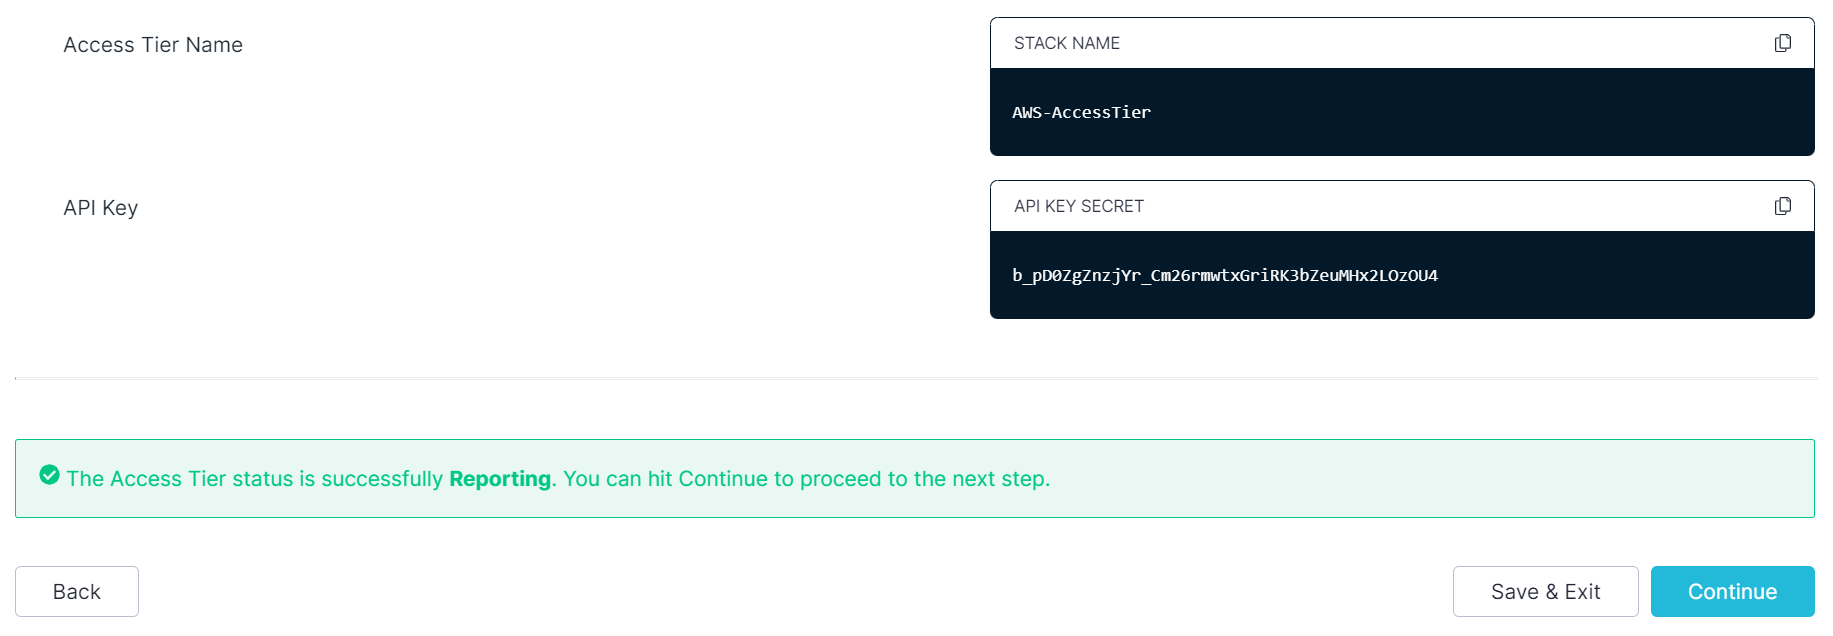
3.2.7 Navigate back to the Command Center, and select Continue once Access Tier status reads Reporting.
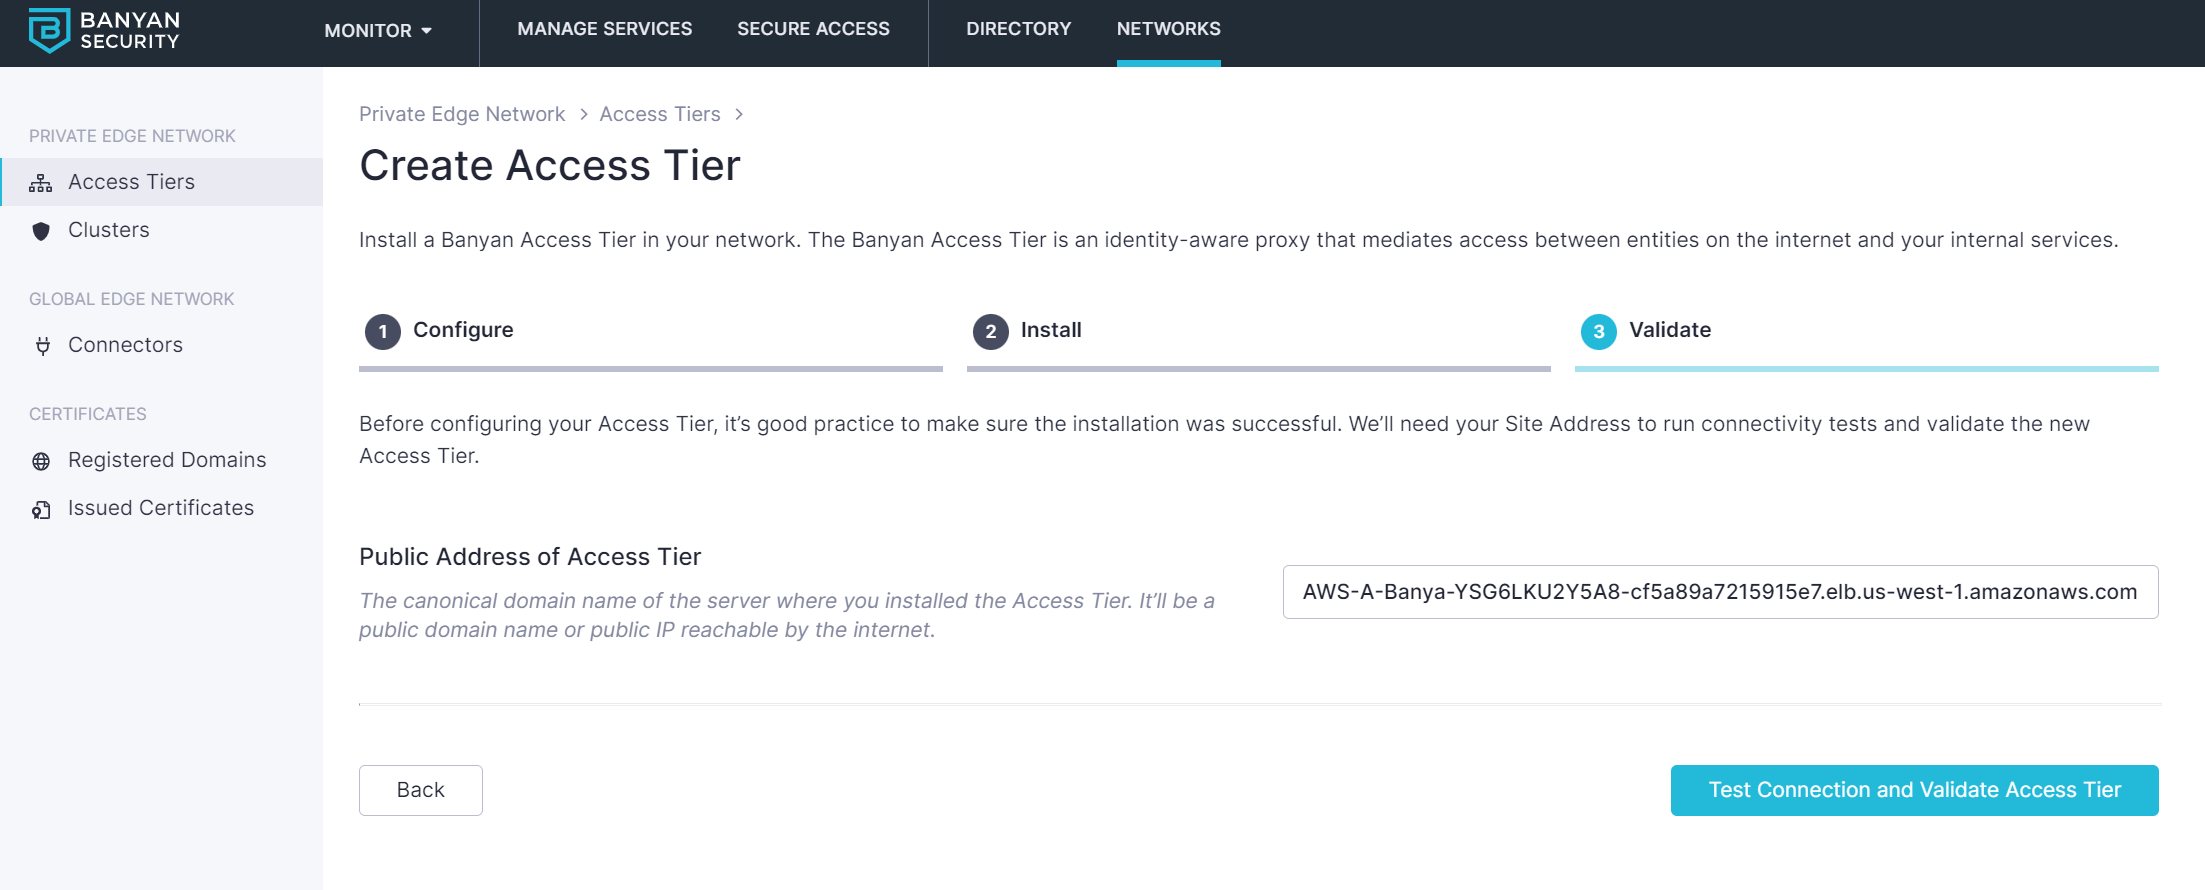
Step 4. Validate
Once the Access Tier is installed, check its logs on one of the instances at /var/log/banyan/netagent.log to ensure it is functioning as expected.
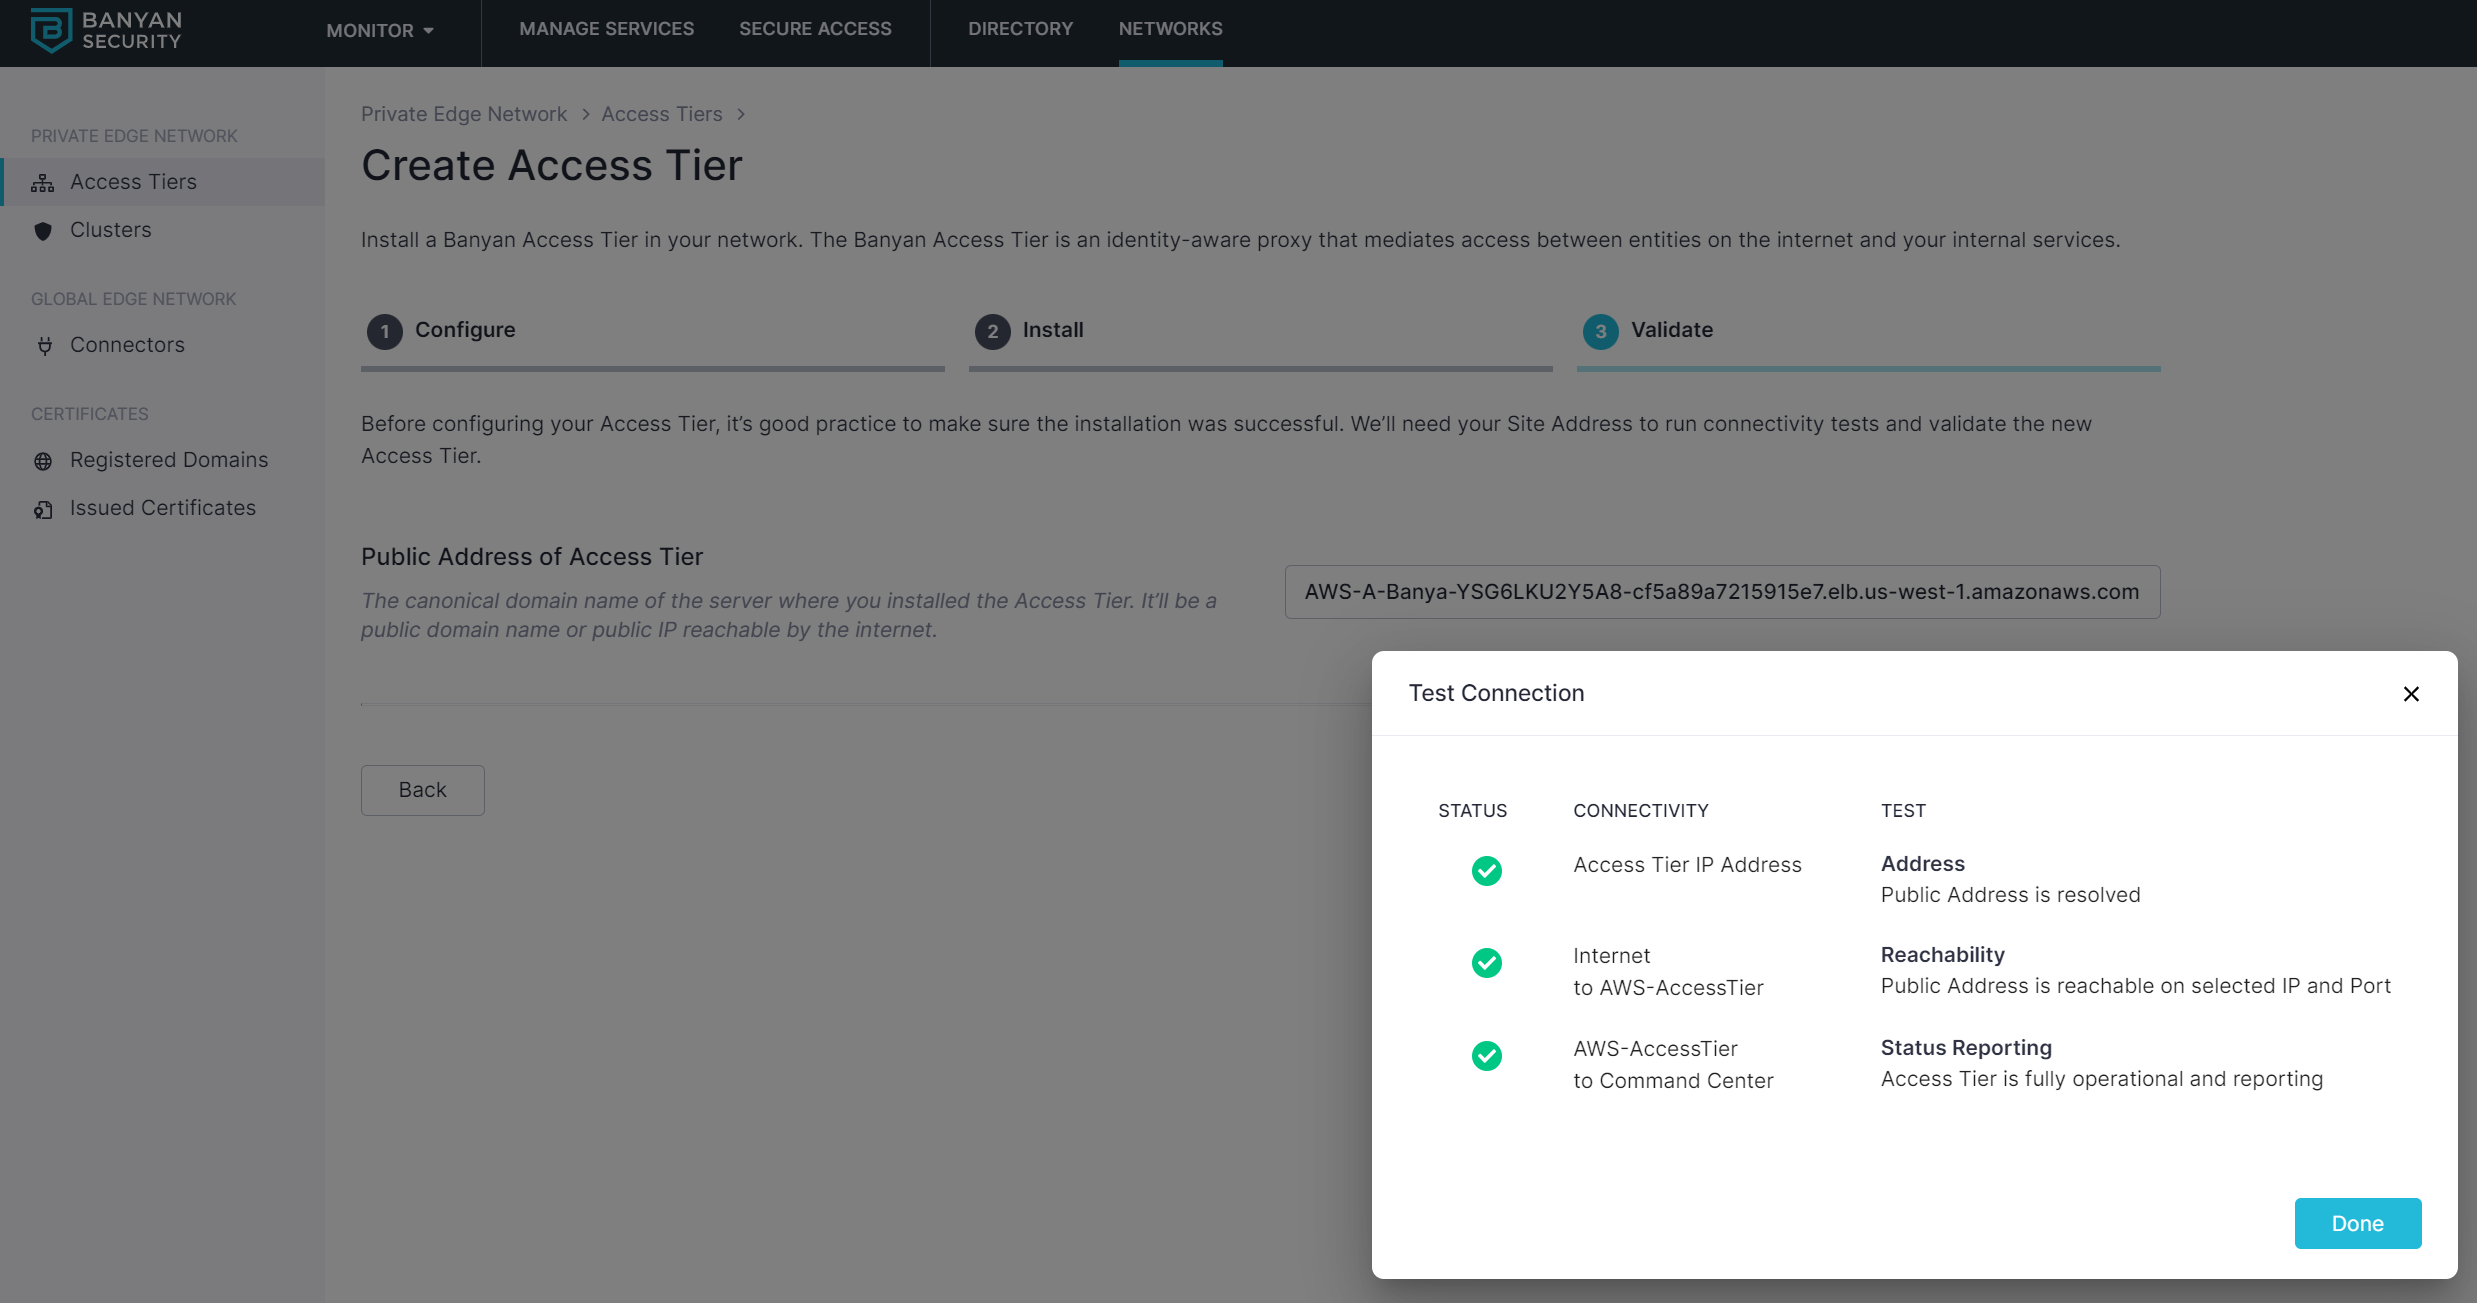
Under Networks > Access Tiers > [Your Access Tier] in the Command Center, select Test Connection to verify that your Access Tier is correctly registered.
Additional Notes
Upgrading Netagent
1. Navigate to the AWS console, select the CloudFormation service, and select your deployed stack.
2. Select Update and then Next (to obtain the stack parameters).
3. Change the banyanPackage parameter to the desired version (i.e., banyan-netagent-[VERSION]).
If your banyanPackage parameter simply reads banyan-netagent (without a [VERSION] appended to it), then you can simply proceed to Update stack and it will automatically update with the latest version.
4. Select Next until you reach Update stack. Then, select Update stack.
Creating a new VPC
Use the steps below to deploy Access Tier on a new VPC and provision all the requisite AWS networking.
1. Download the banyan-network-stack.json file.
2. In the AWS Console, navigate from Services > CloudFormation.
3. Create a stack With new resources (Standard) and upload the banyan-network-stack.json file to provision all the requisite AWS networking.
4. Enter a stack name, and then ensure the Zones are valid for your region.
5. Configure stack options as needed, then select Create stack.
6. Since Access Tier will be deployed in this VPC, ensure the Access Tier has connectivity to the upstream application, server, or host via VPC peering.