Register a Generic TCP Infrastructure Service
This article will show you how to create a Infrastructure service to enable access to an internal database located in your private network, so a user can conveniently yet securely connect using their preferred DB management tool.
- Updated on
Scenario
For this guide we have an internal infrastructure service that needs to published to end users. As depicted in the diagram below, this guide uses an internal SQL database, which is installed on a host named mydb with IP address 10.10.12.12 with the DB process listening on port 3306.
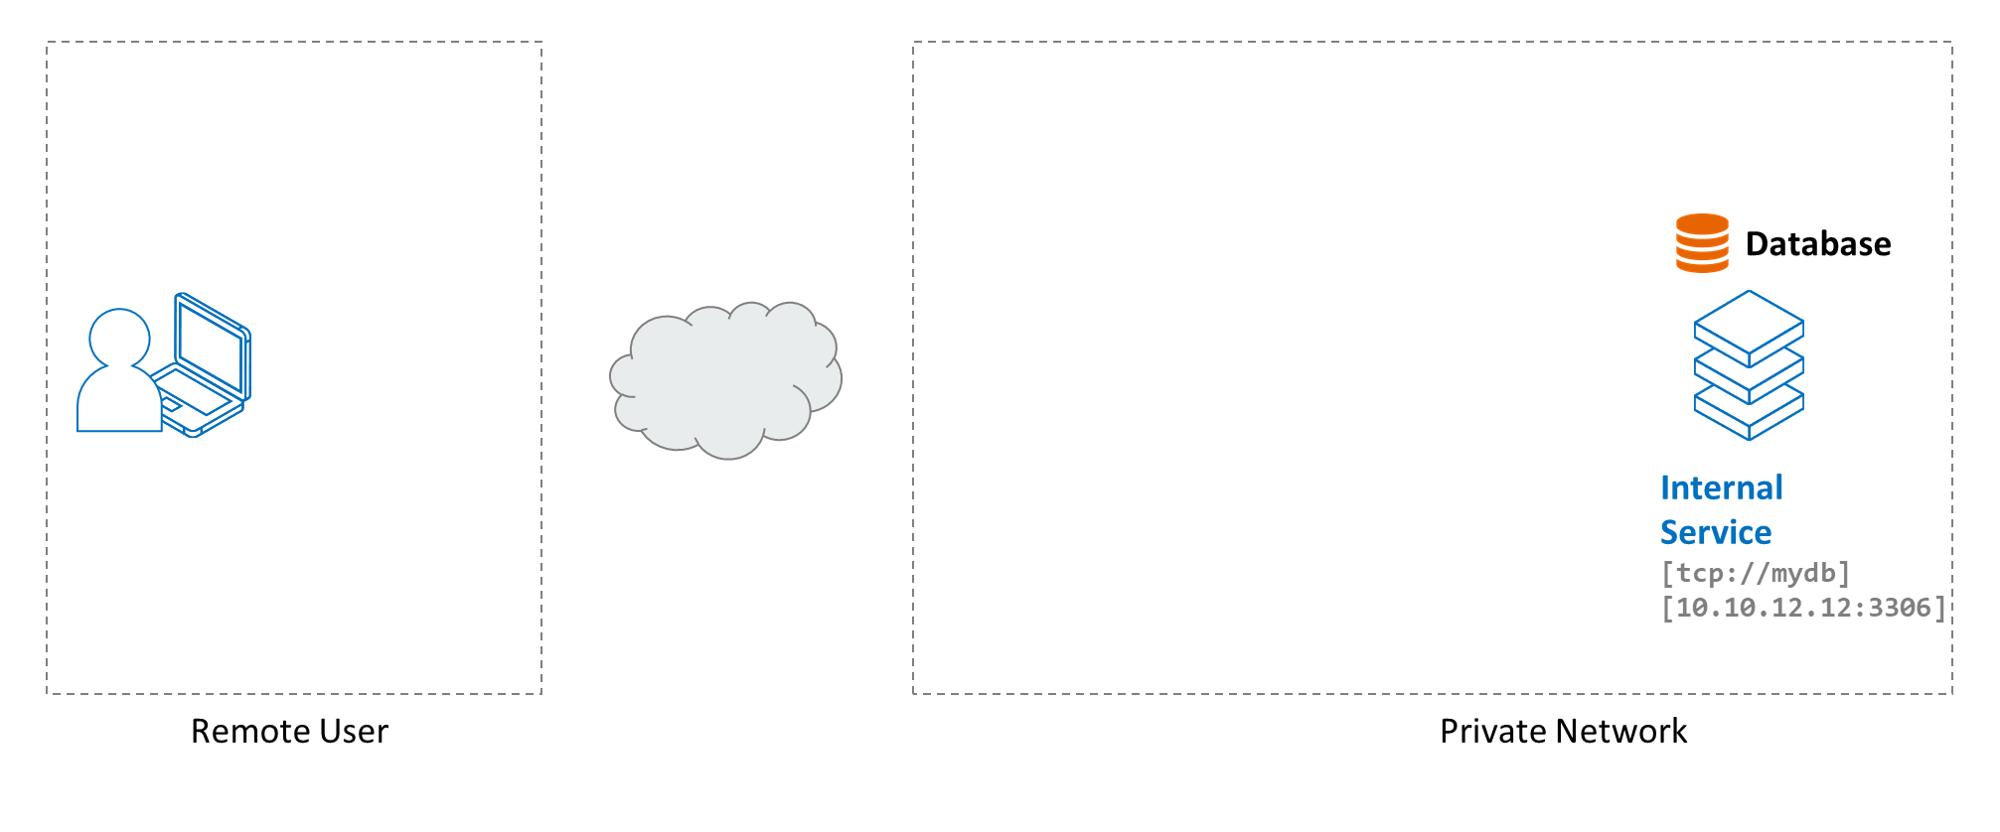
We assume your end users have been added to your Cloud Secure Edge (CSE) directory, and that they have the latest desktop or mobile app installed on devices from which they will access the internal database.
This guide uses the Amazon RDS database as an example. However, you can publish any networked service that uses the TCP protocol on a single fixed port as a CSE Infrastructure service.
Setup
The setup is as follows:
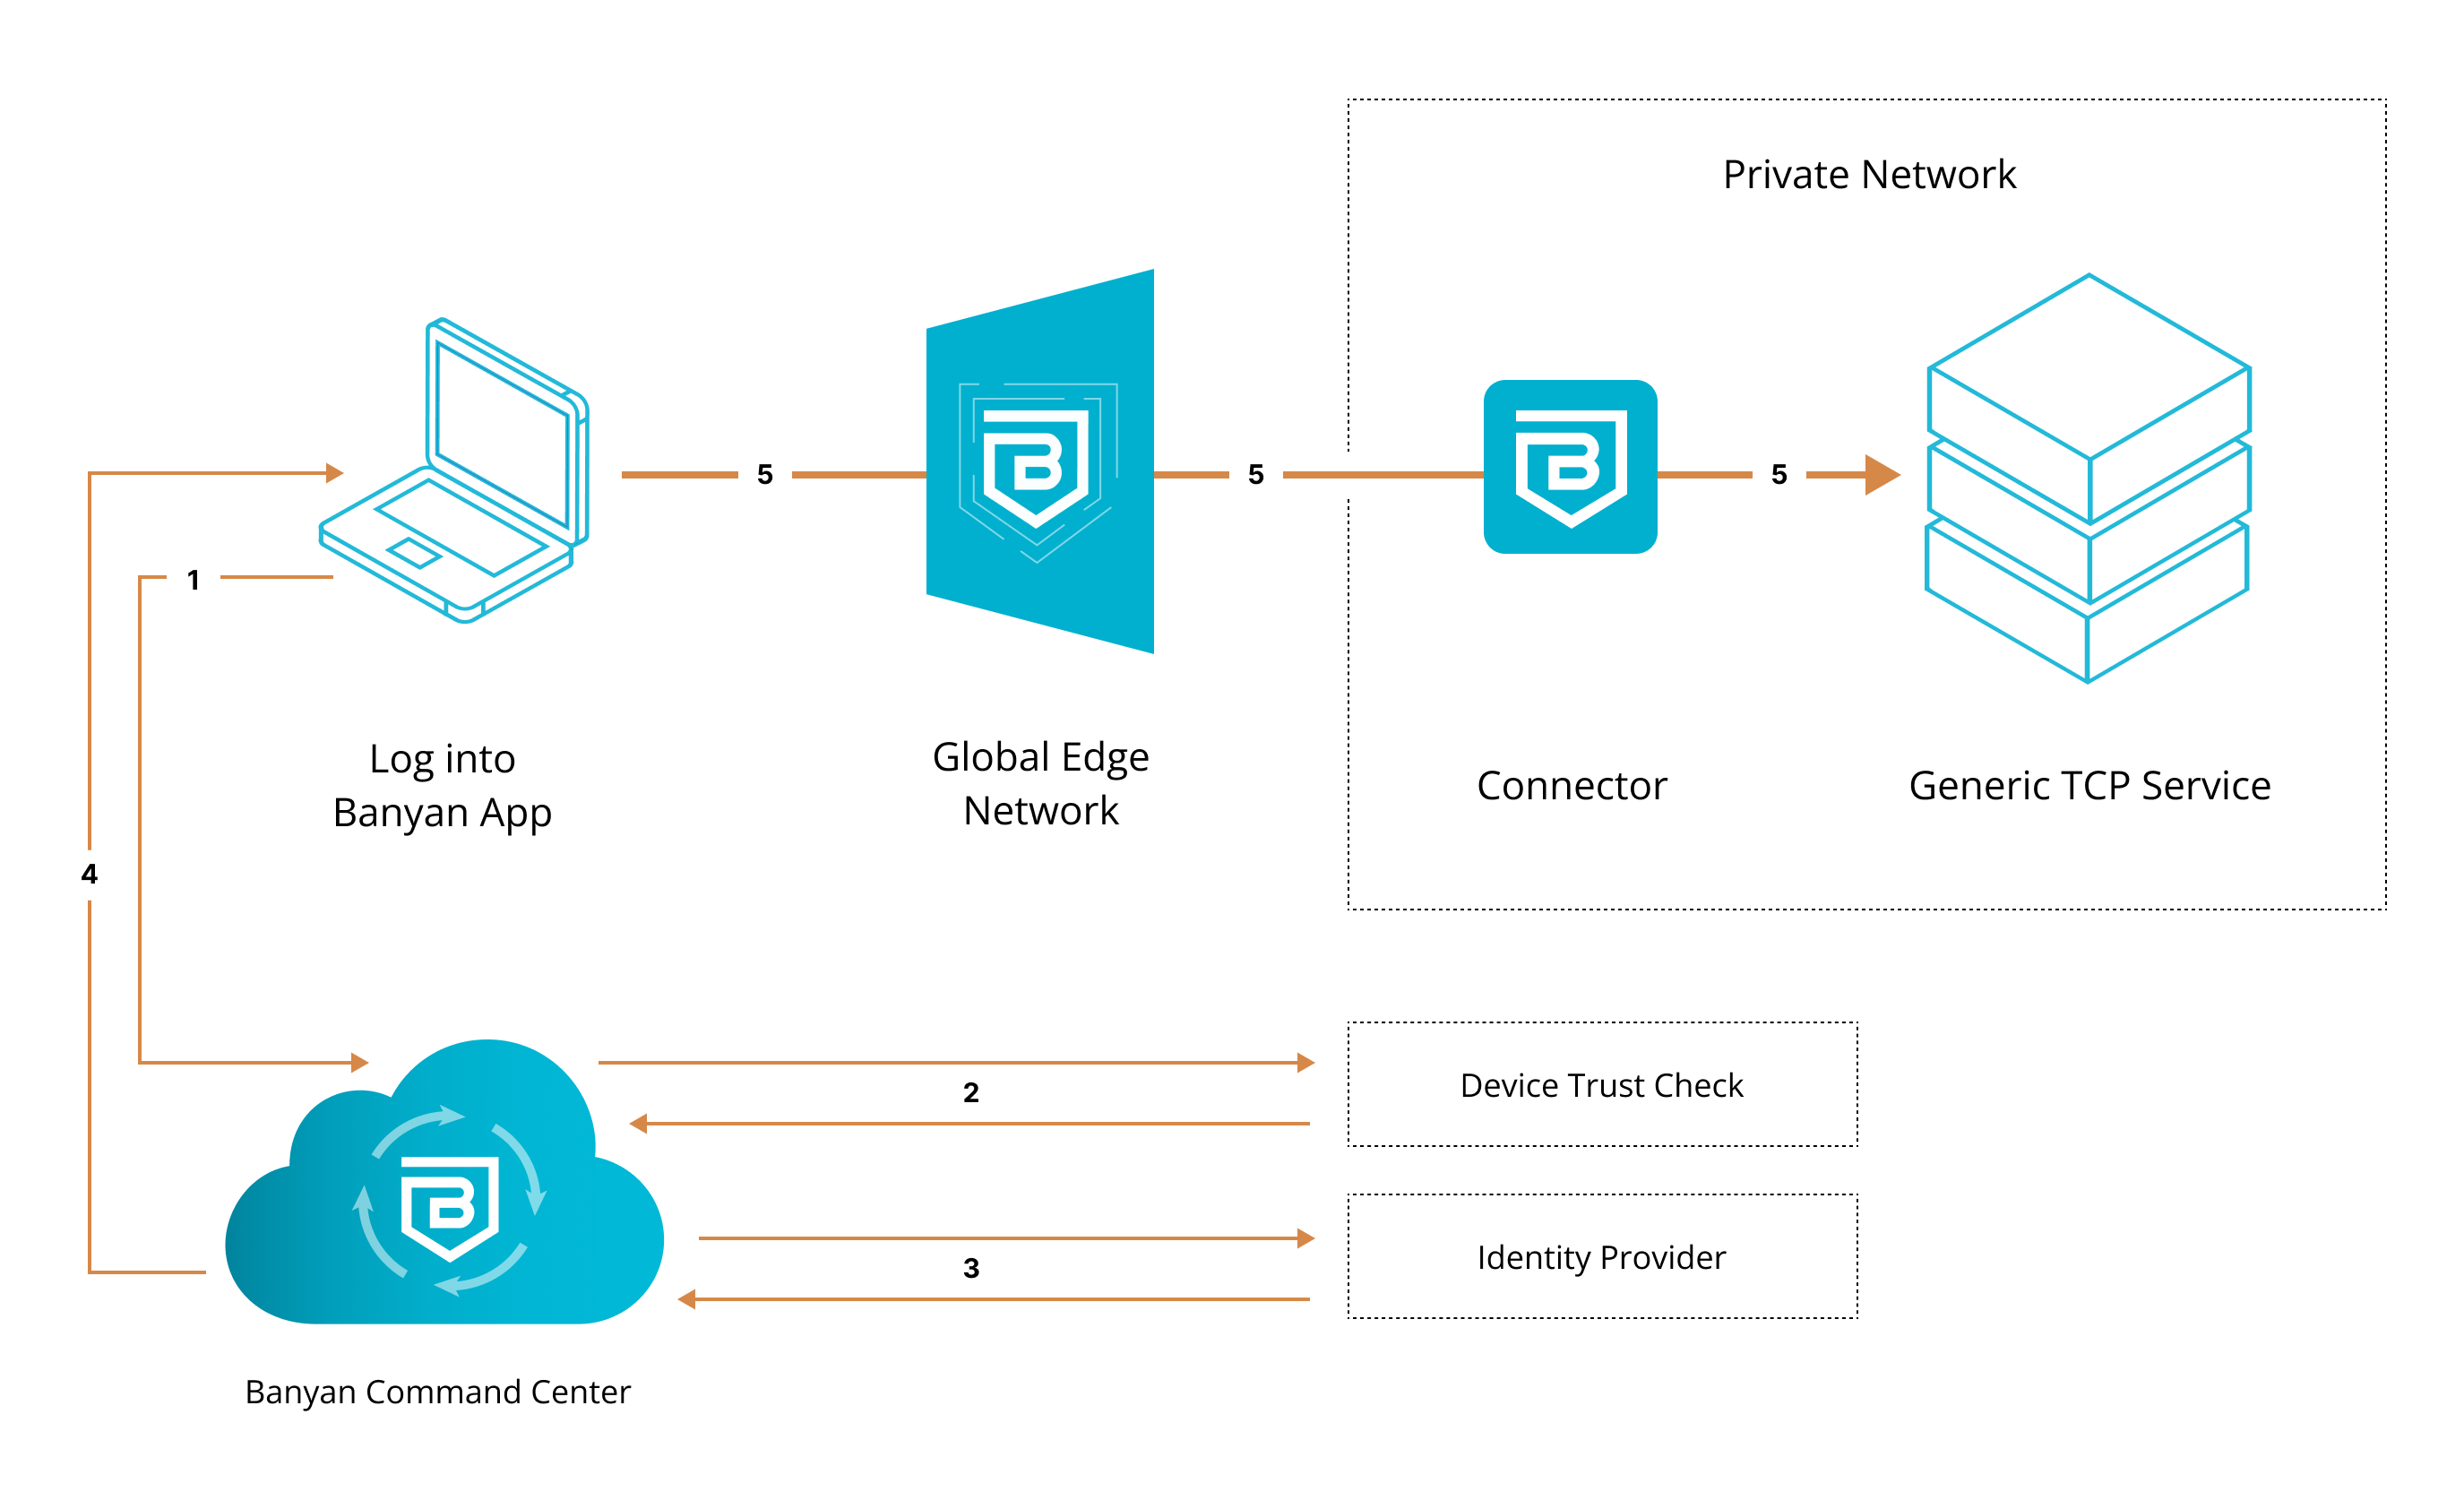
1. End user requests access to server. User’s request is routed to CSE.
2. CSE runs a device trust check via user’s org’s device manager, which is integrated with the app.
3. Once verified, the device is then authenticated via their org’s identity provider.
4. Once authenticated, user’s device is issued a Trust Cert. CSEproxy adds the Trust Cert to the user’s request.
5. User’s request is passed to the Global Edge Network, relayed to the Connector inside the org’s private network, and then sent to the server.
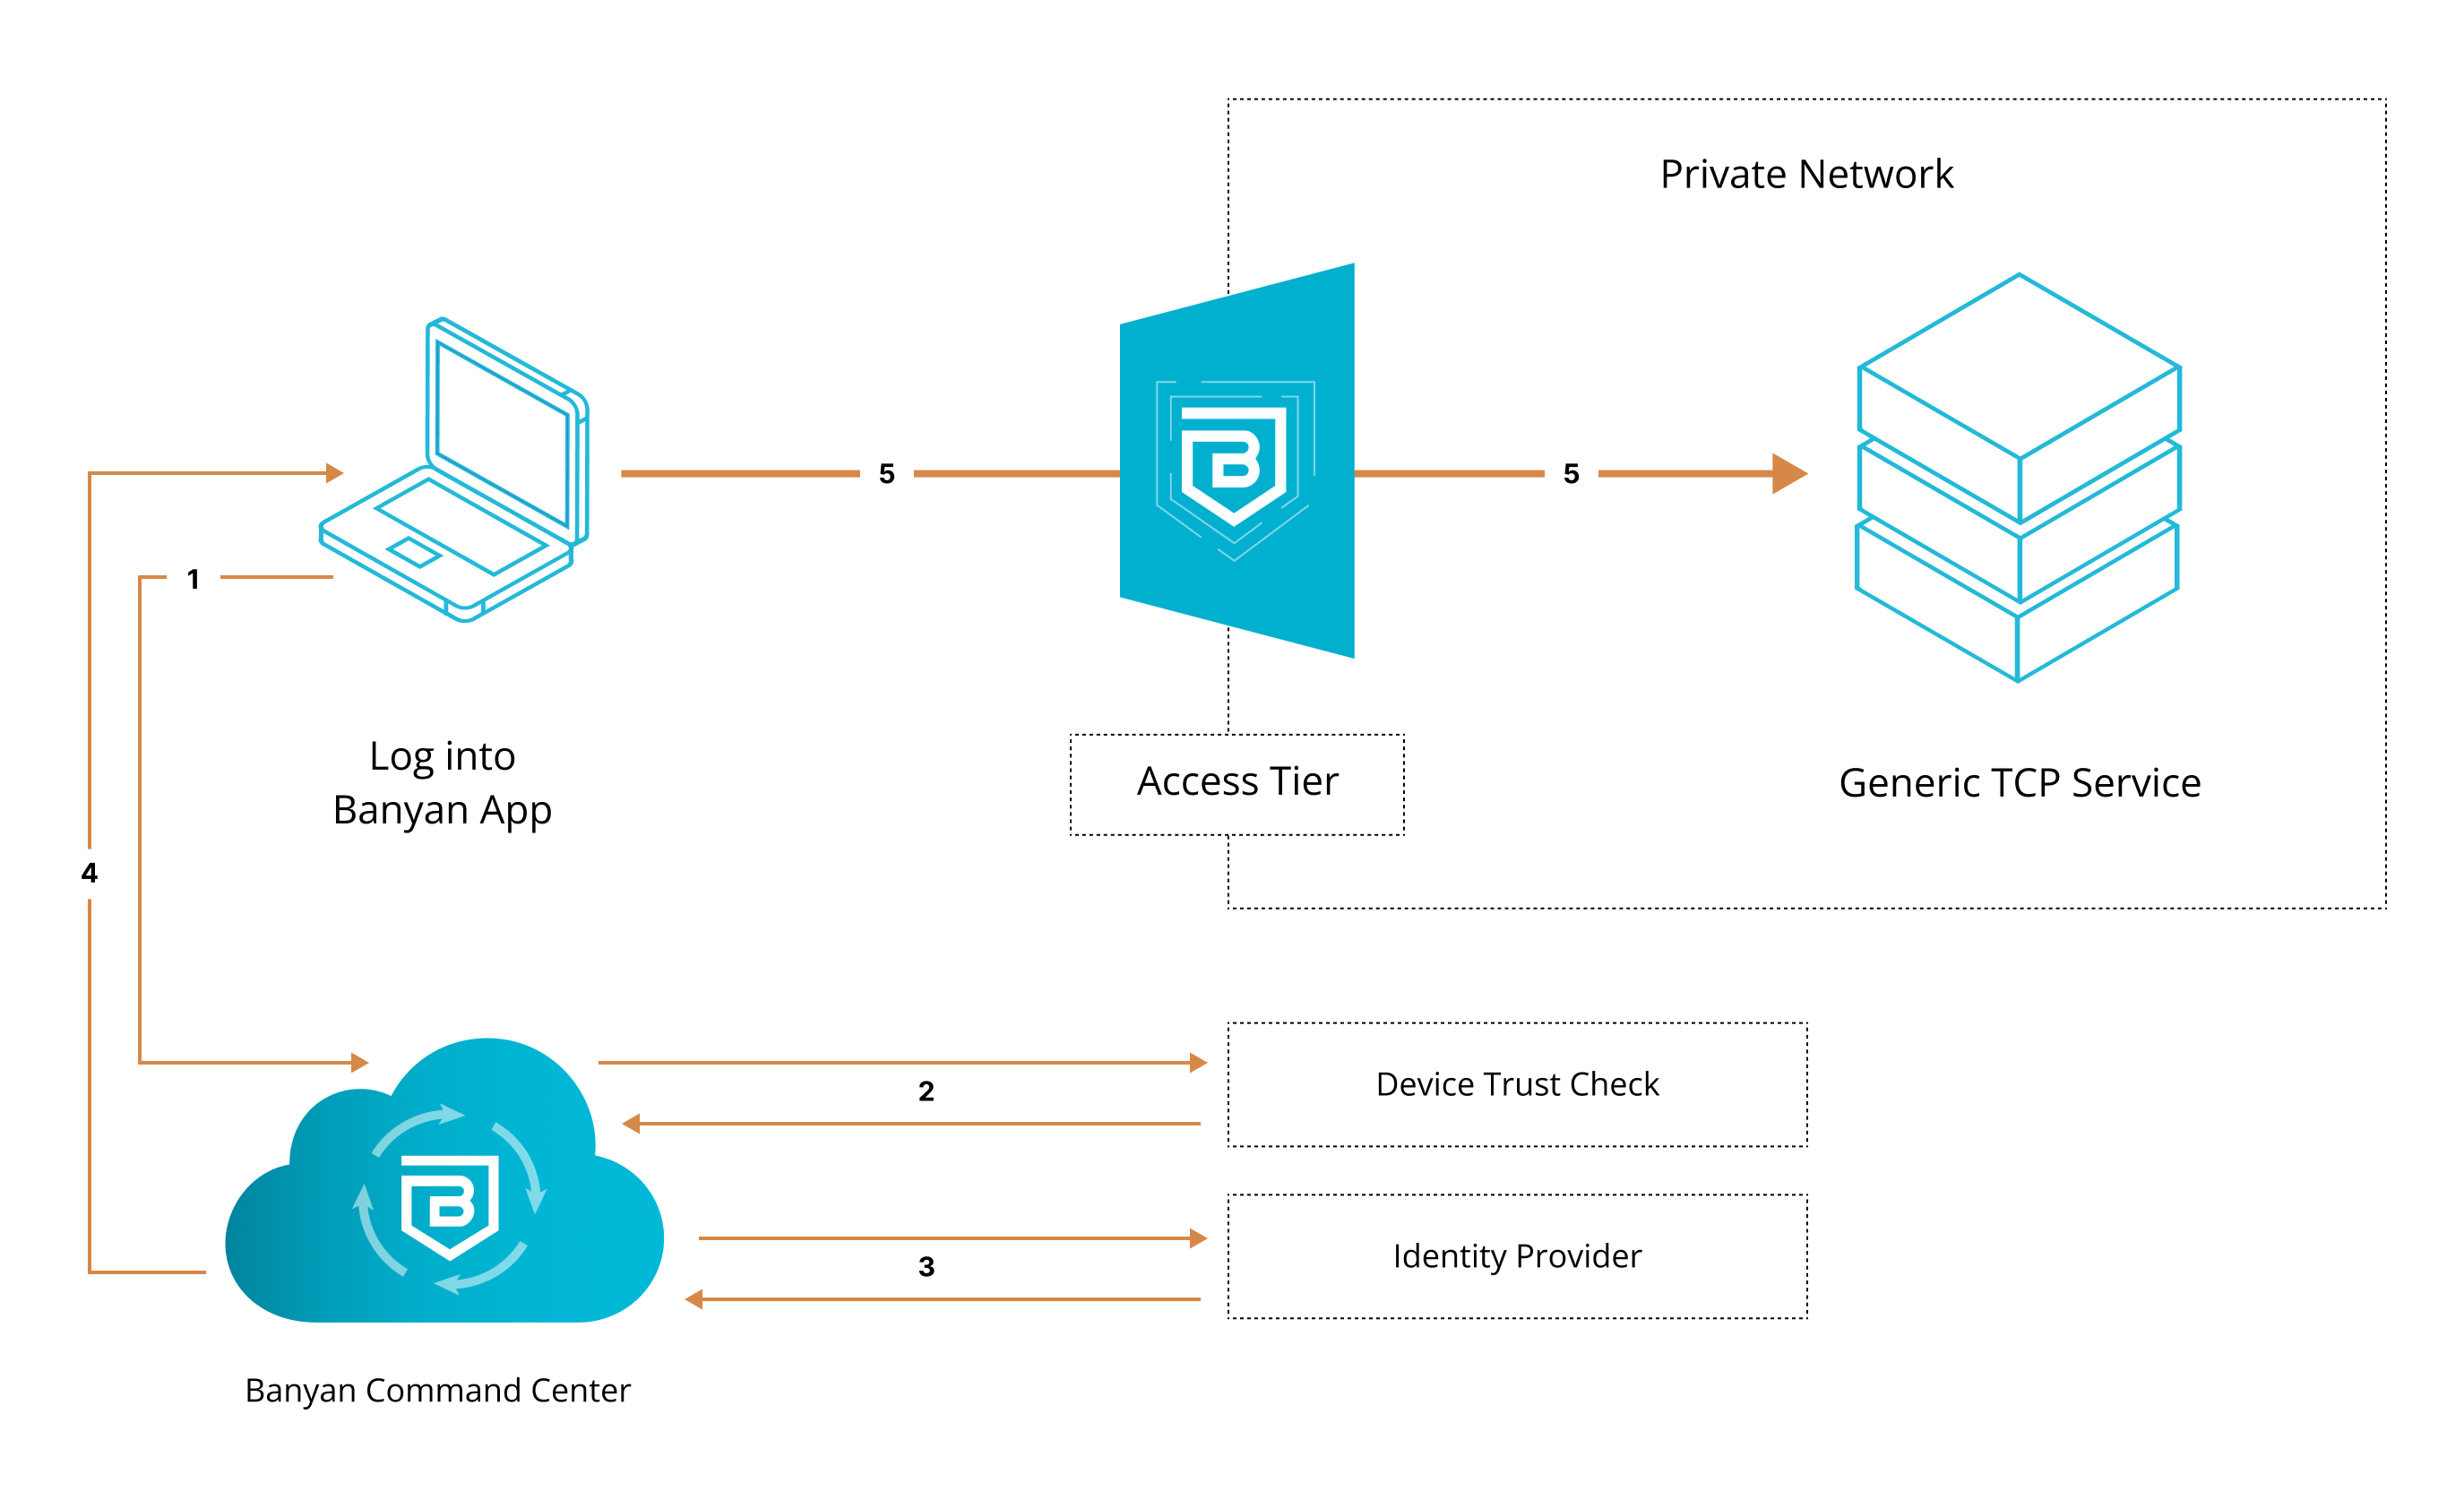
1. End user requests access to server. User’s request is routed to CSE.
2. CSE runs a device trust check via user’s org’s device manager, which is integrated with the app.
3. Once verified, the device is then authenticated via their org’s identity provider.
4. Once authenticated, user’s device is issued a Trust Cert. CSEproxy adds the Trust Cert to the user’s request.
5. User’s request is passed to the self-hosted Access Tier inside the org’s private network, and then sent to the server.
Steps
We will now enable secure access to the database in three steps.
Step 1. Create a Policy for Infrastructure Access
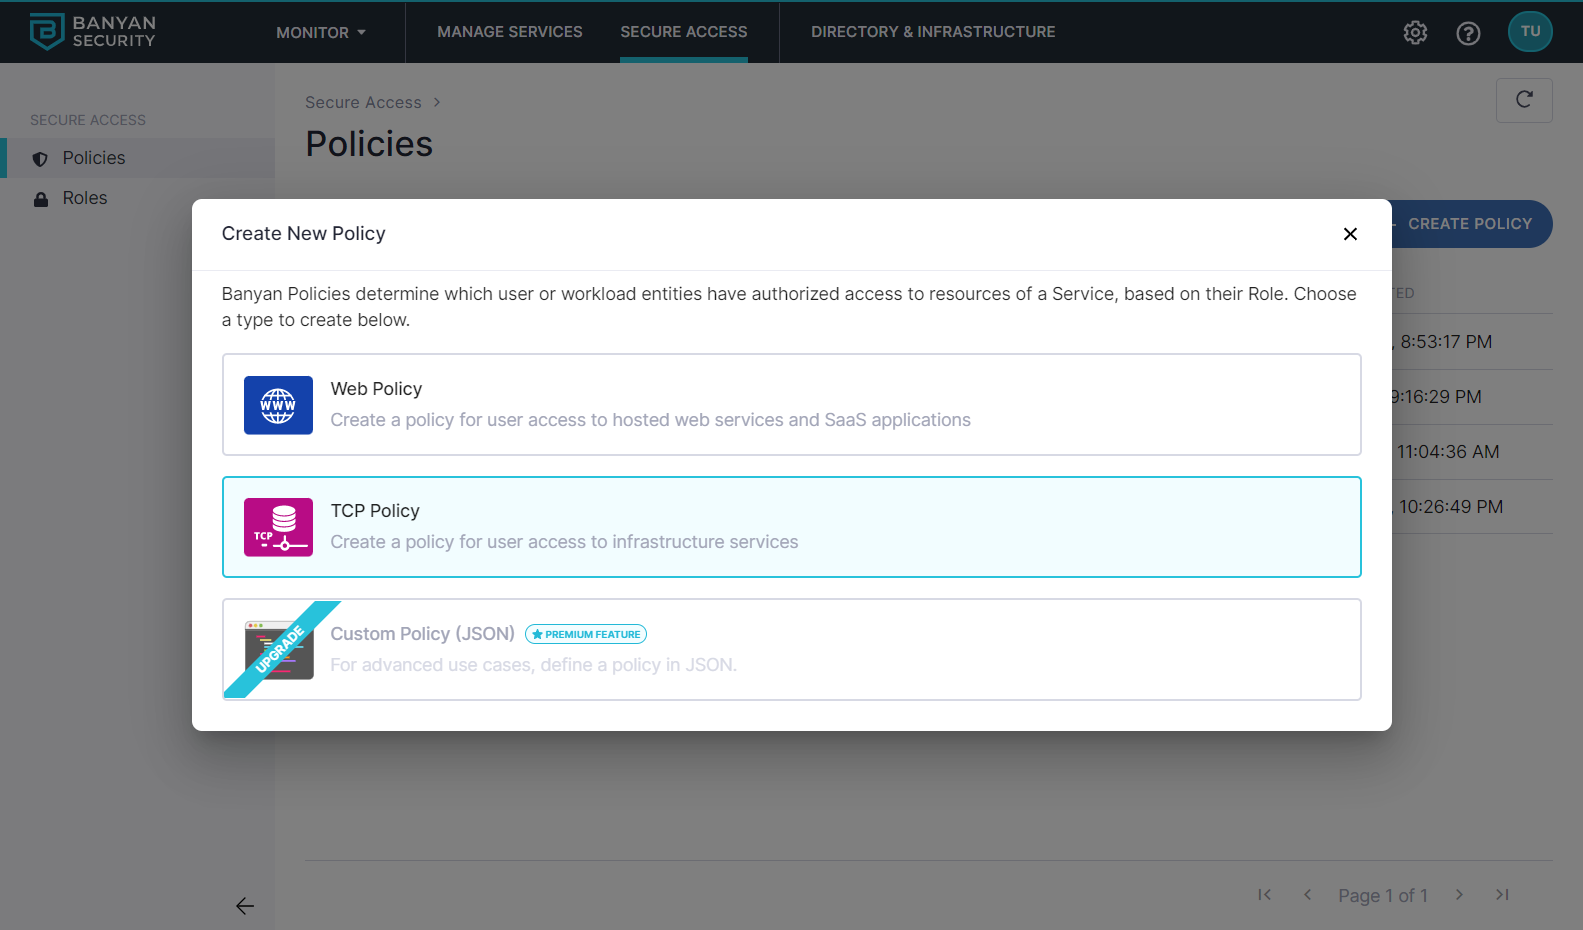
1.1 Log into the Command Center and navigate from Private Access > Access Policies > + Create Policy.
1.2 Create a new Policy using the Infrastructure Policy template .
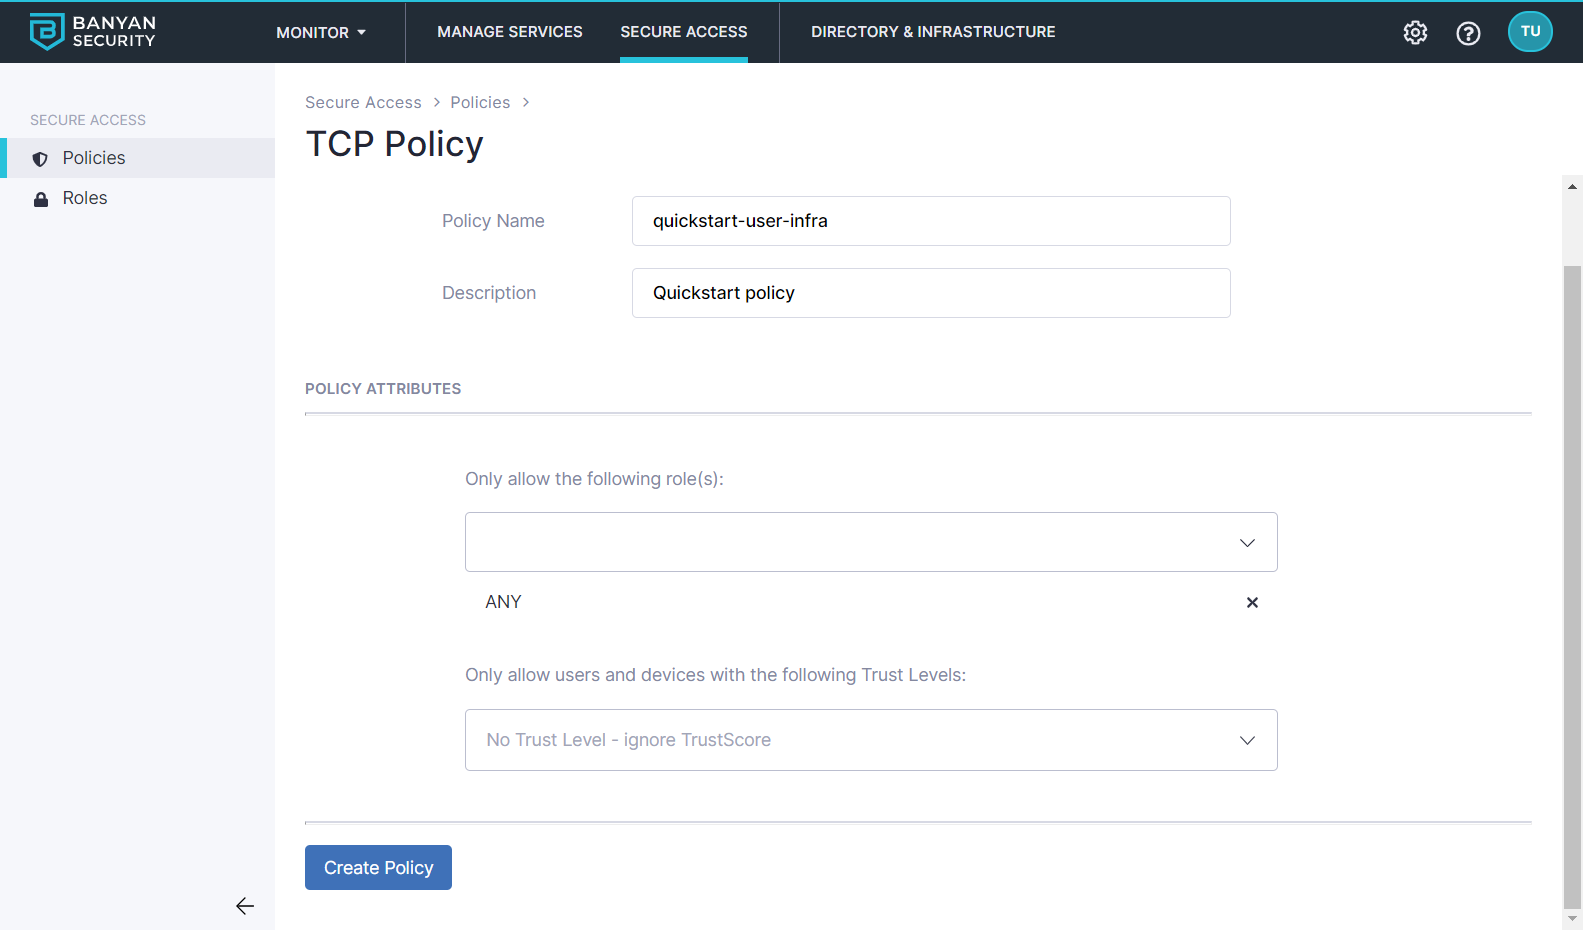
1.3 Enter a Policy Name (such as, quickstart-user-infra) and a Description.
1.4 Configure the Policy Attributes:
- Only allow access from the following role: ANY (or a role according to your organization’s requirements)
- Only allow users and devices with the following Trust Levels: No Trust Level - ignore TrustScore (or a Trust Level according to your organization’s security requirements)
Step 2. Register the Database as an Infrastructure Service
2.1 Navigate to Private Access > Infrastructure, and then select + Register Service.
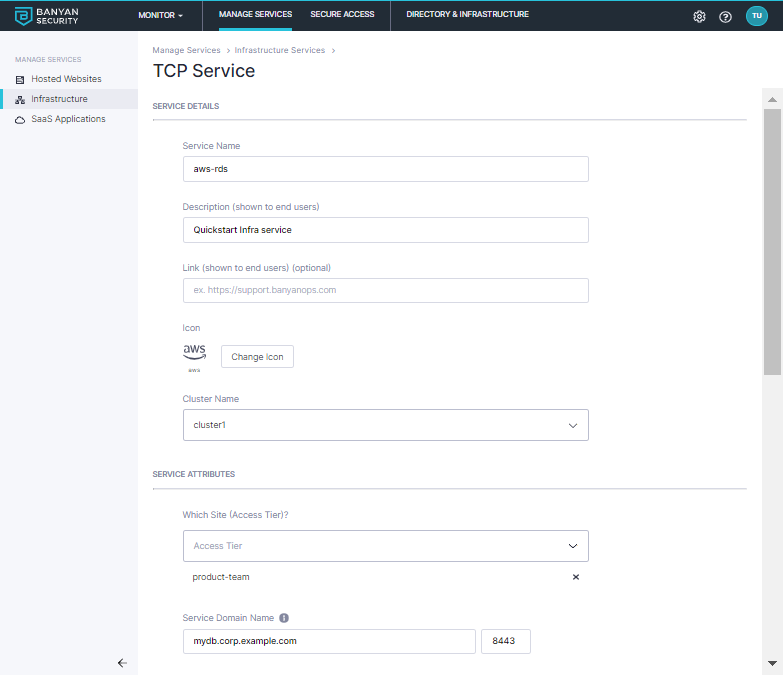
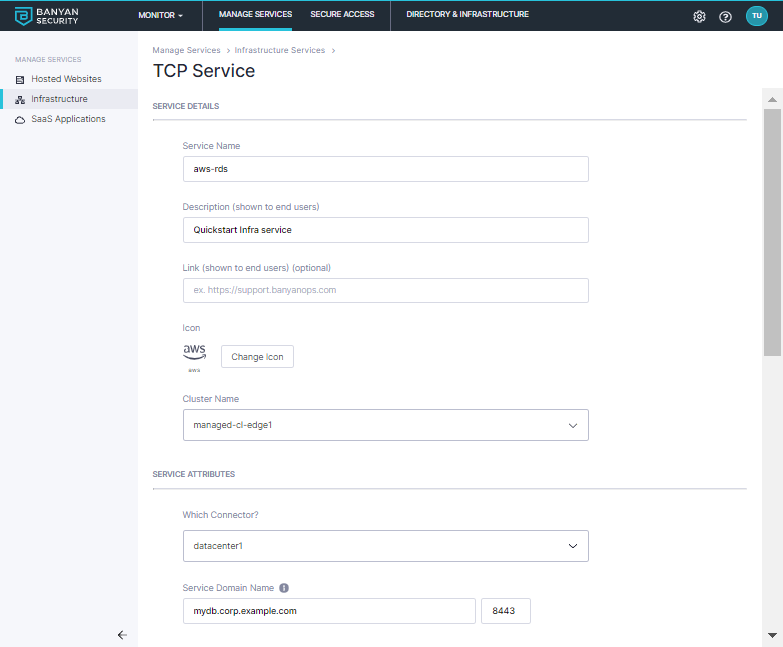
2.2 Enter the Service Name (such as, aws-rds) and set the service attributes based on your deployment model:
-
Select the
product-teamAccess Tier -
Enter the Service Domain Name for this service
mydb.corp.example.comand leave the port as8443; the CSE app will connect to this domain to set up an MTLS tunnel so users can access the service
-
Select the
datacenter1Connector -
Enter the Service Domain Name for this service
mydb.corp.example.comand leave the port as8443; the CSE app will connect to this domain to set up an MTLS tunnel so users can access the service
2.3 Specify how backend connectivity should be set up:
-
Set the incoming connections to be proxied to be Fixed Backend Domain
-
Enter the Backend Domain Name and Port. In this guide, we use
mydband port3306; you may use the backend IP address instead of the backend domain here. -
Enter the Backend Domain Name and Port. In this guide, we use
mydband port3306; you may use the backend IP address instead of the backend domain here. -
Configure the Service Connection Settings:
- Leave the Assigned Listen Port blank to use a random port
- Allow end users the ability to override these settings in the desktop app
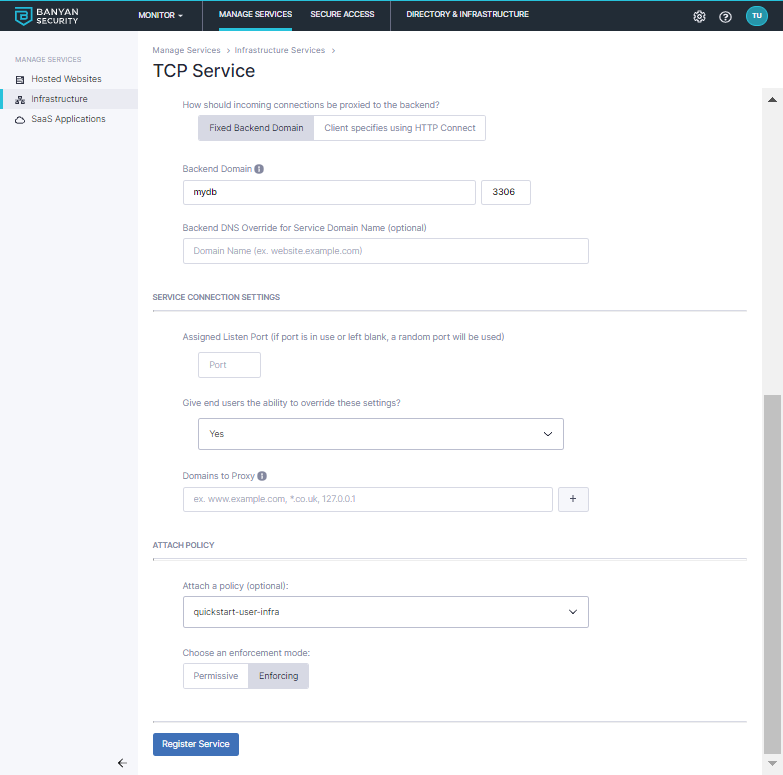
2.4 Attach the policy you created in Step 1.4, and then set enforcement mode to Enforcing.
2.5 Select Register Service.
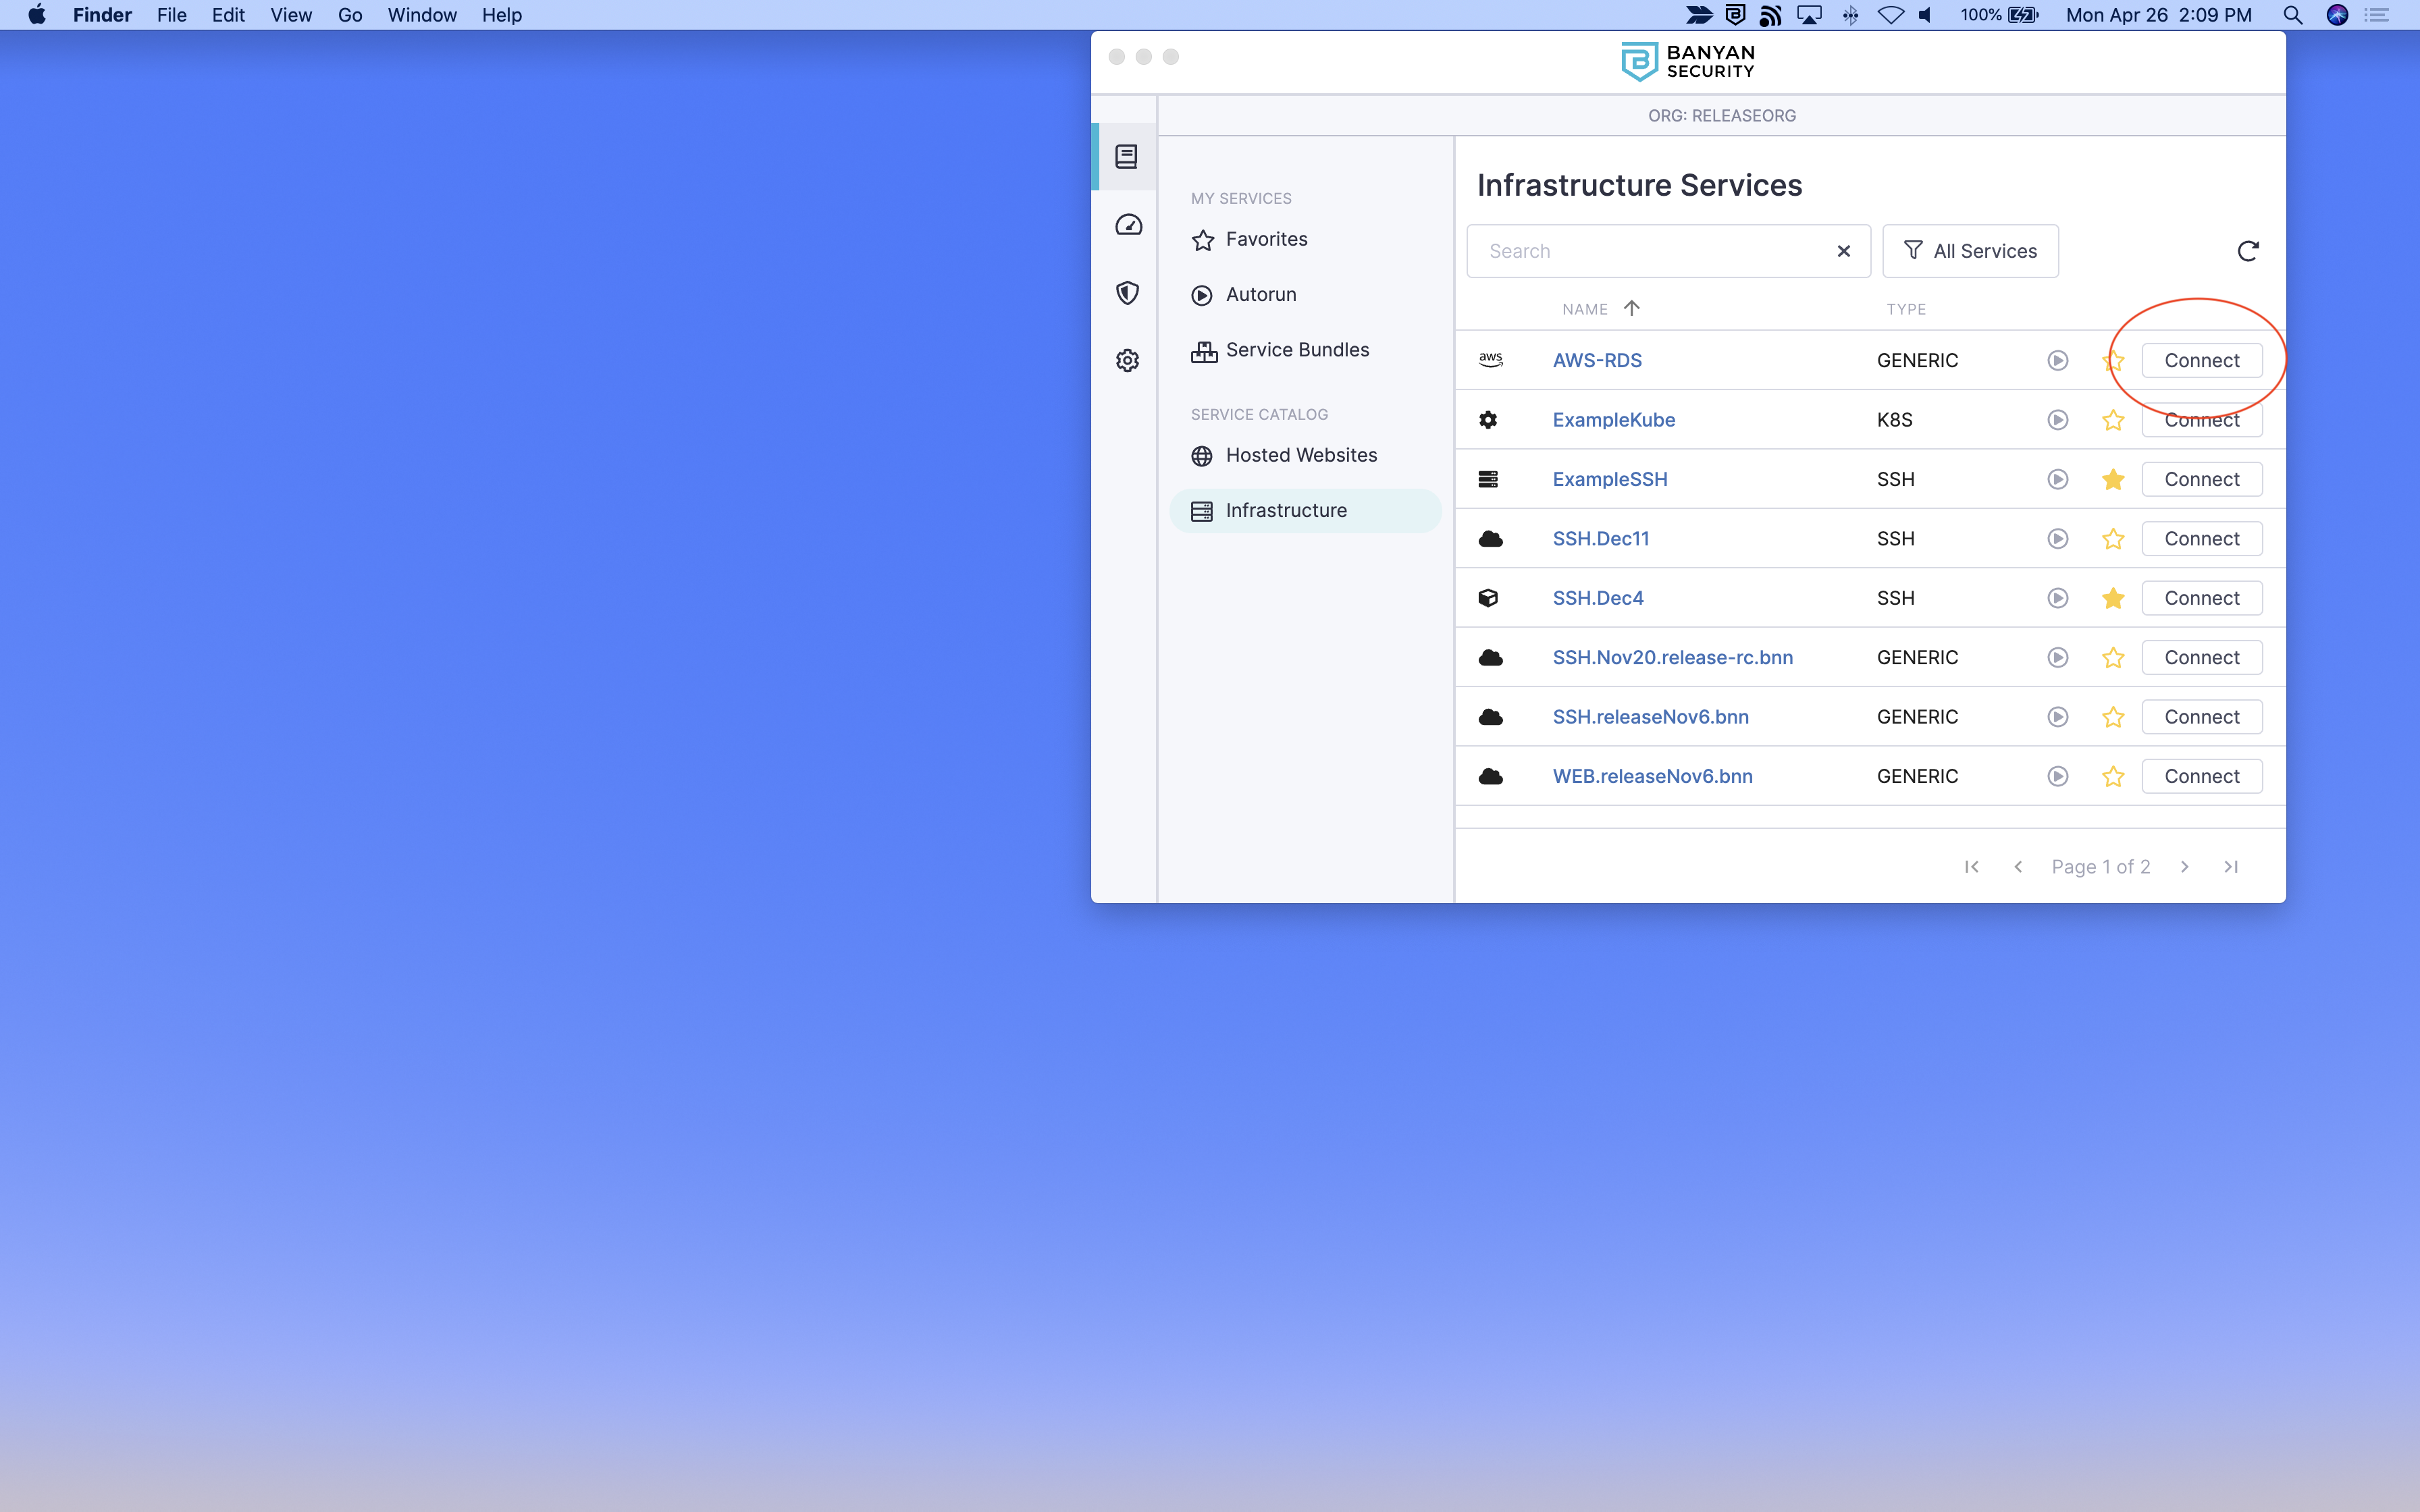
Step 3. As an end user, launch the desktop app and access the database
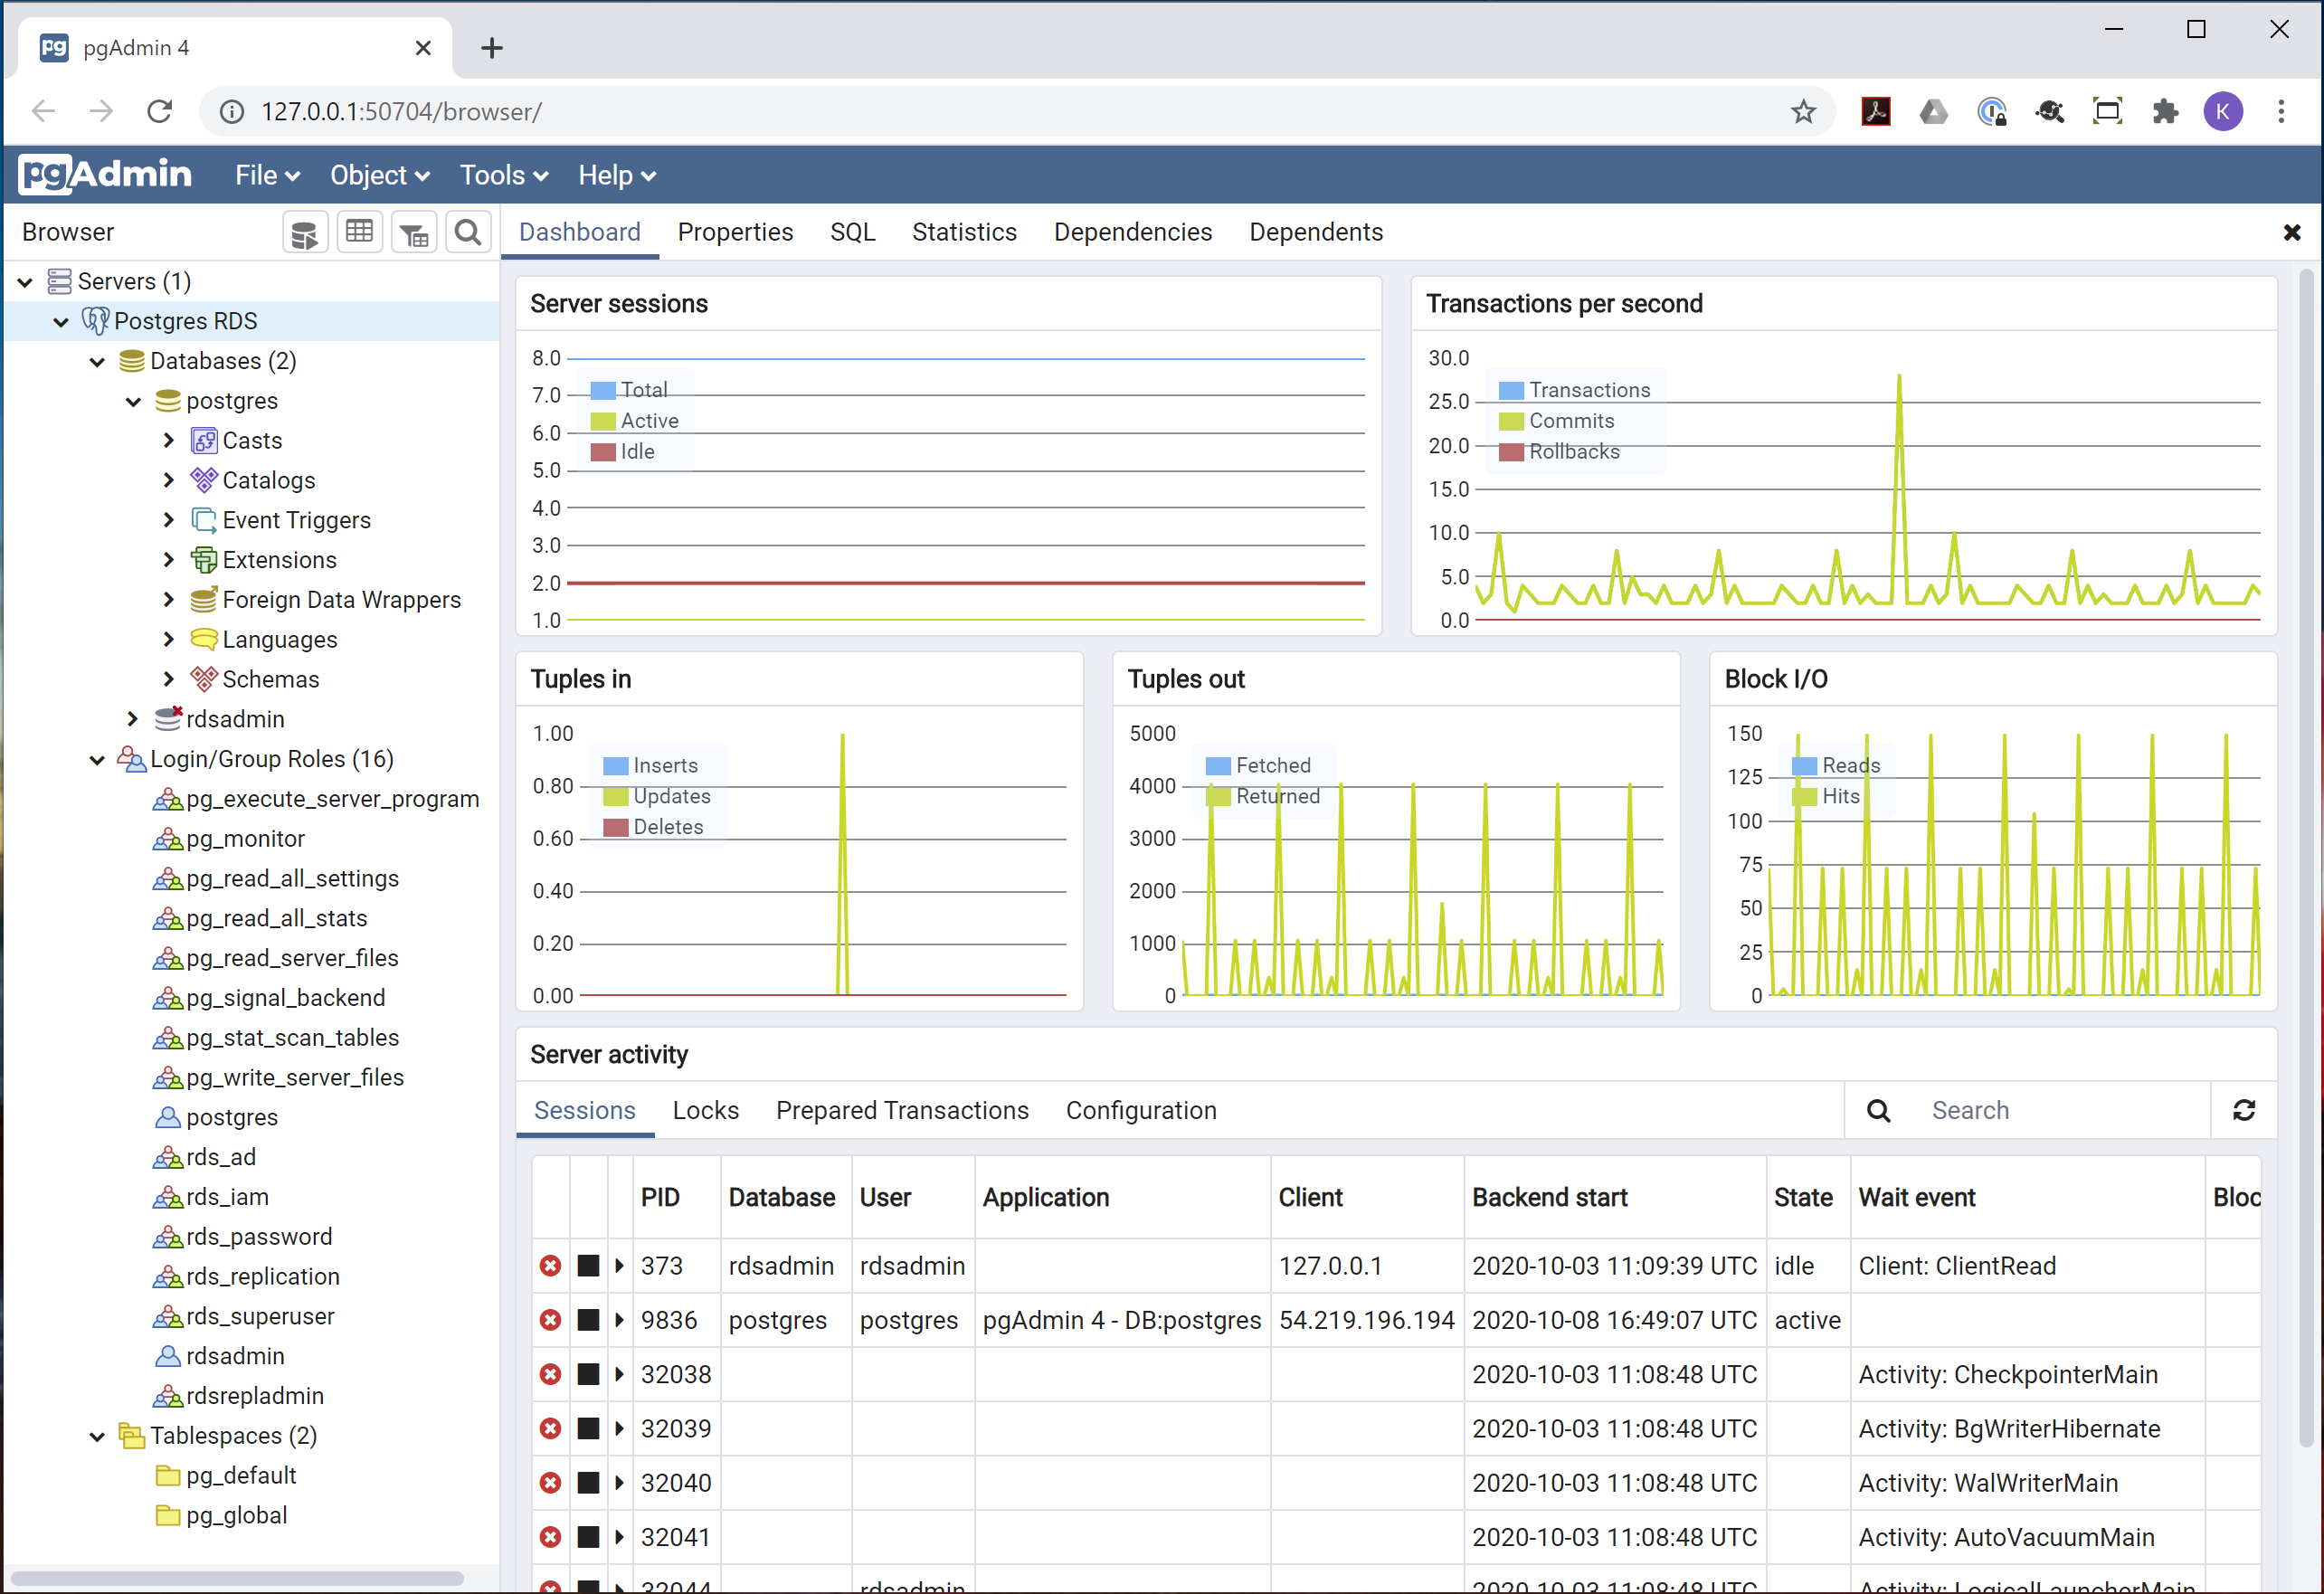
3.1 Launch the desktop app, locate the hosted database (for example, Amazon RDS) server from the list of TCP Services, and then select Connect.
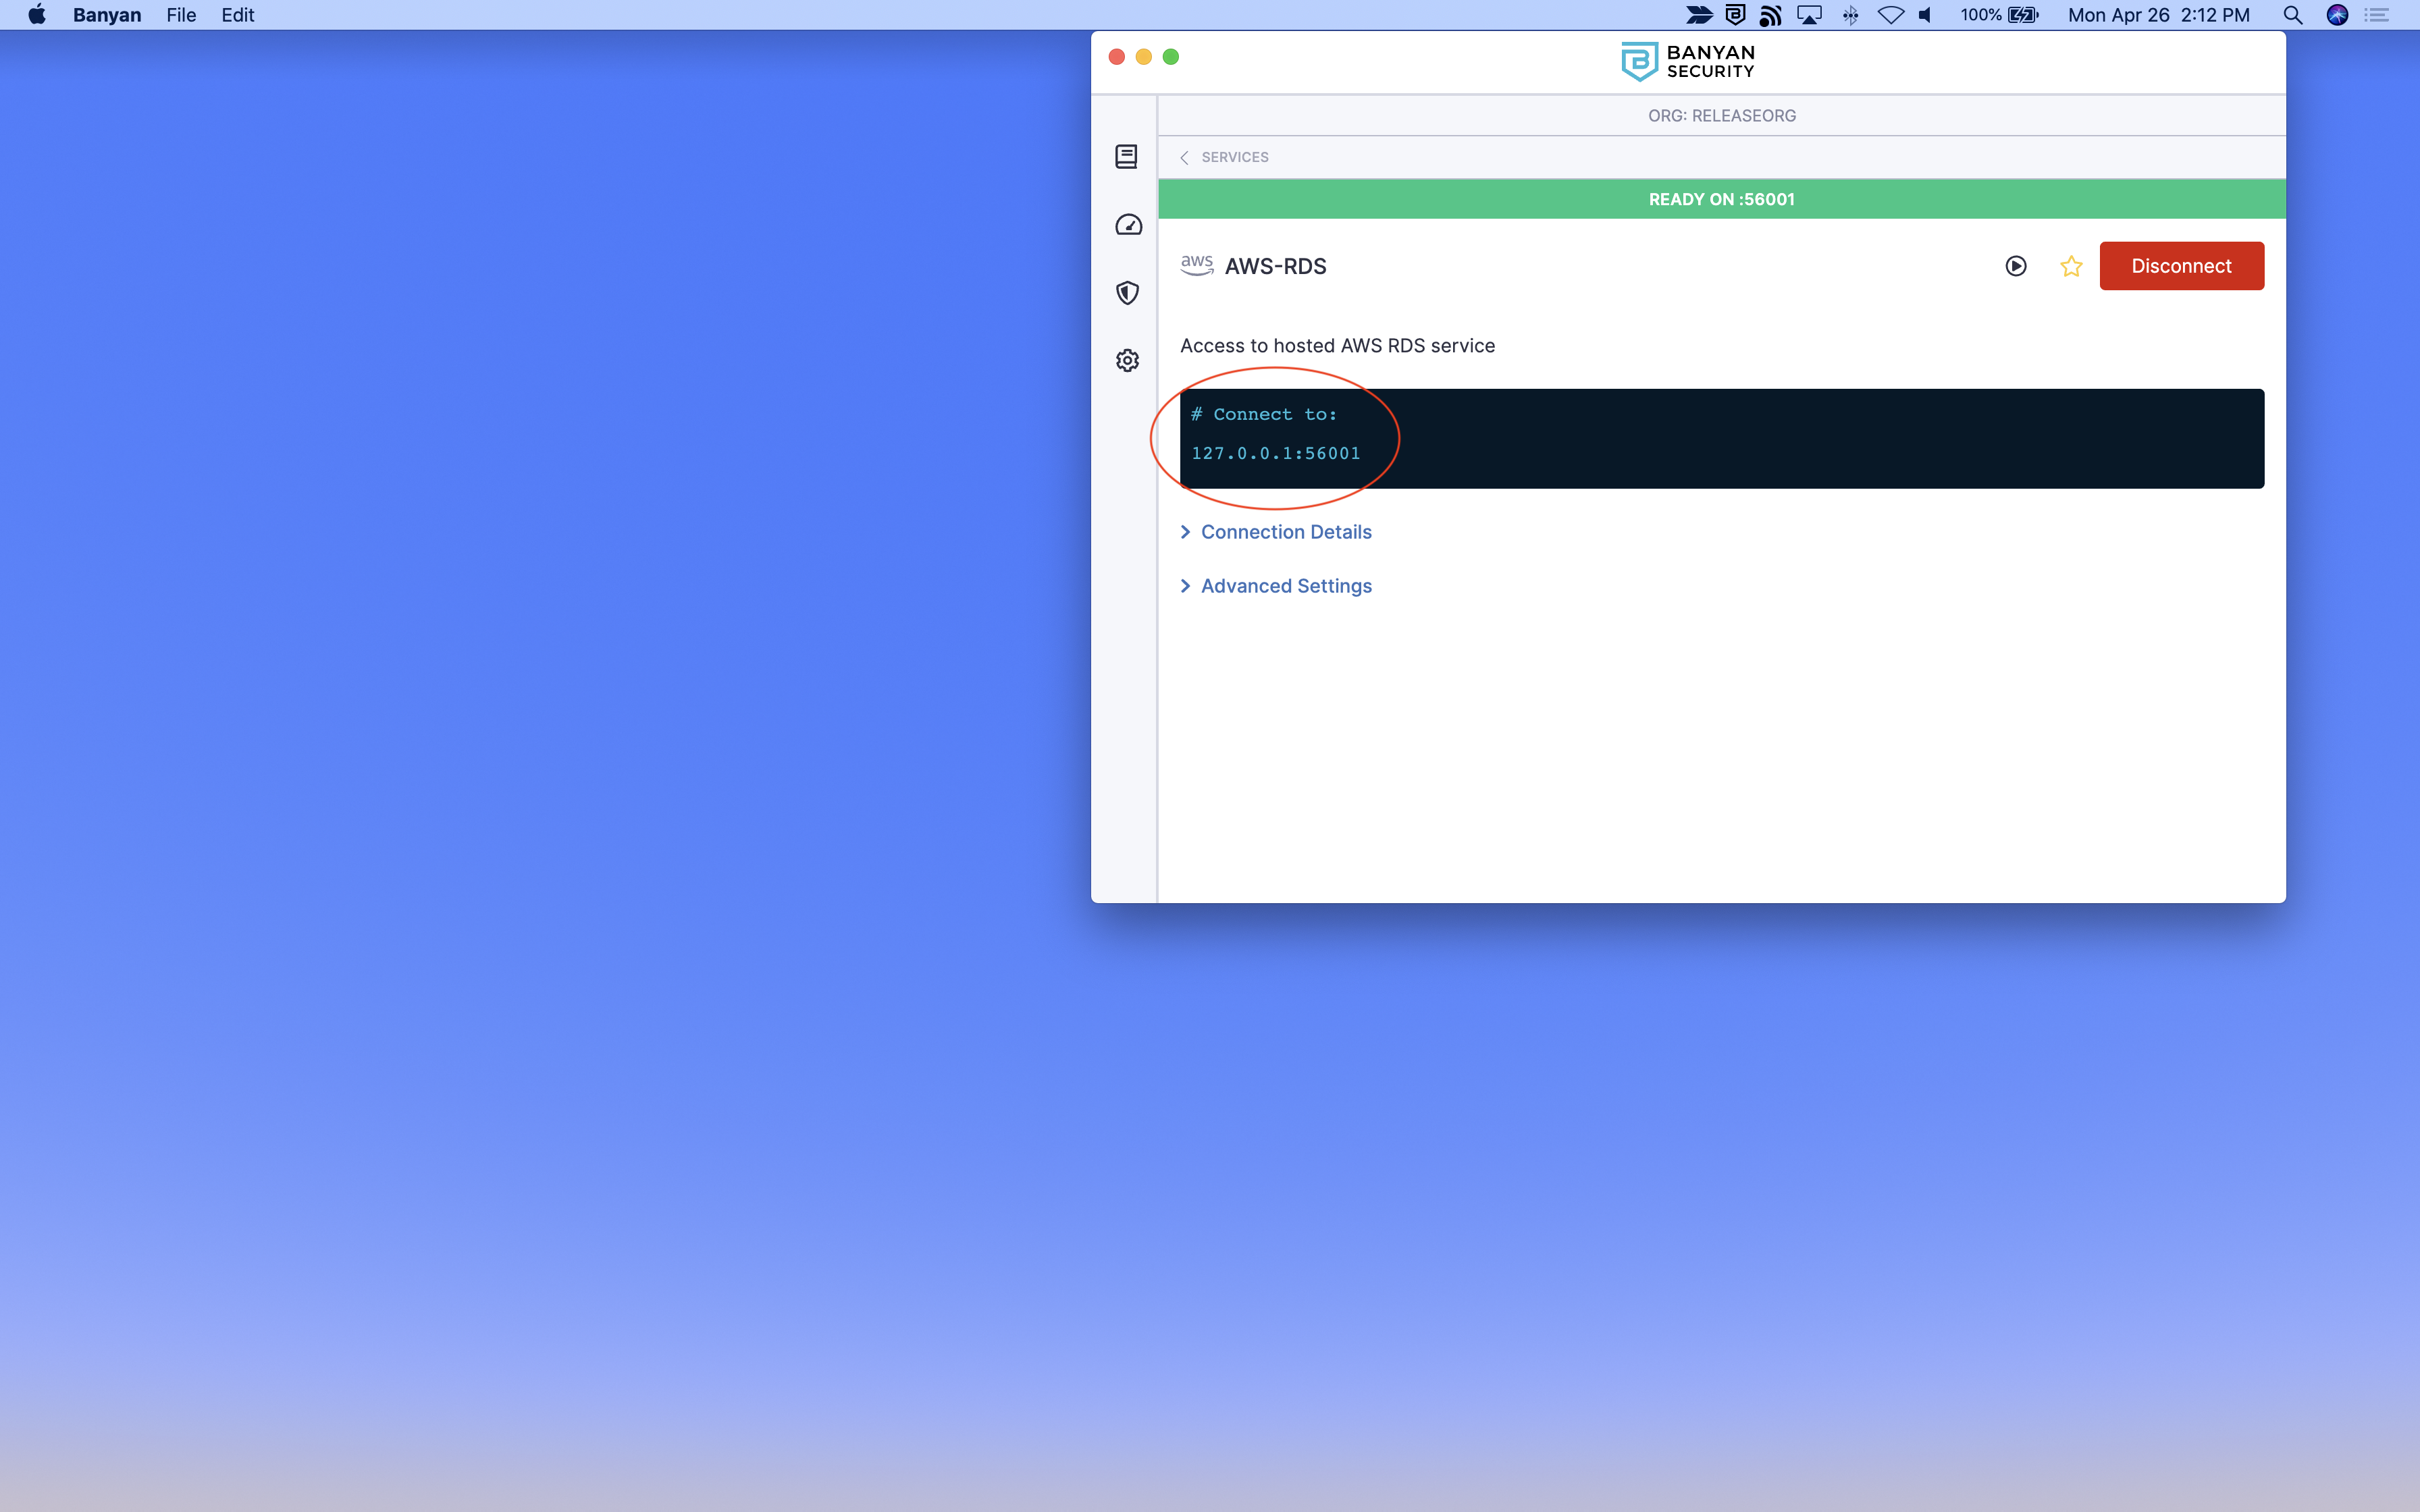
3.2 Click into the service details and take note of the (localhost:port) provided in the desktop app (for example, 127.0.0.1:XXXXX).
3.3 Launch your preferred database management tool (such as Microsoft SQL Server Management Studio, pgAdmin, phpMyAdmin, MySQL Workbench, etc.), and then create a new server using the localhost:port noted in the previous step. If necessary, enter your credentials to authenticate.
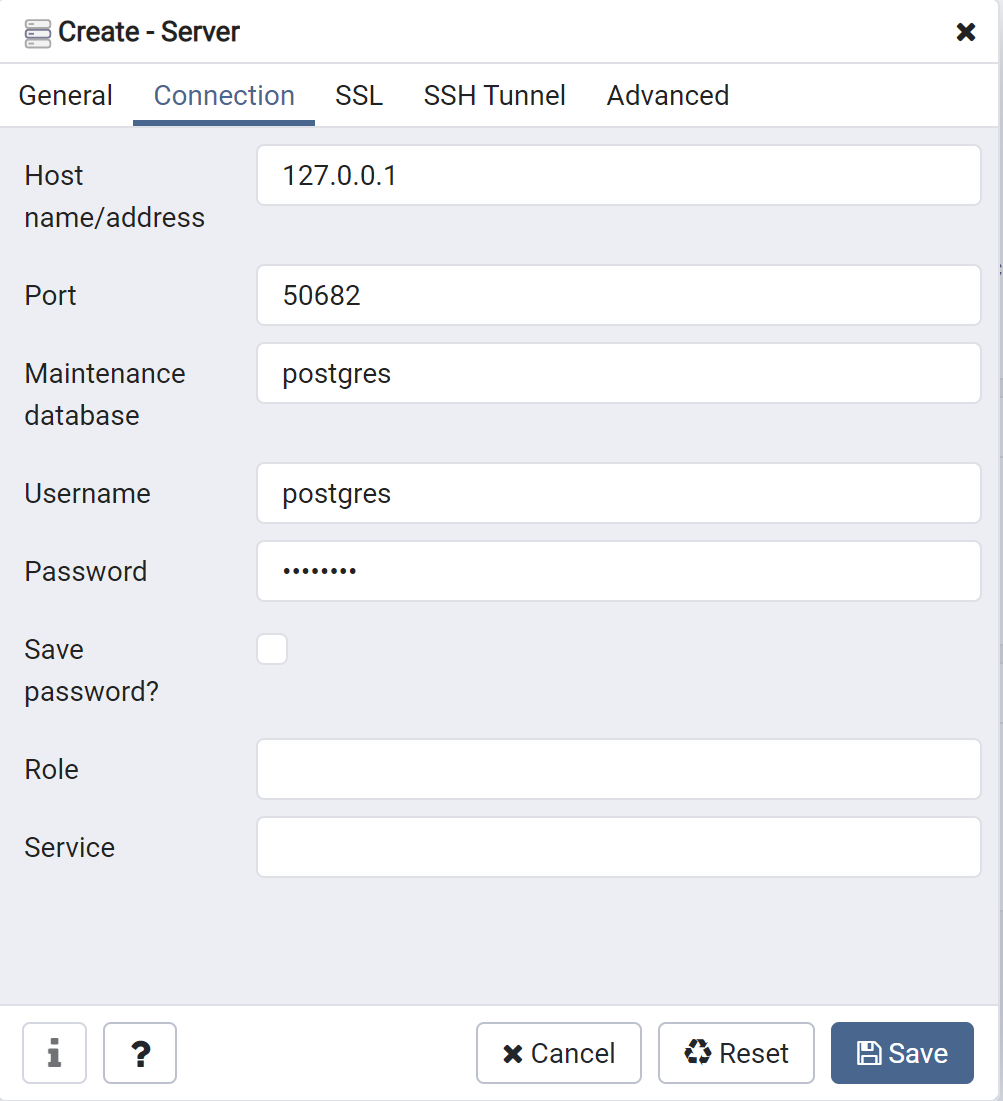
Behind the scenes, CSE evaluates your device posture, enforces your security policies, and grants access accordingly.