Zero-Trust Access to the Kubernetes API
- Last validated: May 19, 2026
Overview
In most environments, the K8S API is not exposed to the public internet. In such cases, you can use Cloud Secure Edge’s (CSE) default Mutually Authenticated TLS (MTLS) flows for TCP services to provide your end users zero-trust access, regardless of their network location. K8S API traffic flows through the Access Tier and is wrapped in a MTLS tunnel (shown in the diagram below).
We define the K8S API as a TCP Service (and not a Web Service) even though it uses the HTTP protocol because the K8S API is accessed via a CLI tool kubectl and not a web browser.
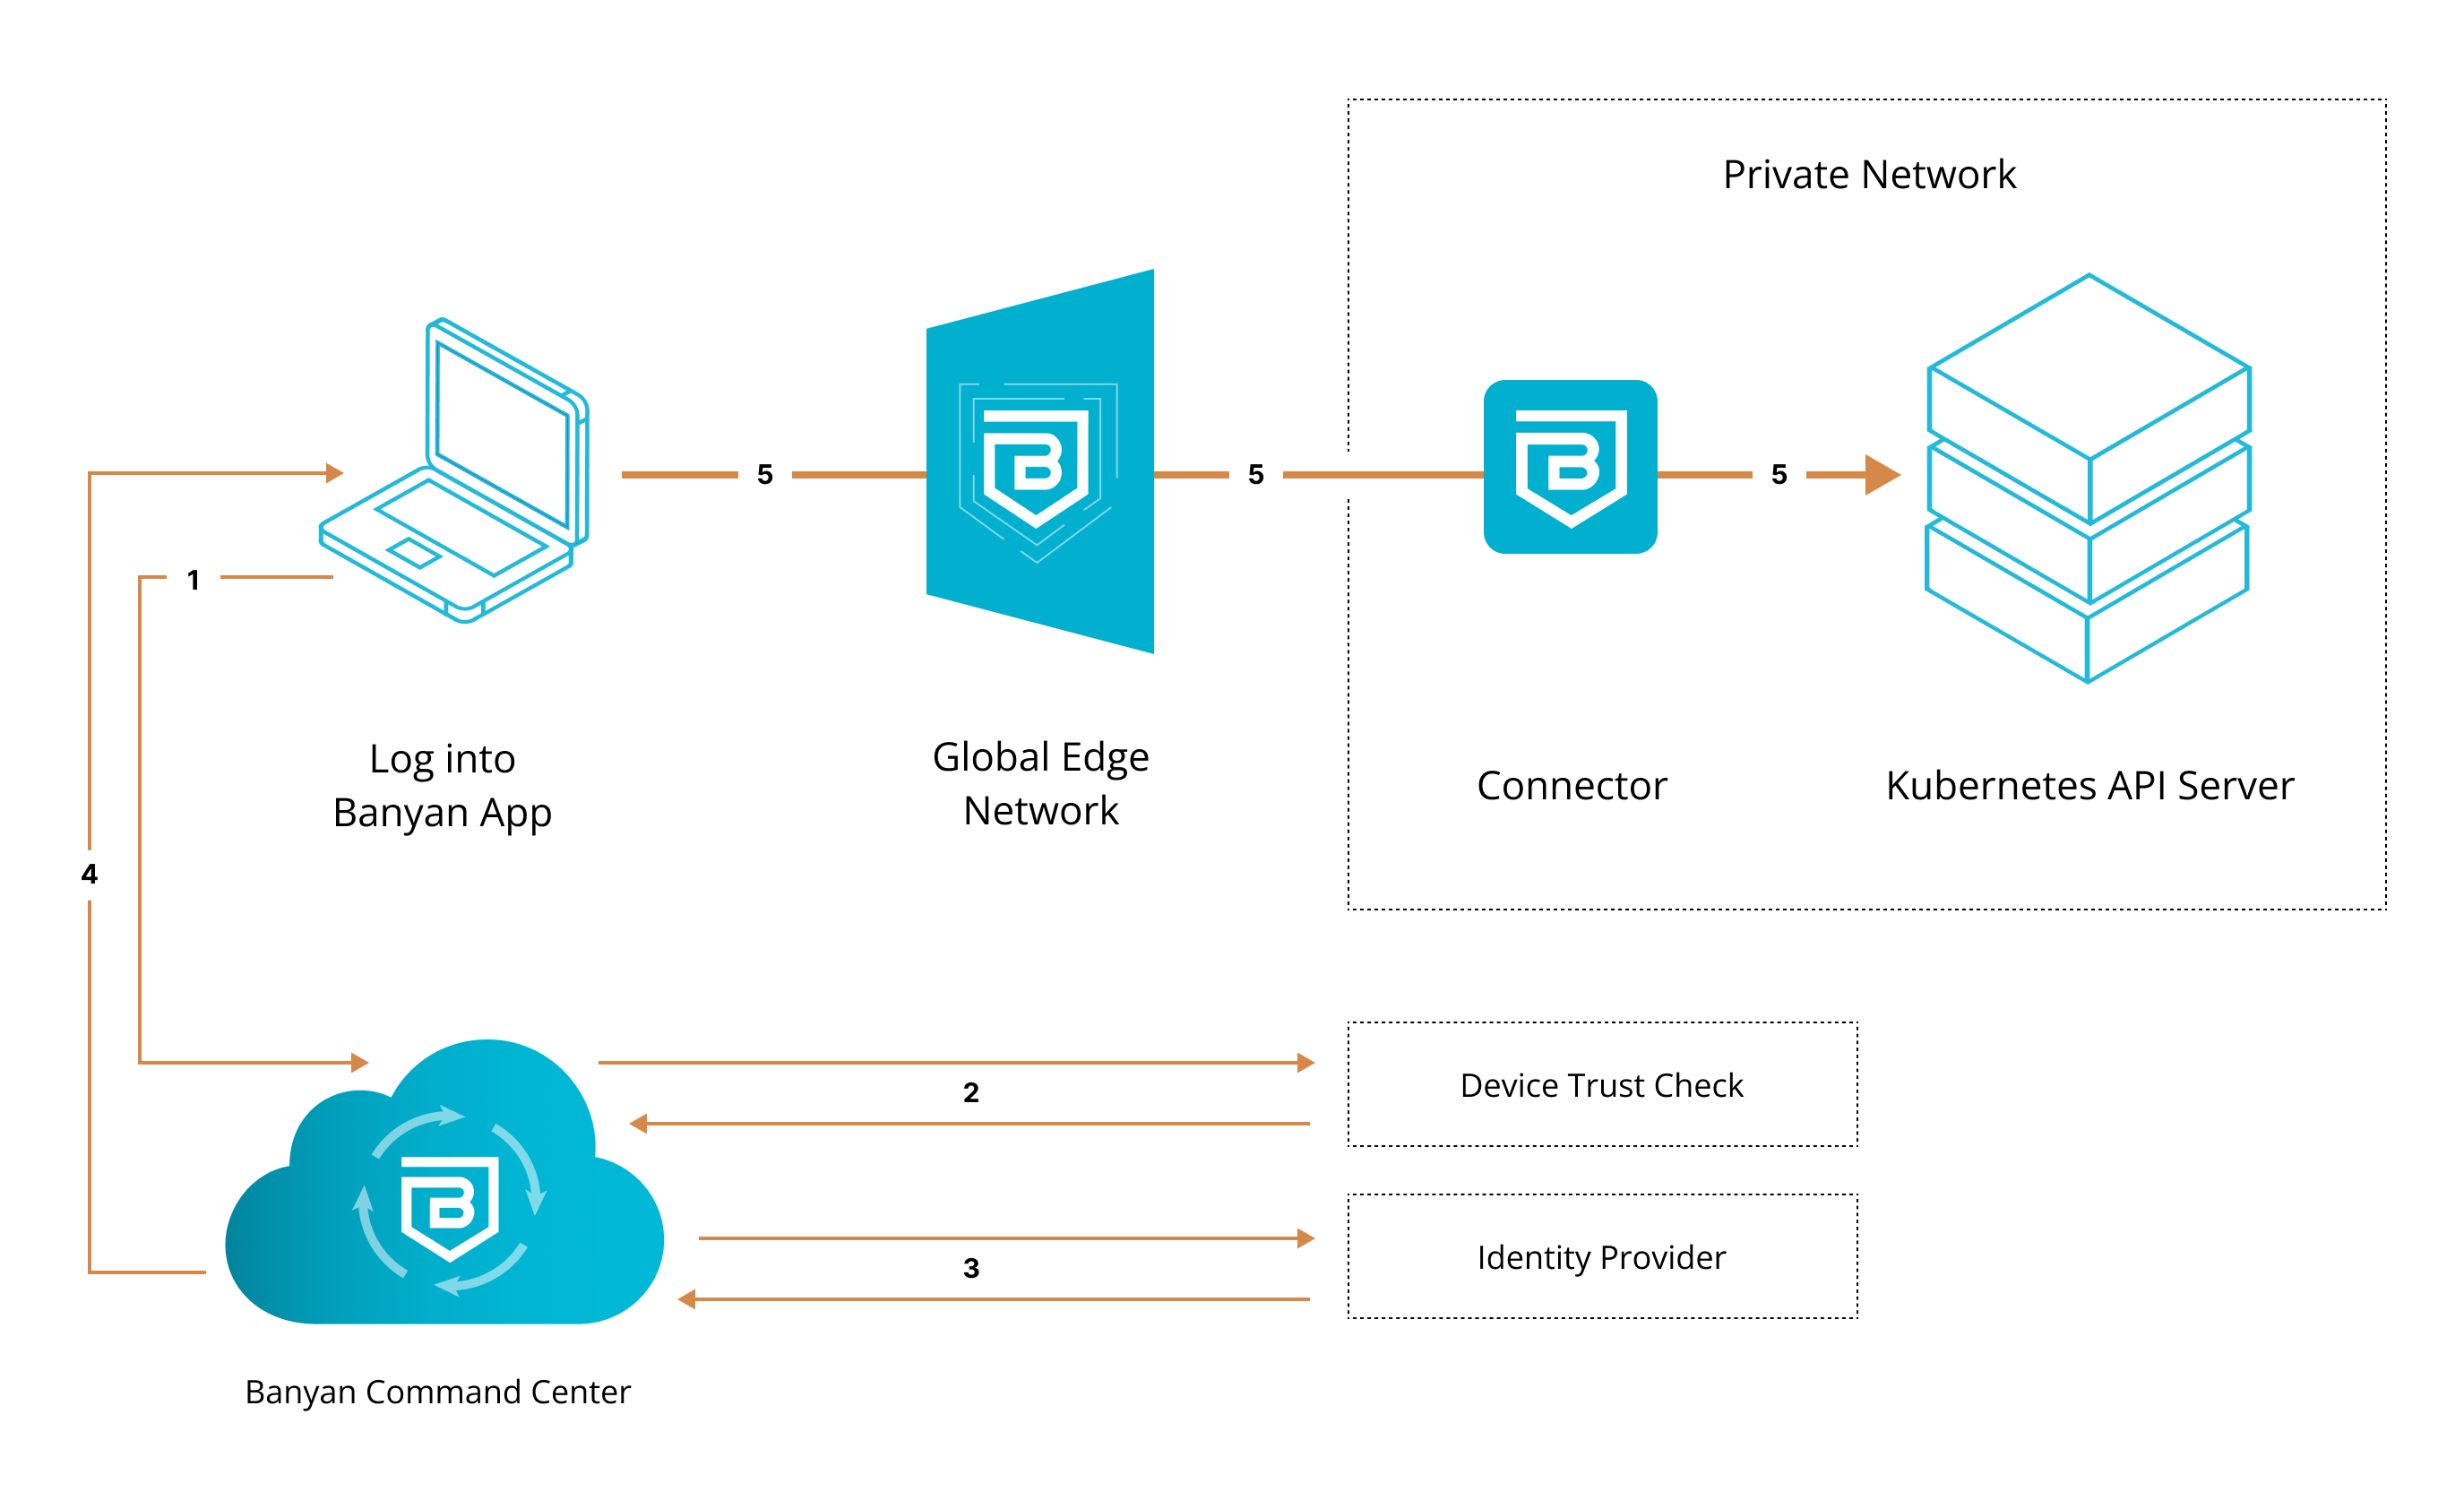
1. End user requests access to a Kubernetes API server. The user’s request is routed to Cloud Secure Edge (CSE).
2. CSE runs a device trust check via user’s org’s device manager, which is integrated with the app.
3. Once verified, the device is then authenticated via their org’s identity provider.
4. Once authenticated, user’s device is issued a Trust Cert. CSEproxy adds the Trust Cert to the user’s request.
5. User’s request is passed to the Global Edge Network, relayed to the Connector inside the org’s private network, and then sent to the Kubernetes API server.
Cloud Secure Edge (CSE) Kubernetes Authentication
CSE’s default approach is to treat K8S like any other TCP service: CSE is agnostic to the underlying K8S authentication method. Admins can retain their current K8S authentication mechanism - be it password, client cert, JWT tokens, etc. We strongly recommend using the CSE OIDC provider which will allow access to your Kubernetes clusters using native K8S Role-based Access Control (RBAC). See our K8S OIDC Authentication capability to learn more.
Steps
Setting up access to a K8S Cluster via the K8S API is the setup process followed to secure a TCP service, as described in Notes on Securing TCP Services.
This doc outlines how to create a CSE Role (for employees with personal devices) and a CSE Policy so that only users on devices that meet the policy requirements can gain to secure access to the Kubernetes API.
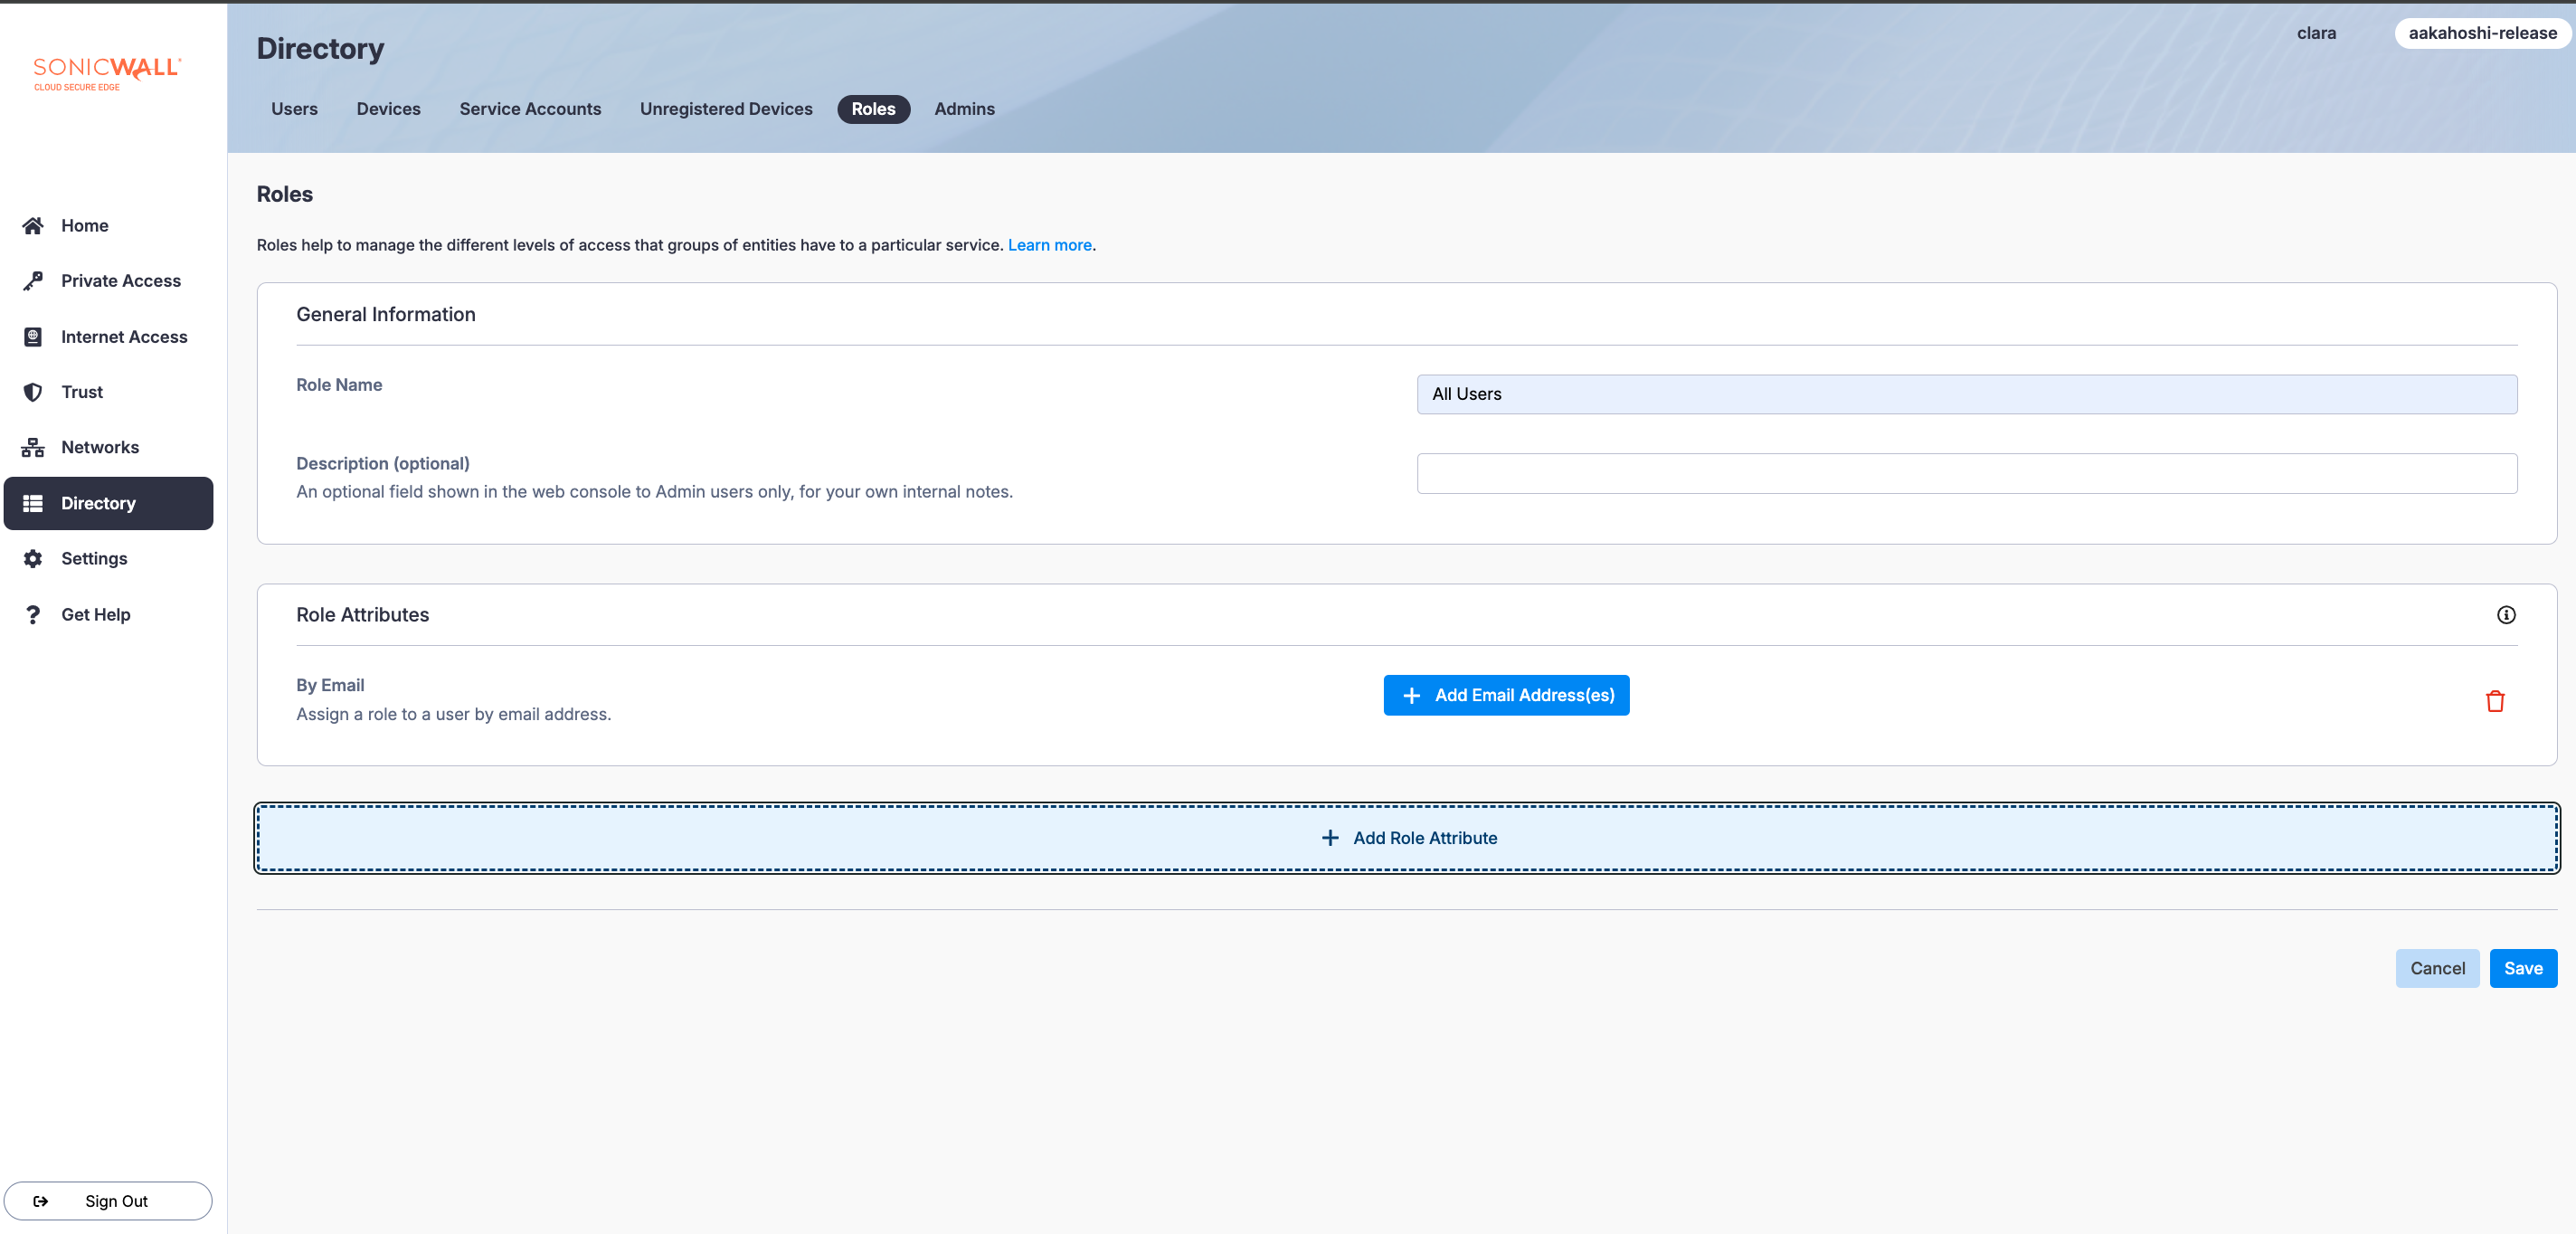
1. Create a Role for your end users
1.1 In the Command Center, navigate to Directory > Roles, and then select + Add Role. Enter a Role Name (and description) and then select Add Role Attribute to specify sets of users and devices.
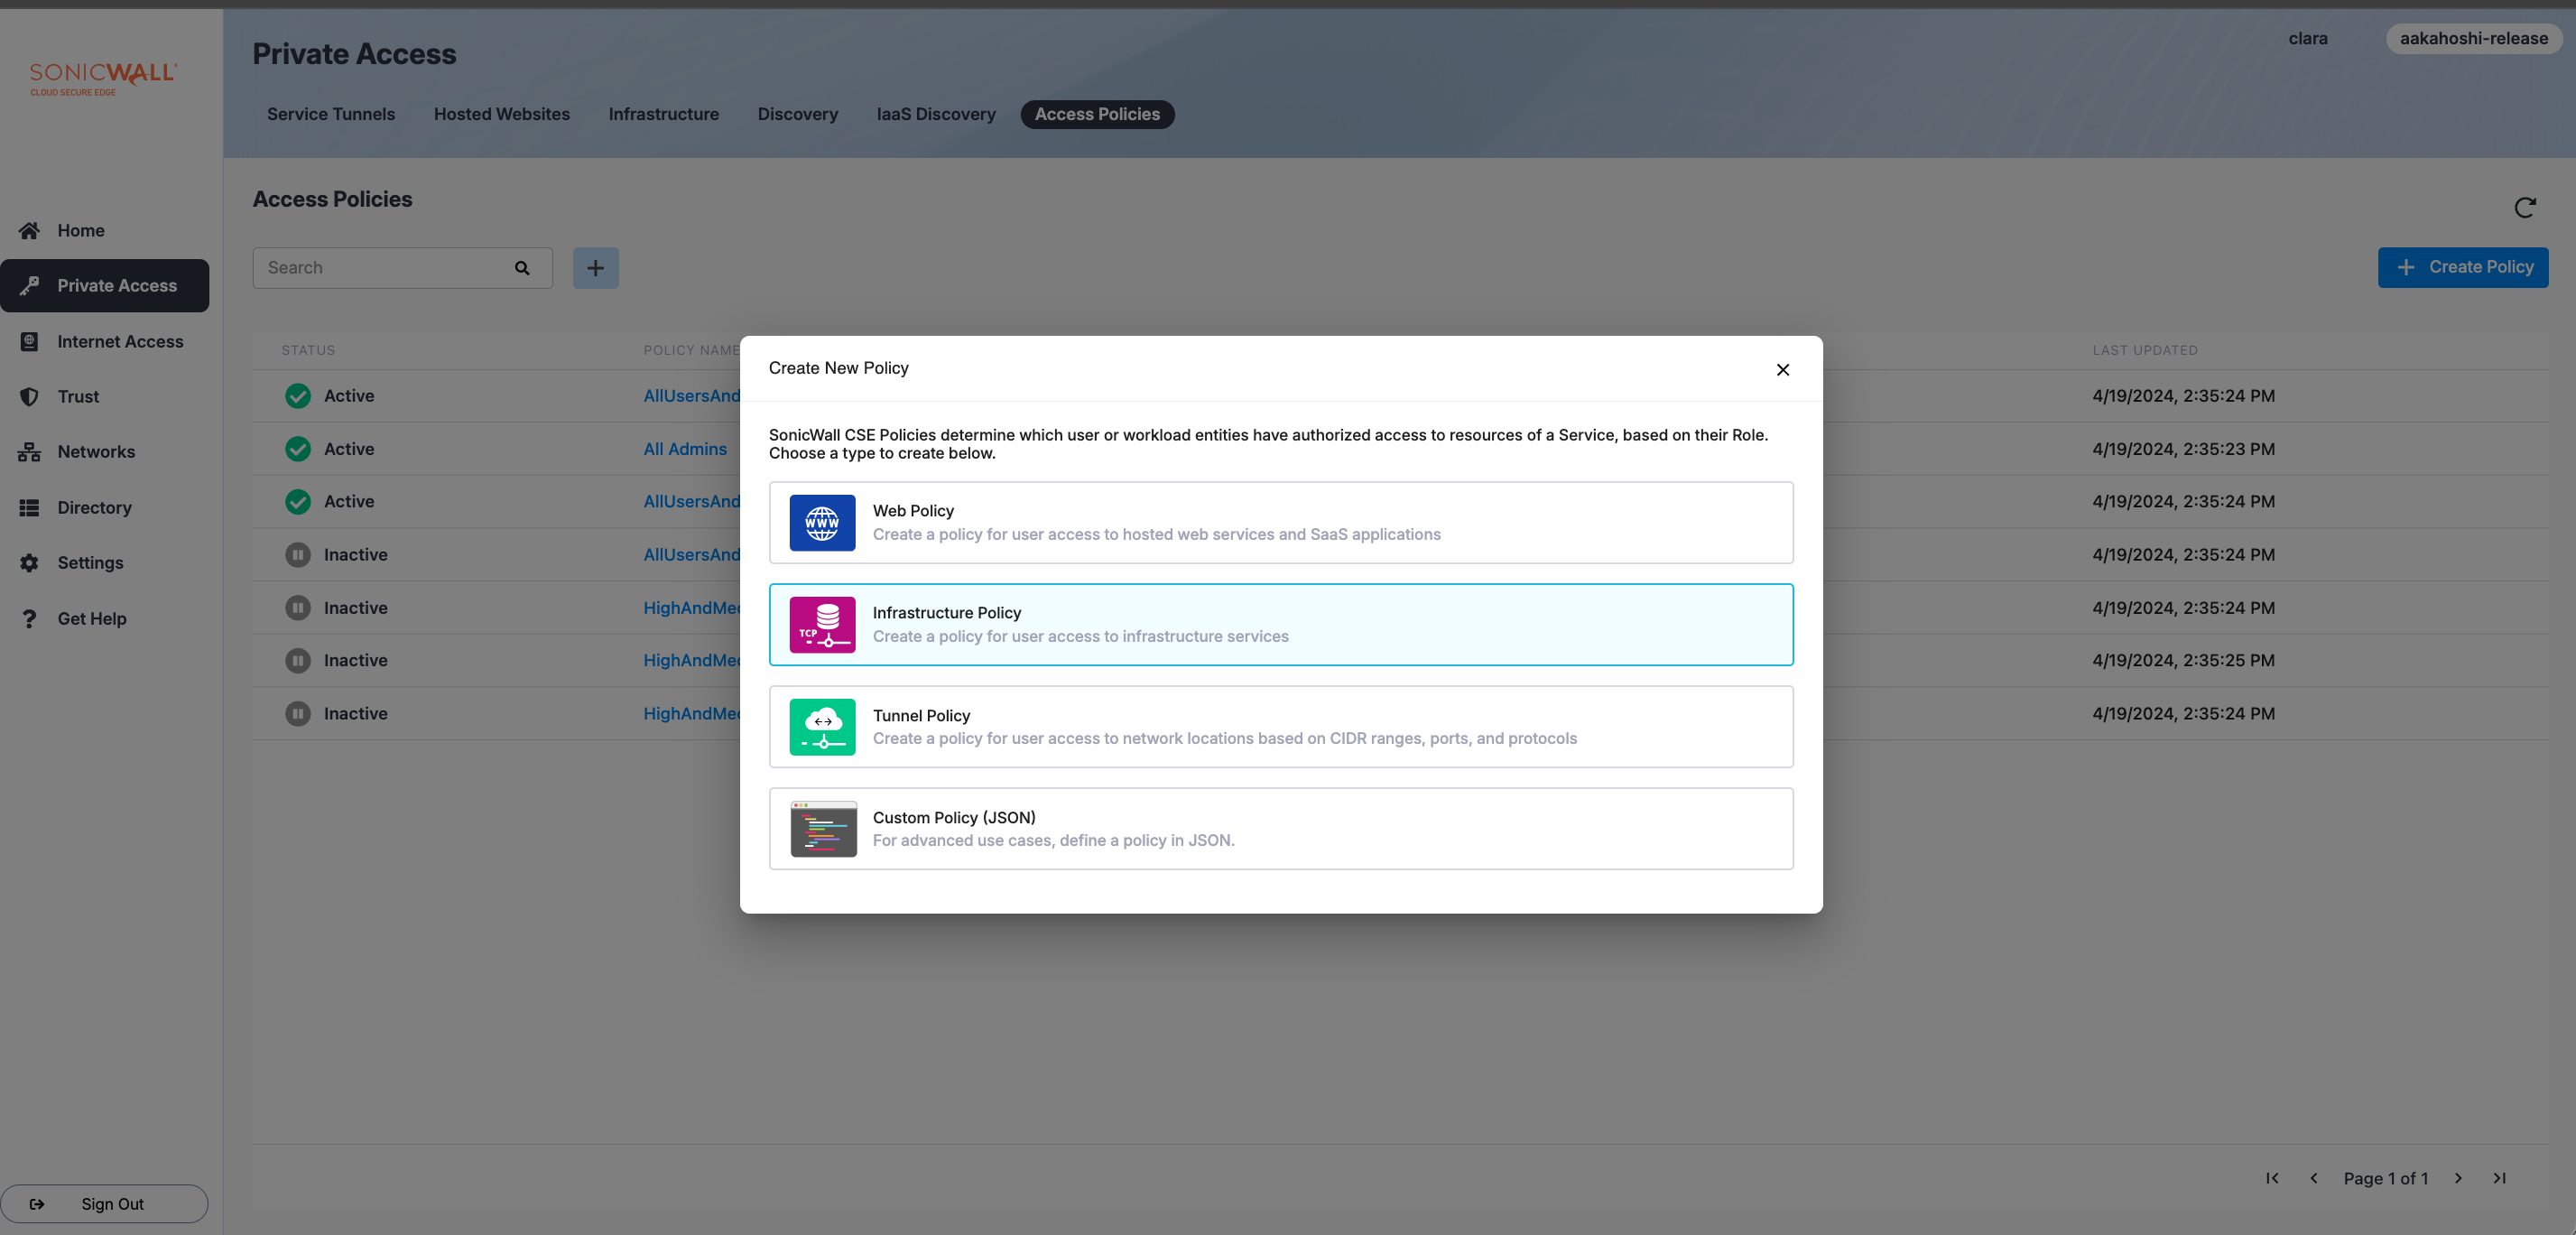
2. Create a Policy for your Kubernetes Cluster
Create an access policy that uses the role.
2.1 Navigate from Private Access > Access Policies, and then select + Create Policy. Select the Infrastructure Policy option.
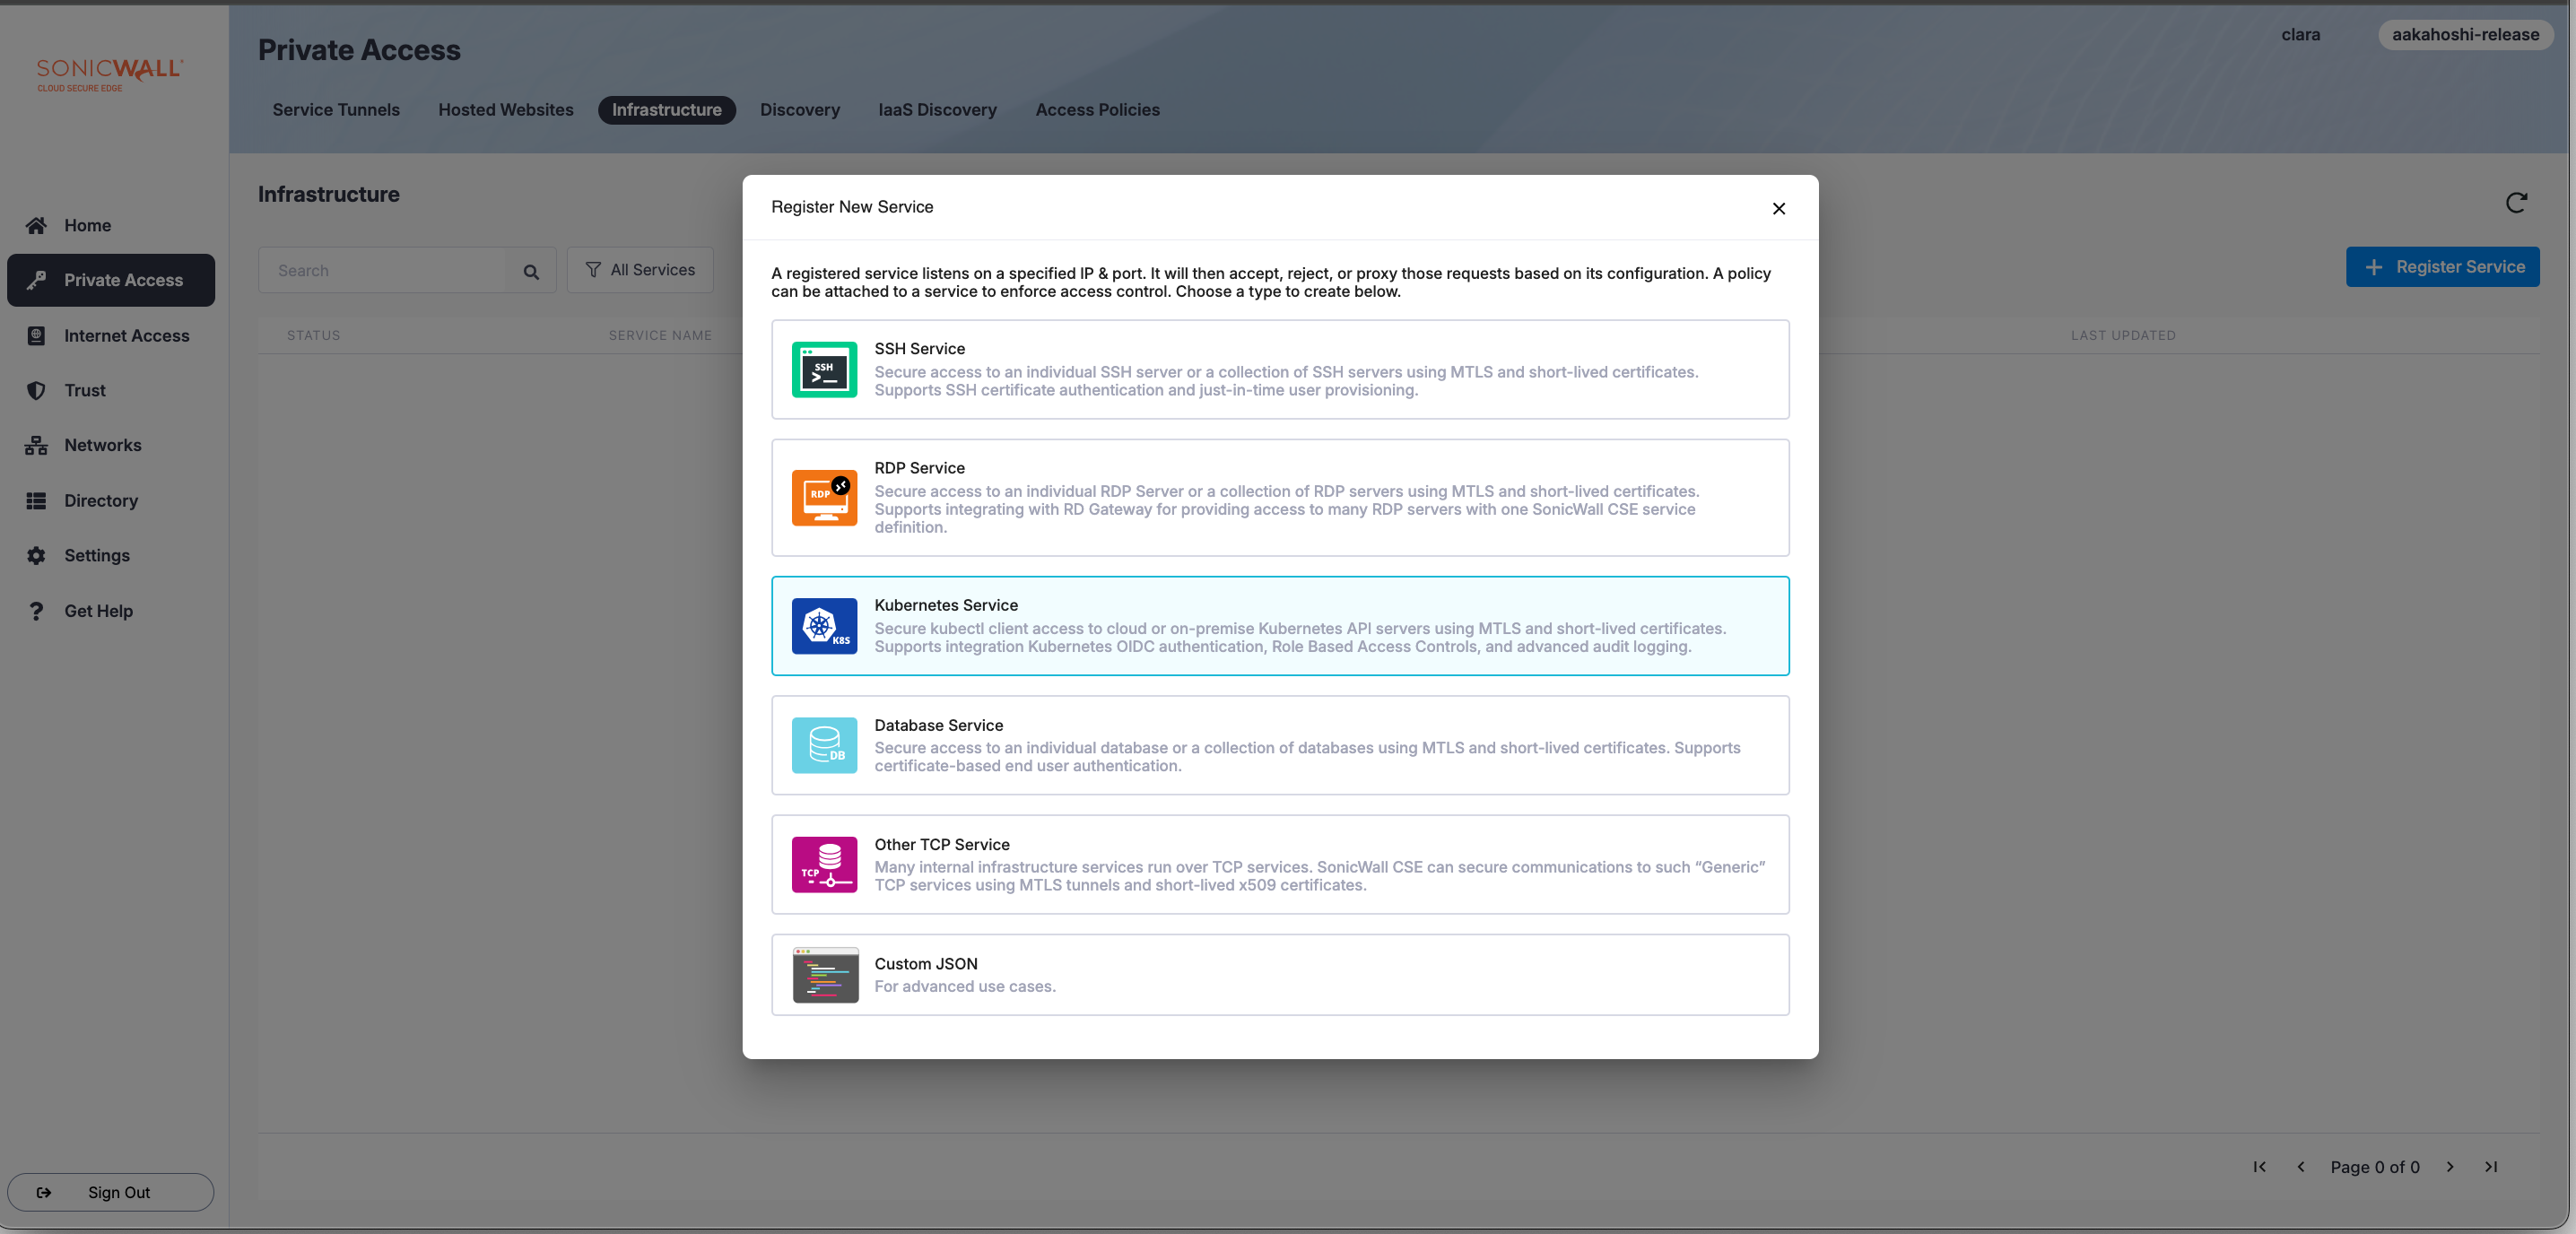
3. Define a Kubernetes Service for the Kubernetes Cluster
We strongly recommend using the CSE OIDC provider which will allow access to your Kubernetes clusters using native K8S RBAC. If configuring OIDC authentication, select Kubernetes and review our K8S OIDC Authentication capability.
Configure a Hosted Service for zero-trust access to your Kubernetes Cluster:
3.1 Navigate from Private Access > Infrastructure, and then select + Register Service. Configure the service as shown below:
3.2 Under Service Details, enter a Service Name. Optionally, enter a Description and a Link.
3.3 Select a Cluster.
3.4 Optional: Display the Service in the app by toggling on Show Service in Service Catalog within the app.
3.5 Optional: Enable Connect on Login if you want this Infrastructure Service to automatically start when users in your org log into the app.
3.6 Under Service Attributes, select a Connector.
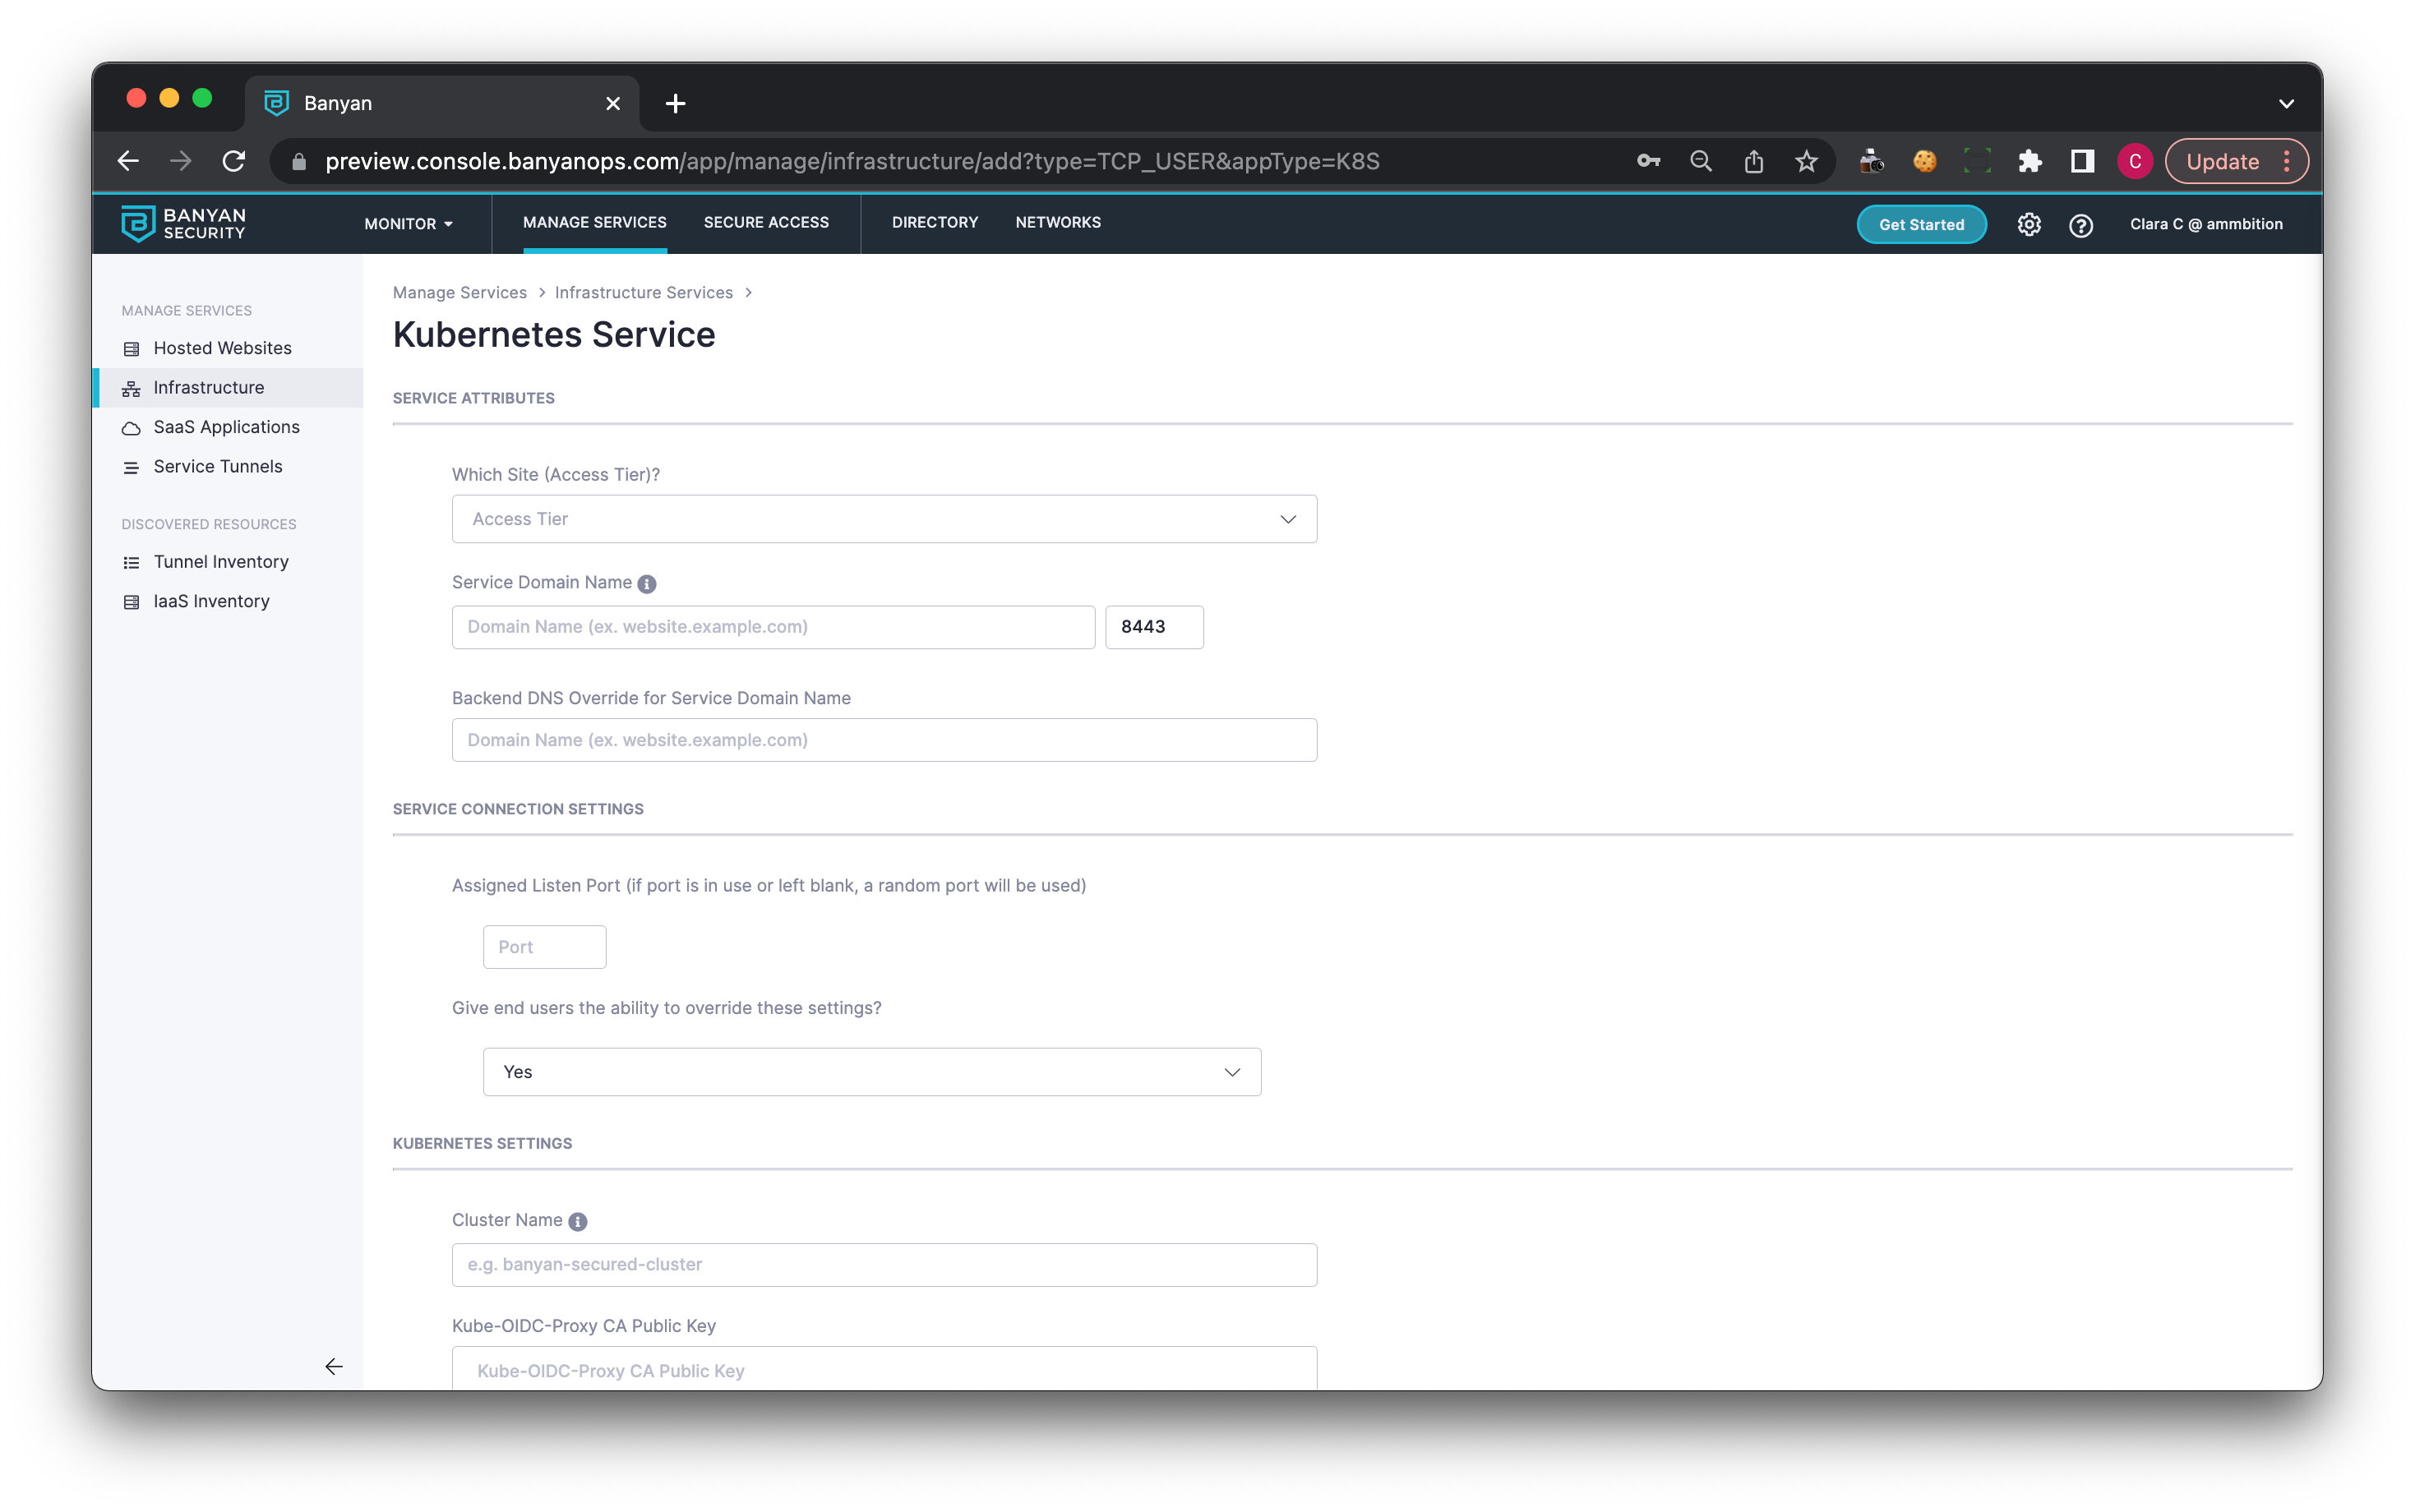
3.7 Select a Service Domain Name for this service (e.g.,mykube.corp.example.com ); the banyanproxy will tunnel Kubernetes traffic over the assigned listen port.
3.8 Enter a Backend DNS Override for your Service Domain Name.
3.9 Under Service Connection Settings, set an Assigned Listen Port (e.g., 8081). Choose whether your end users can override these settings.
3.10 Under Kubernetes Settings, enter a Cluster Name and a Kube-OIDC-Proxy CA Public Key.
3.11 Optional: Attach the policy you created in Step 2, and then choose an Enforcement Mode (i.e., Permissive or Enforcing).
4. Connect via the desktop app
4.1 Ensure that end users install the latest desktop app and register their device.
Once the Service is defined, end users will see it in their desktop app.
Note: By default, the desktop app updates the original kube config file when connecting to a Kubernetes service. If you would like the app to automatically regenerate a kube config file when end users connect to a Kubernetes service, set the mdm_overwrite_k8_config parameter to true in the kube config file.
4.2 Instruct end users to select Connect (only required if Autorun has not been enabled) and the desktop app will launch the banyanproxy in HTTP_CONNECT_DAISY_CHAIN Mode on the specified port.
4.3 Instruct end users to set the https_proxy environment variable before calling kubectl to automatically tunnel the session over the Mutual-Auth TLS channel set up by CSE.
https_proxy=http://localhost:8081 kubectl get pods
If your end user is using kubectl v1.19+, they can add a proxy-url field directly to their ~/.kube/config file instead of specifying the https_proxy env var.
4.4 Verify that output lists the running pods correctly.
NAME                    READY   STATUS    RESTARTS   AGE
podreader-default-pod   1/1     Running   0          35h