Tunnelling to a Collection of TCP Services
- Updated on May 31, 2024
Motivation
Following zero trust principles, Cloud Secure Edge (CSE) enables security policies to be applied at the granularity of a single Service, or even individual Resources (such as APIs) under that Service. This means TCP services are typically defined individually, a single domain at a time. For example, you might configure an individual TCP service at server1.tcp.example.com and server2.tcp.example.com, and define a policy to precisely specify which users and devices that can access those services.
However, organizations often maintain and manage multiple services, sometimes thousands, at a time. While some services require a unique set of access restrictions, many of them require identical access restrictions. Rather than configure each service individually, you can group them and configure via a single service definition.
You can create a single collection service that will use HTTP Connect Tunnelling to route traffic the appropriate backend.
How it Works
SonicWall Cloud Secure Edge (CSE) uses standards-compliant HTTP Connect Tunnelling to enable connectivity to multiple services via a single TCP service definition.

In the desktop app, the end user clicks Connect on the service to start banyanproxy in HTTP Connect mode, listening on a specific port. The end user also configures their TCP client with the application-specific setting or environment variable to connect to the banyanproxy using HTTP Connect proxy.
-
When the TCP client supporting HTTP Connect is run, it connects to
banyanproxy, which forwards an HTTP Connect message that contains an argument including the actual destination. -
banyanproxyinitiates an MTLS connection with the CSE service on the Netagent side attcpcollection.example.com:8443. Netagent checks the device posture and identity and, if successful, establishes the MTLS session.banyanproxythen uses HTTP Connect to specify the actual destination of the TCP request. -
Netagent checks the Service Backend configurations for the
httpconnectandallow_patternsettings. If the connection request matches, Netagent makes the connection to the backend.
Once the TCP connection is established, communication from the TCP client is as if it directly connected to TCP server.
Steps
To configure tunnelling to a collection of TCP Services:
1. Navigate to Private Access > Infrastructure and select + Register Service. Select the option Other TCP Service.
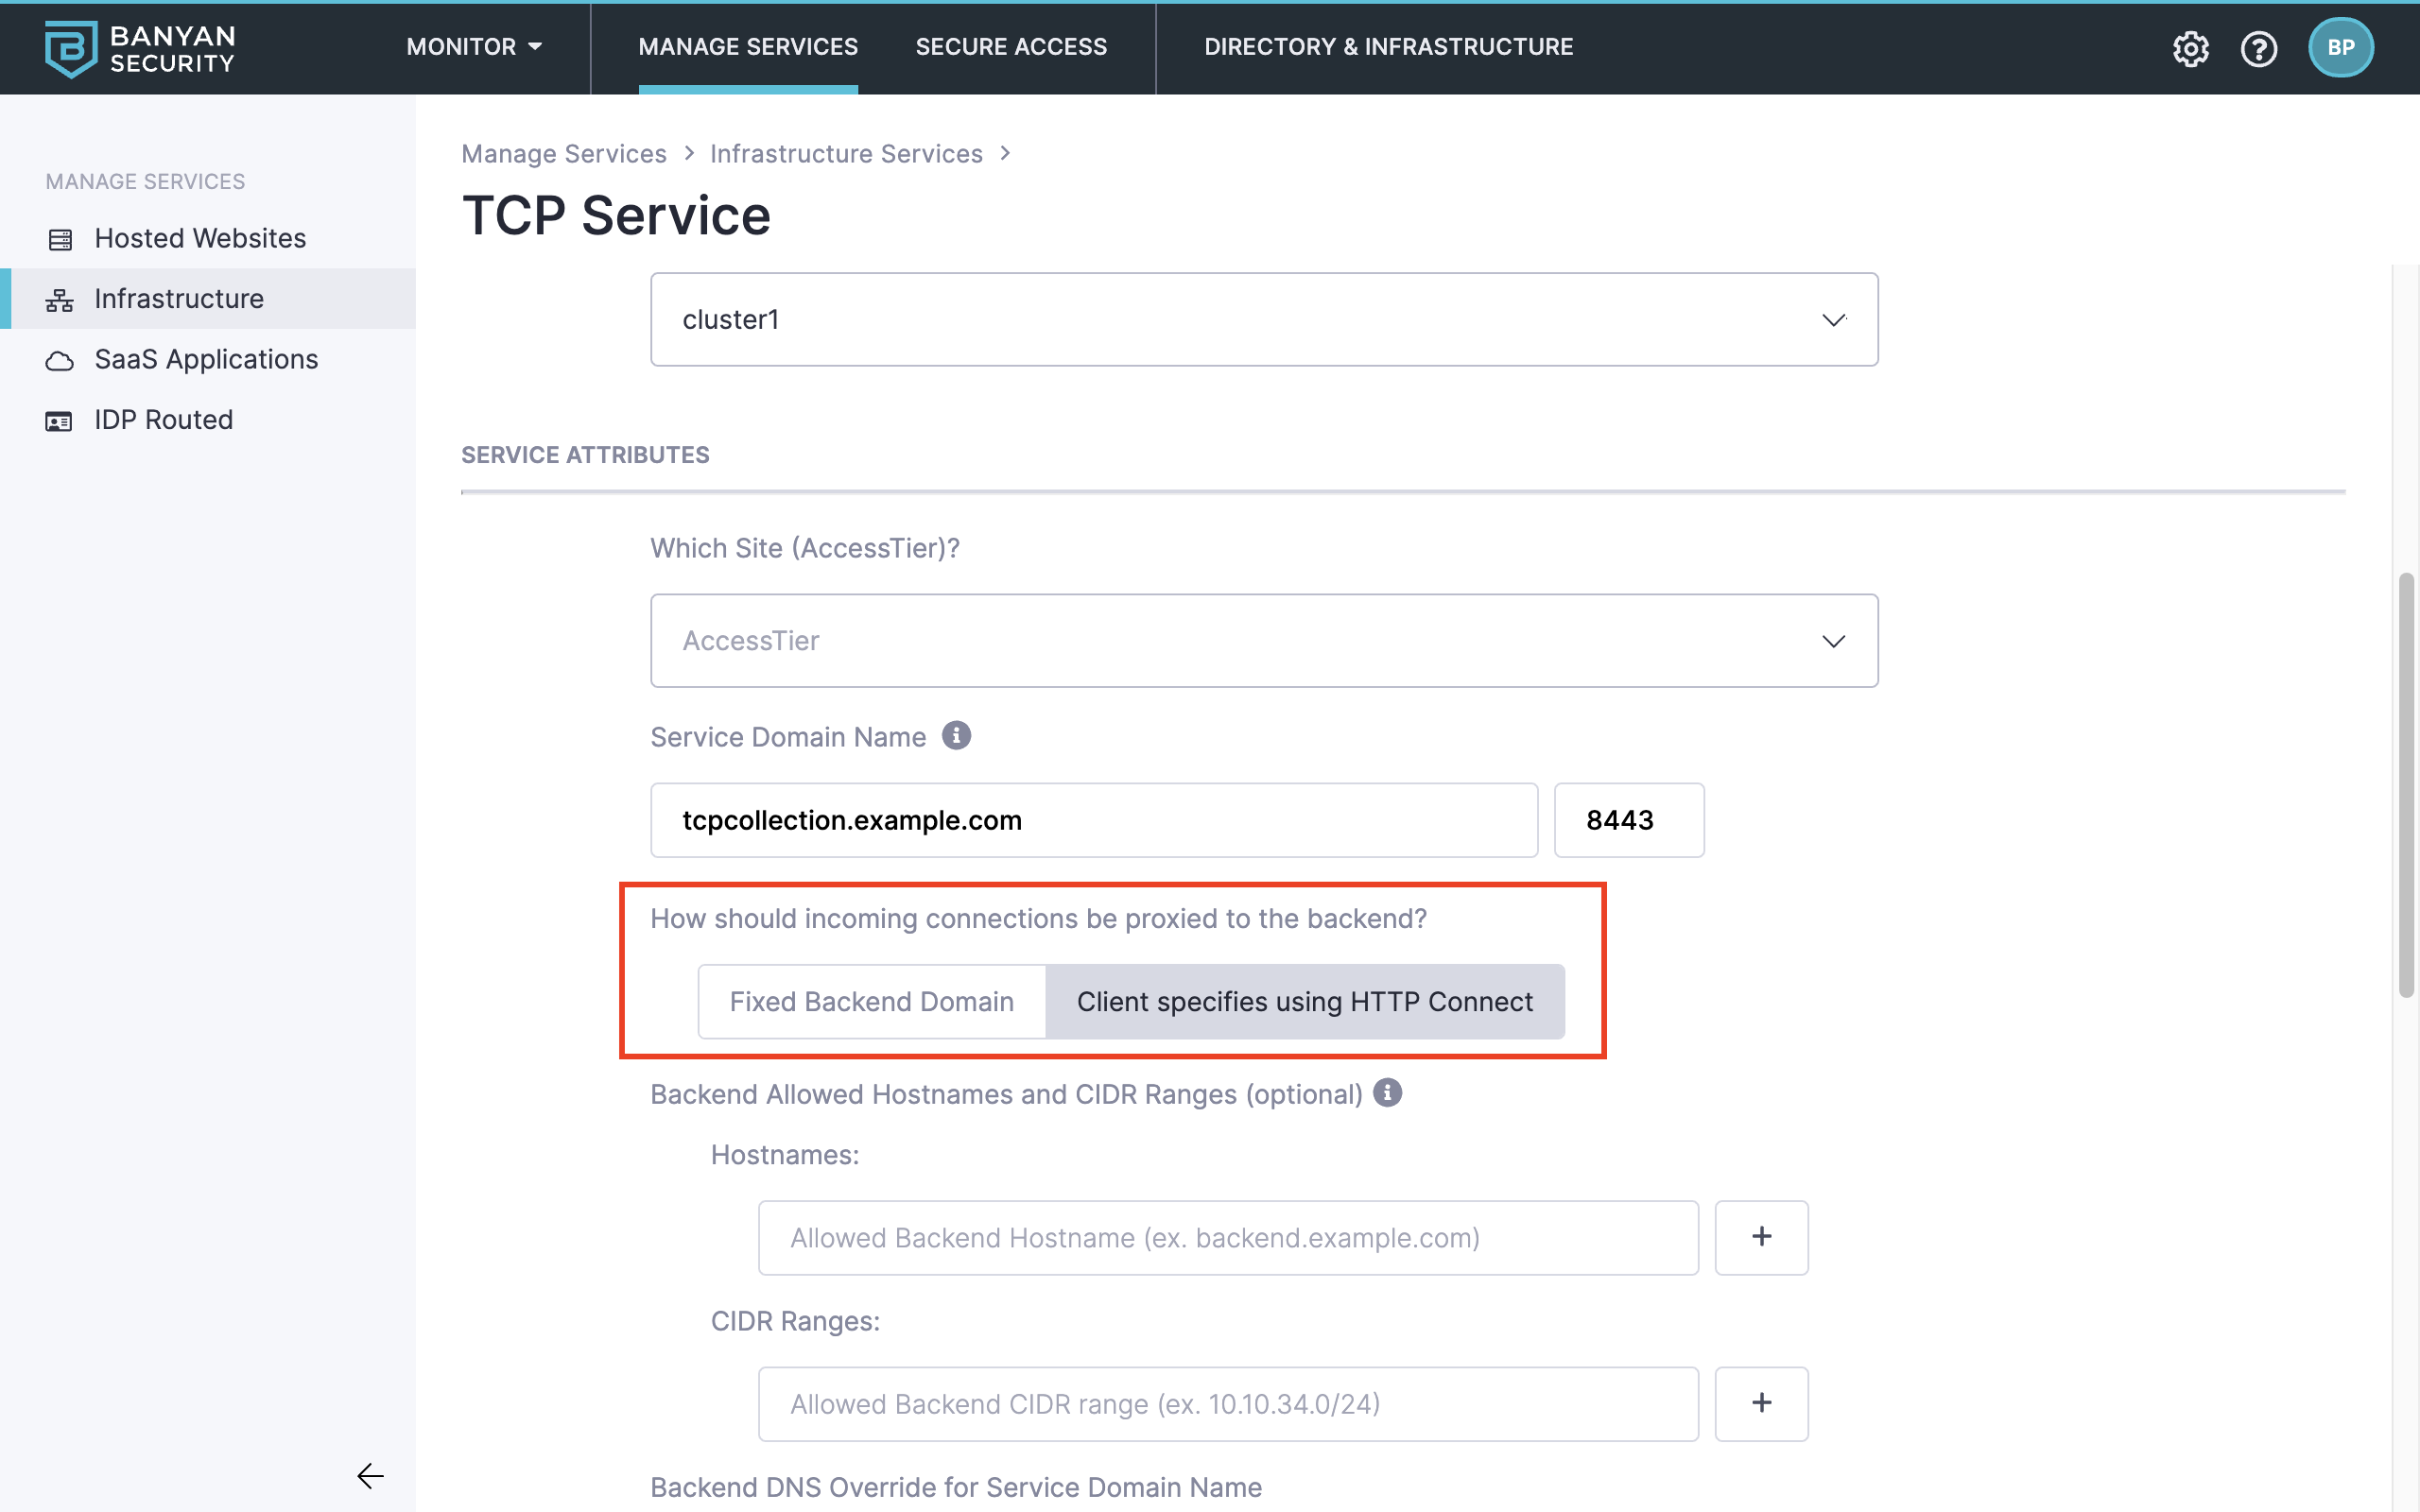
2. On the service registration page, configure all applicable fields and set the method for how incoming connection should be proxied to the backend to Client specified using HTTP Connect.
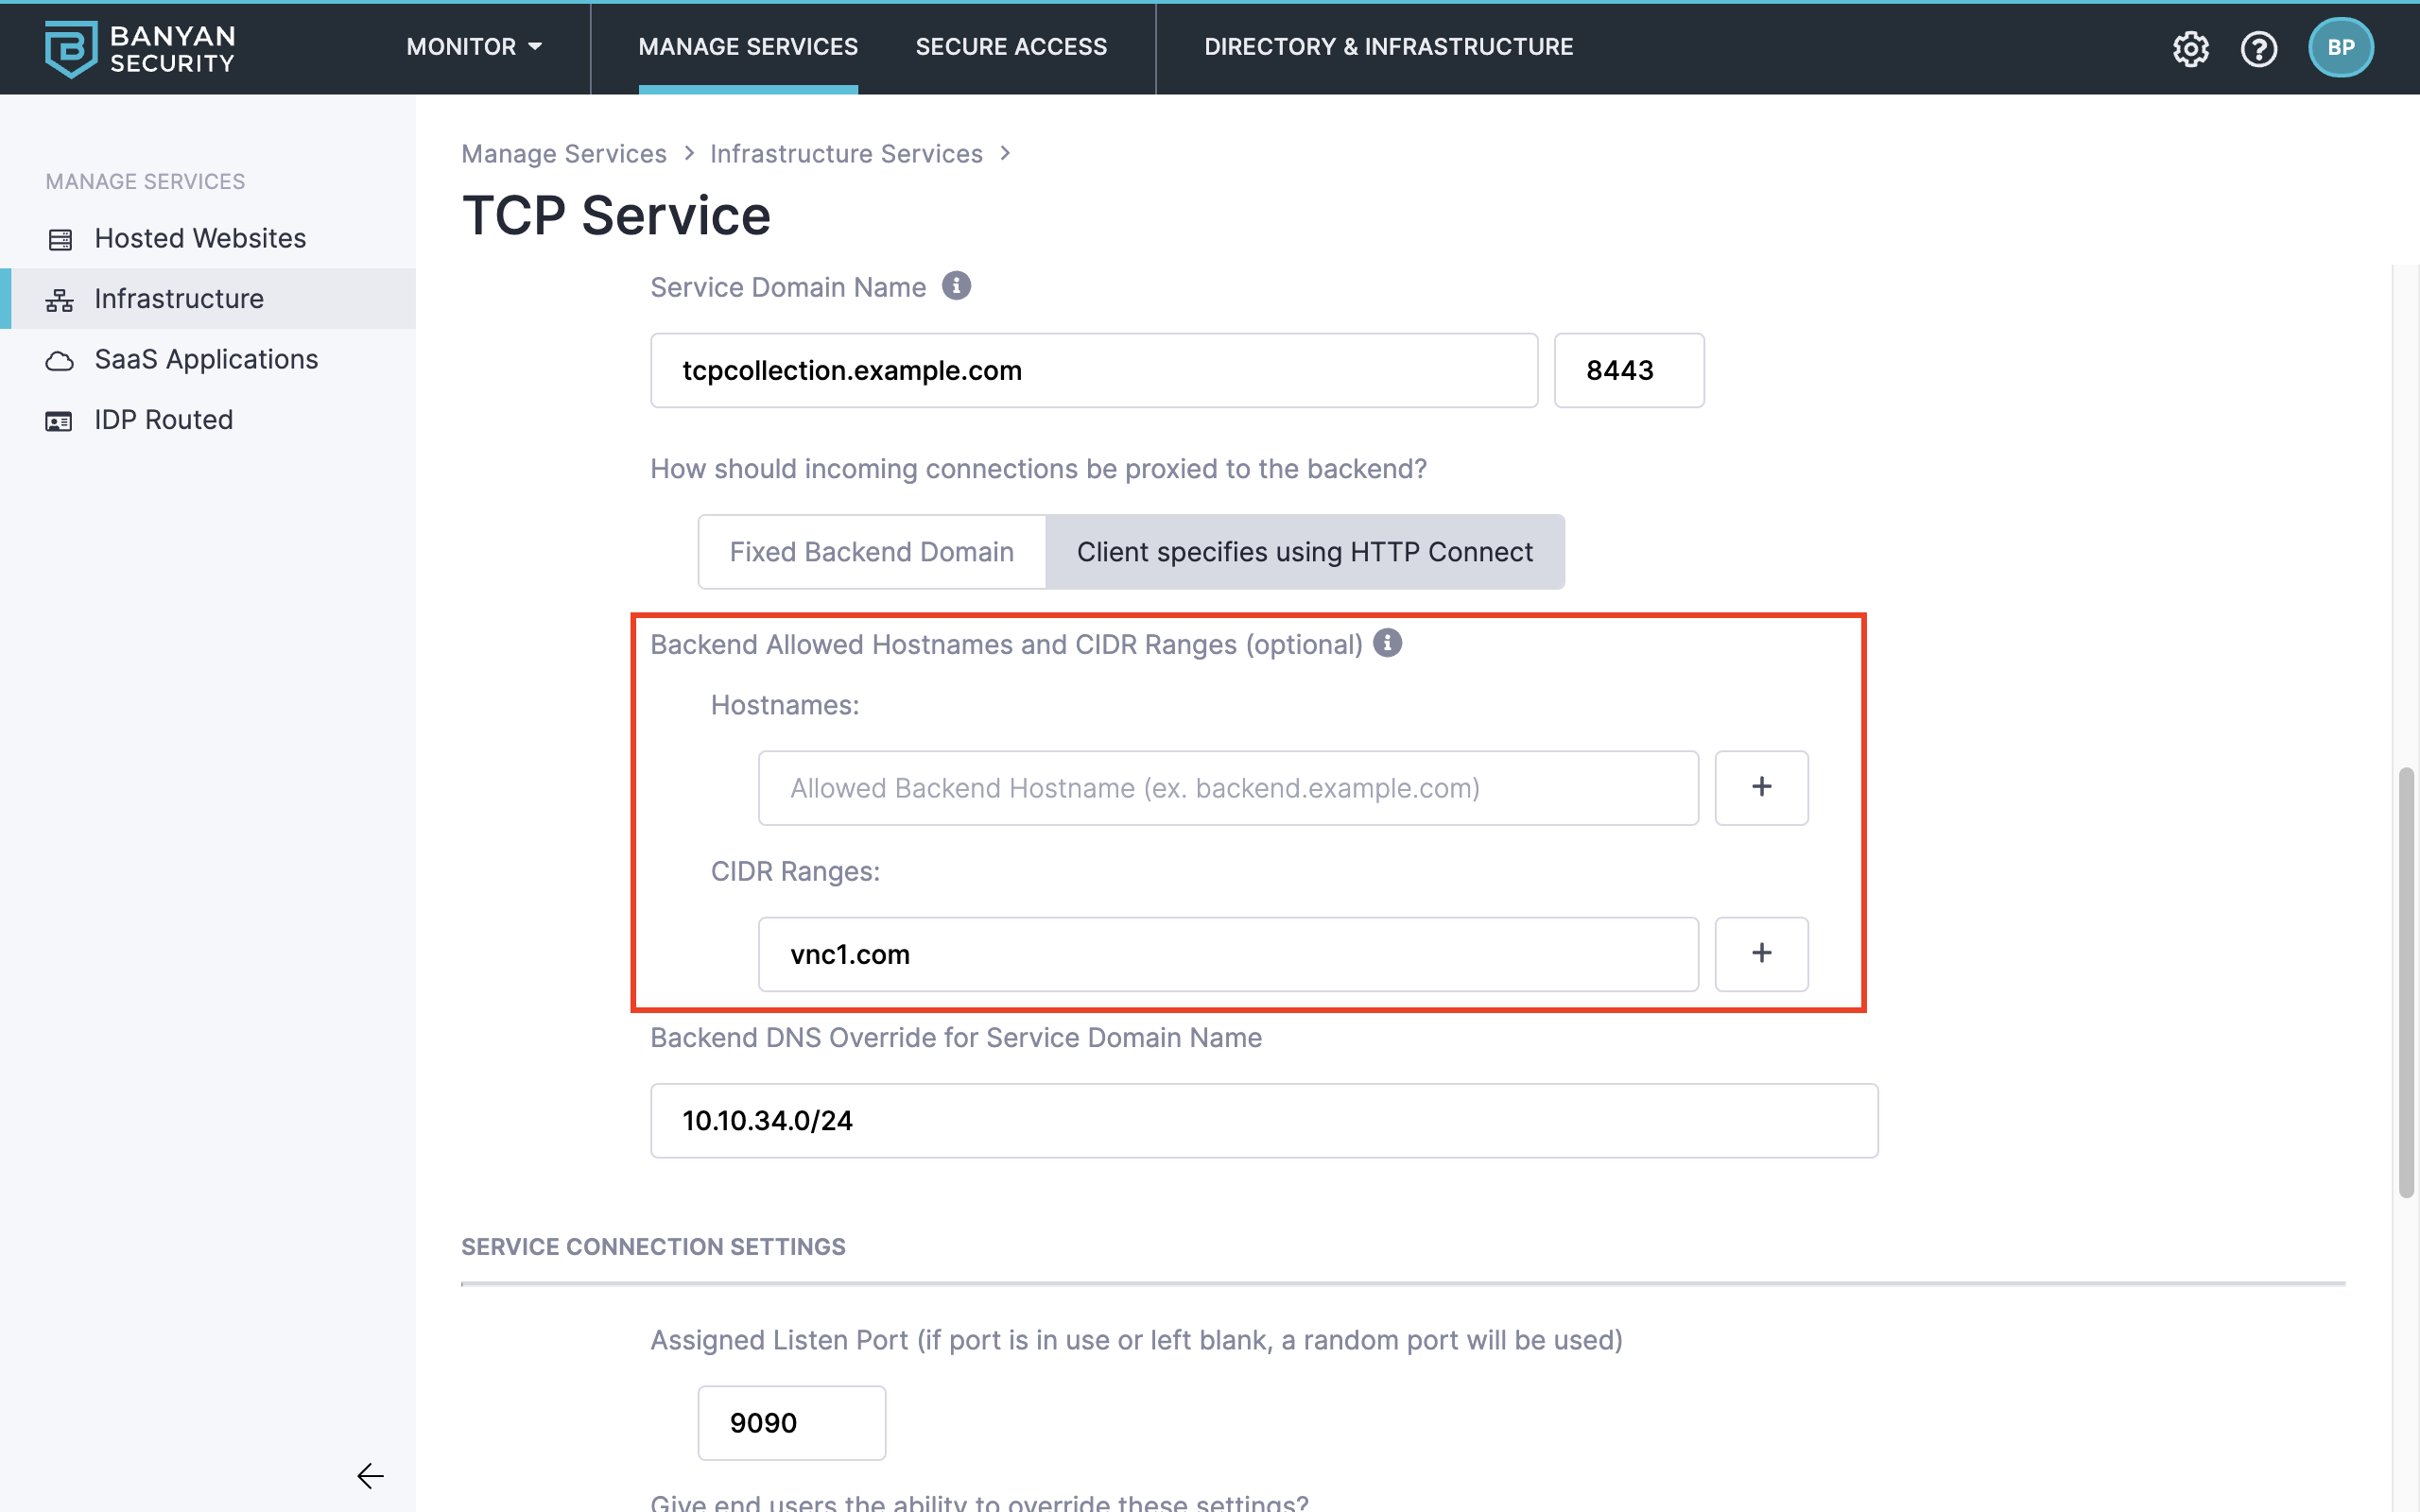
Additionally, you can configure a simple list of Allowed Hostnames and CIDR Ranges.
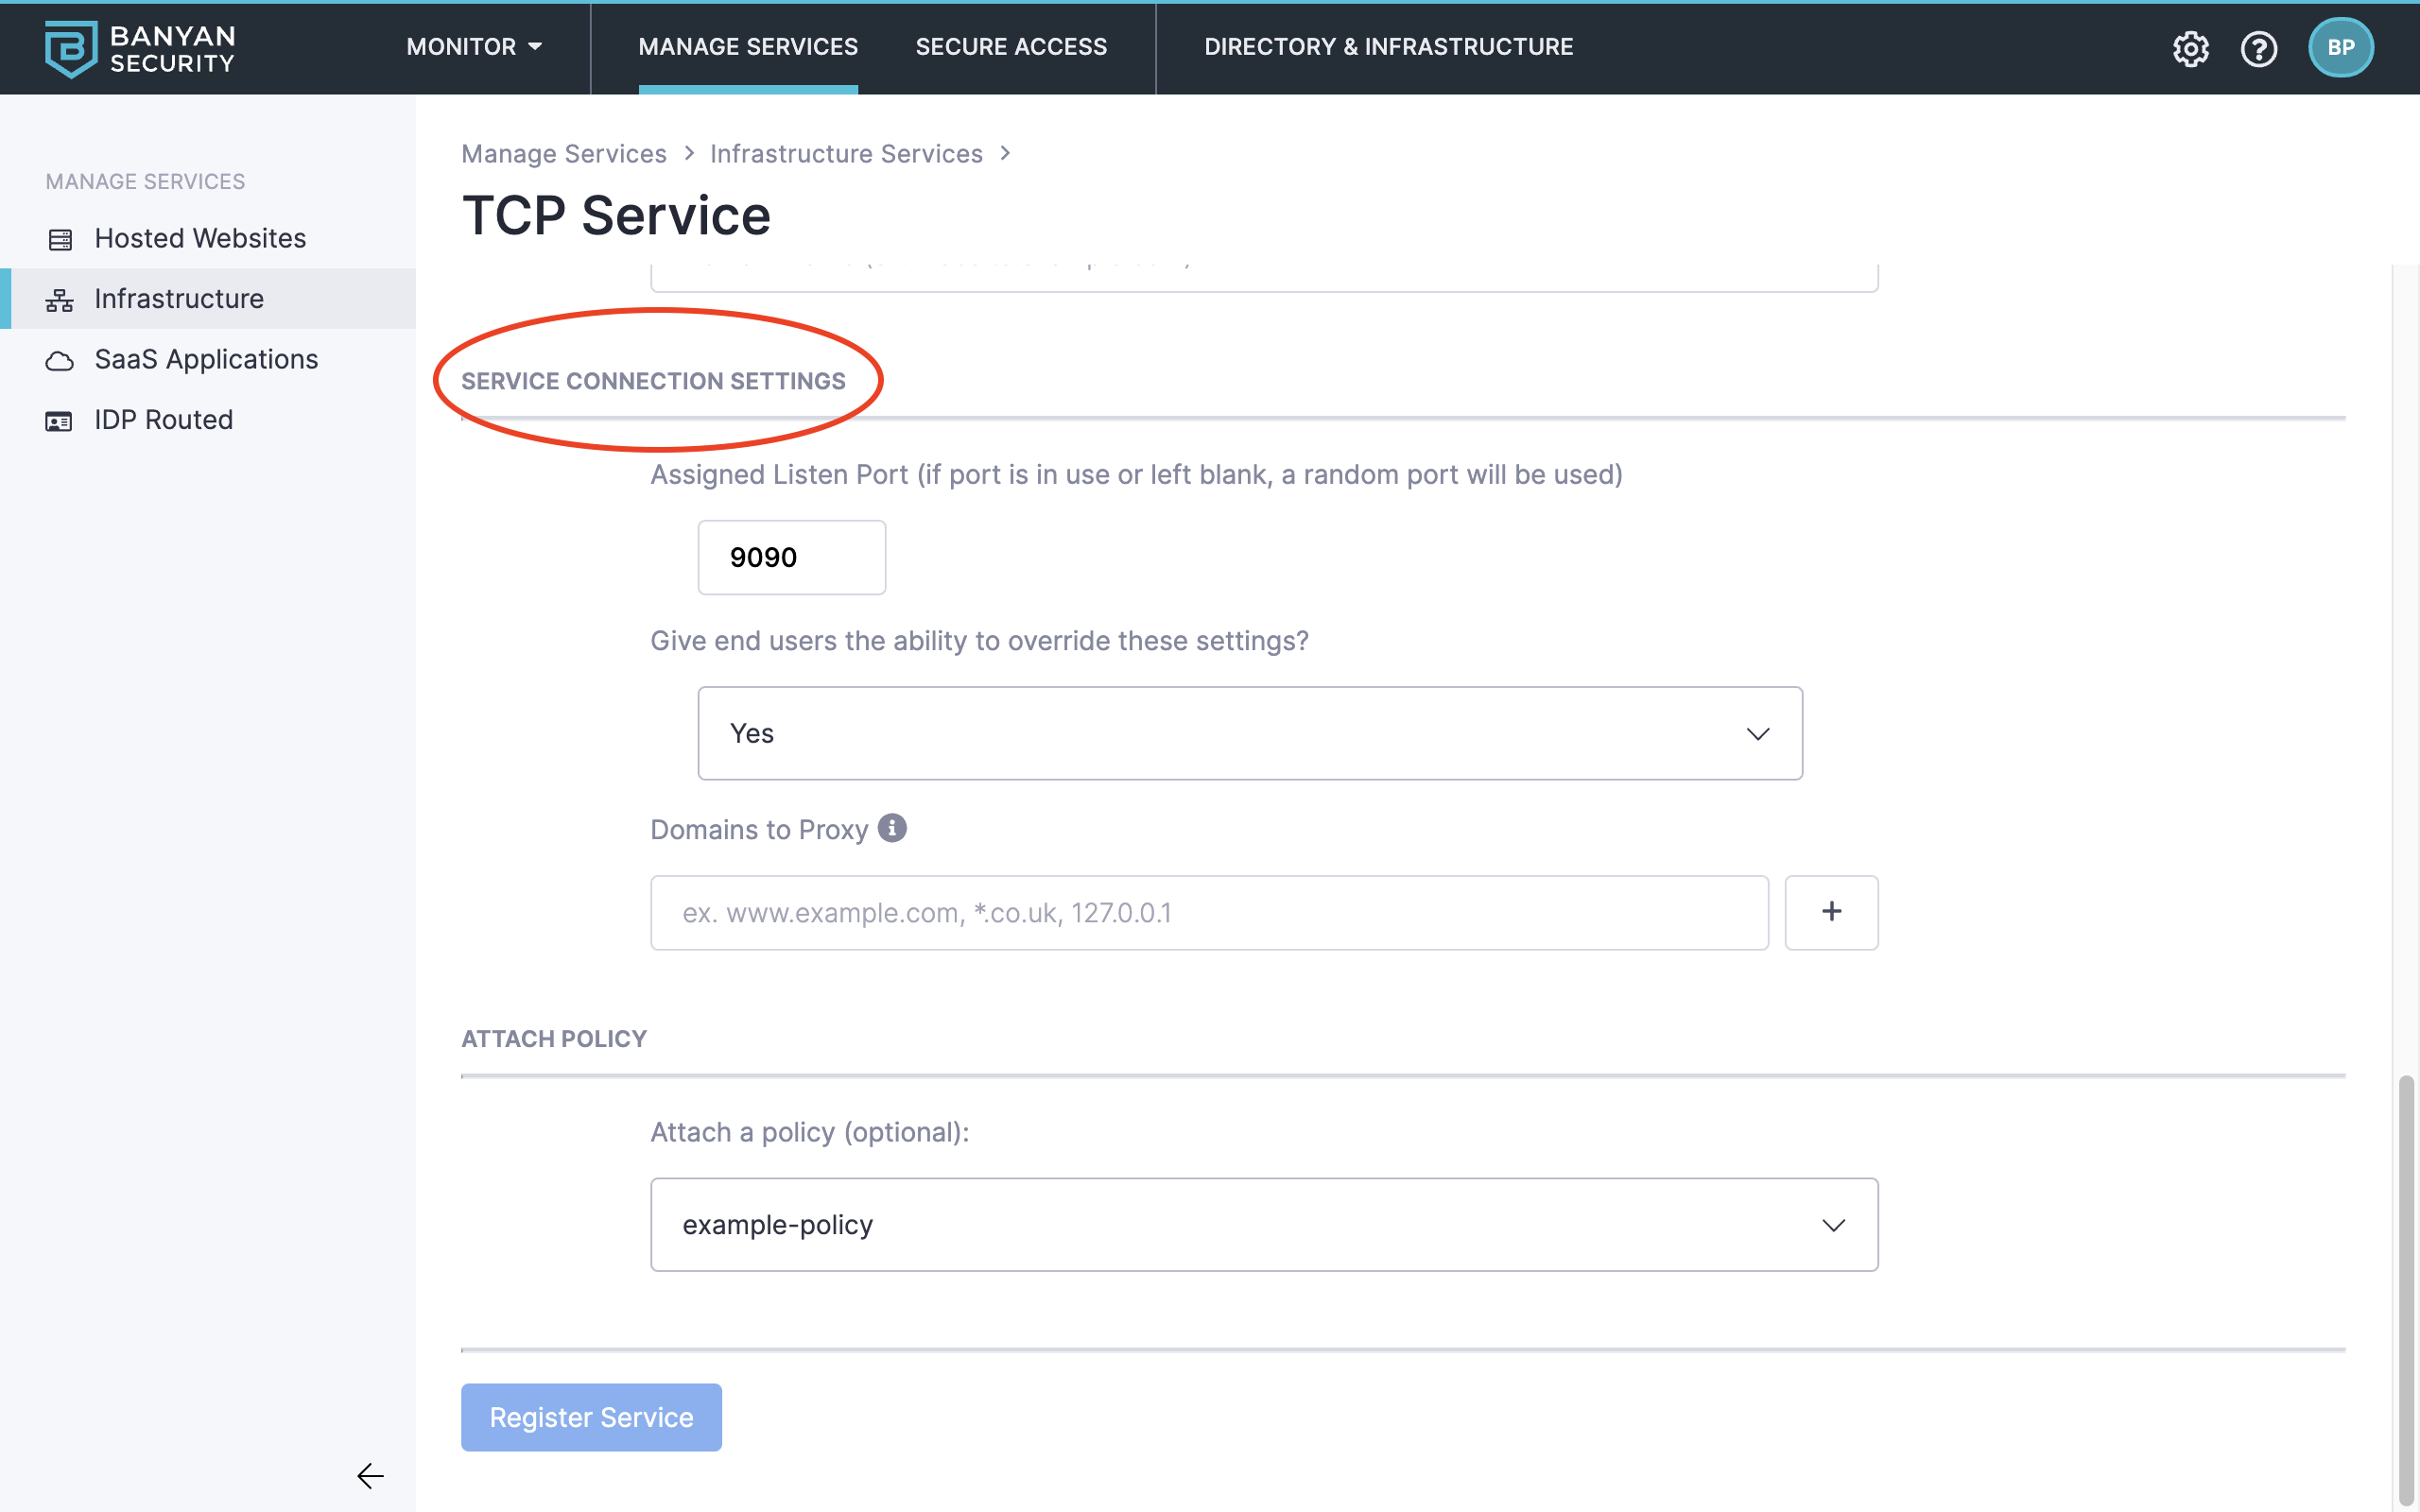
On that page, also configure the Service Connection Details, such as an Assigned Listen Port and whether or not end users are able to override the settings.
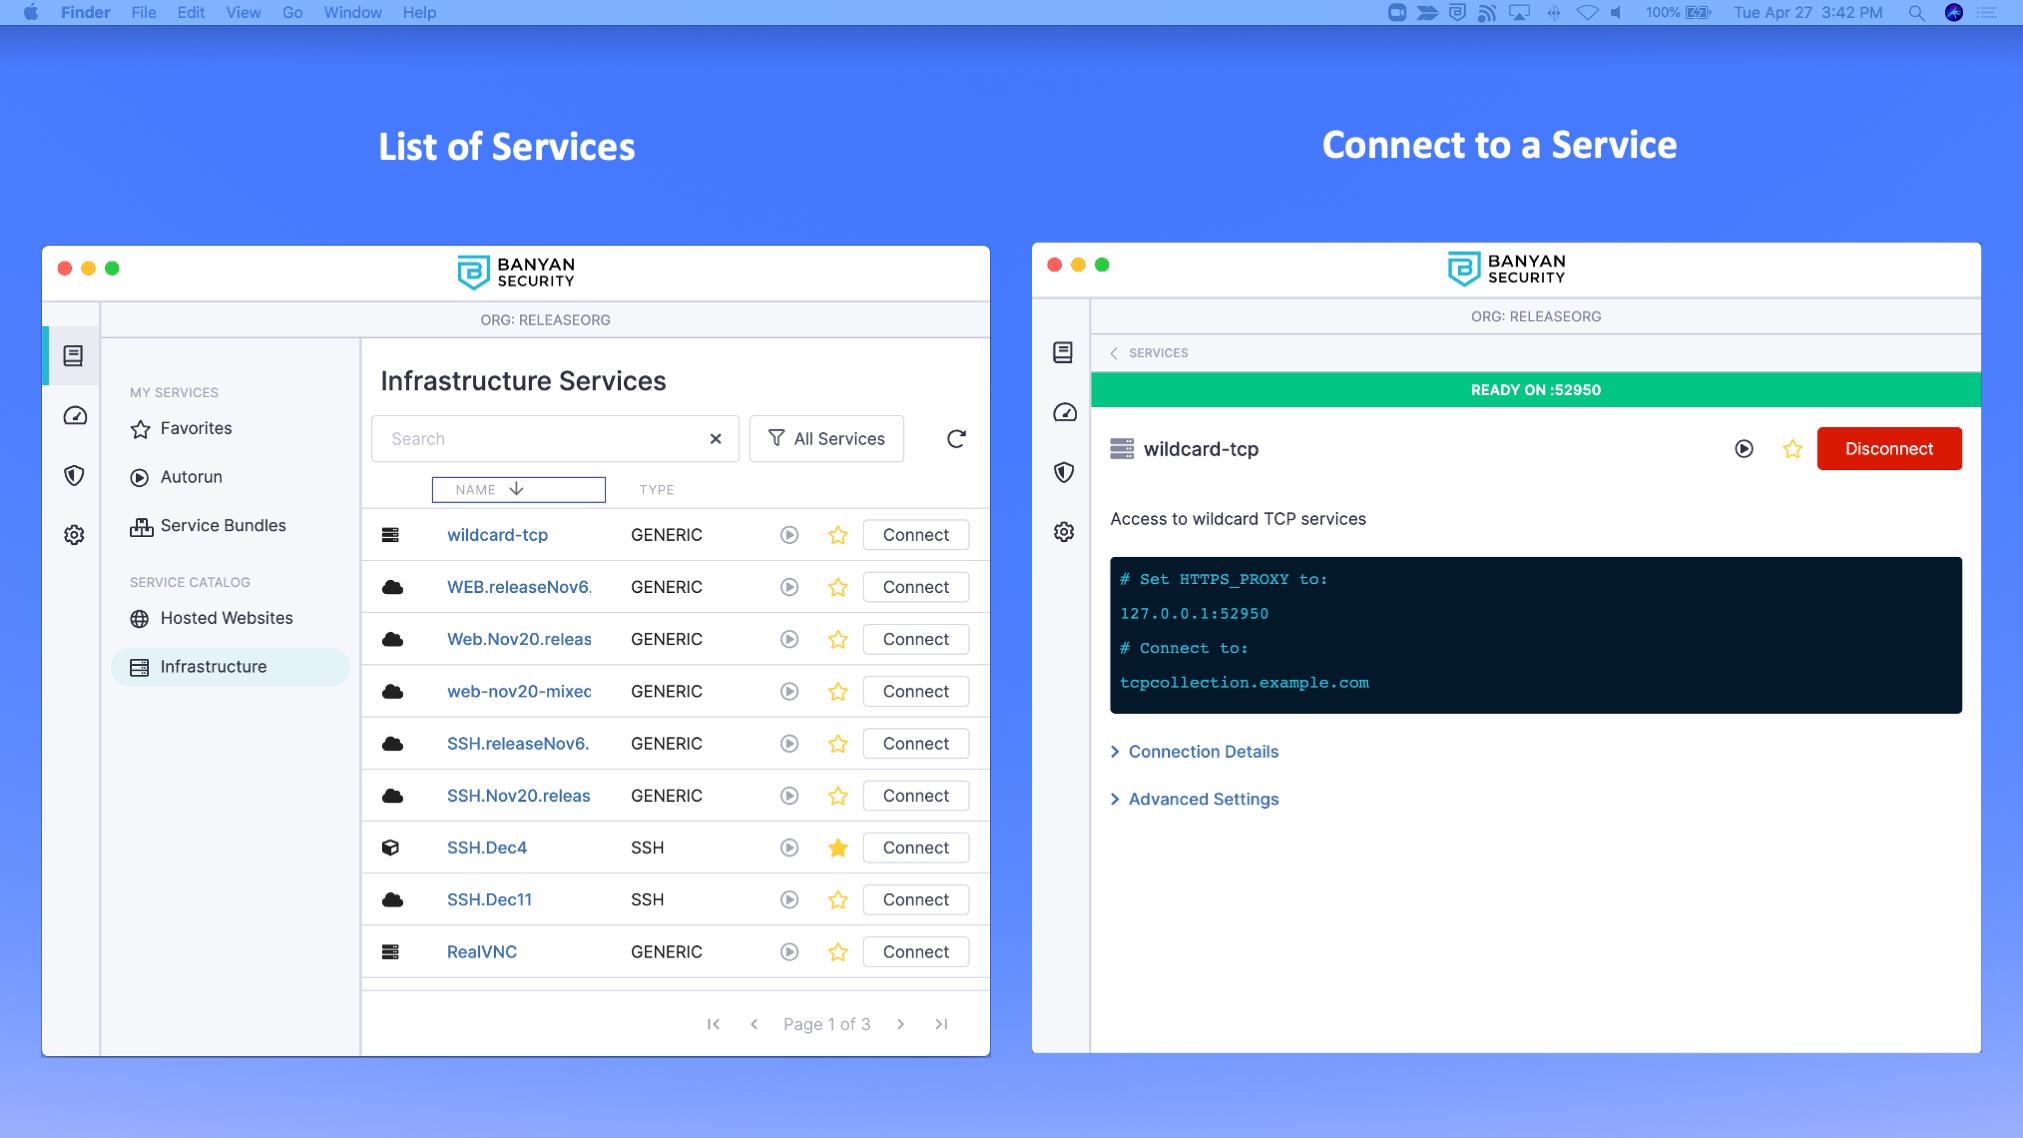
In the app, end users will see a single entry per collection of TCP services. Once they click into the Service details view, they can click Connect to launch banyanproxy and create an HTTP Connect tunnel with the CSE Enforcement Component.
3. On the end-user’s TCP client, configure the HTTP Proxy setting for the specified address on localhost.
Almost all clients have native support for HTTP Connect Proxy tunnelling. Here’s an example of a clients’ setting page:
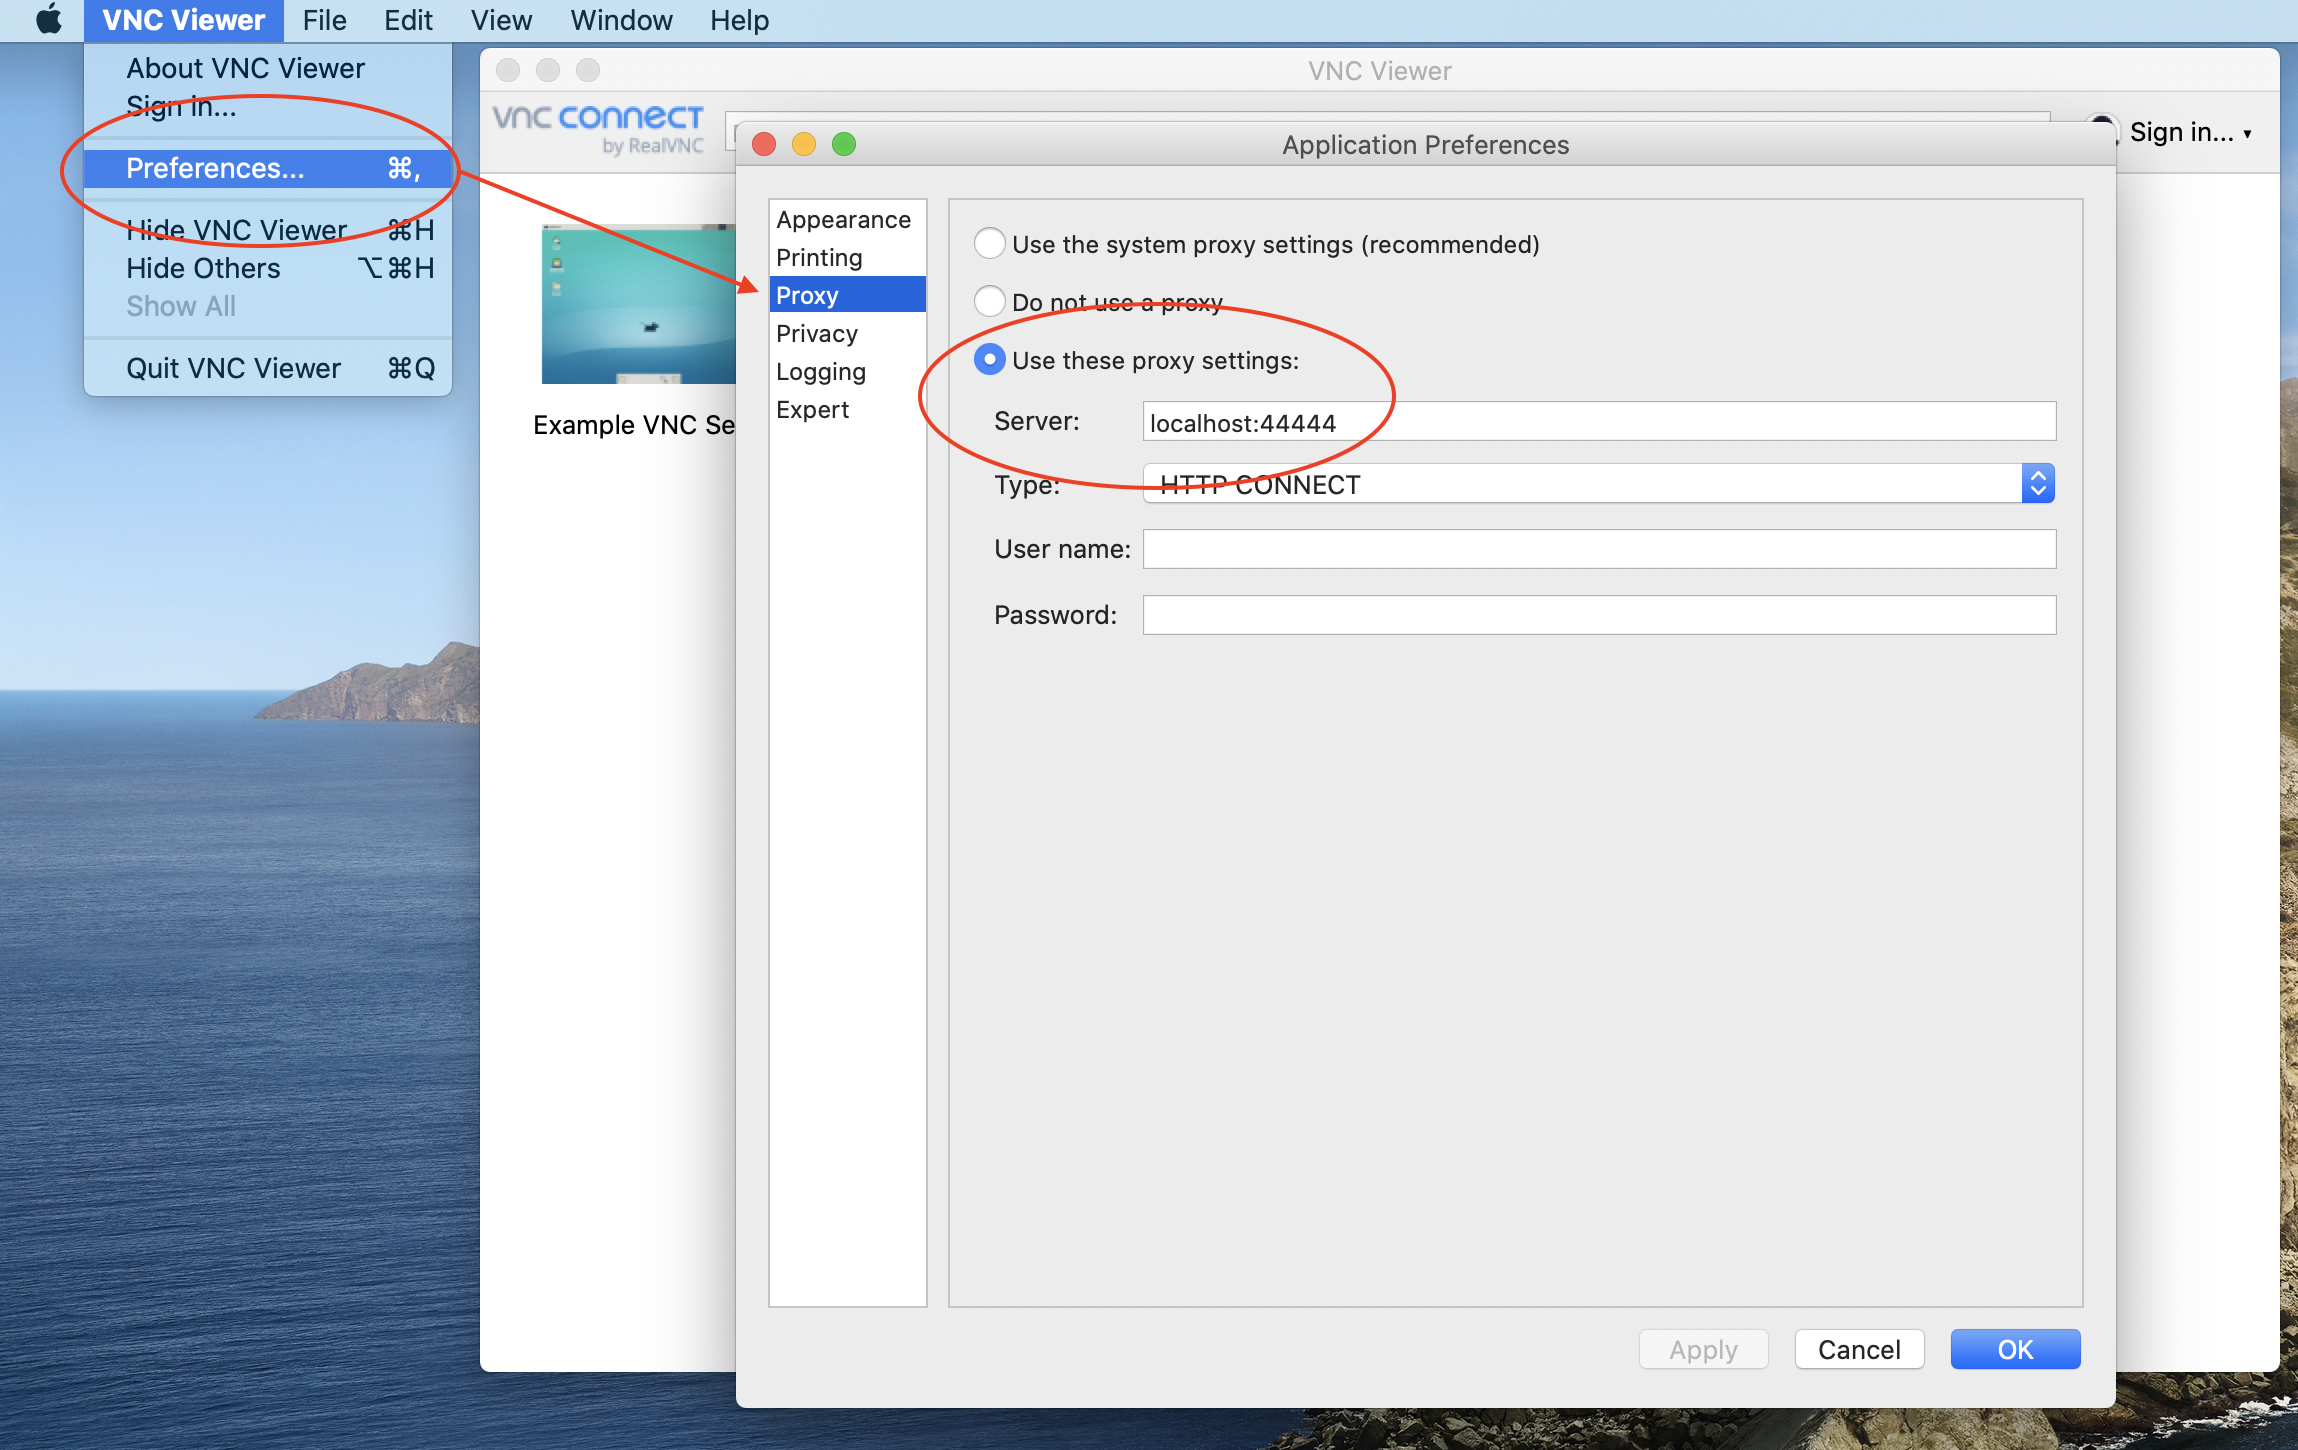
Once the client is configured for the HTTP Connect Proxy, the end-user can enter the address of their TCP service as normal and they will be able to securely connect to it.
Notes
Include & Exclude Backends in your Collection
Simple Allow List
For simple use cases, you can restrict backend connectivity to the specified hostnames or CIDR ranges when configuring a collection of TCP services. In the example below, connections are allowed only if the service destination has the hostname vnc1.com and is in the CIDR range 10.10.34.0/24.
Advanced Use Cases with Complex Patterns
For advanced use cases that require complex patterns, you can create a custom Hosted Service JSON to specify CIDRs and IP Ranges in an “allow list” in the service spec. This lets you manage allow lists that include and exclude specific backends in your collection.
For example, you can define the pattern for the allowed backends using hostnames (via allow_patterns). Additionally, you can override the destination hostname to a different backend service name (via dns_overrides).
In the example below, connections are allowed only the service destination has the hostname vnc1.com and in the CIDR range 10.10.34.0/24. Also, the destination hostname is overridden from vnc1.com to myvncservice.com. Finally, connections have to be in the port range 5901-5999.
"backend": {
  "target": {},
  "dns_overrides": {
    "vnc1.com": "myvncservice.com"
  },
  "allow_patterns": [
    {
      "hostnames": [
        "vnc1.com"
      ],
      "cidrs": [
        "10.10.34.0/24"
      ],
      "ports": {
        "port_ranges": [
          {
            "Min": 5901,
            "Max": 5999
          }
        ]
      }
    }
  ]
}
Regex Support in Hostnames:
-
Hostnames can be specified as regular expressions as well as leading/trailing wildcards.
-
Example - Configure your Hostname with leading/trailing wildcards:
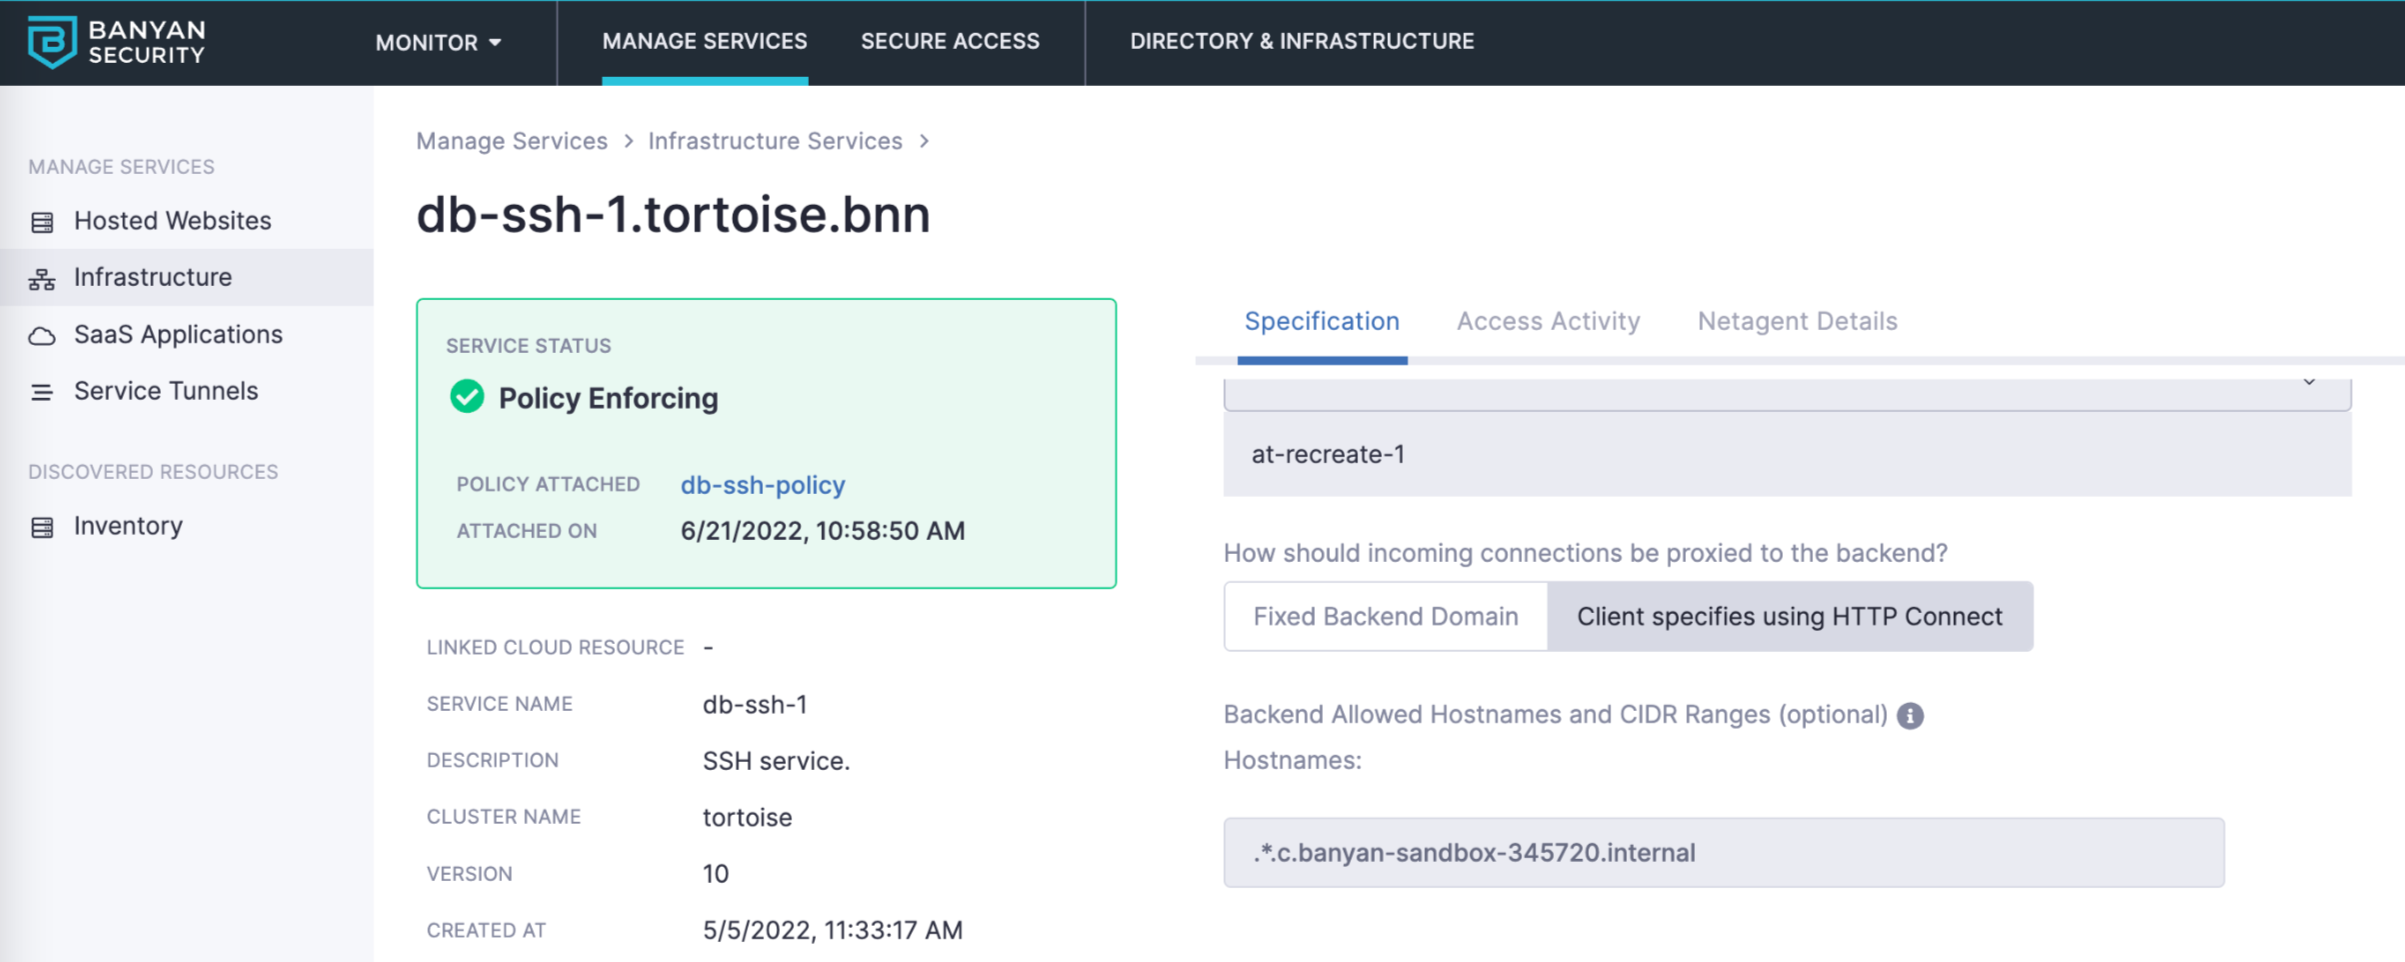
*.c.banyan-sandbox-*
- Example - Configure the Hostname to support two internal DNS servers in GCP under one service:
.*.c.(banyan-sandbox-345720|banyan-maui-\d{6}).internal.
