Configure Entra ID (Azure AD) to manage your directory of users
- Updated on Jul 16, 2024
Entra ID is Microsoft’s cloud-based identity and access management service, which helps your employees sign in and access resources. SonicWall integrates with your organization’s Entra ID SSO to authenticate enterprise users that need access to Cloud Secure Edge services.
Pre-requisites
In order to set up this integration, you need the following privileges:
- administrative access to Entra ID;
- the ability to add a new Enterprise Application.
Steps
Step 1: Add TrustProvider as an App in Entra ID
1.1 In your Entra ID admin center, navigate from Applications > Enterprise Applications.
1.2 Select + New application, and then select Create your own application. This will generate a pop-out window on the right side of the webpage. In the What’s the name of your app? field, enter “Banyan TrustProvider”.
1.3 Select Integrate any other application you don’t find in the gallery (Non-gallery).
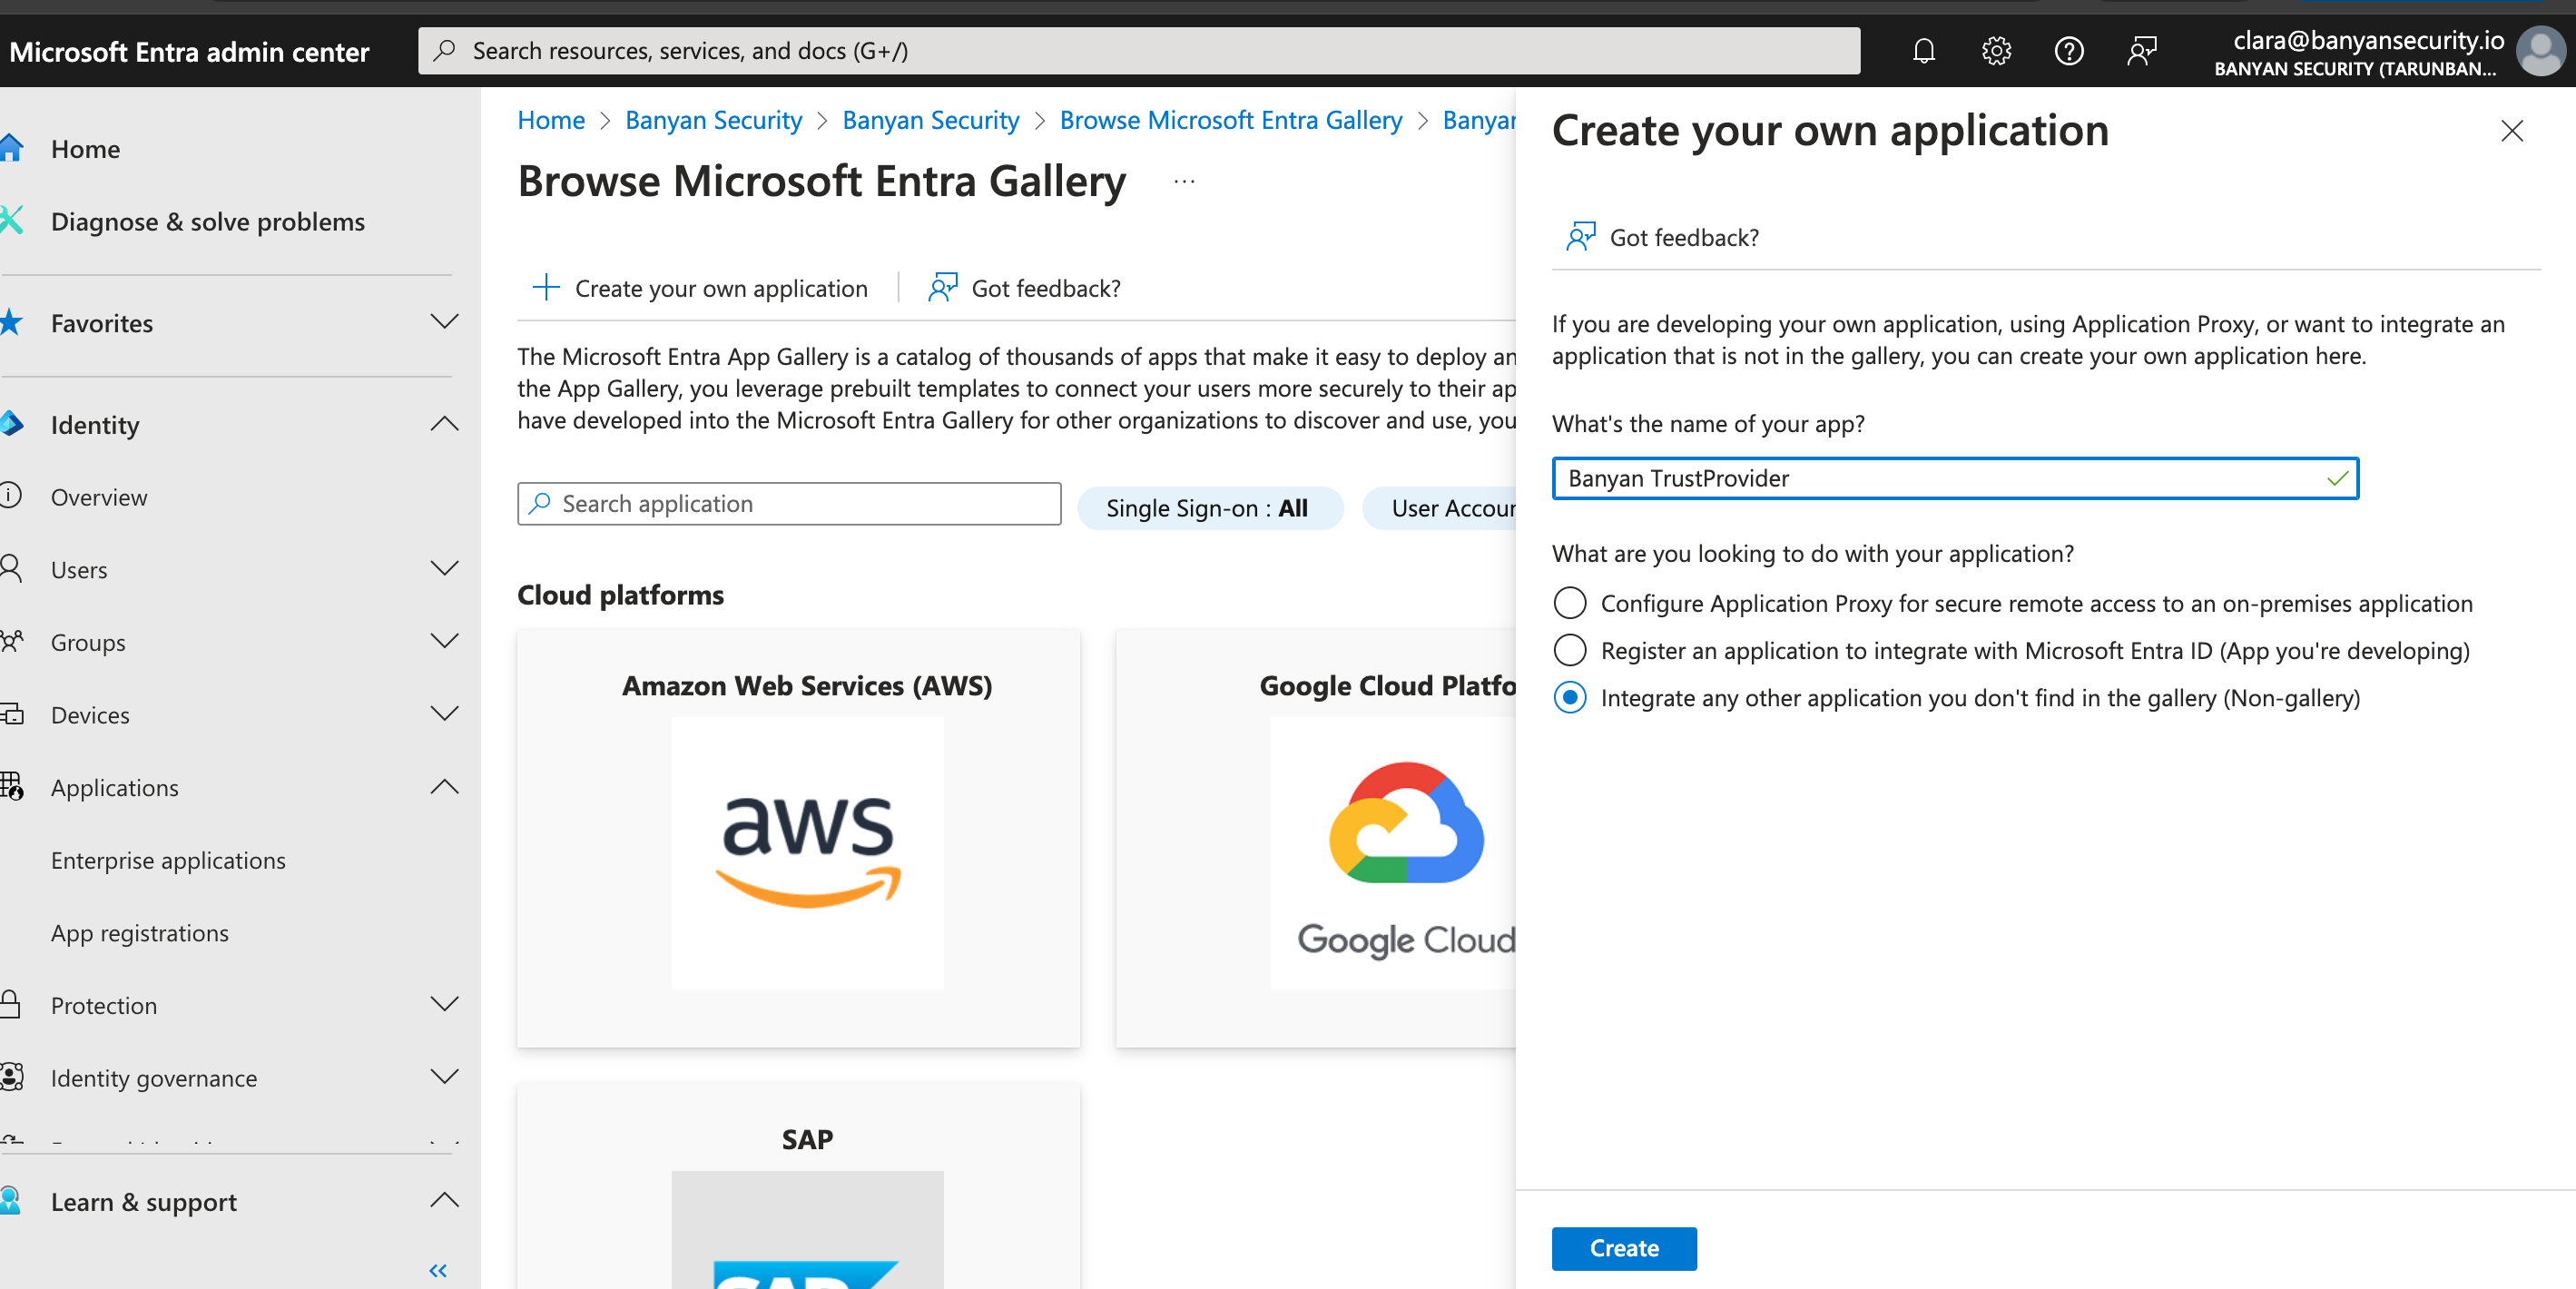
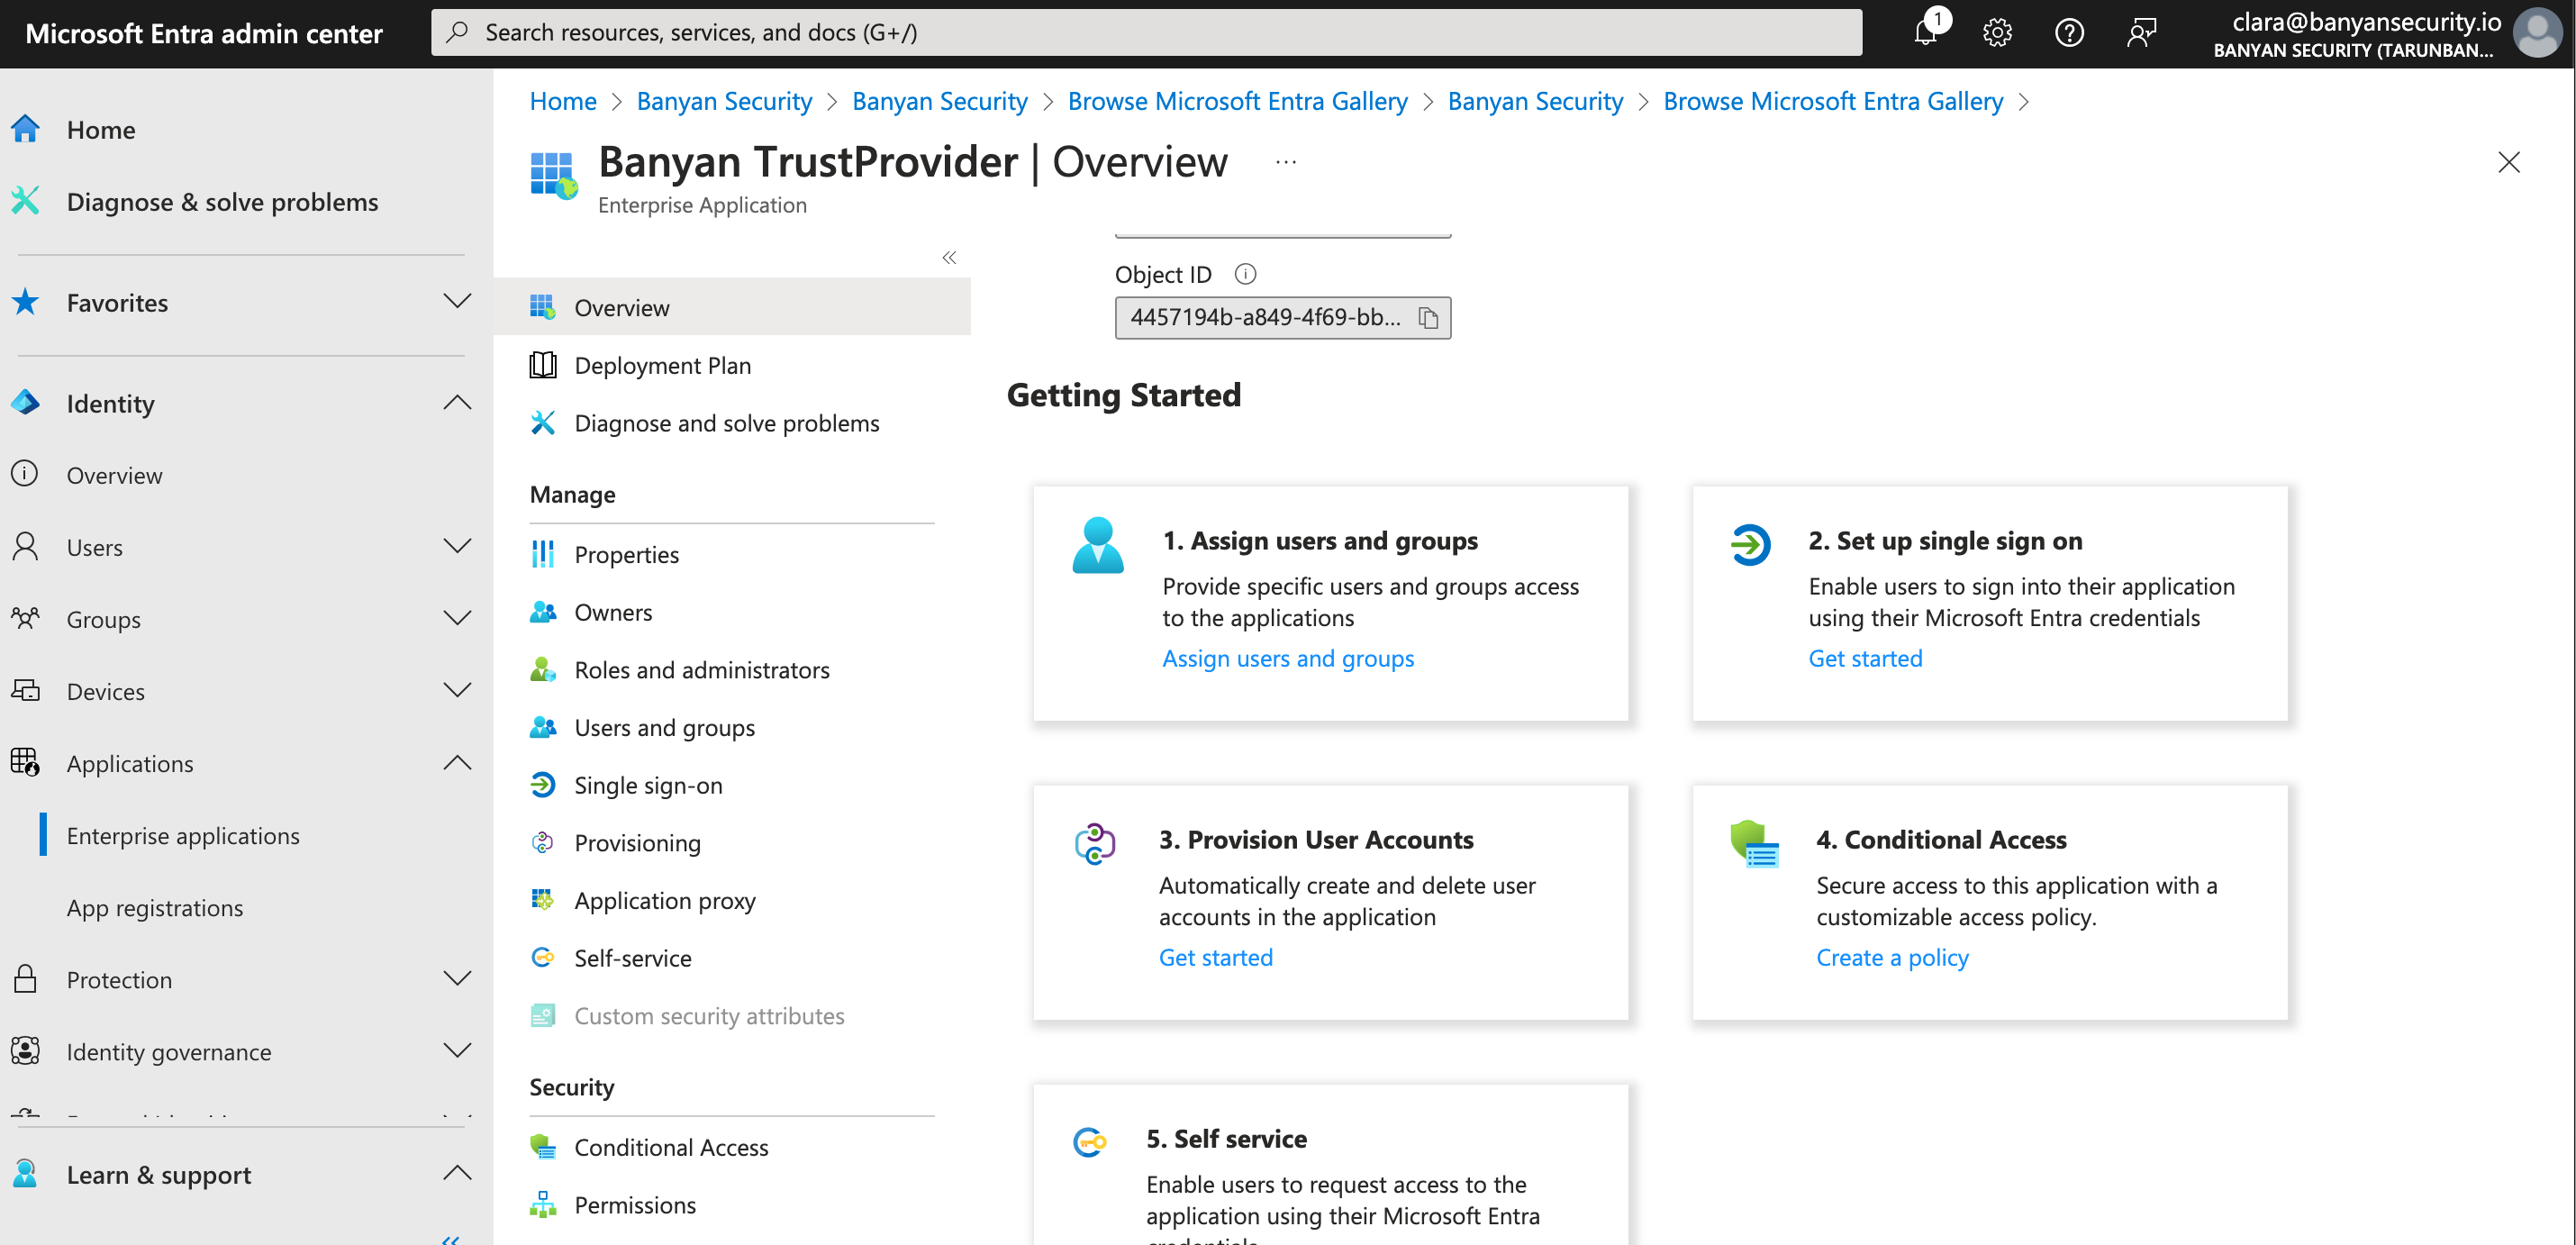
1.4 Select Create. This will navigate you to the new Overview page of the app you just added (i.e., Banyan TrustProvider).
Step 2: Set up a Single Sign-On method in Entra ID
2.1 Under Getting Started, select 2. Set up single sign on. This will generate four different single sign-on methods to choose from. Select SAML.
Step 3: Configure User Identity Provider Settings in SonicWall Cloud Secure Edge
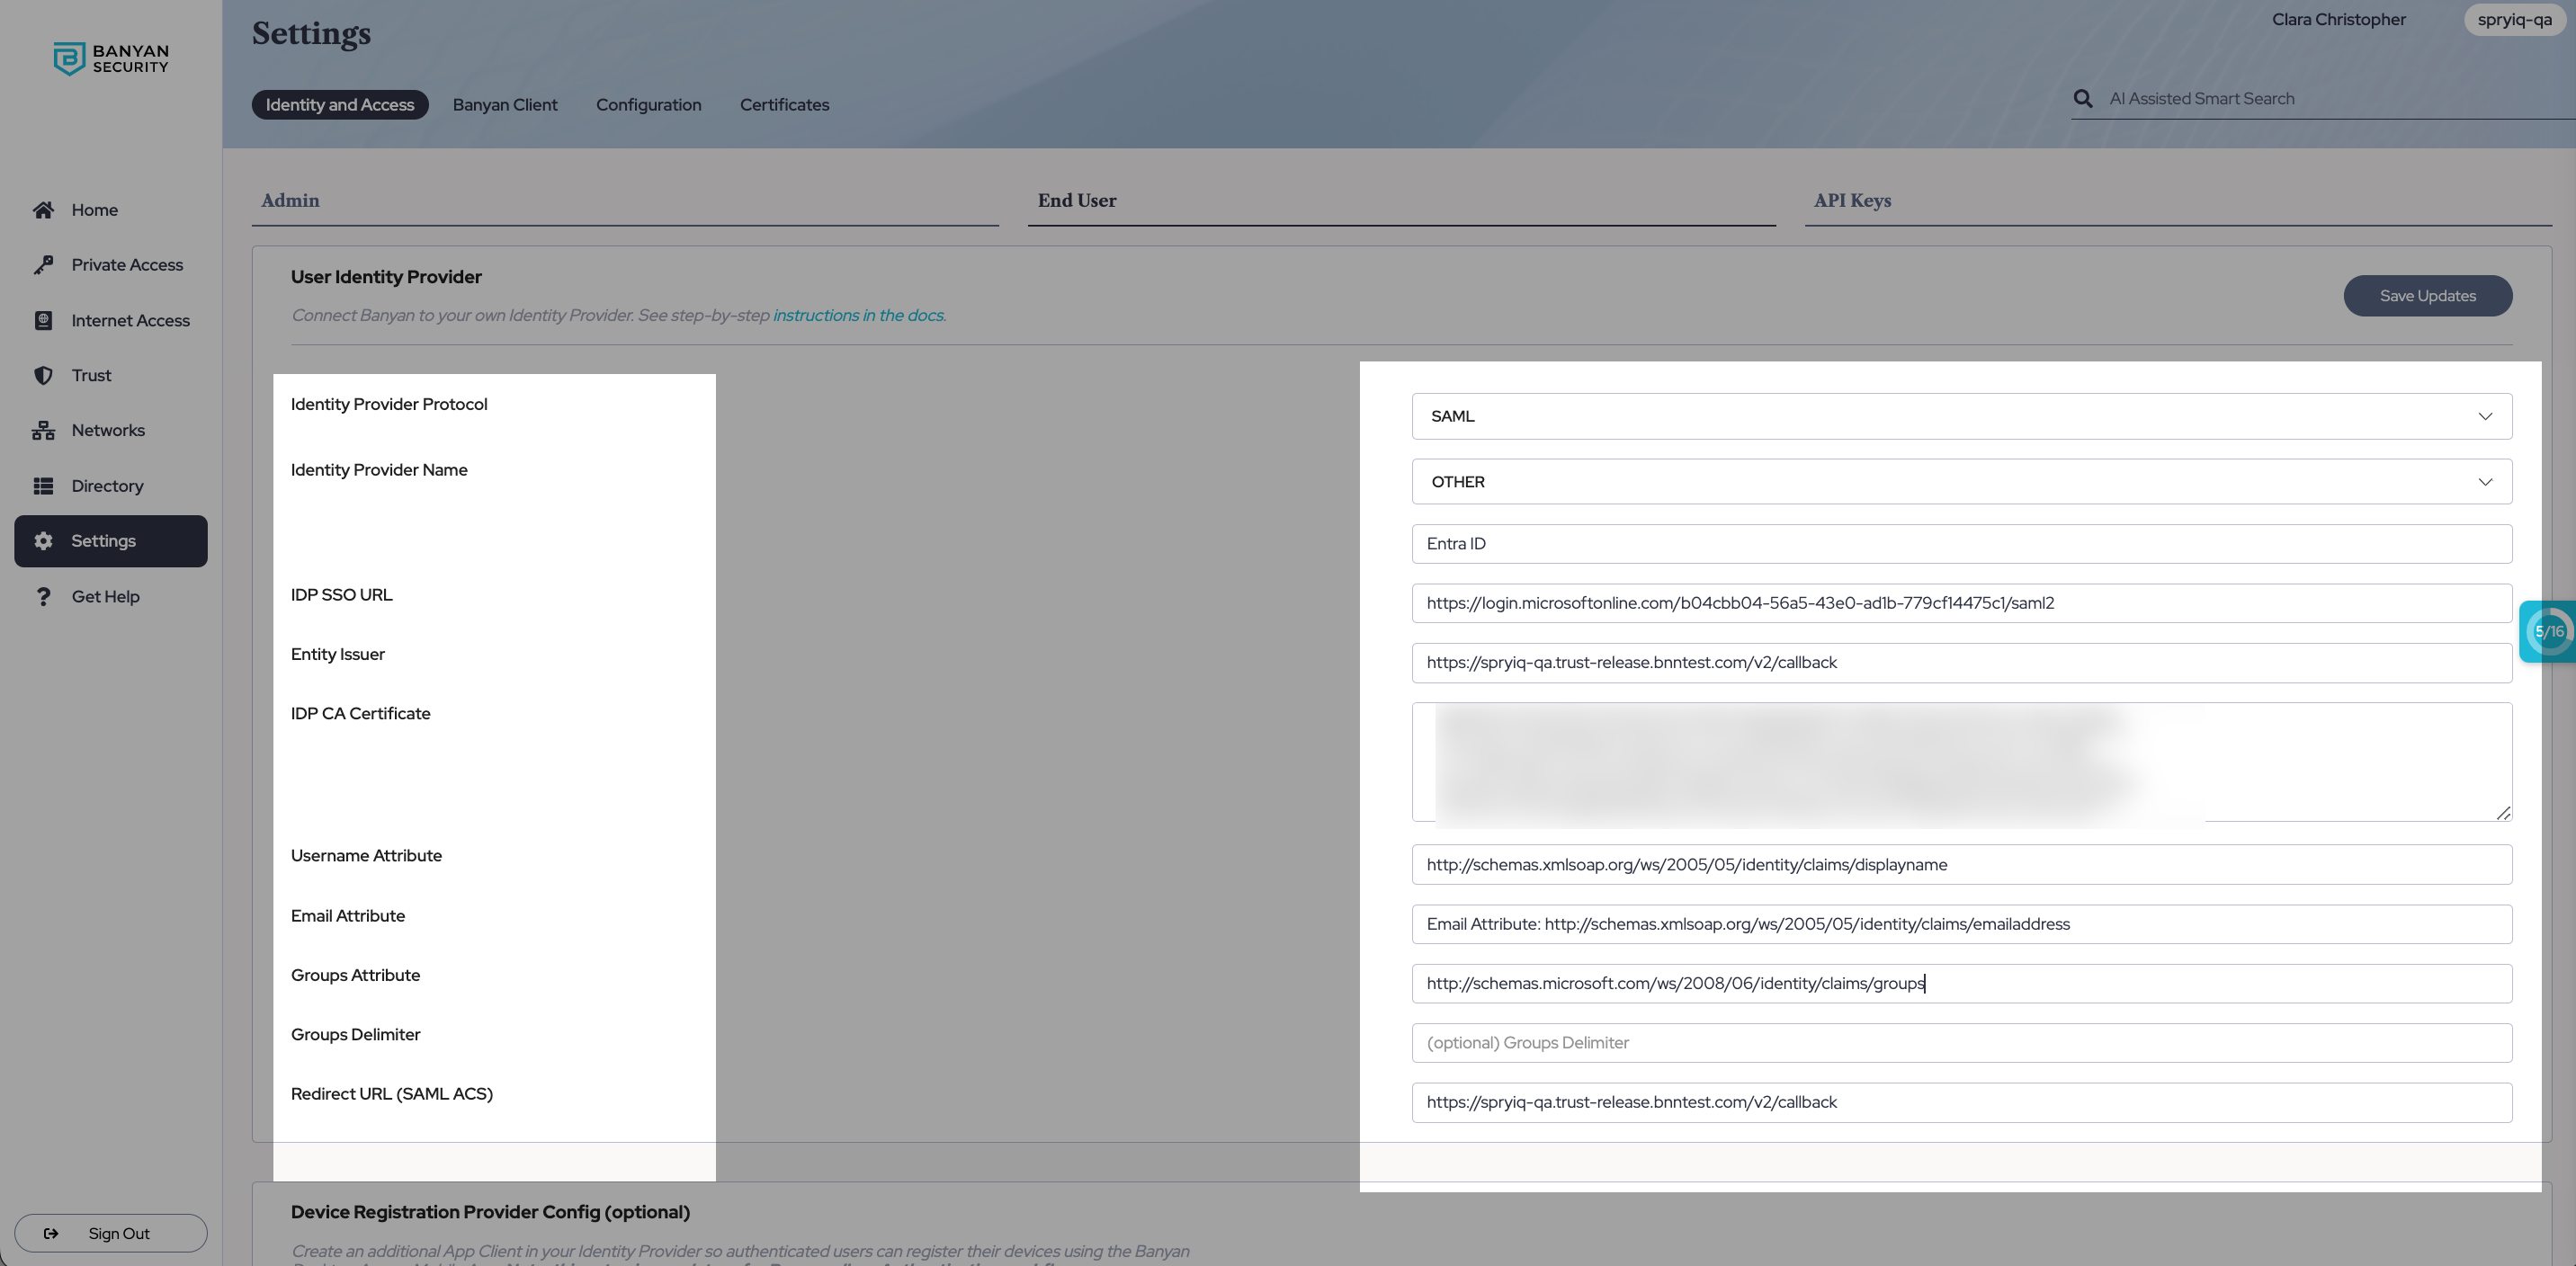
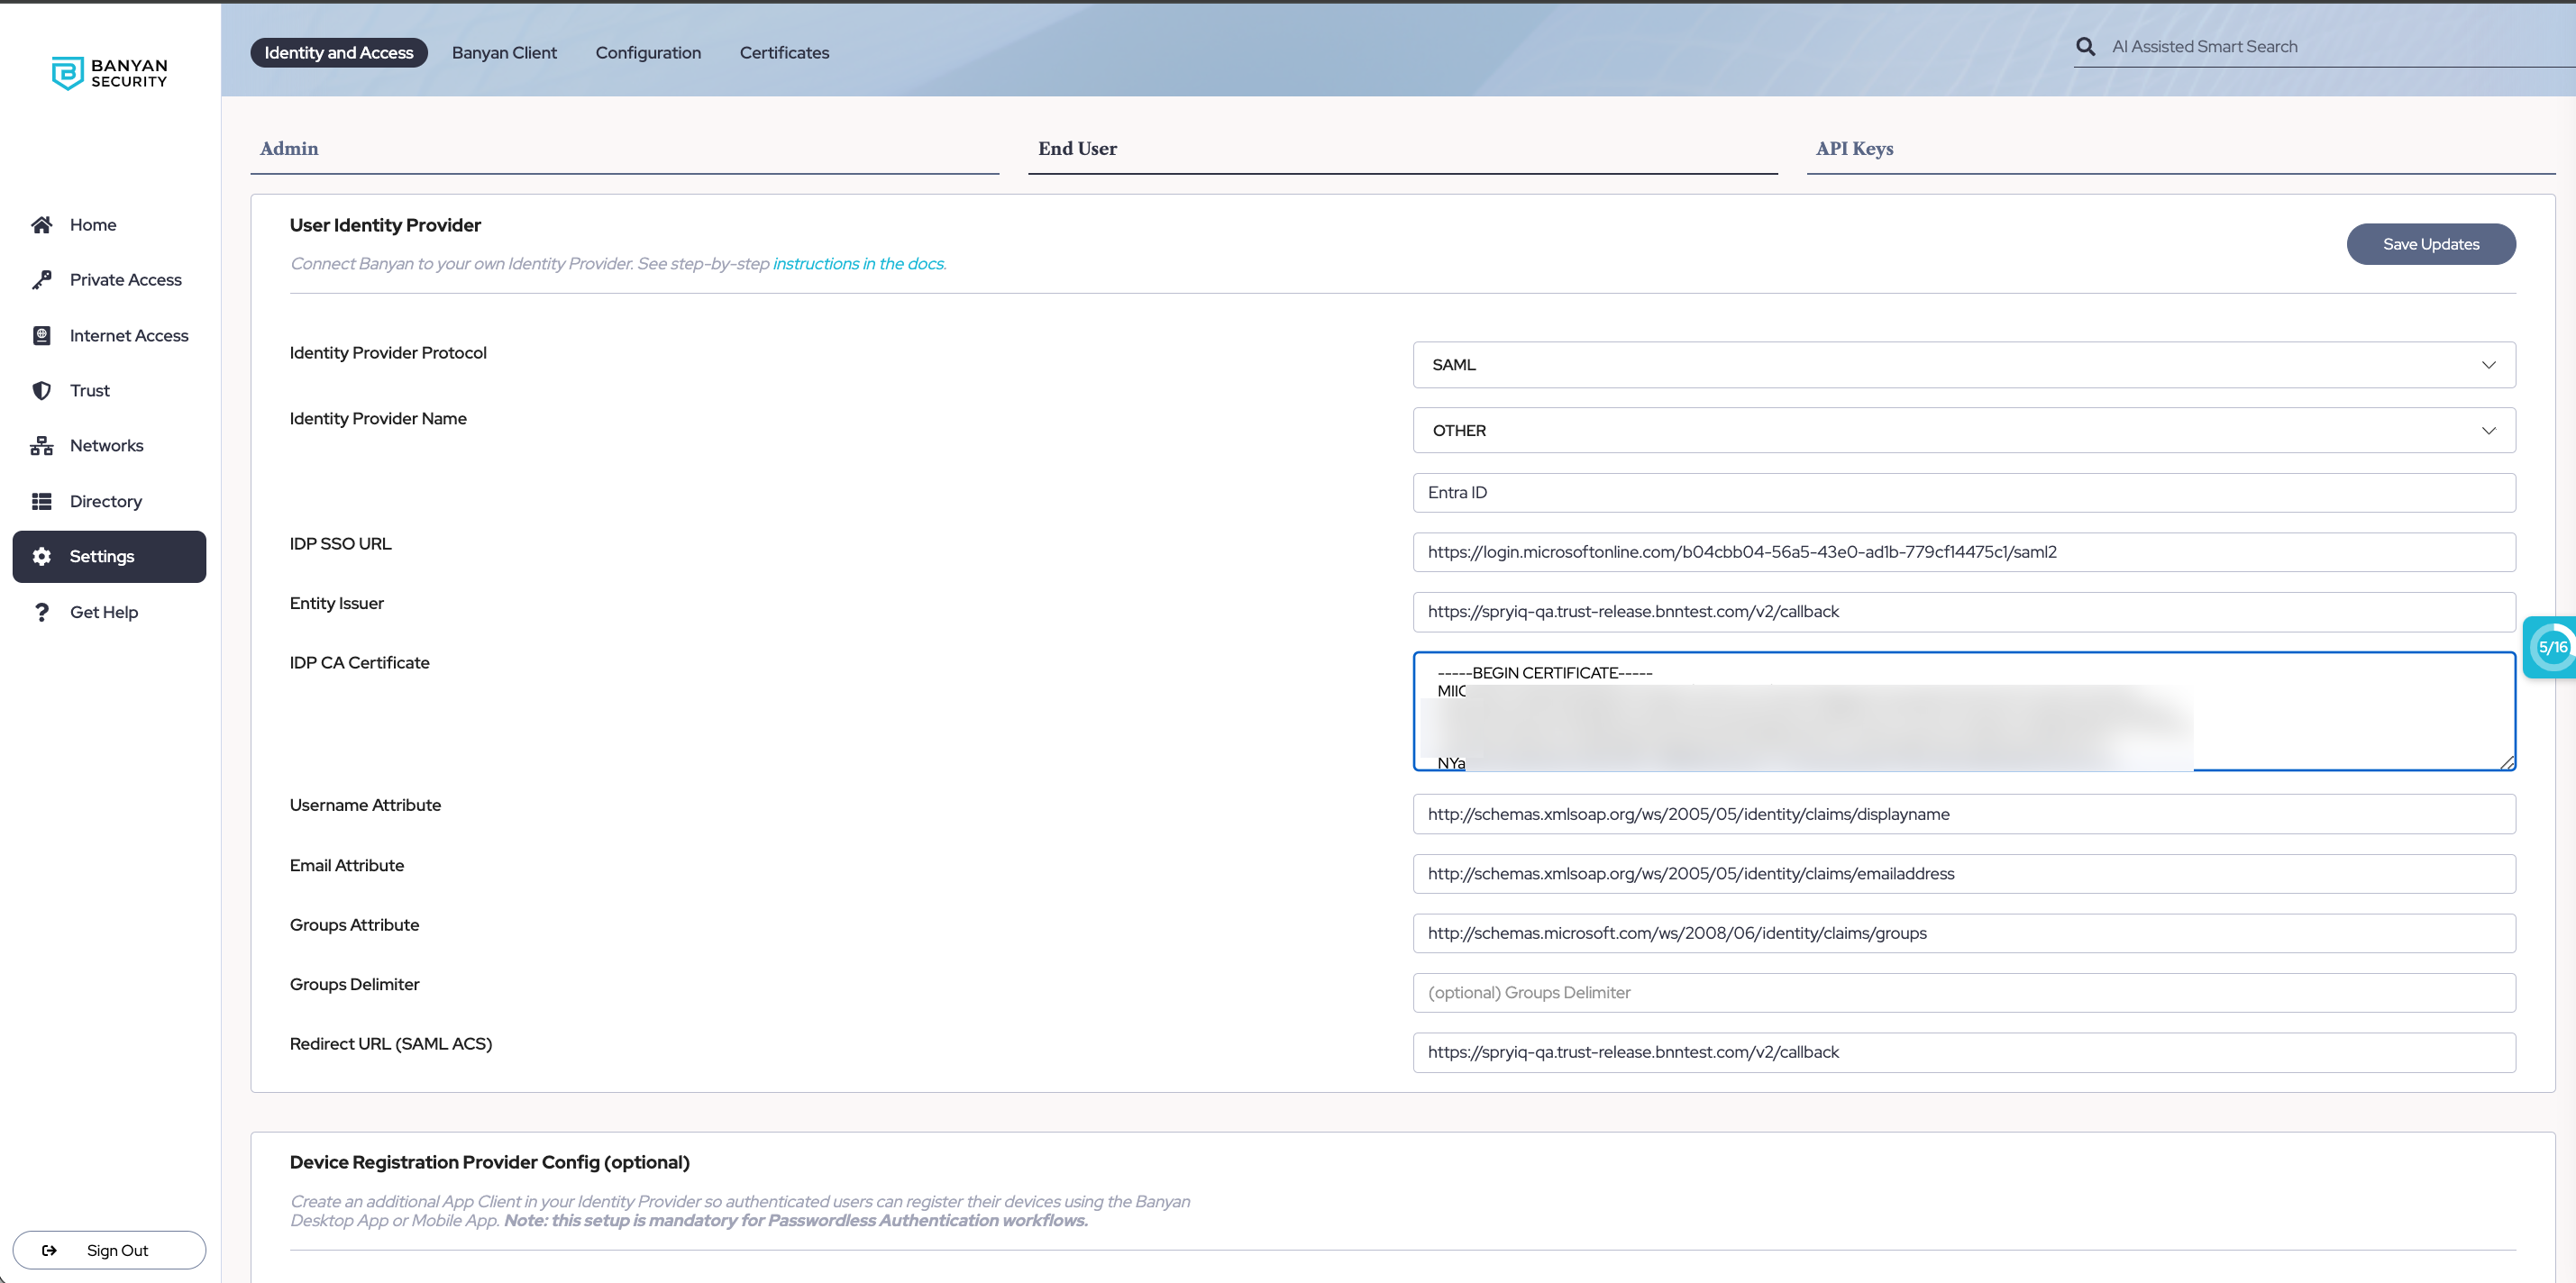
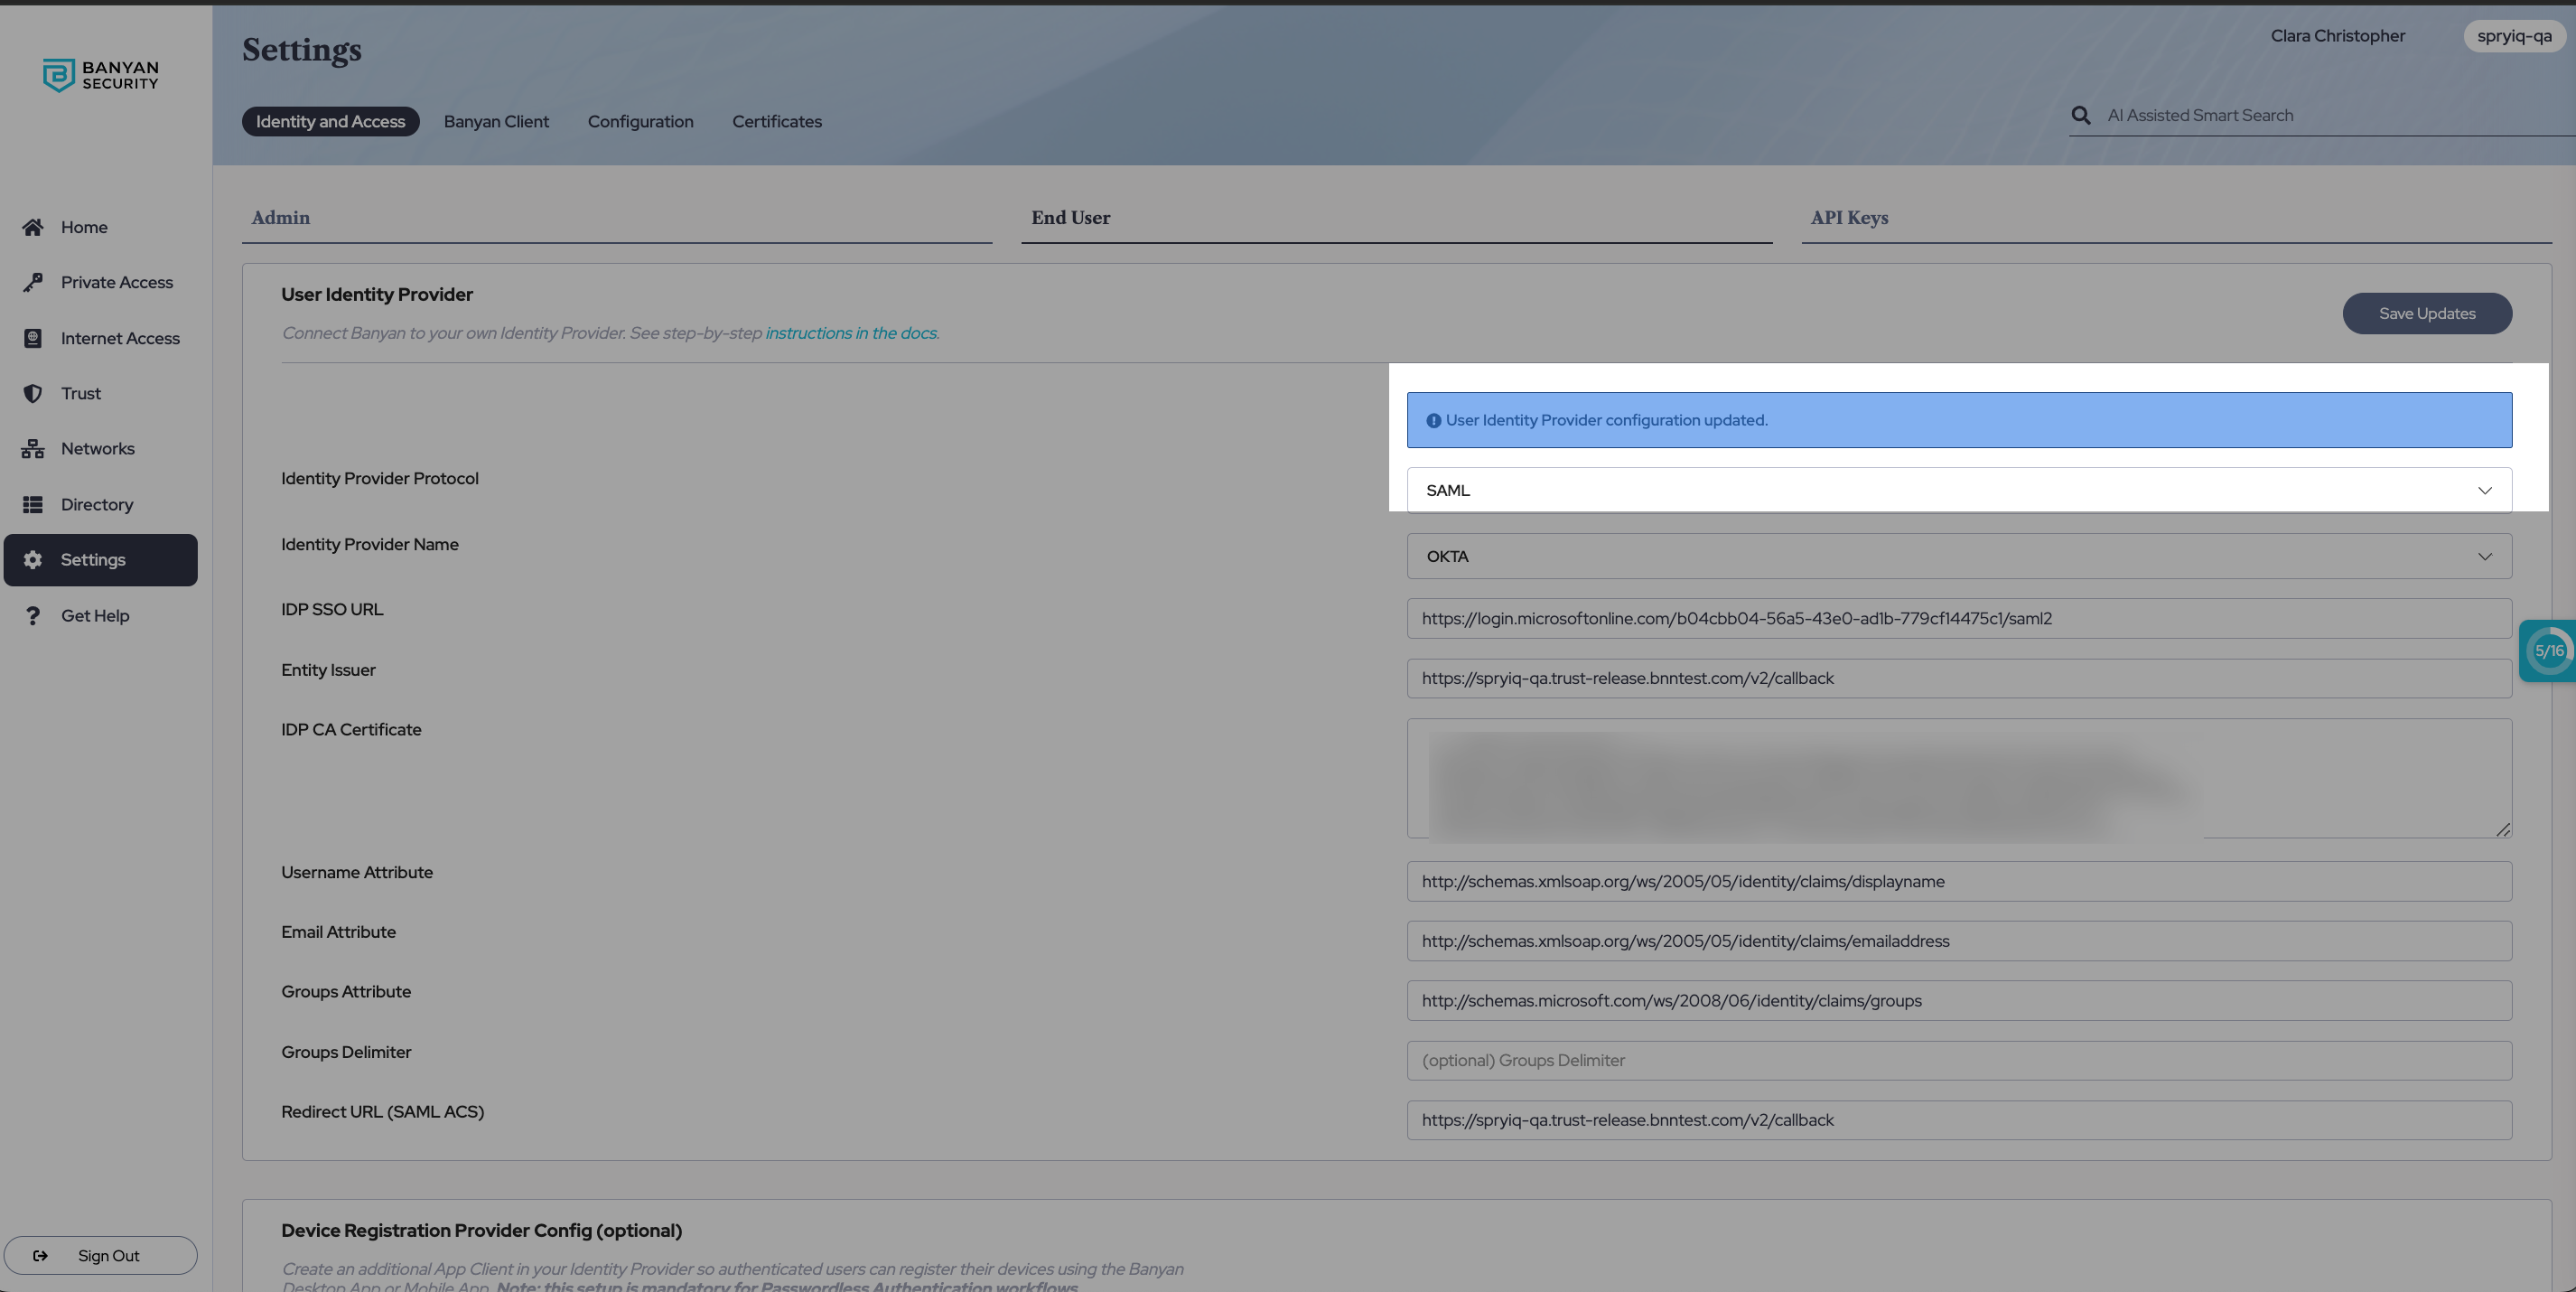
3.1 Log into the Command Center, and navigate from Settings > Identity and Access tab > End User tab.
3.2 In the Identity Provider Protocol field, select SAML. In the Identity Provider Name field, select OTHER and then enter “Azure AD”.
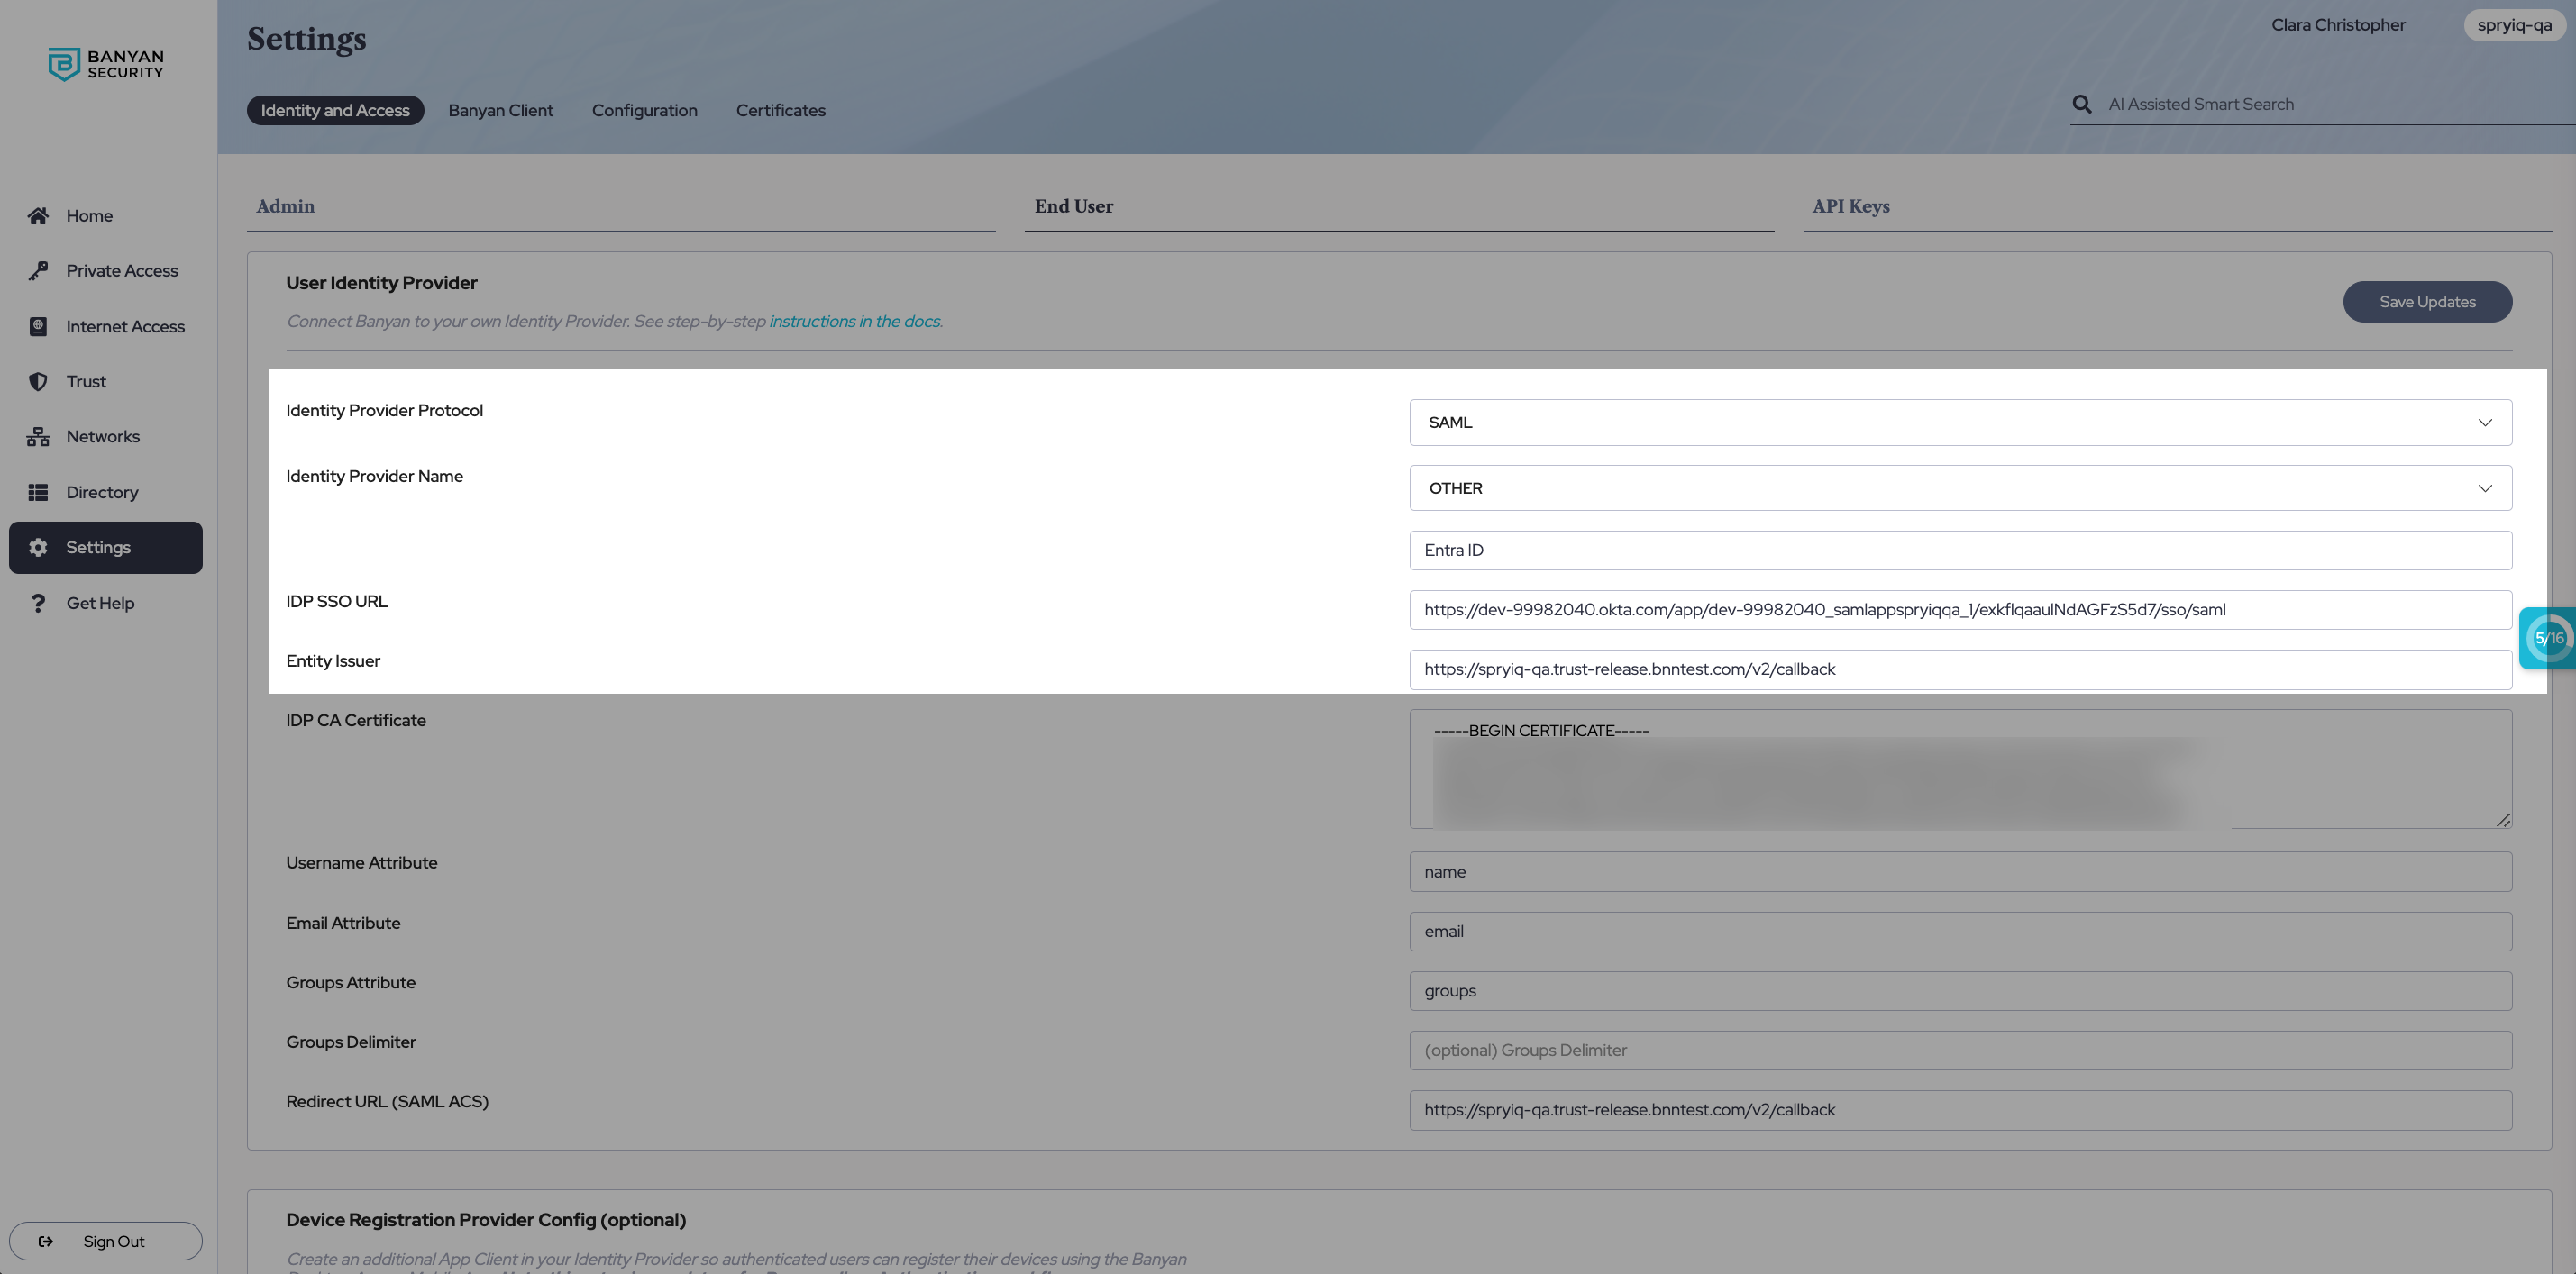
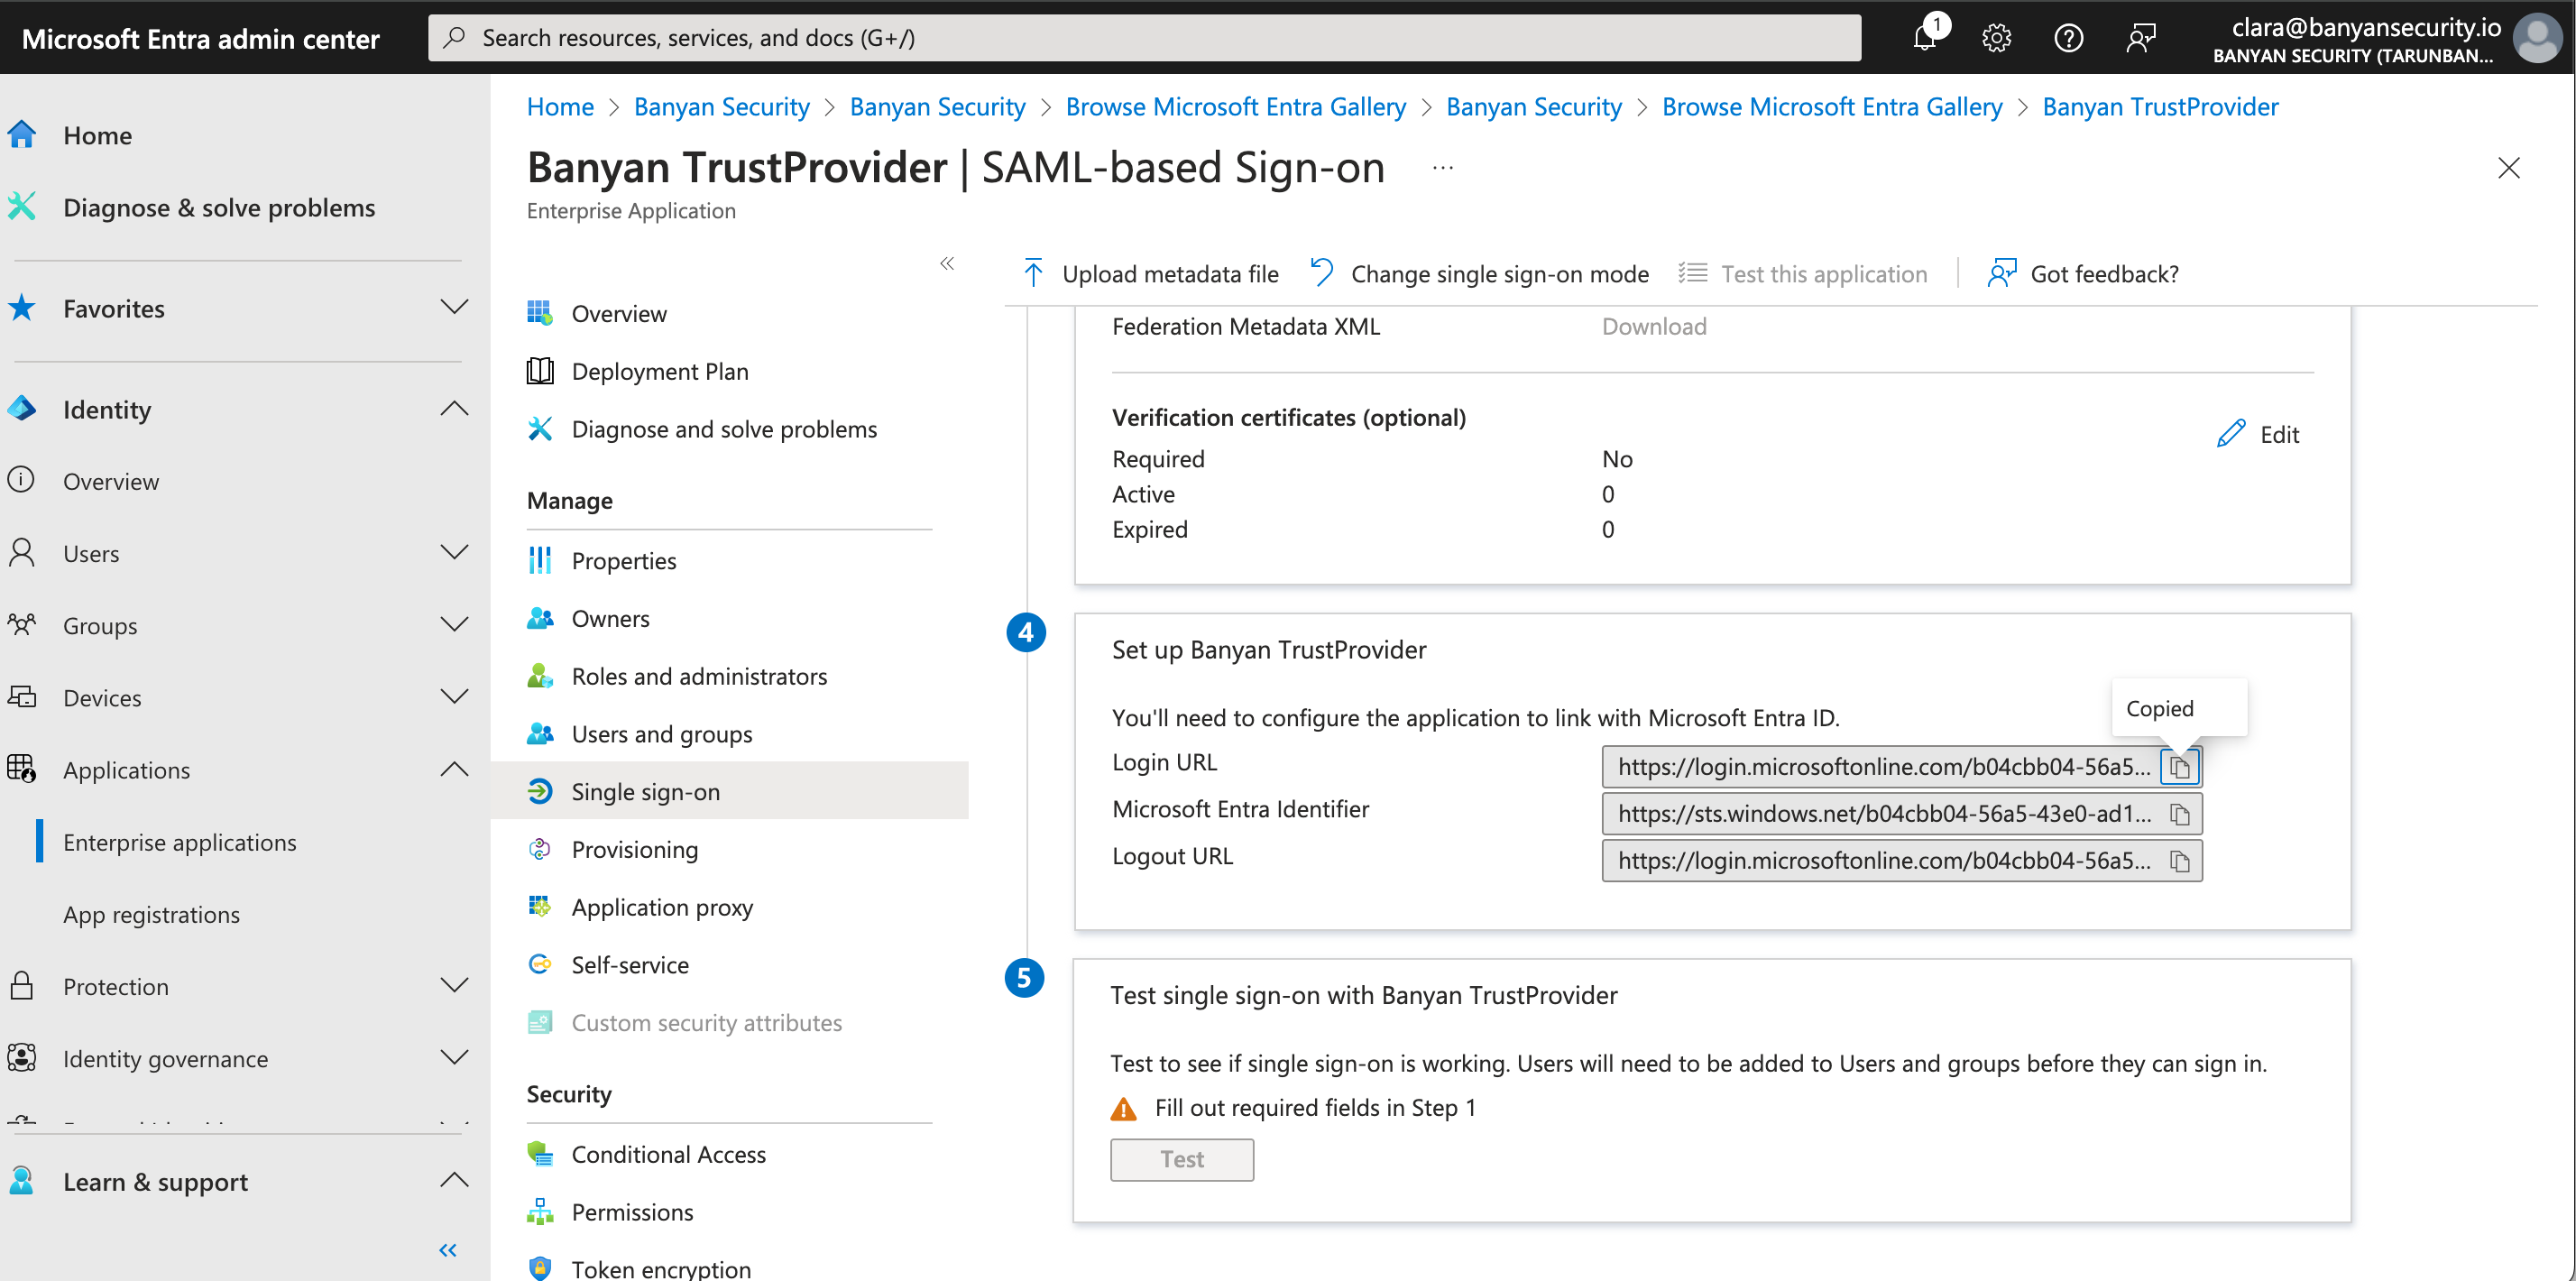
3.3 In the IDP SSO URL field, enter the Login URL (from your Entra ID account). The Login URL can be found in your Entra ID portal under 4. Set Up Banyan TrustProvider.
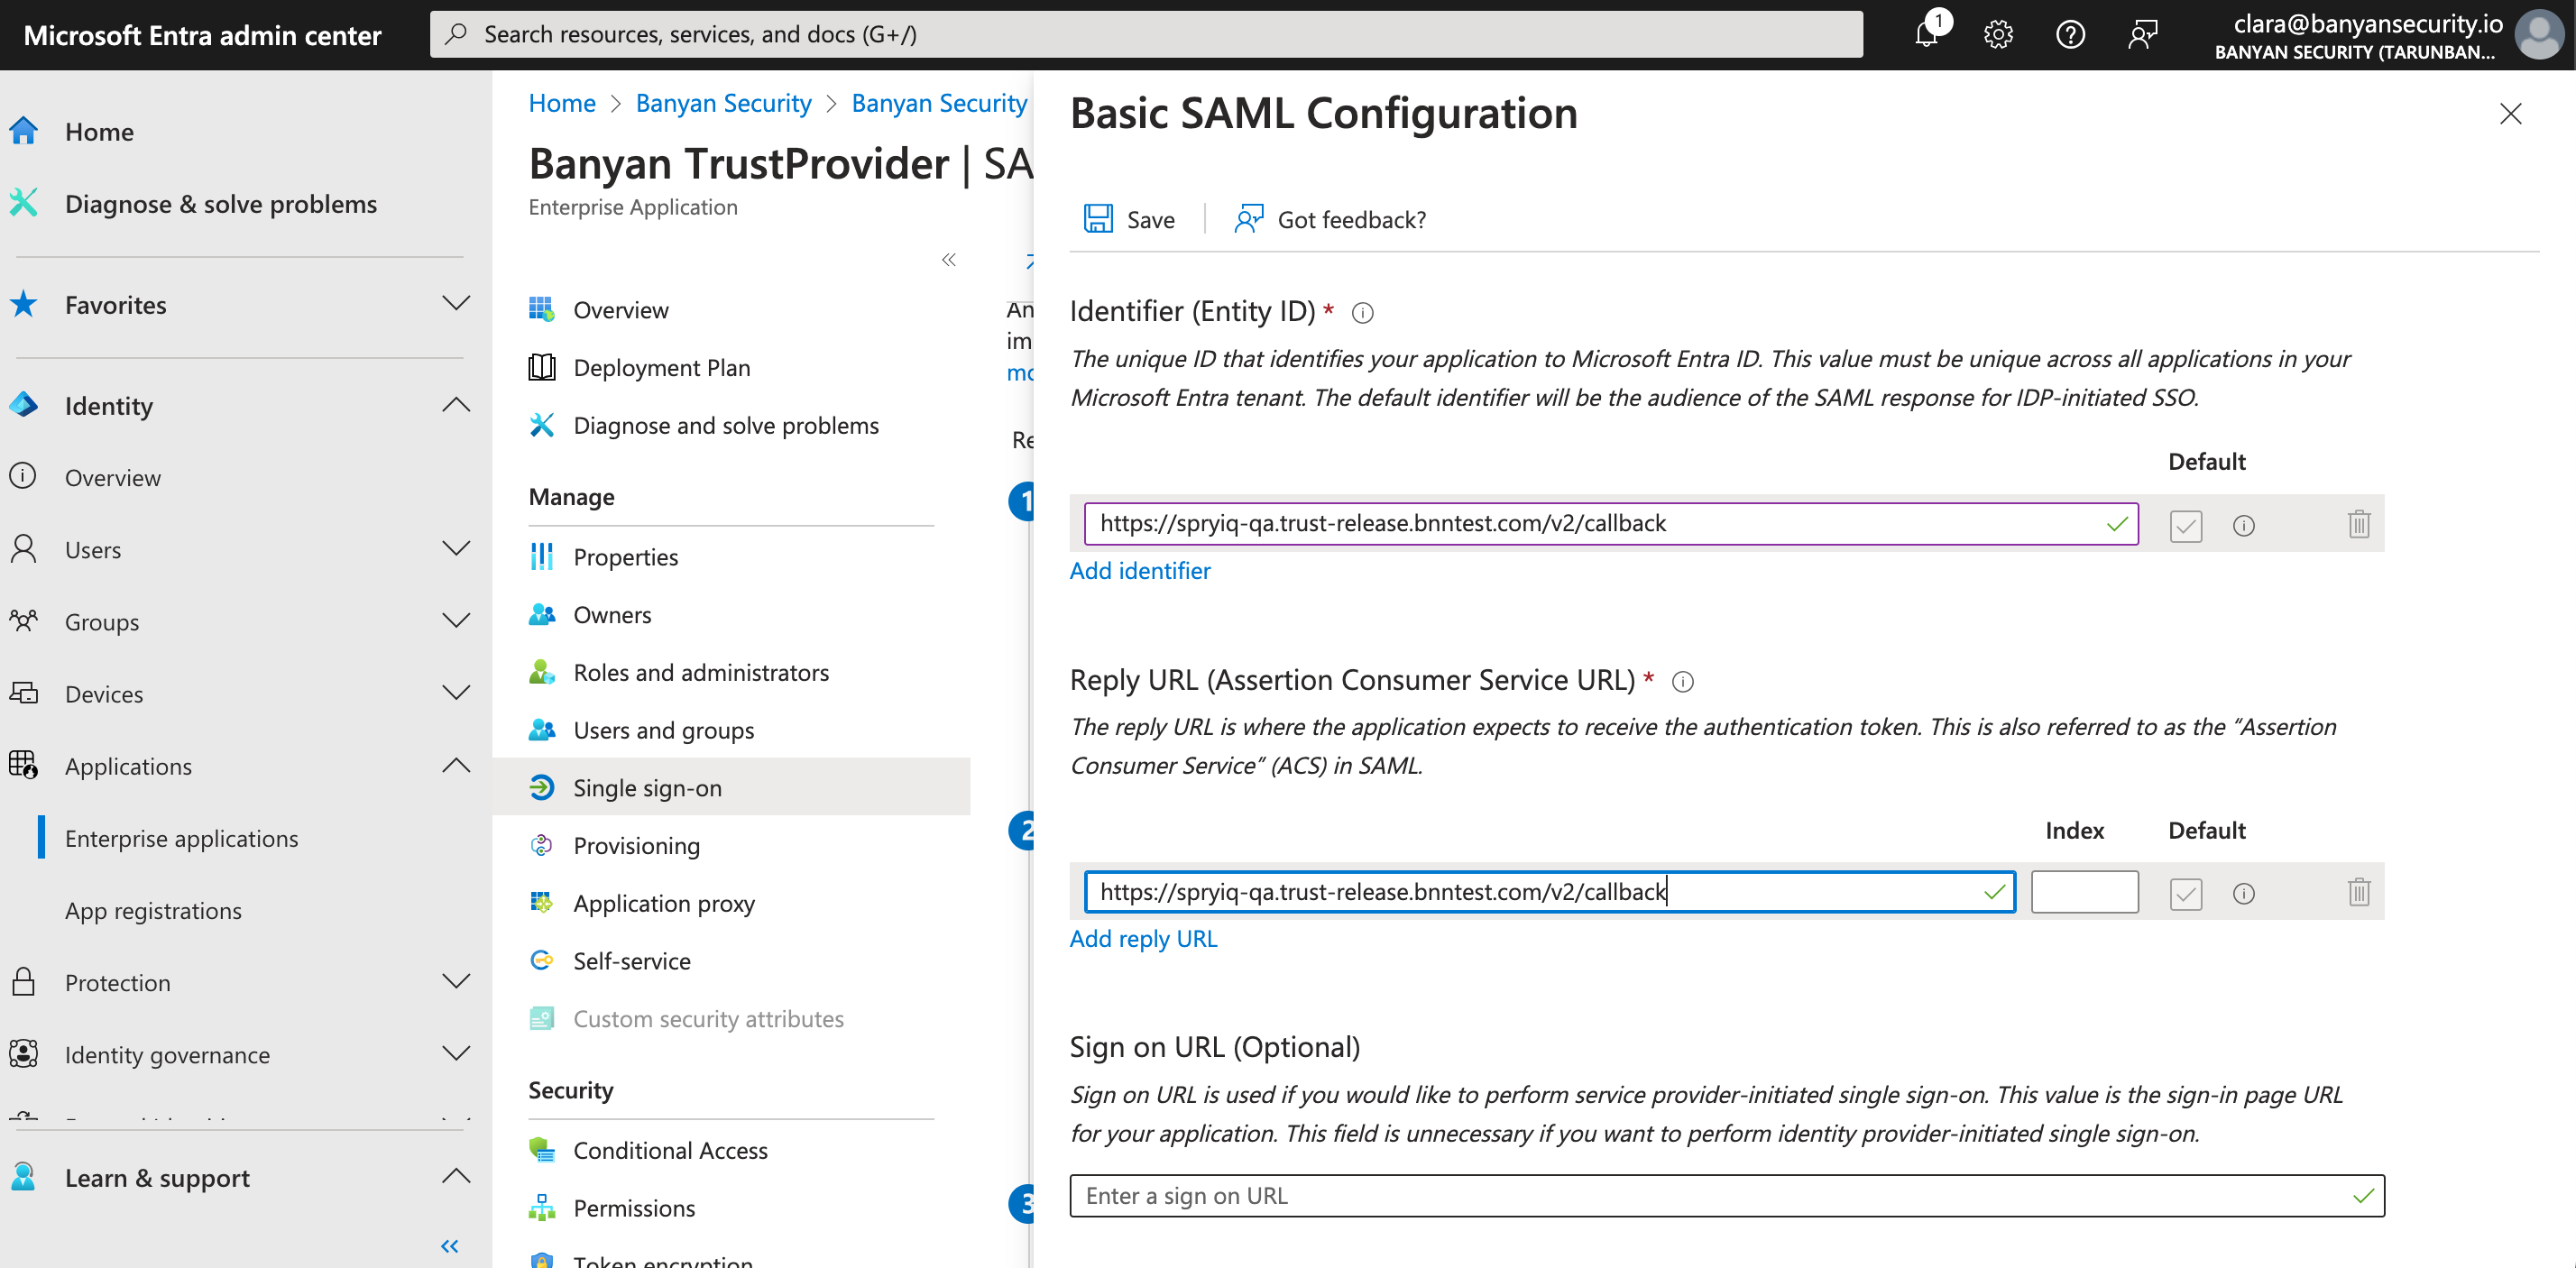
3.4 Copy the Redirect URL (SAML ACS) on the User Identity Provider configuration page, and navigate back to your Banyan Trust Provider app in your Entra ID admin center. In the 1. Basic SAML Configuration box in Entra ID, select Edit. This will generate a pop-out window on the right side of the webpage. Paste the Redirect URL in both the Identifier (Entity ID) field and the Reply URL (Assertion Consumer Service URL) field (by selecting Add Identifier).
3.5 Save.
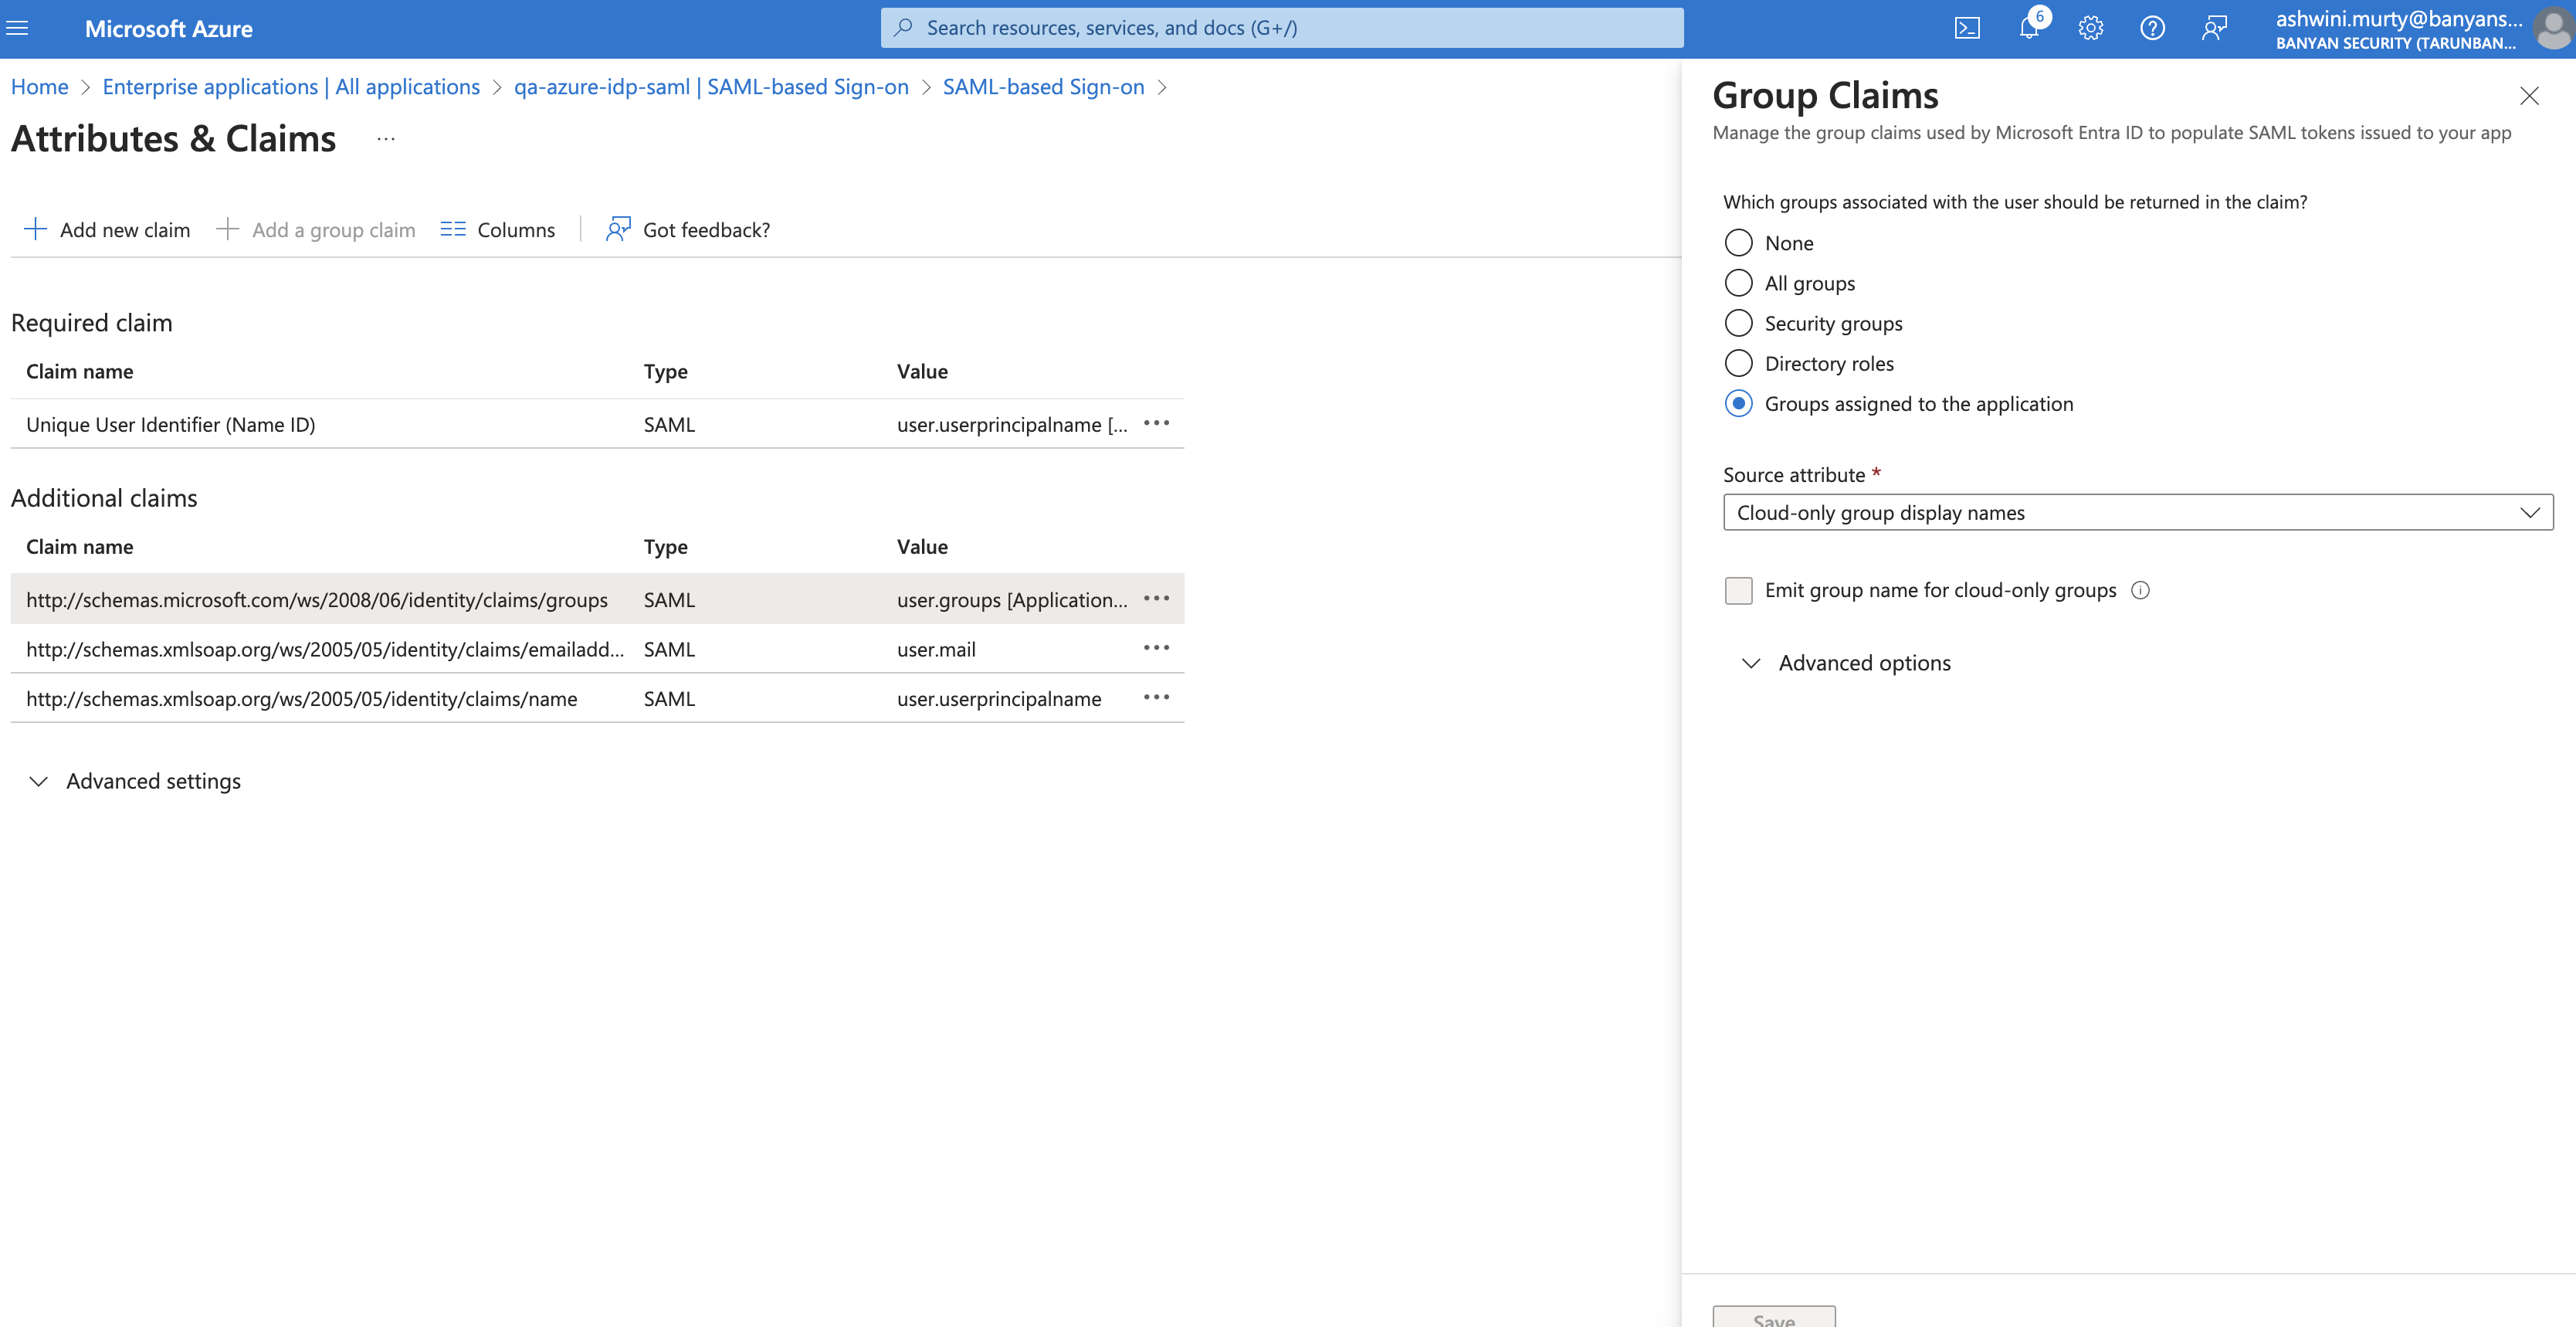
3.6 Next, in the 2. Attributes & Claims box in Entra ID, select Edit. Select Add a group claim. This will generate a pop-out window on the right side of the webpage.
3.7 In the Group Claims pop-out window, select Groups assigned to the application as groups returned in the claim, and select Cloud-only group display names as the Source Attribute. Then select Save.
Note: On-premise active directory (AD) groups are not automatically synced with SonicWall Cloud Secure Edge.
3.8 Select + Add new claim. In the Name field, enter “displayname”. In the Namespace field, enter “http://schemas.xmlsoap.org/ws/2005/05/identity/claims”. Under Source, select Attribute. In the Source attribute field, enter “user.displayname”.
3.9 Copy the following claim names and paste them in their corresponding fields on the User Identity Provider configuration page in the Command Center (i.e., the Username Attribute, Email Attribute, and Groups Attribute fields).
-
Username Attribute:
http://schemas.xmlsoap.org/ws/2005/05/identity/claims/displayname -
Email Attribute:
http://schemas.xmlsoap.org/ws/2005/05/identity/claims/emailaddress -
Groups Attribute:
http://schemas.microsoft.com/ws/2008/06/identity/claims/groups
3.10 In your Entra ID admin center, navigate to box 3. SAML Certificates (under Manage > Single sign-on), and download the Certificate (Base64).
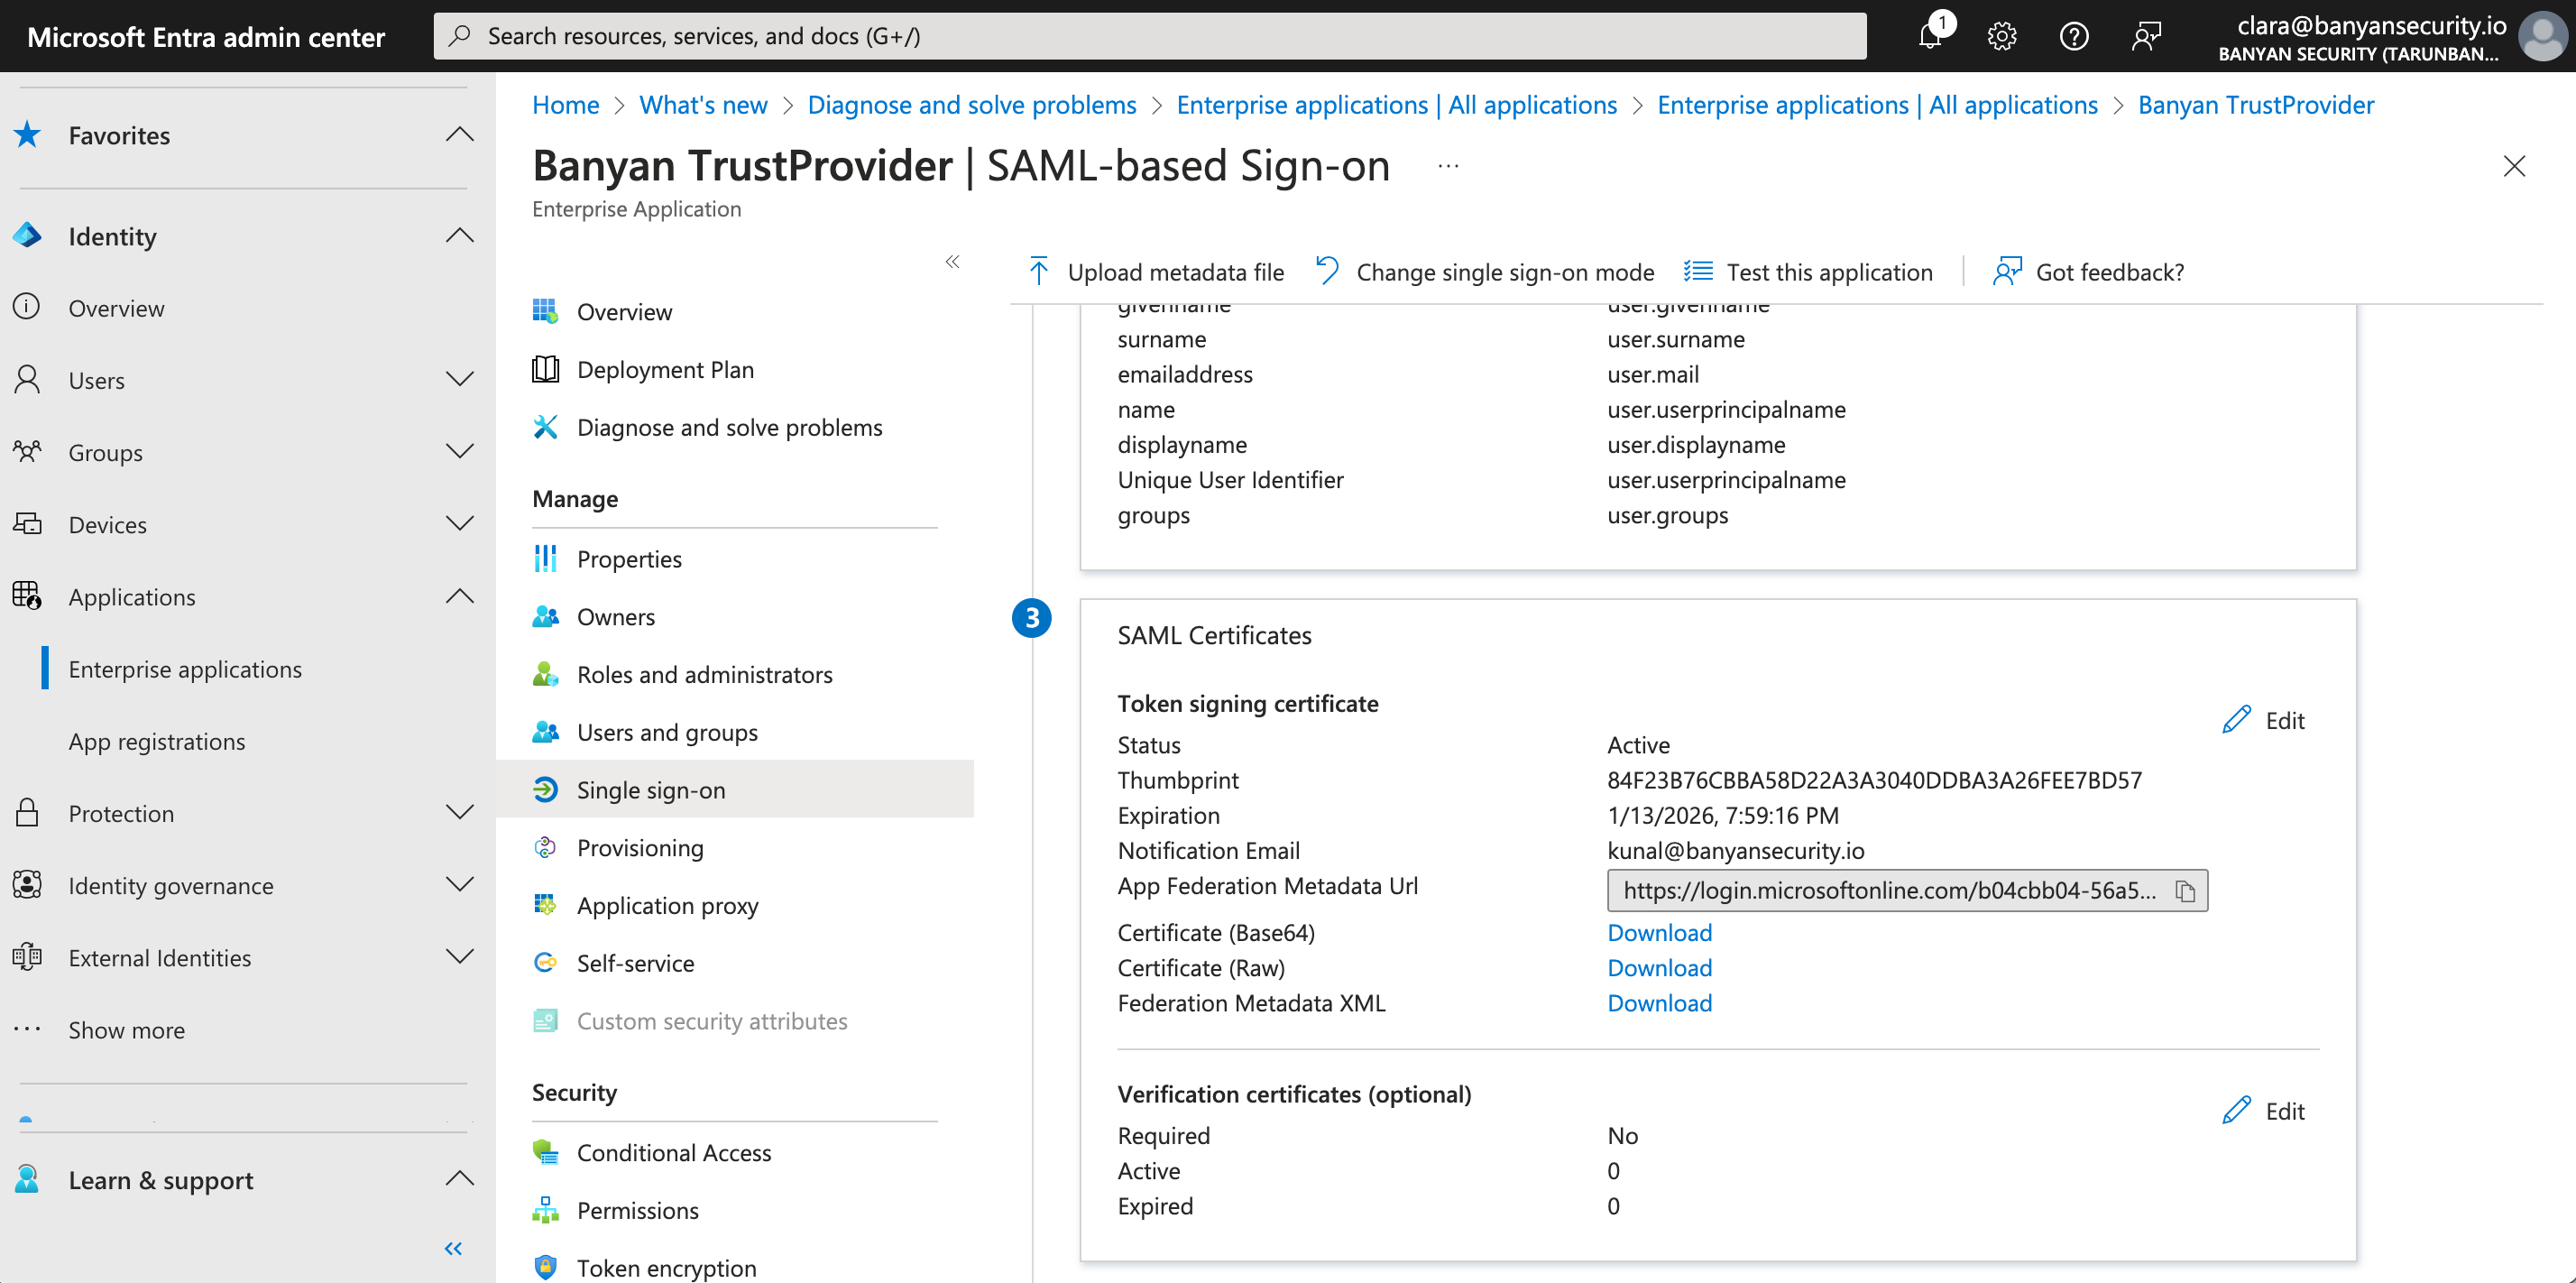
3.11 Open the downloaded certificate in a text editor, and ensure that there are no spaces at the beginning or end of the certificate text. Paste the certificate text in the IDP CA Certificate field on the User Identity Provider configuration page.
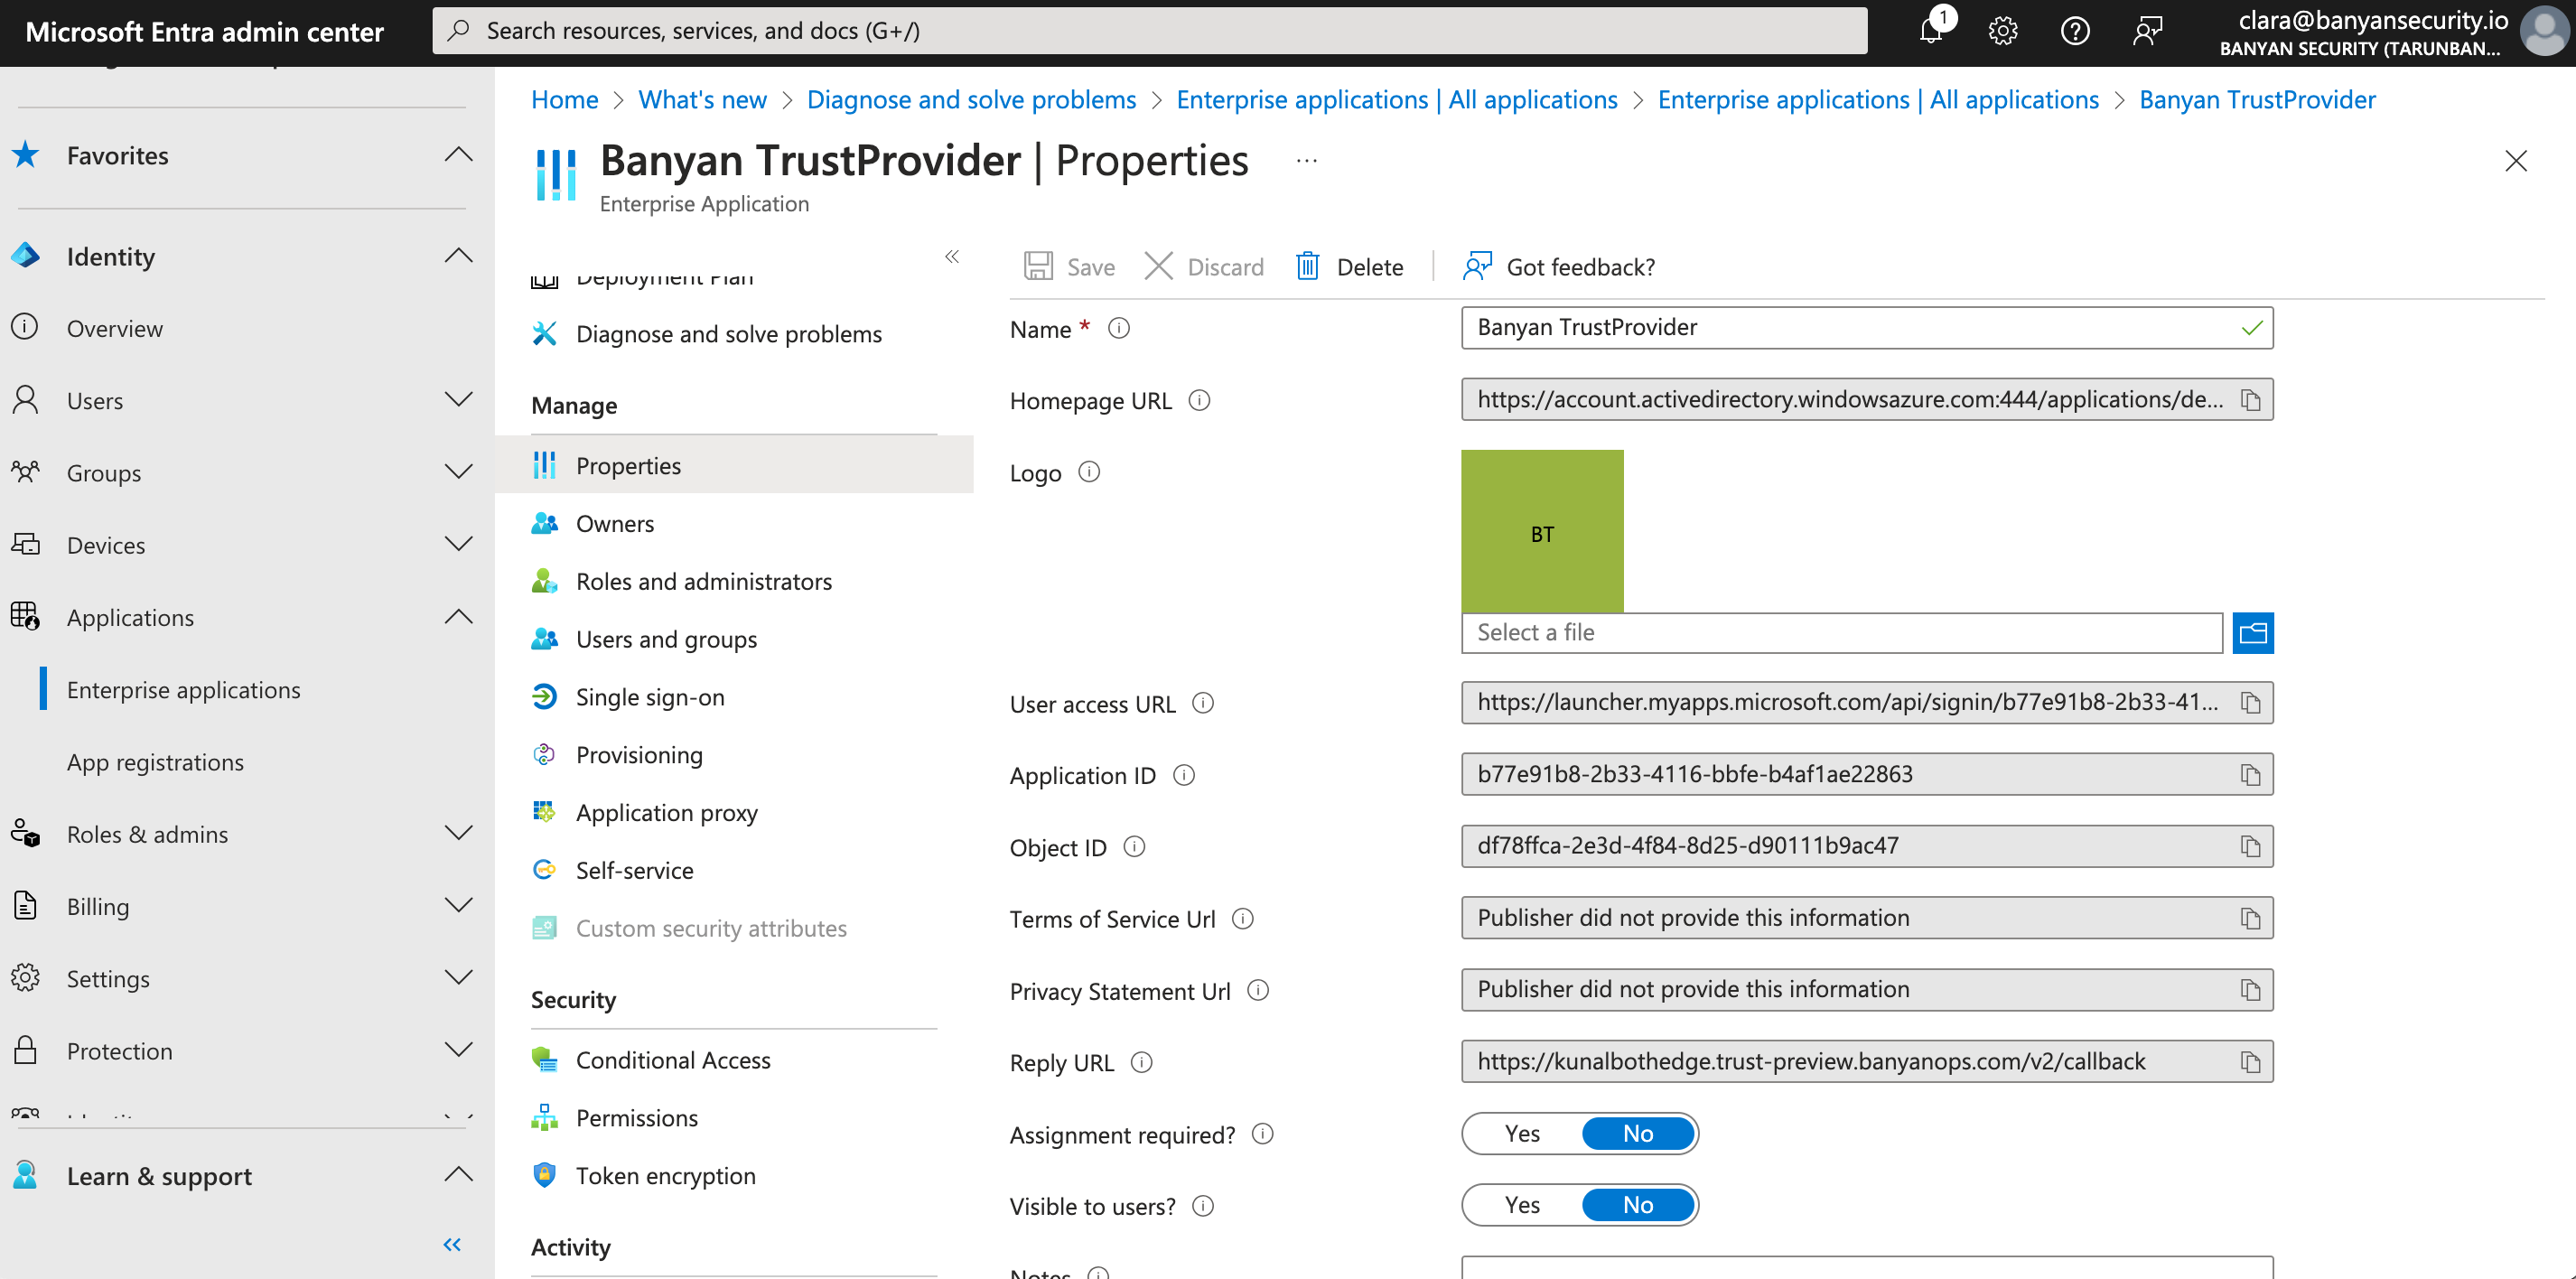
3.12 In your Entra ID admin center, navigate from Banyan TrustProvider > Manage > Properties, and toggle Assignment required? and Visible to users? to No. Then, select Save.
3.13 In the Command Center on the User Identity Provider configuration page, select Save Updates or Update User Identity Provider Config to complete the configuration.
Can’t find what you’re looking for?
We’re happy to help. Contact our team.