Banyan Solution - HashiCorp Vault
- Updated on Apr 25, 2022
Overview
These instructions will show you how to configure Banyan to protect desktop connections to HashiCorp Vault.
Notes:
- The examples use the
bnndemos.comdomain. Replacebnndemos.comwith your own DNS domain. - Vault must be installed and configured to use TLS for its API endpoint.
- The server name in the Vault TLS certificate should match the service domain name you configure in Banyan. If you do not have a TLS certificate, you can obtain one from LetsEncrypt and configure it by following the steps in this guide.
Basic Setup
Advanced Setup
1. Configure DNS
Create a DNS record for vault.bnndemos.com that resolves to the Access Tier.
If you used our CloudFormation stack or Terraform module to create your Access Tier, you can create an alias to the Banyan load balancer.
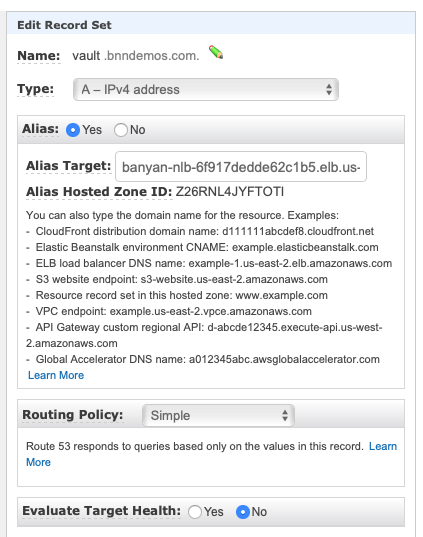
Creating public DNS record for Vault
2. Create the policy
In the Banyan Command Center, create a custom policy to allow traffic from user desktops. Use the following as your template:
{
    "kind": "BanyanPolicy",
    "apiVersion": "rbac.banyanops.com/v1",
    "metadata": {
        "name": "vault-allow",
        "description": "HashiCorp Vault",
        "tags": {
            "template": "CUSTOM"
        }
    },
    "type": "CUSTOM",
    "spec": {
        "access": [
            {
                "roles": ["ANY"],
                "rules": {
                    "conditions": {}
                }
            }
        ],
        "exception": {
            "src_addr": []
        },
        "options": {
            "disable_tls_client_authentication": false,
            "mixed_users_and_workloads": true
        }
    }
}
3. Create the TCP service
In the Banyan Command Center, create a new custom service to receive traffic from CLI clients on the Banyan proxy port (8443) and direct it to Vault.
- Navigate to Manage Services, and then click + Register Service.
- Select Custom Service (JSON).
- Name the service
vault-tcp. - Choose the appropriate Shield cluster for your environment.
-
Under Service Metadata, paste in the following:
"tags": { "template": "CUSTOM", "user_facing": "true", "protocol": "tcp", "domain": "vault.bnndemos.com", "port": "8443", "icon": "cube", "service_app_type": "GENERIC" } -
Under Service Attributes, paste the following. Replace
"ip-10-0-1-145.ec2.internal"with the hostname or IP of your Vault server, andspec.attributes.host_tag_selectorwith the name of your Access Tier.{ "attributes": { "frontend_addresses": [ { "cidr": "", "port": "8443" } ], "host_tag_selector": [ { "com.banyanops.hosttag.site_name": "us-east-1" } ], "tls_sni": [ "vault.bnndemos.com" ] }, "backend": { "target": { "name": "vault.bnndemos.com", "port": "8200", "tls": false }, "dns_overrides": { "vault.bnndemos.com": "ip-10-0-1-145.ec2.internal" }, "whitelist": [] }, "cert_settings": { "dns_names": [ "vault.bnndemos.com" ], "custom_tls_cert": { "enabled": false } }, "http_settings": { "enabled": false }, "client_cidrs": [] }
Don’t forget to attach your vault-allow policy (created in Step 2) to the new service.
4. (Optional) Create a web service
This service will be used to allow browser traffic to Vault after the user has successfully authenticated with Banyan and your IdP.
- Navigate to Manage Services, and then click + Register Service.
- Select Web Service for Users.
- Name the service
vault-web. - Choose the appropriate Shield cluster for your environment.
- Enter the Service Domain Name
vault.bnndemos.com. Leave the port set to 443. - Under Enforcement Mode, select “Site-based (Access Tier)”, and then select the appropriate Access Tier.
- Under Backend Domain, enter the internal DNS name of your Vault server, and port 8200. Ensure the TLS box is checked.
Note: If the backend host name is different from the Service Domain Name you entered above, you will need to either check the “TLS Insecure” box or add a DNS override to your service definition JSON after saving. - Under Attach Policy, select the
vault-userspolicy, and then select Enforcing mode. - Click Register Service.
After creating the service, the Banyan Command Center displays the configured service details:
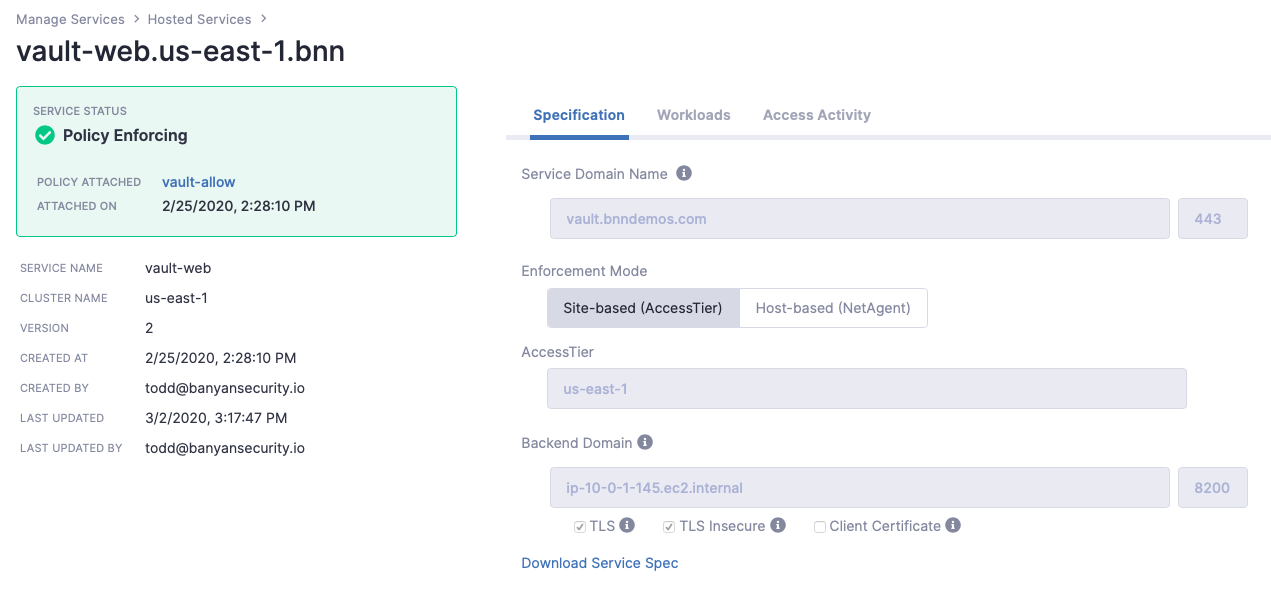
Creating a Web service for Vault
Test
Test access from browser
Ensure you have the Banyan App installed on your system.
Launch a web browser and go to your service domain address (such as, https://vault.bnndemos.com). You should be prompted to provide your Banyan device certificate, then redirected to your IdP for authentication. After authenticating, you should see the Vault login page.
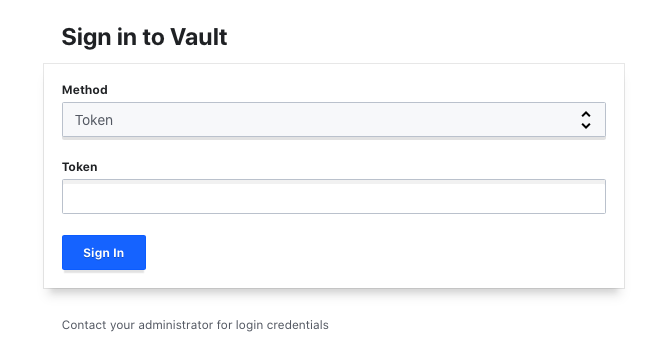
Testing Vault from a web browser
Test access from desktop CLI
Open the Banyan App, switch to the Services tab, and then click Connect to Proxy. From a command prompt, launch banyanproxy to listen on port 8200 and forward requests to the Access Tier.
banyanproxy -l 8200 vault.bnndemos.com 8443
You will need to set up two environment variables to tell the Vault CLI to use the proxy.
export VAULT_ADDR=https://localhost:8200
export VAULT_TLS_SERVER_NAME=vault.bnndemos.com
You should now be able to use the Vault CLI commands.
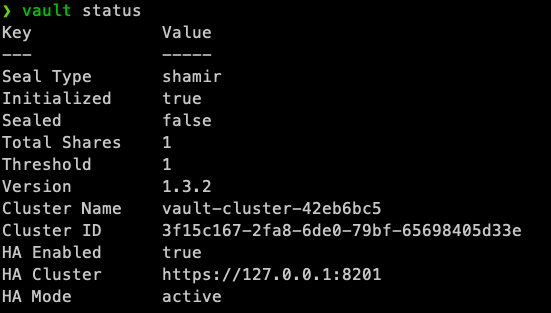
Testing the Vault CLI