Enforce device trust for access to your gitab.com organization
Configure gitlab.com SAML authentication to use CSE's federated Identity Provider so you can enforce device posture requirements.
- Updated on
- 10 minutes to read
-
Contributors

Overview
GitLab is a comprehensive DevOps platform and Git-repository manager, offering a range of issue-tracking and continuous integration and deployment pipeline features. As a CSE Administrator, you can securely expose and protect your team’s GitLab resources via GitLab’s SAML for Groups.
This article describes managing access to the gitlab.com SaaS product. For configuring access to self-managed GitLab, please refer to secure web access to GitLab solution guide.
Prerequisites
In order to set up this integration, you need will need:
- A GitLab Silver/Premium or Gold/Ultimate plan.
- Maintainer and/or Owner permissions your GitLab project and group, with the ability to add an external SSO Provider to your group.
- Your GitLab Group SSO ACS URL and Identifier.
We also assume you have already created the application integration called “CSE TrustProvider” following our instructions to set up an IdP as your Identity Provider.
Setup
Step 1. Create a Policy
1.1 Log in to the CSE Command Center and navigate to Secure Access > Policies > Create New Policy.
1.2 Create a new Policy using the template Basic Authorization Policy for Users.
1.3 Enter a Policy Name (such as, user-saas) and a Description.
1.4 Configure the policy attributes for minimal controls:
- Specify this policy is intended for Web - for accessing HTTP services via web browser
- Only allow access from the following role: ANY
- Only allow users and devices with the following Trust Levels: No Trust Level - ignore TrustScore (or a Trust Level according to your organization’s security requirements)
Step 2. Register GitLab as a SaaS App
2.1 Navigate to Manage Services > SaaS Applications and then click + Register App.
2.2 Enter the SaaS Application Name (such as, GitLab) and Description (such as Access to GitLab).
2.3 Configure the Authentication Federation settings:
- Set Authentication Protocol to SAML
- Set the Redirect URL (SAML ACS) to the Assertion consumer service URL provided by GitLab (such as
https://gitlab.com/groups/(group-name)/-/saml/callback) - Set the Audience URI (Service Provider Entity ID) to
GitLab - Set the Name ID Format to Email
- Set the NameID Value according to your business needs.
- Use passthrough Name ID persists the NameID from your IdP
- Custom enables a NameID Custom Attribute field to enter an attribute supported by your IdP
2.4 Attach the policy created in Step 1 (above), and then set enforcement mode to Enforcing.
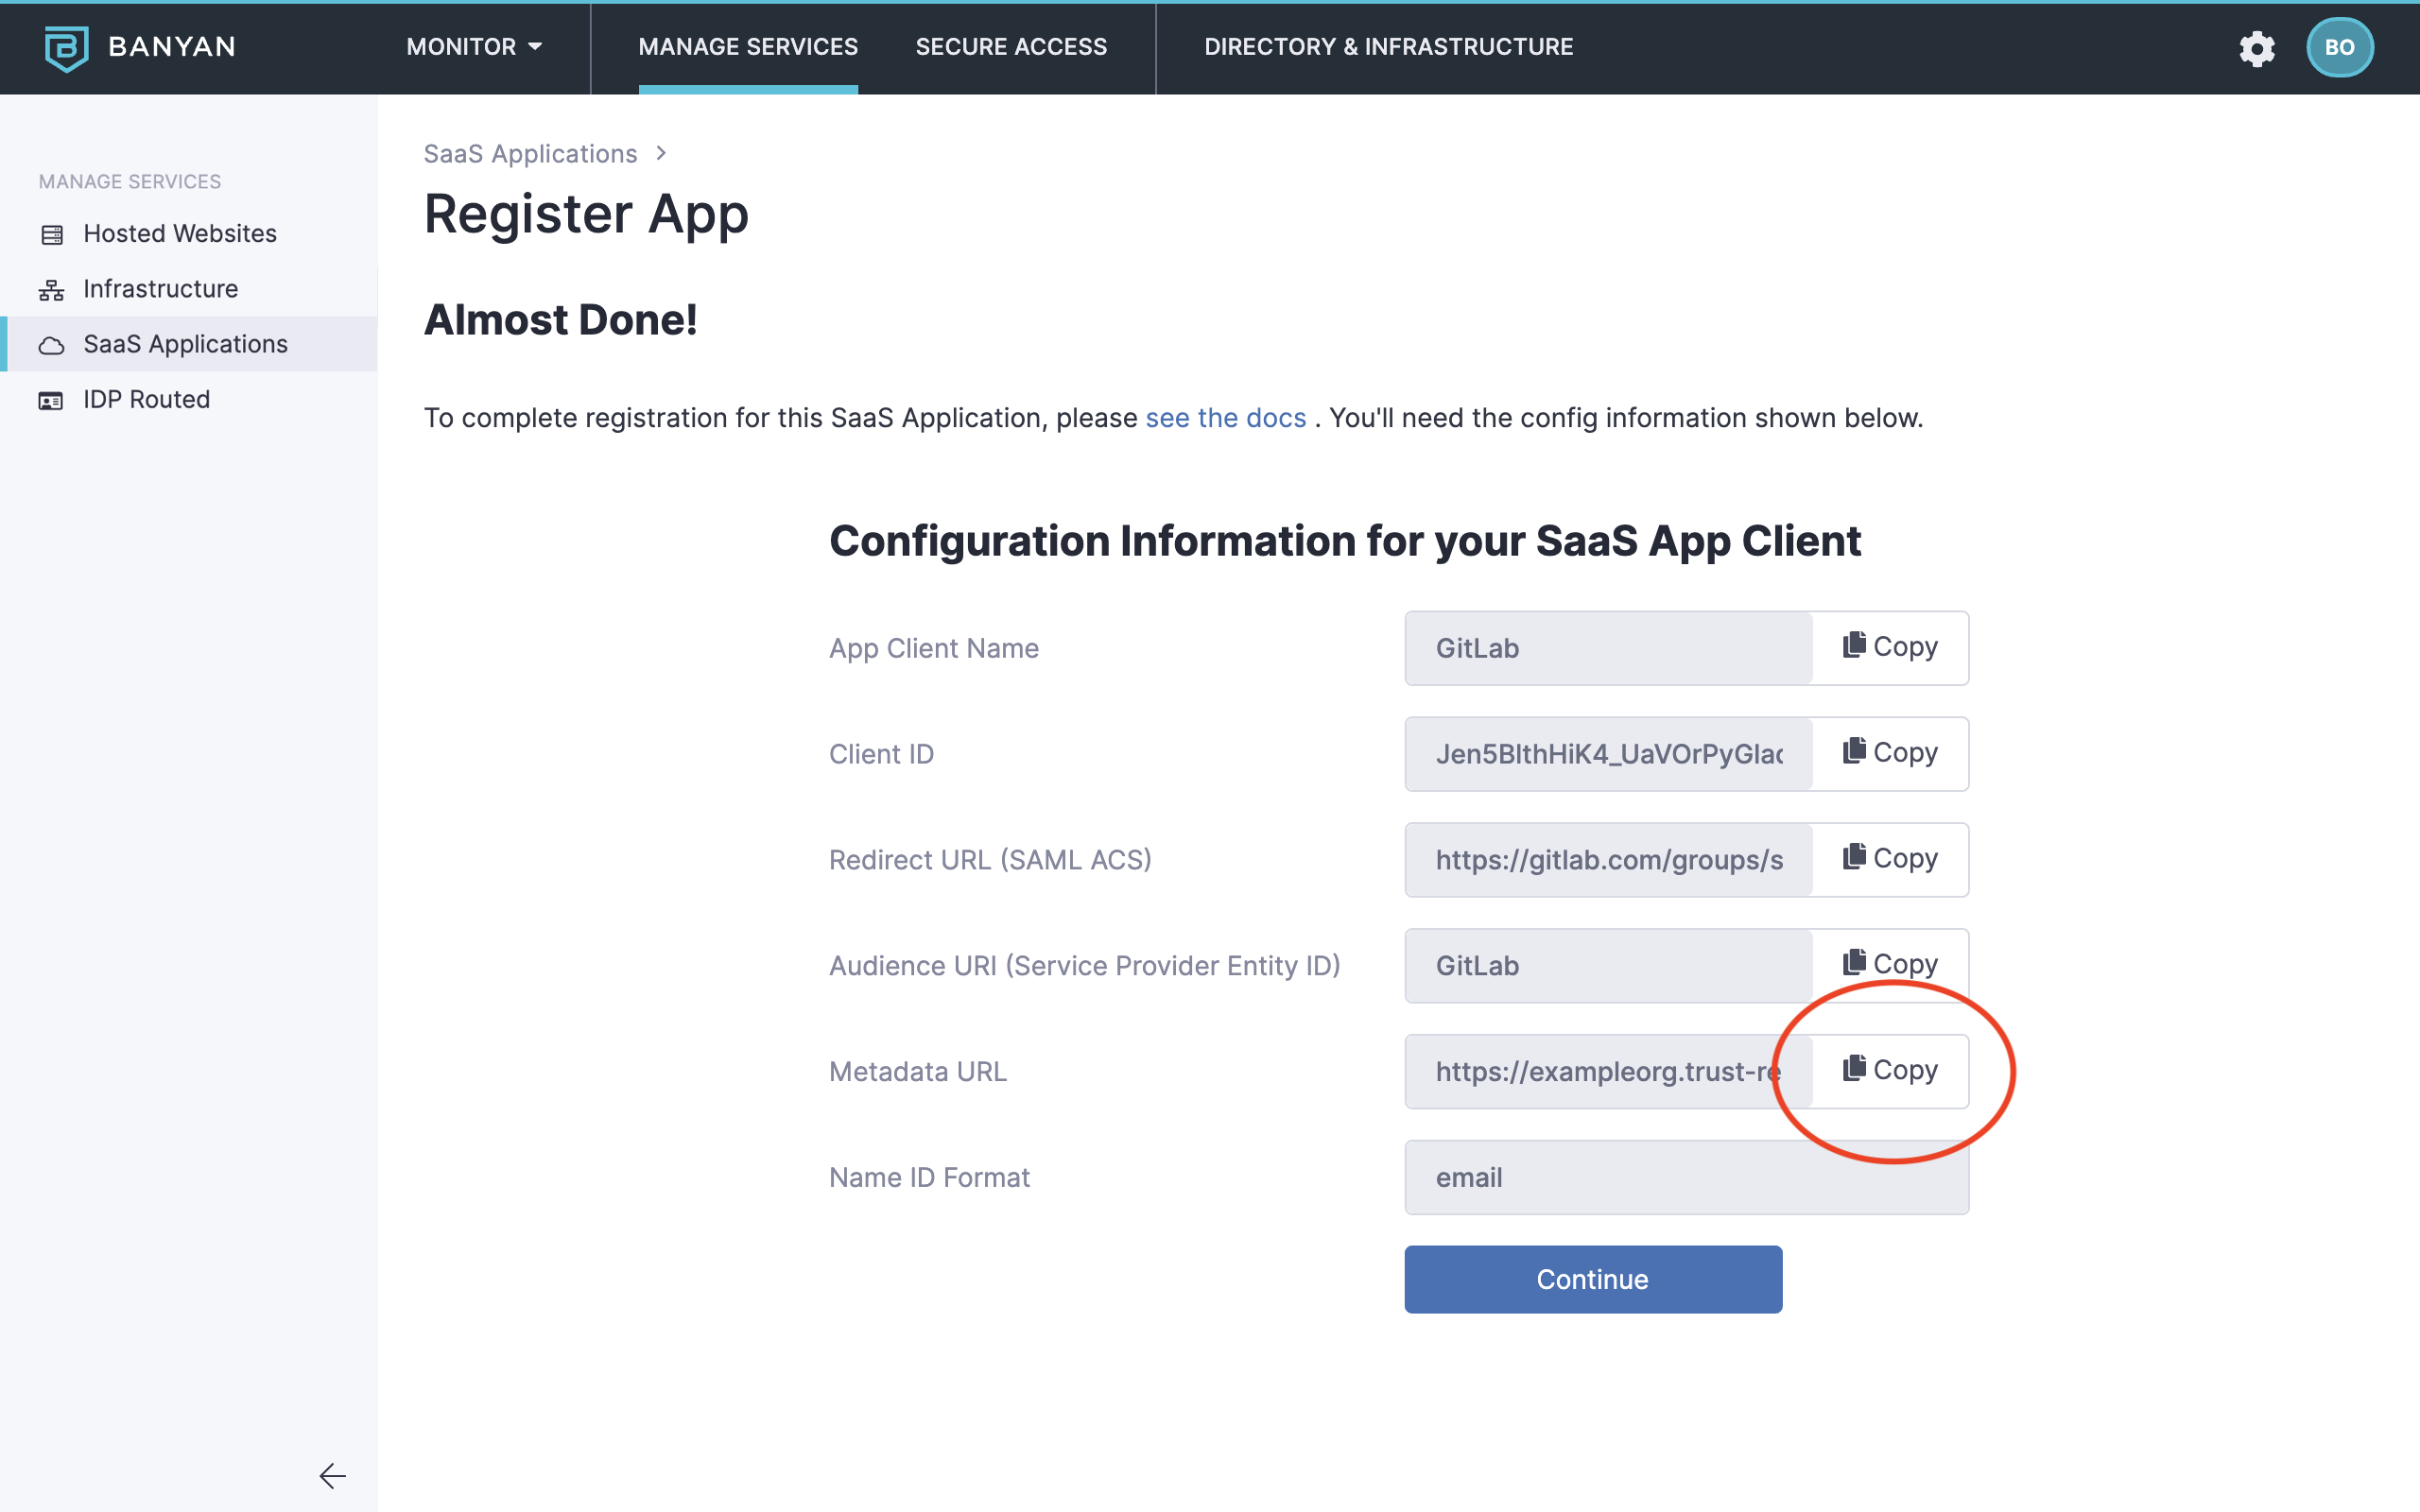
2.5 Click Register.
2.6 Copy the Metadata URL, paste it in your browser search bar and then press enter to download the xml file. You will use the information in this file to configure SSO in your GitLab group.
Step 3. Prepare your CSE-registered App Details for GitLab
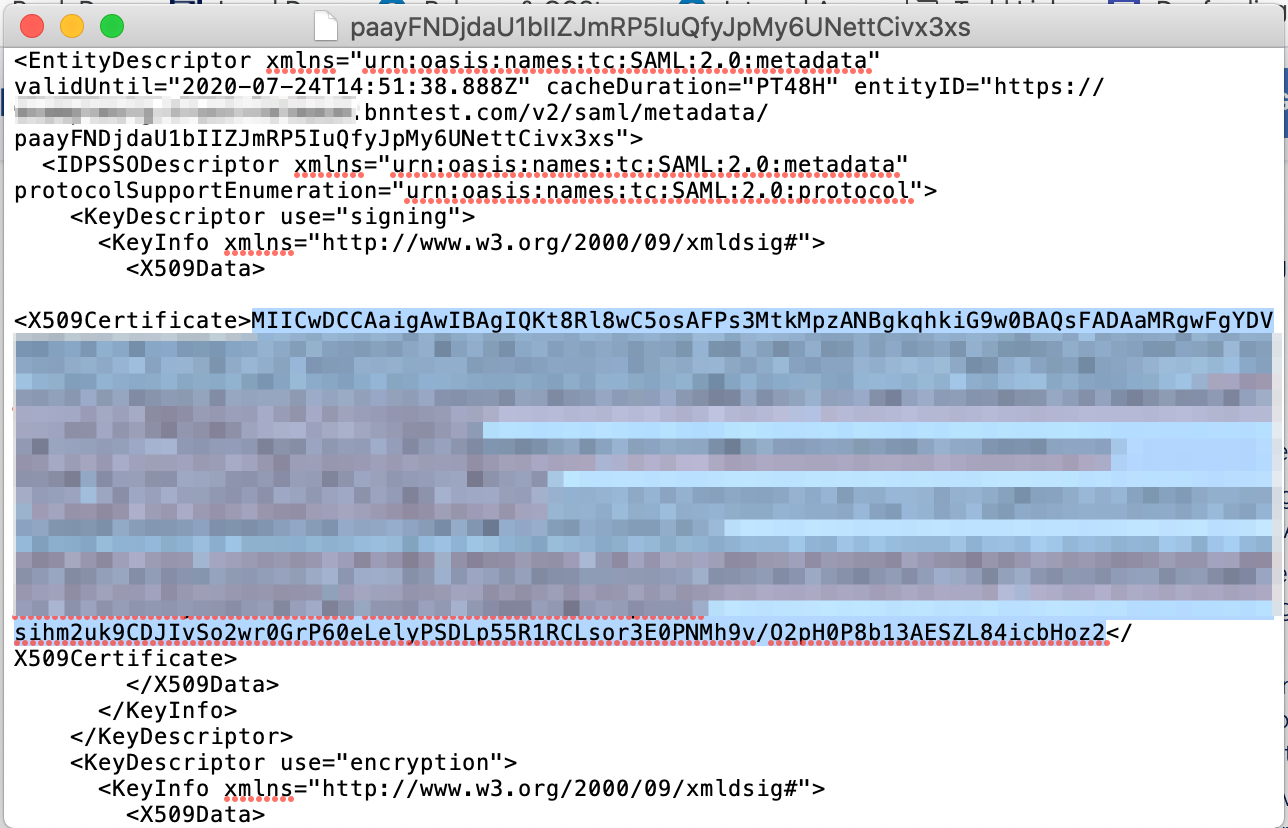
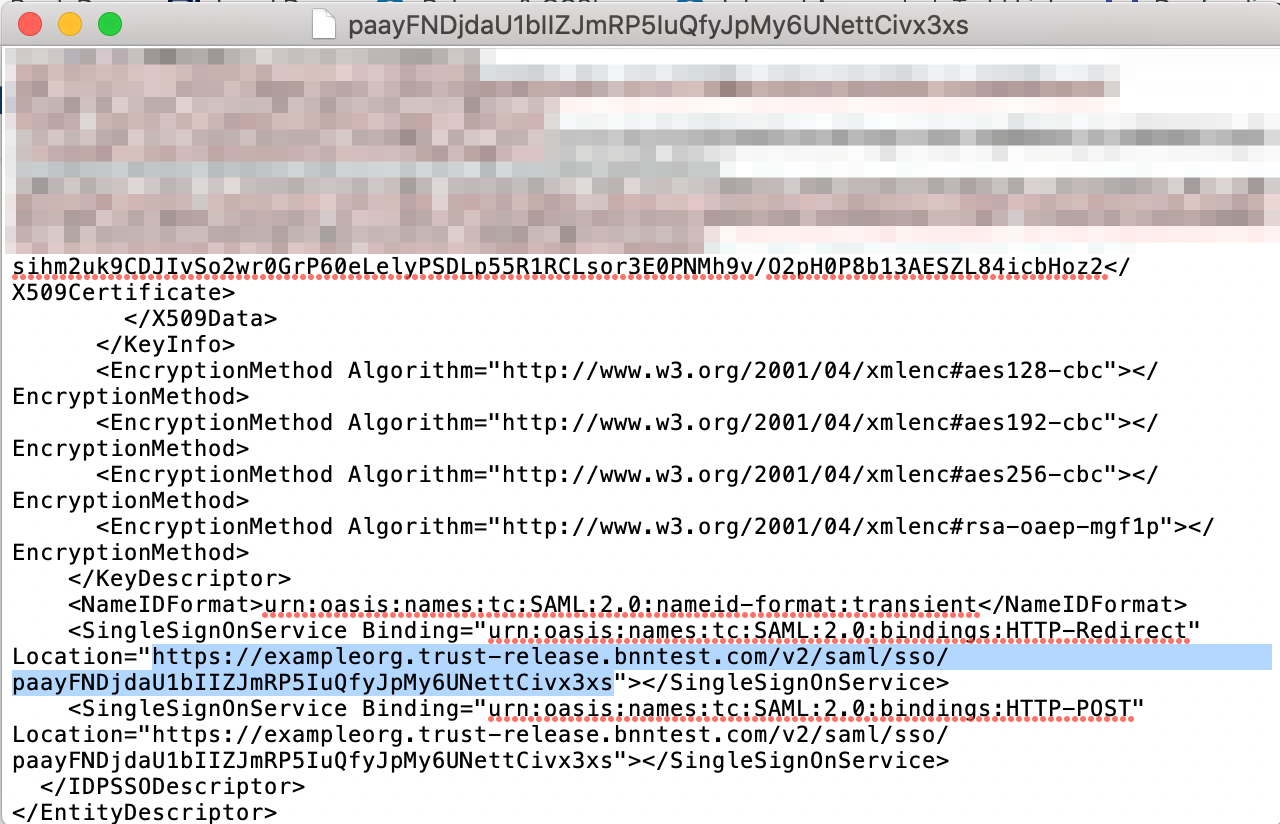
3.1 Open the metadata xml file downloaded in Step 2.6 (above) in your preferred text editor.
3.2 Locate and copy the X509Certificate string.
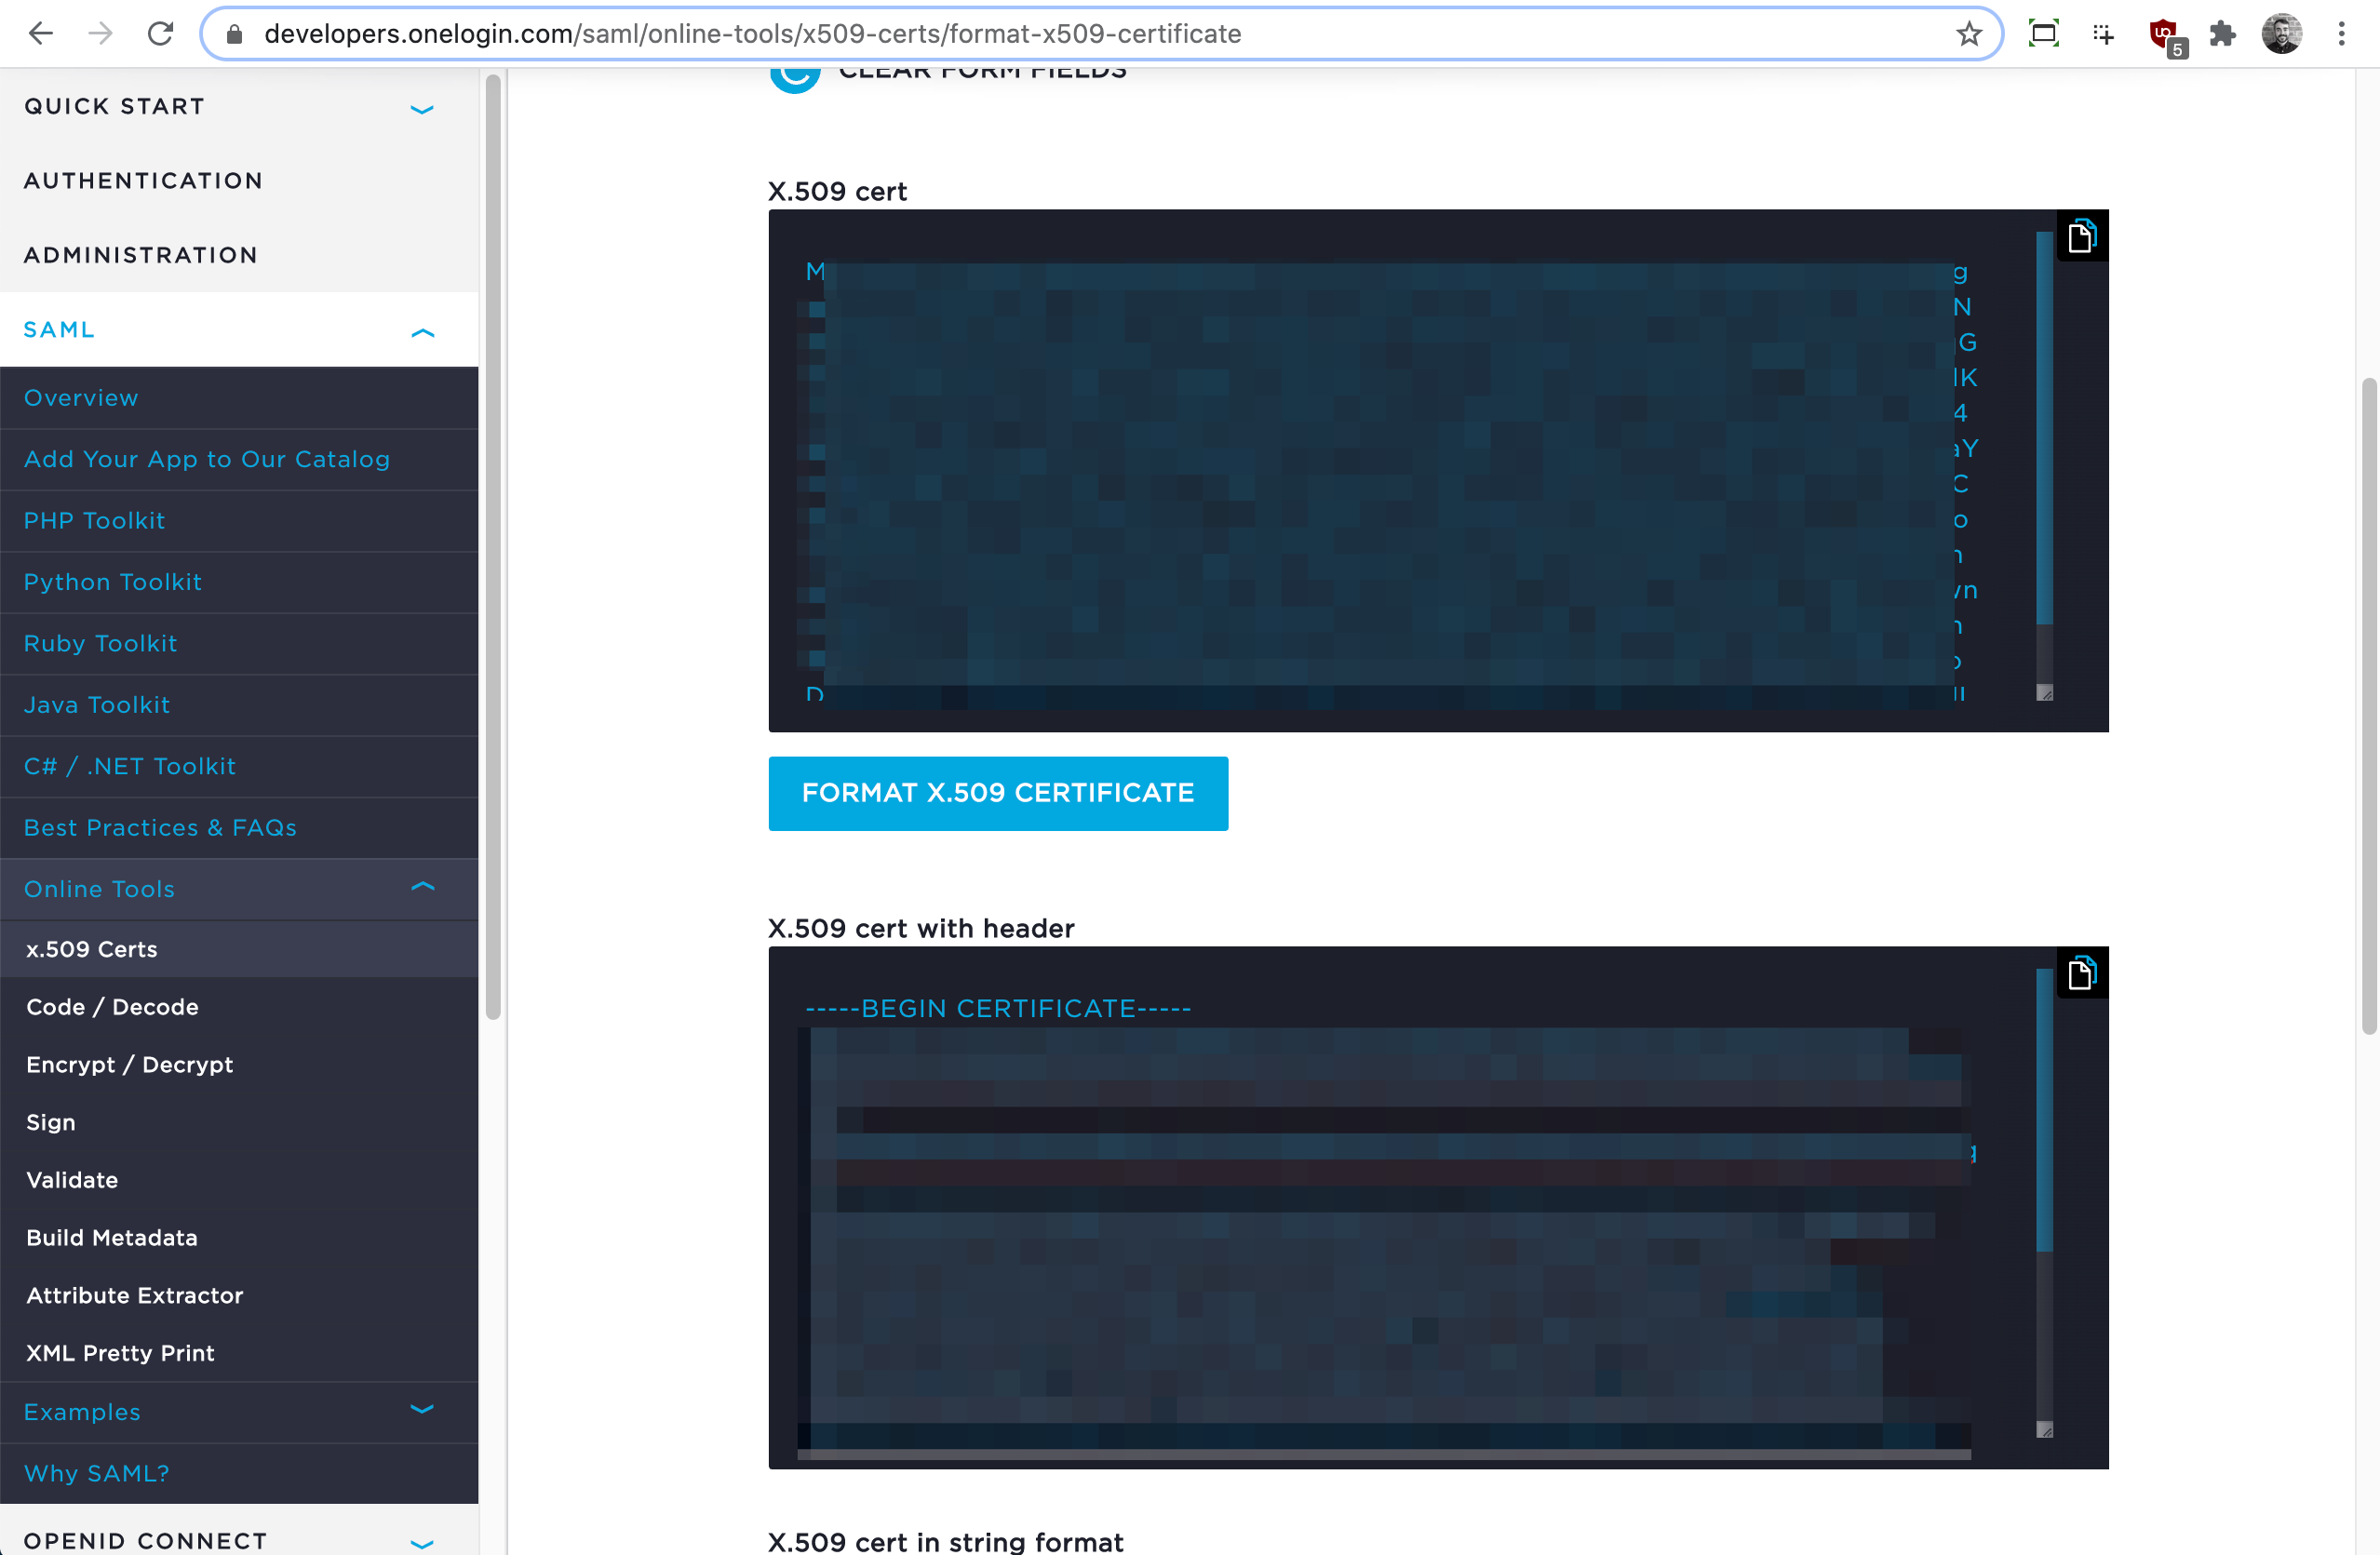
3.3 Using a publicly available certificate formatter (such as OneLogin’s tool), paste the X509Certificate string (copied in Step 3.2) and format the X.509 cert (with header). Take note of the formatted certificate (to be used in the step below (3.4).
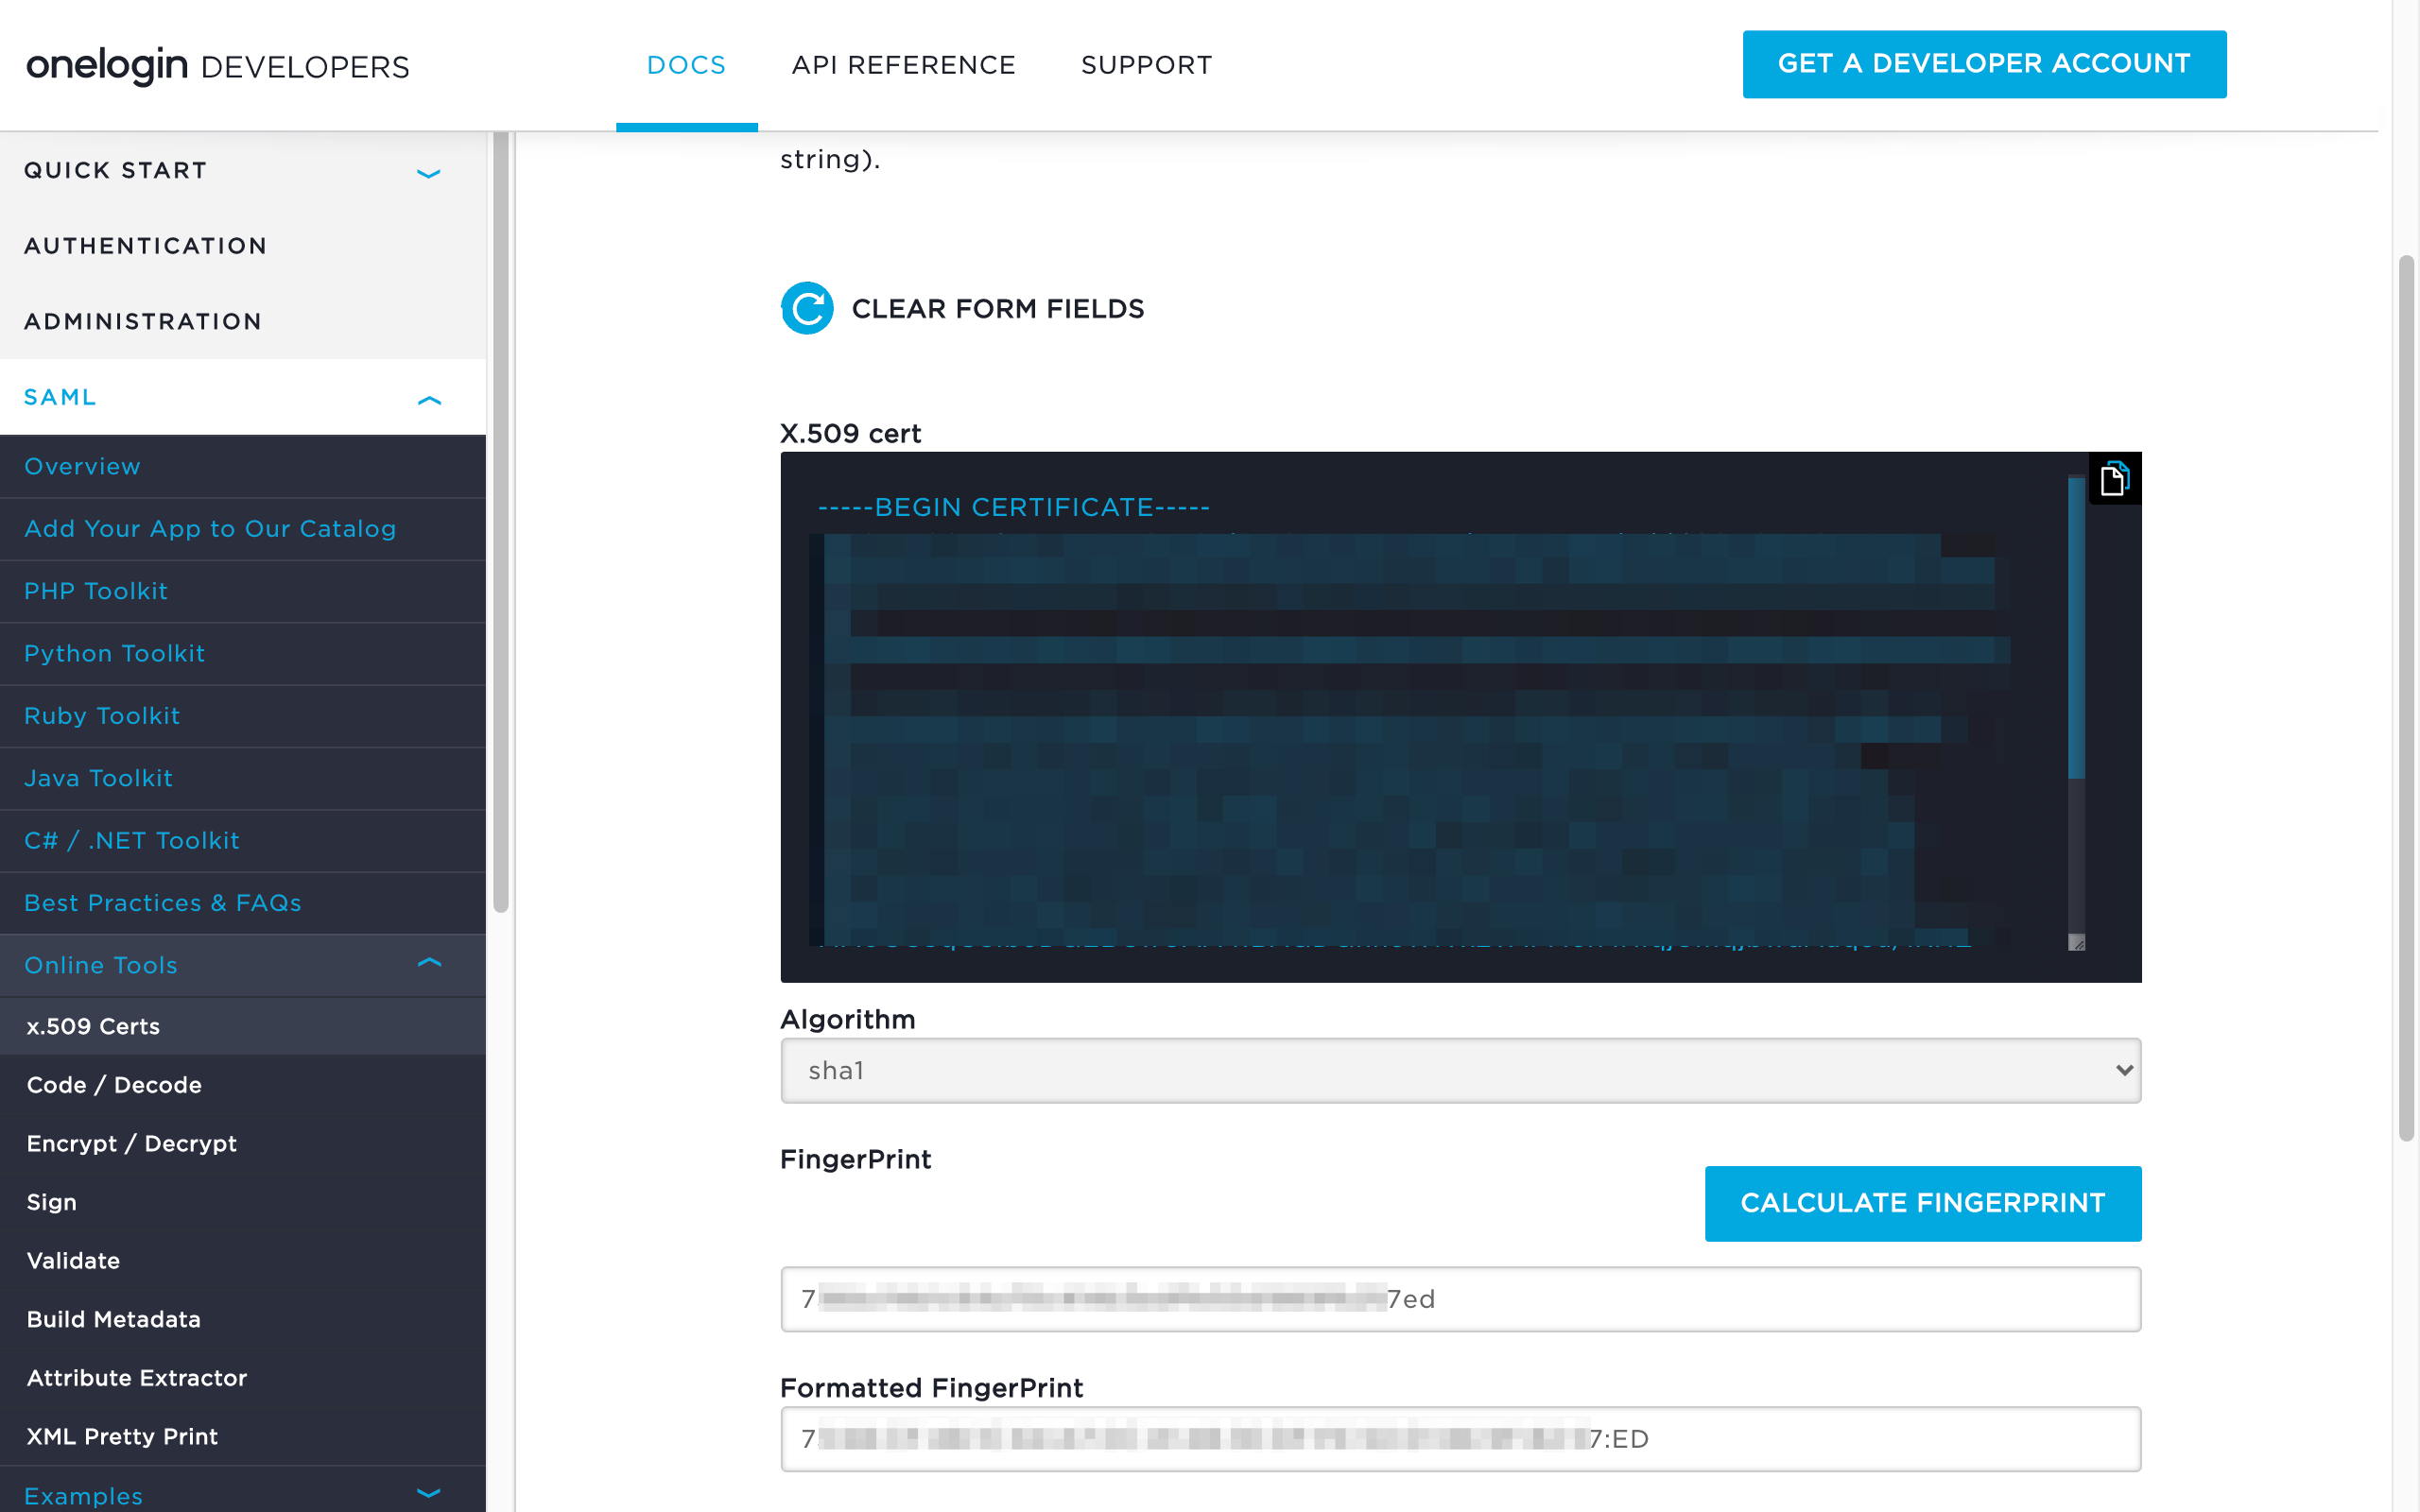
3.4 Using a publicly available fingerprint calculator (such as OneLogin’s tool), paste the formatted X509Certificate string (created in Step 3.3) and calculate the SHA1 fingerprint. Take note of the formatted fingerprint (to be used in Step 4.4).
3.5 Also in the downloaded metadata xml file, locate and take note of the <SingleSignOnService Location> string (to be used in Step 4.3).
Step 4. Configure your GitLab group to use CSE for authentication
4.1 Log in to your GitLab account, and then navigate to Groups > (group you are configuring) > Settings > SAML SSO.
4.2 In the Configuration section, switch the Enable SAML authentication for this group. toggle to the right (on). Optionally, switch the Enforce SSO-only authentication for this group. toggle to the right (on).
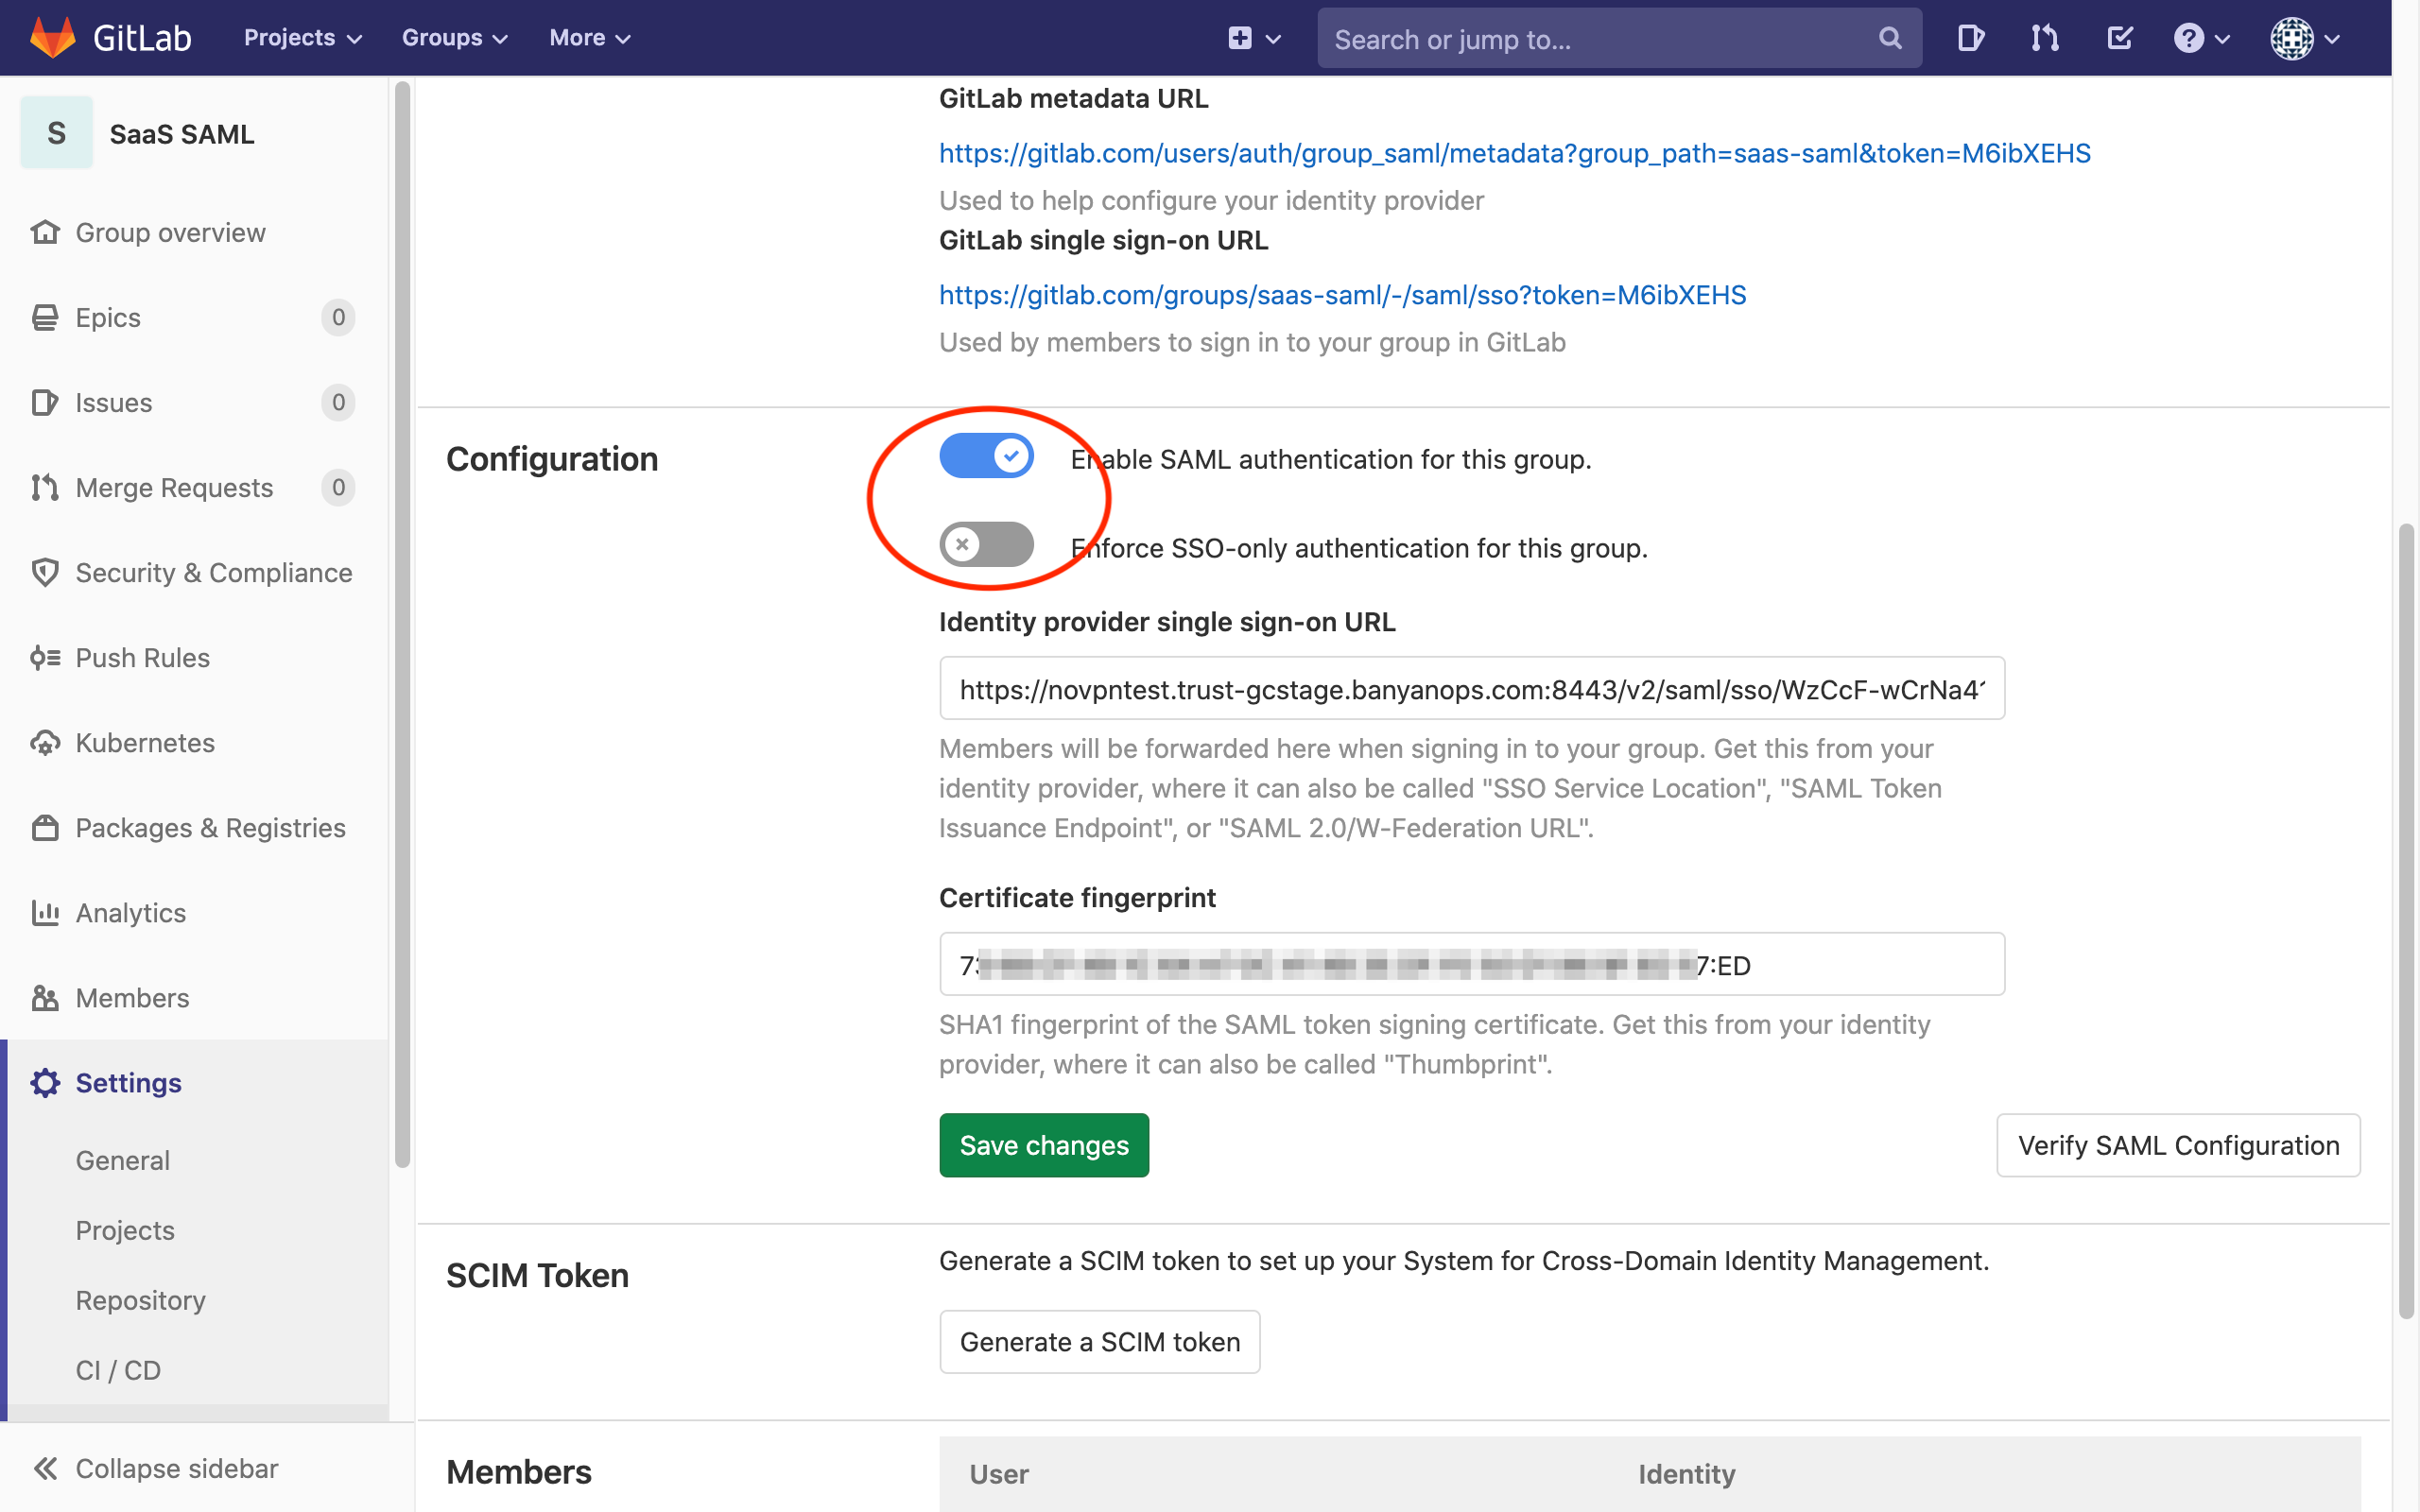
4.3 For the Identity provider single sign-on URL field, enter the <SingleSignOnService Location> string noted in Step 3.5 (above).
4.4 For the Certificate fingerprint field, enter the formatted SHA1 fingerprint noted in Step 3.4 (above).
4.5 Click Save changes.
4.6 Click Verify SAML Configuration, and fix any errors until successful.
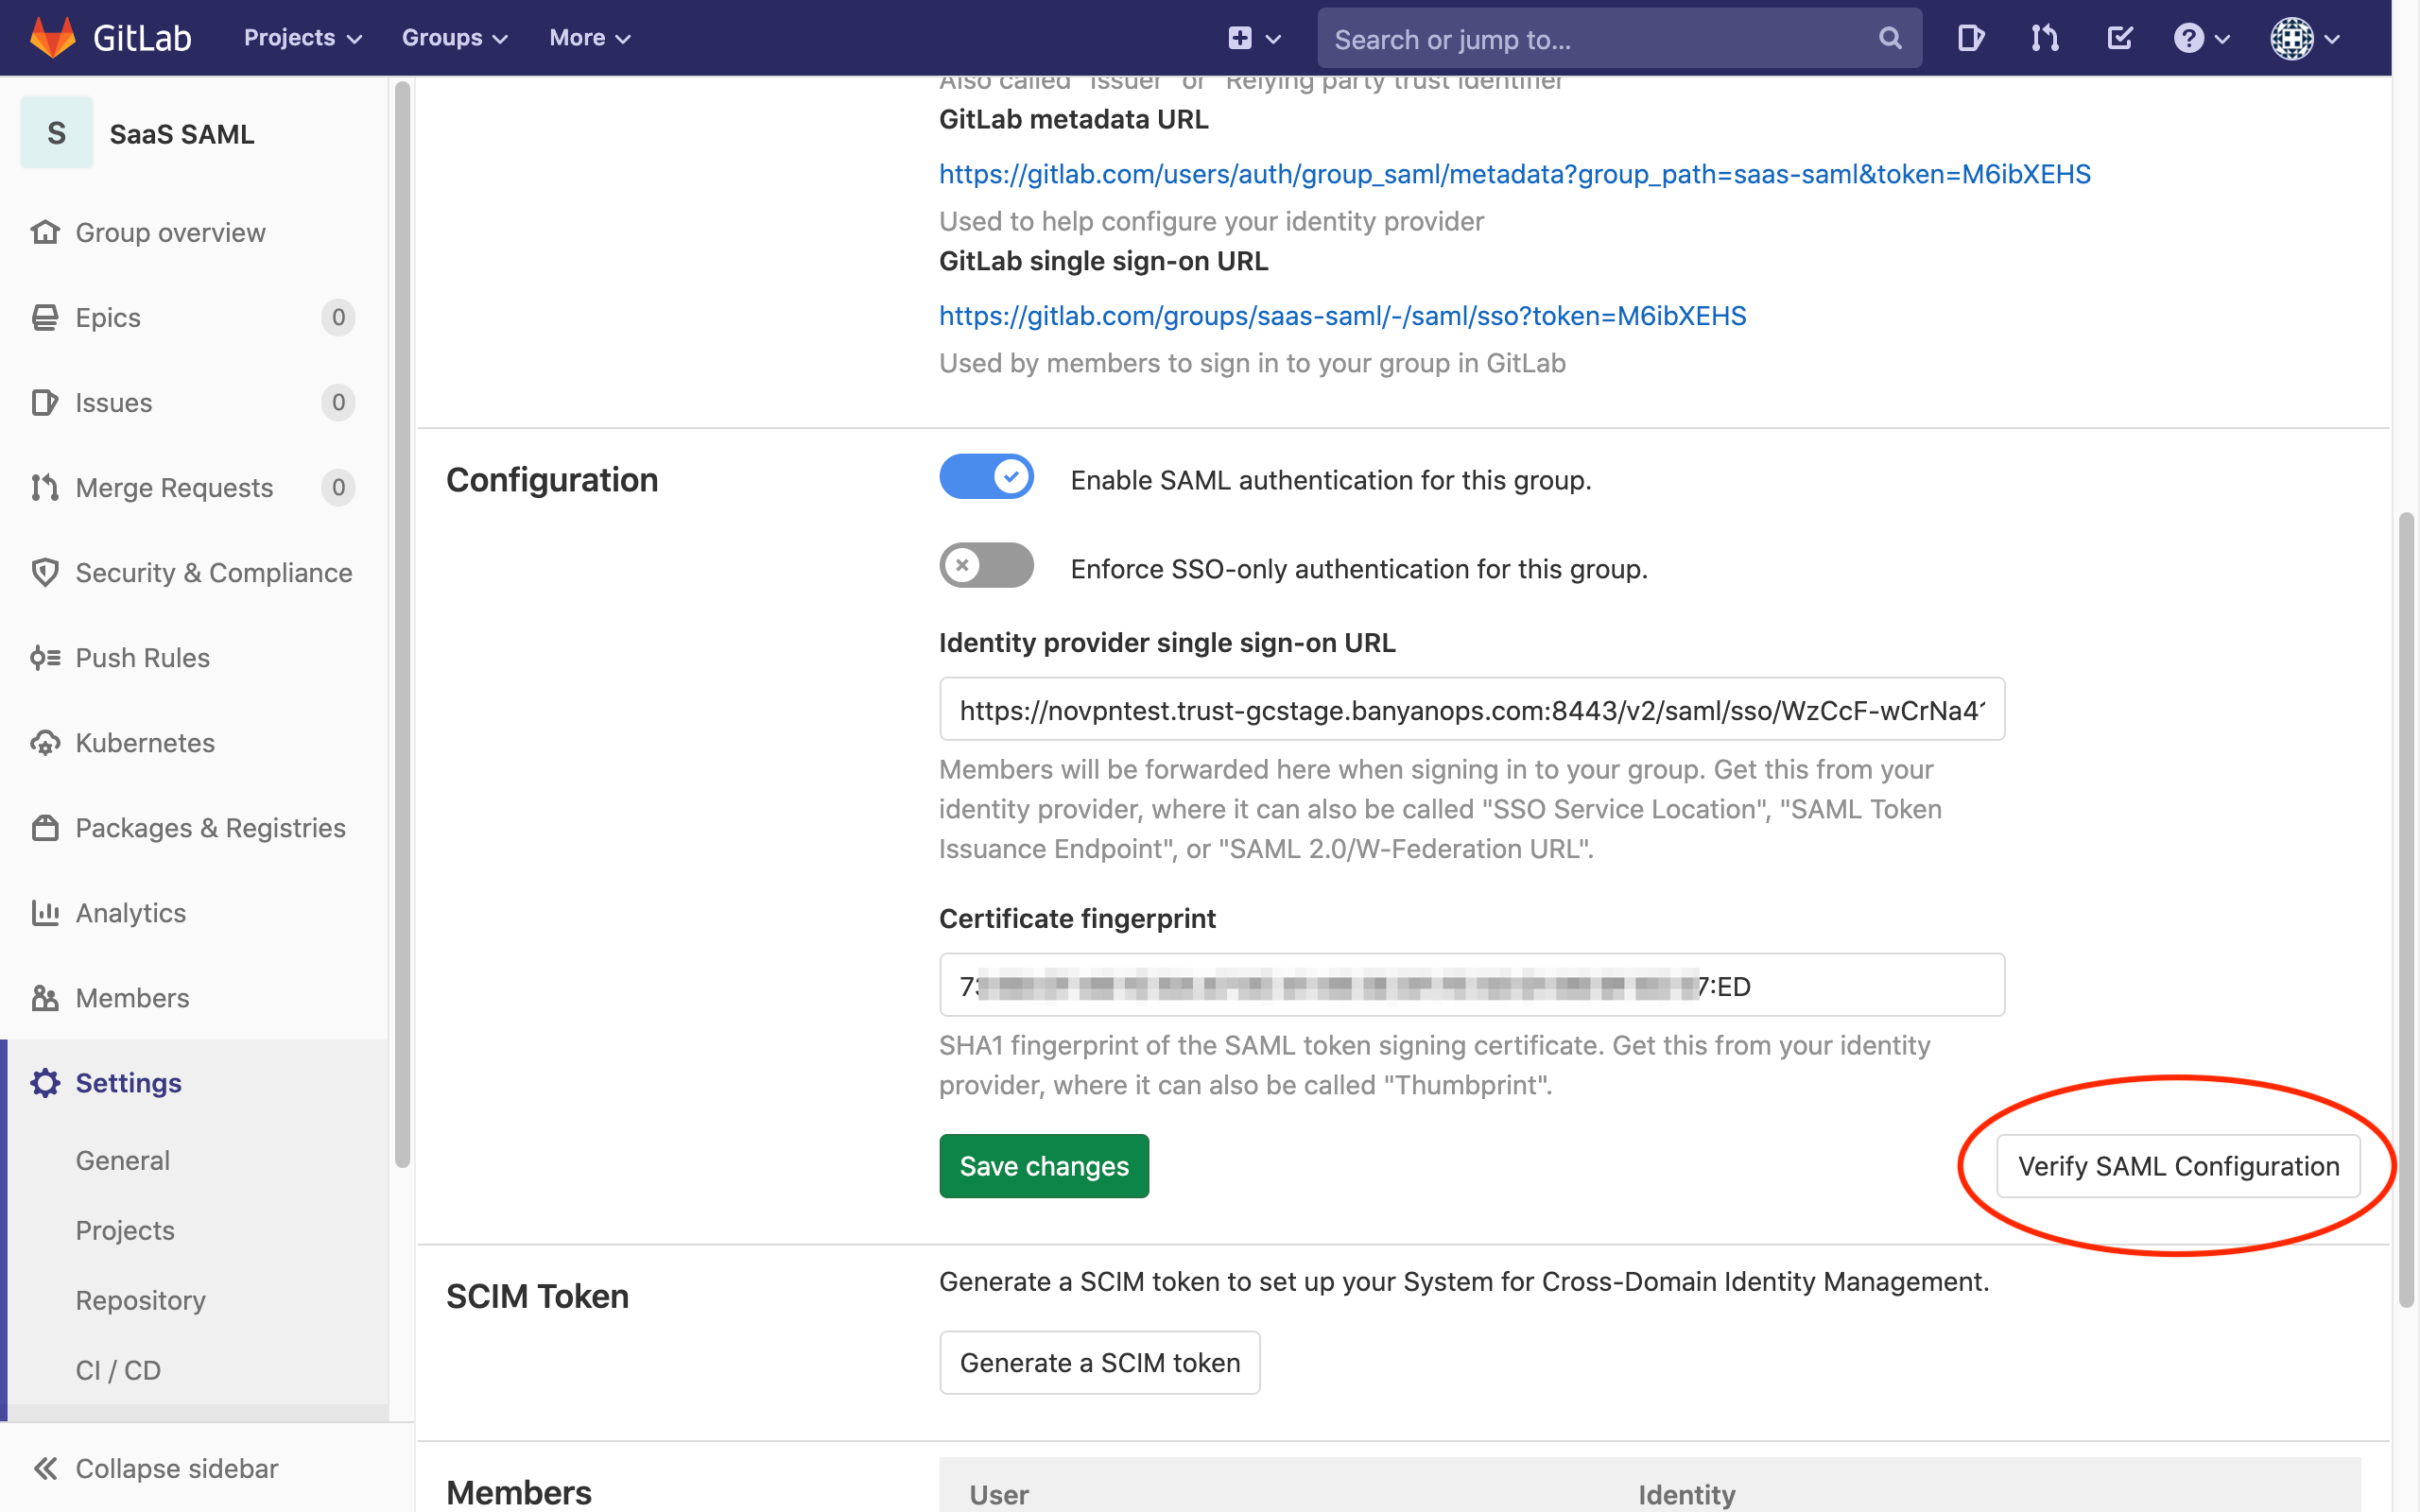
4.7 Copy the SSO sign-in URL, which you’ll use in the step below.
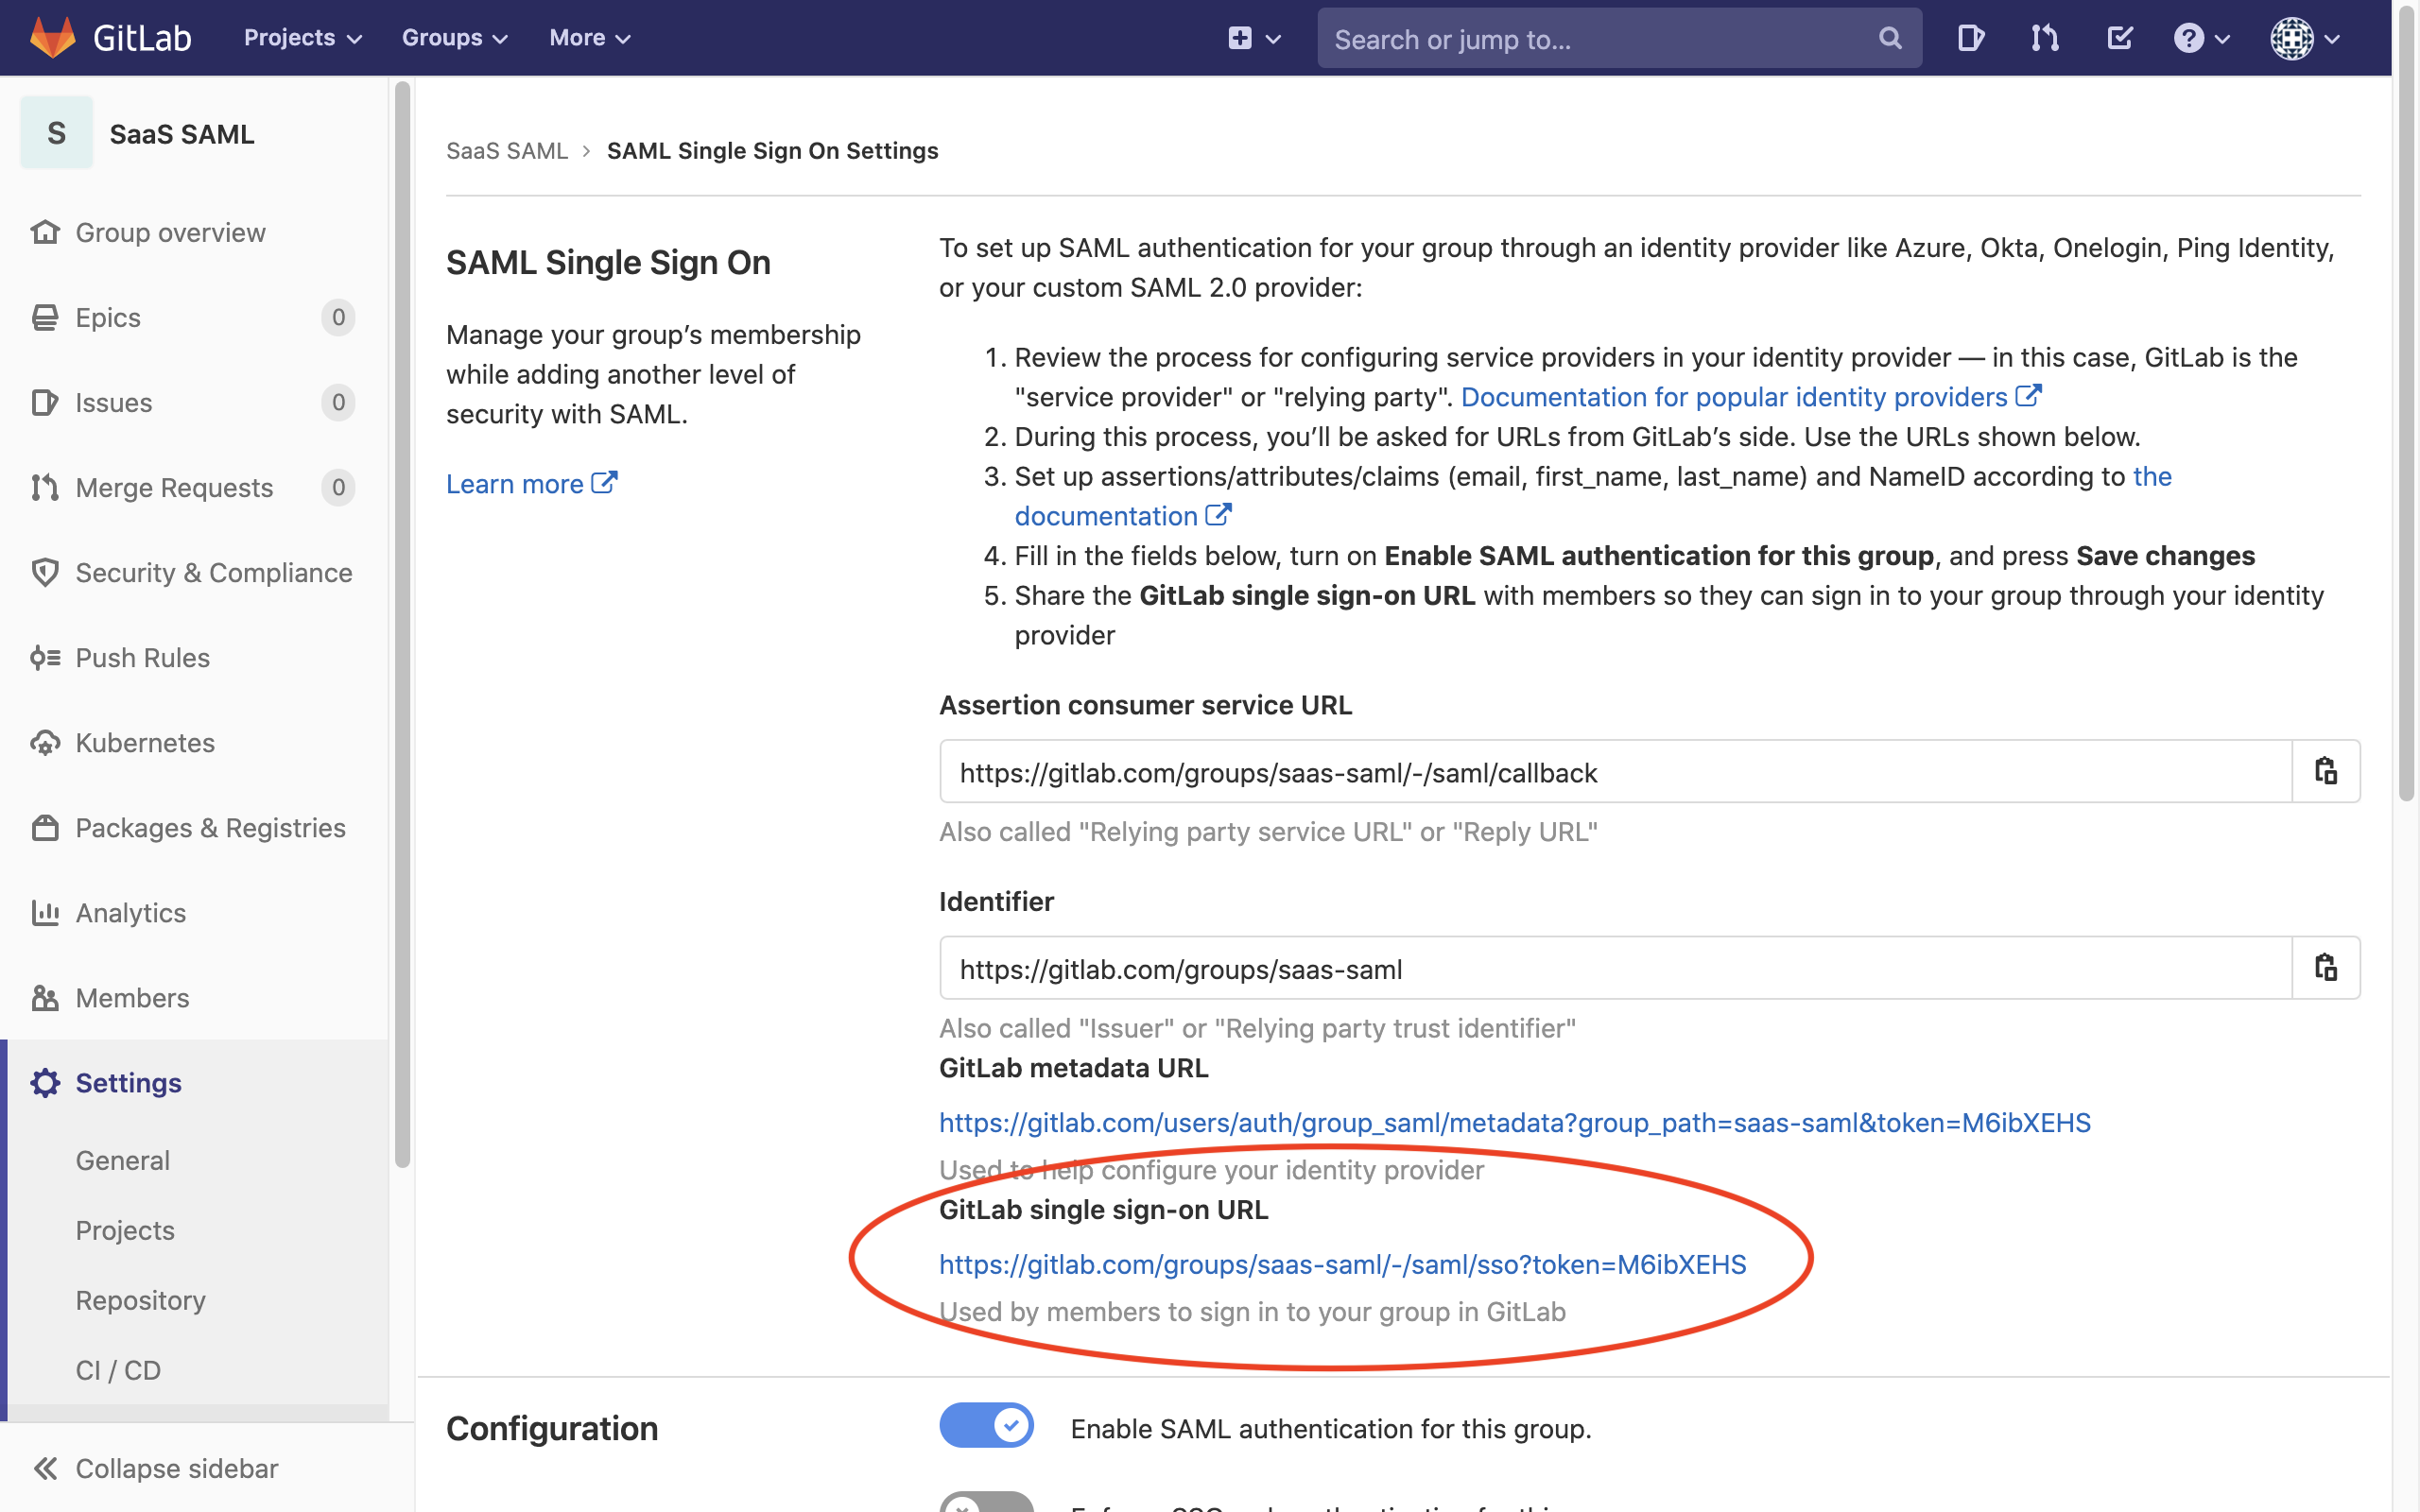
Step 5. Navigate to GitLab and login in via SAML
Now, you can navigate to GitLab and authenticate using the SSO sign-in URL copied in the previous step.
You will be taken to your Identity Provider to login while, behind the scenes, CSE is evaluating device posture and enforcing your security policies.