Secure browser access to your self-managed GitLab – without a VPN
Provide access to Gitlab based on user and device identity, with first-class support for mobile devices. No need to backhaul traffic through a VPN.
- Updated on
- 15 minutes to read
-
Contributors

Overview
GitLab is a comprehensive DevOps platform and Git-repository manager, offering a range of issue-tracking and continuous integration and deployment pipeline features. Many organizations self-manage GitLab for single-tenant hosting, better protection of source code, customized auditing, and compliance needs. Self-managed GitLab is always deployed on a private server, and provisioning access to it involves a significant trade-off between security and productivity.
Some organizations take a perimeter security approach and grant access only to users on the corporate network; this hampers user productivity and collaboration:
- Many DevOps and SaaS tool integrations won’t work because they require you to use broad IP whitelists on your corporate network. For example, if you want to trigger a GitLab pipeline from a Slack slash command, you have to IP whitelist all of Slack’s server IPs. Similarly, if your AWS Lambda job needs to pull code from a single repo in a GitLab instance hosted on-premise, you have to IP whitelist the entire AWS CIDR range. IT and Security teams will not approve these requests because of the level of risk it imposes on them.
- Admins cannot grant access to the different types of remote users who need it. With a corporate VPN requirement, you often cannot support mobile users (on personal devices) or contractors (on unmanaged devices) who need convenient access to do their jobs.
Other organizations prioritize productivity and make their self-managed GitLab instance available on the public internet; they then face several security issues:
- A publicly available GitLab application is susceptible to attack and inadvertent exposure. When GitLab is made available on the internet, it is susceptible to attacks by malicious bots and untrusted devices. It just takes one user to inadvertently mark a private repository as public to expose an enterprise’s entire code base.
- Security cannot ensure that only trusted devices access source code. Anyone with valid GitLab credentials can log in from any browser on any device. If a user loses their credentials, or if a device has malware installed on it, an organization’s sensitive source code can be exfiltrated or compromised.
This solution guide shows how you can use CSE to manage access to your self-managed GitLab instance – enhancing productivity and security. CSE provides zero trust security, so access is based on user and device identity, not on IP addresses. CSE’s built-in support for mobile devices and policy-based access for unregistered devices provides convenient access for all the different types of users that need it.
Approach
A typical self-managed GitLab setup (with a VPN) is depicted below:
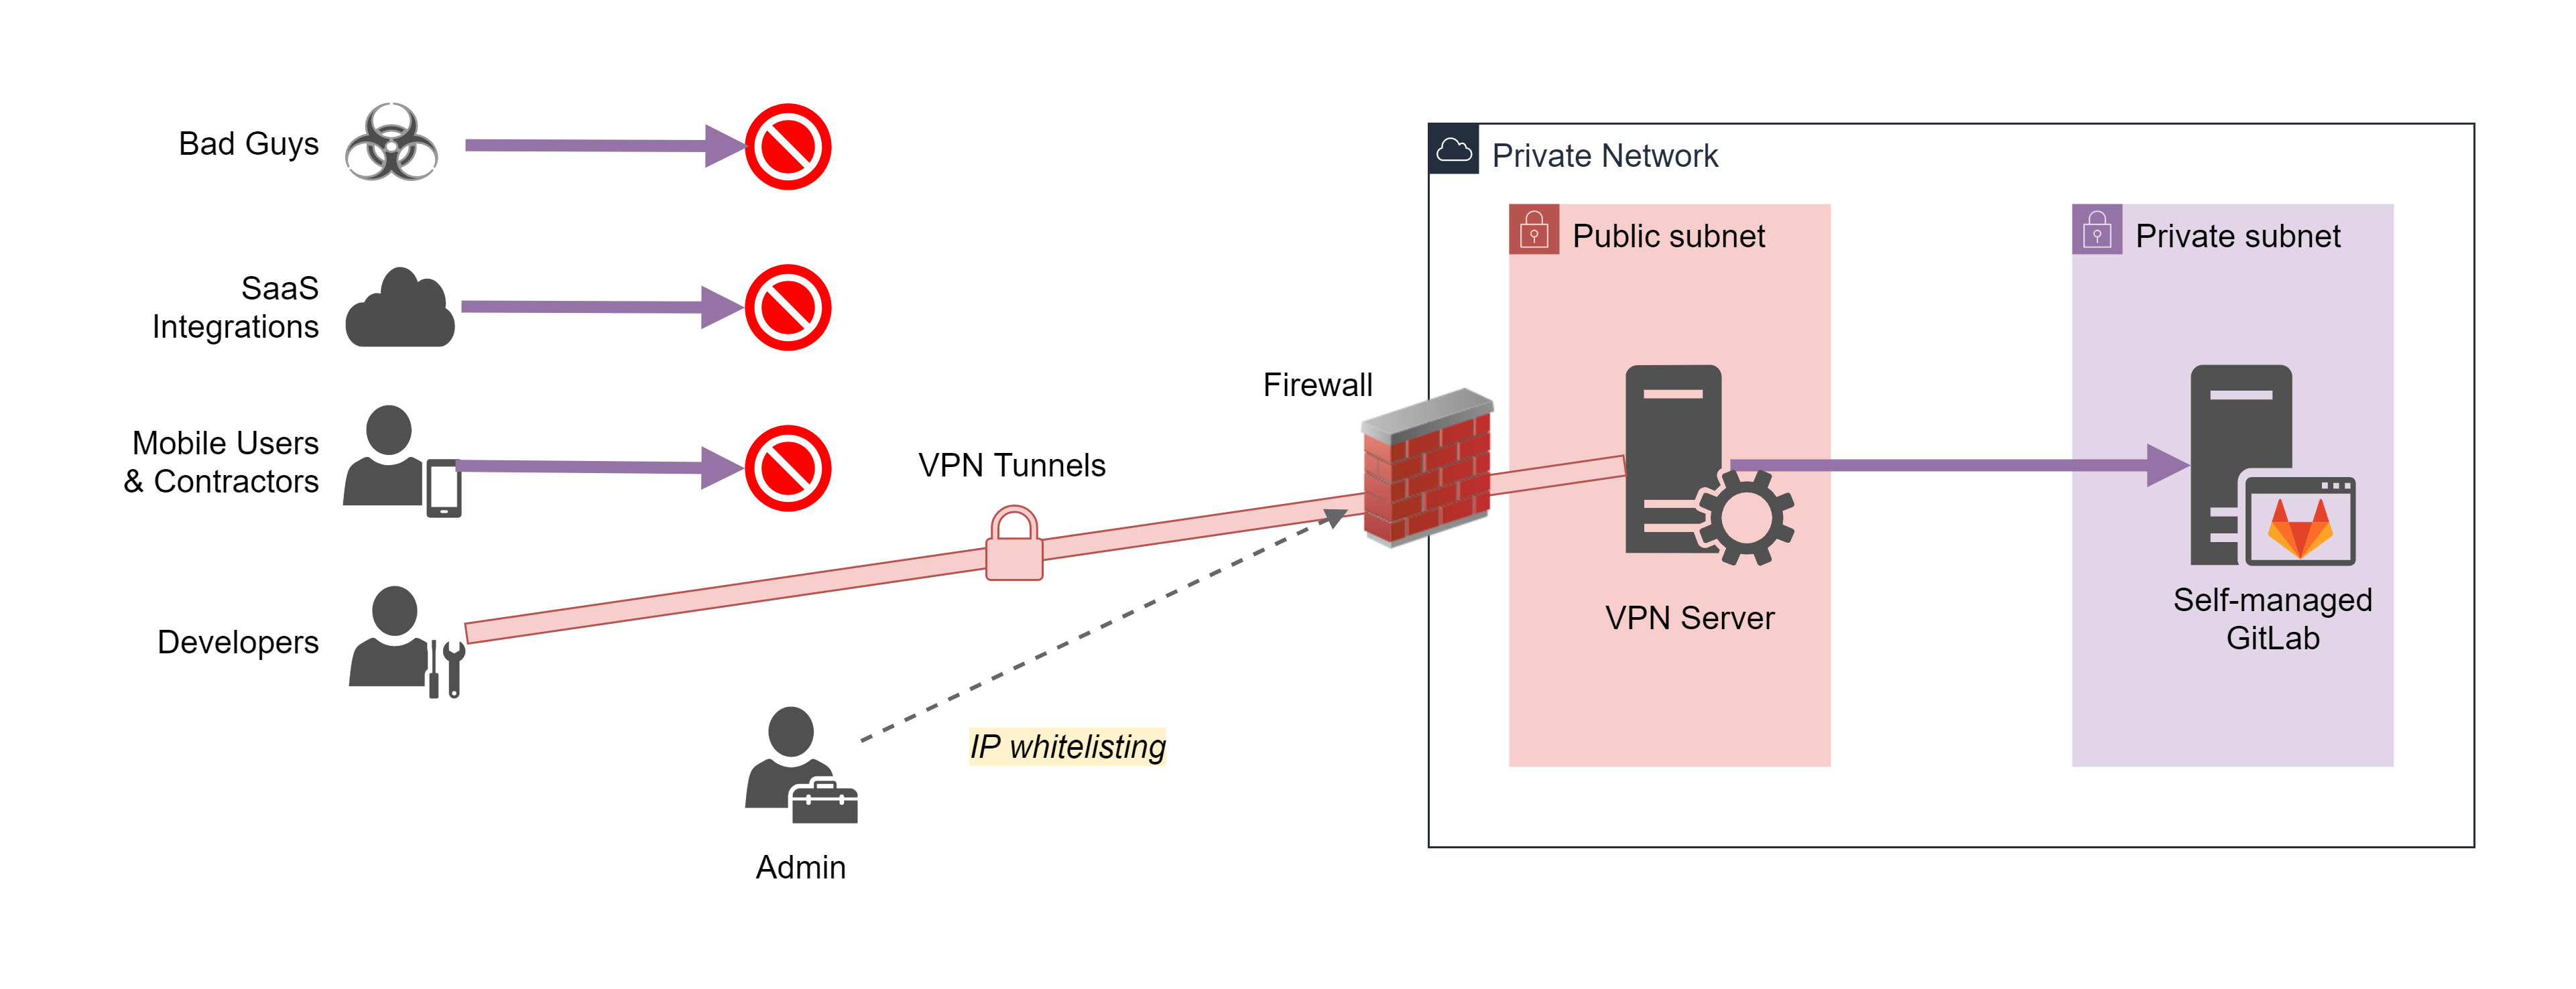
Users have to get onto your corporate network using a VPN in order to access GitLab. You’re protected from Bad Guys via perimeter security. But now mobile users, contractors without a VPN client, and SaaS Integrations outside the IP whitelist do not have access.
With CSE, users can securely access GitLab without a VPN. Your new architecture is as follows:
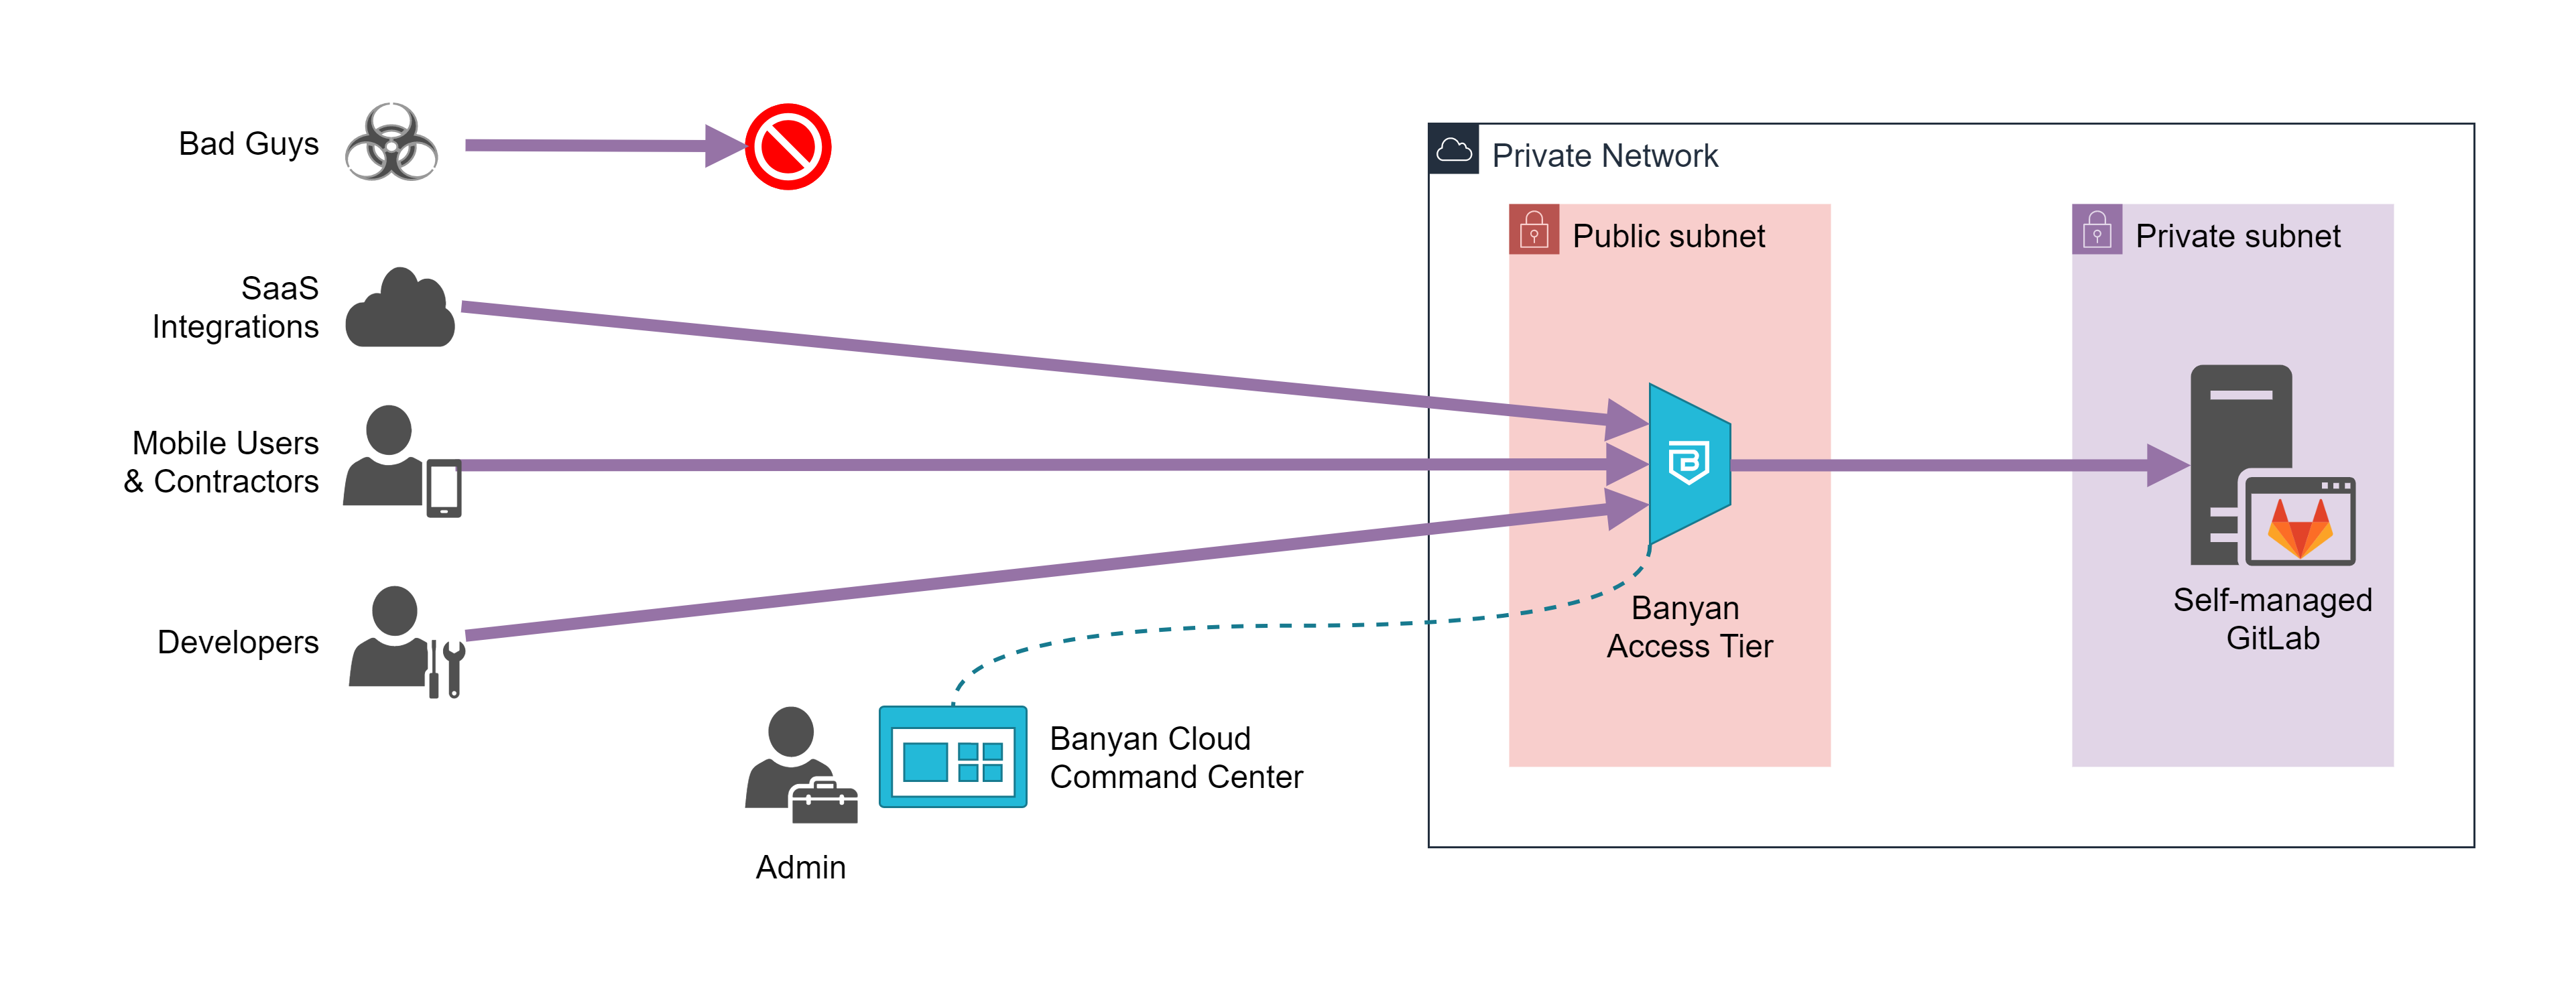
- the CSE Access Tier will act as a gateway to your infrastructure
- the CSE App presents a service catalog to end users, which makes it easy to access services
- the CSE Cloud Command Center is used by admins to publish services and define access policies
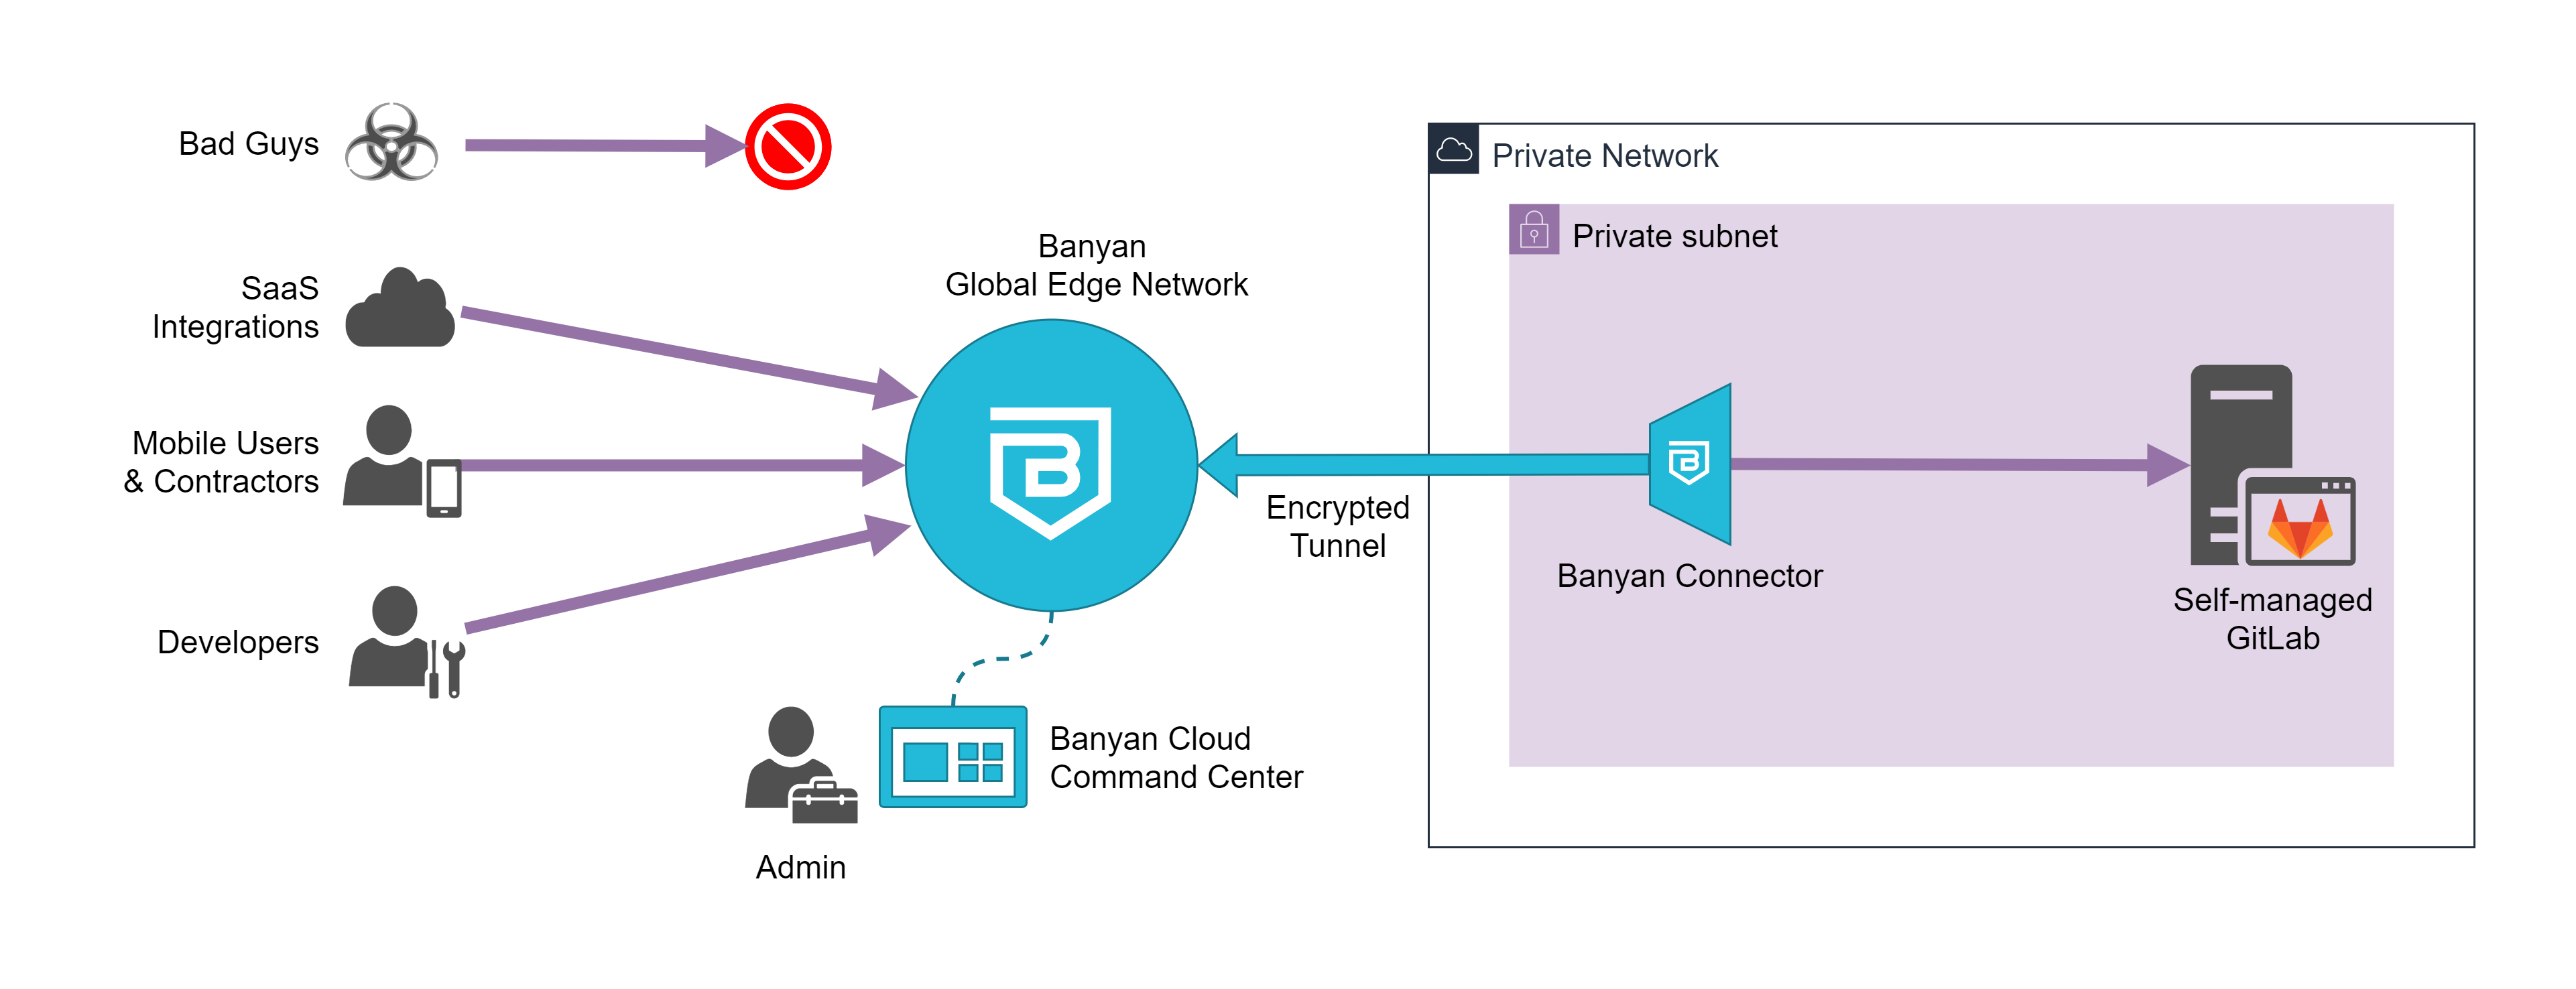
- the CSE Global Edge Network will act as a gateway to your infrastructure
- the CSE Connector, which can sit in your private network, sets up an outbound connection to the CSE Global Edge Network
- the CSE App presents a service catalog to end users, which makes it easy to access services
- the CSE Cloud Command Center is used by admins to publish services and define access policies
The CSE data plane functions as a reverse proxy for your GitLab instance, terminating TLS, enforcing security policy, and forwarding traffic to the self-managed GitLab instance.
Instead of broad IP whitelists, access is granted via simple, human-readable policies. You can keep out the bad guys, while still providing convenient access.
Note: The solution guide below assumes you’re using CSE’s Global Edge Network deployment model. If you’re using the Private Edge deployment model with Self-hosted Private Edges, the guide still applies; however, you have to modify the steps below to use a Self-hosted Private Edge instead of a Connector.
Prerequisites
To get started, you will need the following:
- An admin login for the CSE Zero Trust Access solution (free with CSE’s Team Edition)
- A private network environment where you currently host your self-managed GitLab instance, and where you can deploy a lightweight CSE Connector
Steps
Now, let’s dive into how you can grant secure access to your GitLab with CSE in five easy steps:
- Install the CSE Connector
- Register the domain your users will use to access GitLab
- Define your web service and test the connection
- Update your policy to restrict access to trusted devices
- Update your service to facilitate integrations
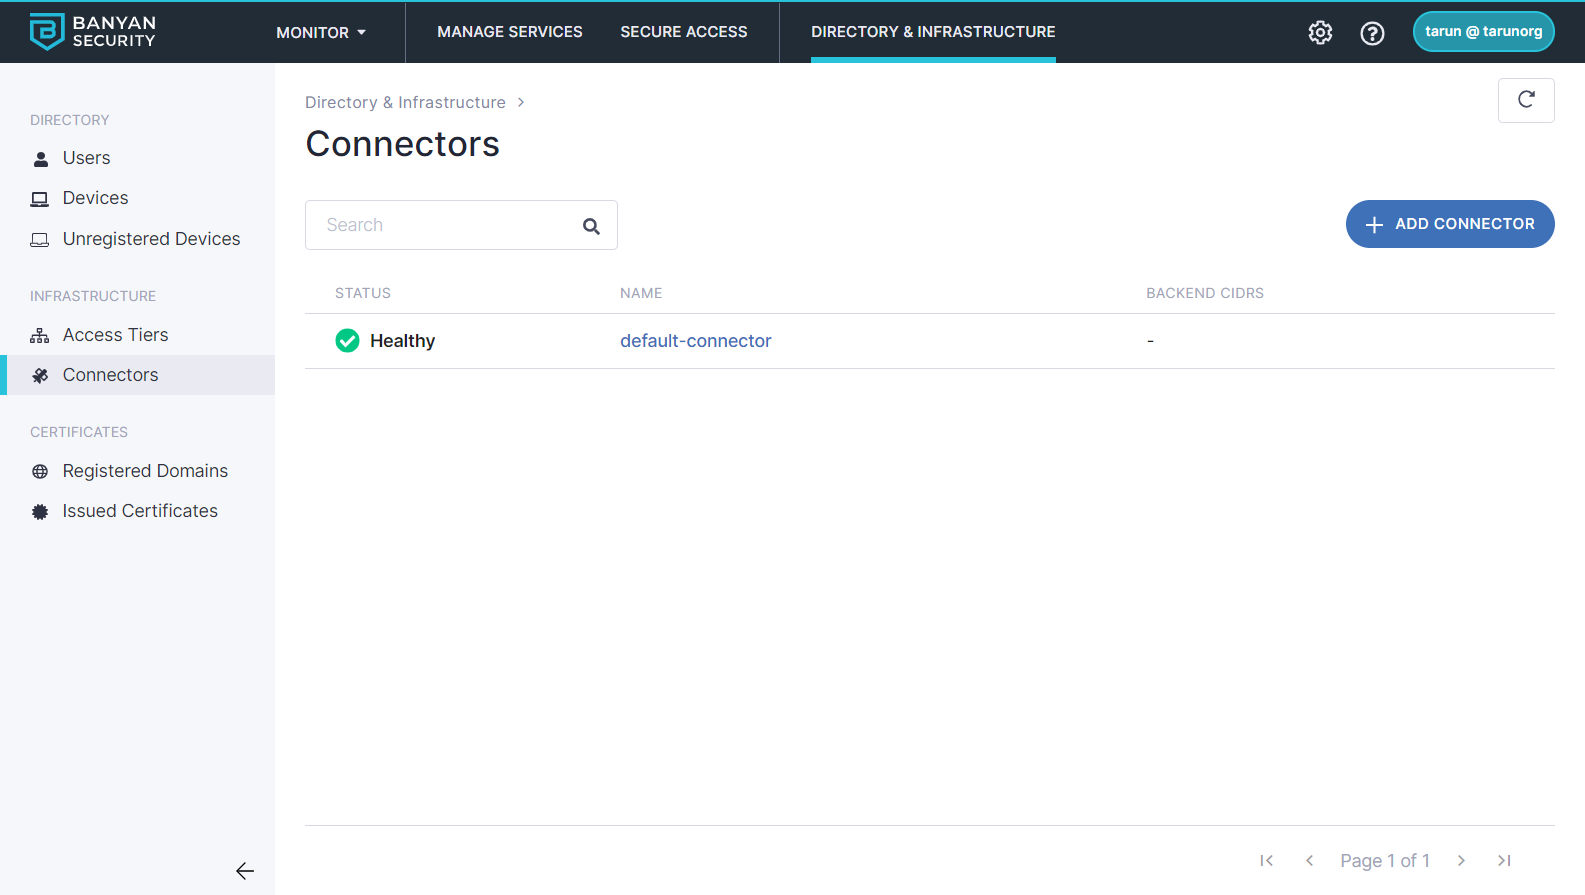
Step 1. Install the CSE Connector
Start by installing the CSE Connector. You can install the Connector on any server in your private network – no inbound firewall rules or open ports are required.
In your Command Center, navigate to Infrastructure > Connectors > {your-connector-name} for installation instructions. Once your status reads Healthy, your Connector is reporting.
Step 2. Register the domain your users will use to access GitLab
With CSE, your self-managed GitLab can be securely published on public domain so there is no need for a VPN tunnel to access it. Another advantage of using public DNS is that CSE can procure and manage your GitLab server certificate using the Let’s Encrypt CA.
In the CSE Command Center, register the domain your users will use to access GitLab.
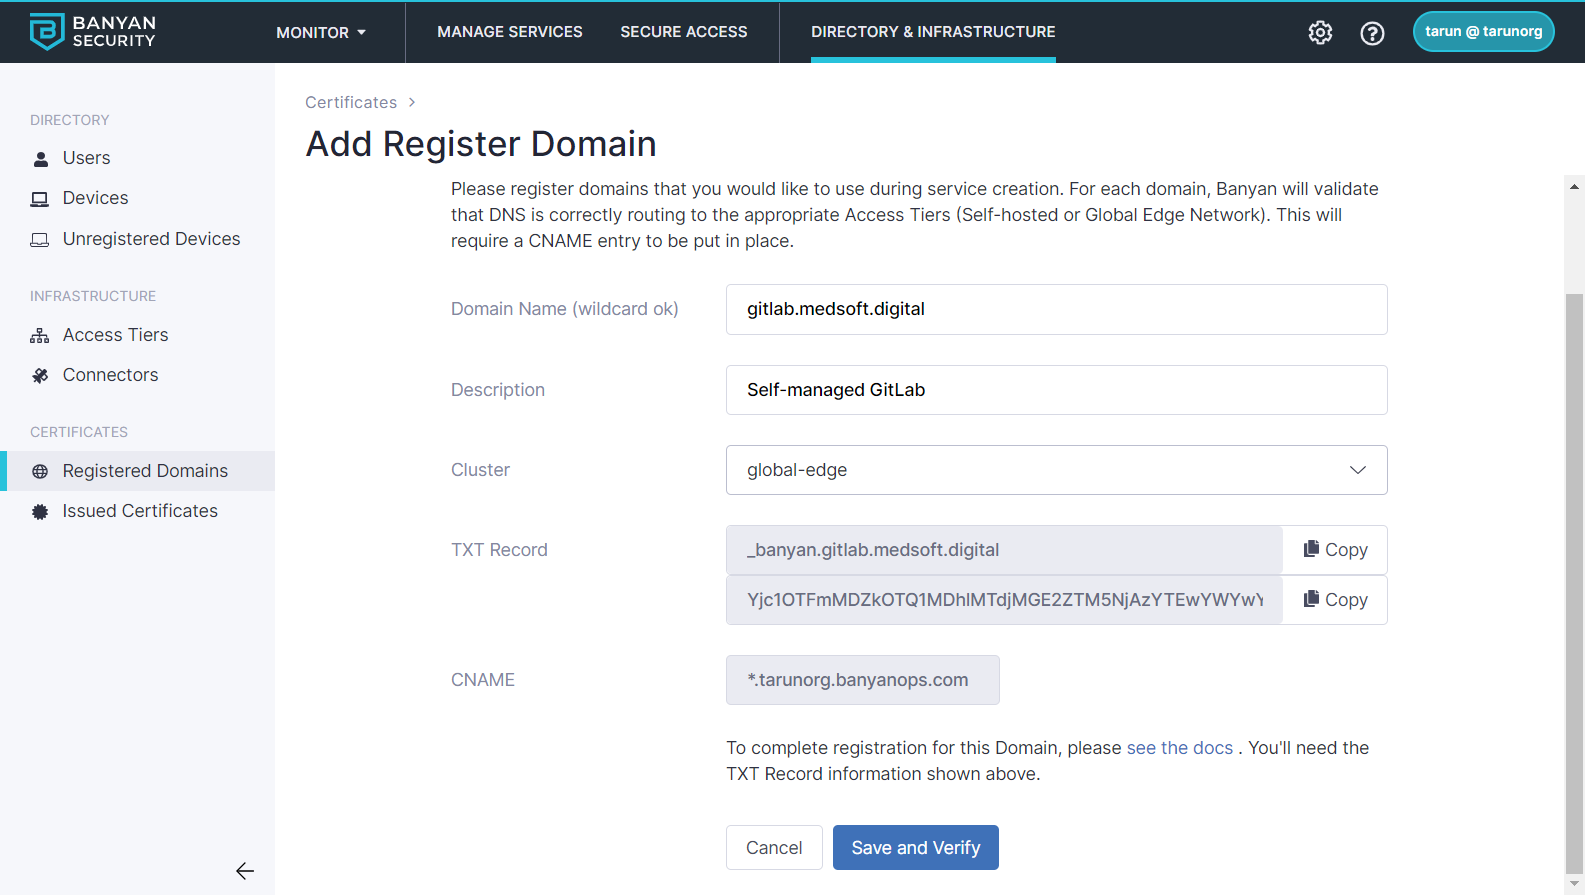
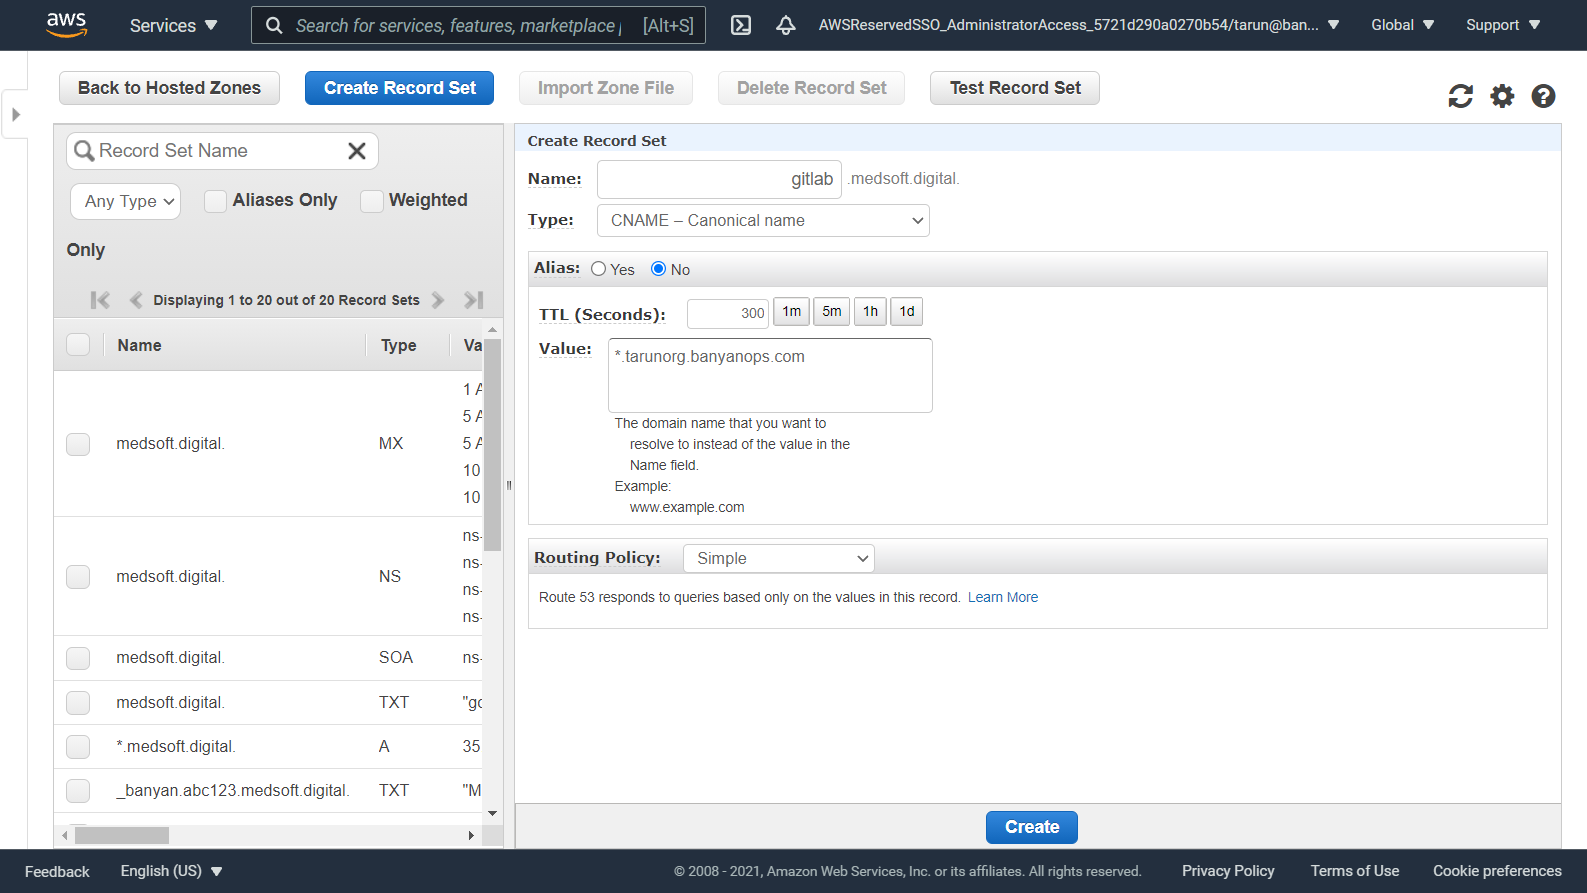
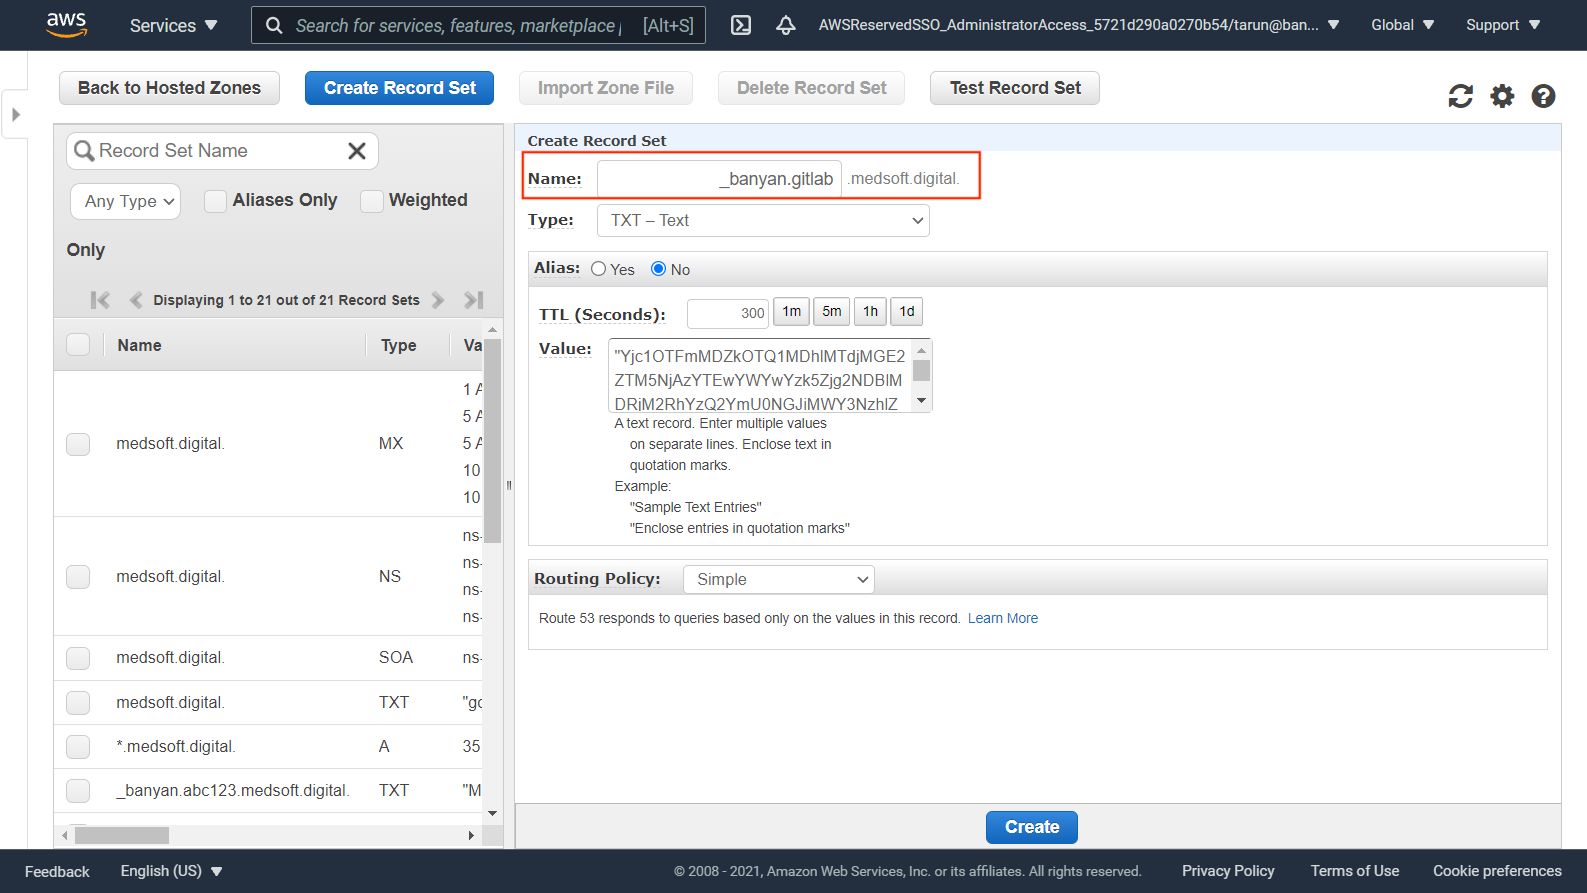
In your DNS registrar, verify ownership of your custom domain using a TXT record, and use a CNAME to resolve the traffic to CSE.
See more details in our guide on registering custom domains.
Step 3. Define your web service and test the connection
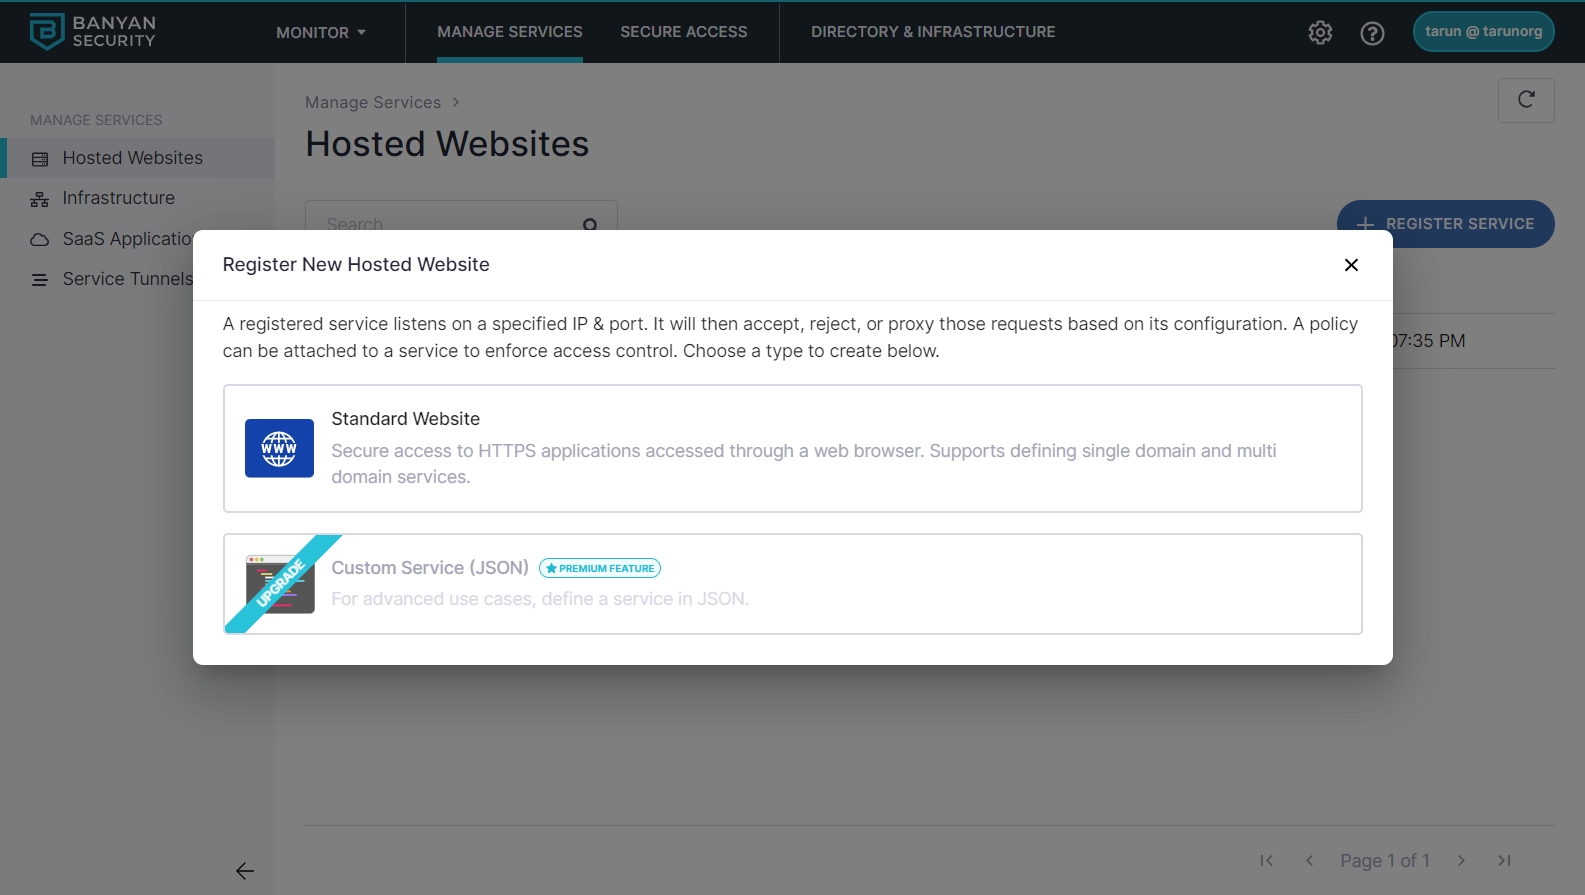
3.1 Register GitLab as a Hosted Web Service. Navigate from Manage Services > Hosted Websites > Register New Hosted Website.
3.2 Select Standard Website.
3.3 Enter a Service Name and Description
3.4 Optionally, select an icon. Search for gitlab, and then select the GitLab icon.
3.5 Configure the Service Attributes:
- Select the connector you’ll be using.
- Set the Service Domain Name to the domain your registered in Step 2
- Check the Let’s Encrypt certificate option (under Service Domain Name) to procure a public CA issued cert
- Enter the private IP address or domain name of your Self-Managed GitLab as your Backend Domain.
- Enter the port of your Self-Managed GitLab (typically
80or443) as your Backend Port. If your Self-Managed GitLab is using a self-signed TLS certificate, be sure to check the TLS Insecure option.
3.6 Under Advanced Configuration, set the HTTP headers needed for GitLab
- If your Self-Managed Gitlab is using HTTP (ie, port
80) you need to let GitLab know SSL termination is being handled by CSE - Add proxy headers
X-Forwarded-Proto => httpsandX-Forwarded-Ssl => on
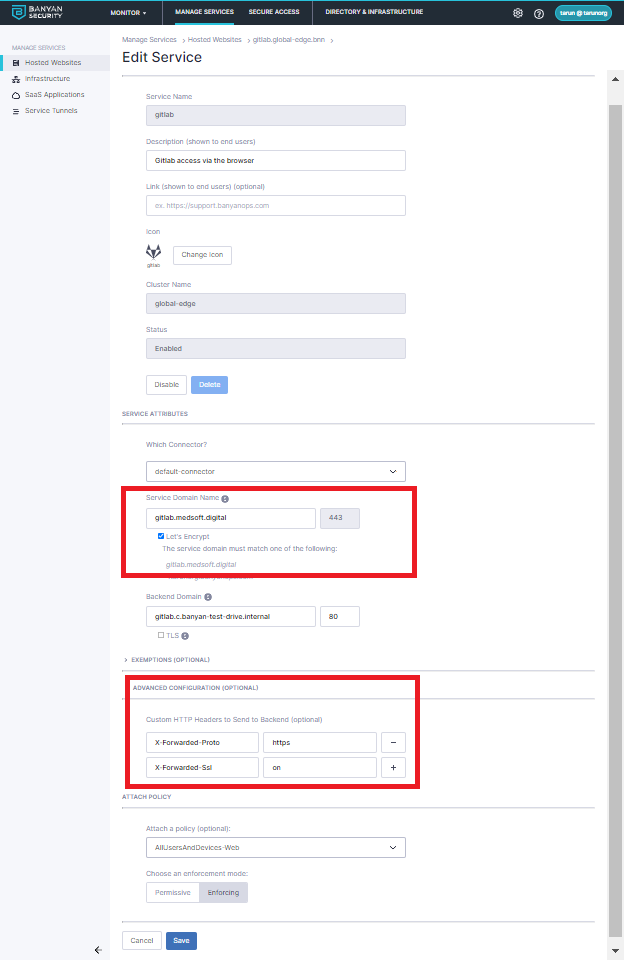
3.7 Select a basic policy: AllUsersAndDevices-Web
3.8 Once completed, select Save.
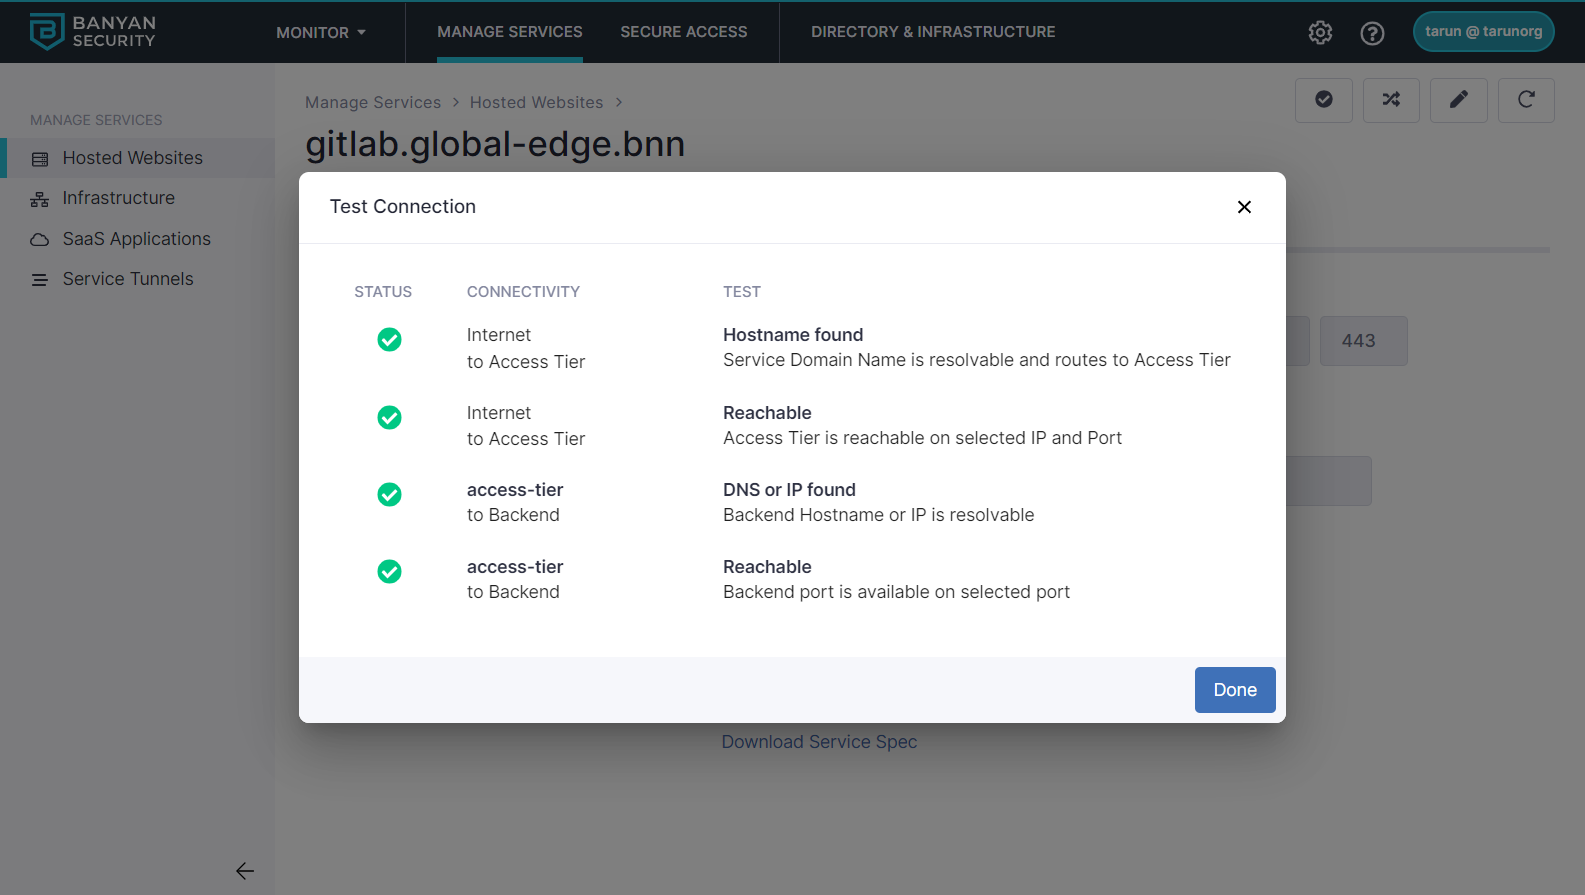
3.9 Test your connection. Ensure that the tests all have green checks under Status.
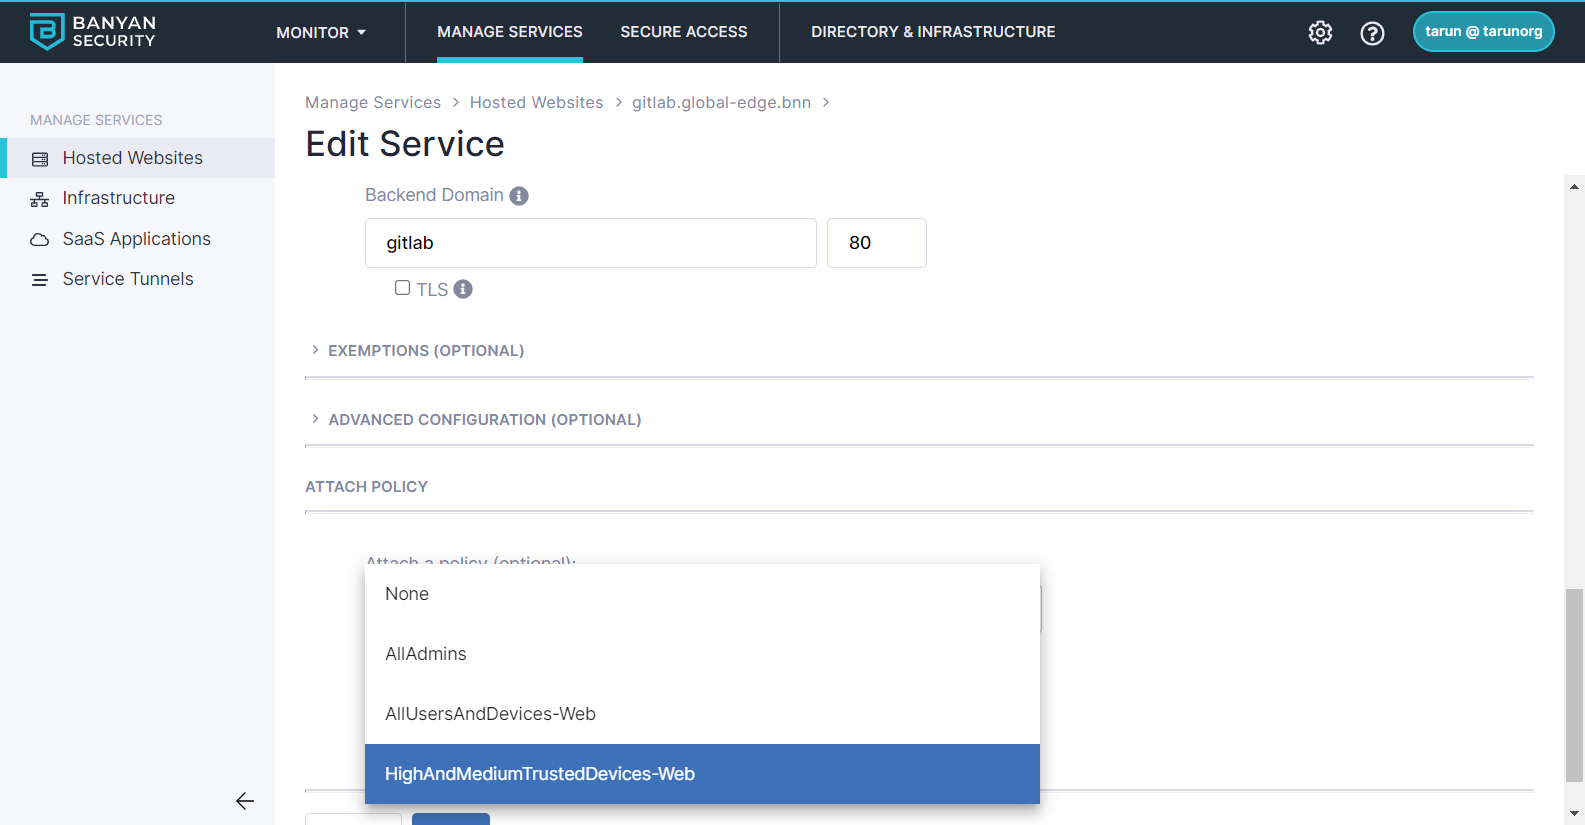
Step 4. Update your policy to restrict access to trusted devices
We’ll update the policy for GitLab so that only trusted devices with a high or medium trust score can access your GitLab service. Edit the service you just created and change the policy selected to HighAndMediumTrustedDevices-Web.
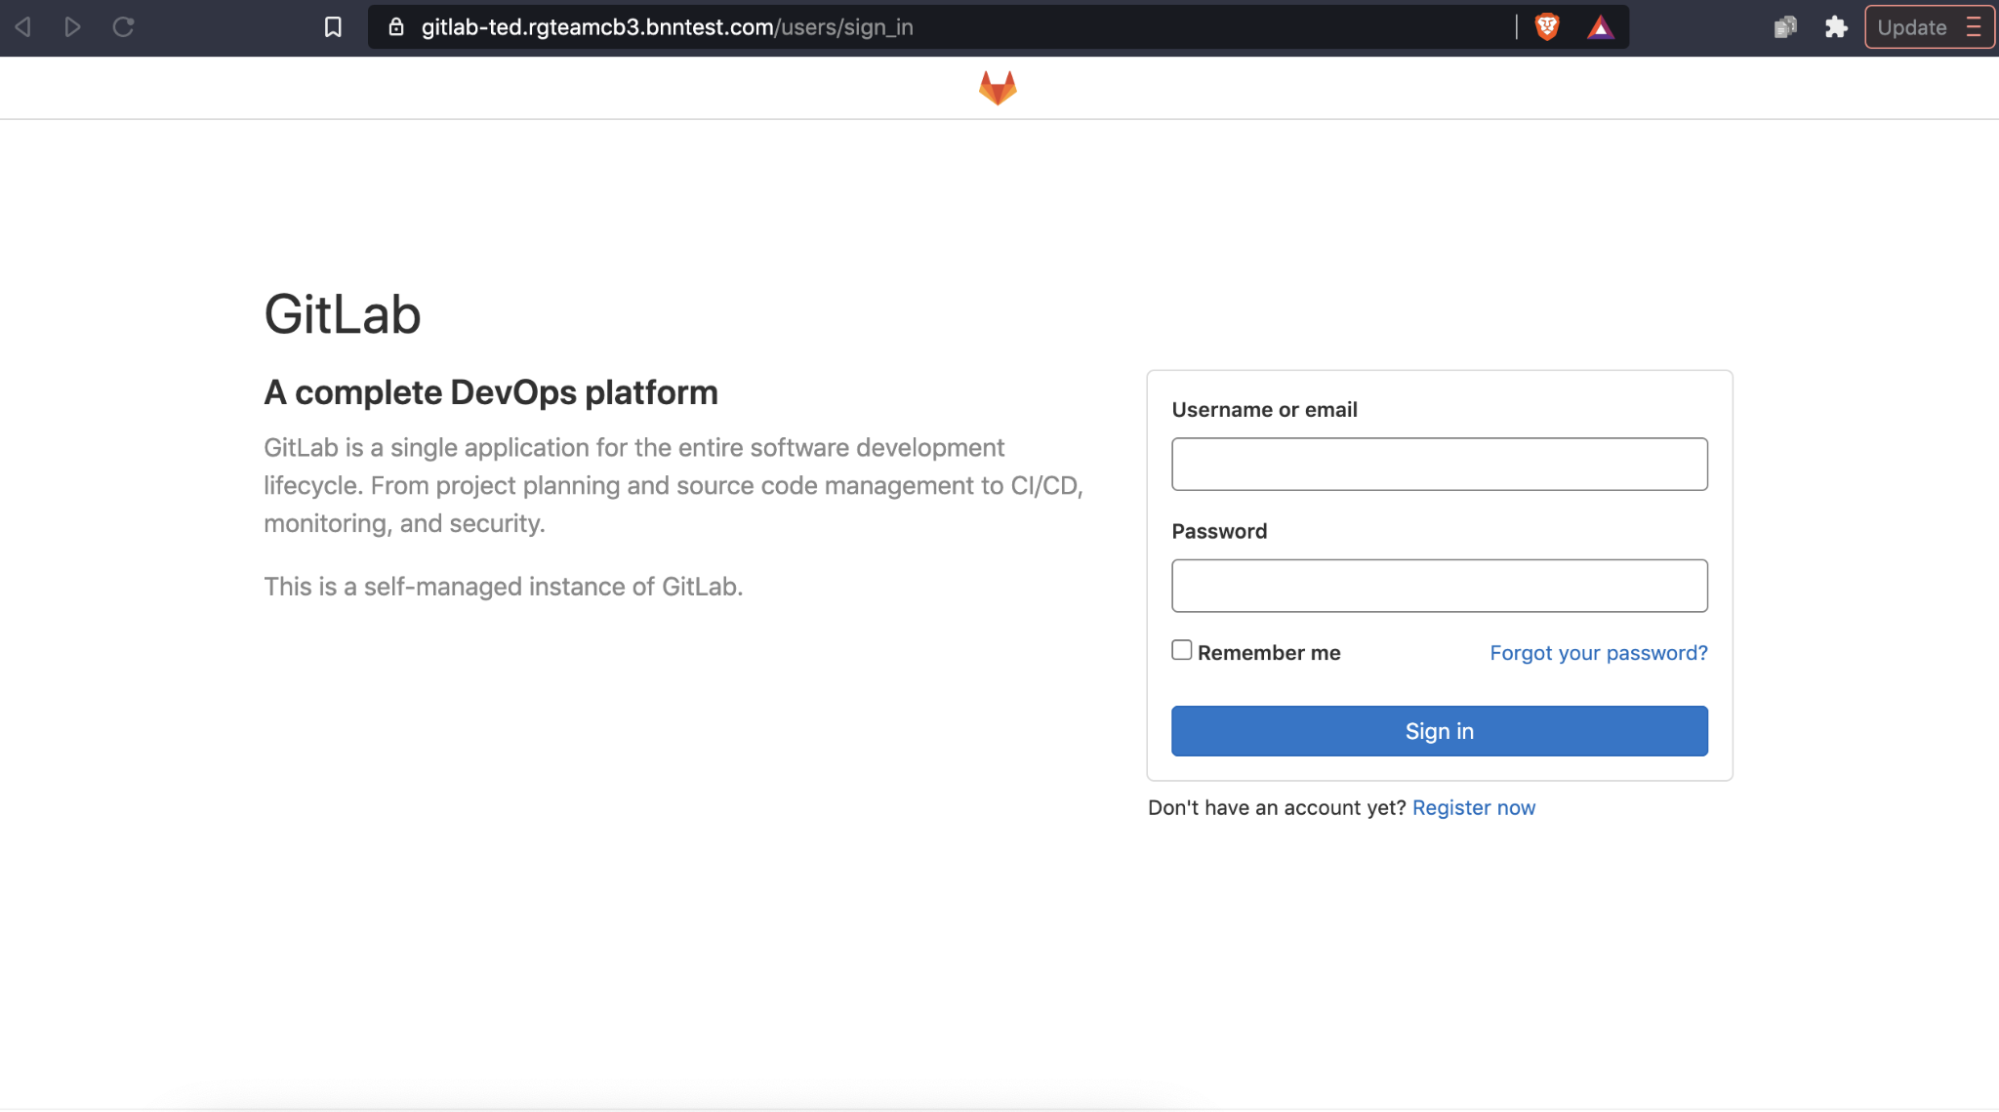
Now only users that meet your device criteria can even see the GitLab home page:
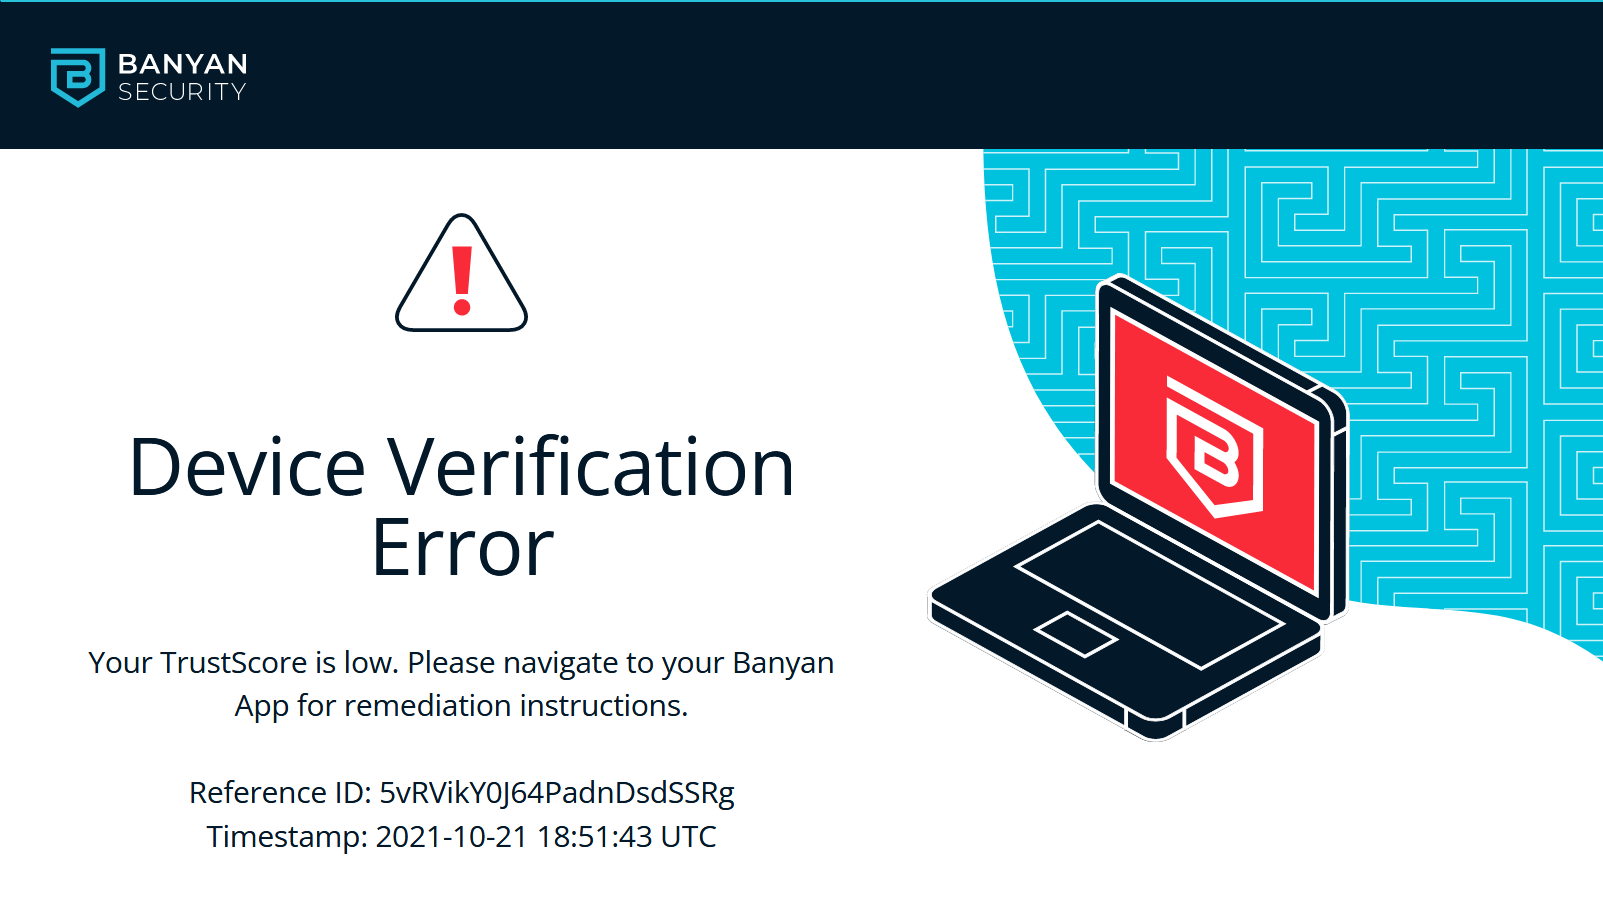
Users without an approved device will see a verification error:
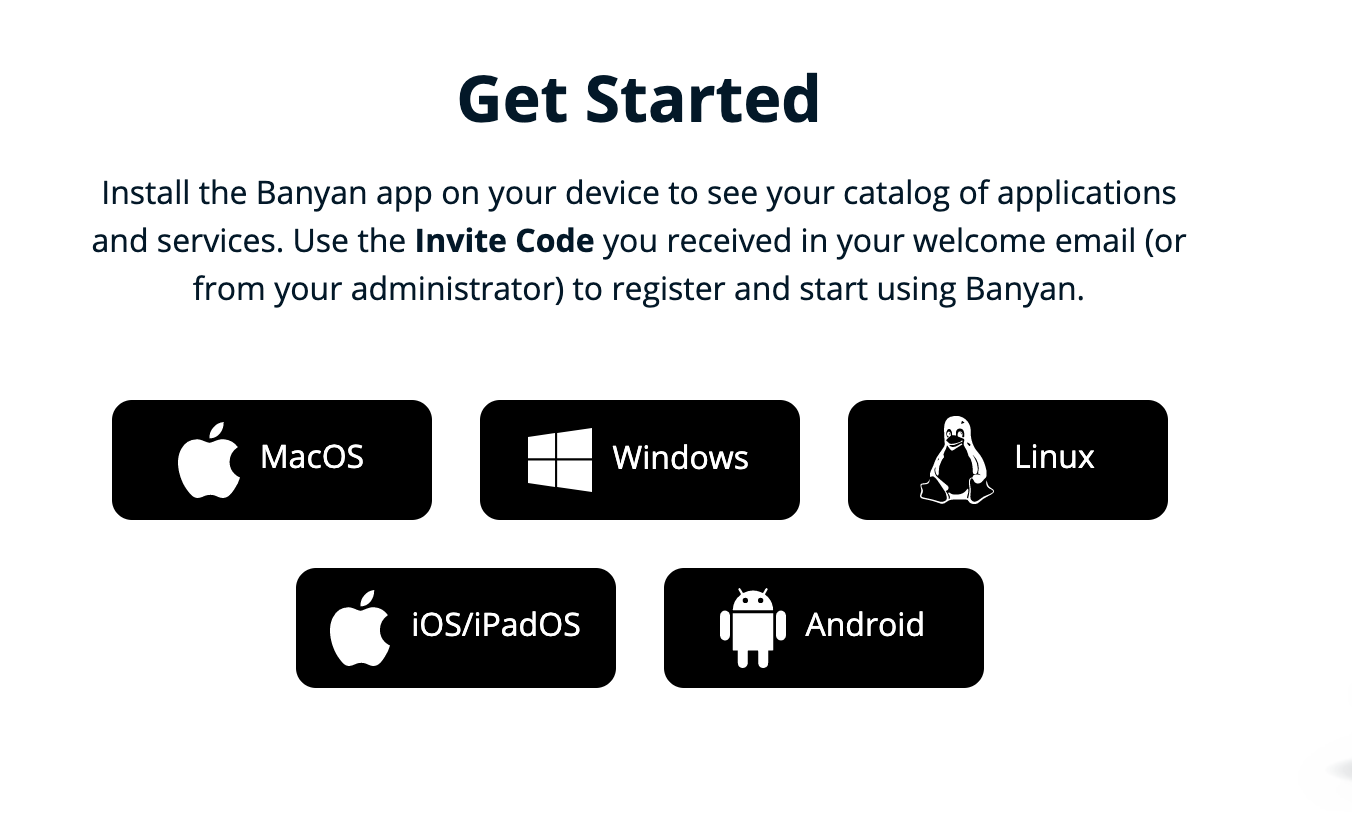
Because CSE apps are easily installed on all platforms, you can securely provision access for mobile users and contractors as well.
Step 5. Update your service to facilitate integrations
We’ll use CSE’s exemptions capability to facilitate additional integrations. In this recipe, we’ll set up exemptions for with Slack slack commands and AWS Lambda - the same techniques can be extended for other integrations as well.
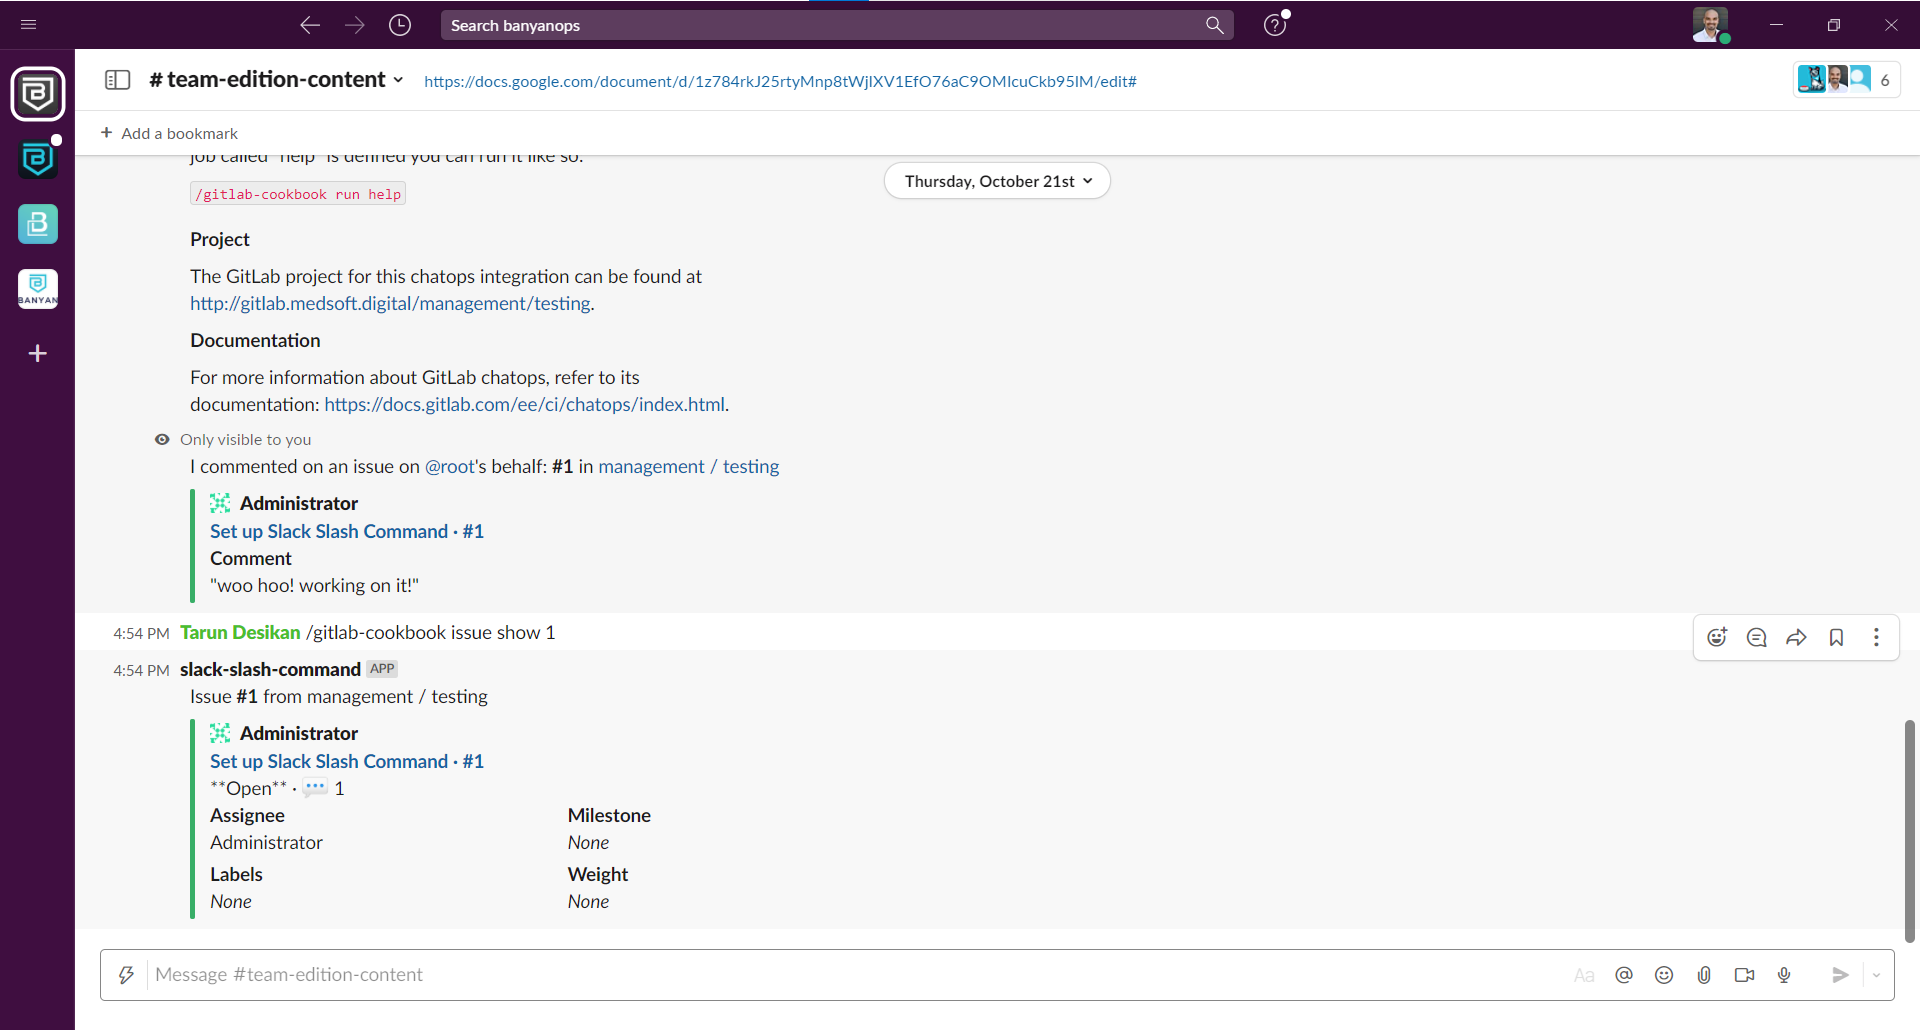
1. Slack Slash Commands
Slack slash commands allow you control and view GitLab content while you’re working in Slack.
Edit your service and add a Exempted Path for the project you will trigger from Slack - Slack slash command paths are of the format /api/.../slack_slash_commands/trigger.
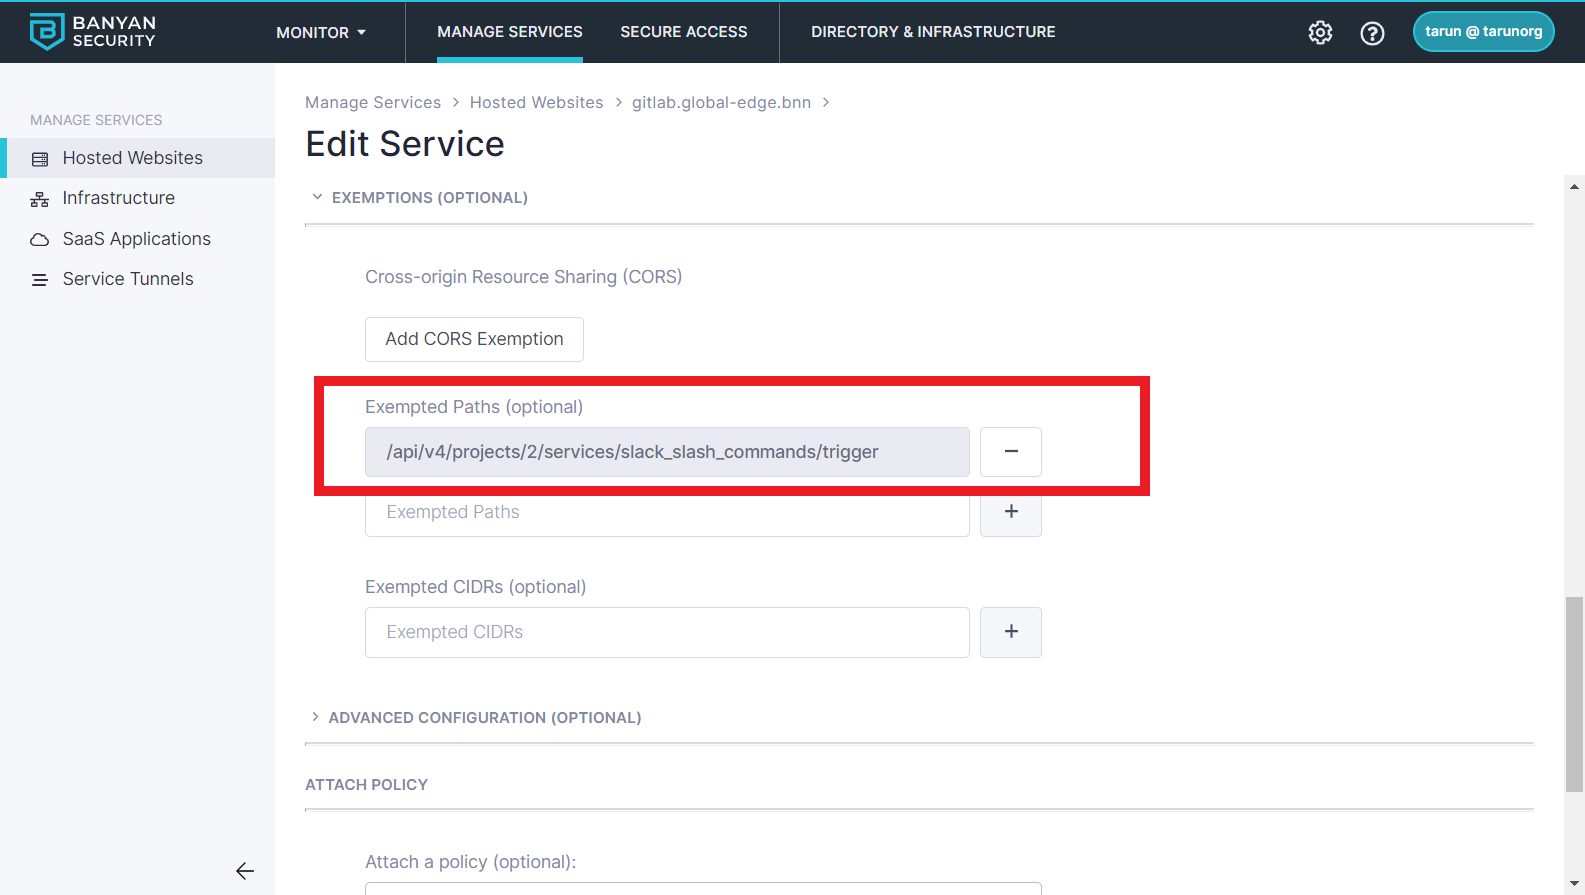
Now your Slack slash command integration will start working. Instead of creating wide IP whitelists for Slack (as you would with a VPN), you have exempted just the specific URL paths in GitLab that Slack needs to call.
2. AWS Lamda
AWS Lambda functions often need to perform comples Serverless workflows that involves pulling code from your self-managed GitLab, launching builds, etc.
Edit your service and add a Exempted CIDR range for the AWS IP range in which your Lambda will run:
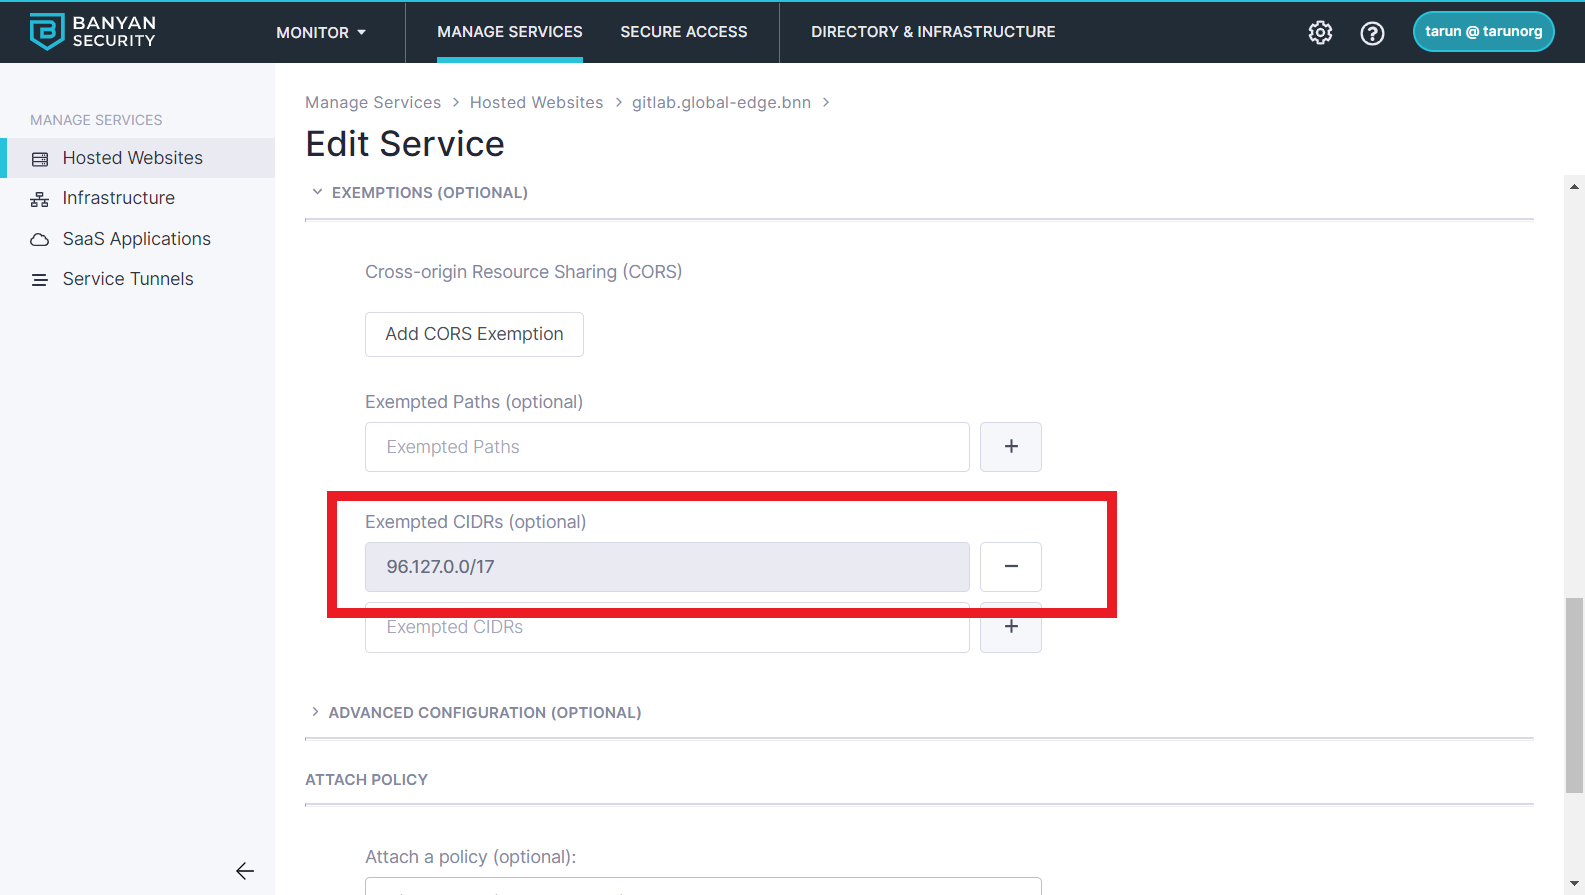
Now your Lambda function can access your GitLab. Note that these CIDR Exemptions are comparable to traditional IP Whitelists - you should use them only when absolutely necessary.
Summary
In this guide, you completed the following:
- Published GitLab on a public domain with a Let’s Encrypt certificate, while restricting access only to approved devices. Only authenticated users on those trusted devices can access your sensitive source code in GitLab.
- Provisioned easy access for mobile users and contractors while completely blocking malicious bots completely. This was all accomplished without the need of a VPN.
- Configured GitLab integrations simply, without compromising security. Instead of relying on wide IP whitelists to your entire corporate network, you can allow access to just specific URL paths in the GitLab service.
You can further extend this guide with CSE’s additional capabilities:
- Non-browser-based Git operations to GitLab including enabling SSH Key authentication and Personal/Project Access Tokens.
- Customize trust scoring and the policy to reflect your organization’s device security posture.