Secure Your Services via Banyan’s Zero Trust Capabilities
How to navigate through Banyan’s Secure Services onboarding flow
- Updated on Oct 07, 2024
- 5 minutes to read
-
Contributors

- Overview
- Steps
- Step 1: Select the secure services path
- Step 2: Choose to secure a Website or an SSH Service
- Step 3: Configure your Connector
- Step 4: Install your Connector
- Step 5a: Register a Web Service
- Step 5b: Register an SSH Service
- Step 6: Access resources on your network from a trusted device
- Step 7: Invite other admins or end users to your org
Overview
This document covers the steps required to publish and secure Banyan Services in your org.
In the zero-trust model, Banyan provides registered users’ devices access to specific protected resources. Access groups (e.g., users and roles) and resources are specified by the admin, and Banyan Policies enforce access rules.
Service-based connectivity is agnostic to the underlying network, and it’s jointly mediated by our components, the Access Tier (an identity-aware reverse proxy) and the Connector.
Steps
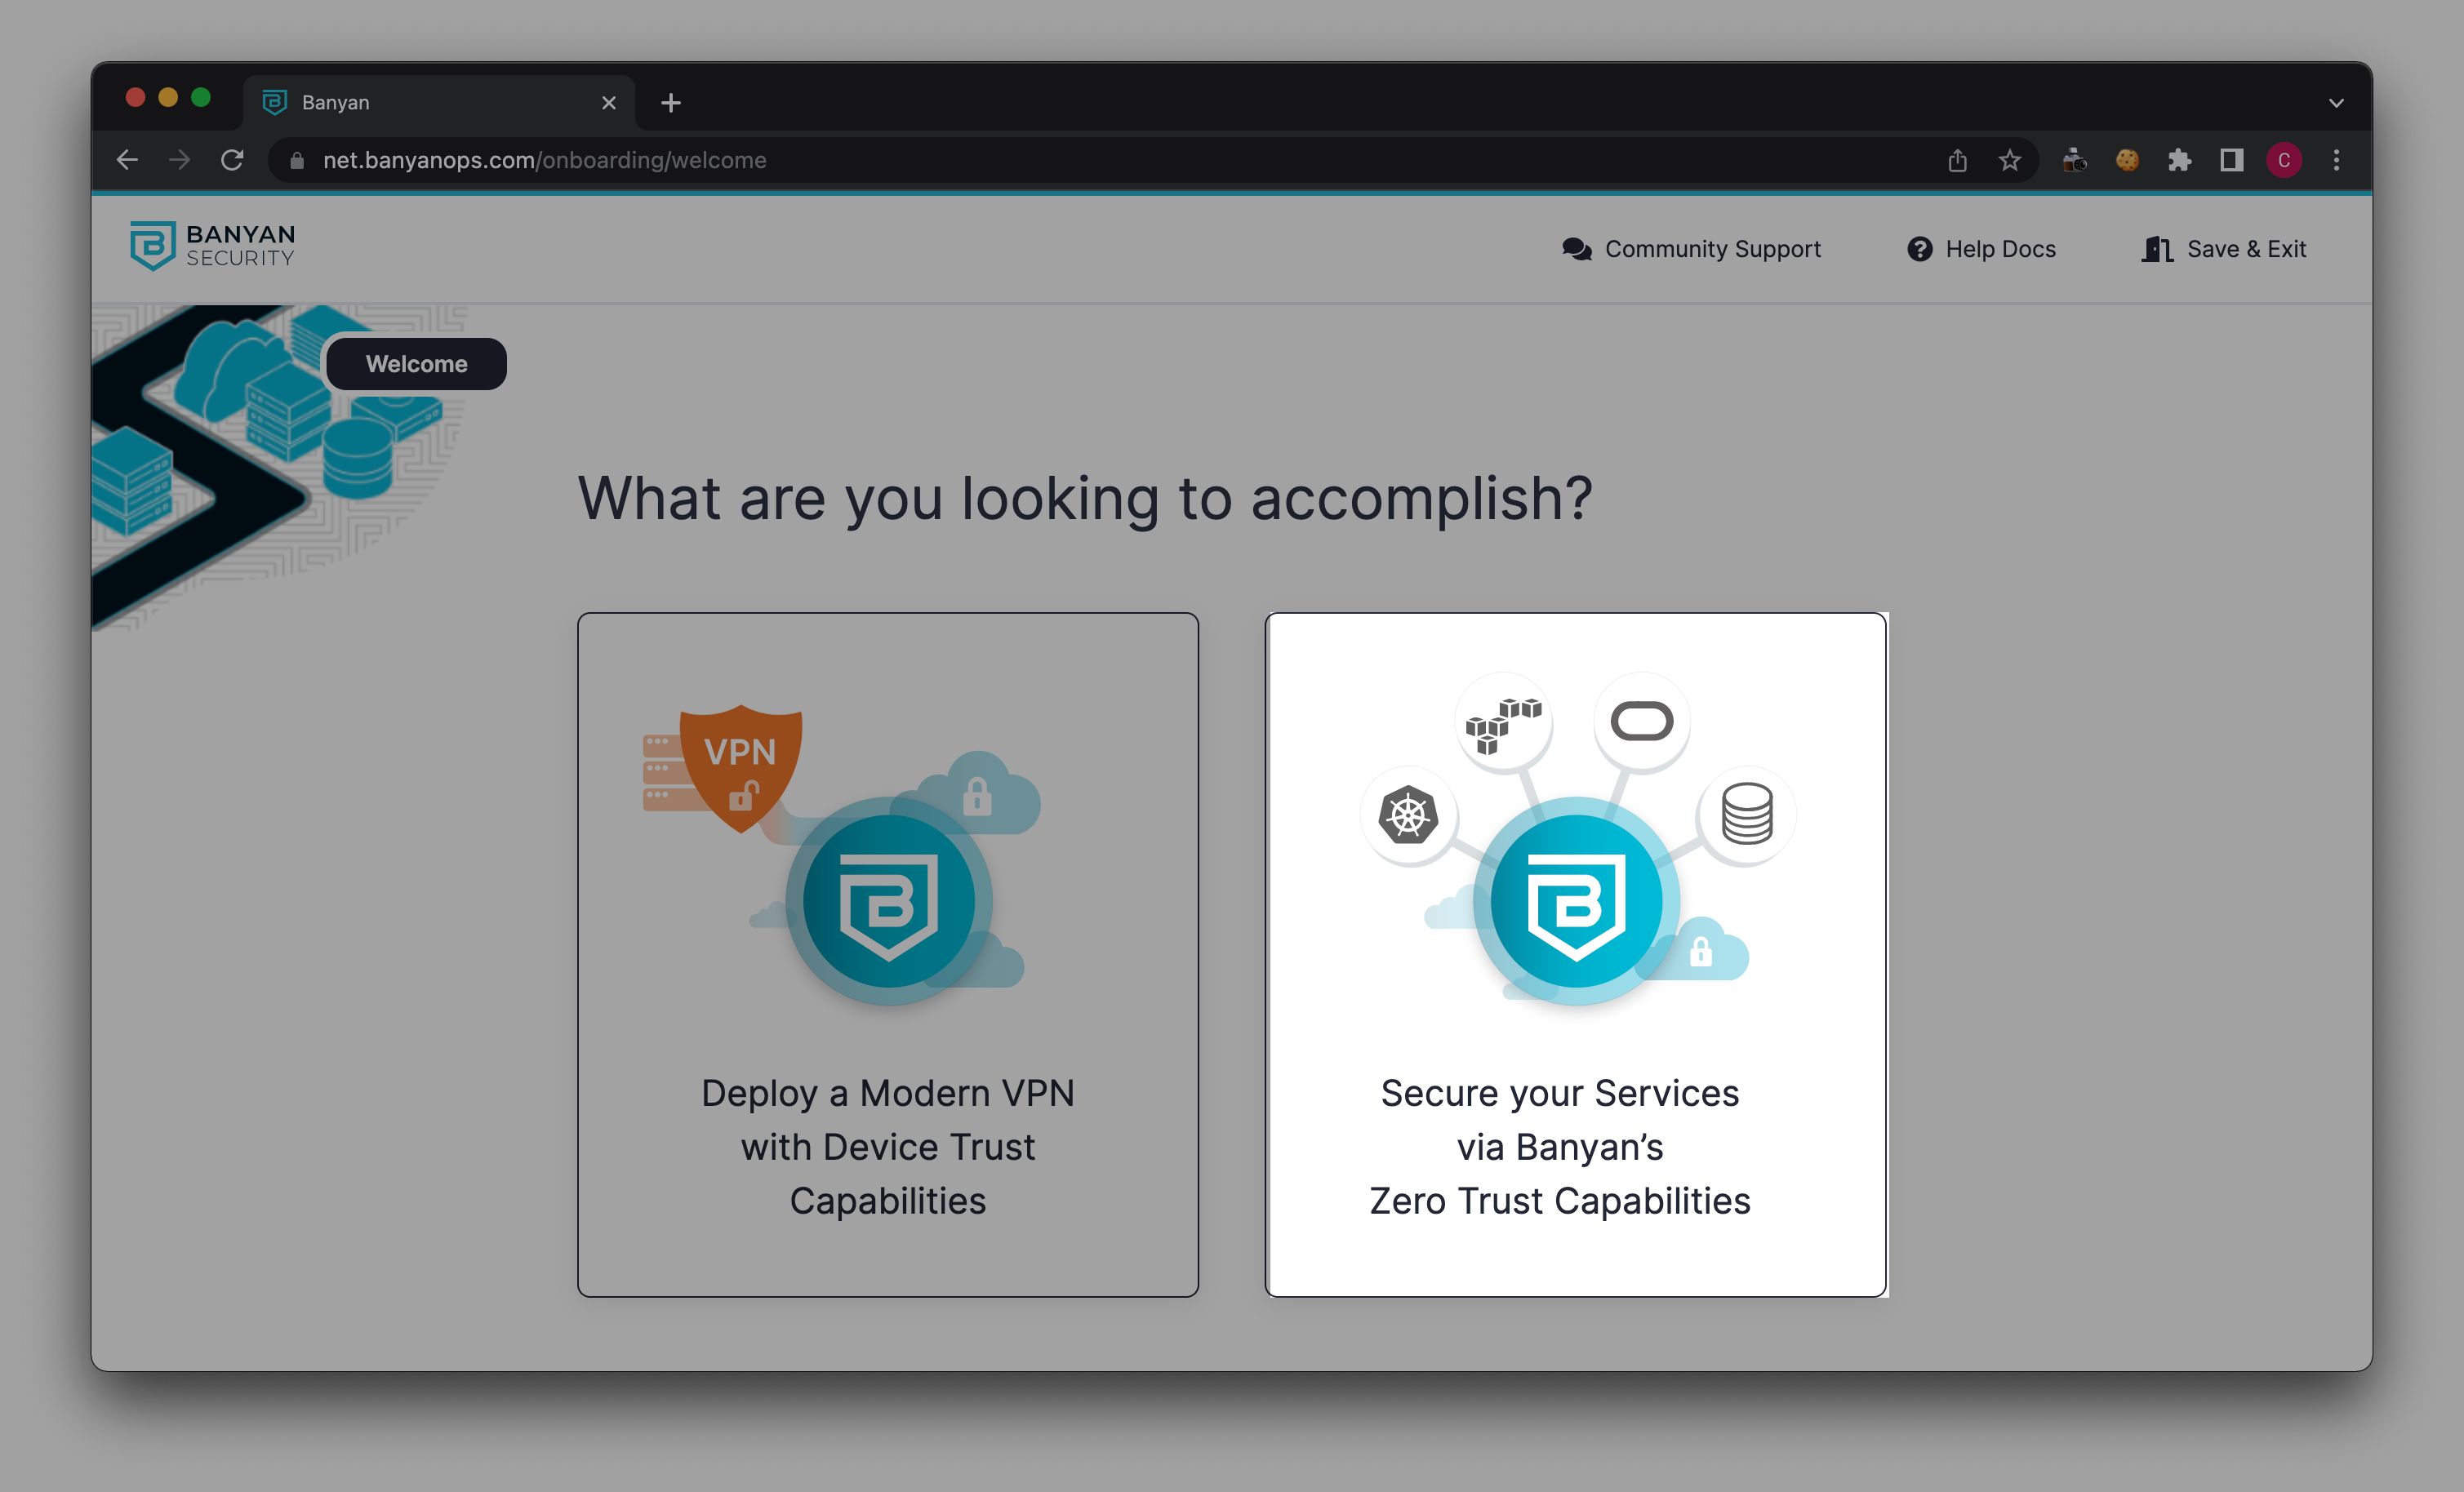
Step 1: Select the secure services path
Secure Your Services via Banyan’s Zero Trust Capabilities
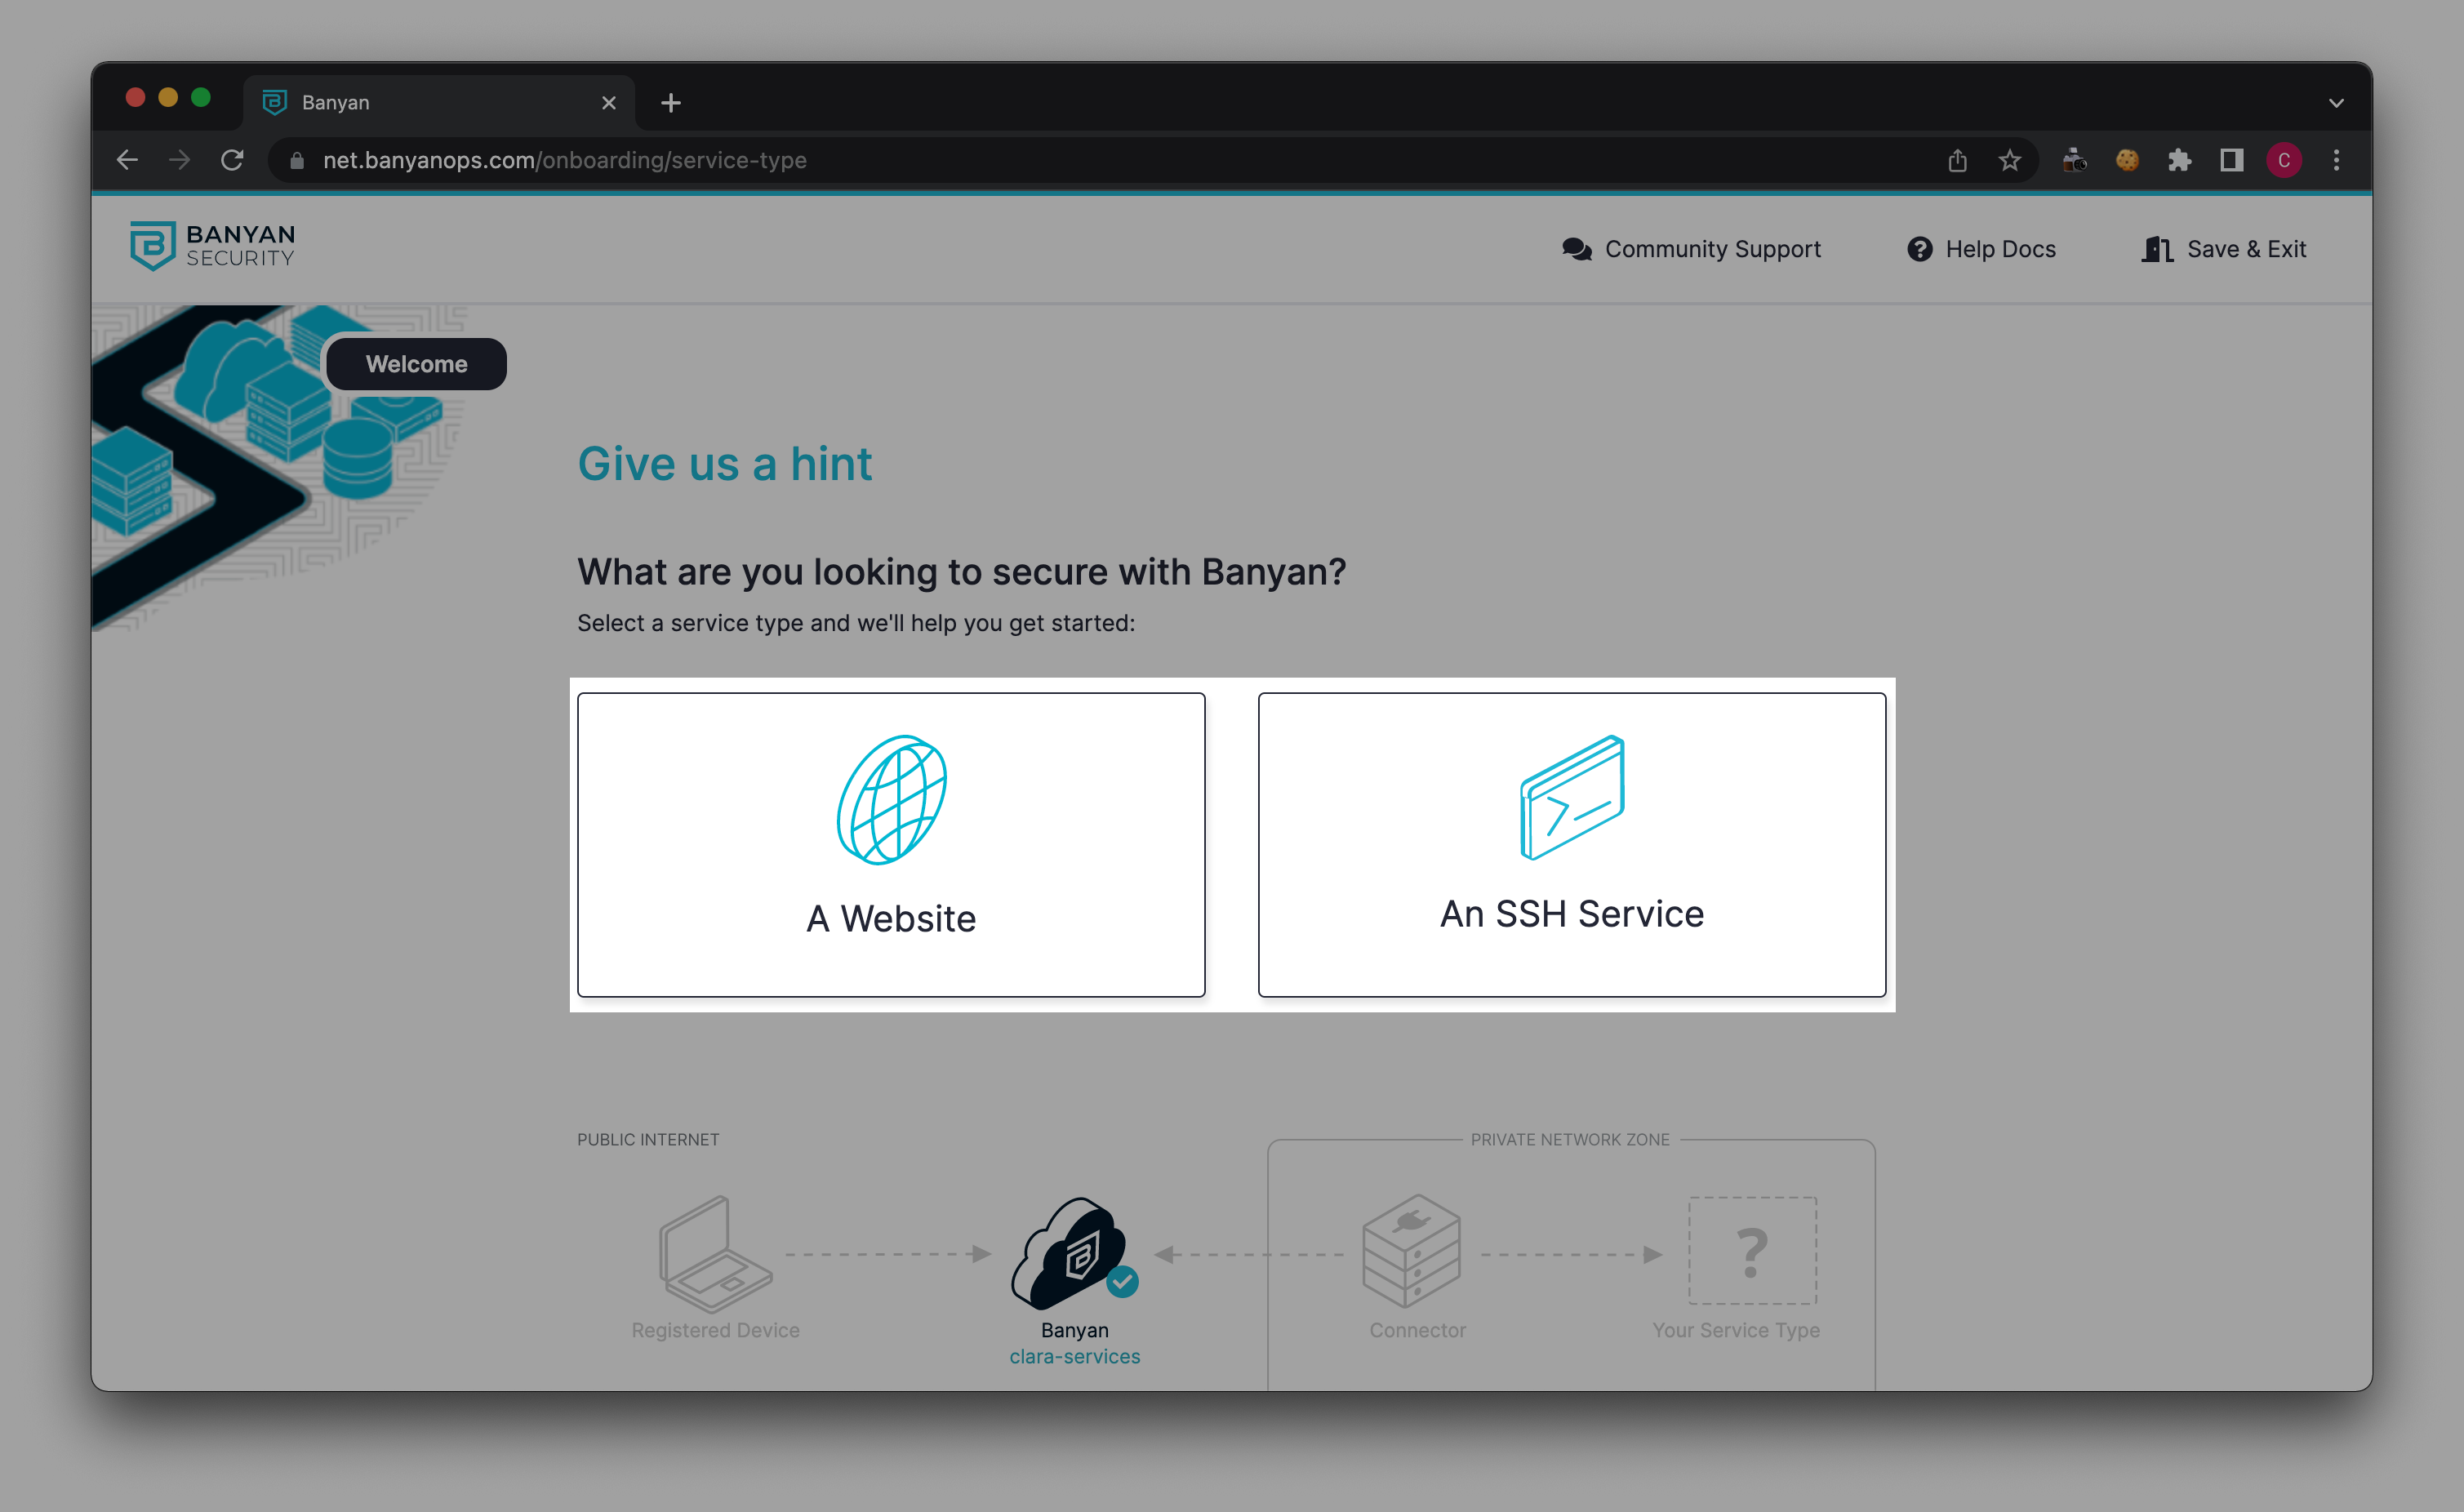
Step 2: Choose to secure a Website or an SSH Service
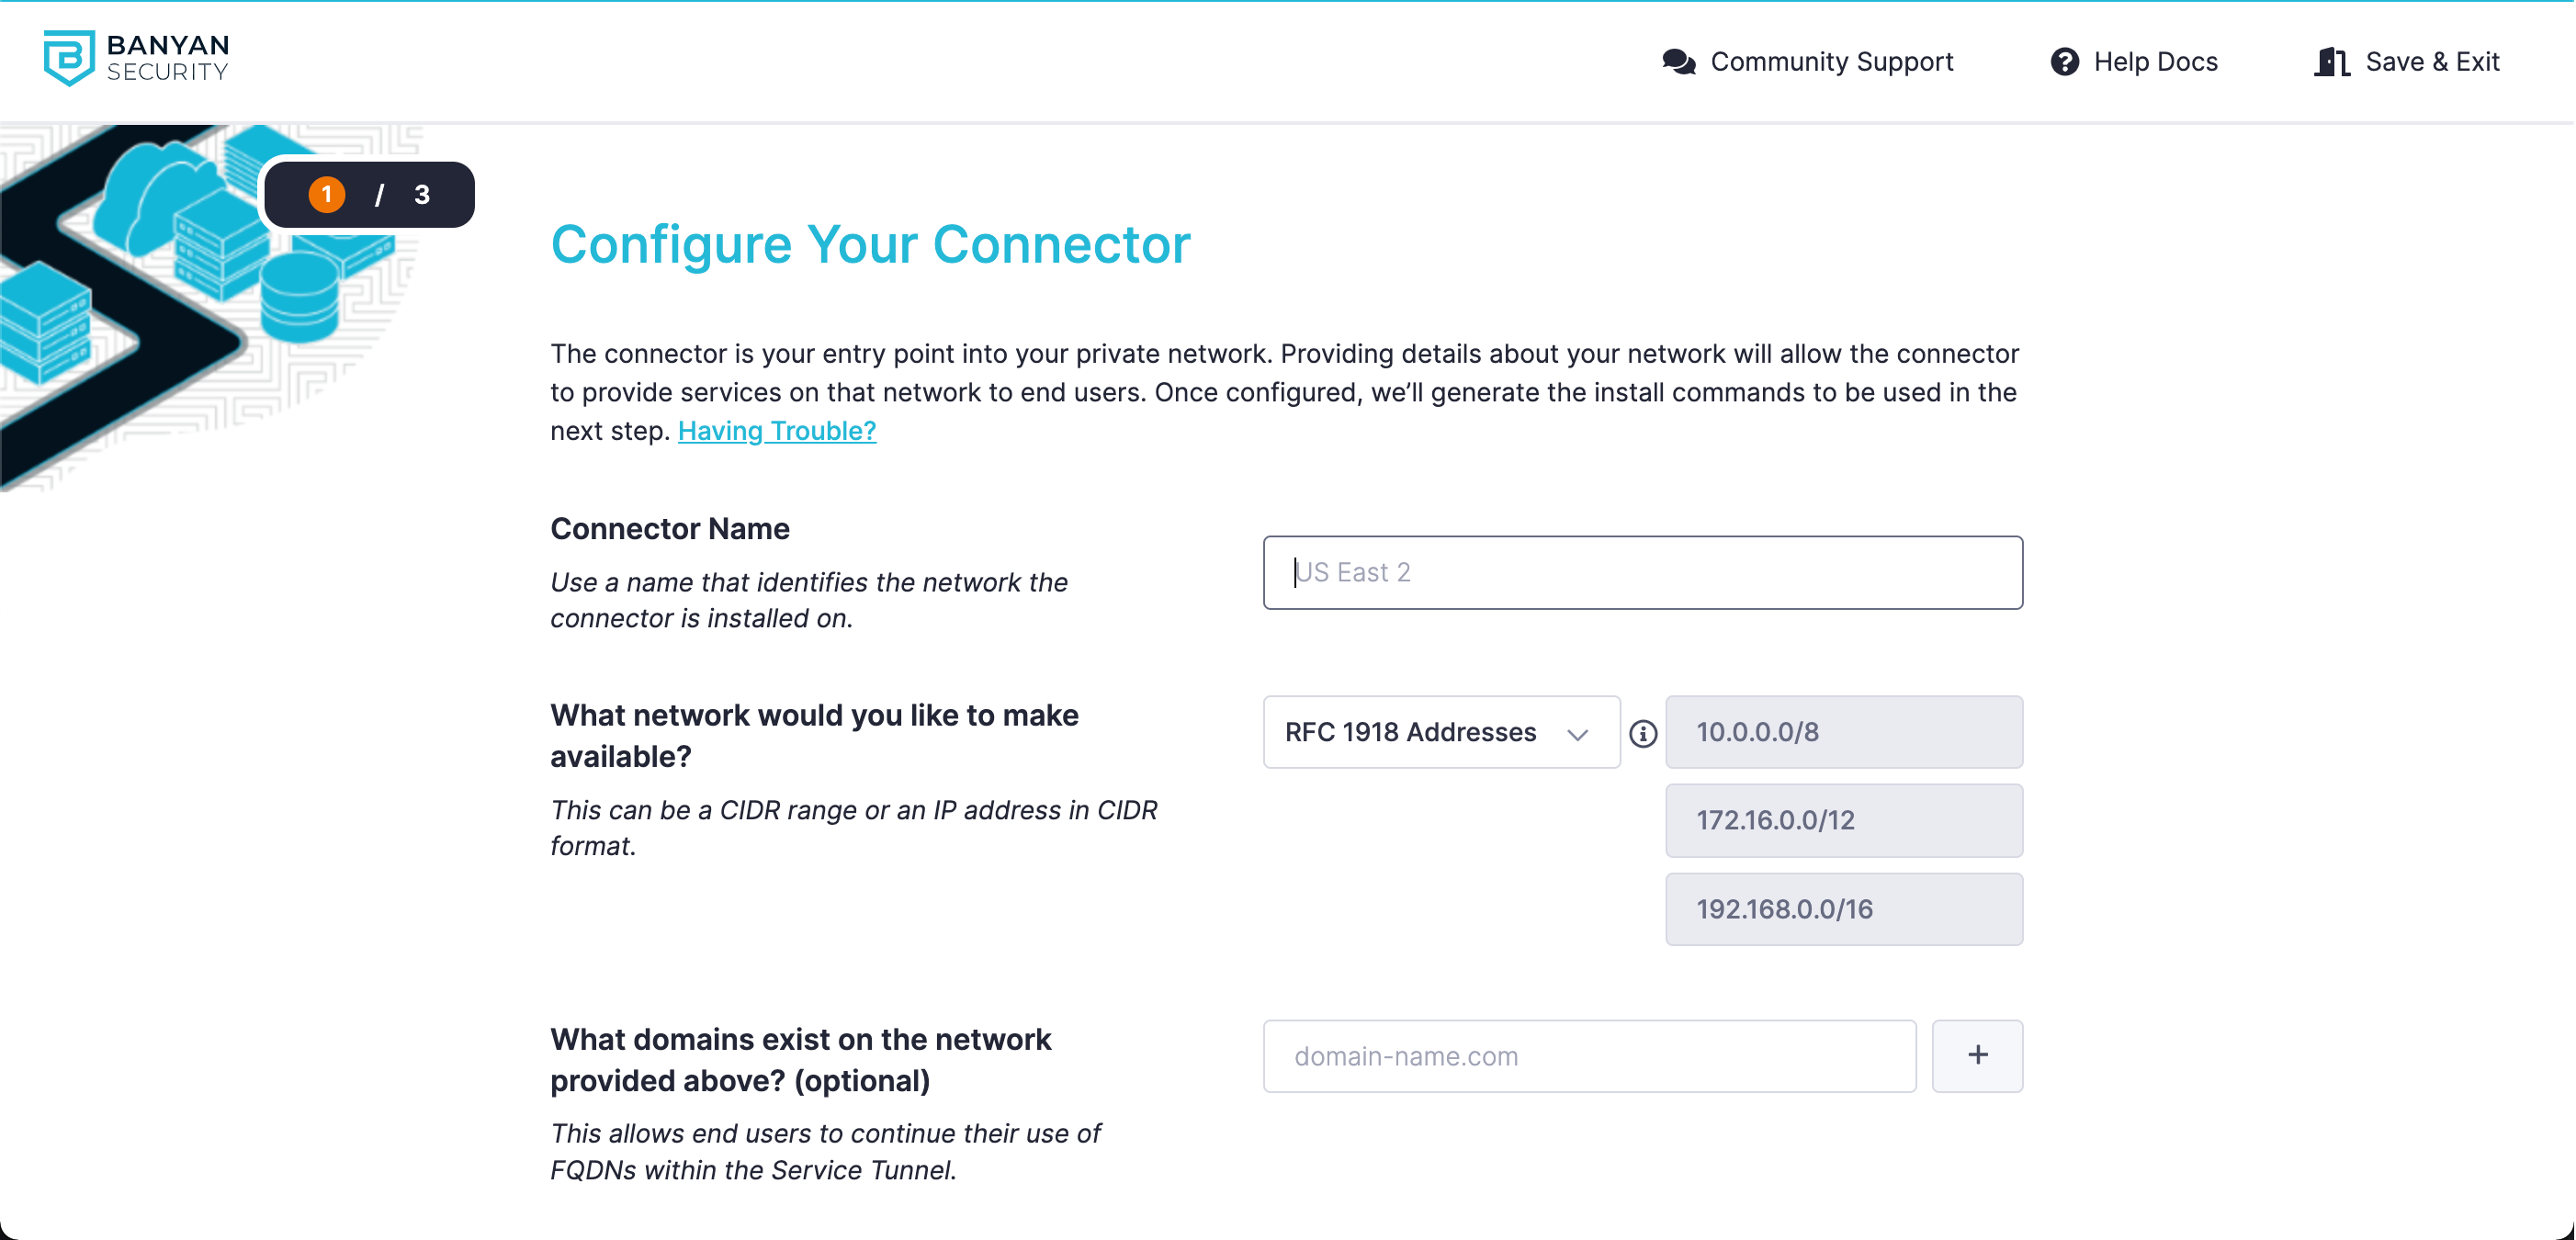
Step 3: Configure your Connector
Note: The Connector should be deployed in any location that has connectivity to your internal network.
3.1 Select Configure Connector.
3.2 Enter your Connector Name.
Step 4: Install your Connector
The Connector can be installed directly on any Ubuntu or Red Hat server, or via Docker on any machine. The machine on which you choose to install the Connector must have access to your internal network, and it must be capable of making outbound HTTPS (port 443) connections and UDP connections, to reach Banyan’s Global Edge Network (ports in the range of 30000 - 32767).
4.1 Follow the instructions in Onboarding to install your Connector.
4.2 Once your Connector is installed, select Test Connection to verify that the Connector has started up successfully and can connect to Banyan’s Global Edge Network.
Step 5a: Register a Web Service
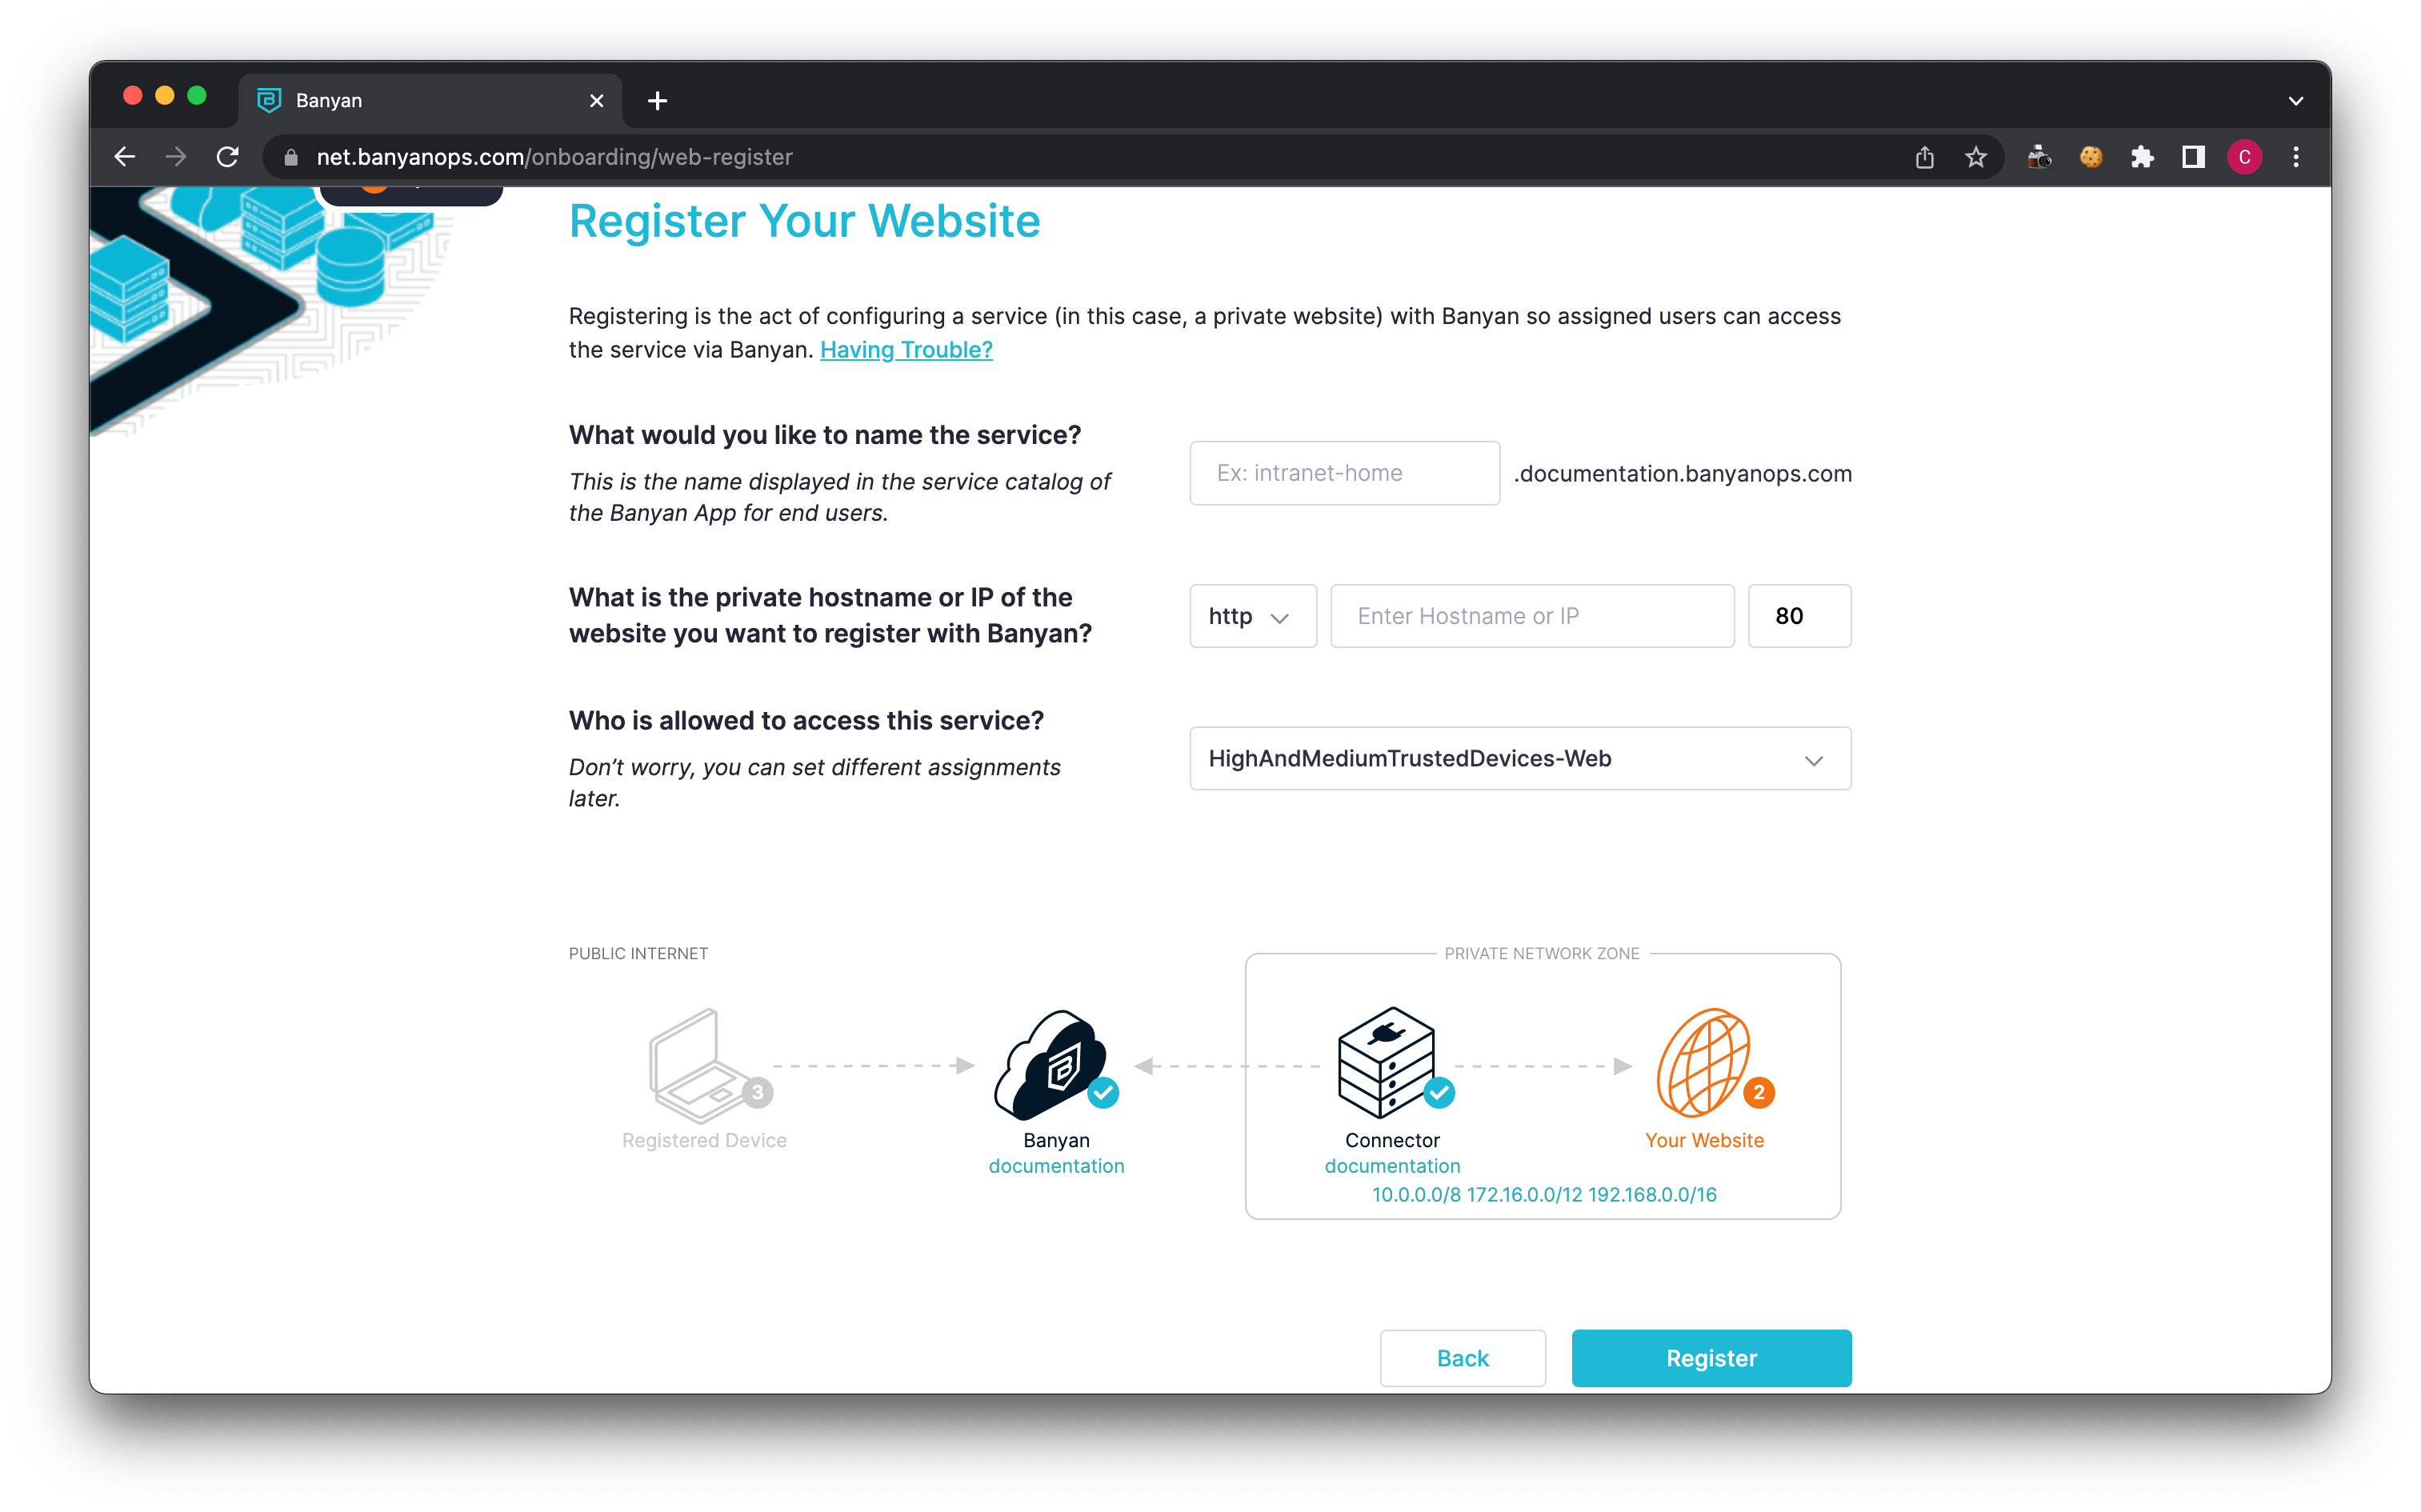
5a.1 Enter a name for your service, this will be used as part of the domain name of the service. Banyan has registered the domain
{yourorg}.banyanops.com
and will route to this service at
{servicename}.{yourorg}.banyanops.com
5a.2 Enter the private hostname or IP for this service. This is the internal route from the connector to this service. When a user visits the above domain, the Connector will send the request to this IP or domain.
5a.3 Set access permissions by selecting which devices (and corresponding Trust Levels) will be able to access this service.
By default, your org comes with two policies: AllUsersAndDevices-Web and HighAndMediumTrustedDevices-Web.
-
If you select HighAndMediumTrustedDevices-Web, Banyan will evaluate the device’s Trust Level before allowing any end user to access this service. If the user’s device Trust Level is not Medium or High, the user will be prevented from accessing this service.
-
Alternatively, select AllUsersAndDevices-Web if you don’t need to evaluate the device’s security posture before granting access to this service.
Step 5b: Register an SSH Service
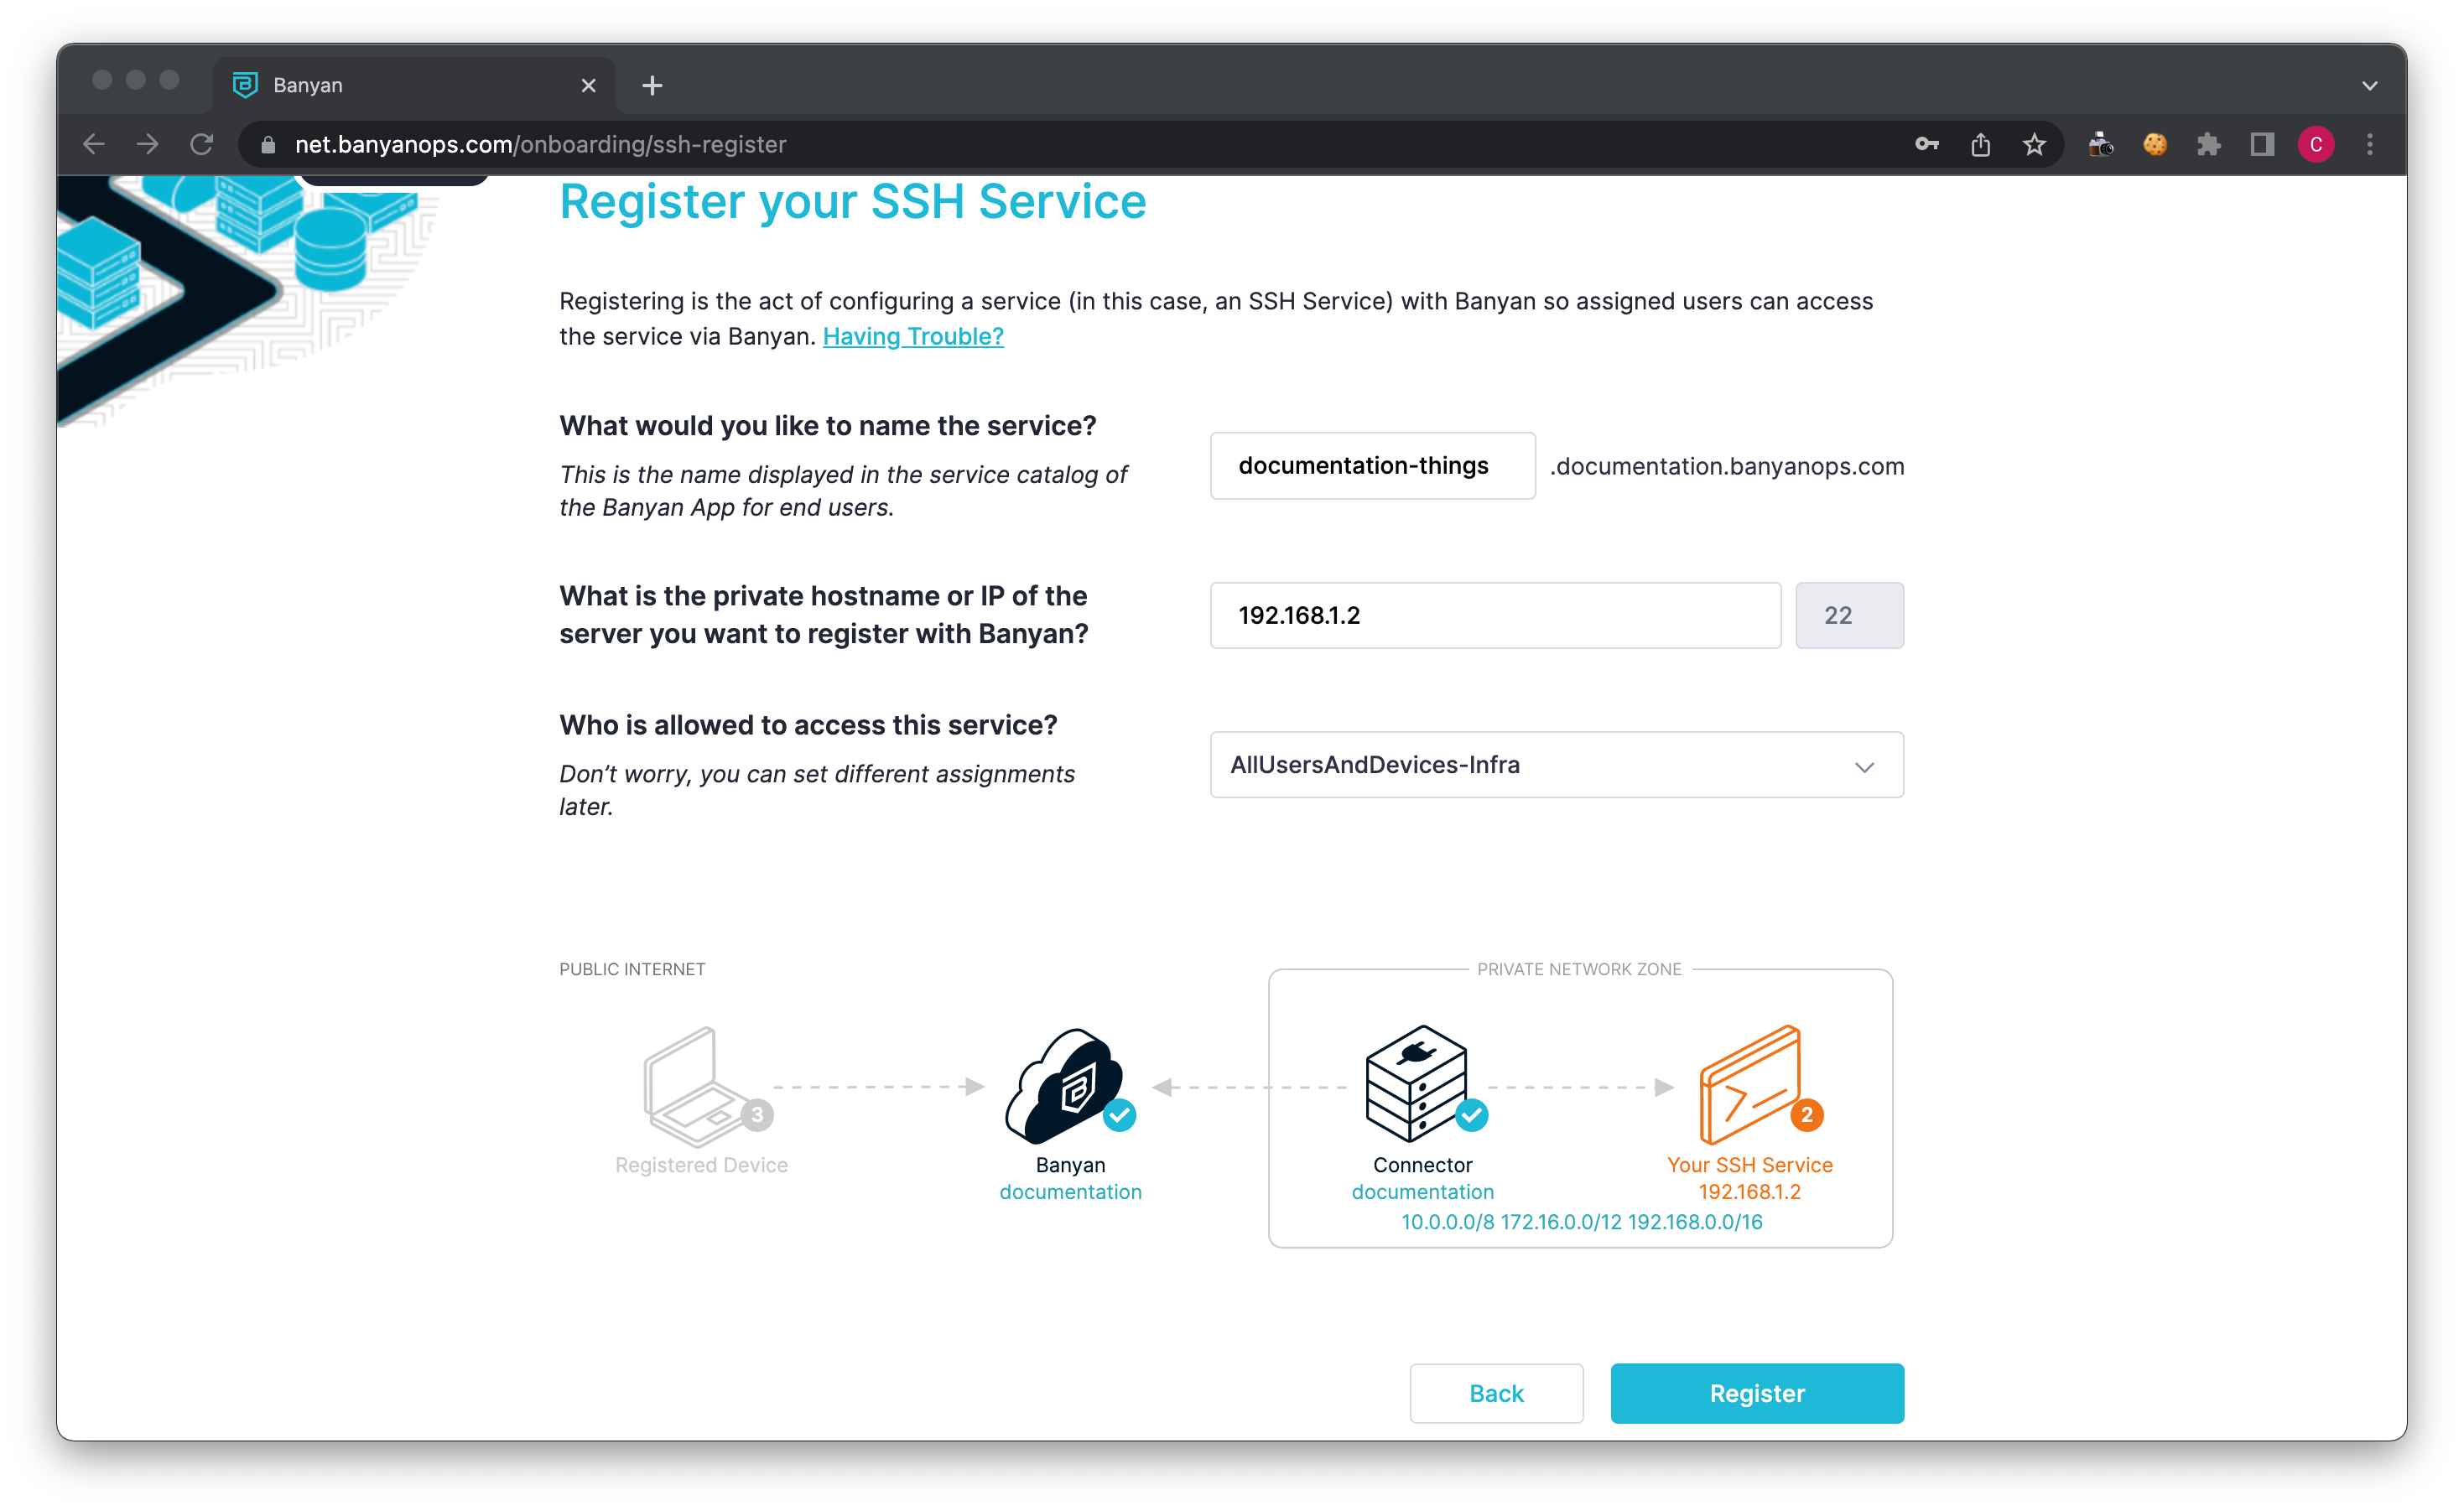
5b.1 Enter a name for your service; this will be used as the SSH hostname when accessing this service.
5b.2 Enter the private hostname or IP for this service. This is the internal route from the Connector to this service. When a user connects to this service, Banyan will send the request to this IP or domain.
5b.3 Set access permissions by selecting which devices (and corresponding Trust Levels) will be able to access this service.
By default, your org comes with two policies: AllUsersAndDevices-Infra and HighAndMediumTrustedDevices-Infra.
-
If you select HighAndMediumTrustedDevices-Infra, Banyan will evaluate the device’s Trust Level before allowing any end user to access this service. If the user’s device Trust Level is not Medium or High, the user will be prevented from accessing this service.
-
Alternatively, select AllUsersAndDevices-Infra if you don’t need to evaluate the device’s security posture before granting access to this service.
Step 6: Access resources on your network from a trusted device
At this point, you can securely access your private website or SSH into your private computer from any macOS, Windows, Ubuntu, or Red Hat-trusted device. Follow the instructions to download and install the Banyan desktop app, and connect to the Service you created:
6.1 Download and install Banyan’s desktop app.
6.2 Open the Banyan desktop app, and enter your org’s Invite Code and follow the prompts to register your device.
6.3a To access a web service, open a browser and enter the full domain configured in step 5a.1. Your browser may prompt you to allow it access to your client certificate, make sure to select “Always Allow”.
6.3b To access an SSH service, navigate from Services > Infrastructure in the Banyan app and locate the service created in Step 5b. Select “Connect”, then use your preferred SSH client to connect. The SSH target will be the name of the service configured in Step 5b.1.
Step 7: Invite other admins or end users to your org
At this point, you can invite other admins to help you configure your org, through the Command Center. You can also invite end users and give them access to your private networks and services.
To do this, complete Onboarding by selecting Explore the Banyan Console, and complete the following steps:
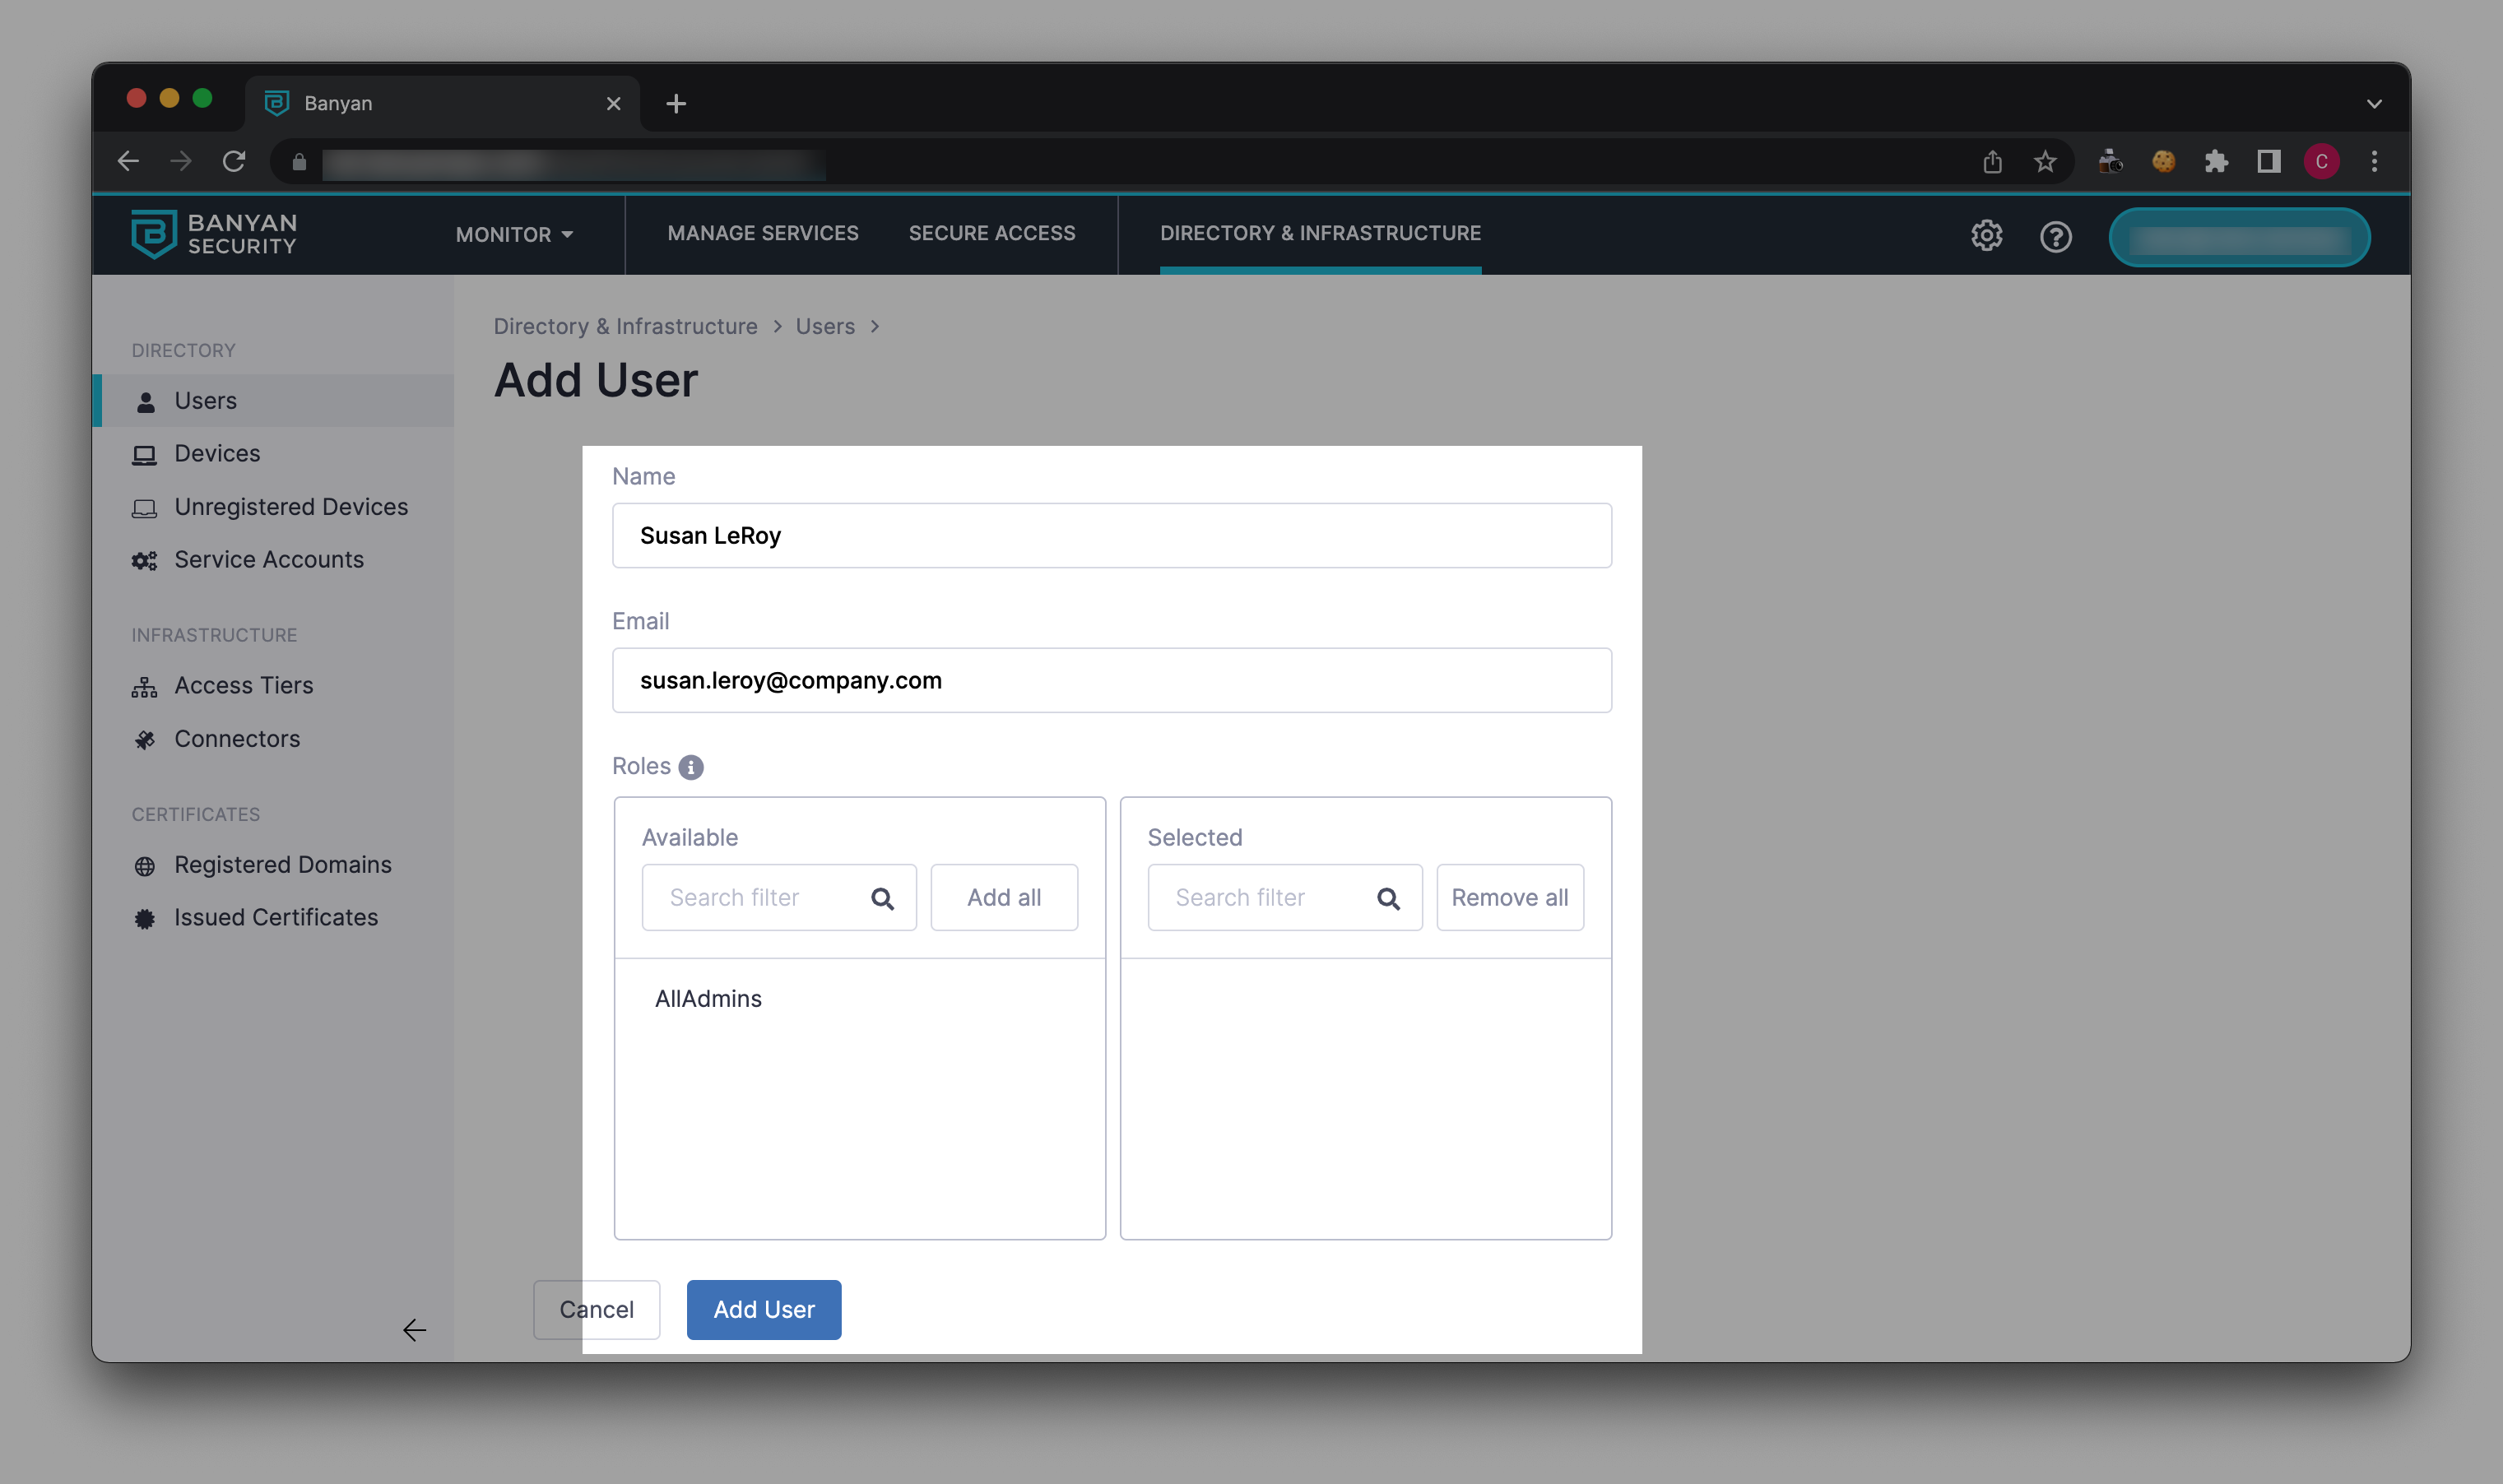
7.1 In Banyan’s Command Center, navigate from Directory & Infrastructure > Users, and select Add User.
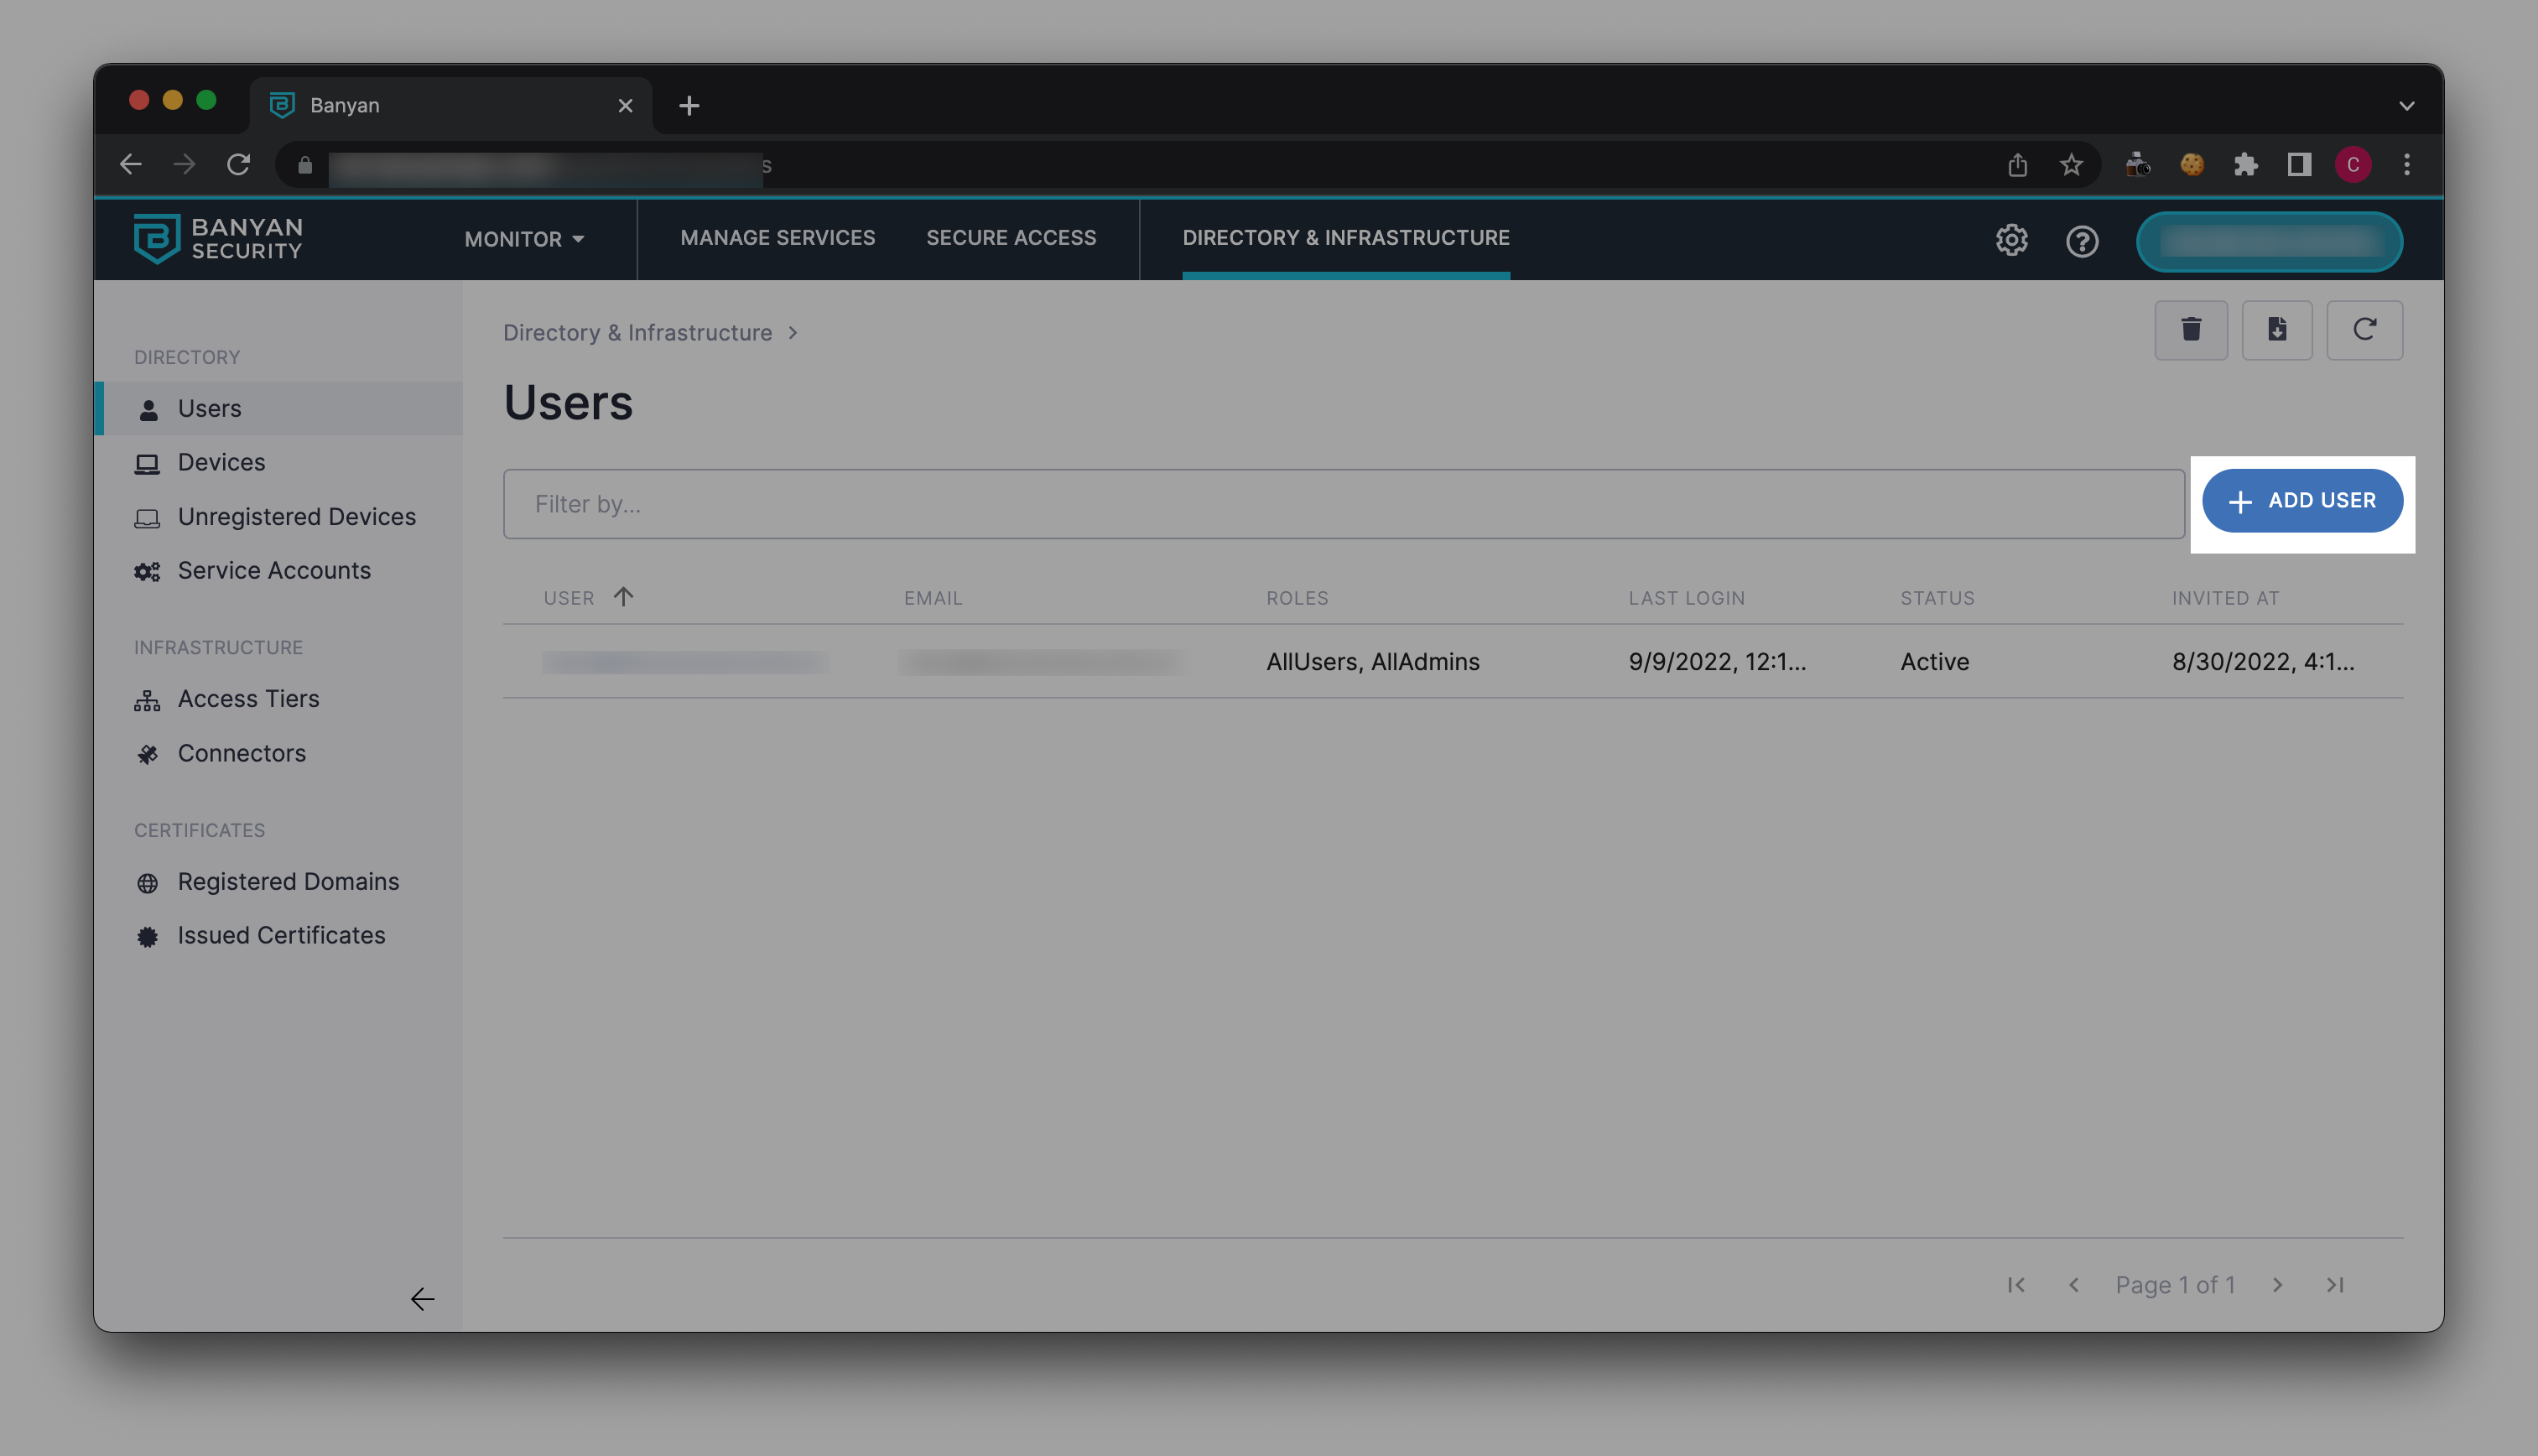
7.2 Enter the new user’s Name and Email in their respective fields.
7.3 Under Roles, select a role from the Available category. This will transfer your selected role to the Selected category.
7.4 Select Add User.