Configure High Availability (HA) for your CSE Connector
How to achieve HA with on-premise firewalls or Connectors on VMs to ensure infrastructure resilience
- Updated on Feb 26, 2026
- 12 minutes to read
-
Contributors

- Overview
- Set up firewall-based high availability (Active/Standby)
- Set up high availability for standalone Connector deployments
Overview
This doc outlines the general set-up required to achieve High Availability (HA) for CSE Connectors, using either native firewall features or third-party hypervisor orchestration. High availability setups minimize downtime during hardware failures or maintenance.
Use this guide to eliminate single points of failure within your network architecture: each of these set-ups are compatible with CSE Connectors.
Set up firewall-based high availability (Active/Standby)
A pair of two identical firewalls (i.e., a Primary and a Secondary unit) can be used to create redundancy. These work in an Active/Standby mode, wherein the Primary unit handles all traffic while the Secondary unit remains ready to take over if the Primary unit fails. When “Stateful Synchronization” is enabled, the units continuously sync connection data, ensuring that active VPN tunnels and user sessions do not drop during a failover.
Note: CSE Connectors can be configured on SonicWall Gen7+ firewalls. Configuration steps are laid out in these docs.
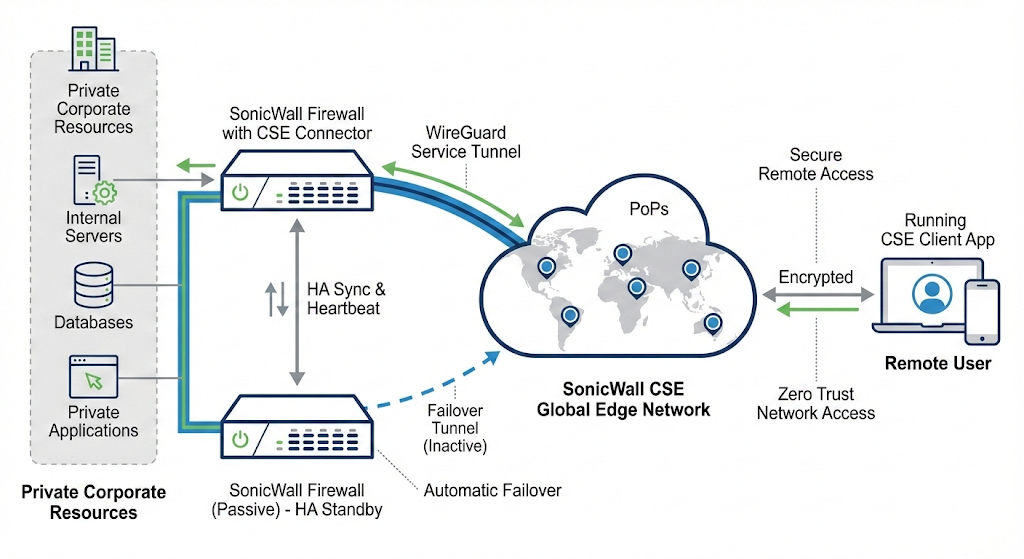
Note: The anticipated recovery timeframe for CSE tunnels following a firewall failover is approximately 2 seconds, ensuring minimal disruption to active traffic streams.
Set up high availability for standalone Connector deployments
For standalone Connector deployments (e.g., Connectors deployed on virtual machines), high availability is achieved by leveraging a hypervisor’s (e.g., VMware, HyperV, KVM) high-availability feature. In this example implementation with vSphere, these steps lay out how admins can set a policy to monitor the host server and switch that host if the server goes down. This example can be used as a general guide for how to set up high availability with any hypervisor.
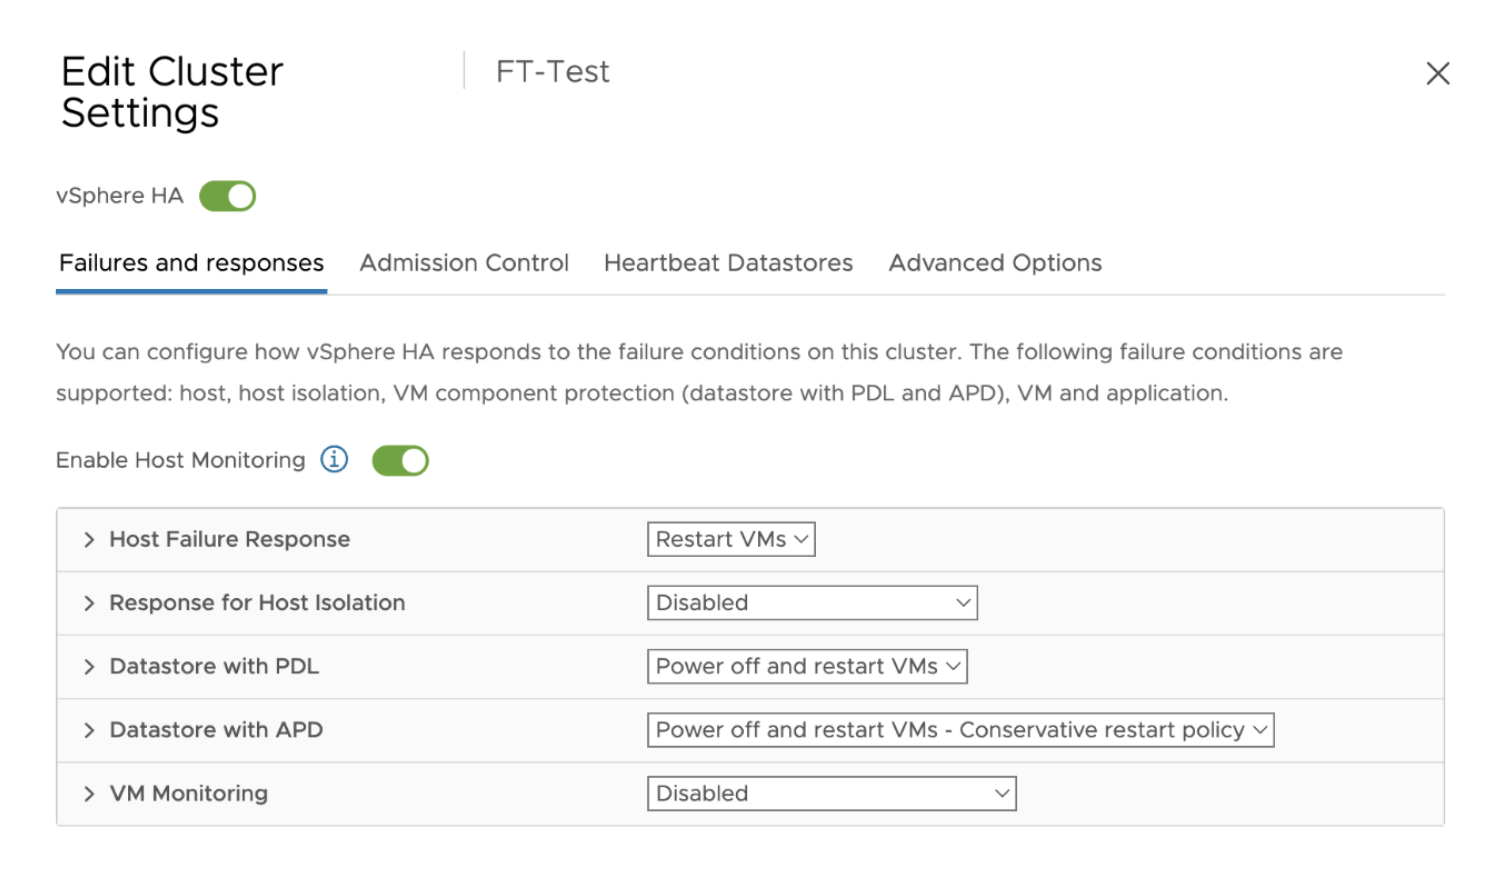
Step 1: Enable high availability
- In Edit Cluster Settings, toggle on vSphere HA.
Step 2: Enable host monitoring
- Toggle on Enable Host Monitoring and configure necessary failure conditions on your cluster.
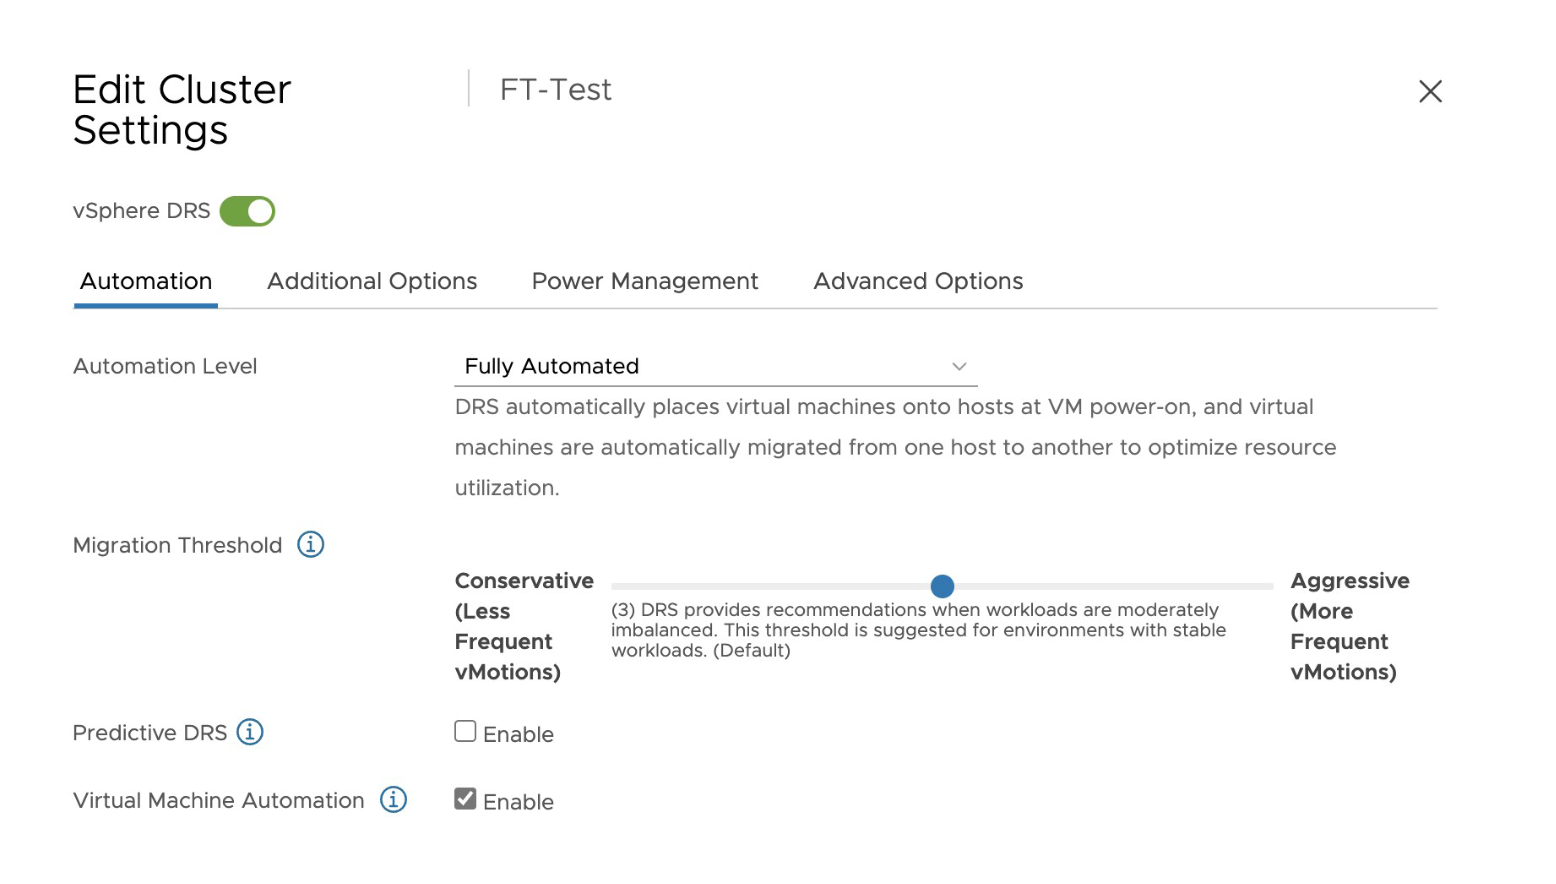
Step 3: Automate distribution of VMs across your cluster
-
Toggle on vSphere DRS.
-
Under the Automation tab, select Enable under Virtual Machine Automation.
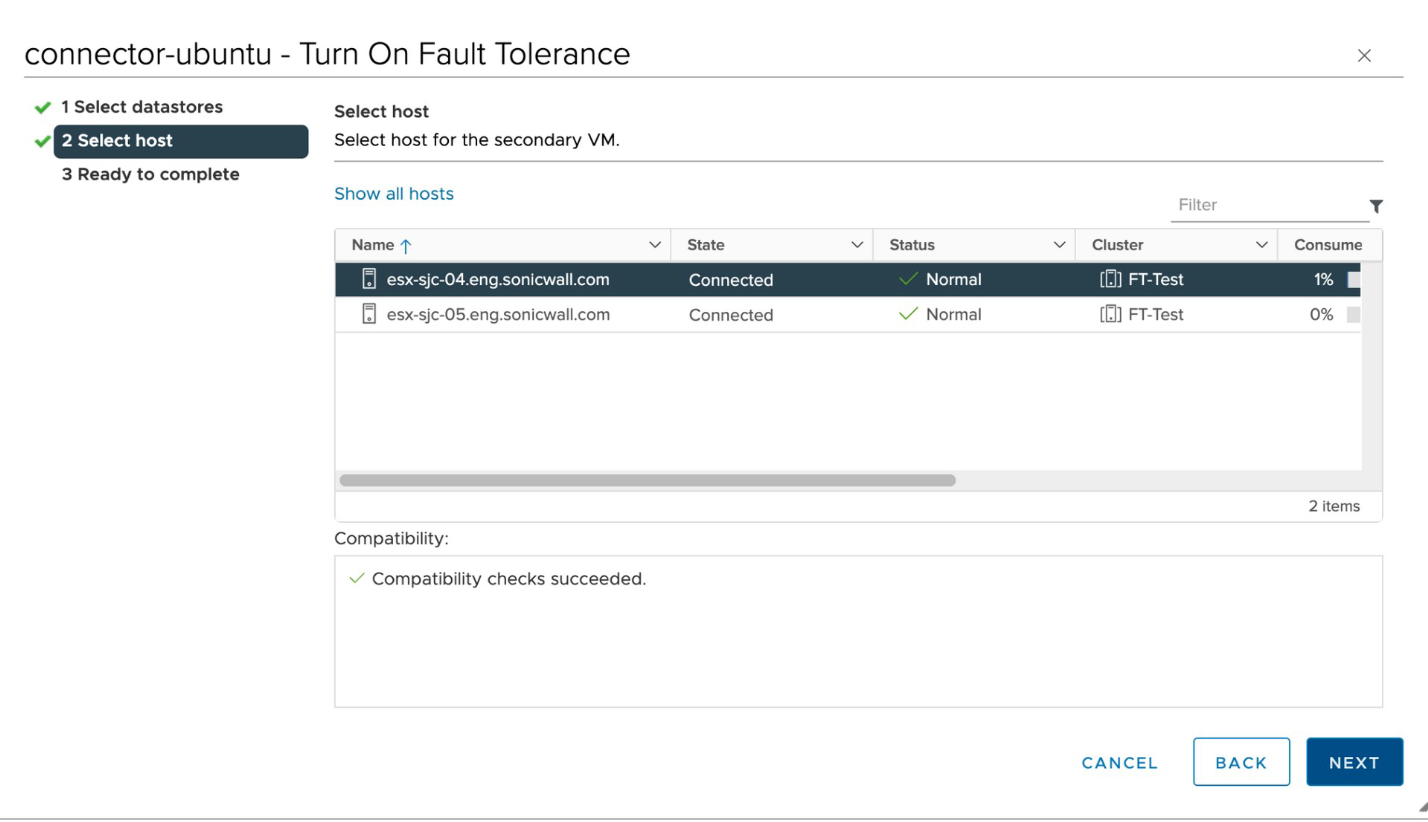
Step 4: Enable fault tolerance
- On your vSphere Client, turn on the Fault Tolerance setting.
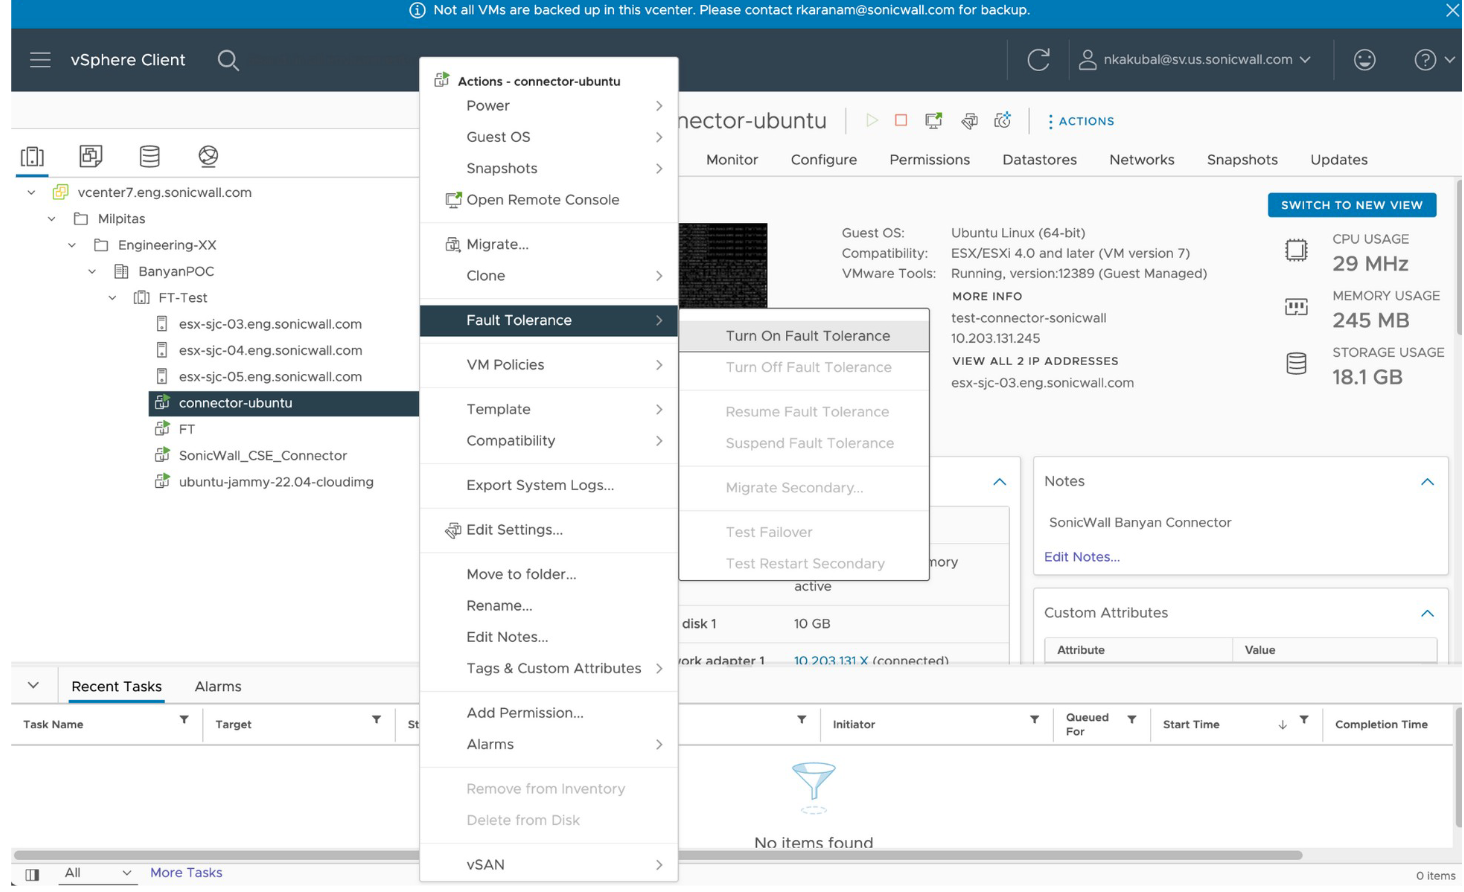
- Select the host that will have fault tolerance enabled.