Install Connector using Windows Executable
Install the Connector on Windows devices
- Updated on
Steps
Install the Connector via the following steps.
Step 1. Register your Connector
1.1 Log into the Command Center, and navigate to Networks > Connectors.
1.2 Select + Create Connector, and configure the required parameters when going through the installation wizard. An existing API key is required; these should appear in the dropdown menu of the API Key field on the Configure tab. If you don’t have an existing API key, navigate to Settings > API Keys and generate an API key with an satellite scope.
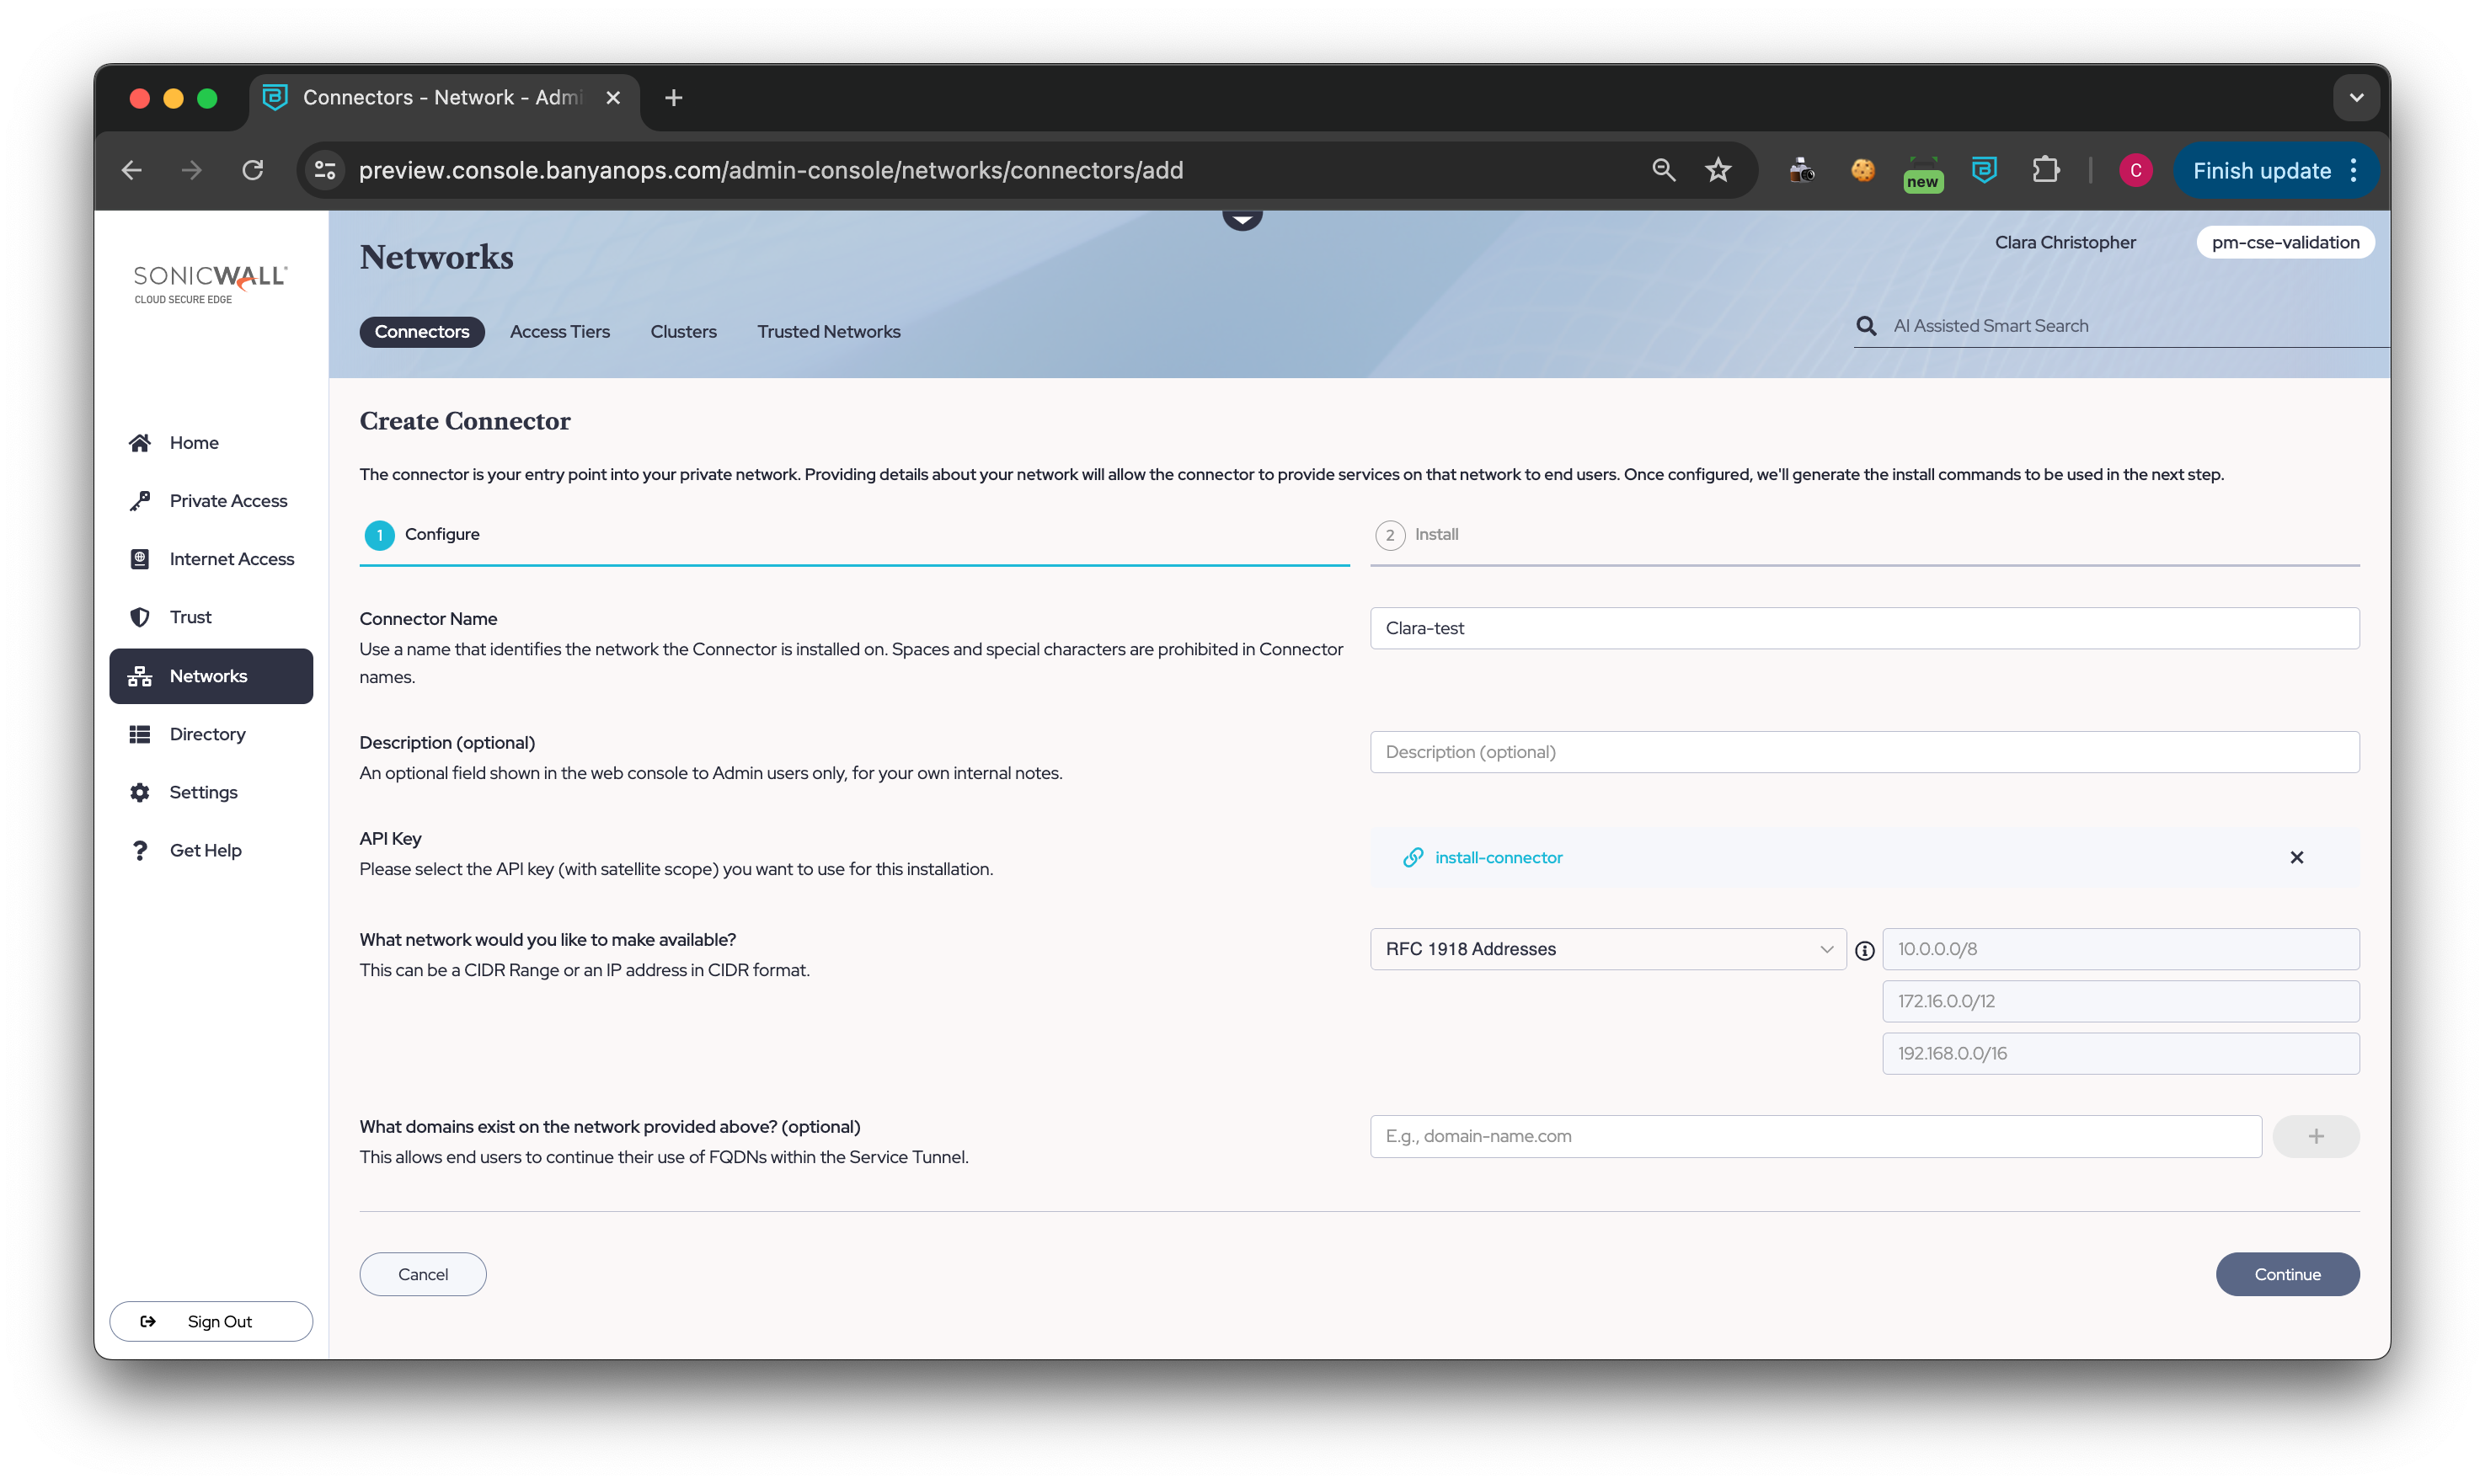
1.3 Take note of the installation parameters for use in subsequent sections.
Step 2. Review the Pre-Install Checklist
Network Reachability
-
The Connector needs to be able to connect outbound to the internet; it does not need any inbound open ports to operate correctly.
-
Ensure that the Connector server can make an outbound HTTPS connection via port 443 to the Command Center. The Connector does this to register itself and receive its configuration parameters, by making API calls to
https://{ccname}.console.banyanops.com/api/v1/…. -
Ensure that the Connector can make an outbound UDP connection to the Global Edge Network. The Connector will pick a port in the range 21000 - 59999 to set up WireGuard tunnels with the Edge Network.
-
Ensure your networking policies allow traffic to flow from the Connector server to backend machines running the applications and services you need to secure access to.
-
Enable Internet Connection Sharing on your network. This setting can be found in the network adapter settings of Windows devices.
Step 3. Download & Install Windows Executable
3.1 Download installer package.
3.2 Start installer.exe. The latest version can be found and downloaded from the Windows Connector changelog.
3.3 Choose installation location (or leave it as default).
3.4 Copy the Cloud Secure Edge (CSE) Command Center FQDN and paste it into its respective field in the executable.
3.5 Copy the API key from the Command Center and paste it into its respective field in the executable.
3.6 Copy Connector name from the Command Center and paste it into its respective field in the executable.
3.7 Select Install.

3.8 If the connectivity check was successful, select Next. If it failed, please ensure your network is configured to allow connections specified in the pre-requisite checklist, and then retry.
3.9 Select Finish.
3.10 In the Cloud Secure Edge Command Center, select Continue.
Note: Do not uncheck the Start SonicWall CSE Connector service box.