Install SonicOS Connector
Install the Connector on your firewall
- Updated on Sep 30, 2024
Steps to install the SonicOS Connector
Step 1. Review the Pre-Install Checklist
Network Reachability
-
The Connector needs to be able to connect outbound to the internet; it does not need any inbound open ports to operate correctly.
-
Ensure that the Connector server can make an outbound HTTPS connection via port 443 to the Command Center. The Connector does this to register itself and receive its configuration parameters, by making API calls to
https://{ccname}.console.banyanops.com/api/v1/. Note that the CCNAME for North American data centres isnet, and the CCNAME for European data centers iseucc(i.e.,https://net.console.banyanops.com/api/v1/for U.S. andhttps://eucc.console.banyanops.com/api/v1/for Europe). -
Ensure that the Connector can make an outbound UDP connection to the Global Edge Network. The Connector will pick a port(s) in the range 21000 - 59999 to set up WireGuard tunnels with the Edge Network.
-
Ensure your networking policies allow traffic to flow from the Connector server to backend machines running the applications and services you need to secure access to.
- Installing the SonicOS Connector requires SonicOS versions 7.1.2 or greater.
Step 2: Establish the connection between your SonicWall firewall and CSE Connectors
2.1 In your SonicWall firewall dashboard, select Network.
2.2 In the table of contents on the left of the webpage, select Cloud Secure Edge.
2.3 Select Access Settings.
2.4 Turn on the Enable Cloud Secure Edge Connectivity toggle. Then select Accept.
2.5 Select the Connectors tab: here you can view a list of reporting Connectors. Select the Connectors that you want to enable by toggling on ENABLE on the specific Connector. This will establish the connection.
Step 3: Configure private CIDRs (networks or hosts) for your Connector
3.1 Select the edit button under CONFIGURE on a reporting Connector that you want to configure.
3.2 Select the edit button again in the Configure Connector pop-up.
3.3 An Edit Allow List module will pop up: Select the Private CIDRs tab, and then select the networks or hosts that you want to configure for your Connector. Select a network or host from the left column, and then select the arrow button. That network or host should now appear in the In Group section, in the right column.
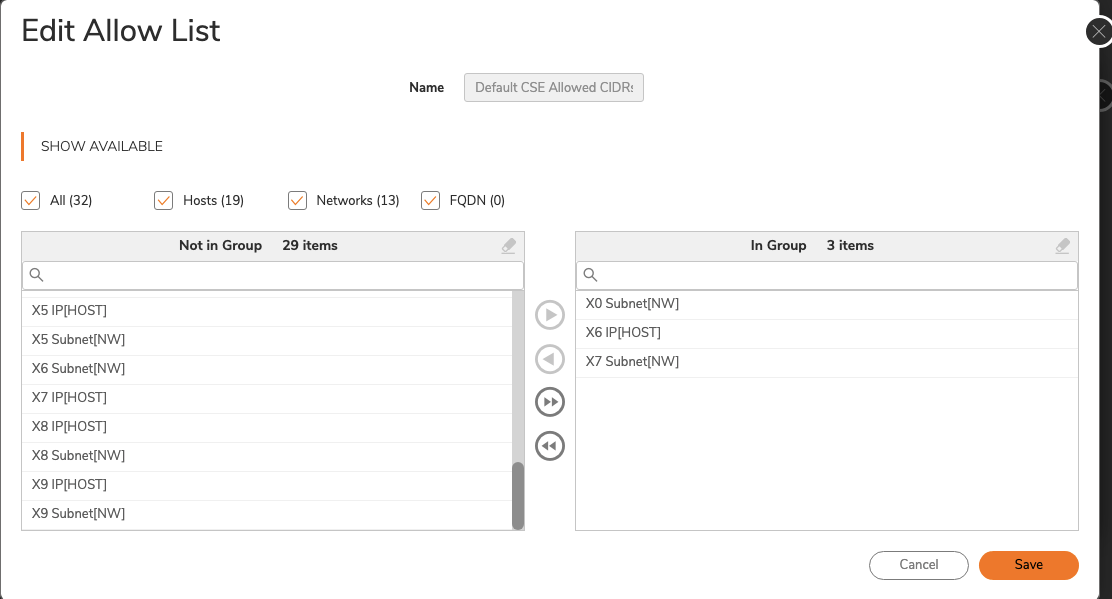
3.4 Save.
3.5 Once saved, the configured private CIDRs should be viewable in the Configure Connector list in SonicWall, as well as viewable in the CSE Cloud Command Center (in your list of reporting Connectors).
Step 4: Configure domains for your Connector
4.1 Select the Domains tab in the Configure Connector module.
4.2 Select + Add.
4.3 An Add Split DNS module will pop up: Enter the relevant Domain Name.
4.4 Enter the internal DNS server IP address that resolves the above domain (in Step 3.3) in the IPv4 DNS Server Primary field.
4.5 Optional: If you have additional internal DNS servers that resolve the above domain name, enter their IP addresses in the IPv4 DNS Server Secondary and IPv4 DNS Server Tertiary fields respectively.
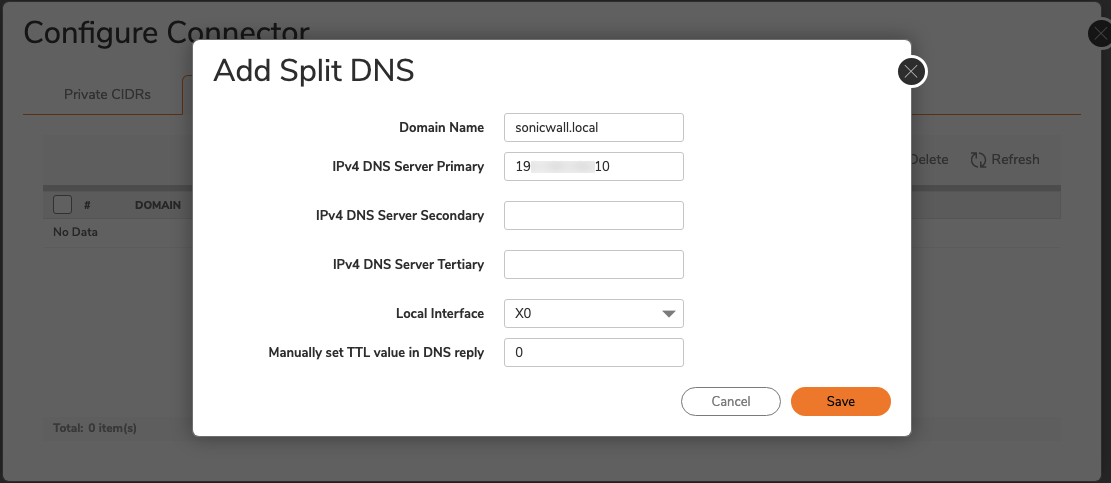
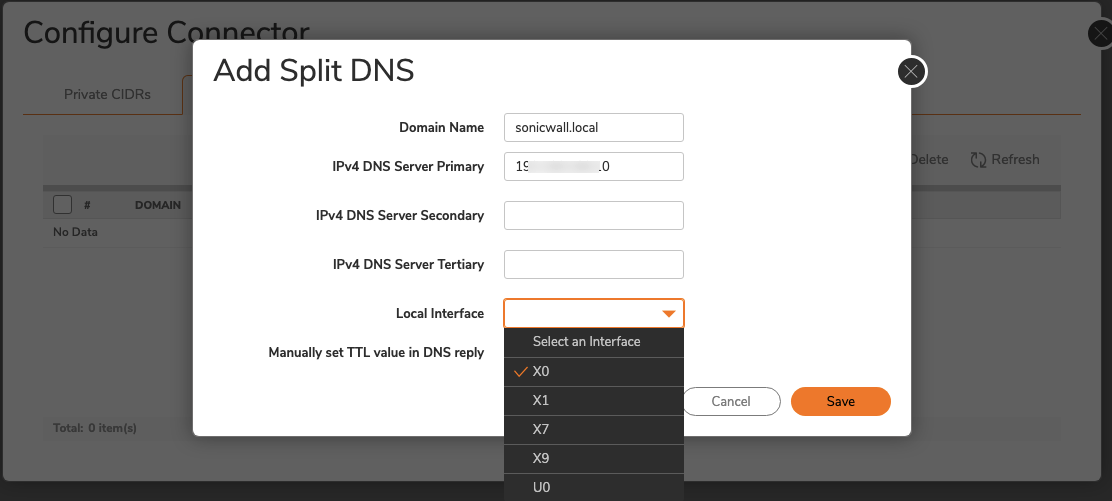
4.6 Select the Local Interface that you want to use.
4.7 Save. Your configured domains should now be viewable in the Configure Connector module list, under the Domains tab.
Step 5: Update your DNS Settings
5.1 On your SonicWall firewall, navigate from DNS > Settings (in the table of contents on the left side of your dashboard).
5.2 Under IPv4 DNS Settings, ensure that Specify DNS Servers Manually is selected, and then enter your internal DNS server address(es) (from Step 3.4 and Step 3.5), following the ordering of their original entries (i.e., Primary Server in Step 3.4 is also the Primary Server address in this step).
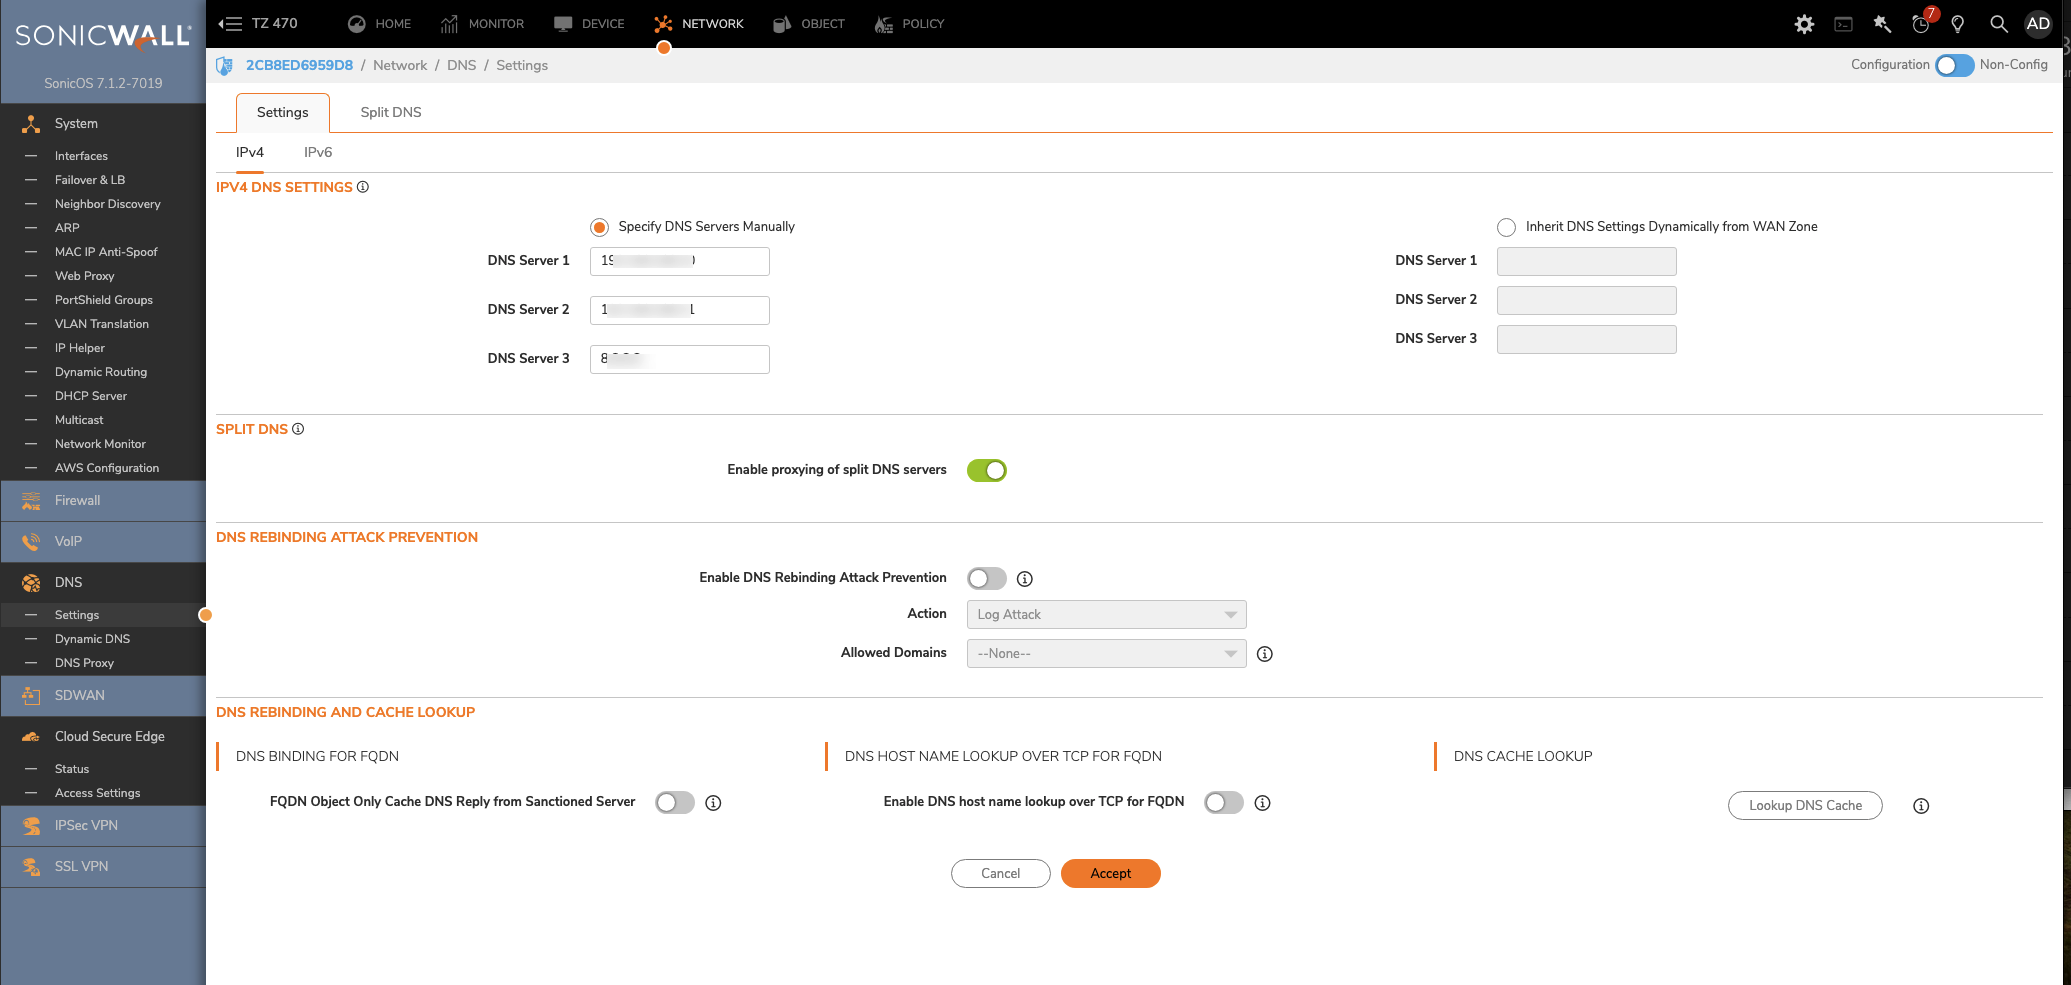
5.3 Select Accept.