Install Connector using Open Virtual Appliance (VMware)
Install the Connector on a virtual image
- Updated on
Steps
Install the Connector via the following steps.
Step 1. Register your Connector
1.1 Log into the Command Center, and navigate to Networks > Connectors.
1.2 Select + Create Connector, and configure the required parameters when going through the installation wizard. An existing API key is required; these should appear in the dropdown menu of the API Key field on the Configure tab. If you don’t have an existing API key, navigate to Settings > API Keys and generate an API key with a satellite scope.
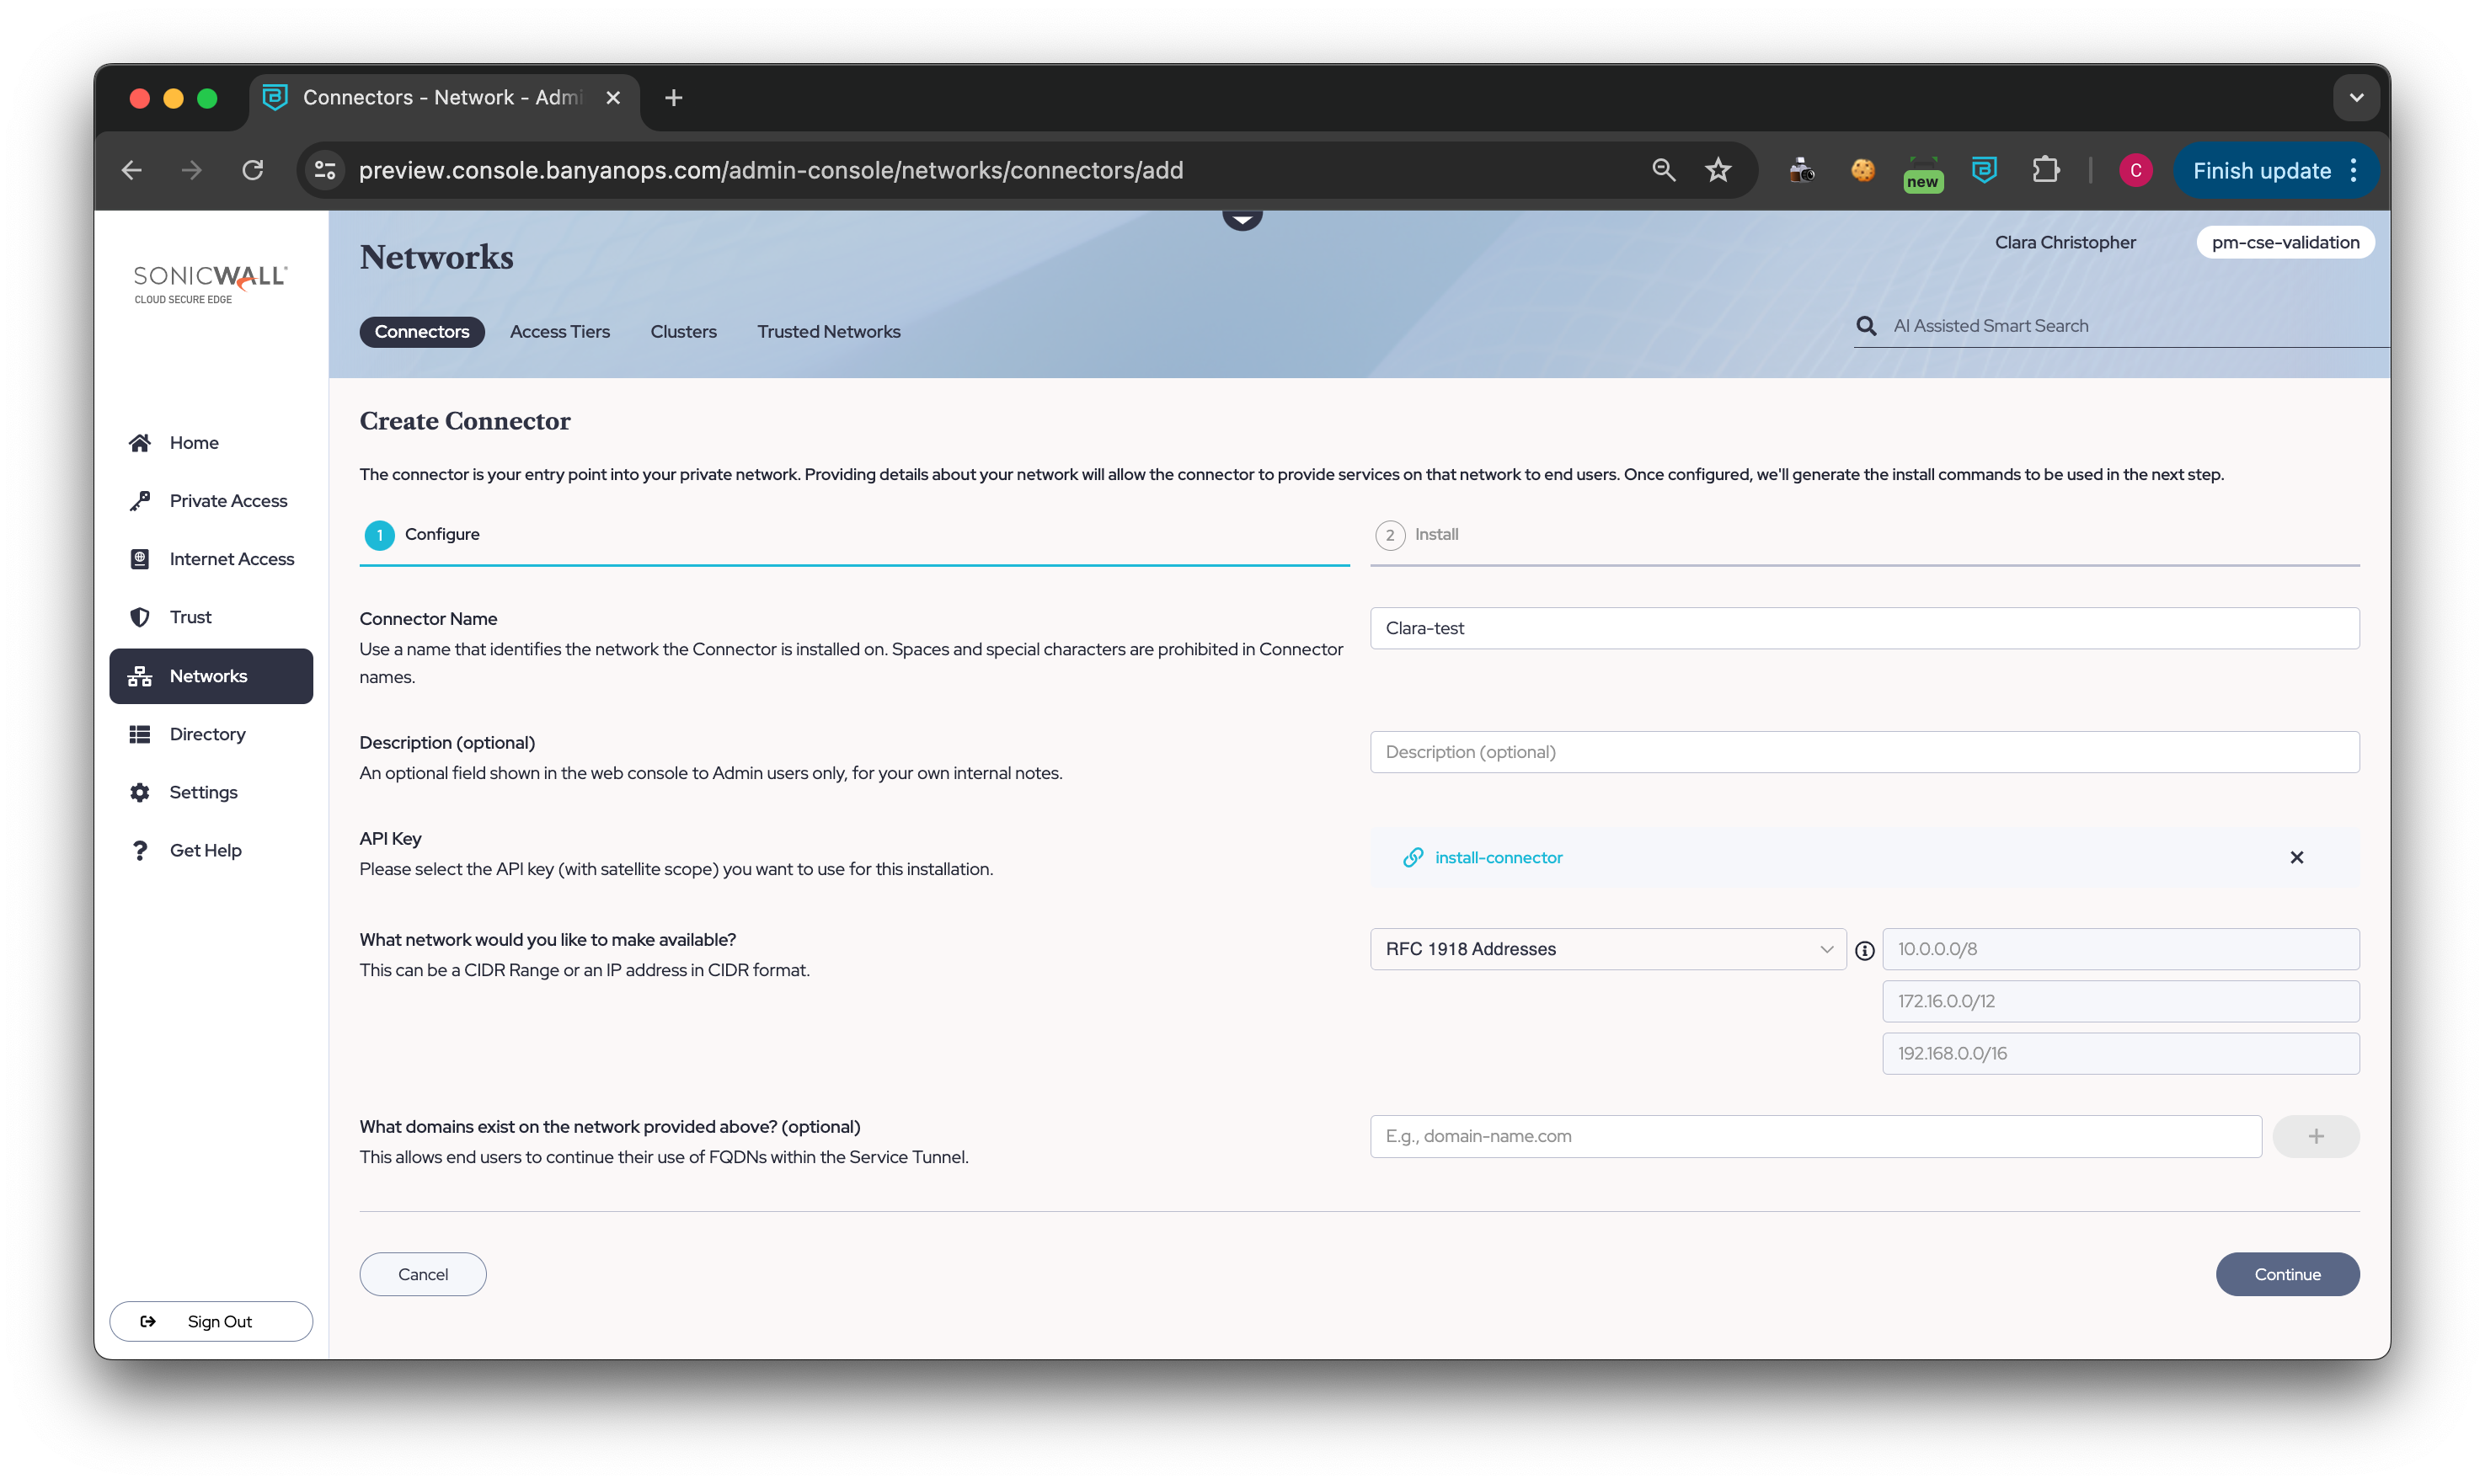
1.3 Take note of the installation parameters for use in subsequent sections.
1.4 Optional: Toggle on Public IPs & Increased Connector Limit to enable access through your Global Edge private network to public IP addresses or services.
Note: Changes to your Connector configuration may take up to 10 minutes to take effect.
Step 2. Review the Pre-Install Checklist
Network Reachability
-
The Connector needs to be able to connect outbound to the internet; it does not need any inbound open ports to operate correctly.
-
Ensure that the Connector server can make an outbound HTTPS connection via port 443 to the Command Center. The Connector does this to register itself and receive its configuration parameters, by making API calls to
https://{ccname}.console.banyanops.com/api/v1/. Note that the CCNAME for North American data centres isnet, and the CCNAME for European data centers iseucc(i.e.,https://net.console.banyanops.com/api/v1/for U.S. andhttps://eucc.console.banyanops.com/api/v1/for Europe). -
Ensure that the Connector can make an outbound UDP connection to the Global Edge Network. The Connector will pick a port(s) in the range 21000 - 59999 to set up WireGuard tunnels with the Edge Network.
-
Ensure your networking policies allow traffic to flow from the Connector server to backend machines running the applications and services you need to secure access to.
Step 3. Download & Install the OVA file
3.1 Download the OVA file.
3.2 In your deployment tool (e.g., ESXi, VSphere, VMware Fusion) create a virtual machine, and then select Deploy OVF Template. If you are deploying in ESXi, you must extract the files from the OVA and select all three (.ovf, .vmdk, and .nvram) during upload.
3.3 Follow the OVF deployment instructions provided by VMware (referencing link for connector system requirements for system requirements).
3.4 Expand Optional Configuration, and enter the SonicCore Hostname.
3.5 Verify that the Command Center URL in your deployment tool matches the value below. If it does not match, copy and paste the Command Center URL into its corresponding field.
3.6 Copy and paste the API Key into its corresponding field in the OVF template.
3.7 Copy and paste the Connector name into its corresponding field.
3.8 Review your configuration, and then select Finish. Once the deployment status completes in the Command Center, power on the VM and launch the remote console. Then, select Enter to boot.
3.9 When services are initialized, select SonicCoreX and then select Enter.
Upgrade
-
In the CLI, in CSE, enter
show system. Check the current Connector version. -
Execute
safemode. -
When prompted to restart the Connector, enter
yes. -
Use the link provided to upload firmware. Select Upload Firmware
-
Select Browse and select the relevant firmware file. Select Upload.
-
Select the Boot button.
-
When Warning modal pops up, select OK. Restart and upgrade will begin.
-
Verify that the upgraded version exists by using your CLI to navigate to CSE and entering
show system.