Protect sensitive SaaS apps using a SAML proxy configuration in Okta
Learn how to use CSE to secure access to high-security corporate apps.
- Updated on
- 15 minutes to read
-
Contributors

Overview
Some orgs want to protect their most critical SaaS applications by ensuring that the devices accessing these apps undergo a mandatory security posture check. This solution guide provides the steps to set up a SAML proxy configuration in Okta, using CSE, so that high-security applications can be protected with secure access.
Use Cases
Leverage this solution guide to accomplish the following:
- Protect the most critical (high-security) SaaS apps used in your org;
- Ensure that all devices accessing these apps are evaluated for their security posture.
Steps
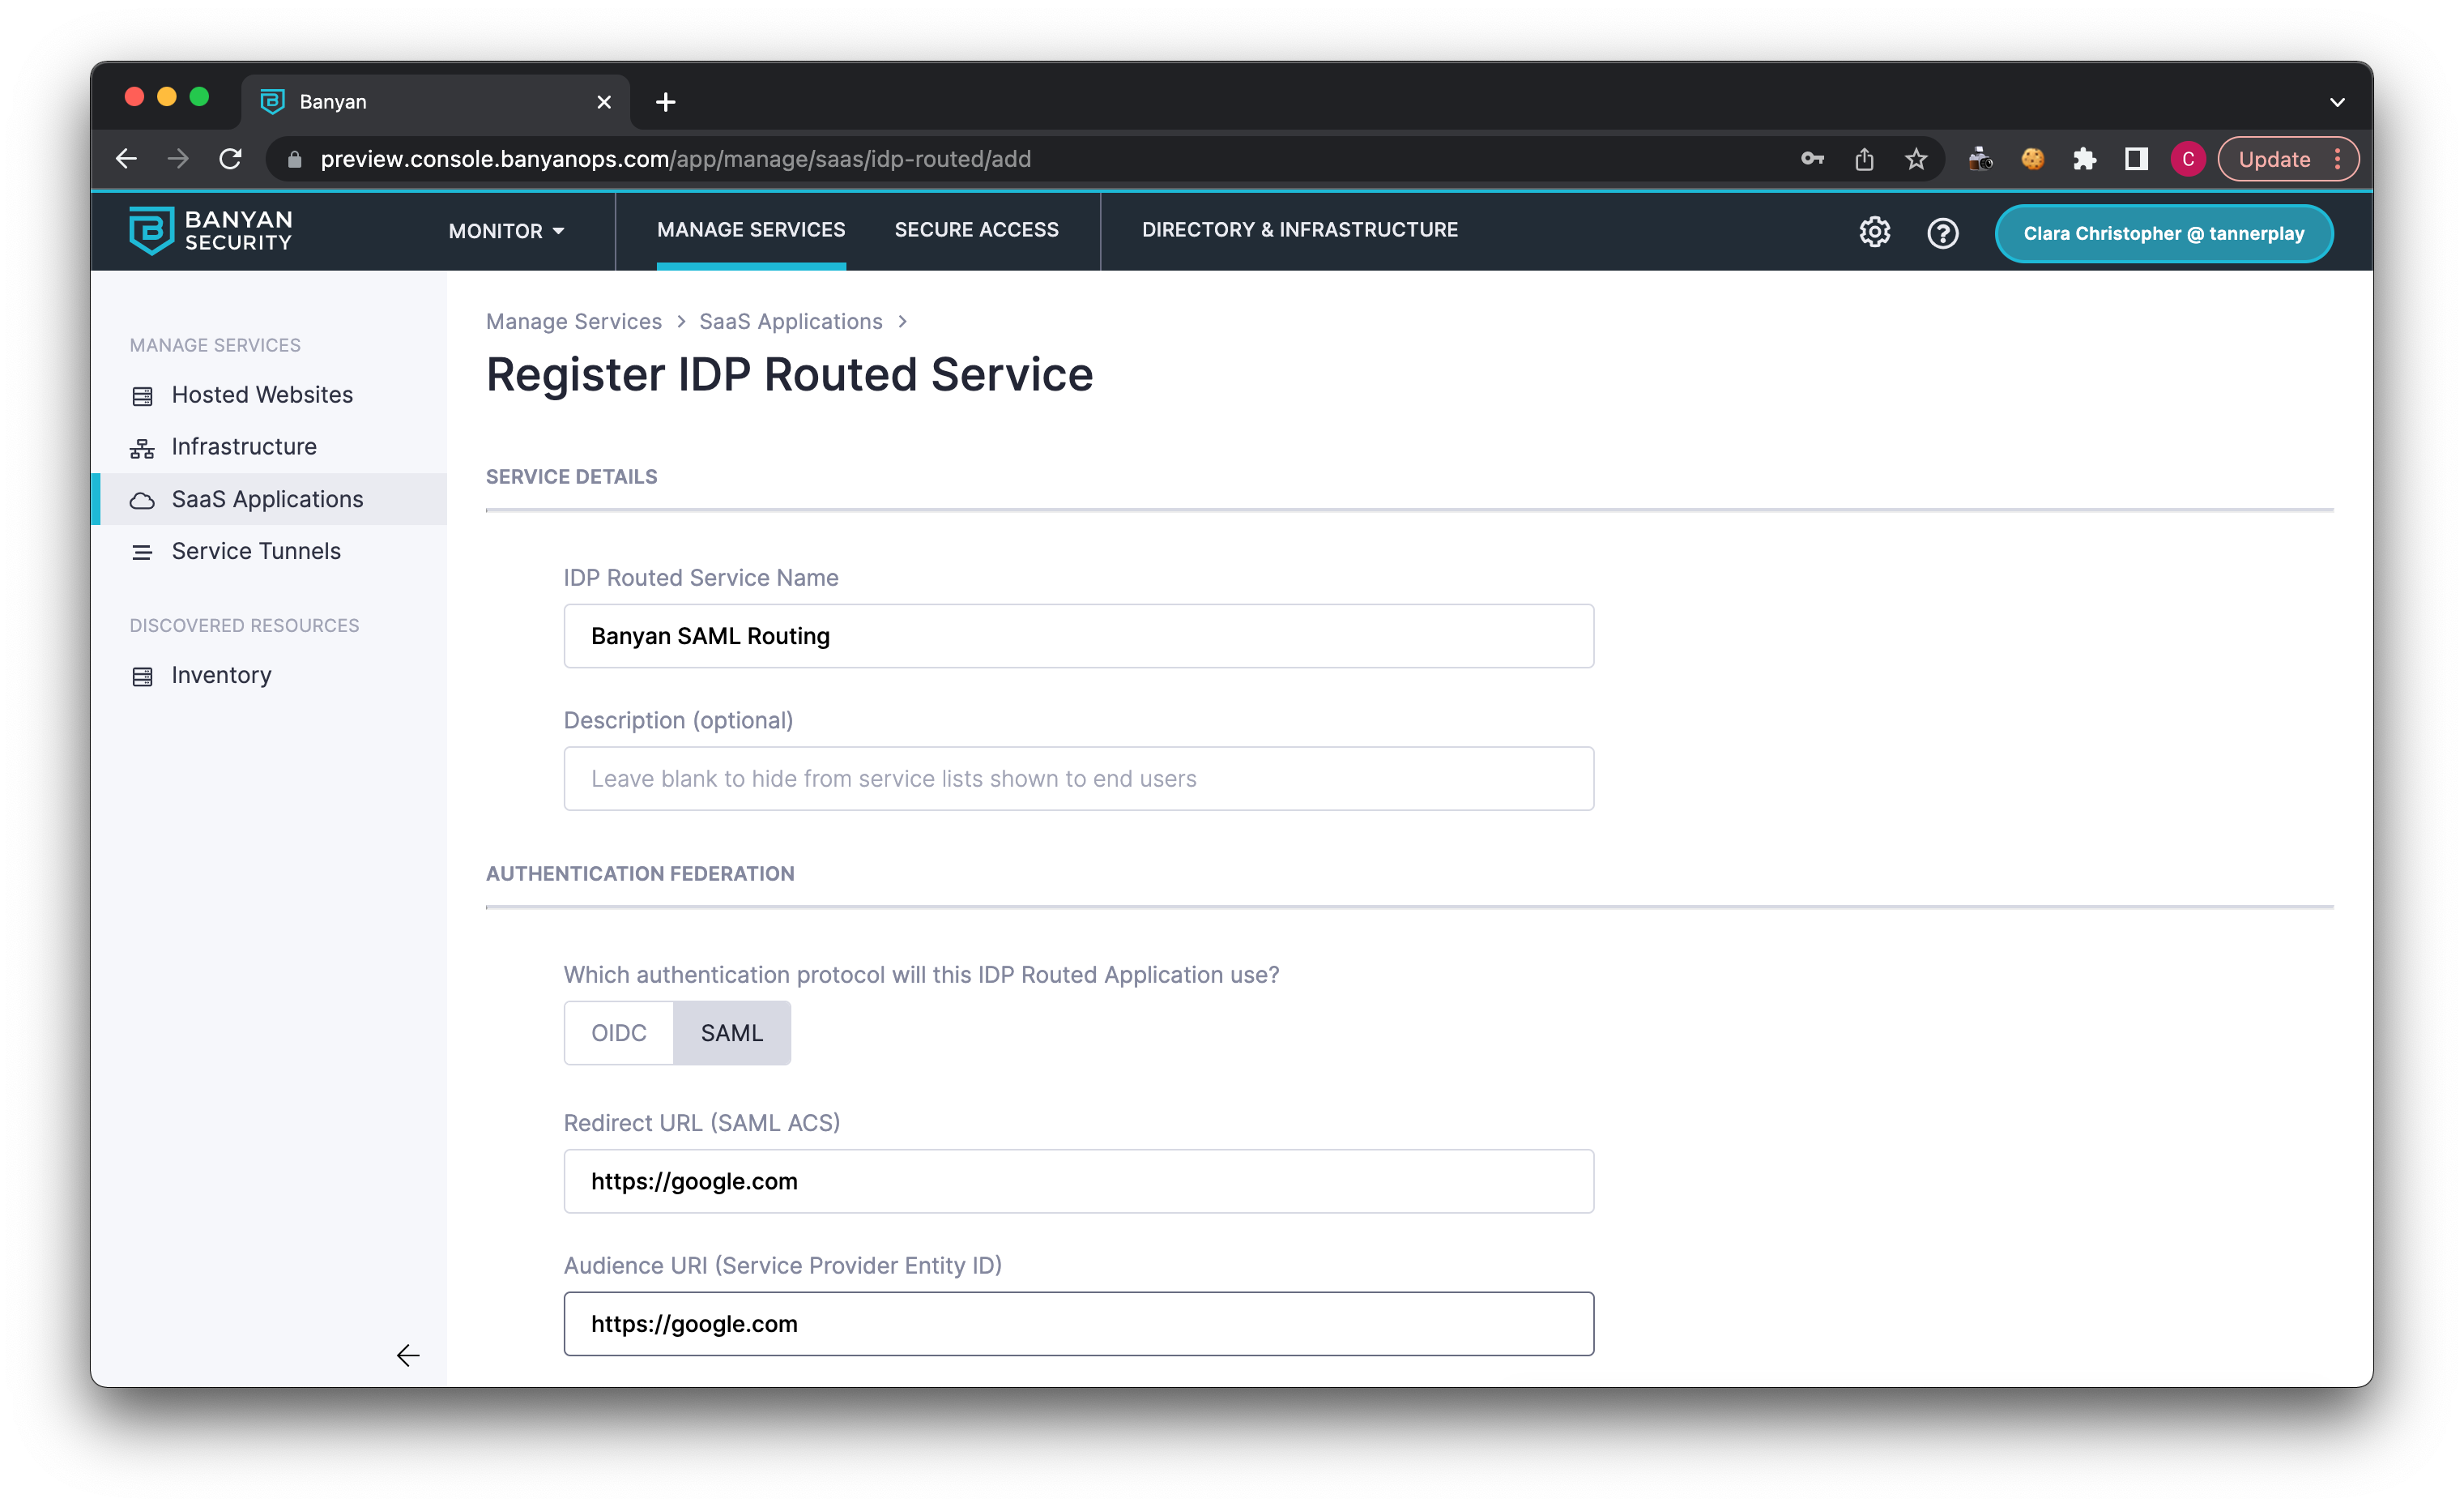
Step 1: Create a SaaS application in CSE
1.1 In the Command Center, navigate from Manage Services > SaaS Applications, then select + Publish SaaS Application.
1.2 Select IDP Routed.
1.3 In the IDP Routed Service Name field, enter your service name (e.g., the name of your app).
1.4 Under Authentication Federation, select SAML as your authentication protocol.
1.5 Enter a placeholder Redirect URL and Audience URI (e.g., https://dummy.url).
Note: These inputs (in the Redirect URL and Audience URI fields) will be updated later on.
1.6 Attach a Policy of your choice (e.g., High Security).
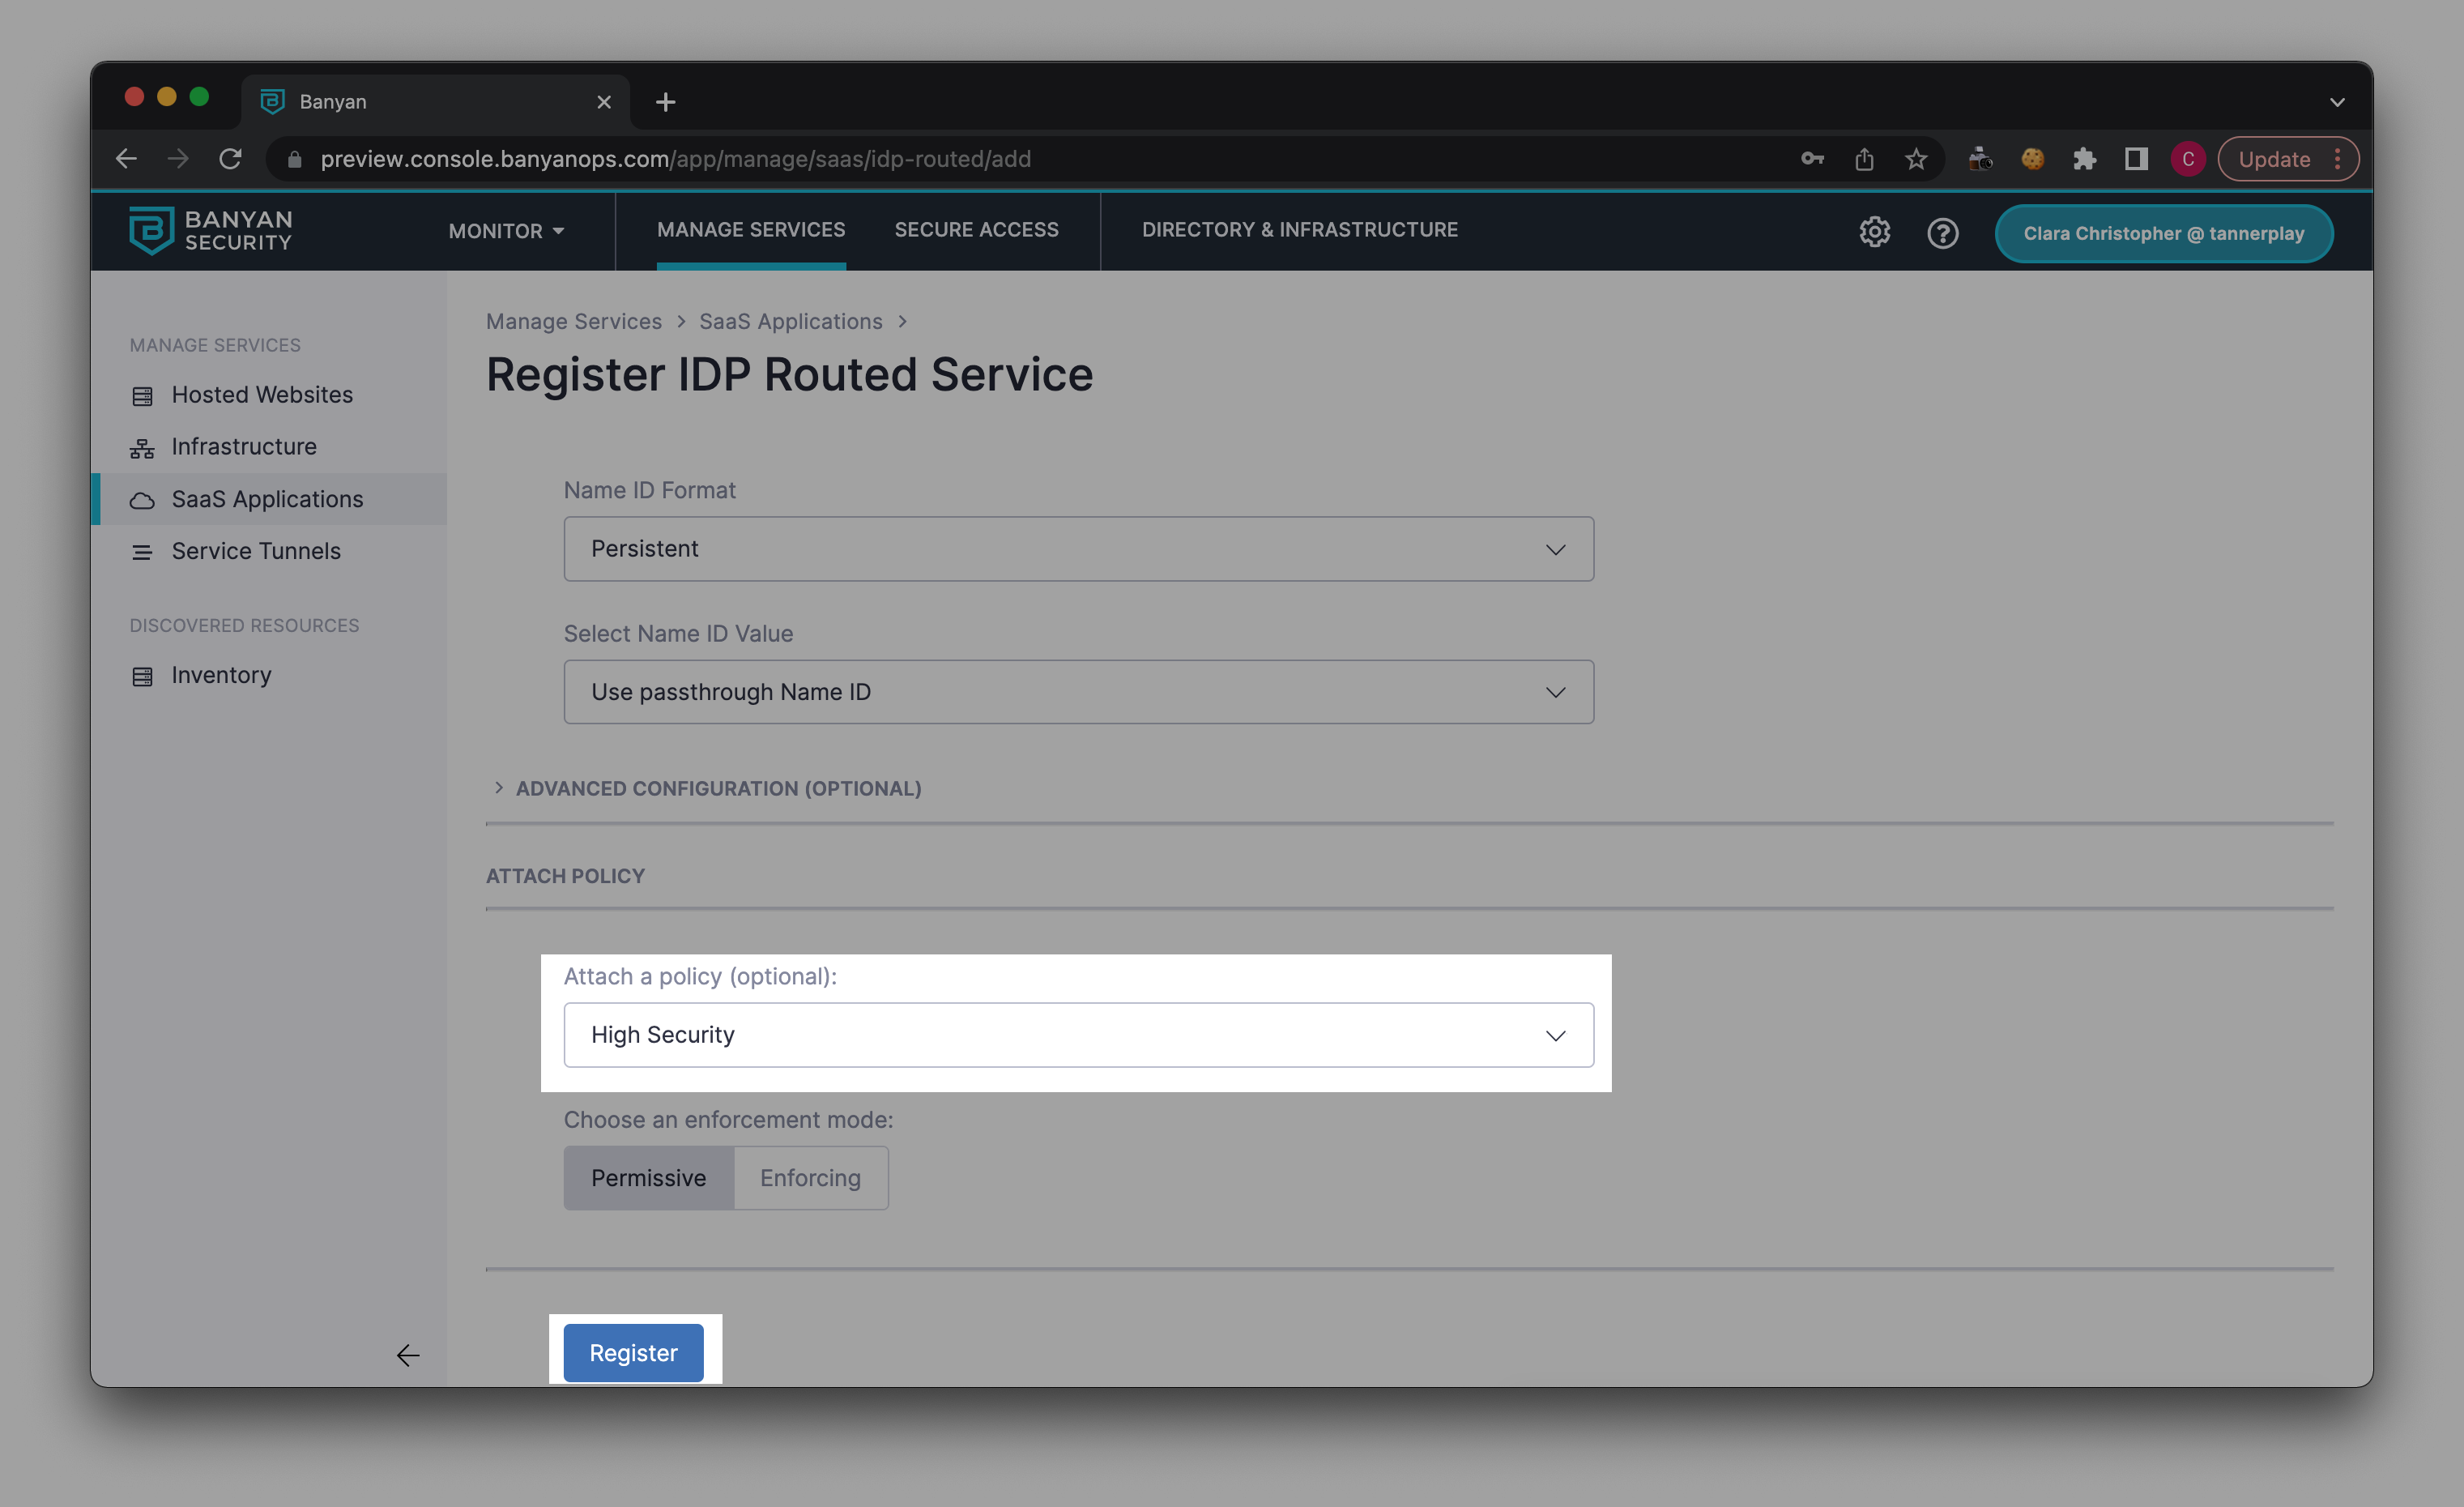
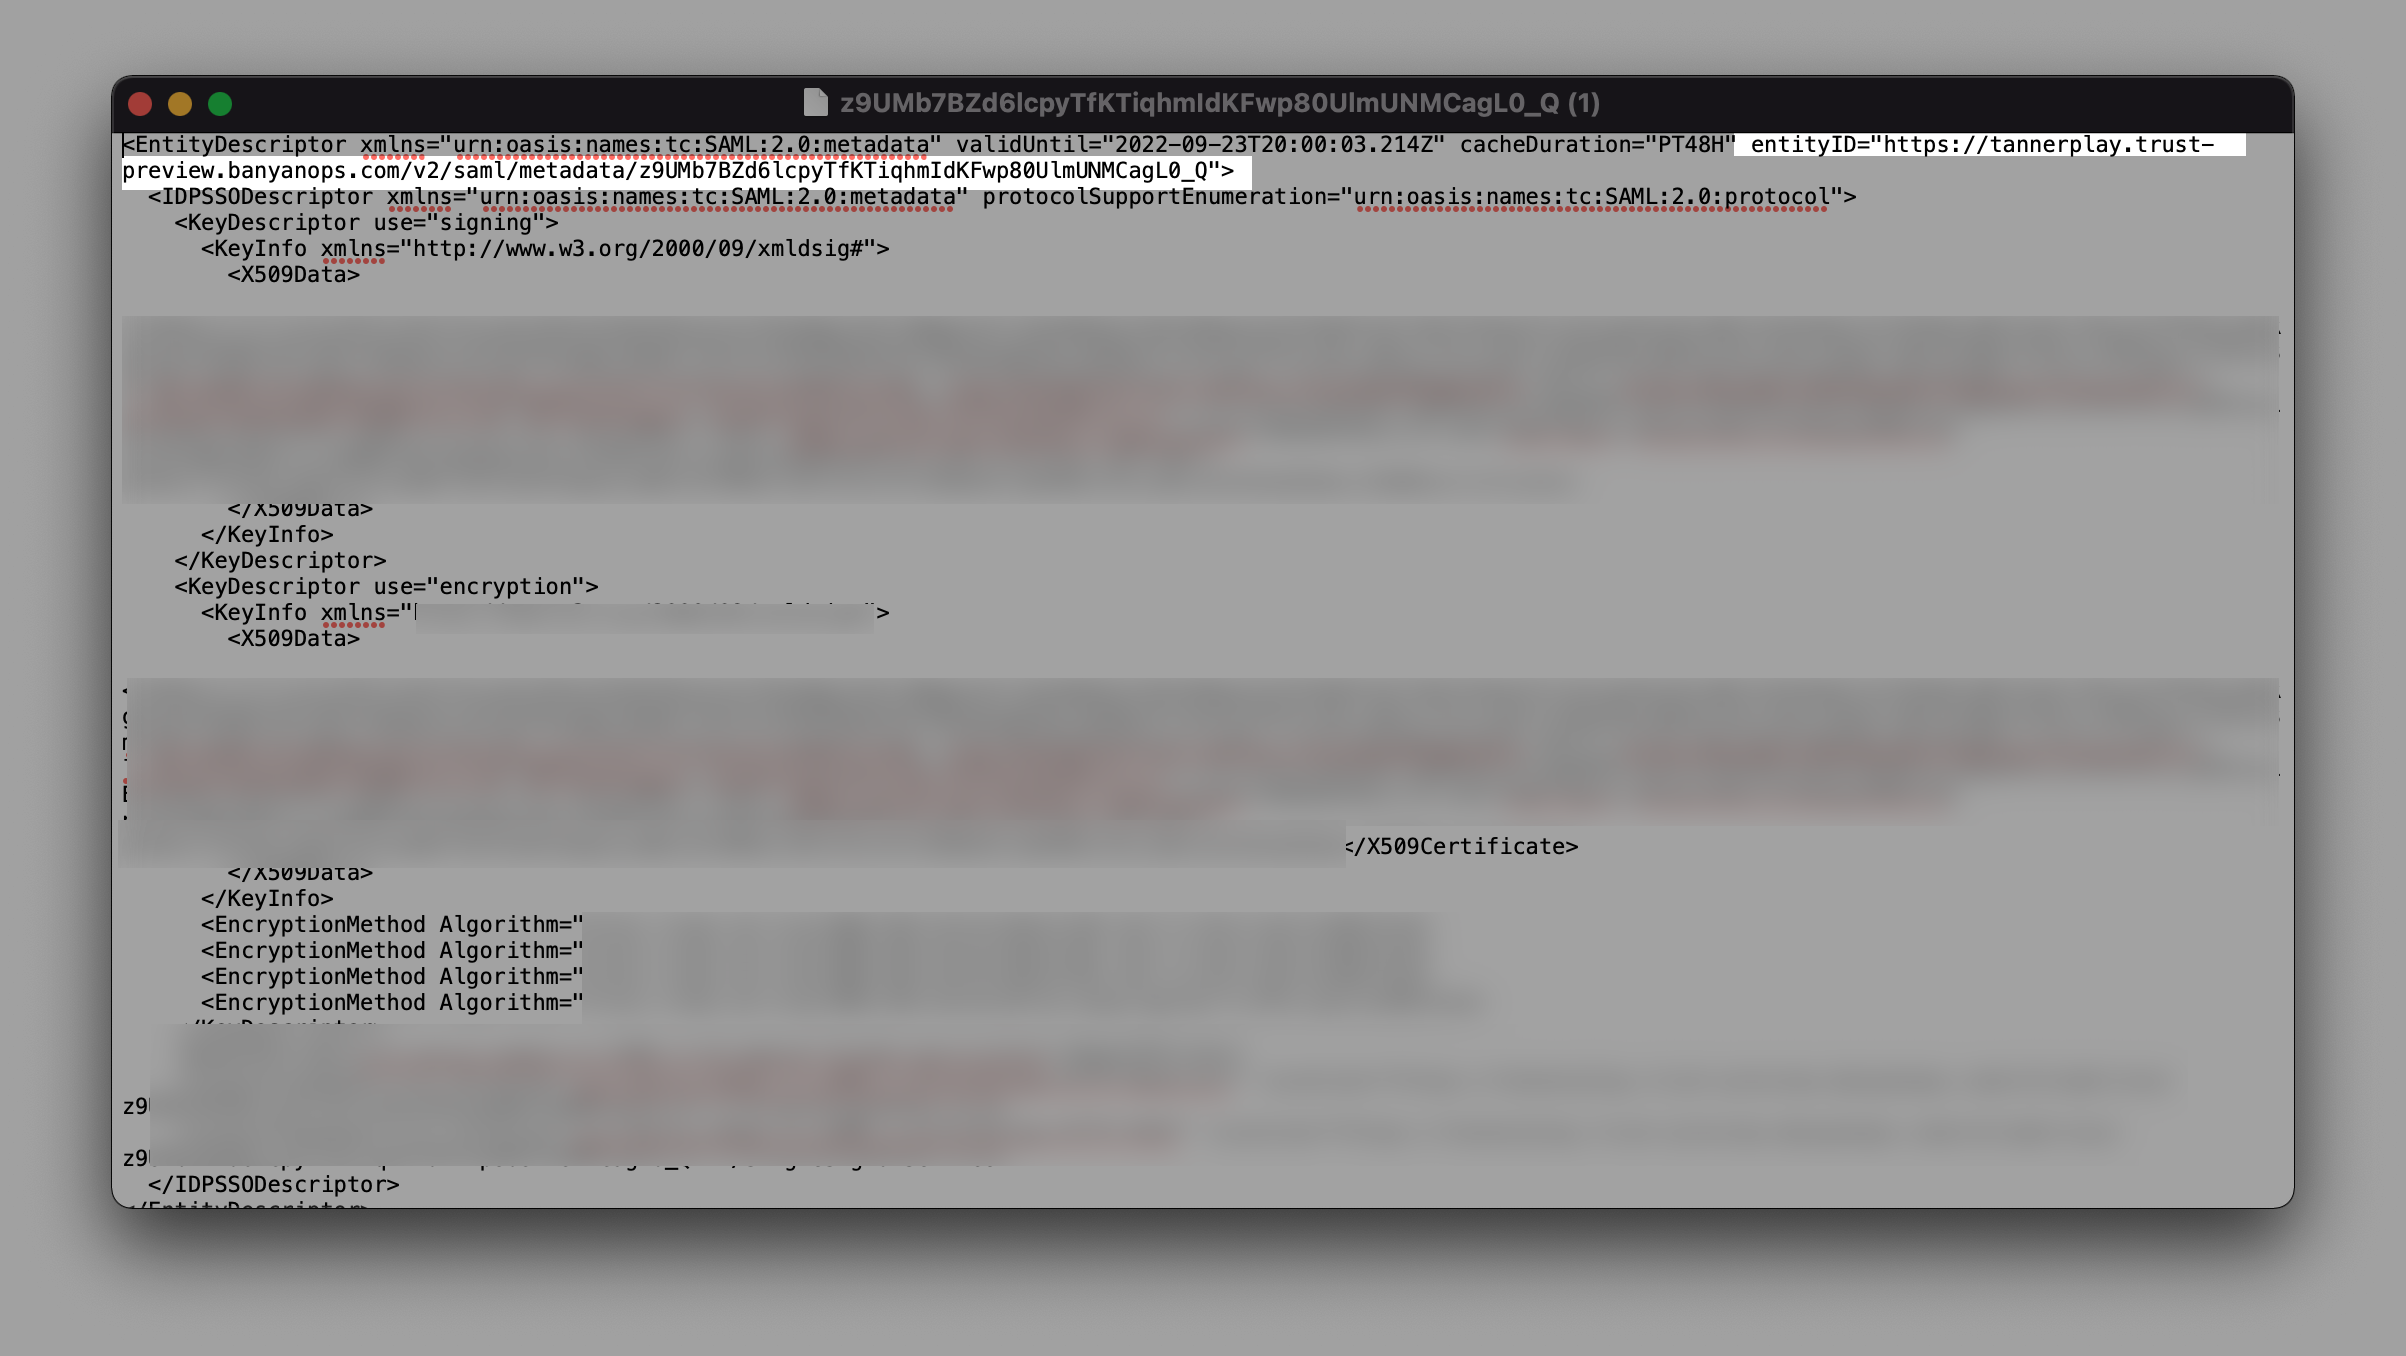
1.7 Select Register. This will generate a Metadata URL. Copy the Metadata URL, and paste it in a new browser tab.
This will automatically download a text file that contains your x.509 Certificate.
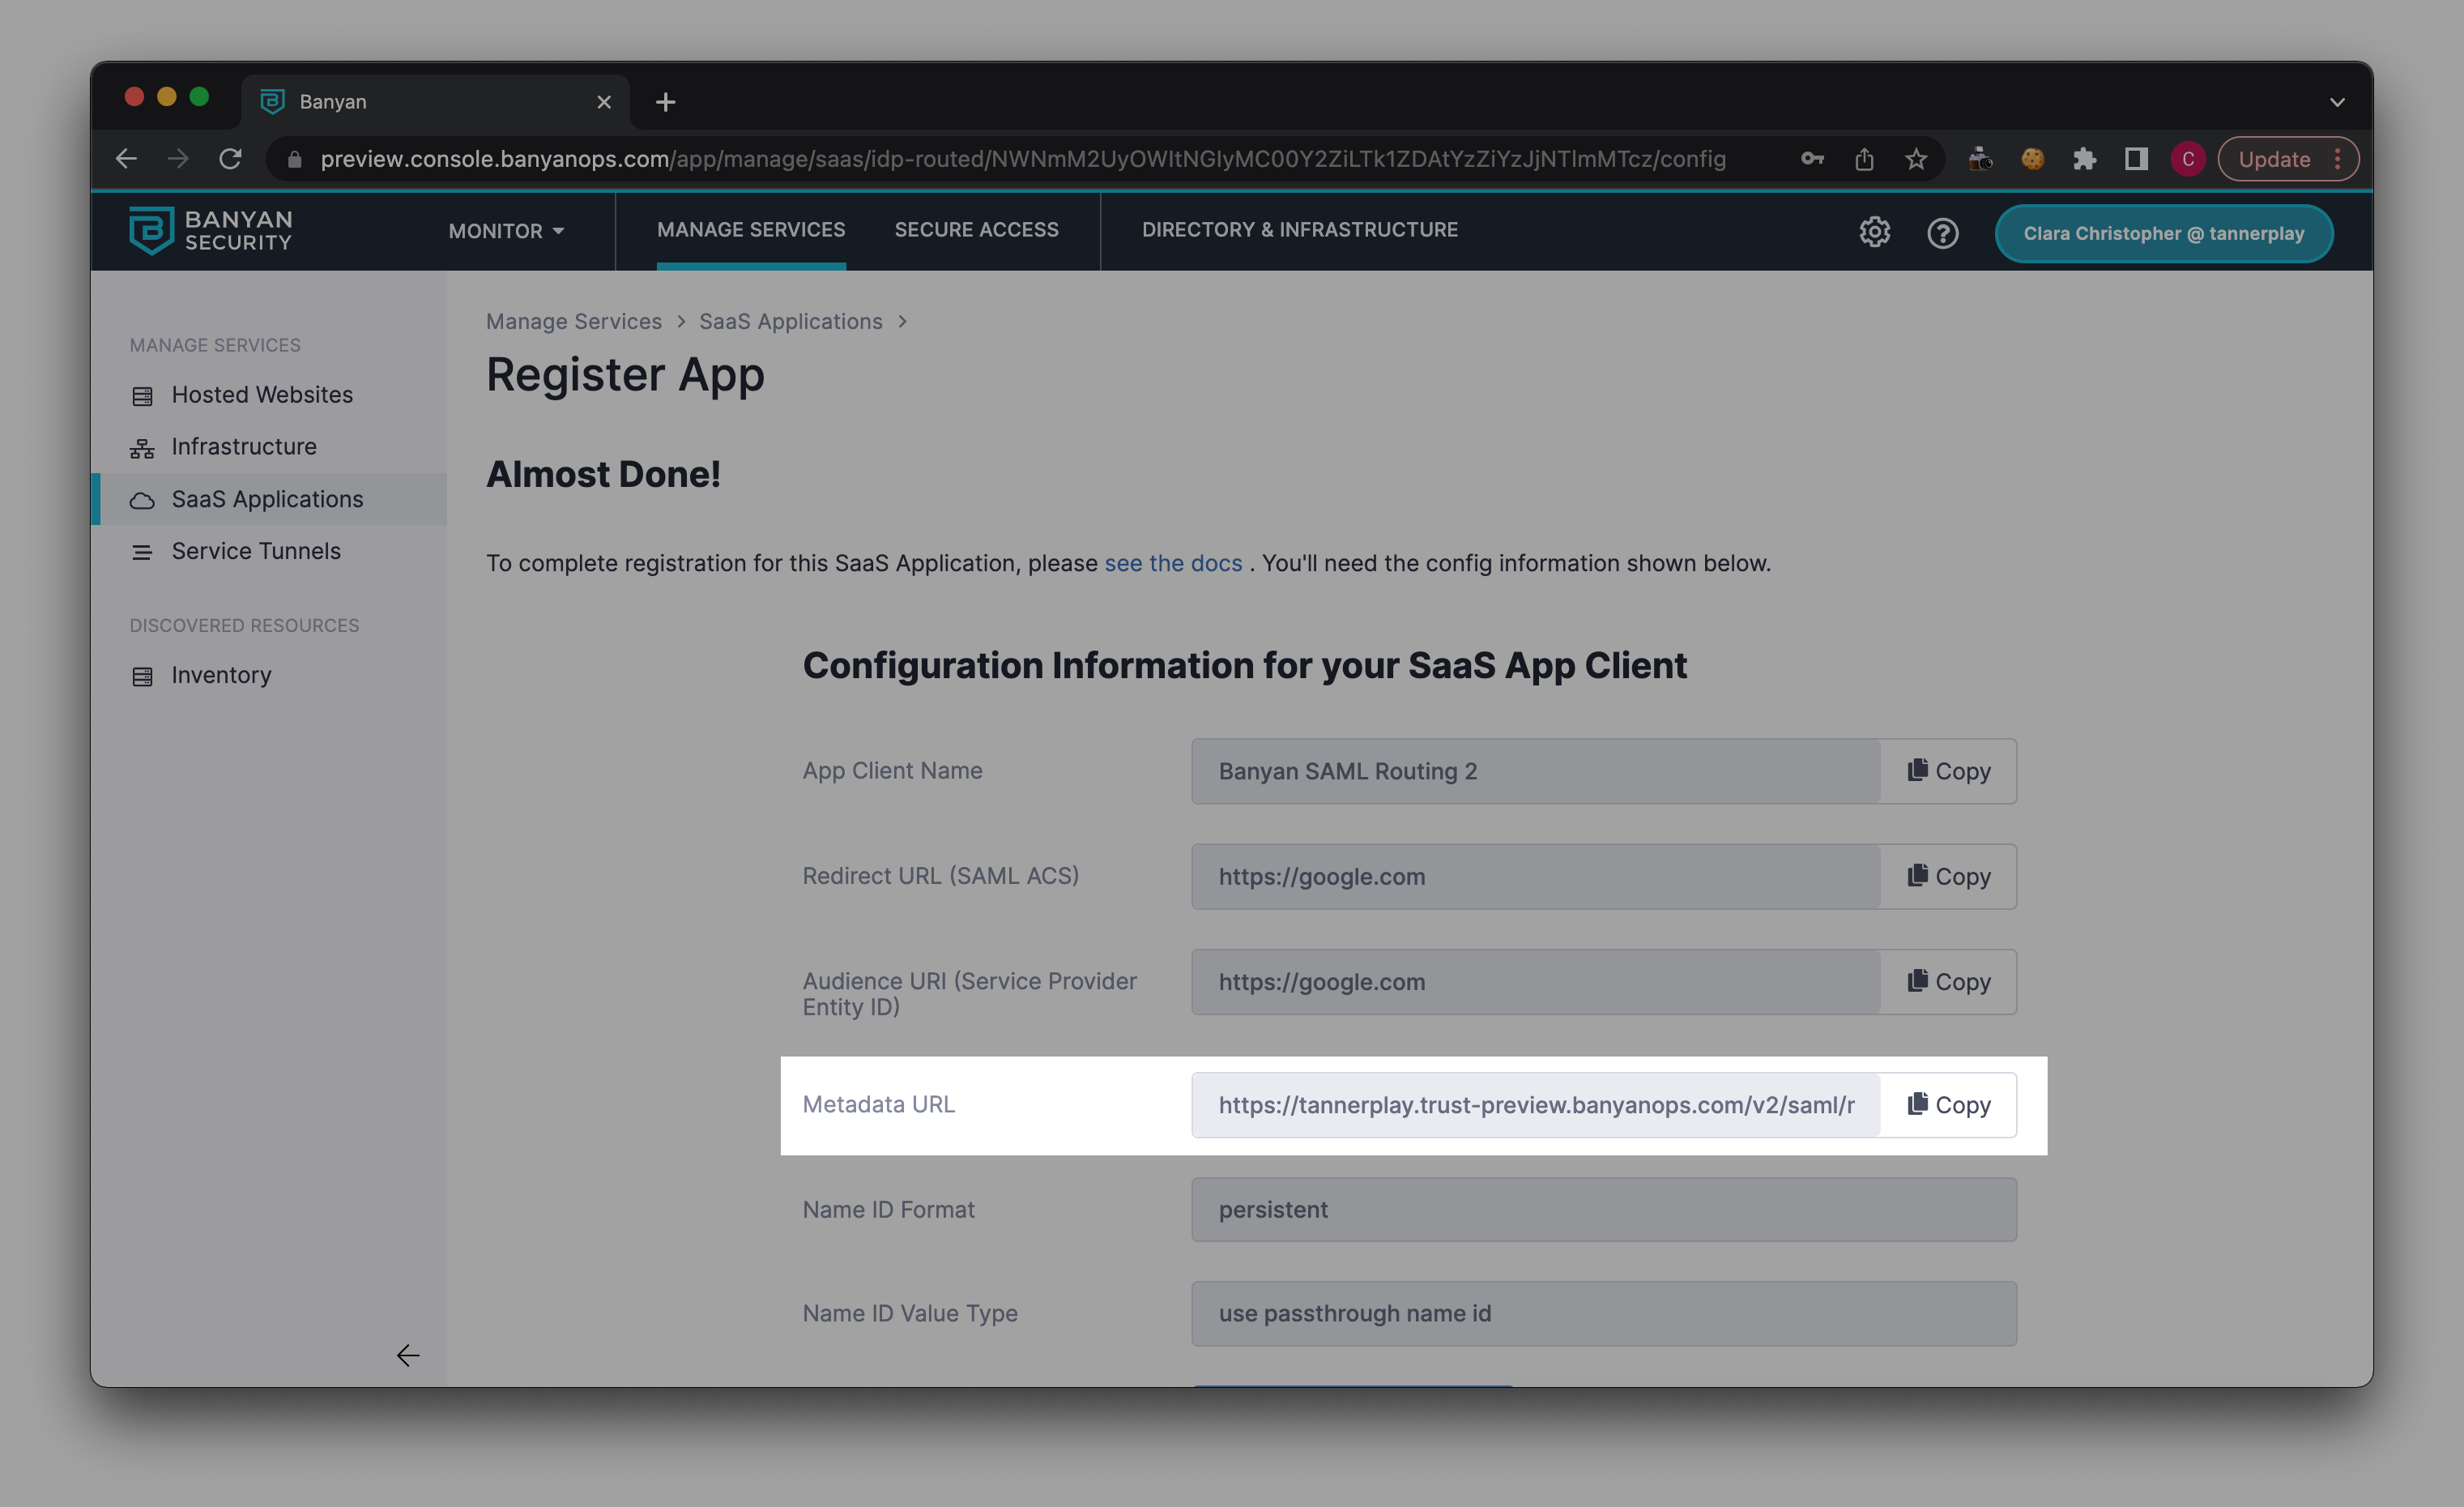
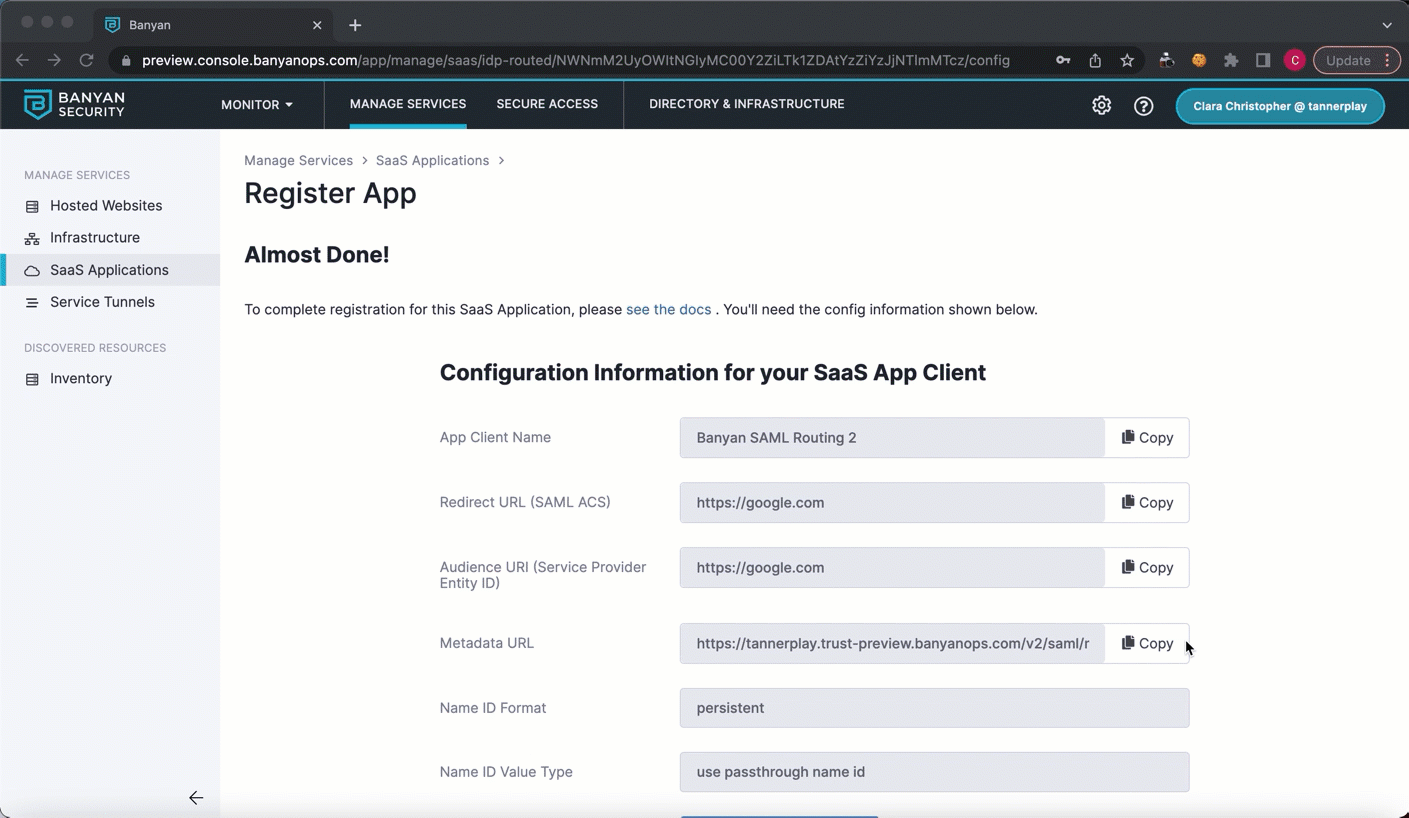
Note: Information in this downloaded text file will be used in Step 3 for the SAML configuration.
1.8 Navigate back to CSE’s Command Center (Manage Services > SaaS Applications > Register Apps), and select Continue. This will lead to your published SaaS app service detail page.
Step 2: Configure a SAML identity provider connection in Okta
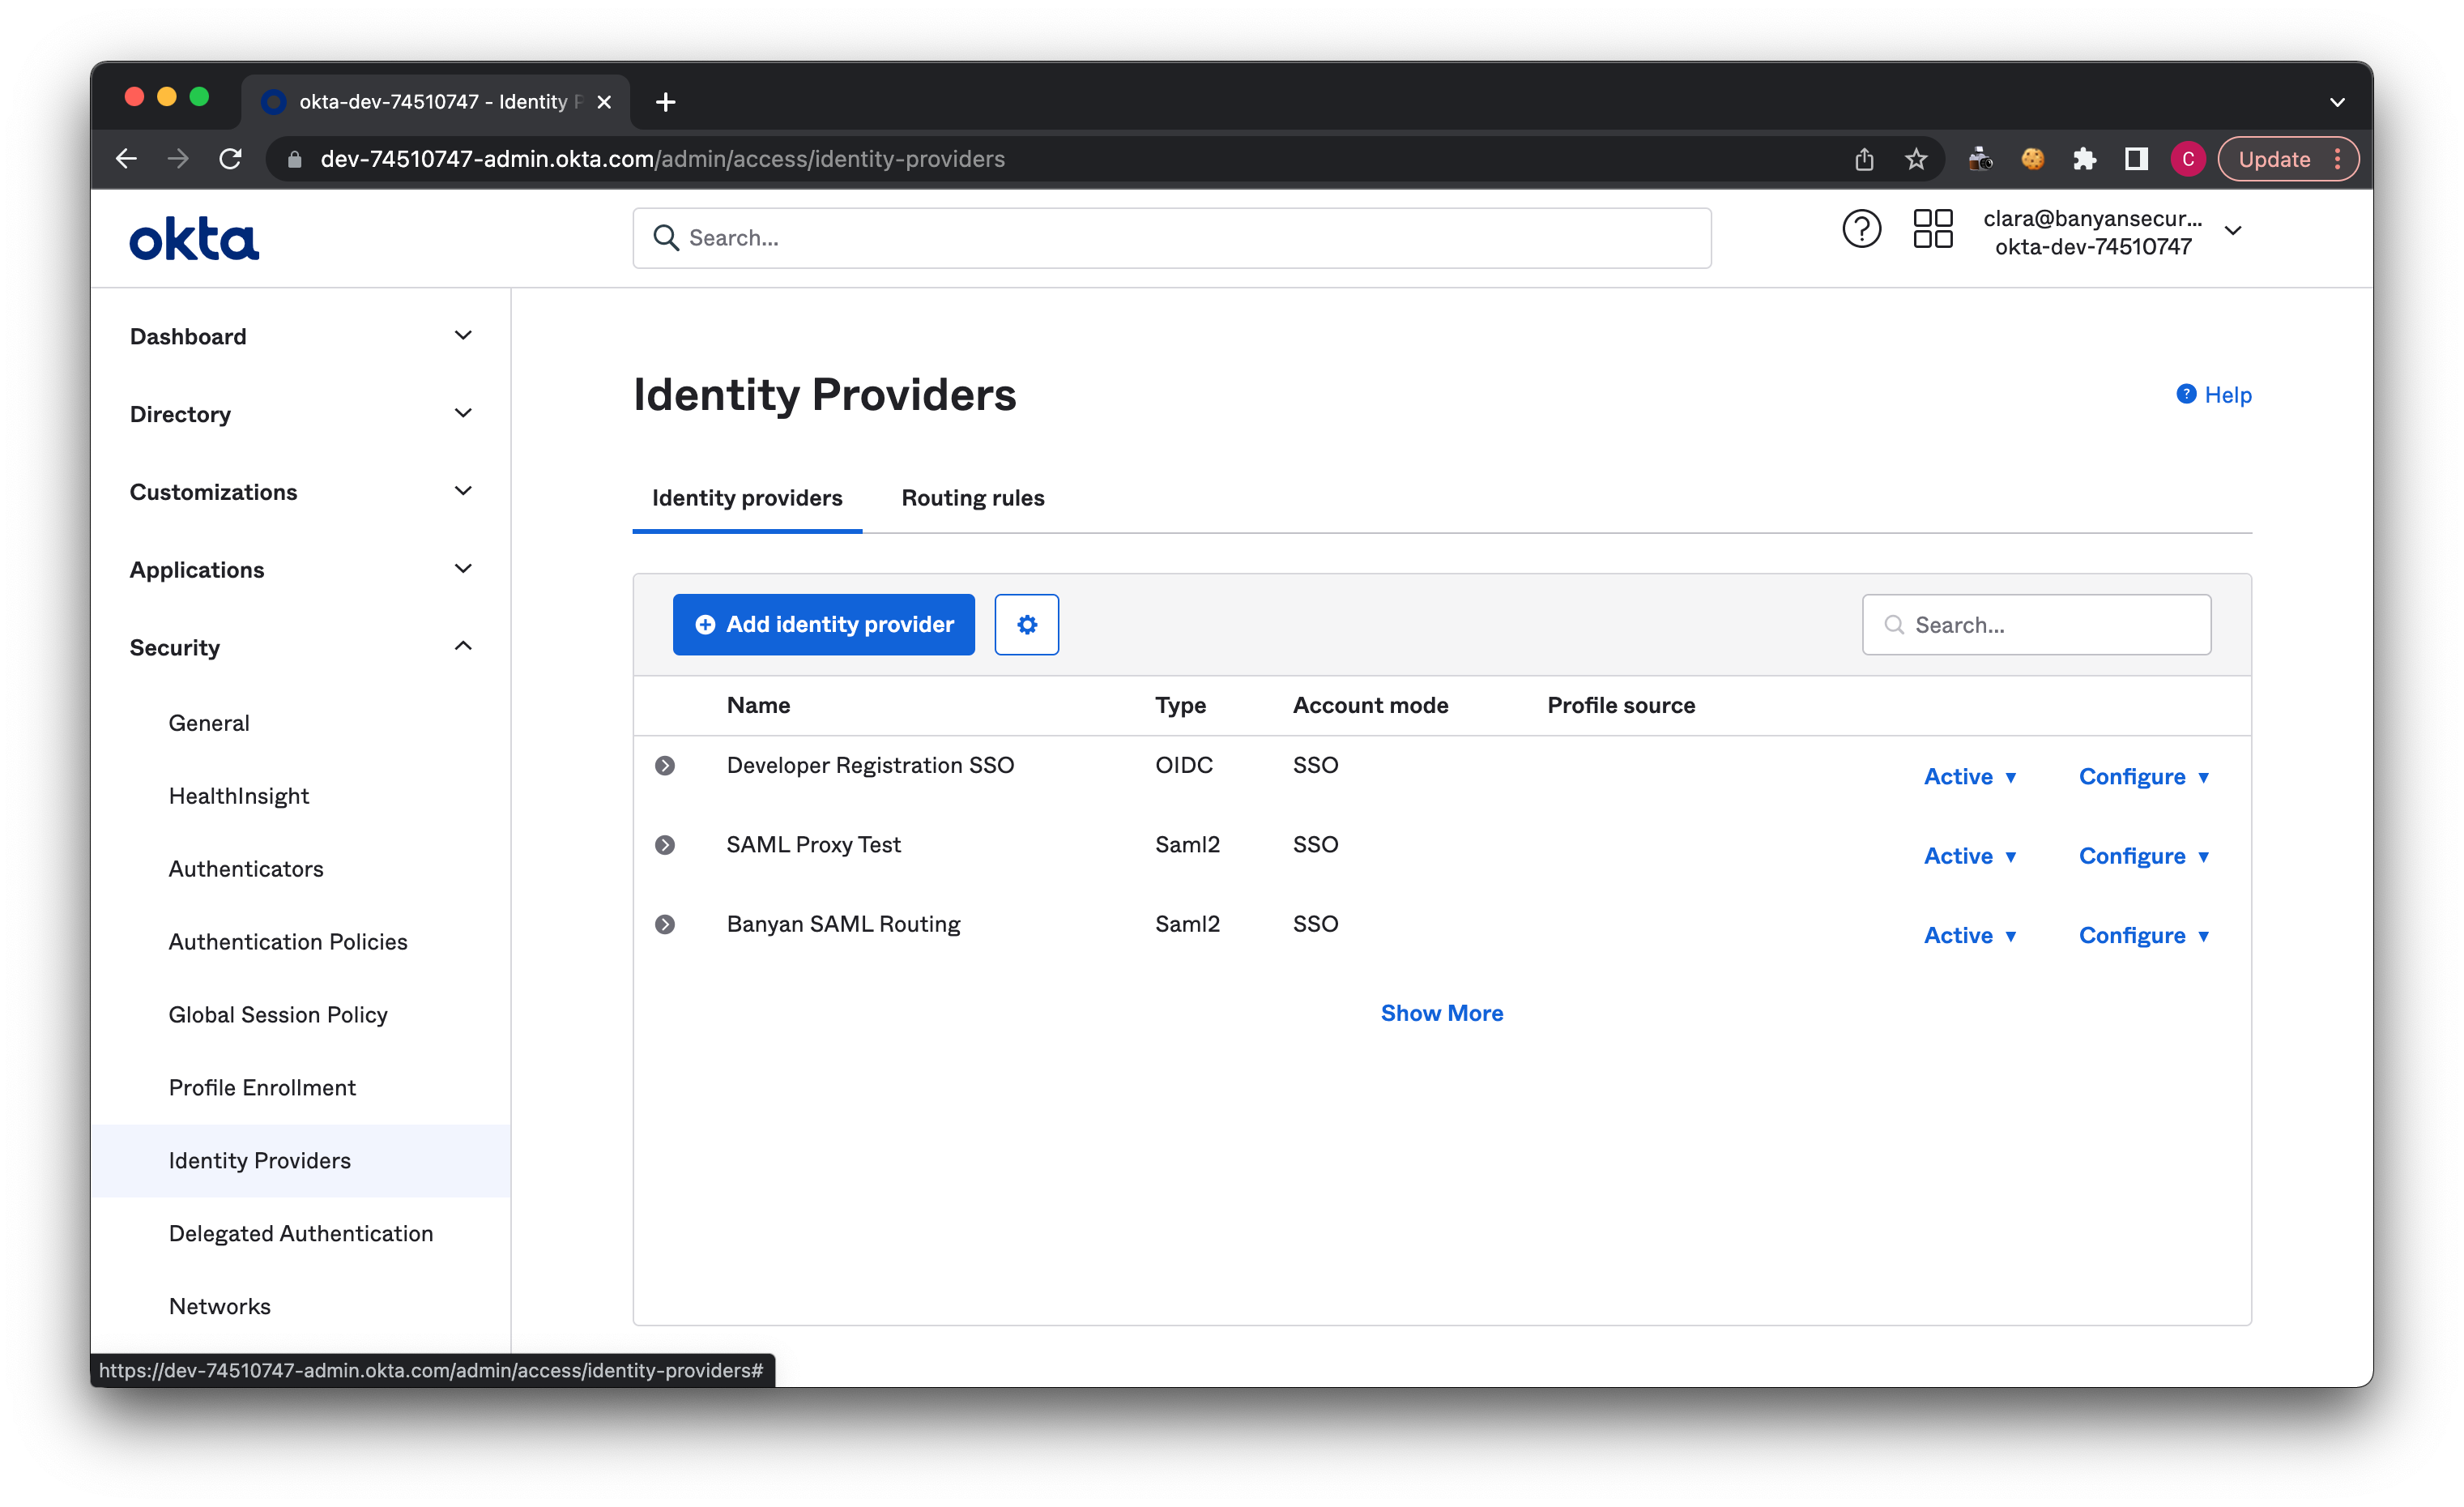
2.1 In your Okta admin account, navigate from Security > Identity Providers. Then, select Add identity provider.
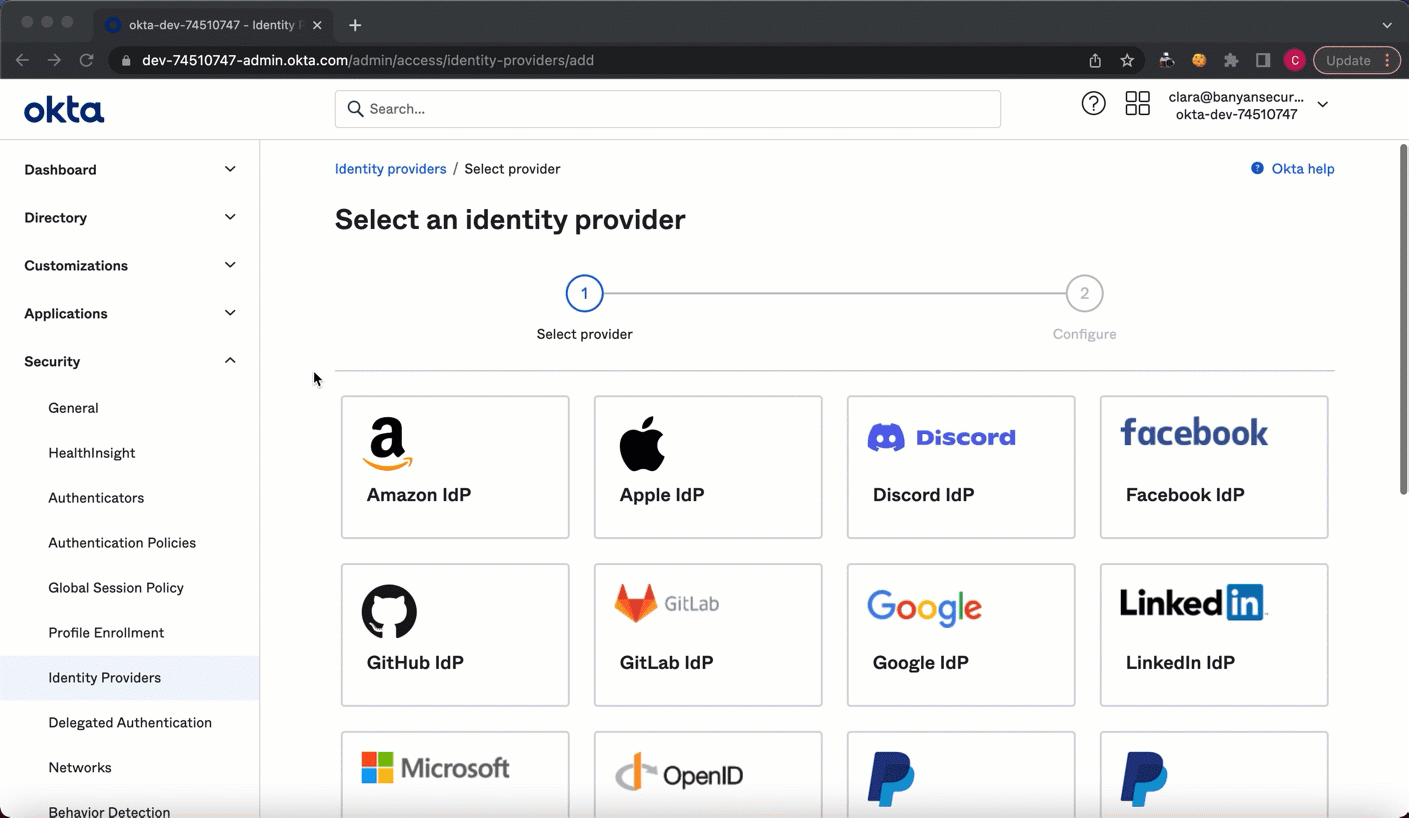
2.2 Select SAML 2.0 IdP.
2.3 Name the Identity Provider that you want to add (e.g., “CSE SAML Routing”).
2.4 In the IdP username field, select idpuser.subjectNameId from the dropdown menu.
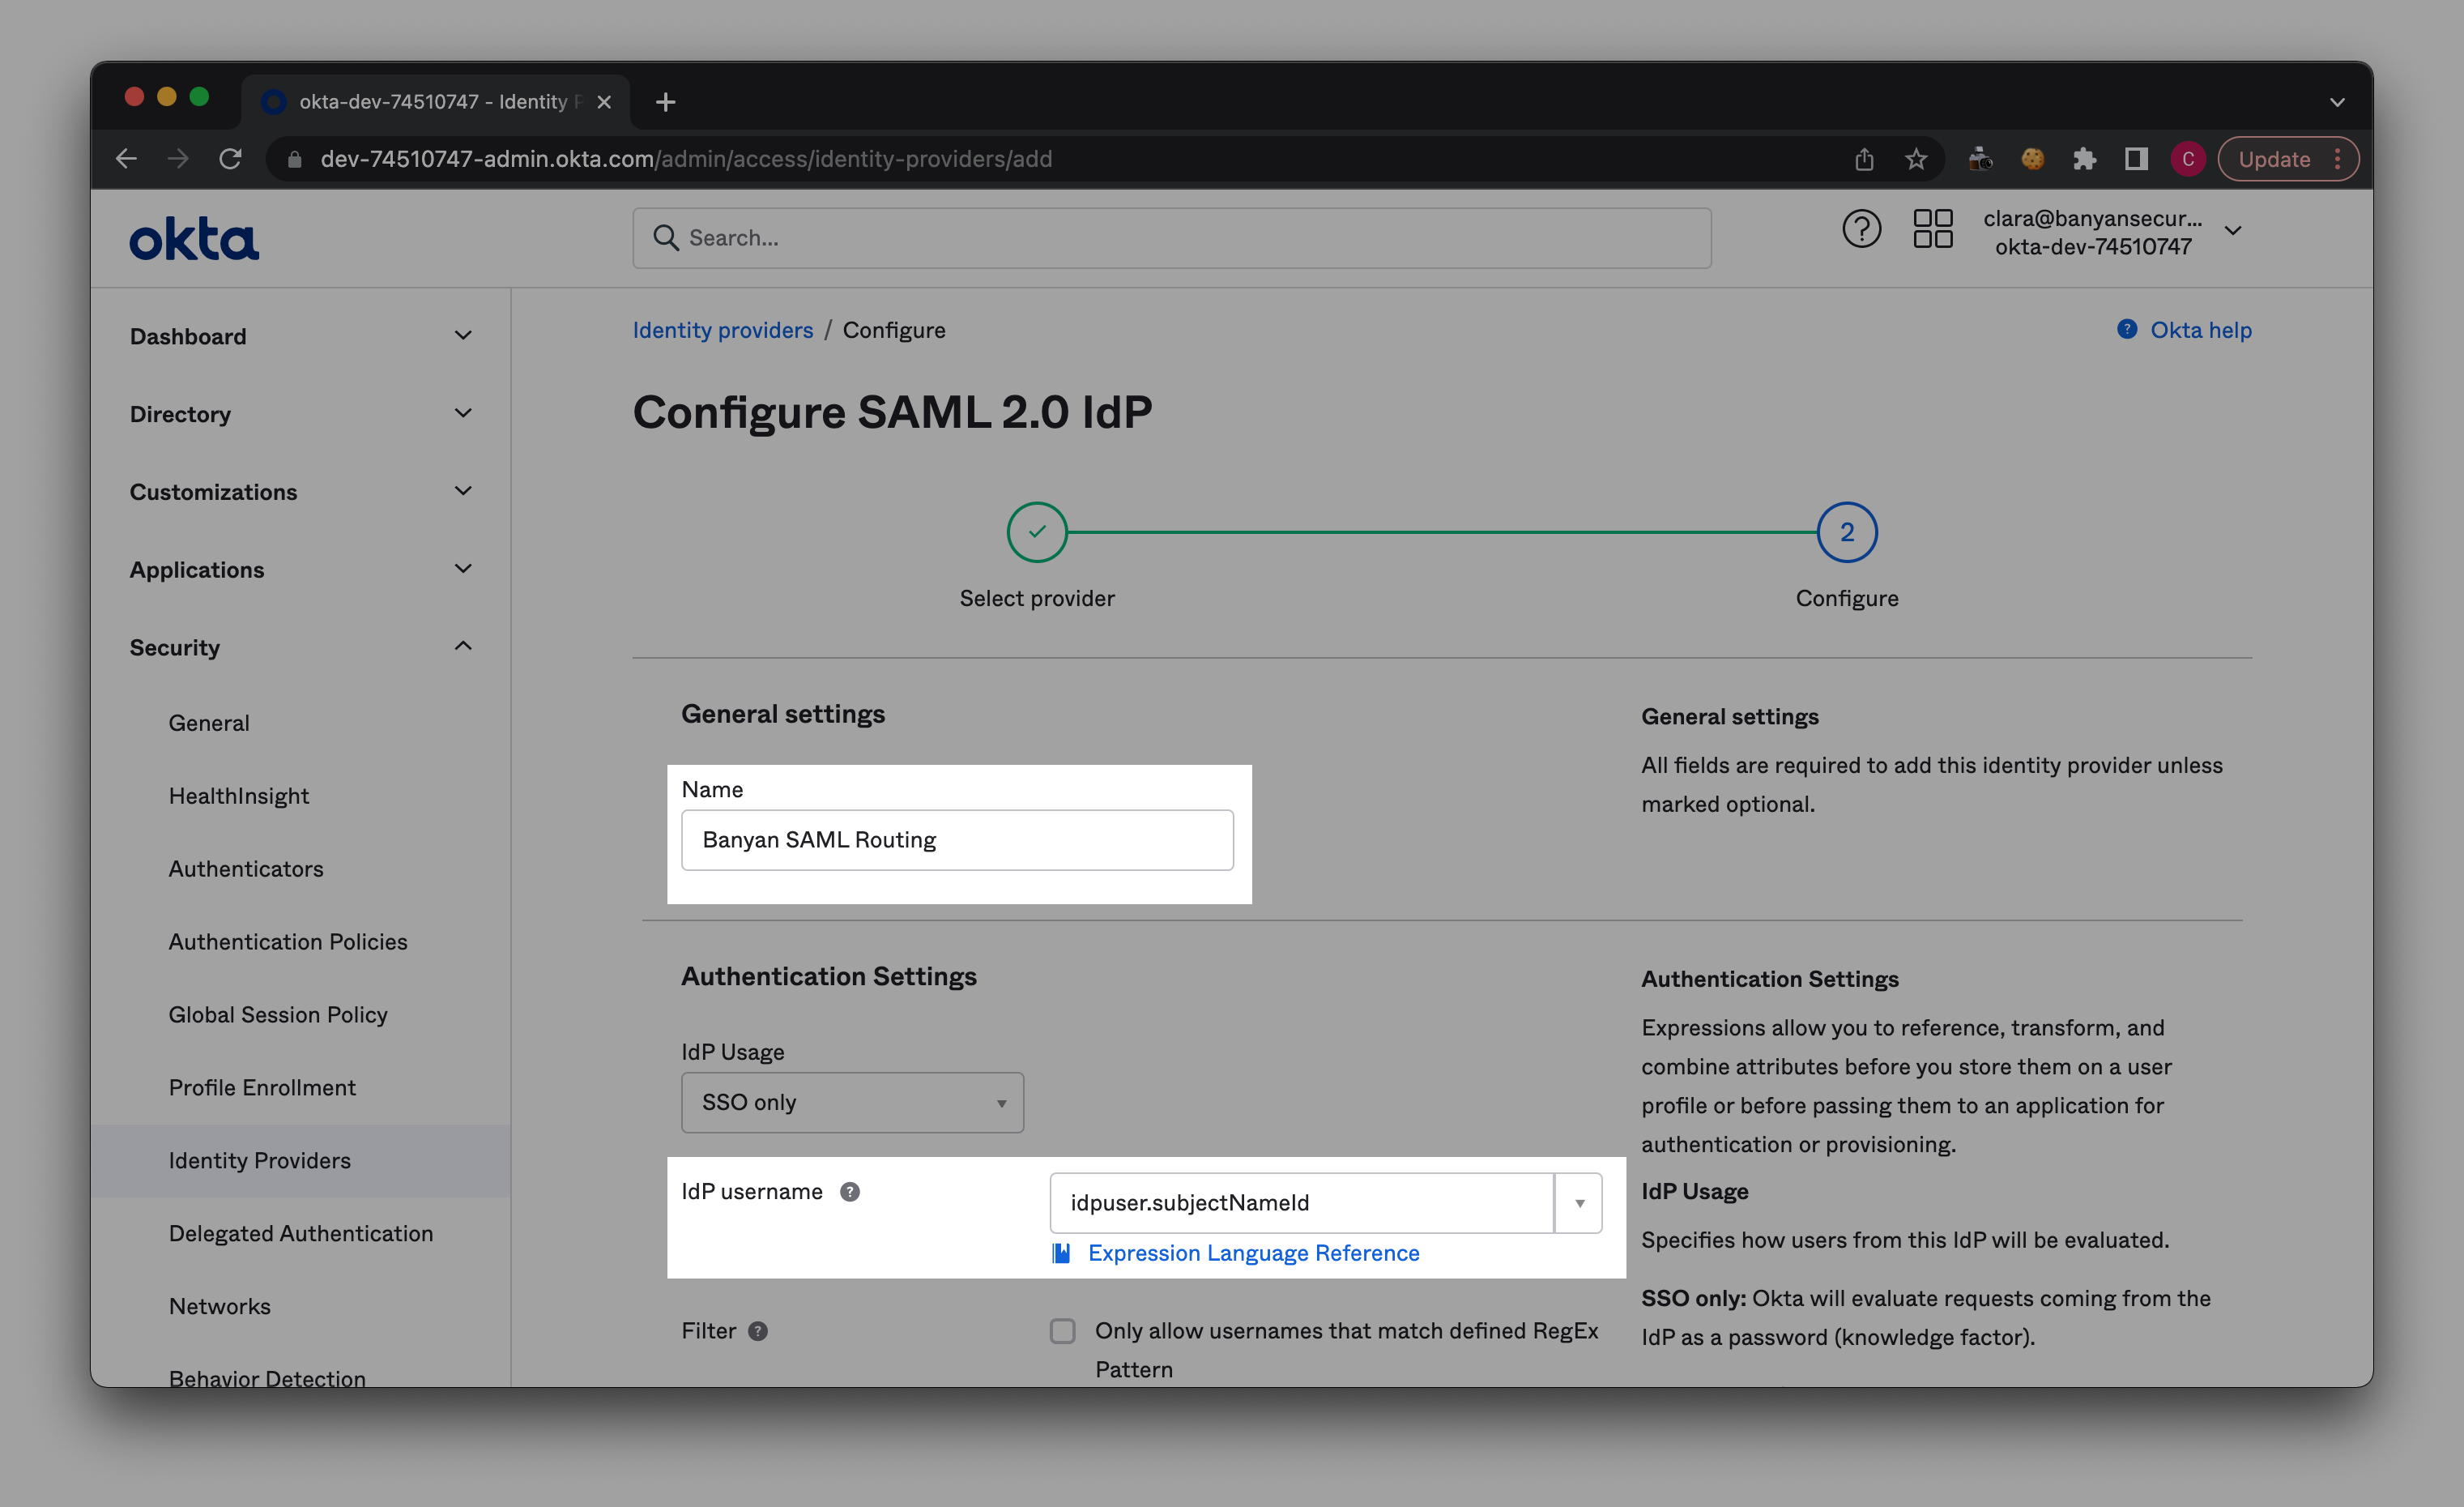
2.5 In the Match against field, select Okta Username or Email.
2.6 In the If no match is found field, select Redirect to Okta sign-in page.
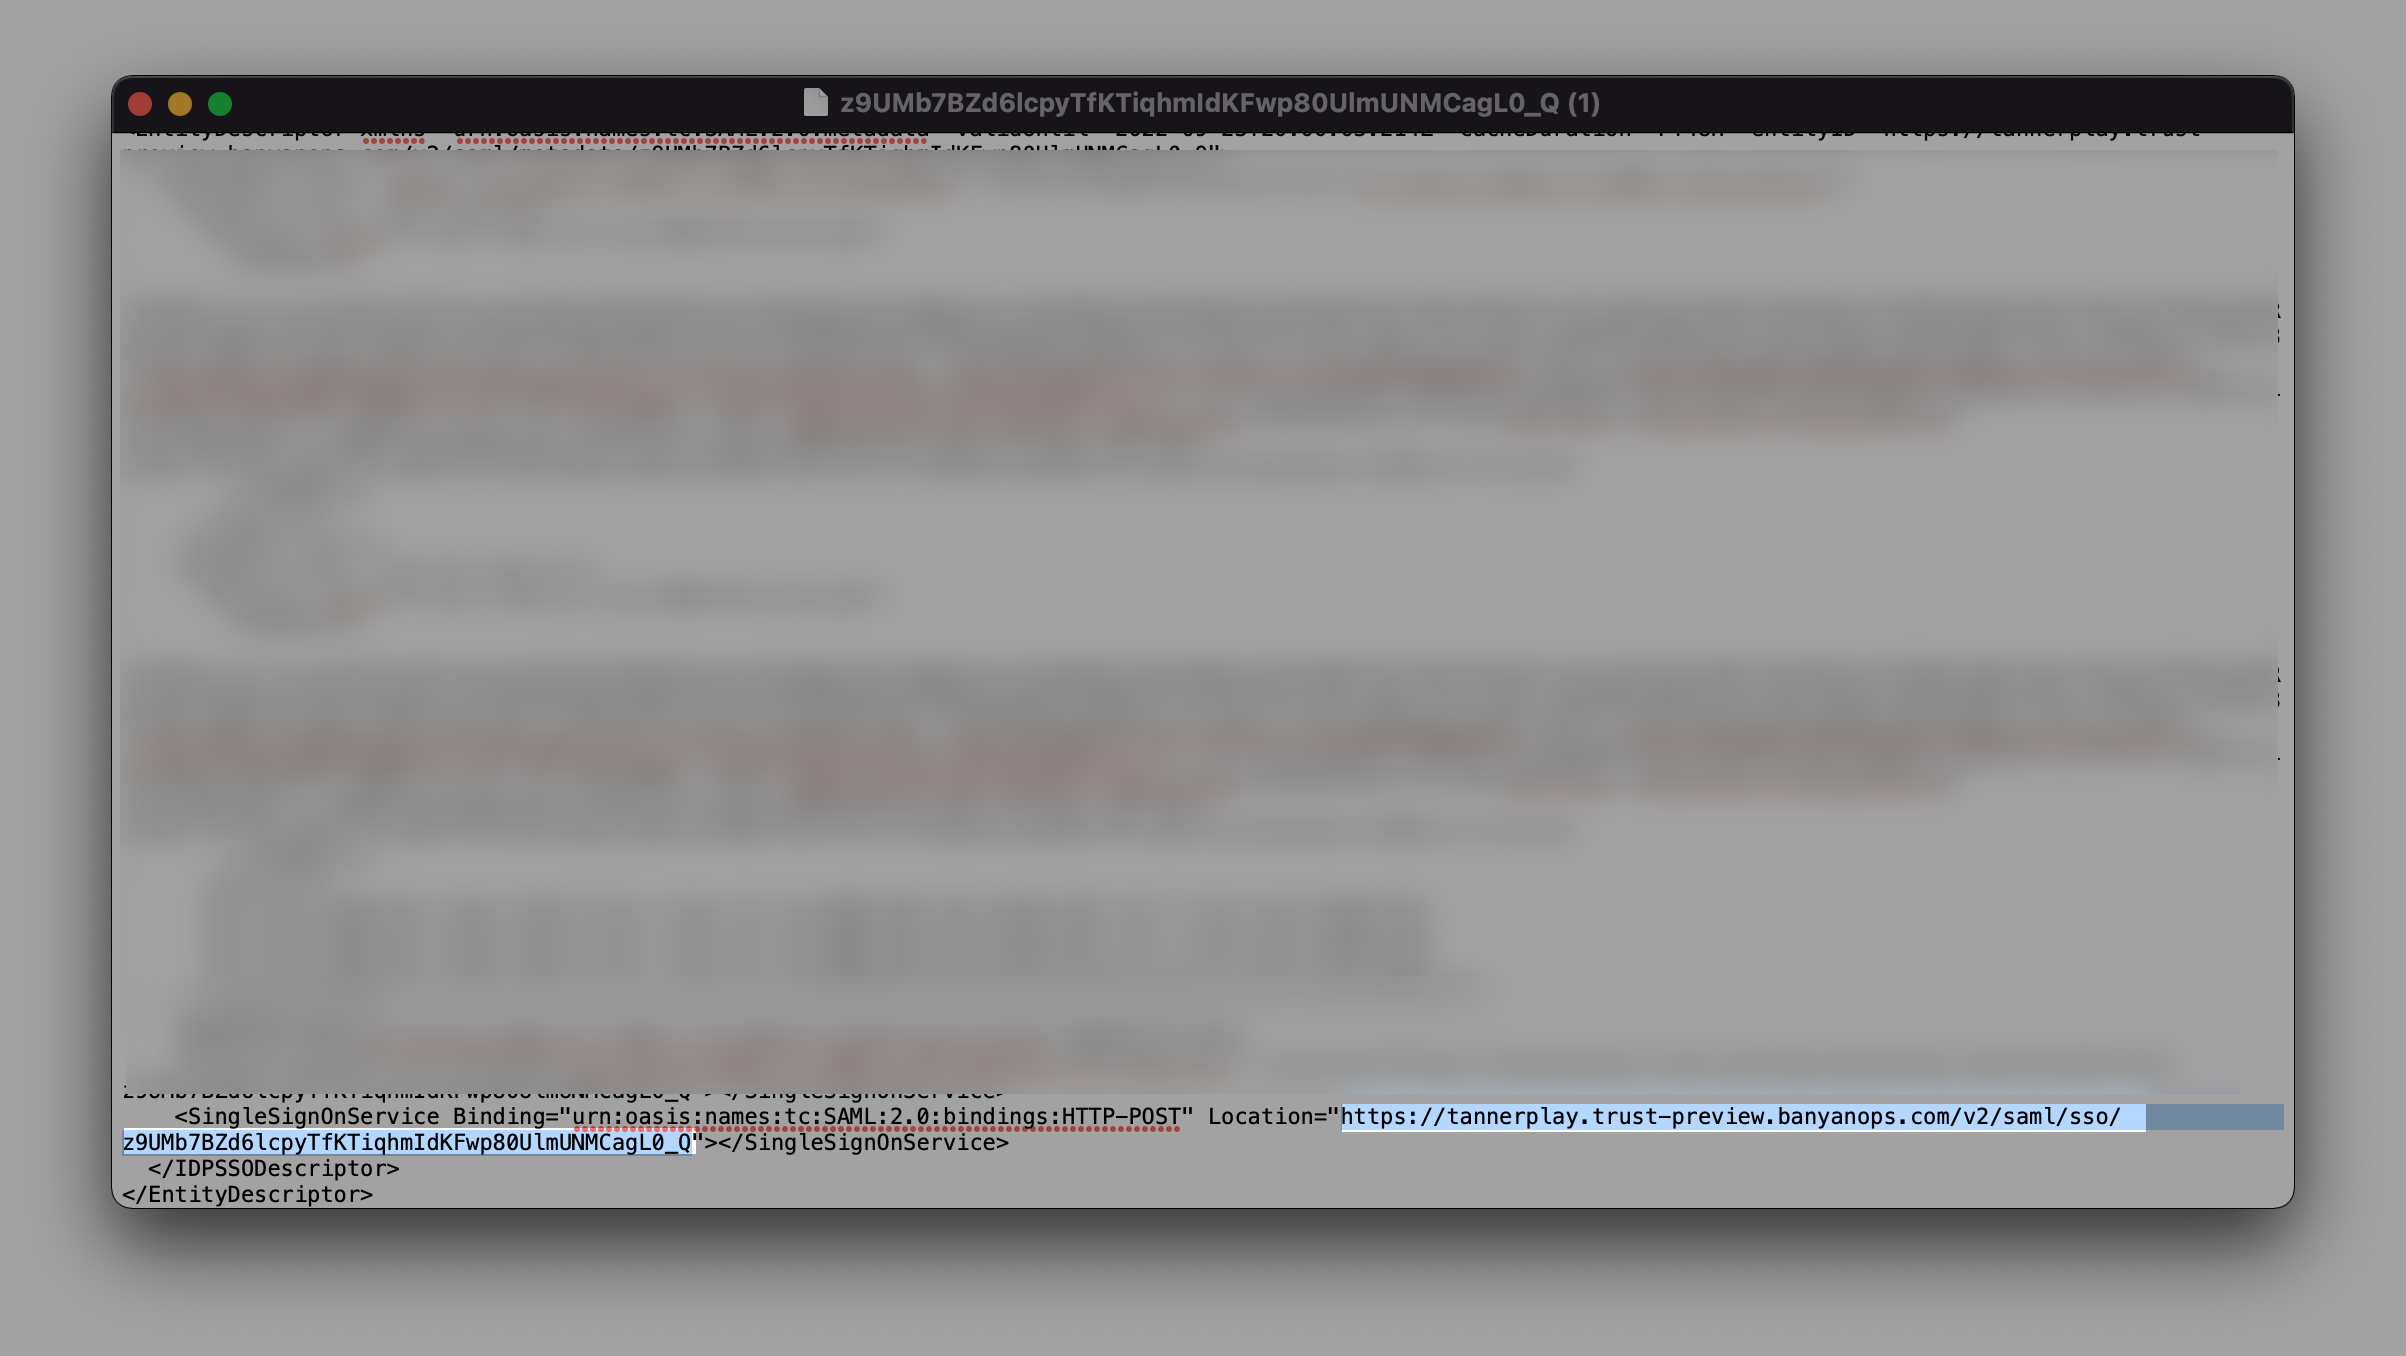
2.7 In the IdP Issuer URI field, enter the entity ID from the downloaded text file (from the copied Metadata link).
2.8 In the IdP Single Sign-On URL field, enter the Single Sign-On Service URL from the same downloaded text file.
2.9 Copy and paste the x.509 Certificate into this formatting tool. Save the formatted certificate as a .pem file.
2.10 Upload the file to the configuration page in Okta.
2.11 Select Finish.
Step 3: Update the Redirect URL and Audience URI in your newly created SaaS app in CSE
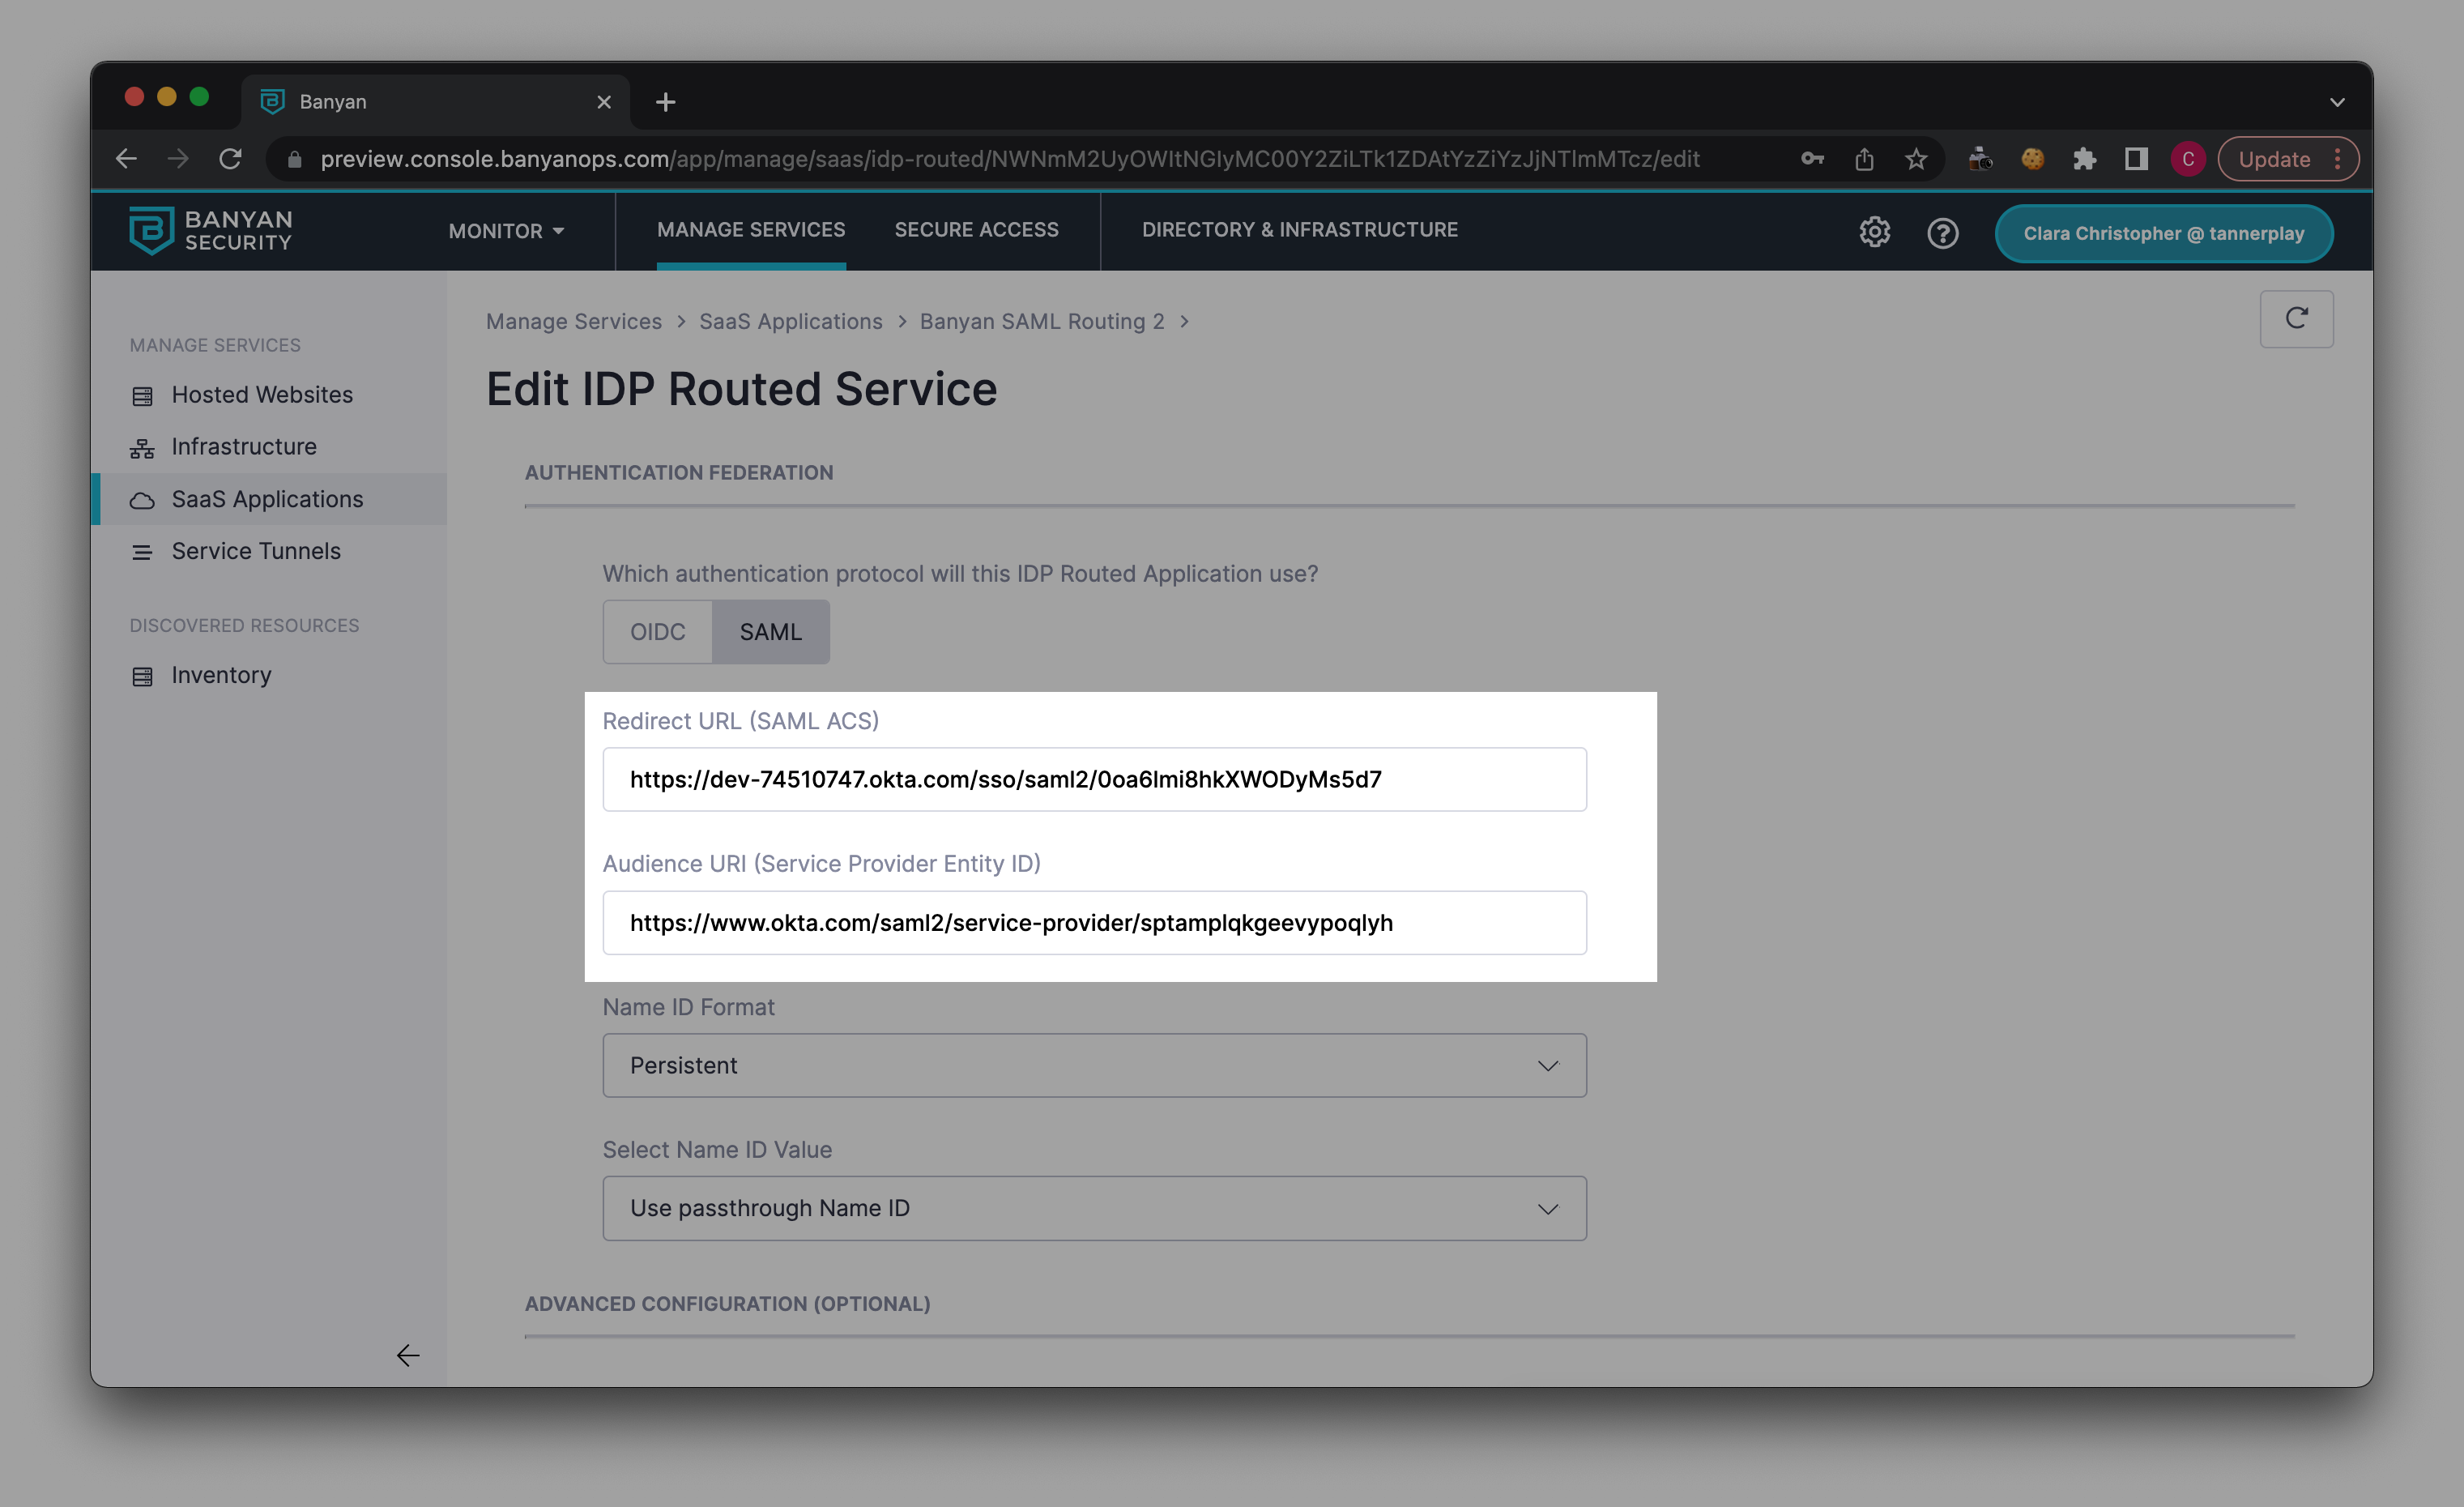
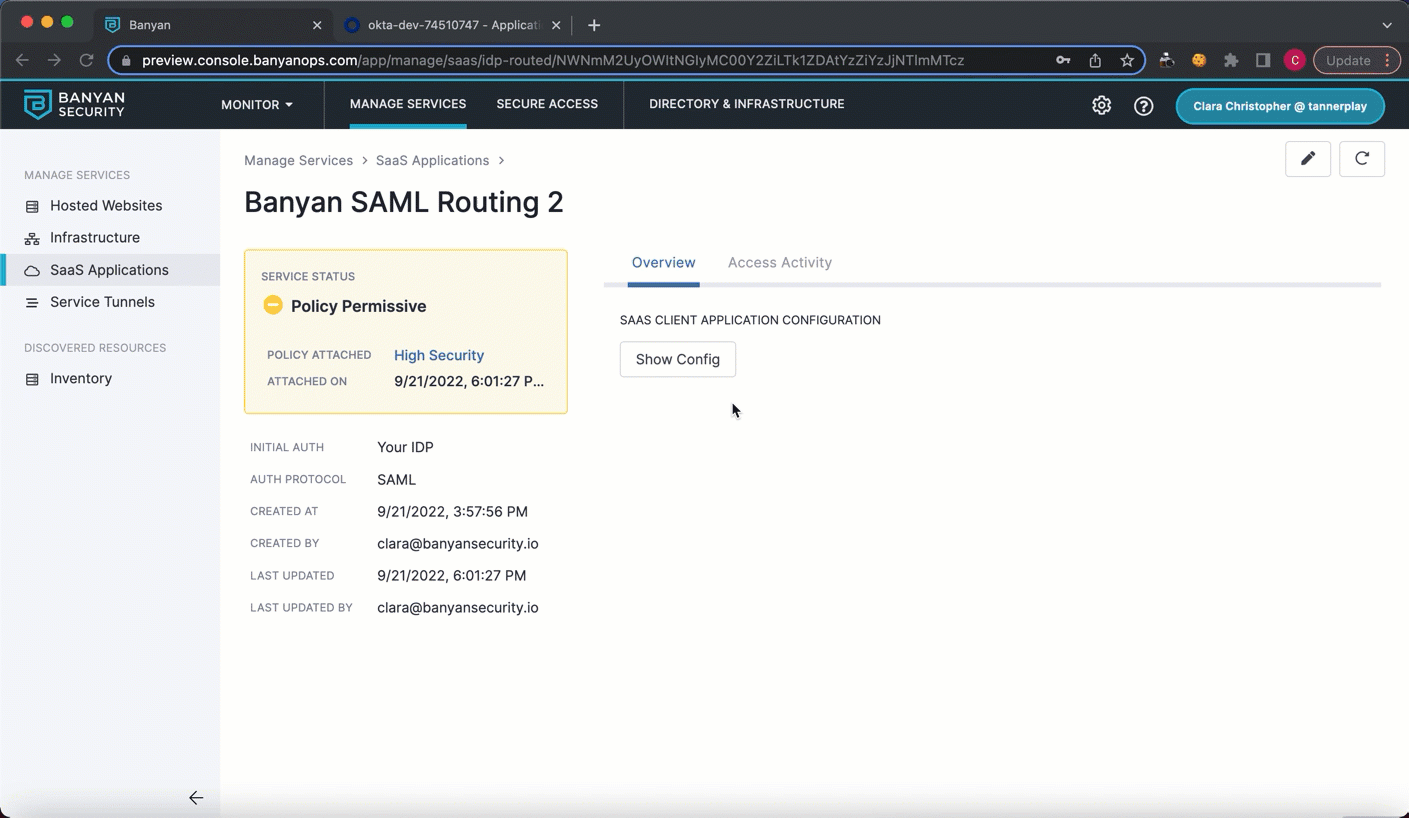
3.1 In the Command Center, navigate from Manage Services > SaaS Applications. Select your newly published SaaS application, and click into the detailed view. Select the pencil icon to edit your IDP routed service.
3.2 Copy the Assertion Consumer Service URL and the Audience URI (from the expanded view of your new Identity Provider in Okta; See image below).
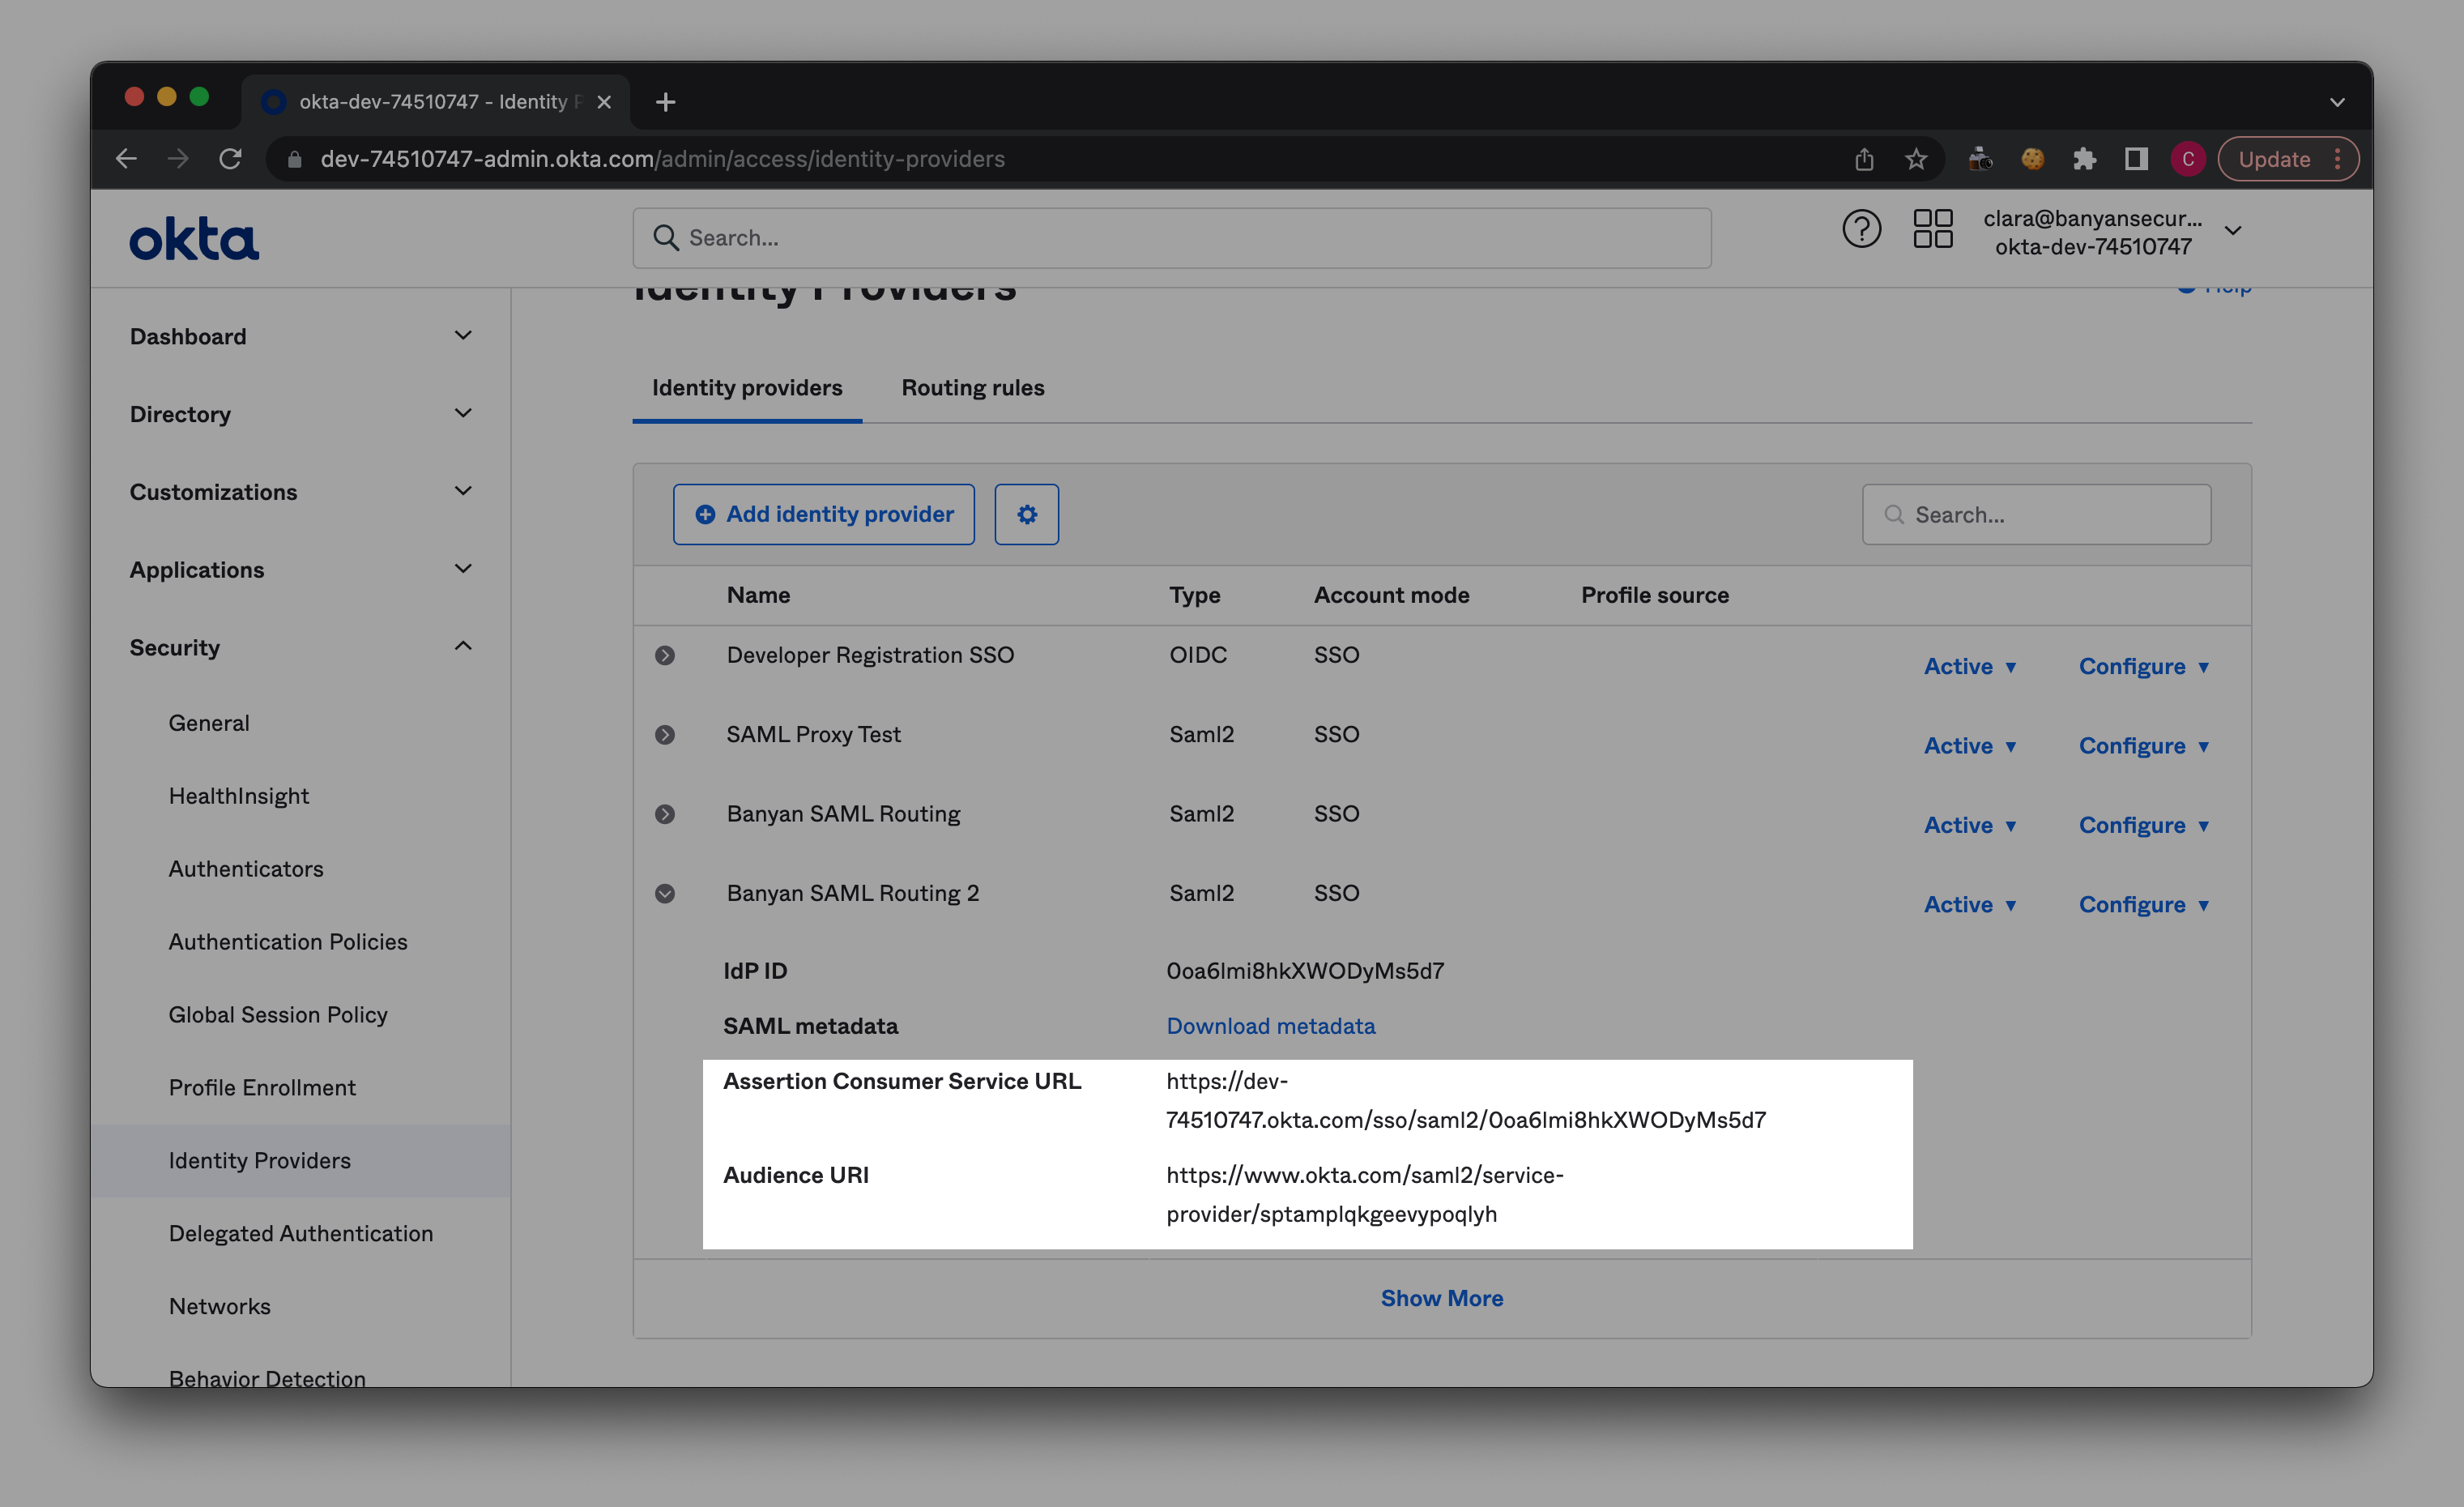
3.3 Paste the Assertion Consumer Service URL (from the expanded view of your new Identity Provider in Okta) in the Redirect URL (SAML ACS) field in your CSE SaaS app edit service page.
3.4 Paste the Audience URI (from the expanded view of your new Identity Provider in Okta) in the Audience URI (Service Provider Entity ID) field in your CSE SaaS app edit service page.
3.5 Select Save.
Step 4: Create an application integration
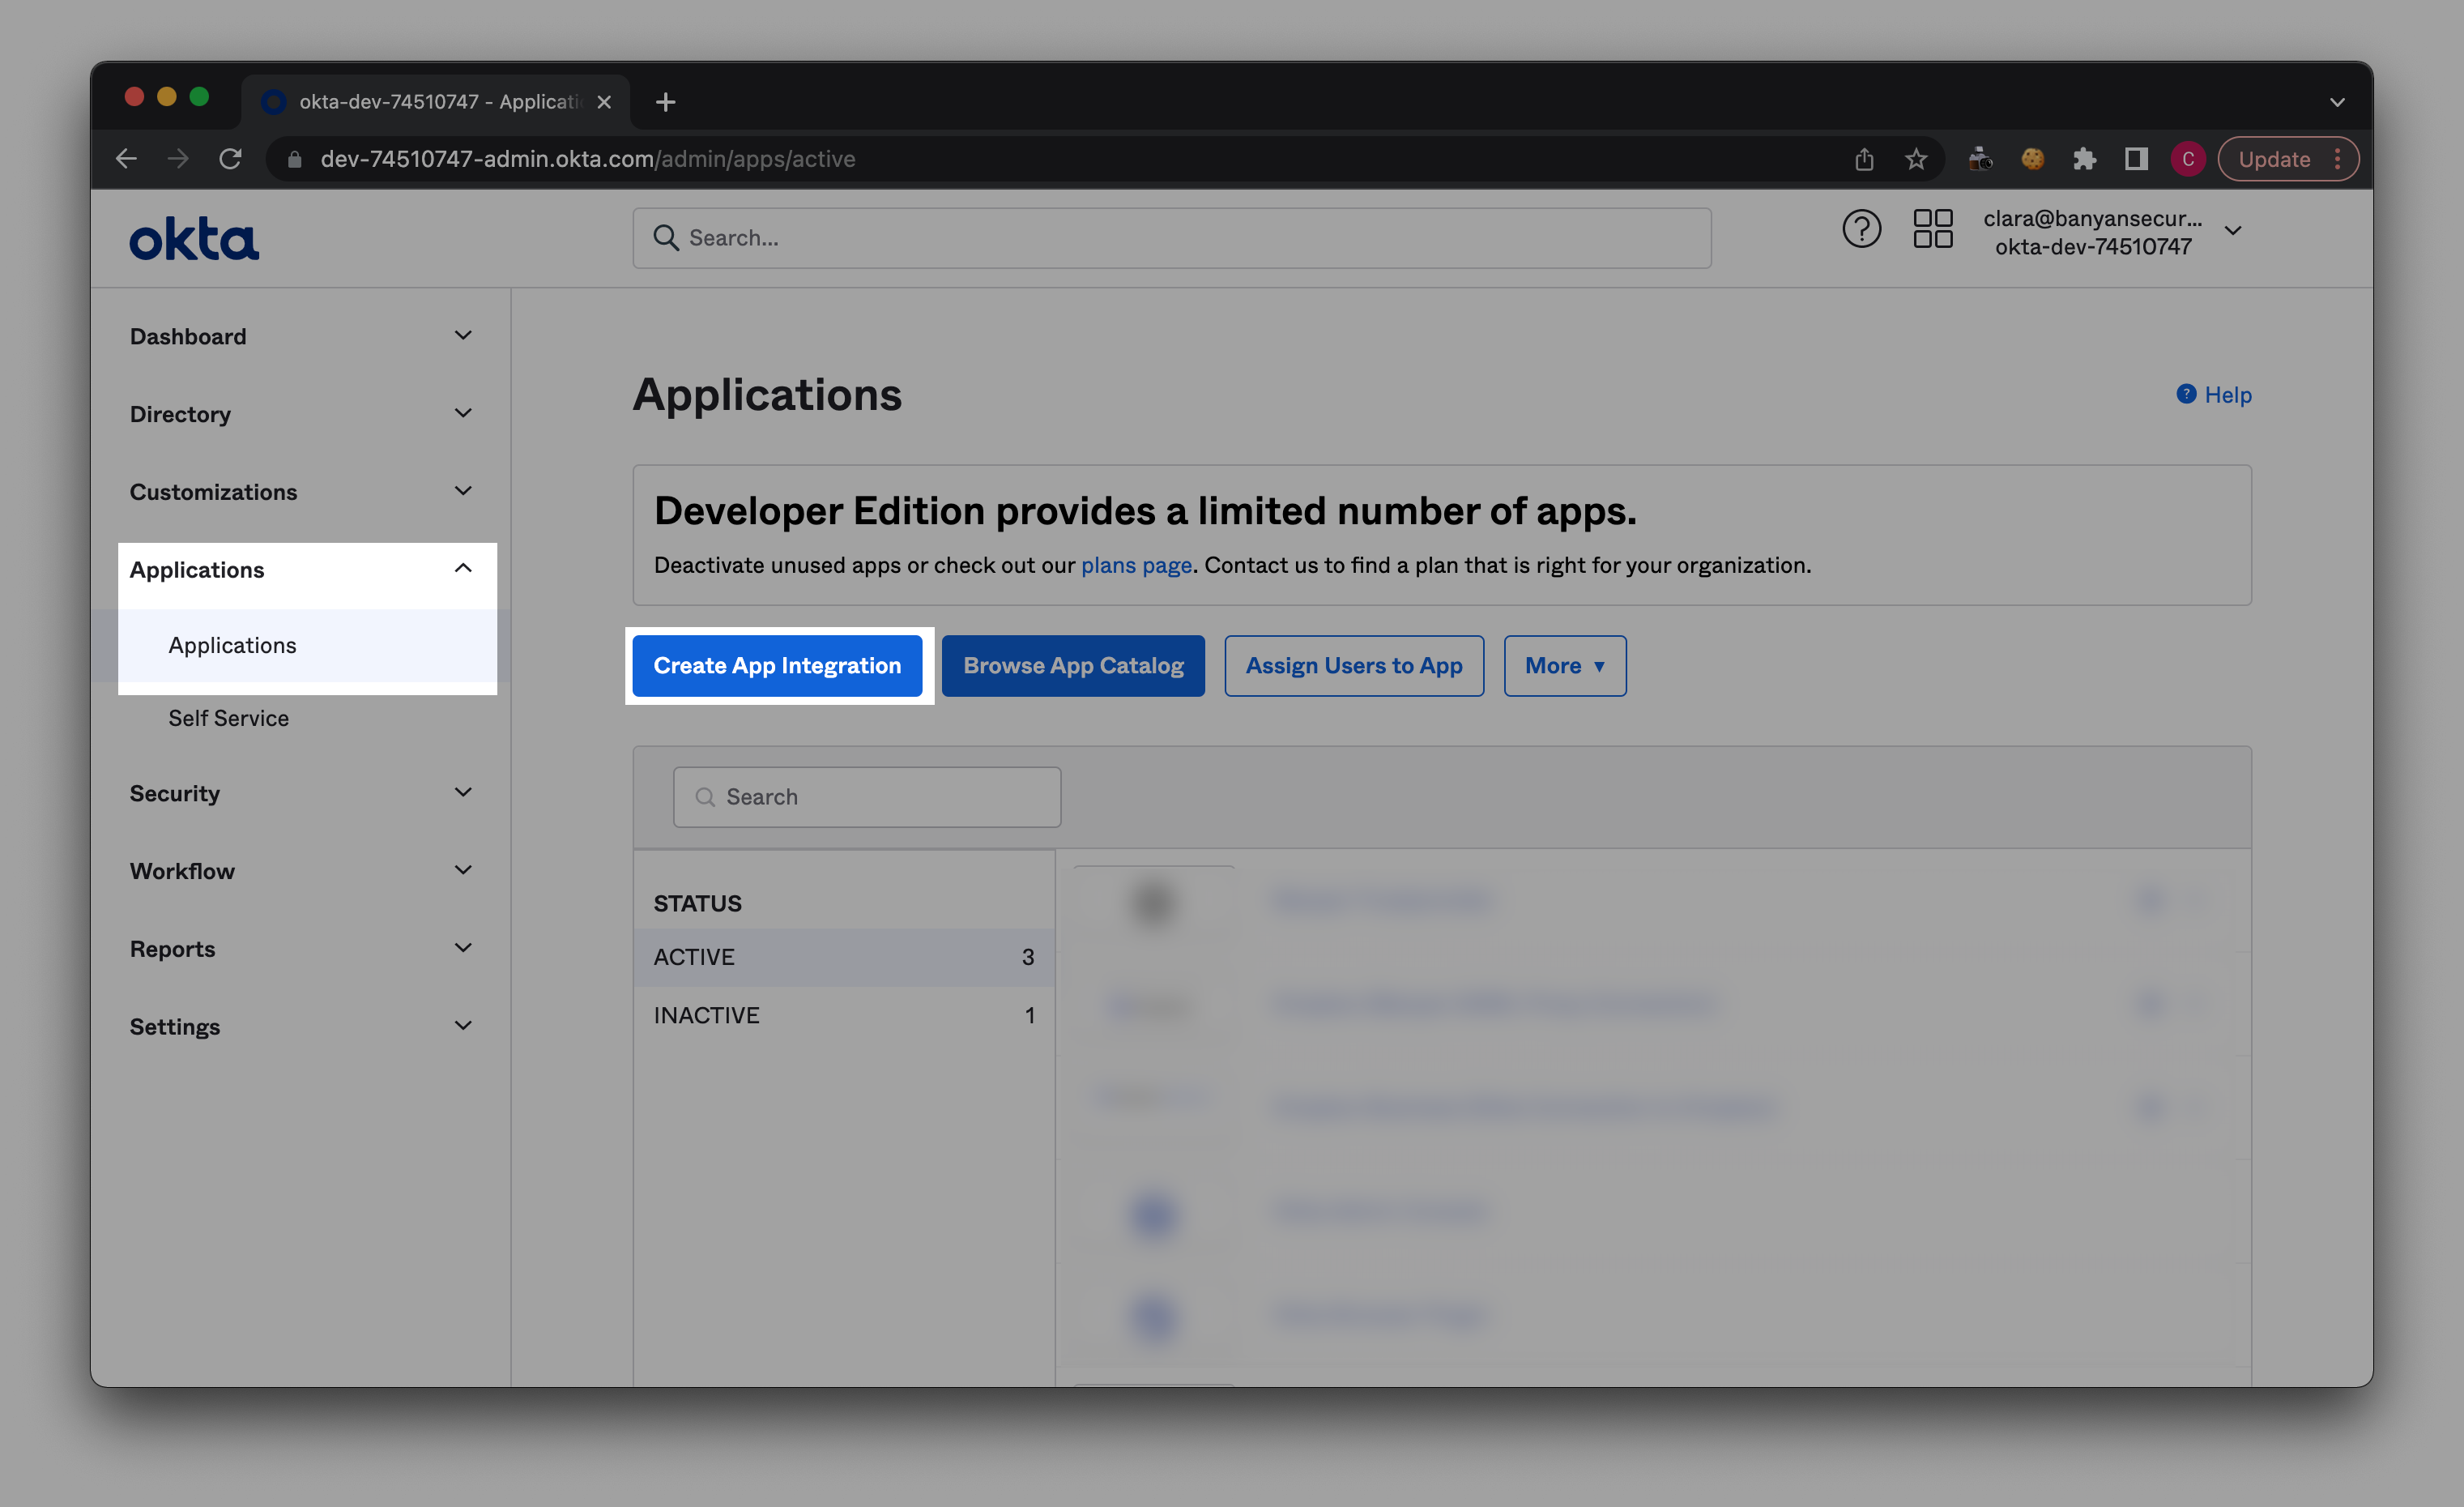
4.1 In Okta, navigate from Applications > Applications.
4.2 Select Create App Integration.
4.3 Select SAML 2.0, then select Next.

4.4 In General Settings, name your app (e.g., Dropbox).
4.5 Then, upload the relevant app logo (e.g., Dropbox’s logo).
4.6 On your newly published SaaS app service spec page, under Overview, select Show Config. Copy the SAML Proxy URL. Navigate back to your Okta Create SAML Integration flow, under 2 Configure SAML, and enter the copied SAML Proxy URL in the Single sign on URL field. Select Use this for Recipient URL and Destination URL.
4.7 Enter the same copied link in the Audience URI field (in Okta).
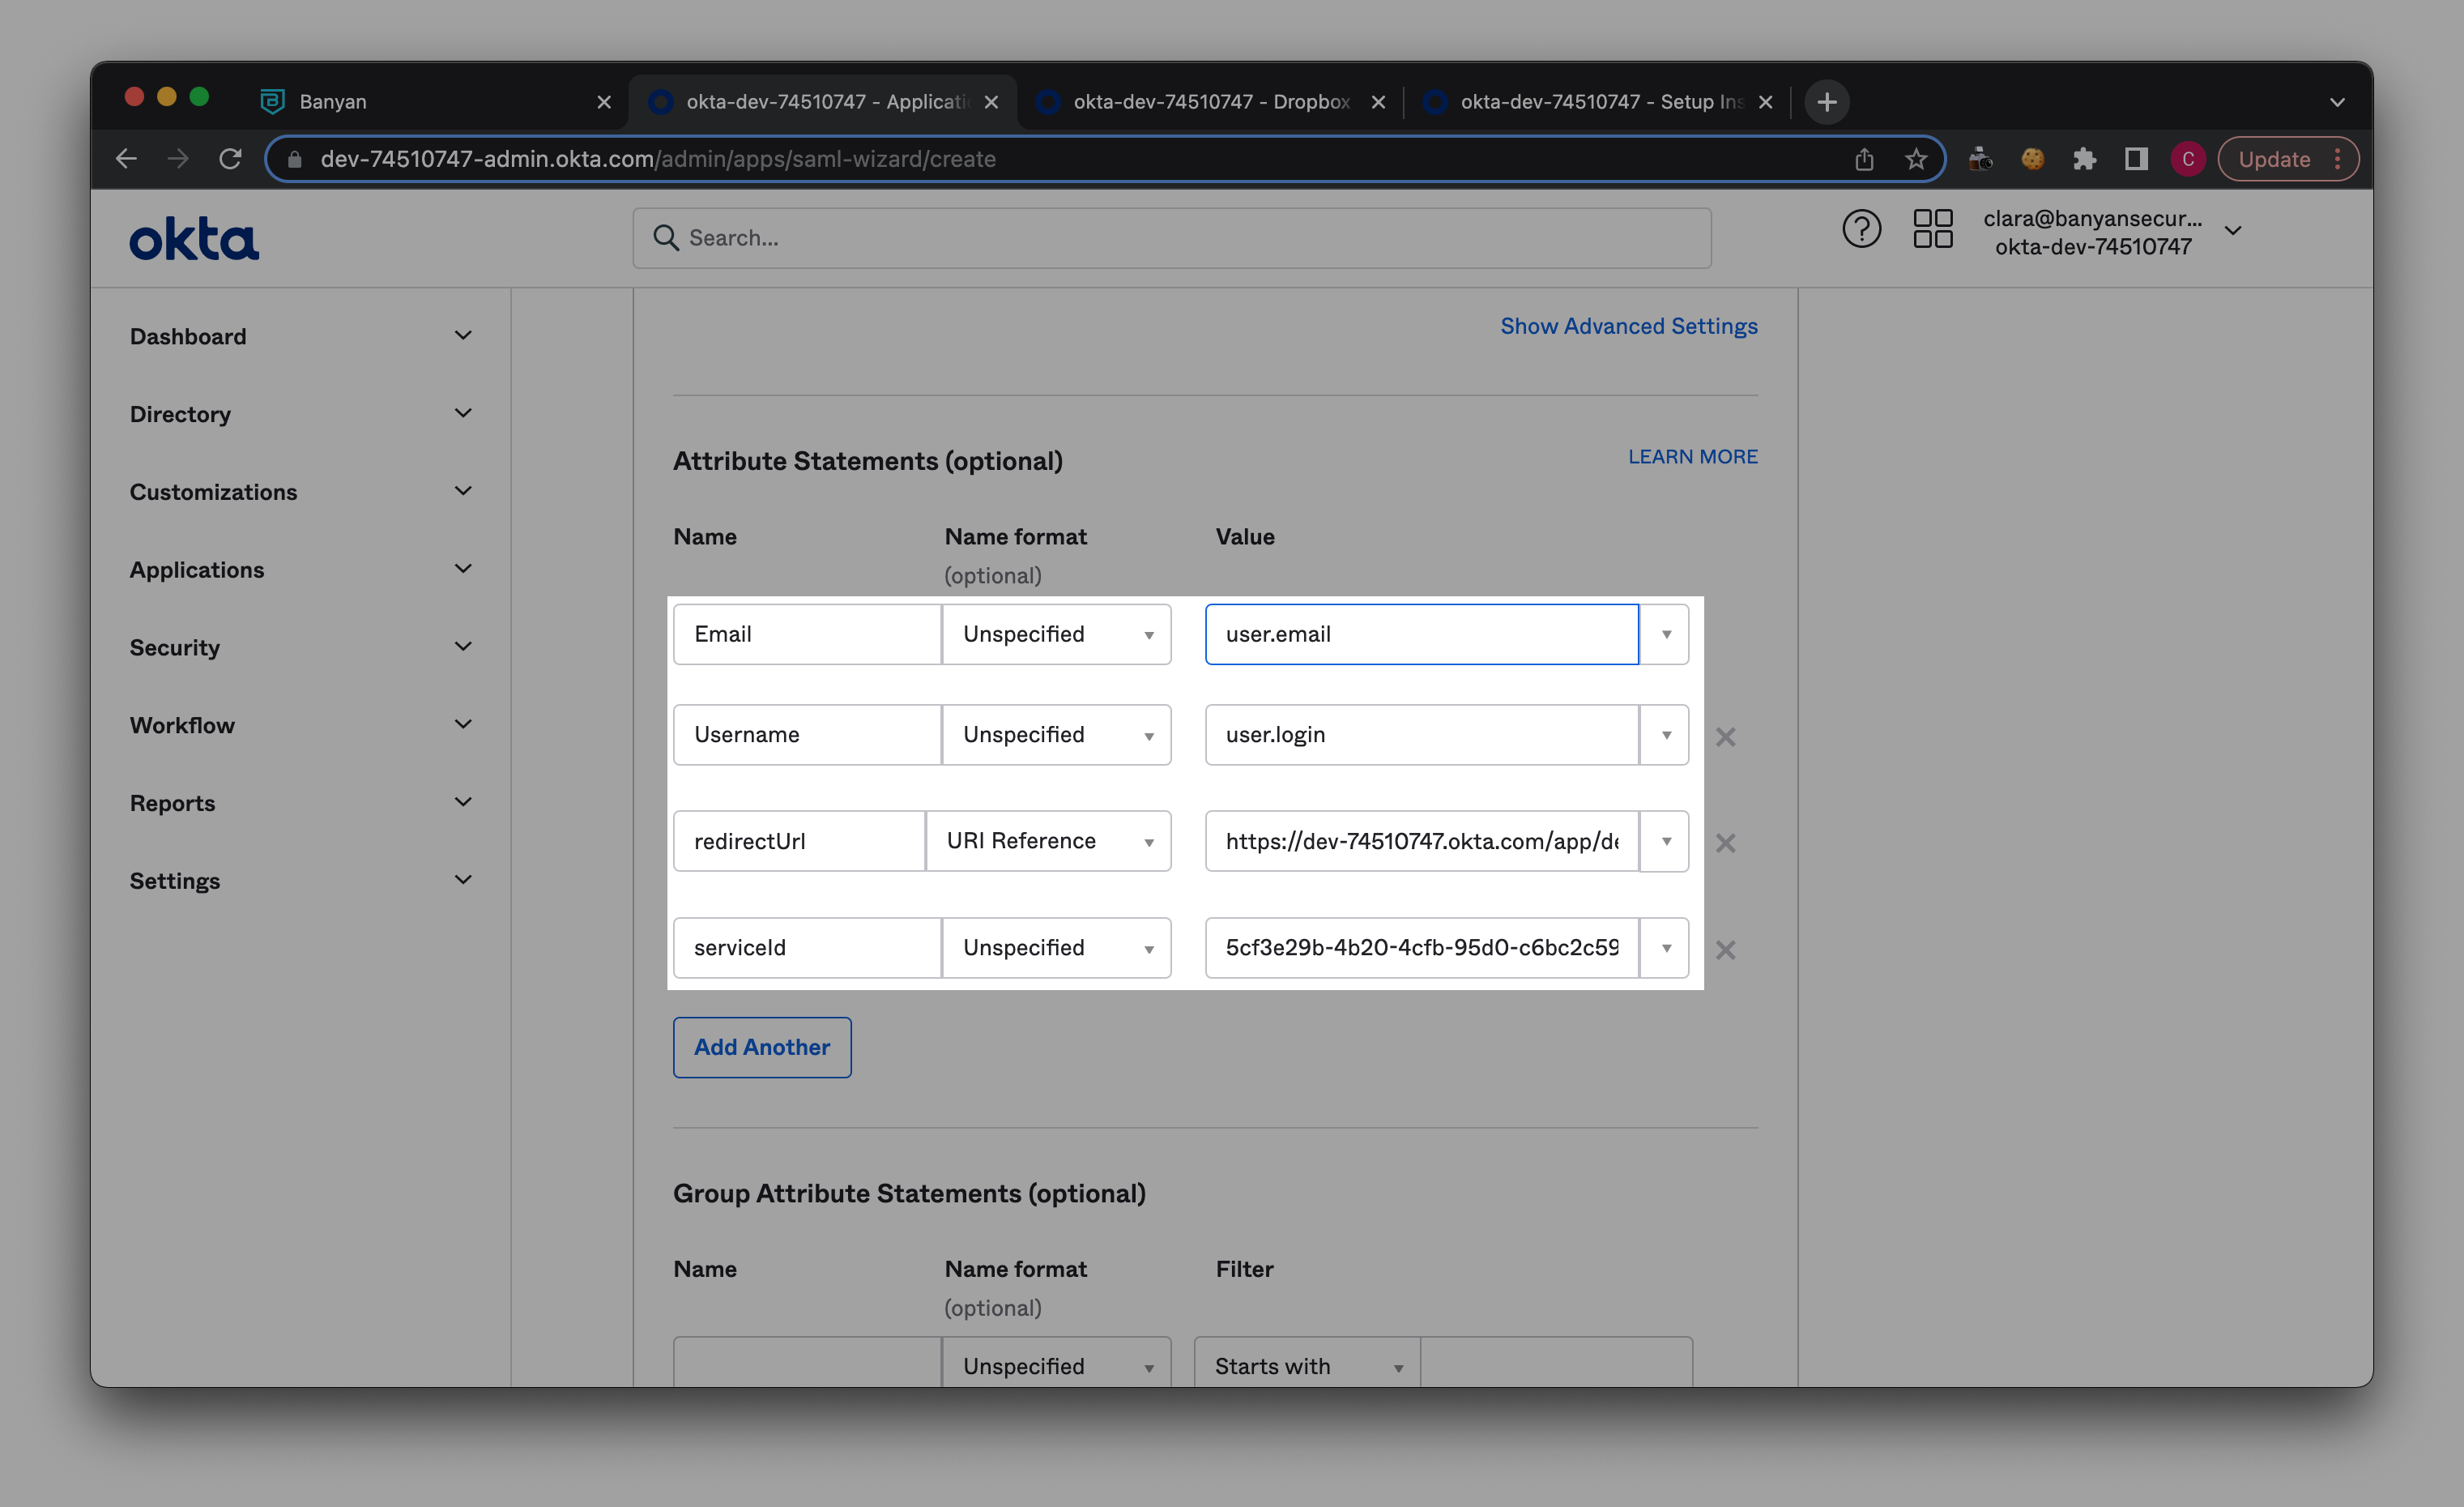
4.8 In Attribute Statements, enter ‘Email’ under Name (in the first available field). Select user.email from the dropdown in the adjacent Value field.
4.9 Select Add Another. Enter ‘Username’ under Name in the added field. Select user.login from the dropdown in the adjacent Value field.
4.10 Select Add Another. Enter ‘redirectUrl’ under Name in the added field. Fetch SSO URL from your SaaS app (e.g., Dropbox).
4.11 Select URI Reference as the Name Format for ‘redirectUrl’.
4.12 Select Add Another. Enter ‘serviceId’ under Name in the added field. Copy Saas App Service ID from your newly published SaaS app’s service spec in CSE, and paste in adjacent field.
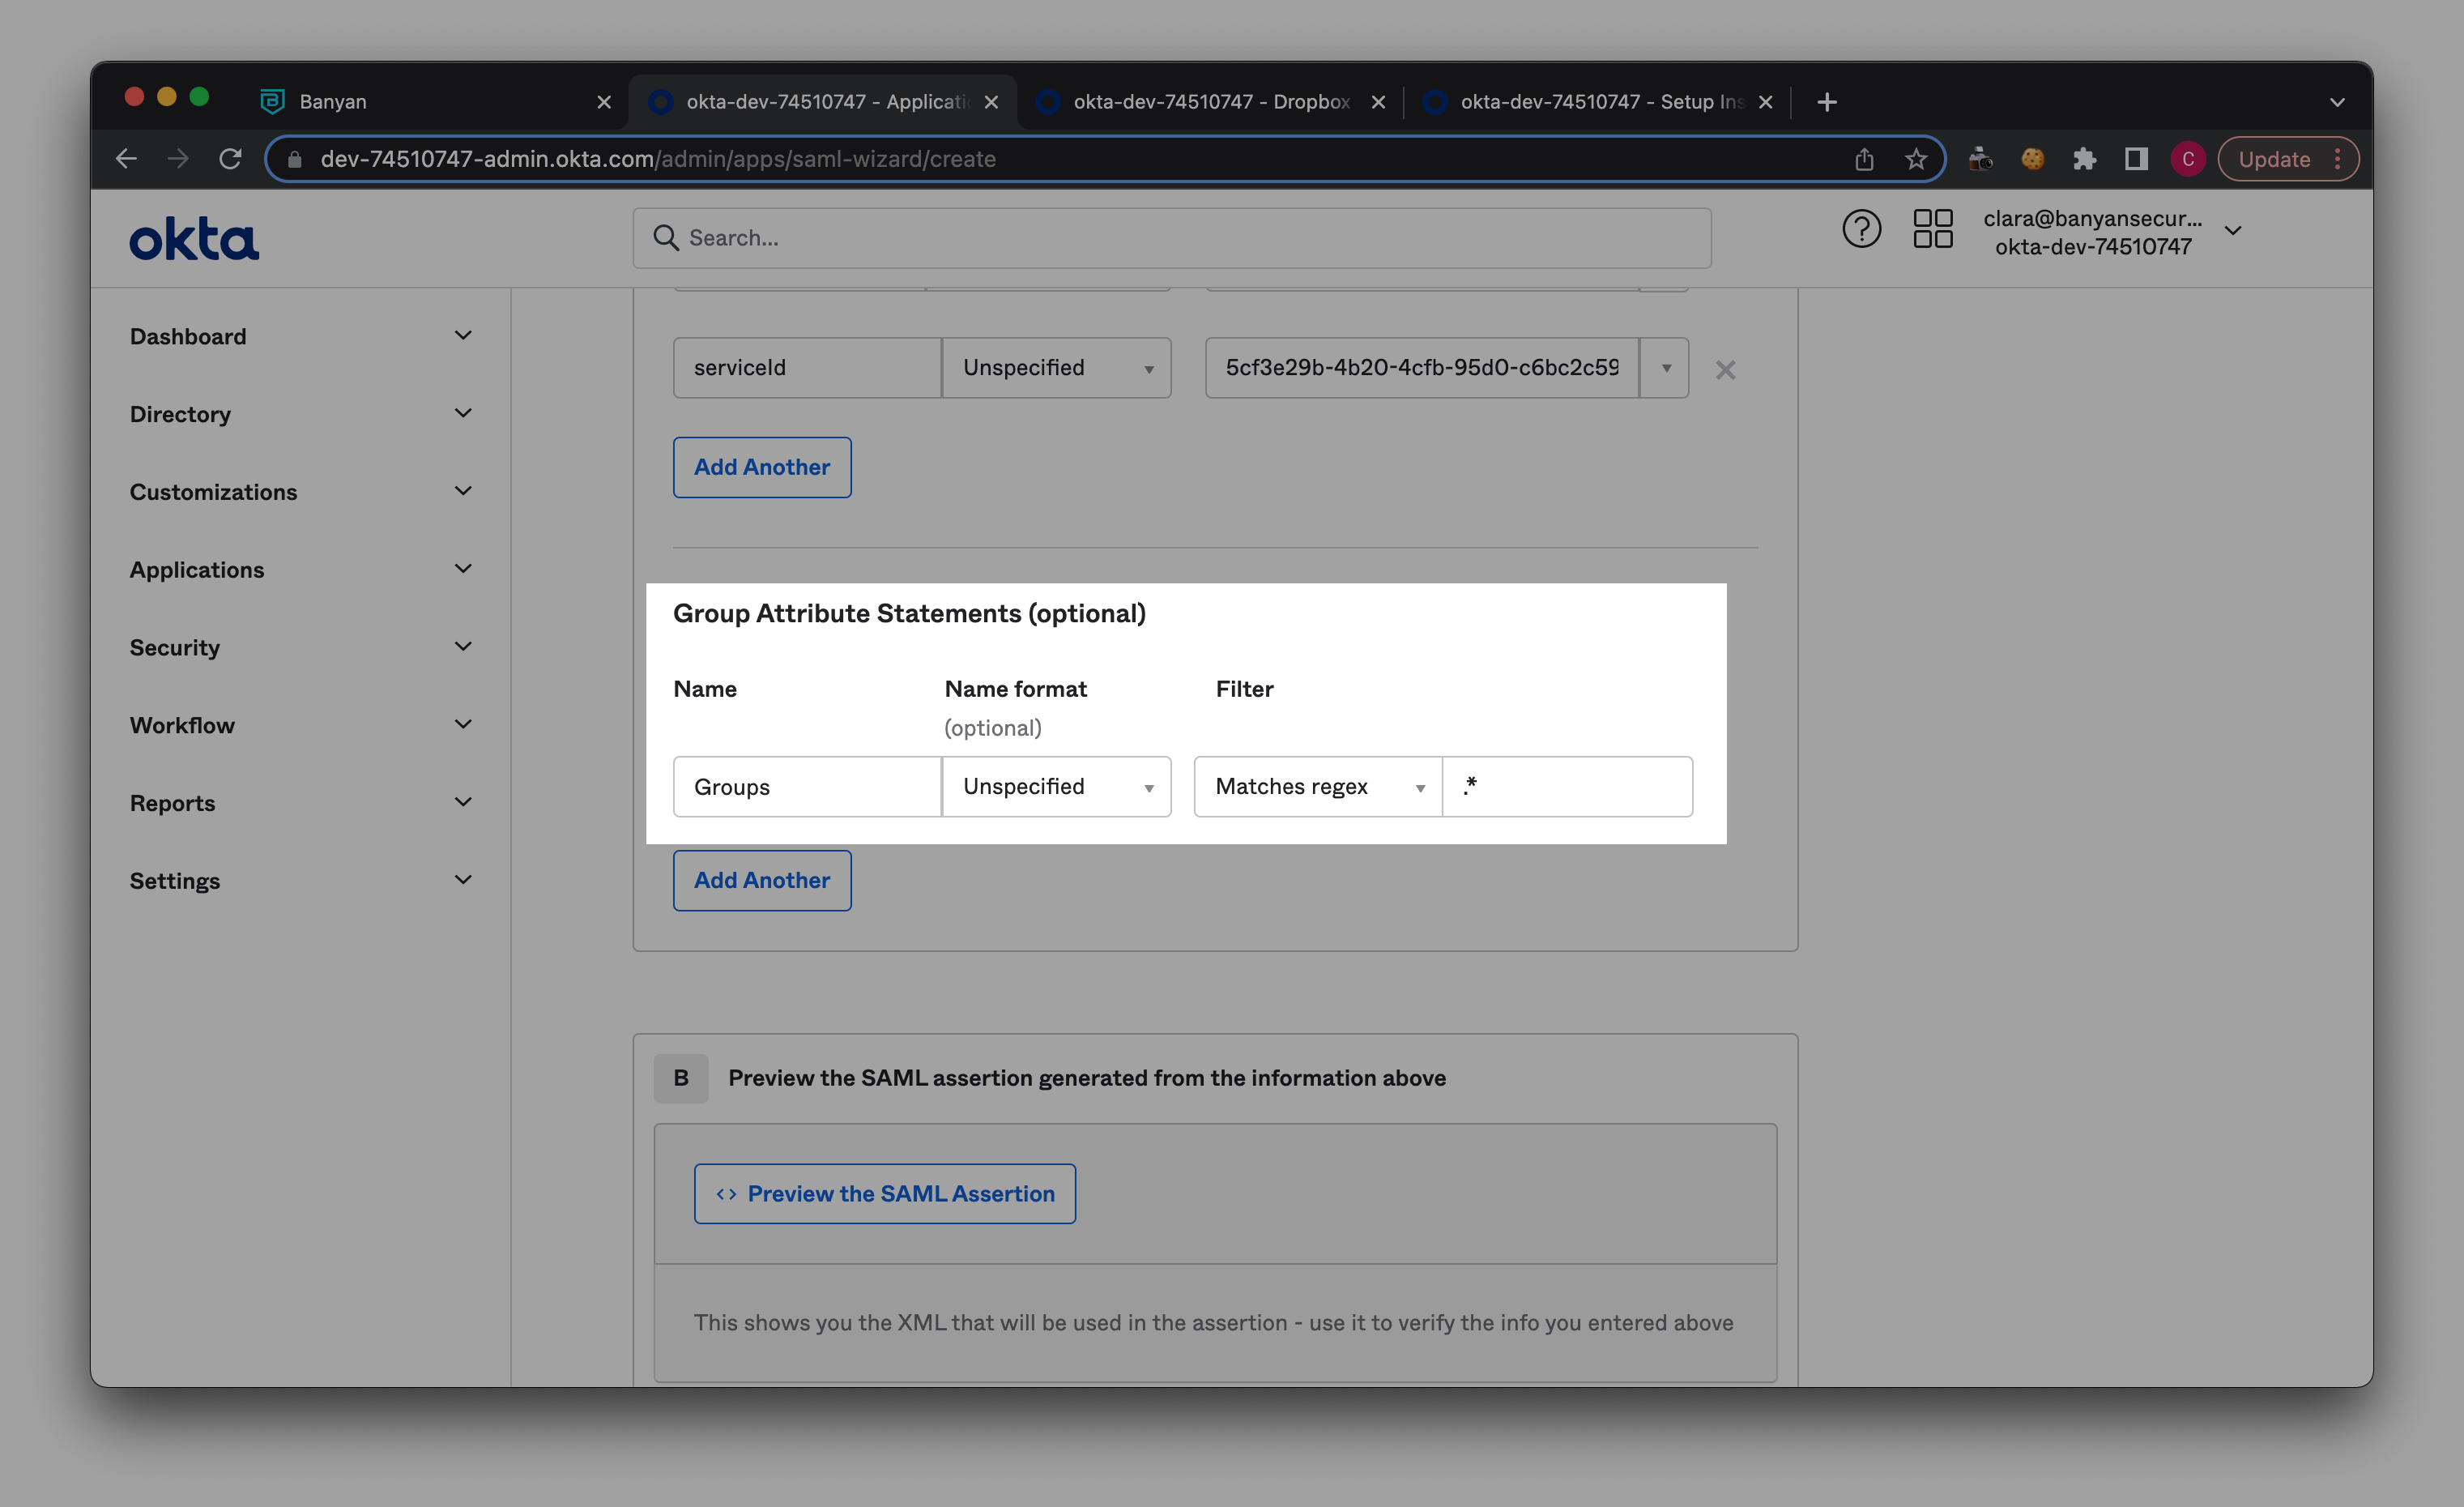
4.13 In Group Attributes Statements, enter ‘Groups’ under Name, and select Matches regex as the Filter. Then add ‘ .* ‘ in the field adjacent to the Filter.
4.14 Select Next.
4.15 Select I’m an Okta customer adding an internal app.
4.16 Select Finish.
Step 5: Add routing rules for SP-intitiated flows
5.1 In Okta, navigate from Security > Identity Providers > Routing Rules.
5.2 Select Add Routing Rule, and configure the following settings:
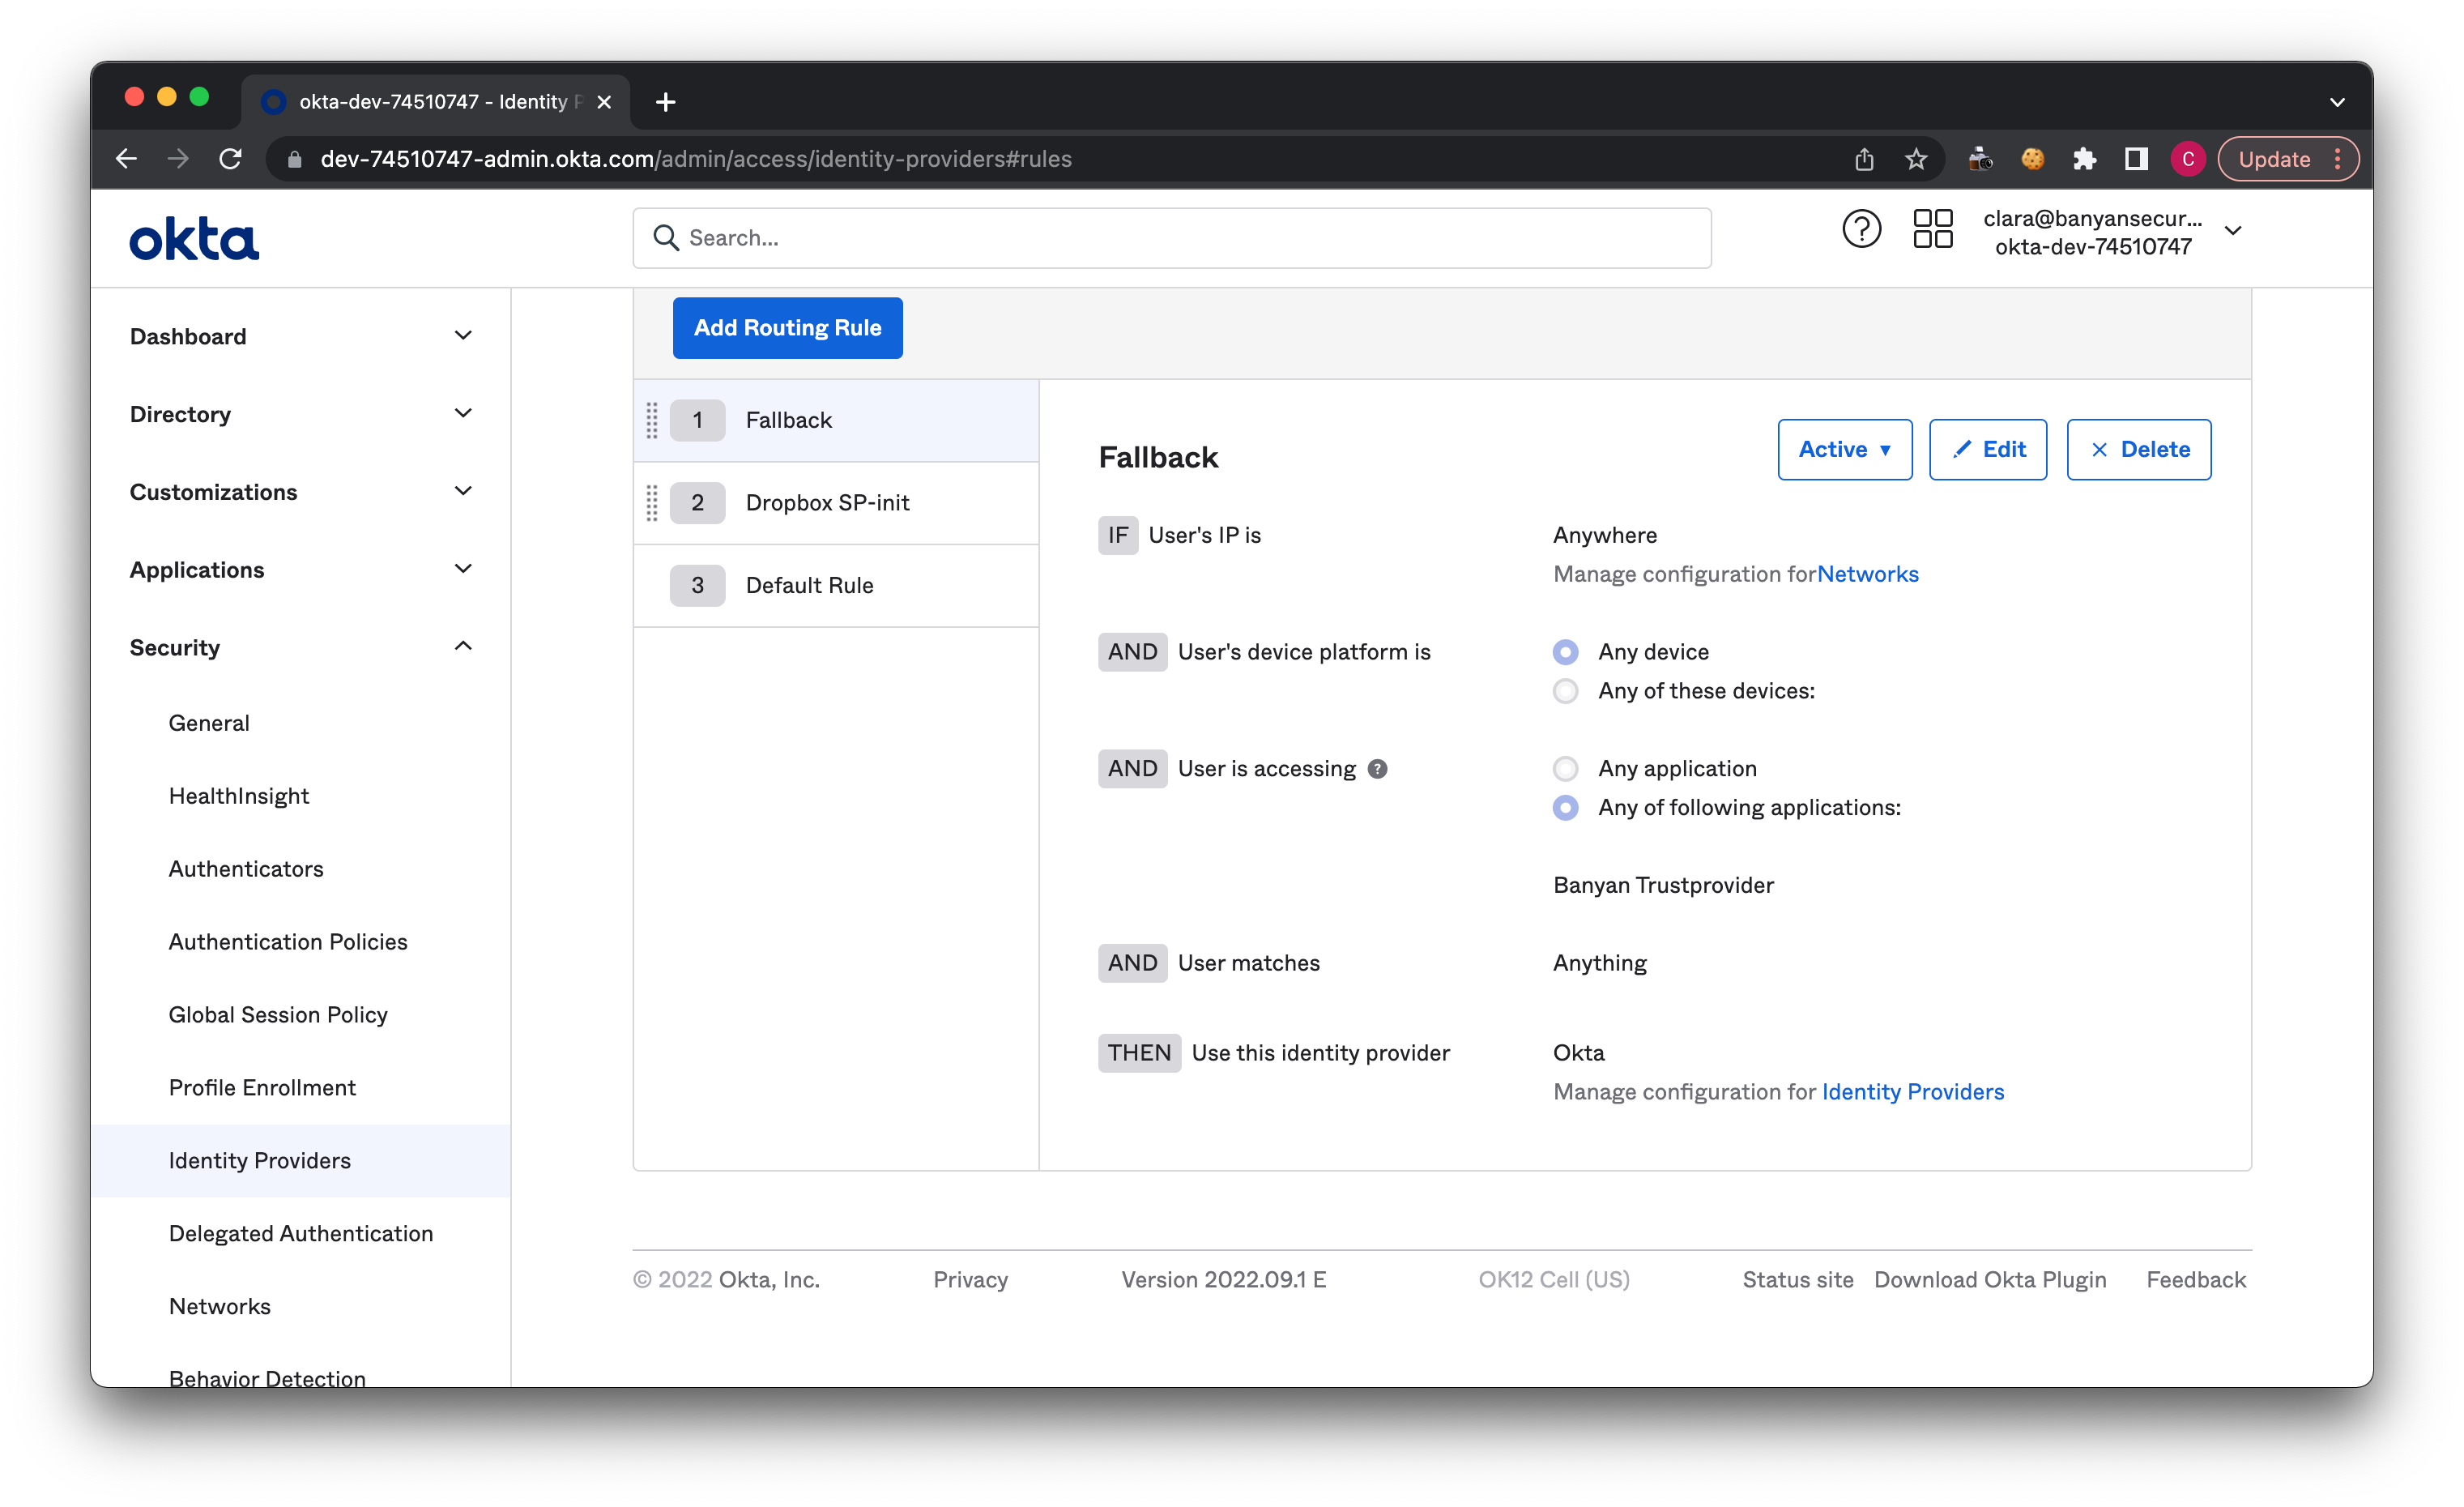
5.3 Select Add Routing Rule again, and configure the following settings:
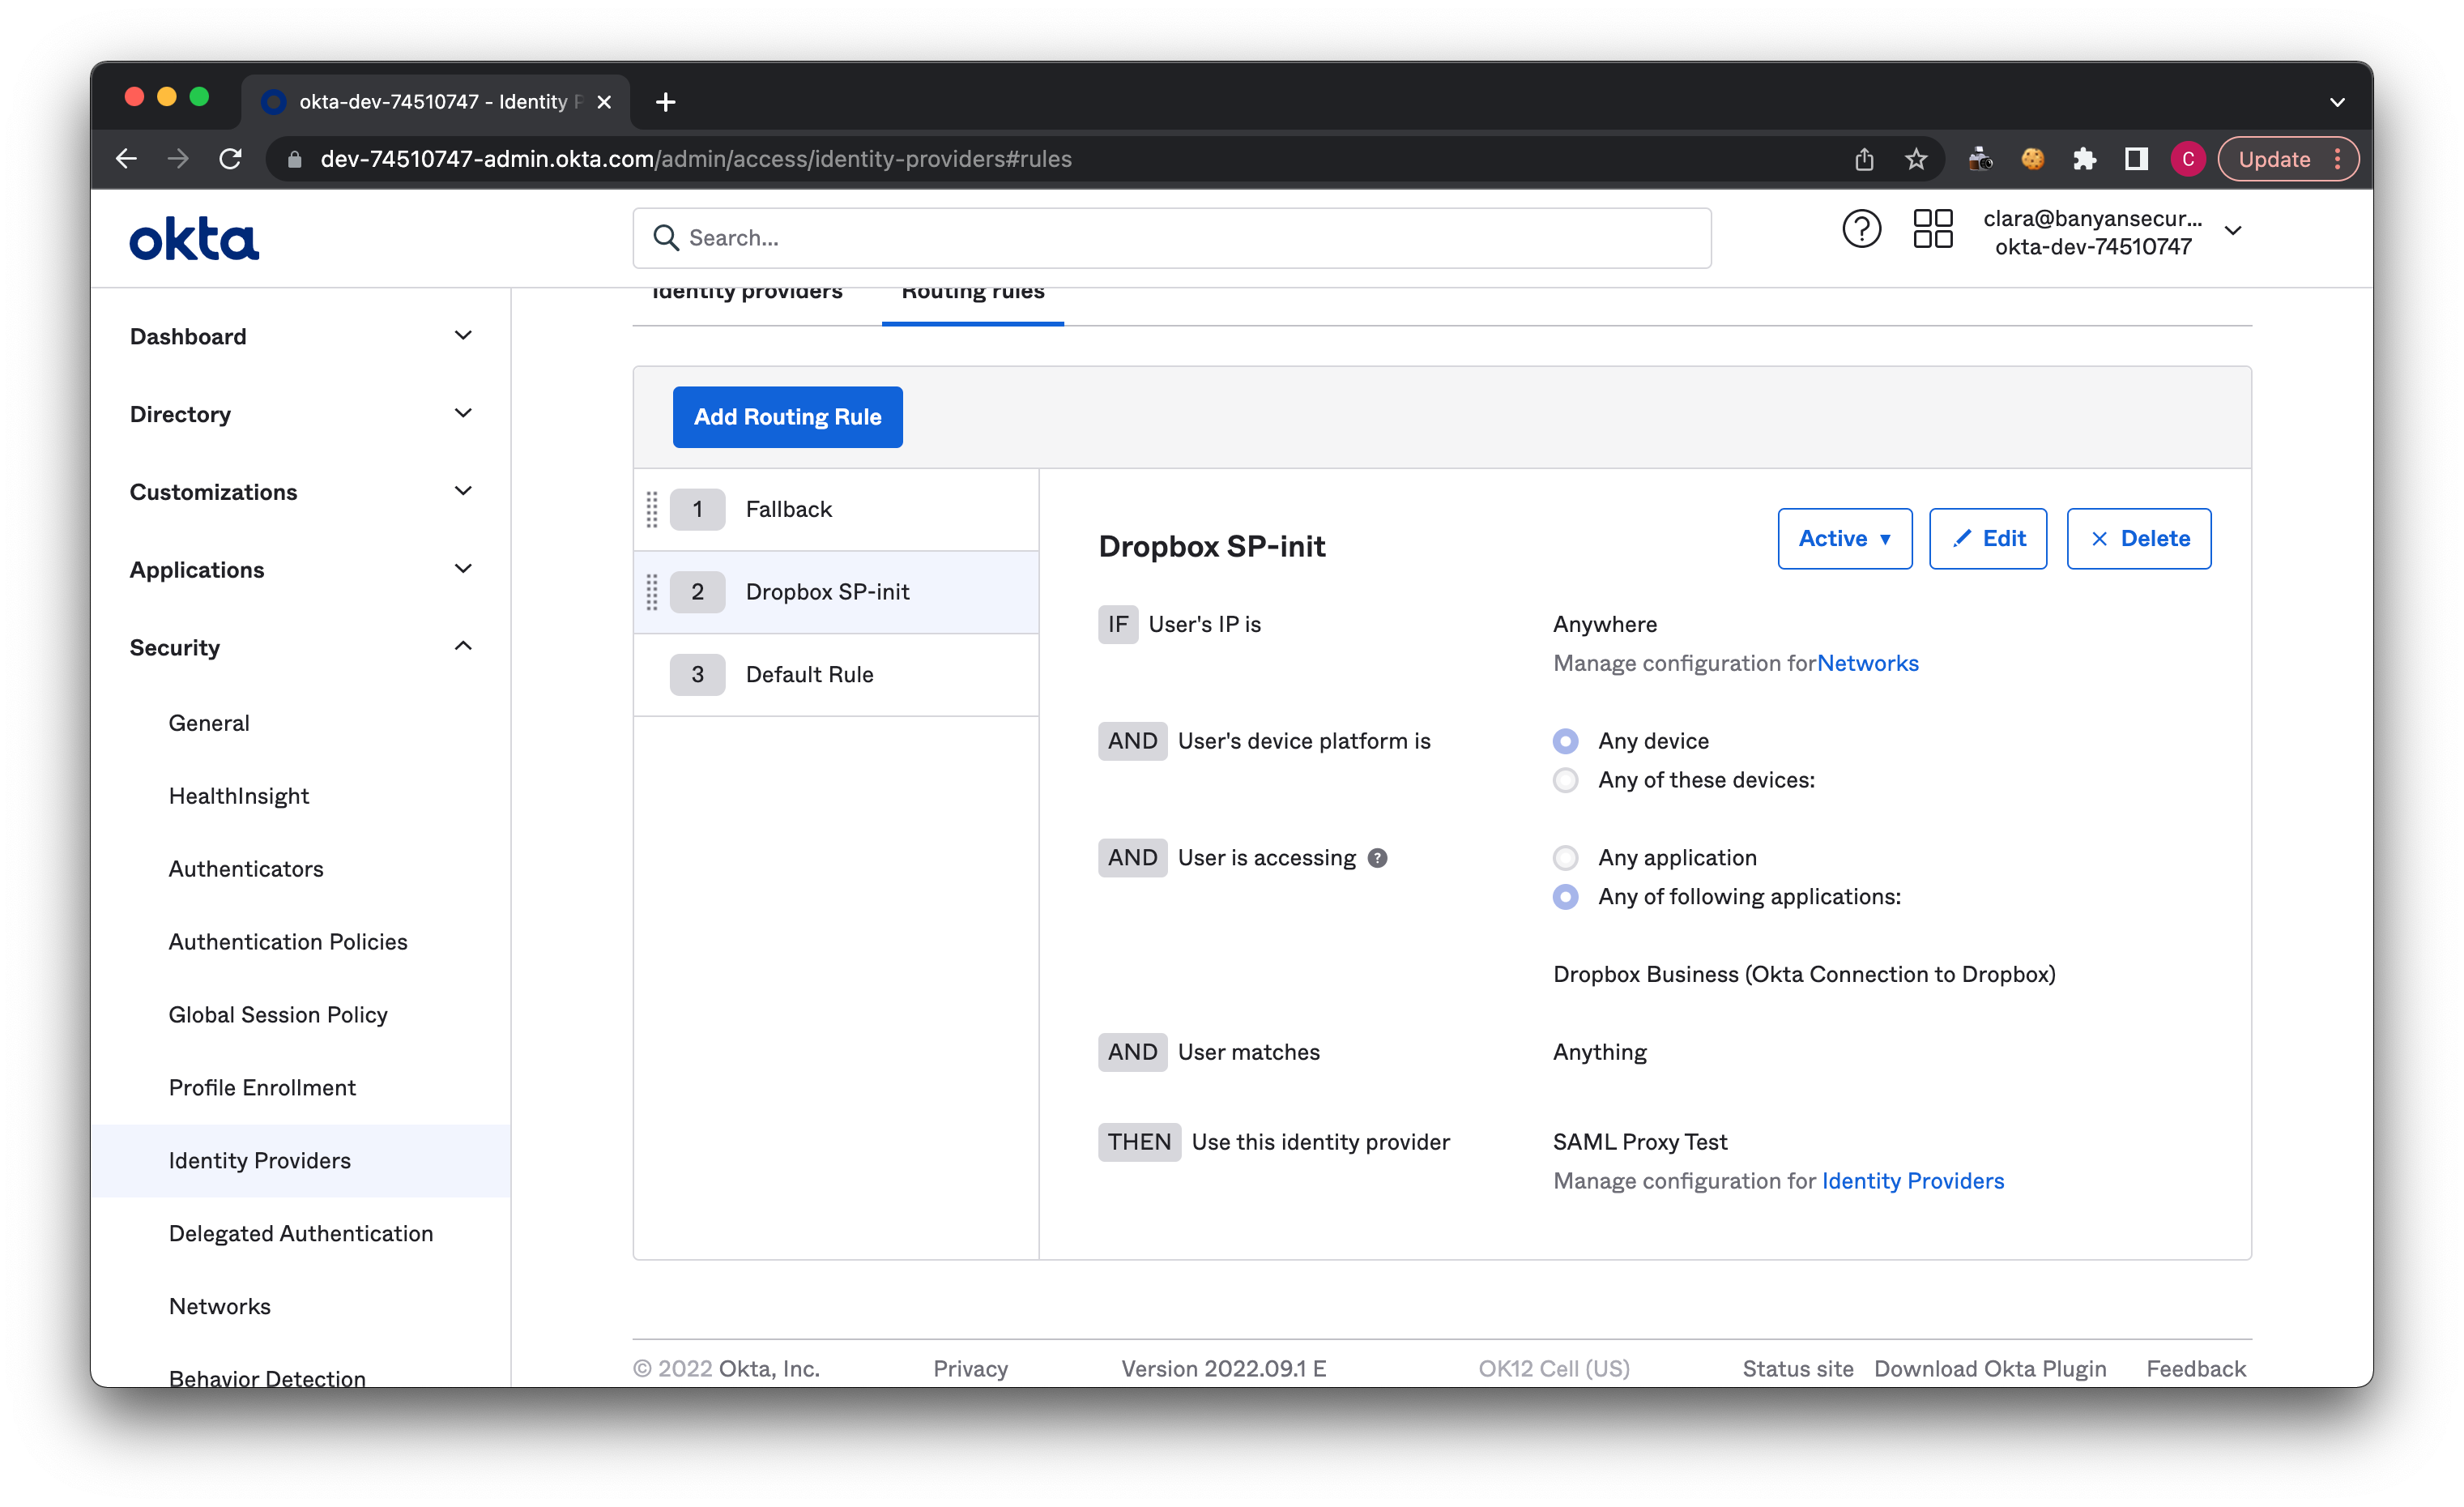
Note: This ensures that any specified devices accessing your SaaS app will go through CSE in an SP-initiated flow.
Step 6: Assign the app to your users
6.1 In Okta, on your Application’s page under Assignments, select Assign, and choose which user groups you want to assign the published SaaS app to.
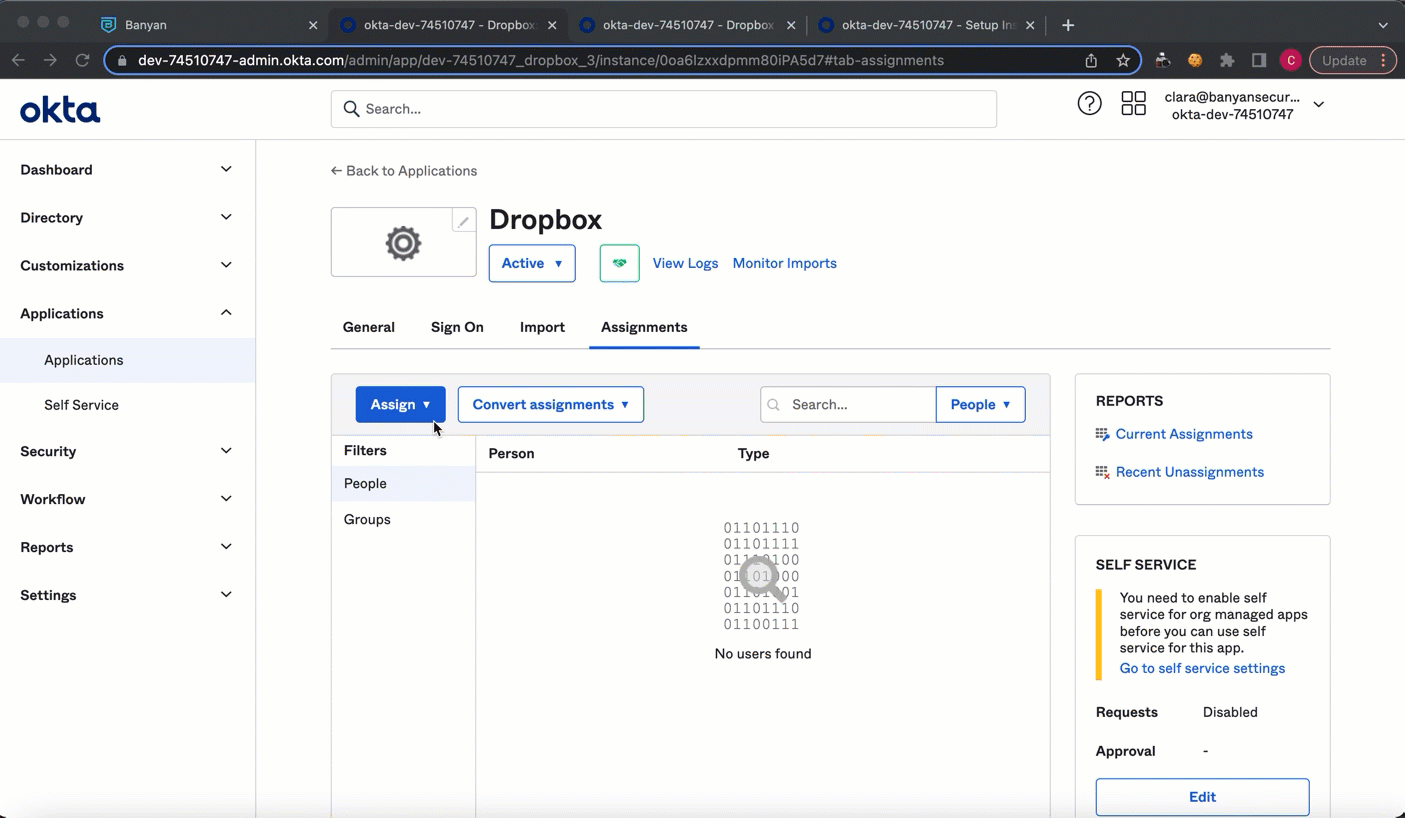
6.2 In Okta, on your Application’s page under General > App Settings, navigate to the Application visibility settings, and select Do not display application icon to users. Then, select Save. This ensures that the app will not appear in your Okta dock.
6.3 Selected end users should now be able to securely log into your SaaS app (e.g., Dropbox).