Secure access to AWS Amazon Relational Database Service (RDS) instances
Enable access to an internal RDS instance so a user can conveniently yet securely connect using their favorite database management tool.
- Updated on
- 5 minutes to read
-
Contributors


Overview
Amazon Relational Database Service (RDS) is an easy-to-administer, highly scalable relational database available in AWS.
Using CSE you can configure you add on a zero trust access control layer where all traffic to your RDS is transparently upgraded to Mutual-Auth TLS using short-lived X509 certificates. Security policies can then be continuously enforced, locking down access to specific servers based on user and device attributes and trust levels.
Prerequisites
This guide assumes you have:
- Configured the RDS security group to allow access from the network hosting the CSE Access Tier.
- Created the application integration called “CSE TrustProvider” following our instructions to set up an IdP as your Identity Provider.
- Installed a CSE Access Tier in the same network segment as the server to be exposed using CSE.
- Installed the latest CSE App on your desktop machine, and registered with a valid organization.
Setup
Step 1. Create a Policy
You may create a new policy for Amazon RDS, or use a previously configured policy attached to SSH or RDP policies. If you use a previously configured policy, proceed to Step 2.
1.1 Log in to the CSE Command Center and navigate to Secure Access > Policies > Create New Policy.
1.2 Create a new Policy using the template Basic Authorization Policy for Users.
1.3 Enter a Policy Name (such as, hosted-service) and a Description.
1.4 Configure the Policy Attributes:
- Specify this policy is intended for TCP - for remote access using a TCP-based protocol
- Only allow access from the following role: ANY
- Only allow users and devices with the following Trust Levels: No Trust Level - ignore TrustScore (or a Trust Level according to your organization’s security requirements)
Step 2. Register AWS RDS as a Hosted Service
If you are configuring a high number of RDS services, try using wildcards.
2.1 Navigate to Manage Services > Infrastructure and then click + Register Service.
2.2 Select the template TCP Service for Users.
2.3 Enter the Service Name (such as, AWS RDS) and Description (such as Access to hosted AWS RDS service).
2.4 Click Select an Icon, then search for and select the AWS icon.
2.5 Select the cluster where the applicable Access Tier is located.
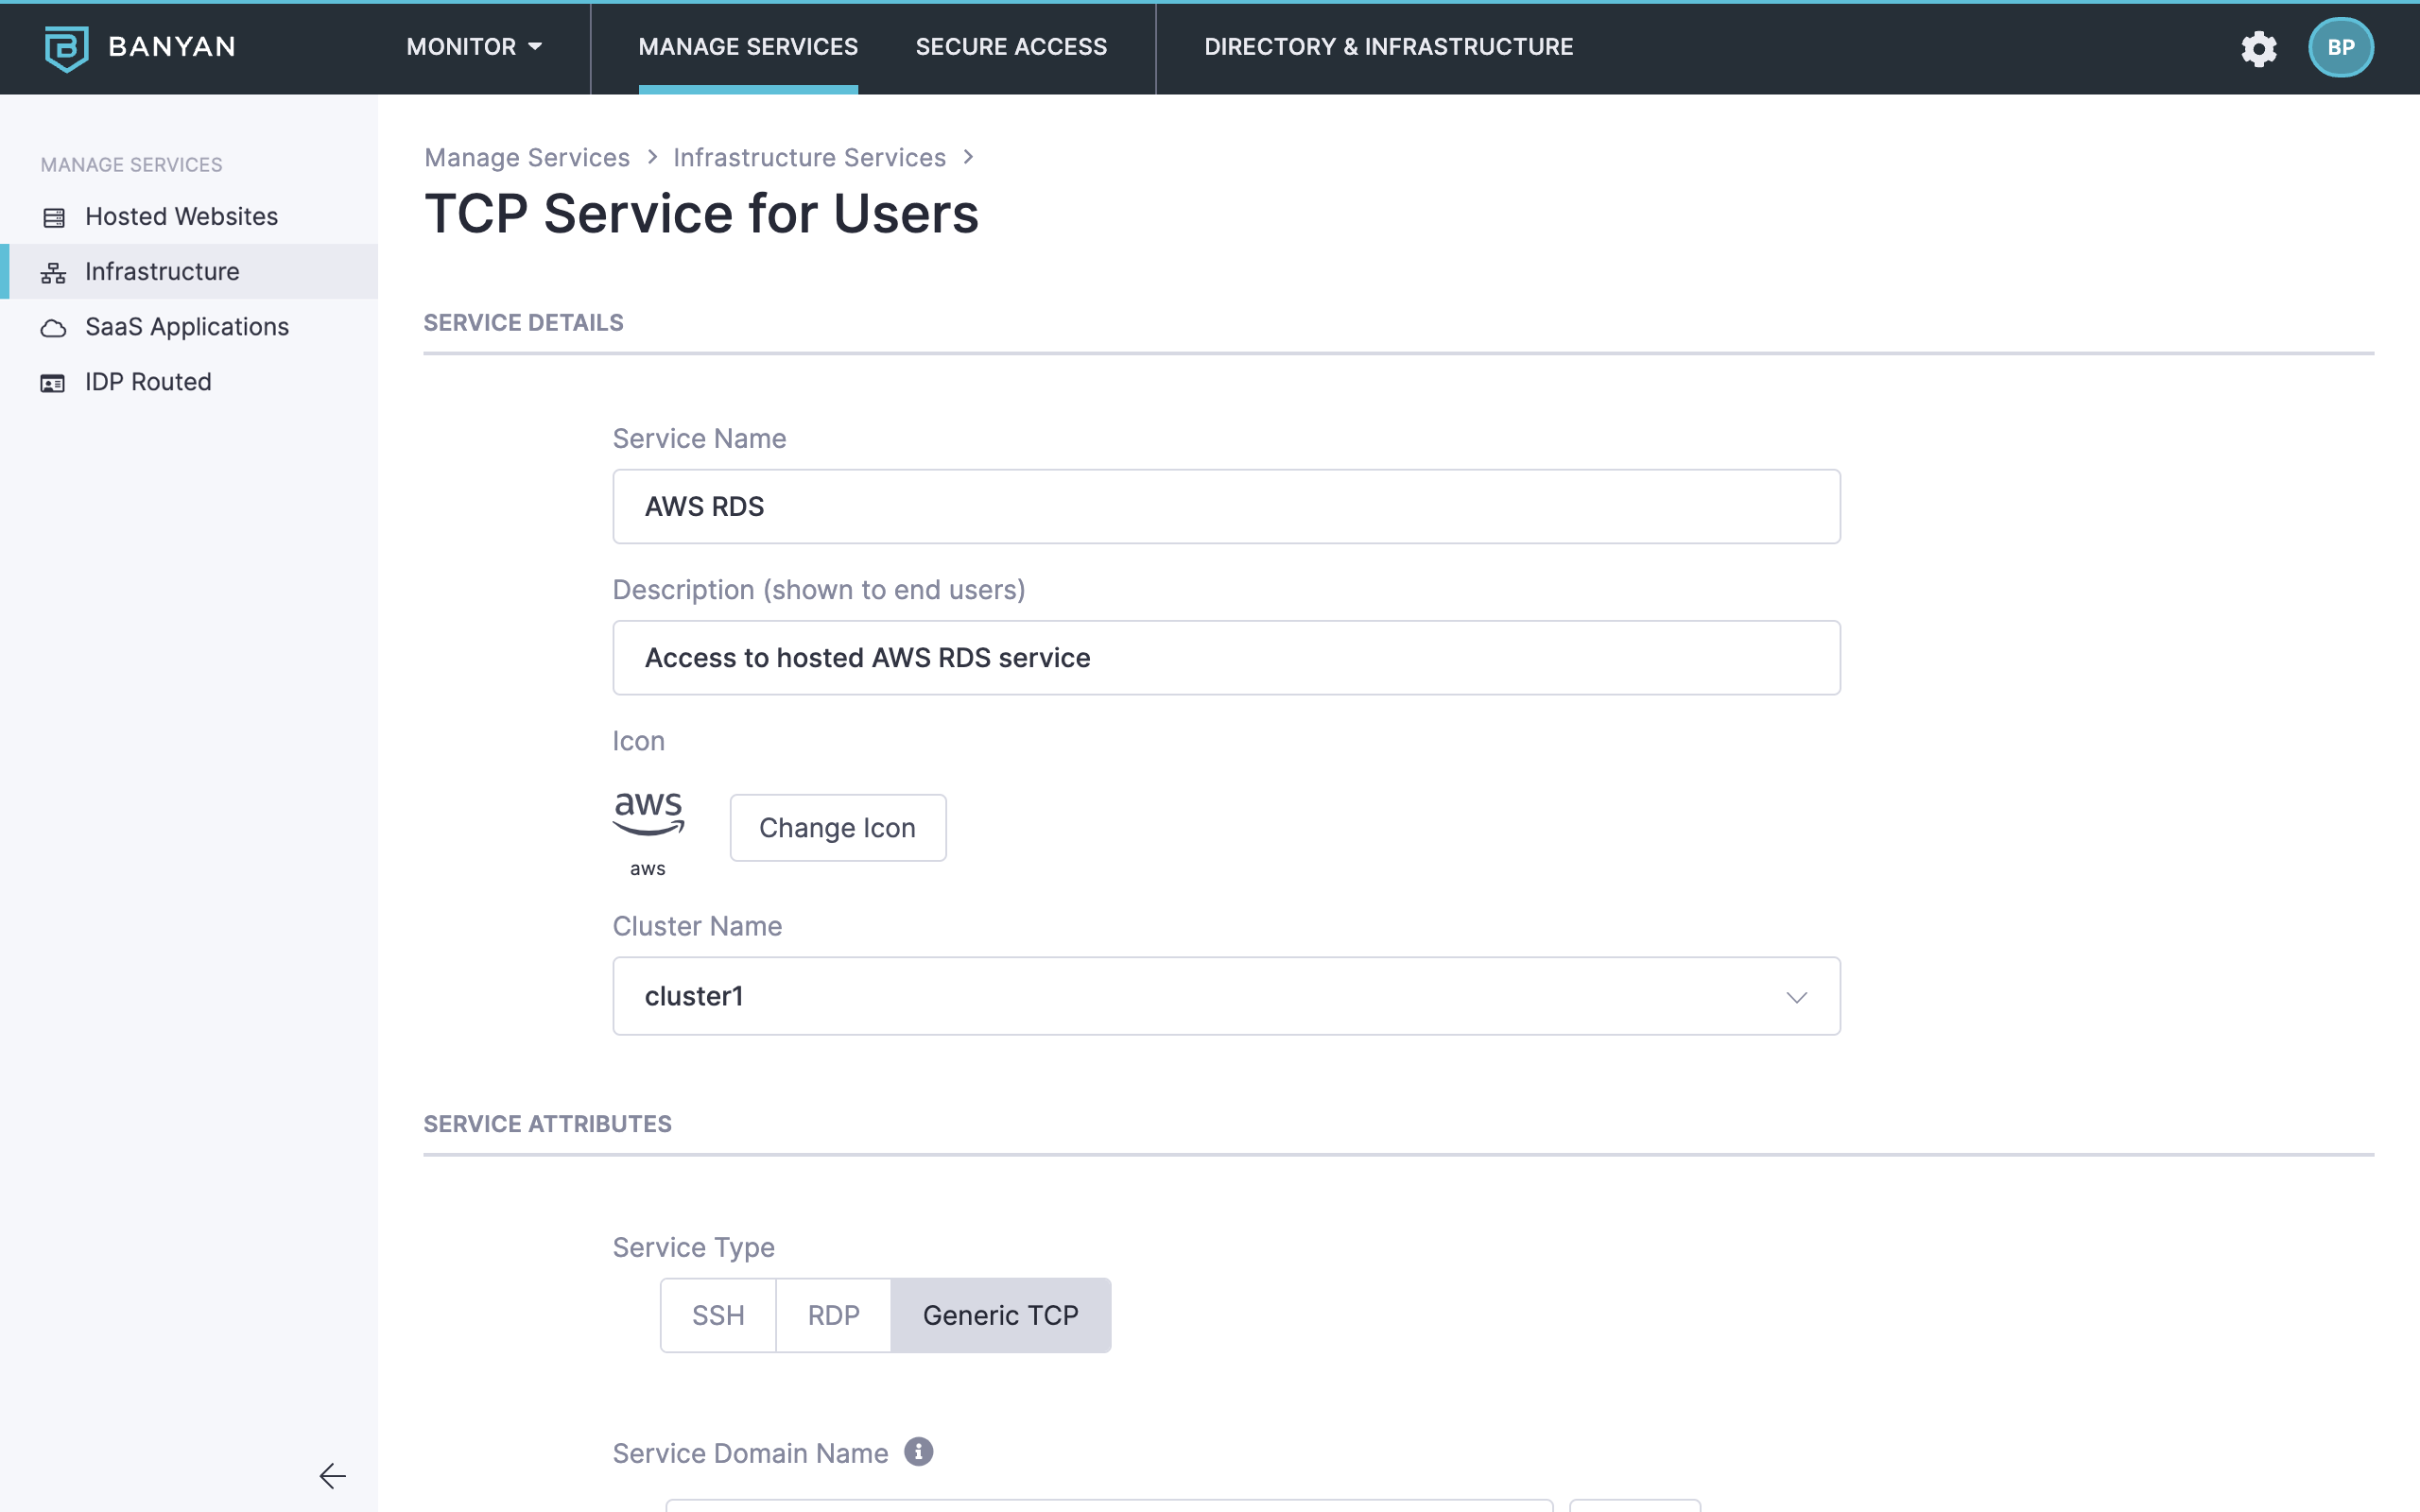
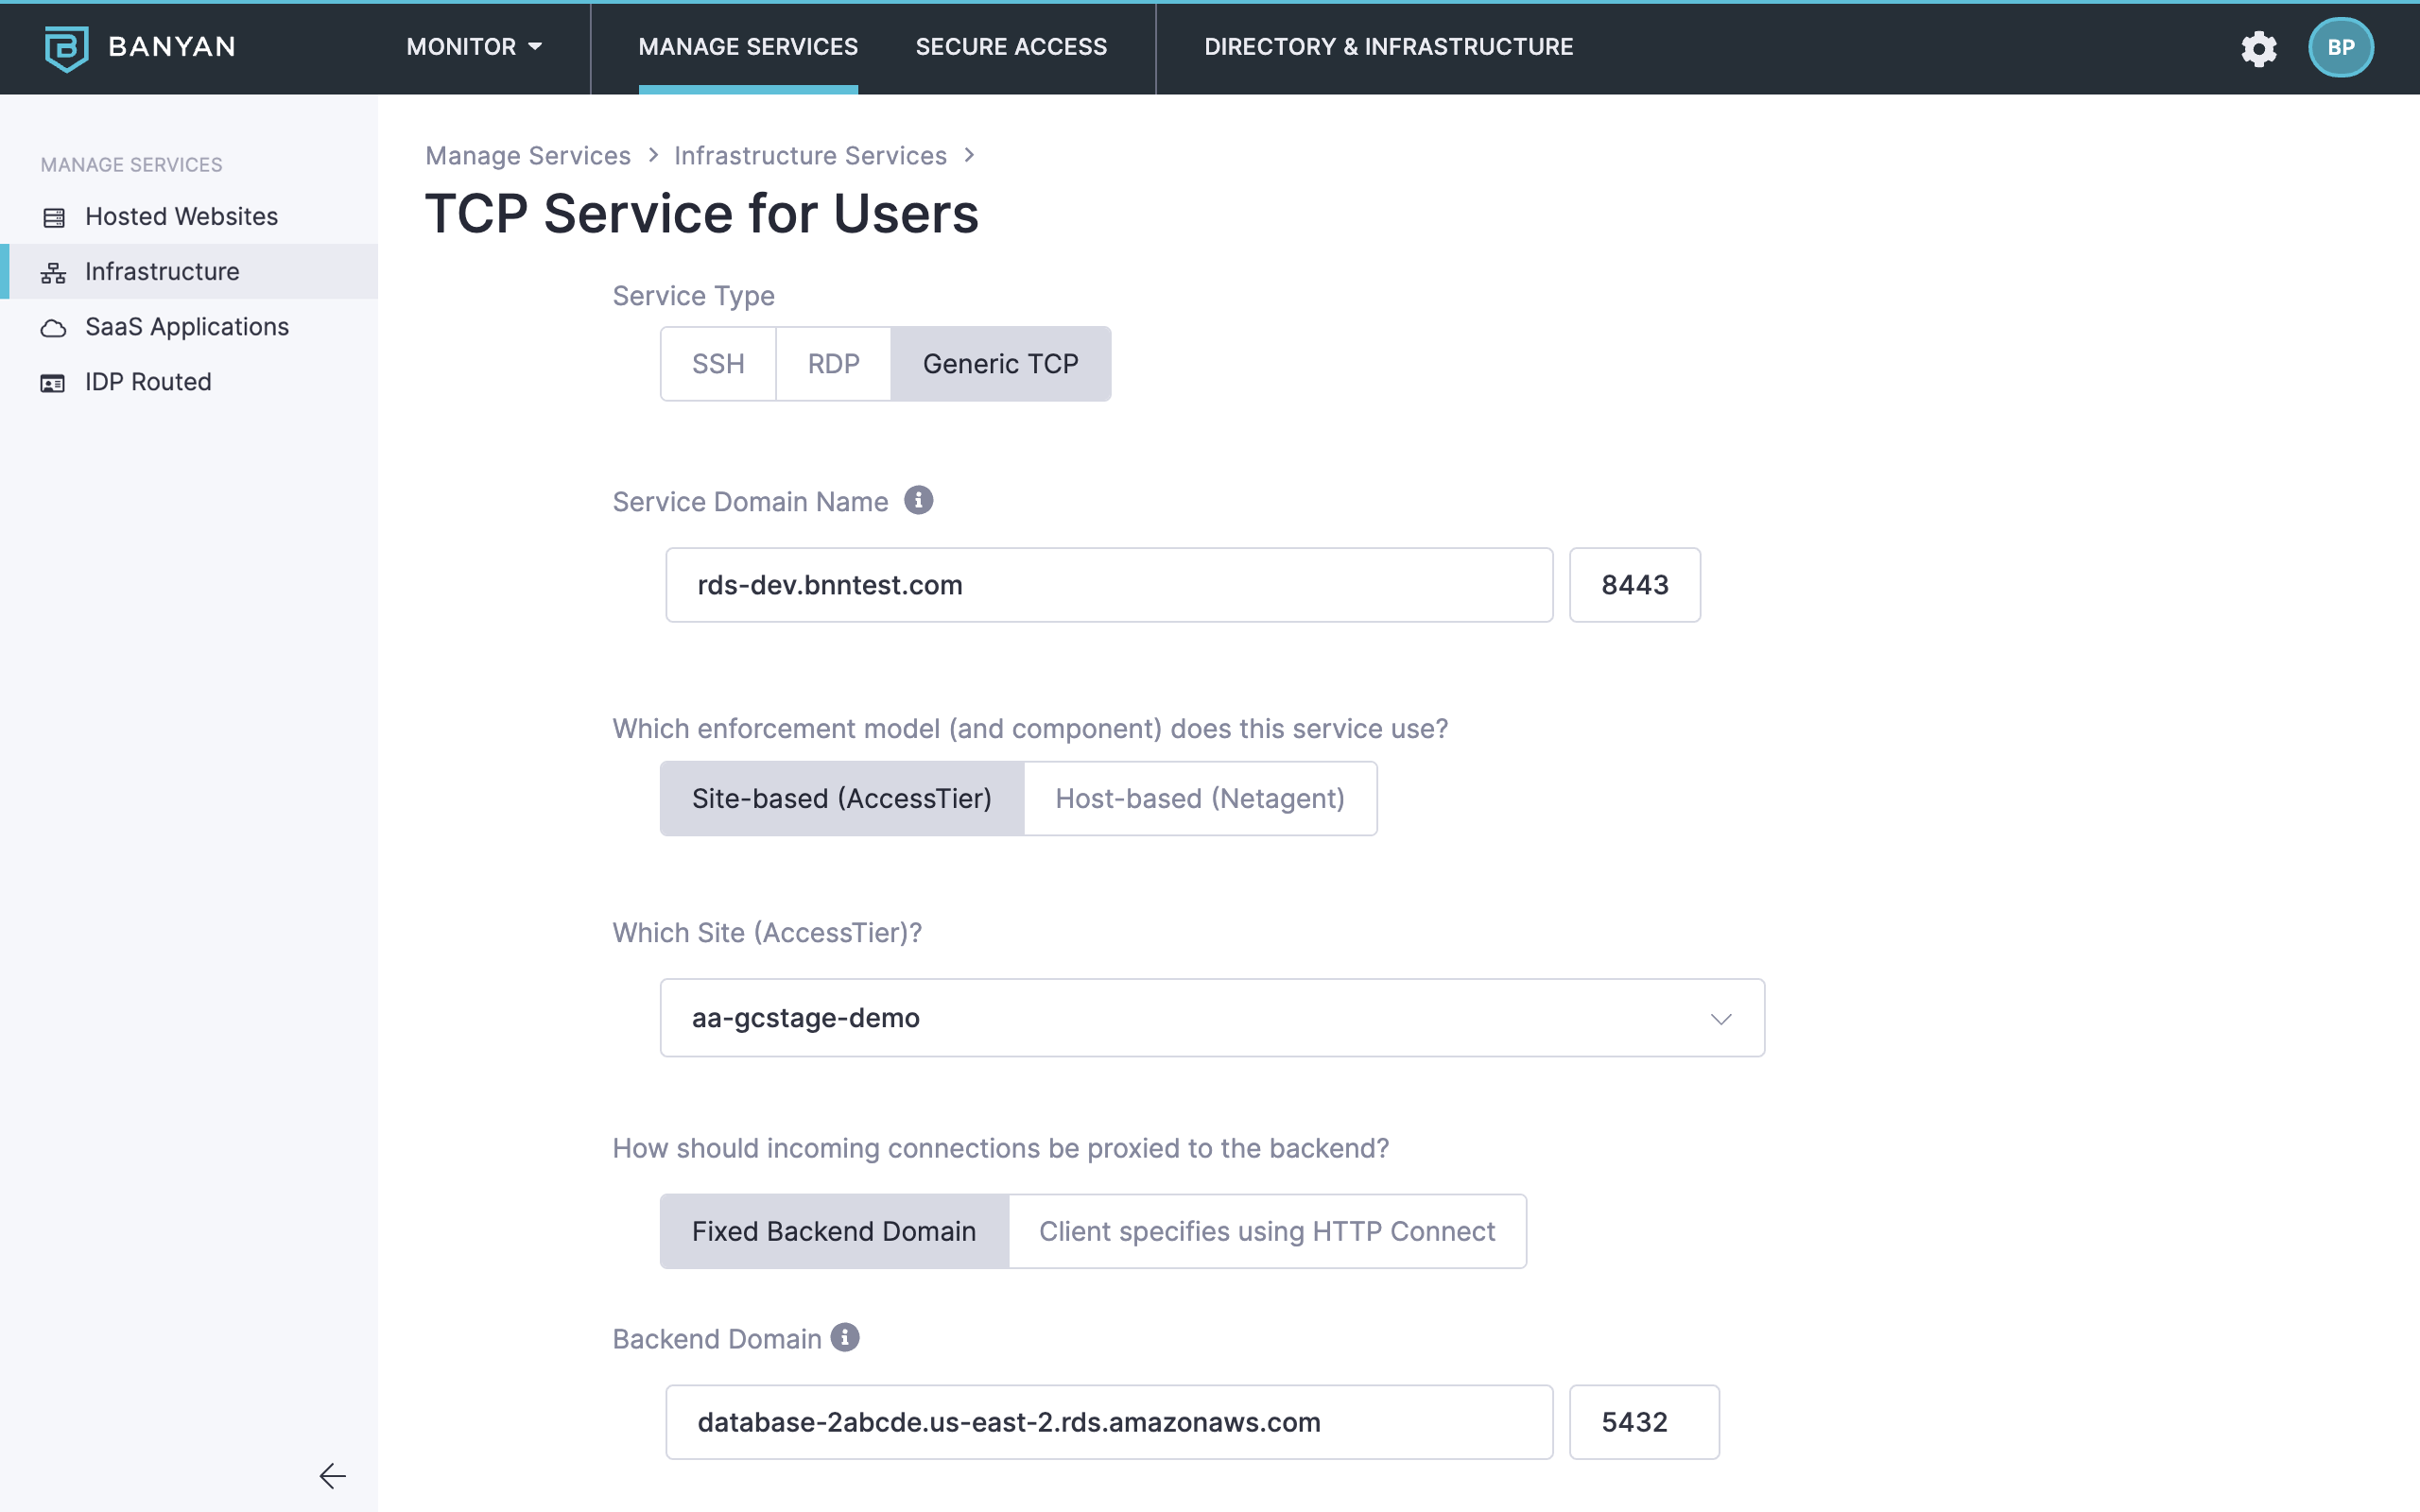
2.6 Configure the Service Attributes:
- Enter the Service Domain Name of the Access Tier behind which the AWS RDS service is deployed and leave the port as
8443 - Set the enforcement model to Site-based (Access Tier) and then select the applicable Site (Access Tier)
- Set the incoming connections to be proxied to the Fixed Backend Domain
- Enter the Backend Domain Name and Port
2.7 Configure the Service Connection Settings:
- Optionally, set an Assigned Listen Port or leave it blank to use a random port
- Optionally, allow or deny end users the ability to override these settings in the CSE Desktop App
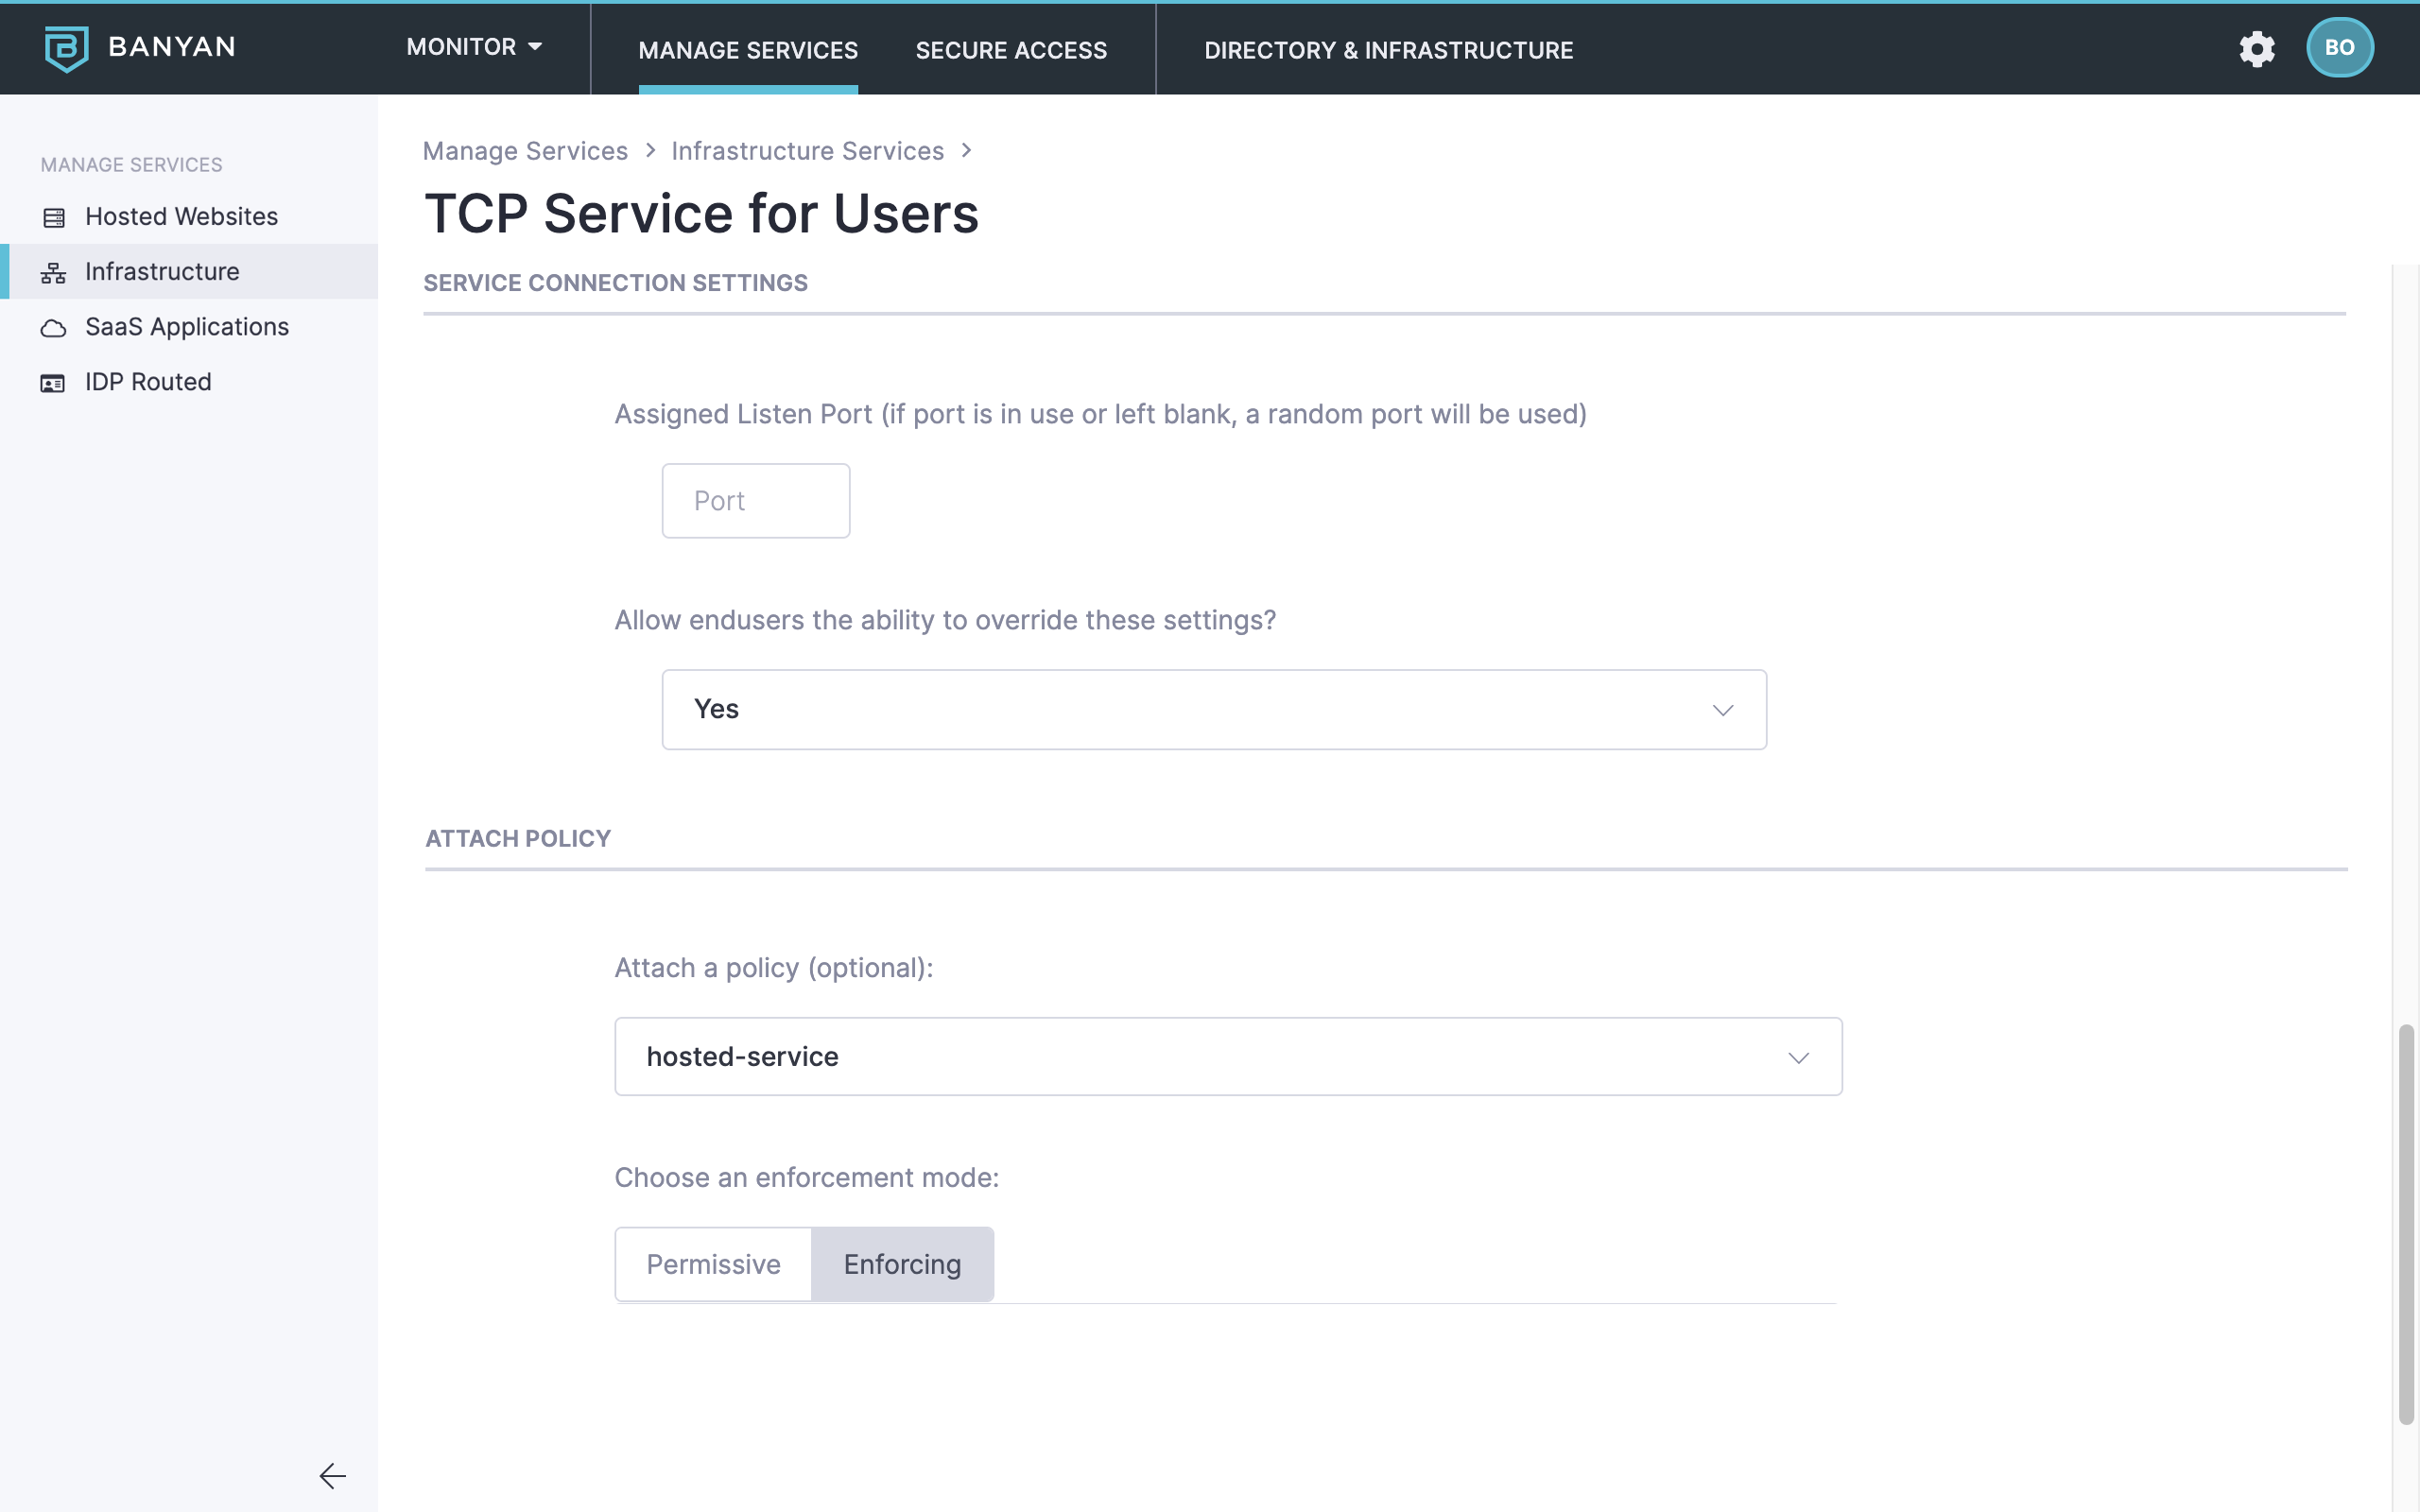
2.8 Attach the policy we had previously created in Step 1.4, and then set enforcement mode to Enforcing.
2.9 Click Register Service.
Step 3. Navigate to AWS RDS and log in to your IdP
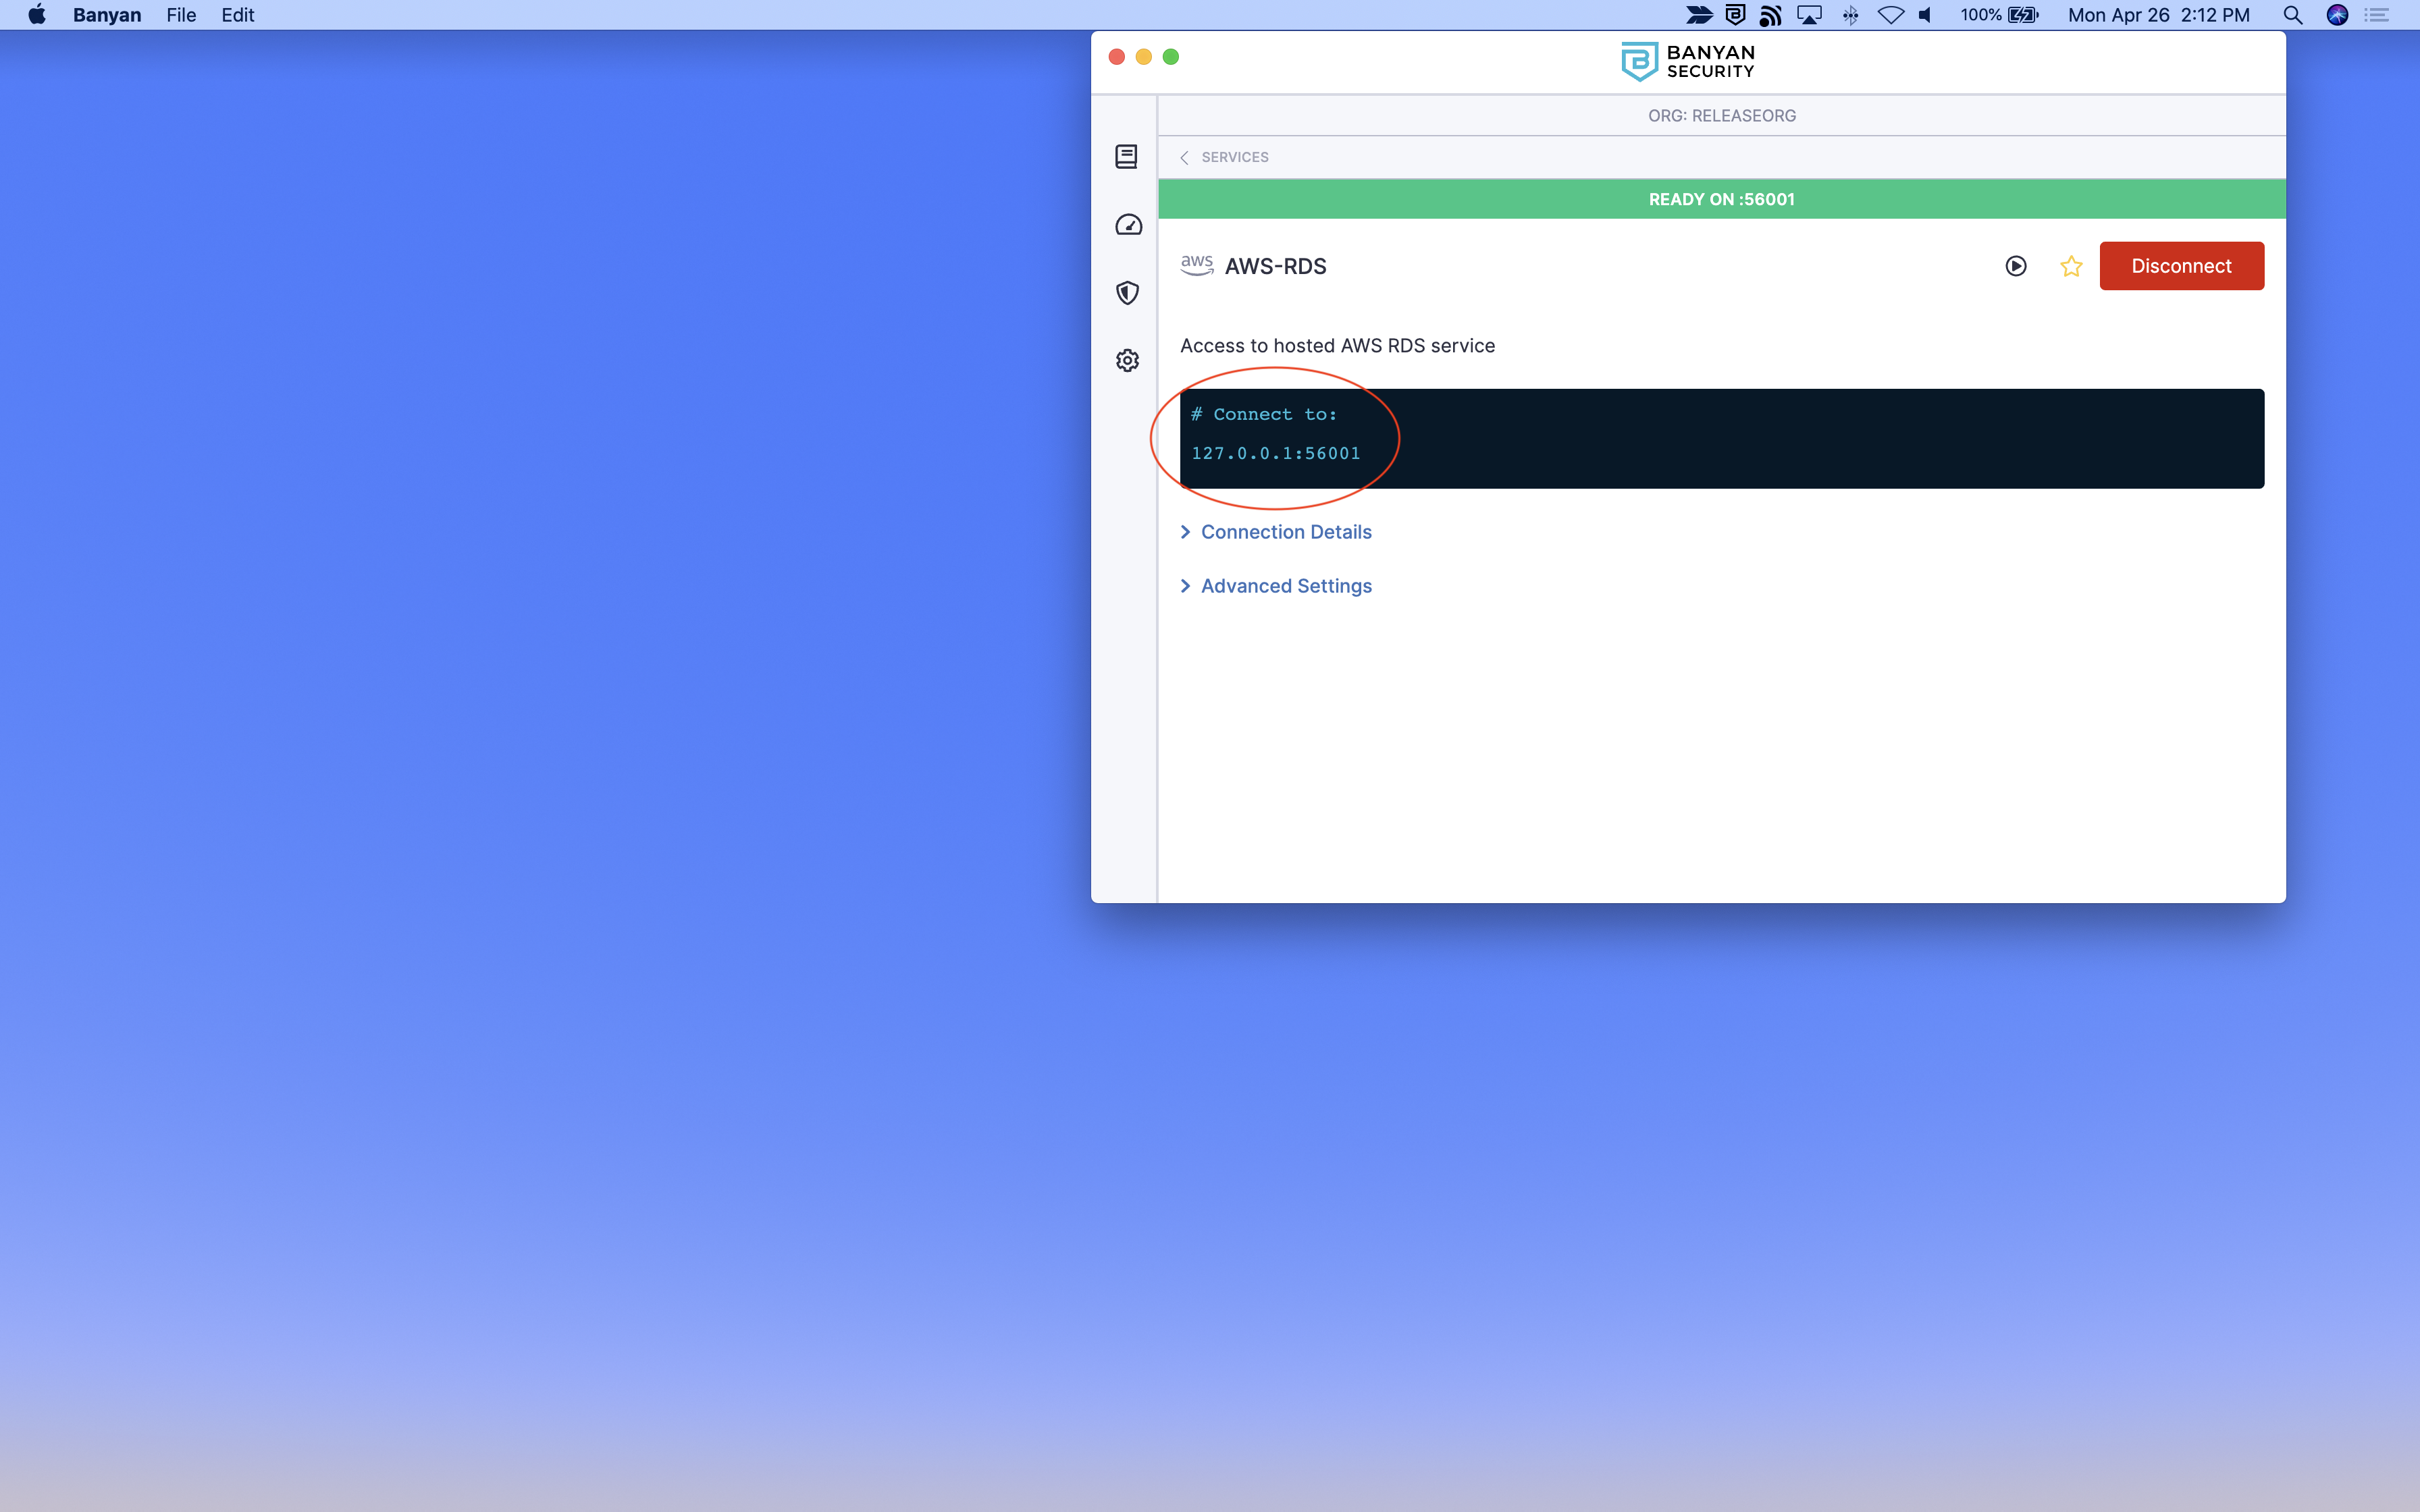
3.1 Launch the CSE Desktop App, locate the hosted RDS server from the list of TCP Services, and then click Connect.
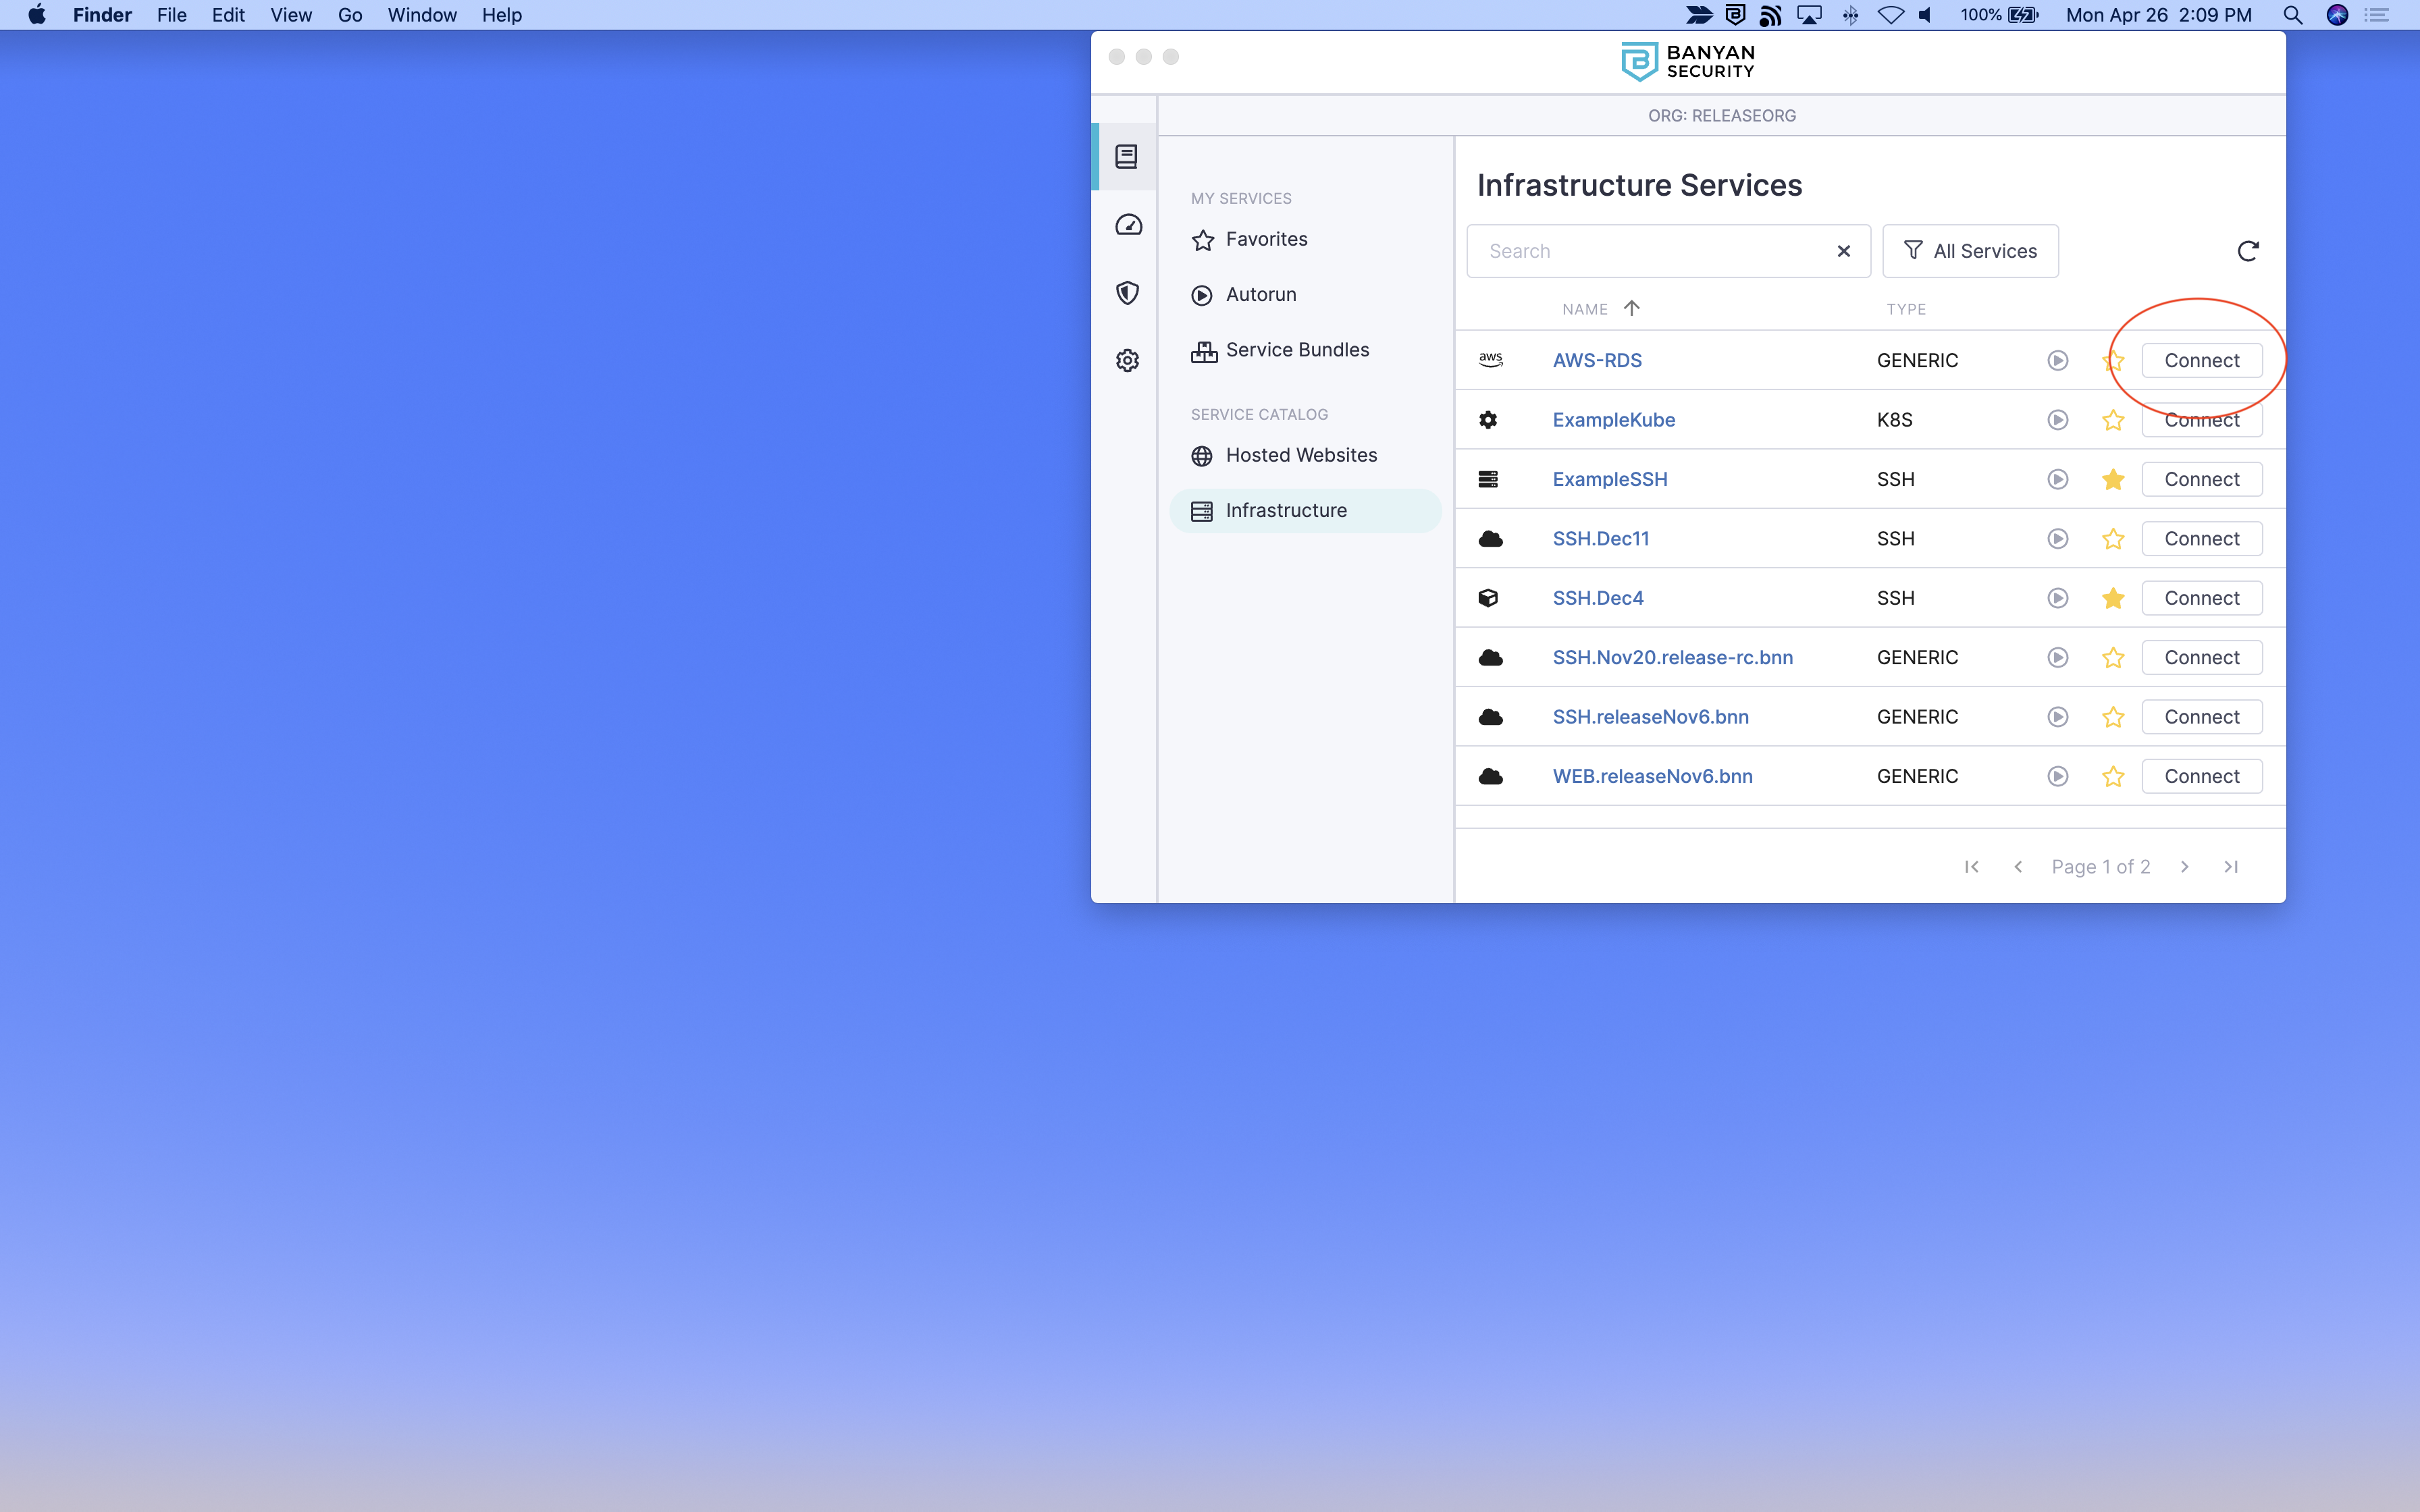
3.2 Click into the service details and take note of the (localhost:port) provided in the CSE Desktop App (for example, 127.0.0.1:XXXXX).
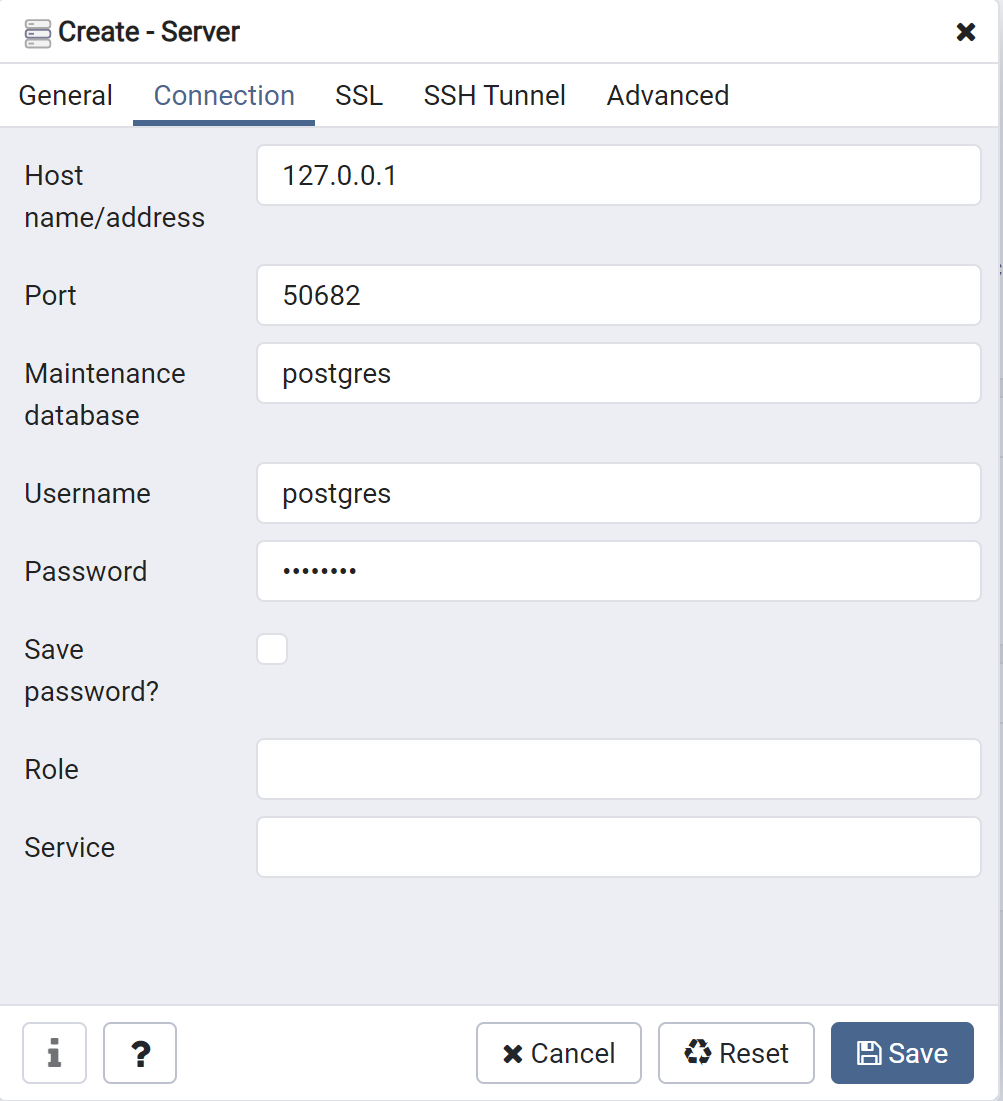
3.3 Launch your preferred database management tool (such as Microsoft SQL Server Management Studio, pgAdmin, phpMyAdmin, MySQL Workbench, etc.), and then create a new server using the localhost:port noted in the previous step. If necessary, enter your credentials to authenticate.
Behind the scenes, CSE evaluates your device posture, enforces your security policies, and grants access accordingly.
Additional Notes
Use Wildcards to Configure RDS Services at Scale
Organizations who have dozens or hundreds of RDS services can use wildcards (*) to ease the pain of configuring each of them individually.
To configure RDS services via wildcards, configure a custom policy while paying particular attention to the service metadata and attributes below.
Configure the Service Metadata as shown below:
{
     "tags": {
          "user_facing": "true",
          "protocol": "tcp",
          "domain": "<wildcard domain, such as *.rds.amazonaws.com>",
          "port": "8443",
          "service_app_type": "GENERIC",
          "template": "CUSTOM"
     }
}
Configure the Service Attributes according to your business needs while paying particular attention to the specific parameters below:
attributes- Set
tls_snito the wildcard domain, such as*.rds.amazonaws.com
- Set
backendtarget- Set
name_delimiterto"--" - Set
nameto{{index .Parts 0}}.{{index .Parts 1}}.{{index .Parts 2}}.rds.amazonaws.com - Set
portto5432 - Set
tlstofalse
- Set
cert_settings- Set
dns_namesto the wildcard domain, such as*.rds.amazonaws.com
- Set
For example:
"attributes": {
     "tls_sni": [
          "<wildcard domain, such as *.rds.amazonaws.com>"
     ]
}
"backend": {
     "target": {
          "name_delimiter": "--",
          "name": "{{index .Parts 0}}.{{index .Parts 1}}.{{index .Parts 2}}.rds.amazonaws.com",
          "port": "5432",
          "tls": false
     },
}
"cert_settings": {
     "dns_names": [
          "<wildcard domain, such as *.rds.amazonaws.com>"
     ],
     }
}