Zero-Trust Access to a Collection of RDP Servers
- Updated on May 31, 2024
Overview
Following zero-trust principles, SonicWall Cloud Secure Edge (CSE) enables security policies to be applied at the granularity of a single RDP Server. However, organizations often maintain and manage multiple RDP servers, sometimes thousands, at a time. While some RDP servers require a unique set of access restrictions, many of them require identical access restrictions. Rather than configure each RDP server individually, you can group them and configure via a single service definition.
How it Works
CSE uses standards-compliant HTTP Connect Tunnelling and RD Gateway to enable connectivity to multiple services via a single RDP service definition.

In the desktop app, the end user selects Connect, which runs banyanproxy in a special RD Gateway mode. The user has to update their Remote Desktop client’s RD Gateway configuration to point to this banyanproxy.
-
When user enters the address of the Windows server they wish to RDP into, traffic is automatically sent by the RDP client to
banyanproxyrunning in HTTP Connect mode. -
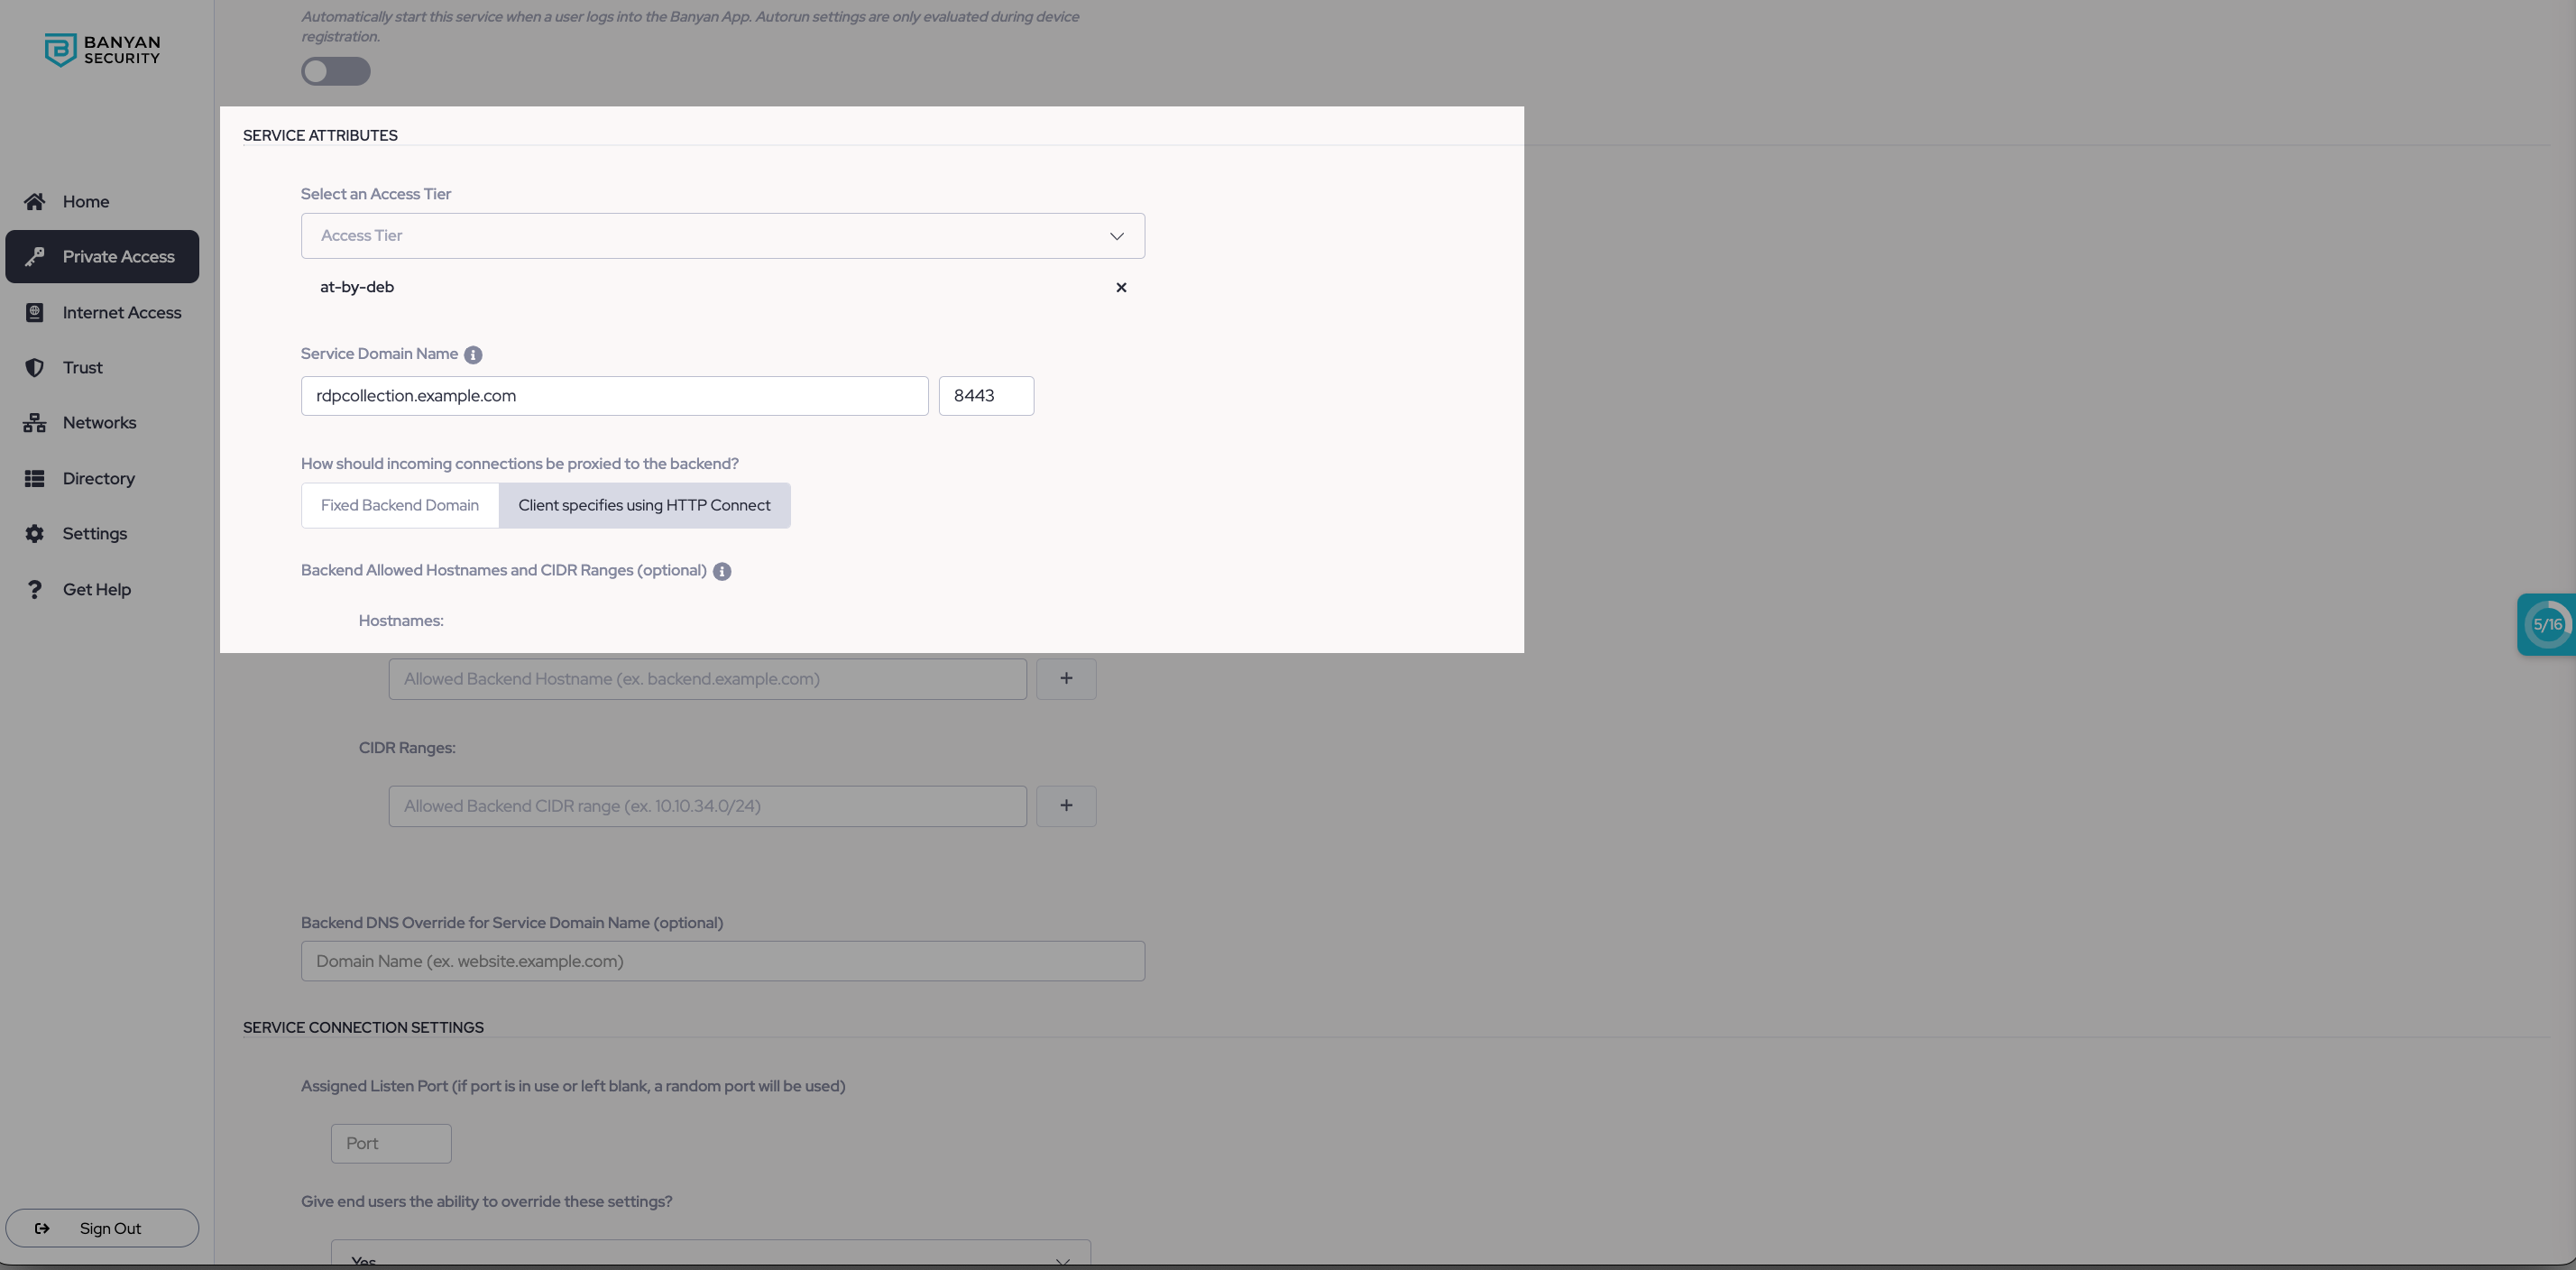
banyanproxyinitiates an MTLS connection with the CSE service on the Netagent side atrdpcollection.example.com:8443. Netagent checks the device posture and identity and, if successful, establishes the MTLS session.banyanproxythen uses HTTP Connect to specify the actual destination of the request. -
Netagent checks the Service Backend configurations for the
httpconnectandallow_patternsettings. If the connection request matches, Netagent makes the connection to the backend.
Once the connection is established, communication from the RDP client is as if it were directly connected to RDP server.
Steps
To configure access to a collection of RDP servers:
1. Navigate from Private Access > Infrastructure, and select + Register Service. Then, select the RDP Service template.
2. On the service registration page, configure the Service Details.
3. Configure the remaining Service Attributes fields, making sure to set the method for how incoming connections should be proxied to the backend to Client specified using HTTP Connect.
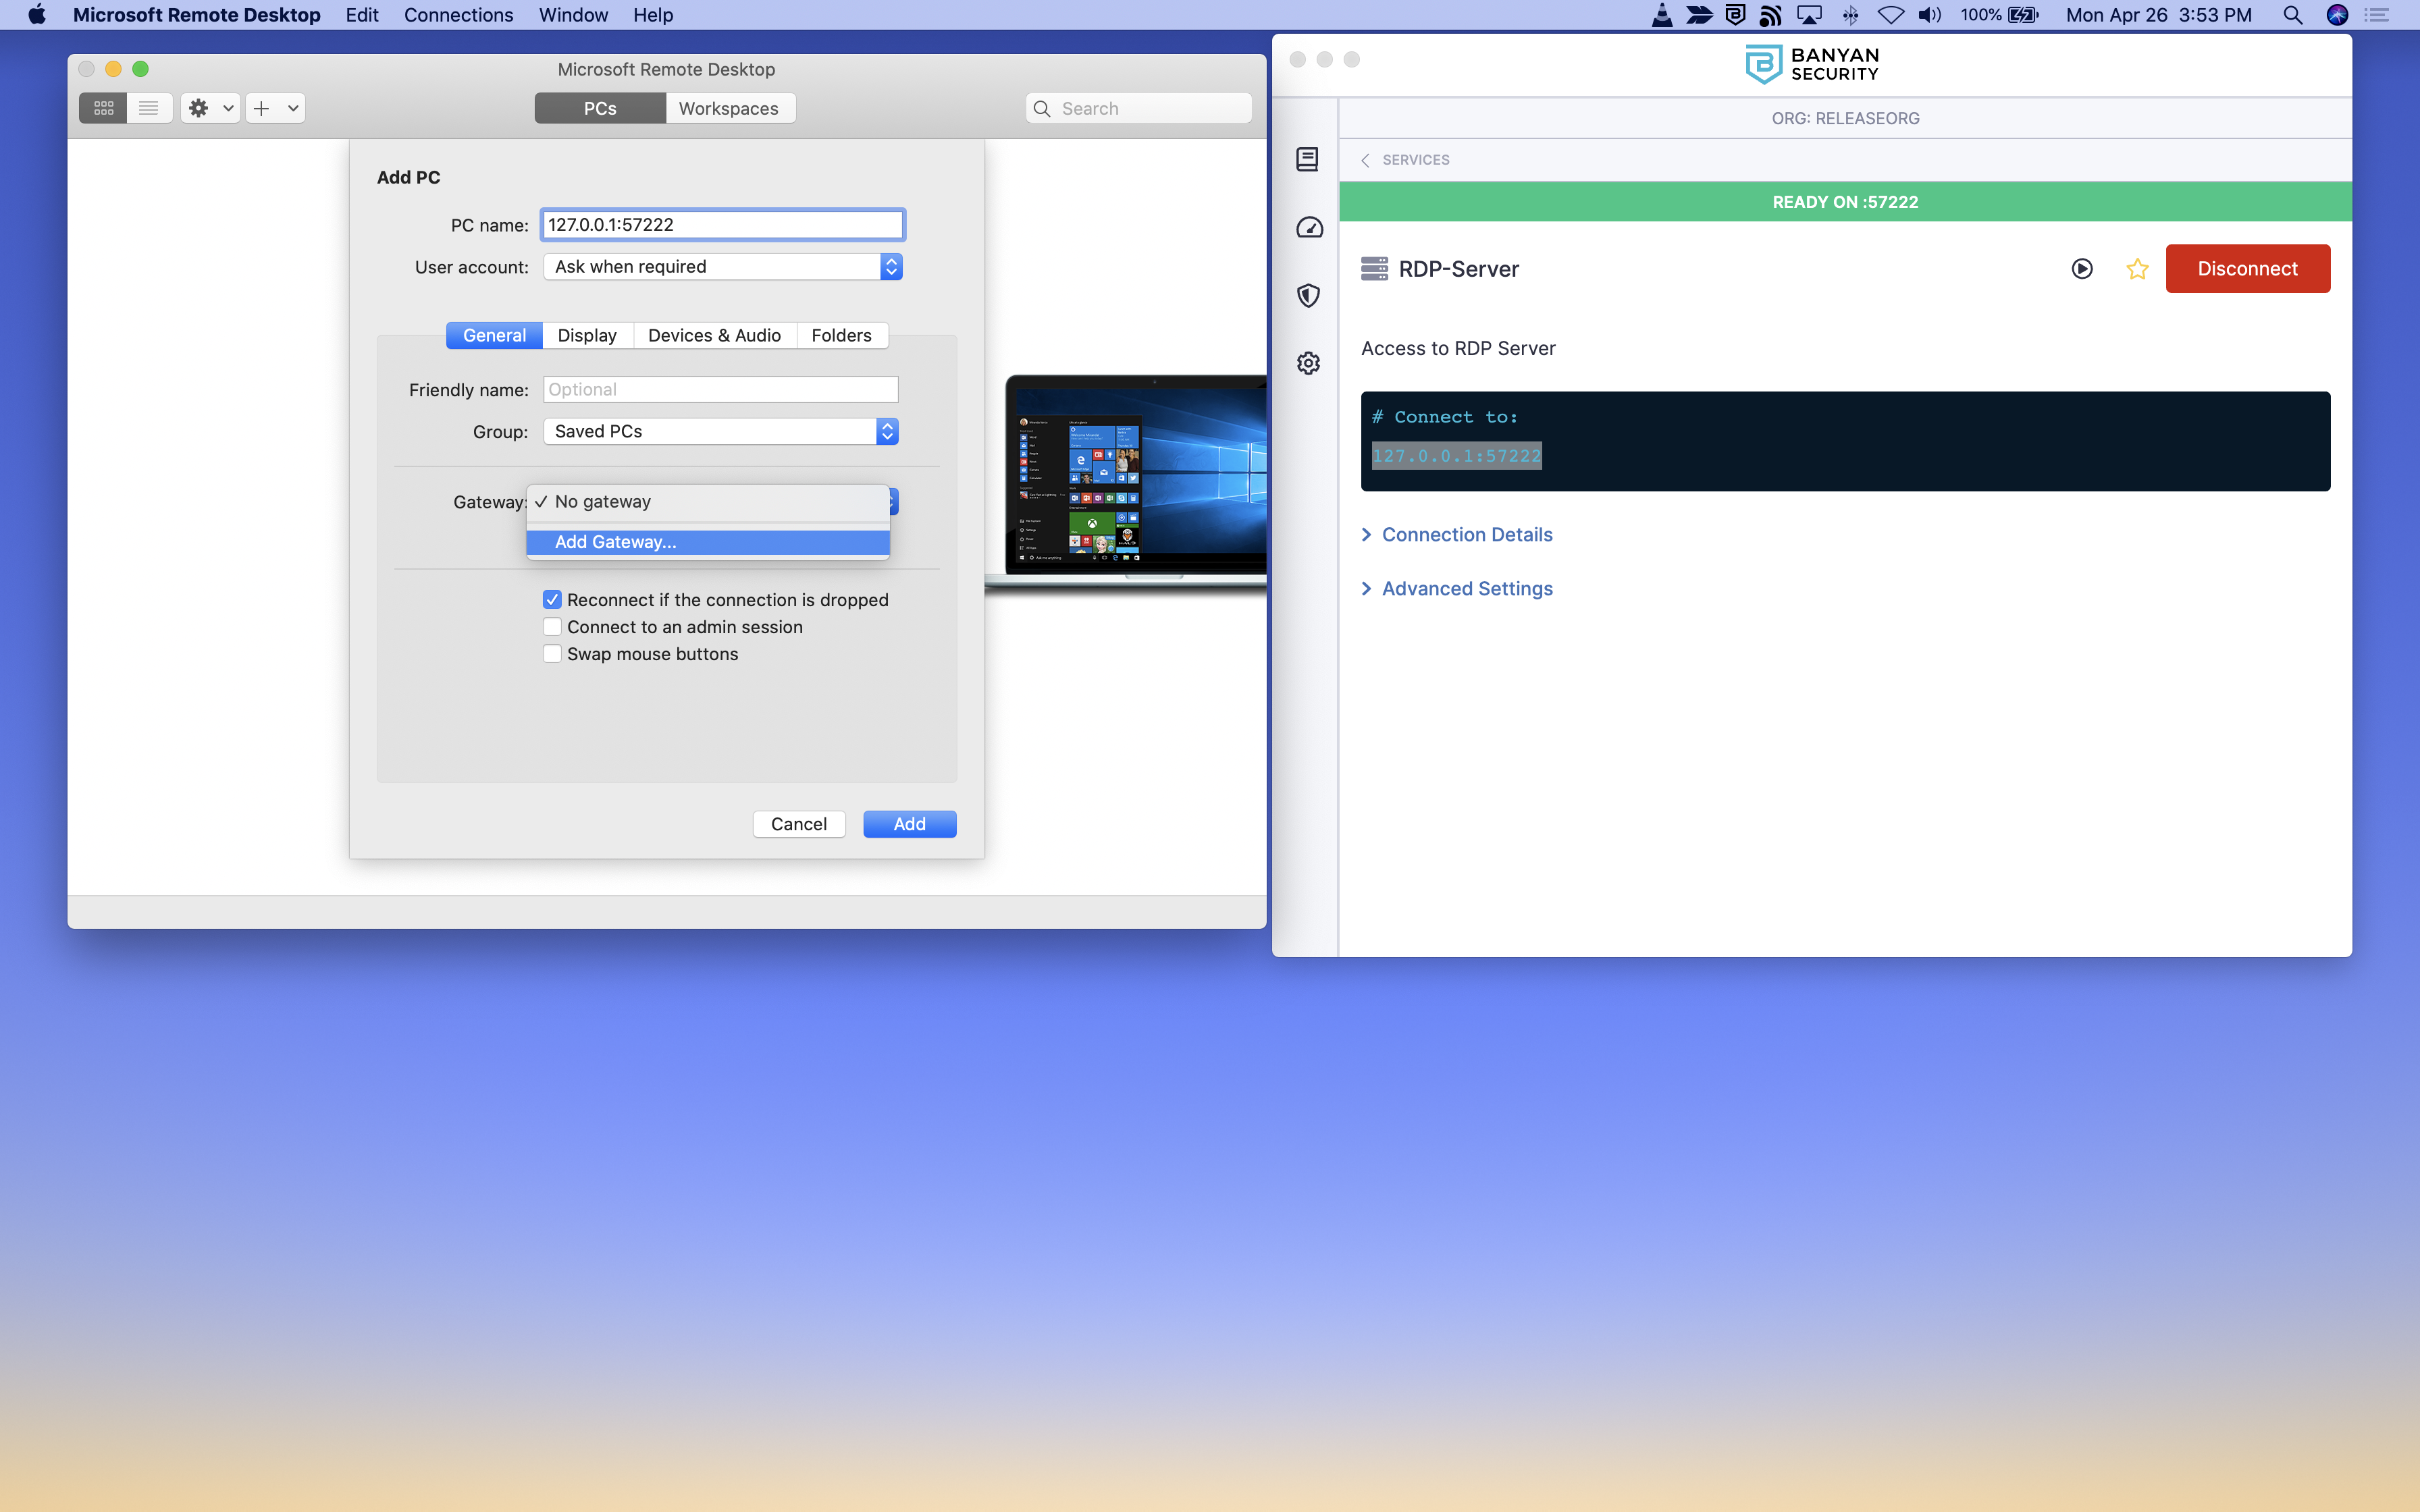
4. In the desktop app, locate the single entry (for this collection of RDP servers) and select Connect.
5. Open your preferred RDP client and access the applicable PC to which you are connecting. Or, create a new PC by adding the applicable backend IP. Then, add a gateway.
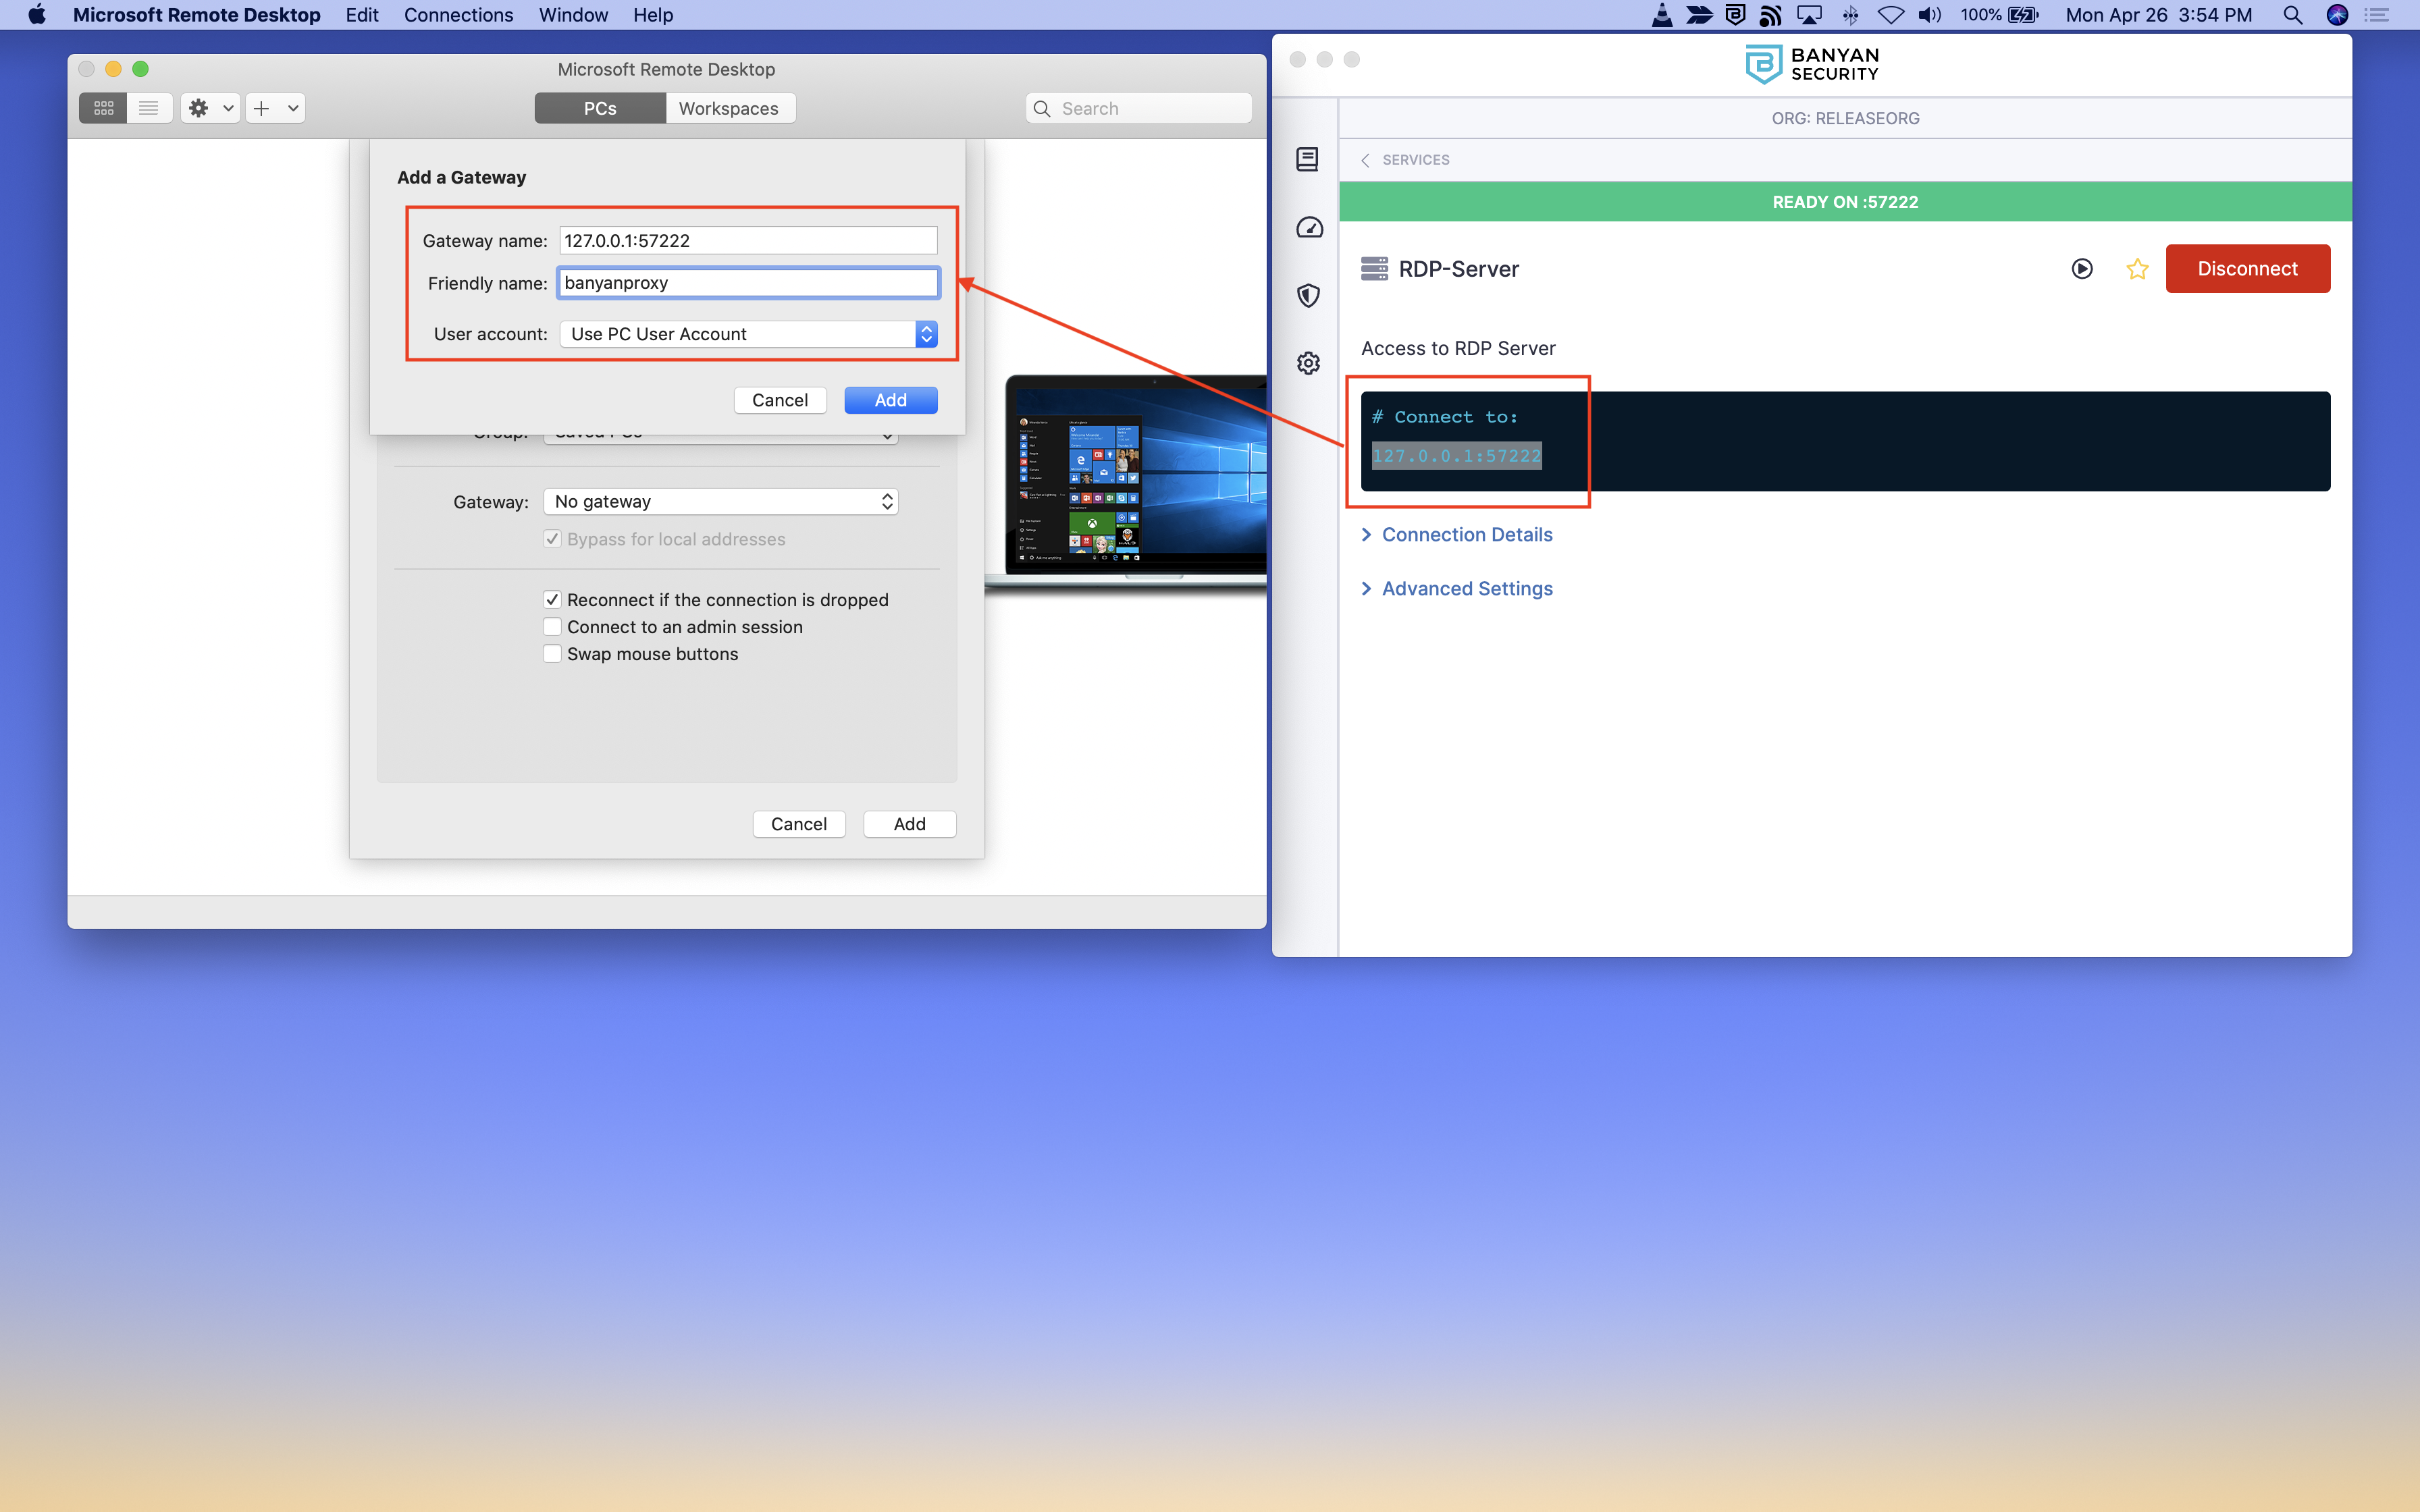
6. Enter the gateway name, which is the banyanproxy from the desktop app and then enter a Friendly Name (such as banyanproxy).
7. Enter the user account credentials as needed.
8. You will be prompted to accept certificates for the RD Gateway and Client.
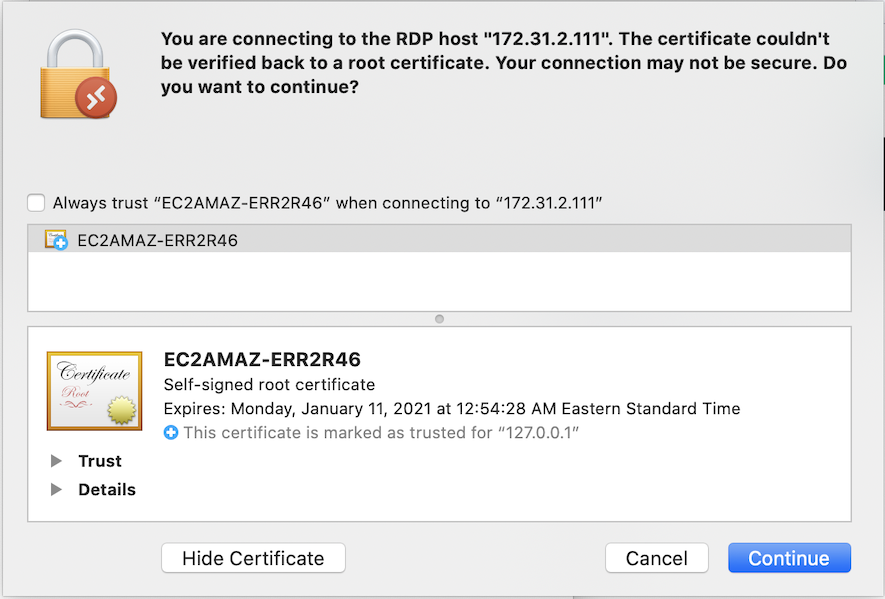
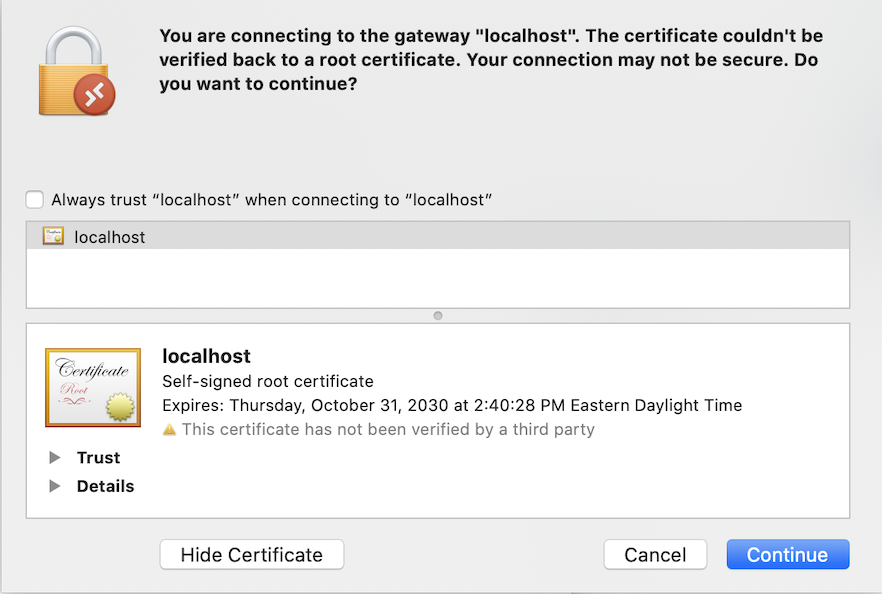
9. The RDP client will use banyanproxy to automatically tunnel the RDP session over a Mutual-Auth TLS channel using HTTP Connect Tunneling.

Additional Configurations for Windows RDP Clients
We recommend the following additional Windows RDP client configurations to enhance user experience.
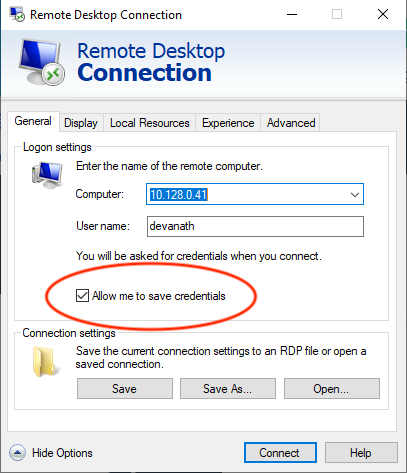
Enable the option to Allow me to save credentials.
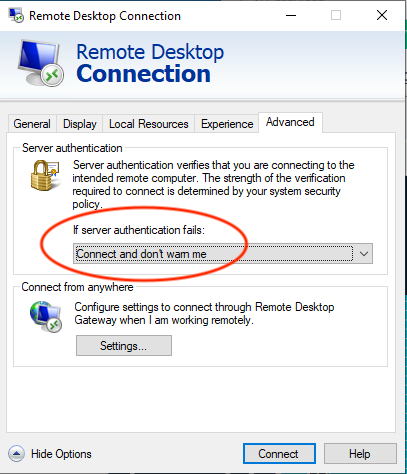
Set If server authentication fails to Connect and don’t warn me.
In Connection settings:
- Select Use these RD Gateway server settings
- Set Logon method to Allow me to select later
- Enable Bypass RD Gateway server for local addresses.
In Logon settings, enable Use my RD Gateway credentials for the remote computer.
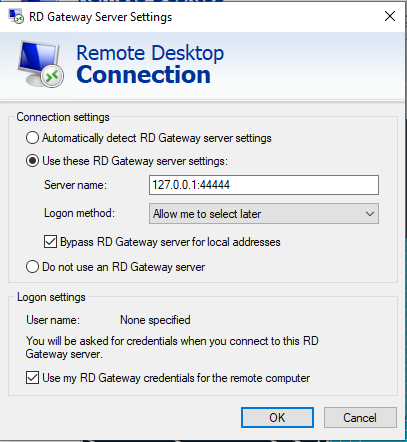
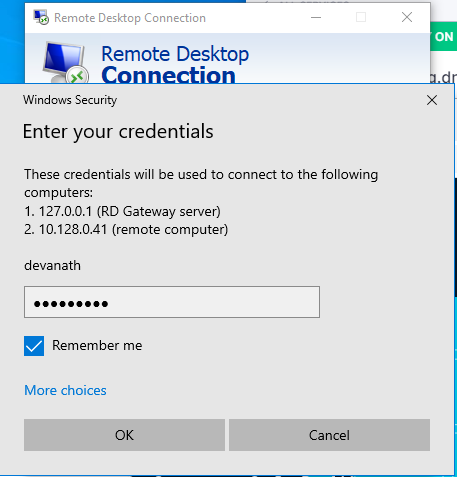
Then, enter your credentials and check the Remember me checkbox.
