Alternative Routing to Public Resources via a TCP Service
How to use a hosted web (TCP) service to route to public apps when Service Tunnel is unavailable
Overview
In some cases, a Service Tunnel is not available to securely route your users to public resources. As a workaround, admins can create a hosted web (TCP) service in SonicWall Cloud Secure Edge (CSE) to route to public resources.
Steps to creating a TCP service that routes to public resources
Step 1: Add and Configure a Hosted Website
1.1 In the Command Center, navigate from Private Access > Hosted Websites, and then select +Add Hosted Website.
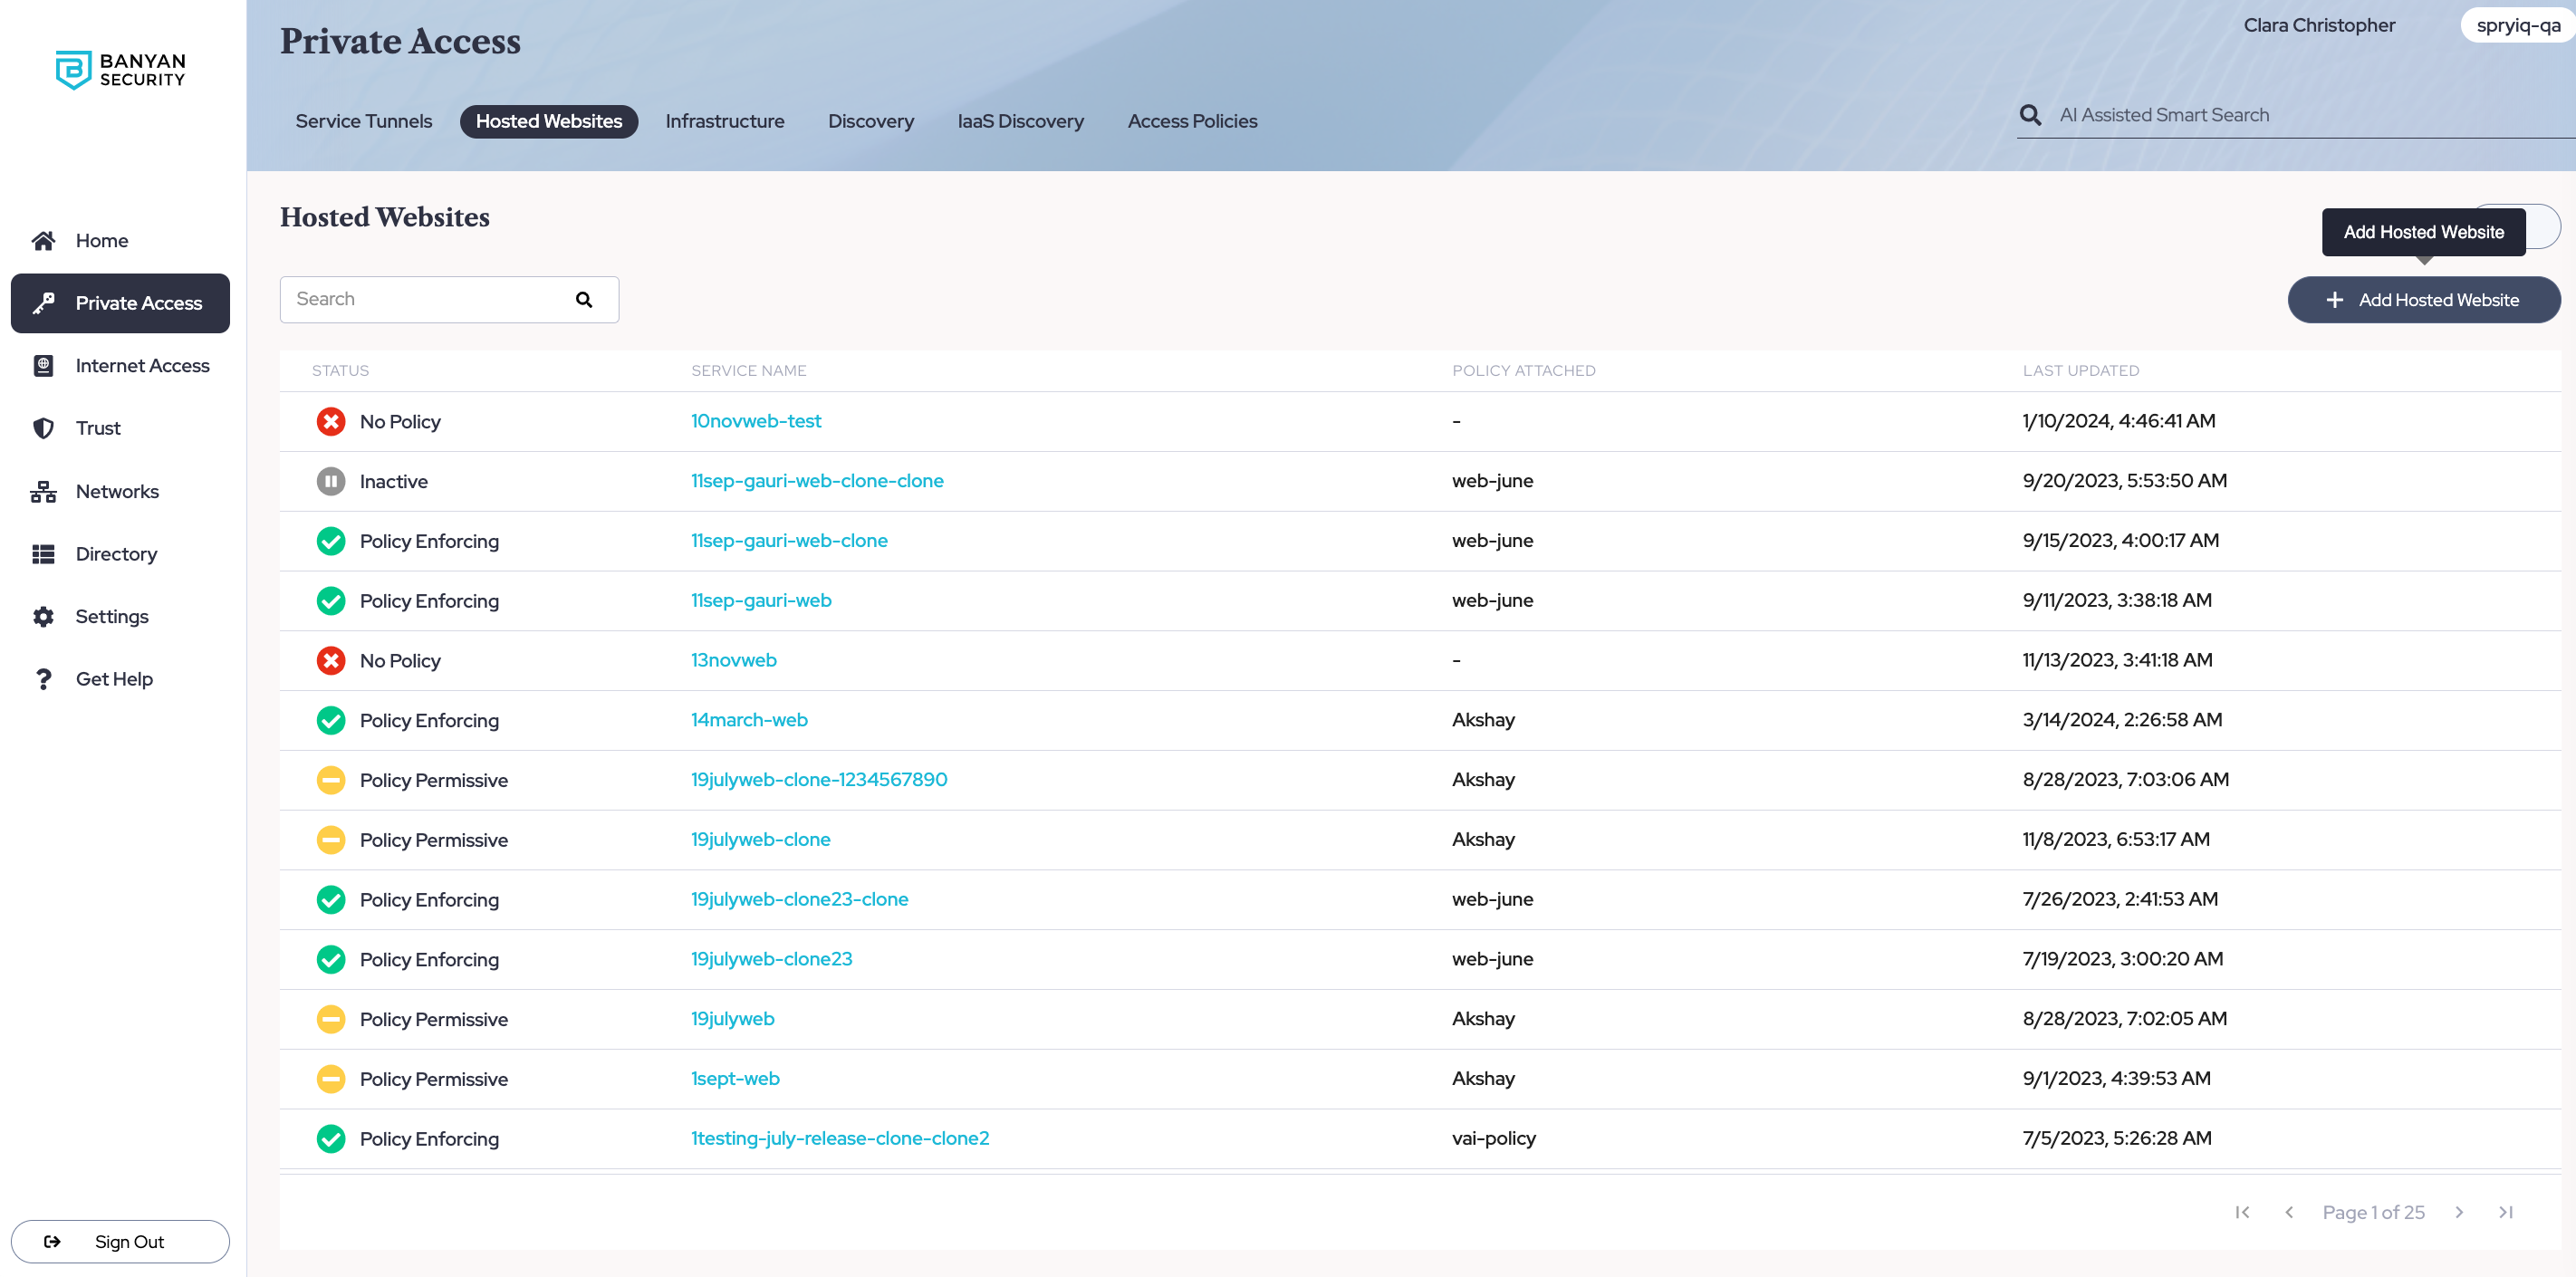
1.2 Under the Configuration tab, enter a name for your service.
1.3 Add a network (i.e., an Access Tier).
1.4 Enter the private hostname or IP address that corresponds to the public resource you are securing access to.
1.5 Select the https header and enter port number 443.
1.6 Select use unregistered domain.
1.7 Use a SonicWall Cloud Secure Edge (CSE) PKI Certificate.
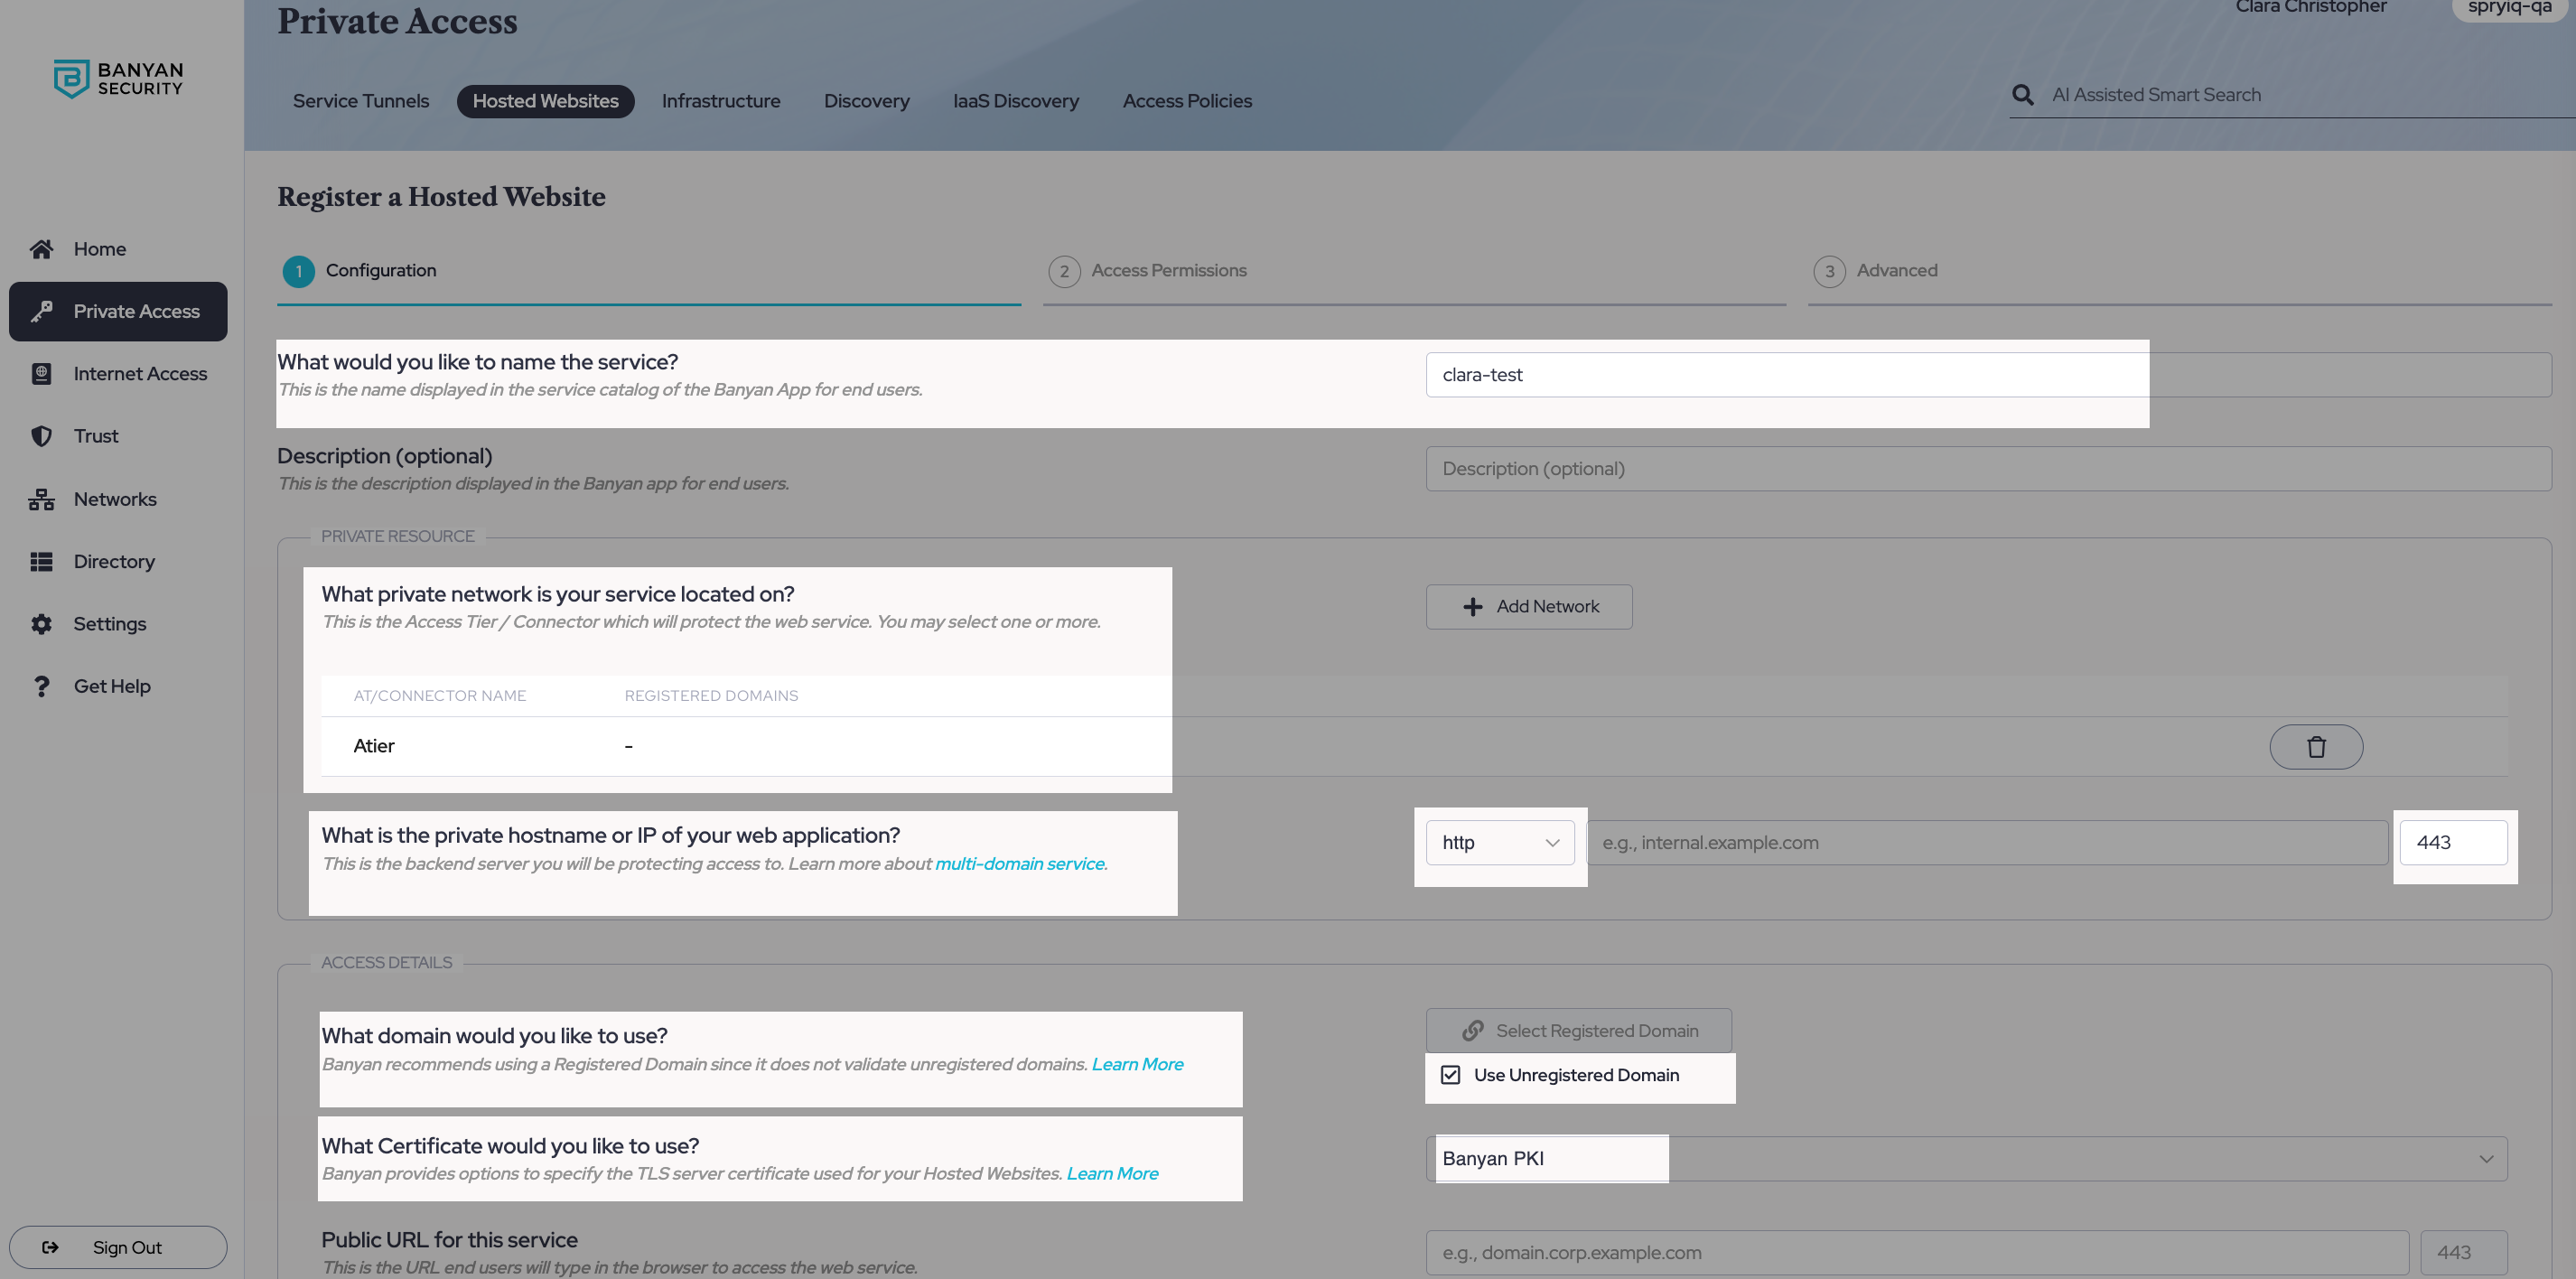
1.8 Enter the public URL for this service.
Step 2: Attach an access policy
2.1 Select an access policy to attach to this service, and set it to Enforcing mode.
2.2 Save & validate.
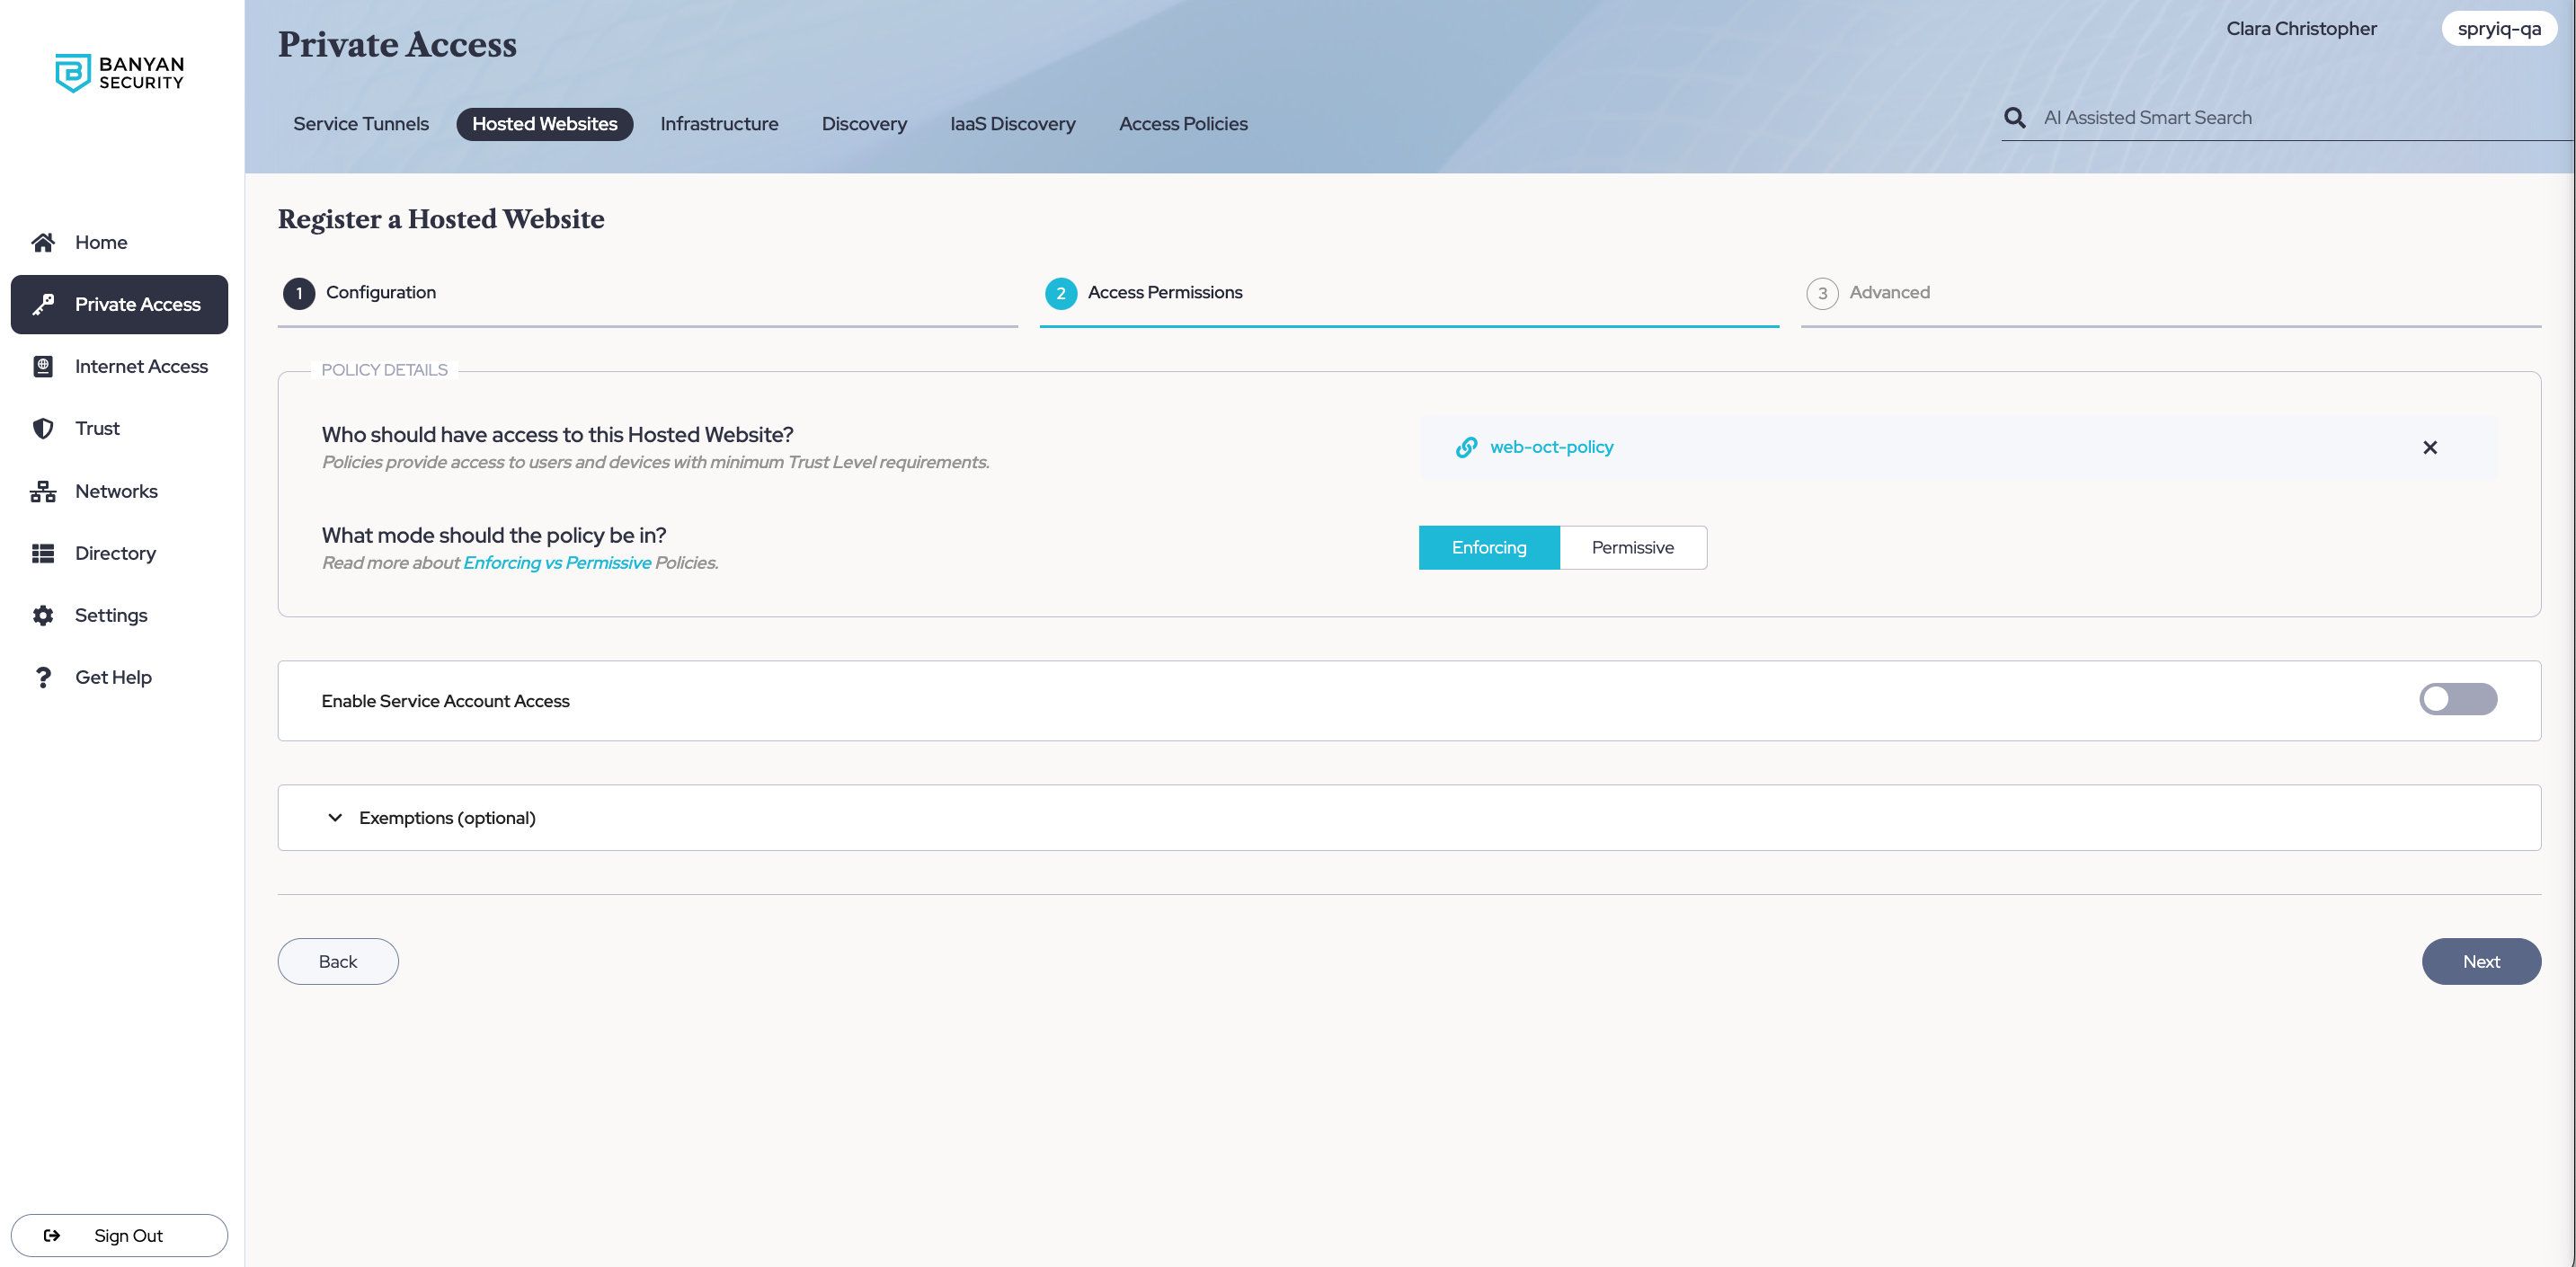
2.3 Select Next. In the Advanced tab, select Save & validate.
Step 3: Locate the host file on your device and enter the Access Tier hostname and IP address
3.1 On a mac device, the host file will be under private/etc/hosts; on a Windows device, it will be under %SystemRoot%\System32\drivers\etc\hosts. On mac, use Terminal to search for the host file using the following command:
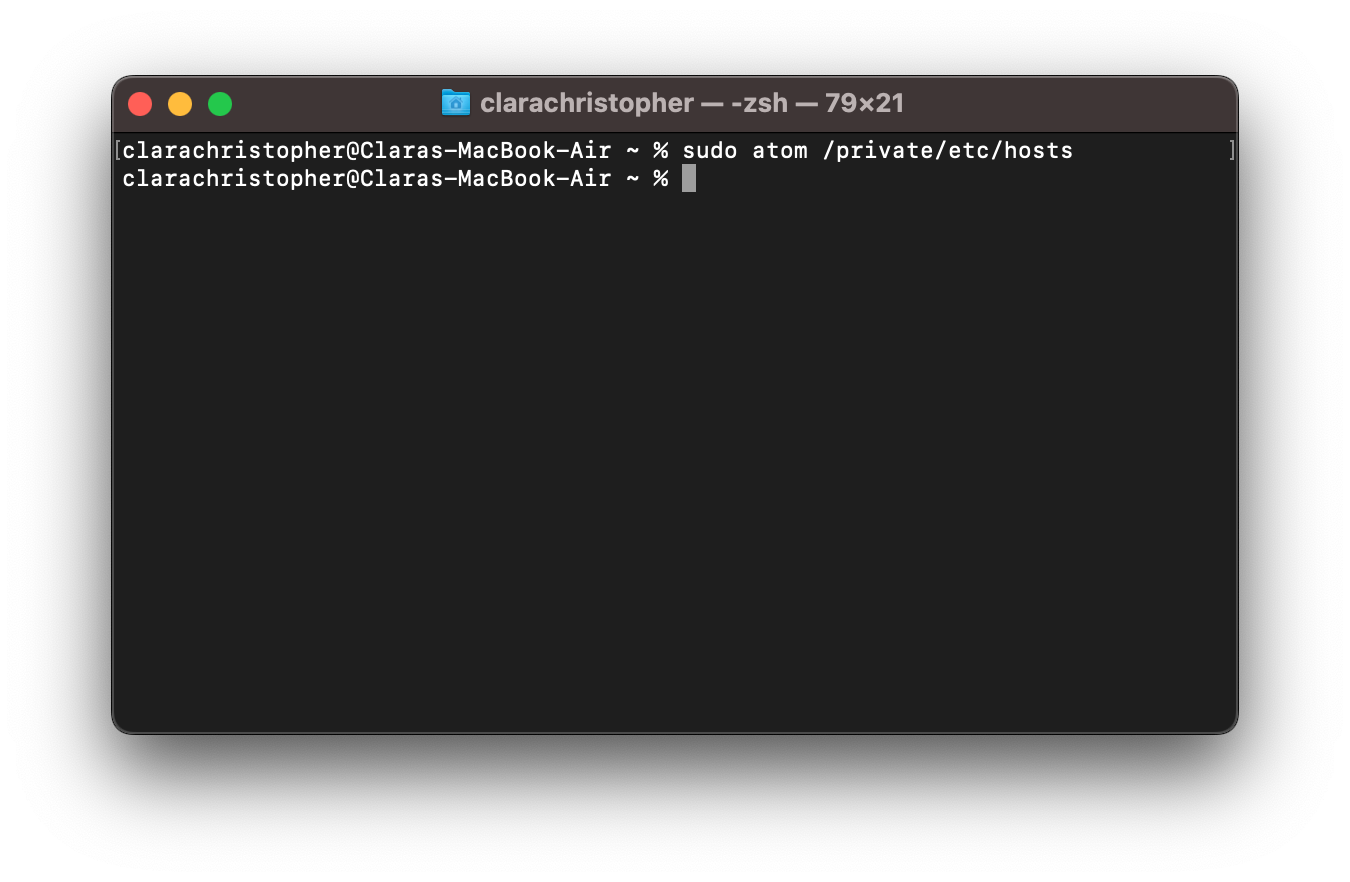
Note: The sudo command in the image above opens atom, a text editor. The command can use any text editor on your device to open the host file; atom is just one example.
3.2 Enter the public IP address and hostname of your Access Tier into the host file. To find the IP address/hostname of your Access Tier, you can navigate from Networks > Access Tiers, and select the Access Tier you used in the hosted web configuration above. In the field that contains public address of the Access Tier, copy the IP address or hostname and paste into the host file. If the IP address is not available in this field (since the hostname was entered instead), retrieve the IP address from your DNS entry or from infrastructure (AWS or GCP). Then, paste the IP address and host name into the host file, as seen below:
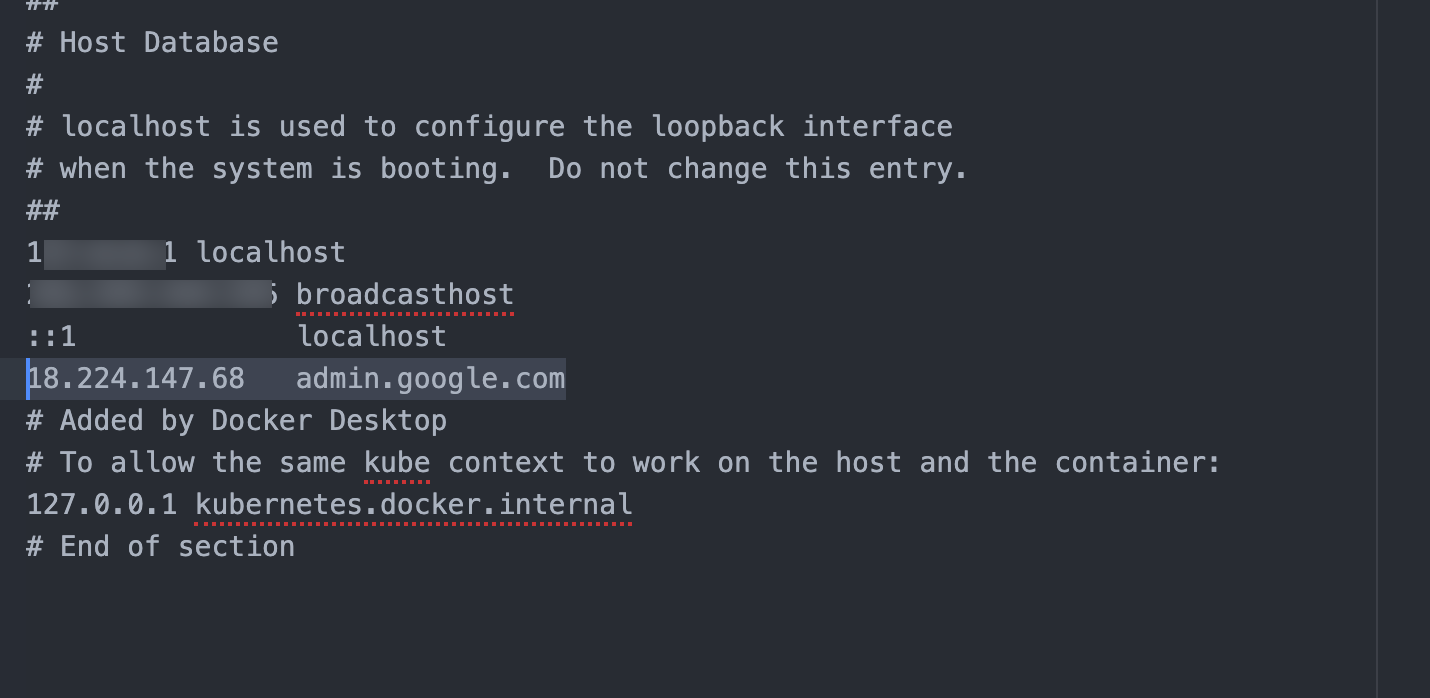
Note: The highlighted IP address and hostname shown in the image above are just examples.
Step 4: End user connects to the hosted web (TCP) service in the app and accesses the public resource
4.1 End users in your org can now connect to the hosted web service (created in the steps above) in the app to access public resources, without having to connect to a Service Tunnel.