Manage Internet Threat Protection (ITP) Policies
Creating, editing, and prioritizing ITP policies in SonicWall Cloud Secure Edge (CSE)
- Updated on Aug 18, 2025
- 5 minutes to read
-
Contributors

- ITP Policy Overview
- Create an ITP Policy
- Edit or Delete an ITP Policy
- Prioritizing ITP Policies
- Exclude Users from ITP Policies
- ITP policy sync status
- Lookup Domain
- Disabling ITP
ITP Policy Overview
Internet Threat Protection (ITP) policies are designed to protect users and devices from untrusted internet resources. Admins can create and manage ITP policies in the Command Center. Admins assign ITP policies to users and devices via Roles, similar to other protected services in the Cloud Secure Edge (CSE).
In CSE, admins decide which content categories, which domains, and which apps they want to block or allow. Additionally, a selection of common threat categories are pre-selected and always toggled on for protection against. Admins then associate the ITP policy with a device or a group of devices.
Create an ITP Policy
Step 1: Create an ITP Policy
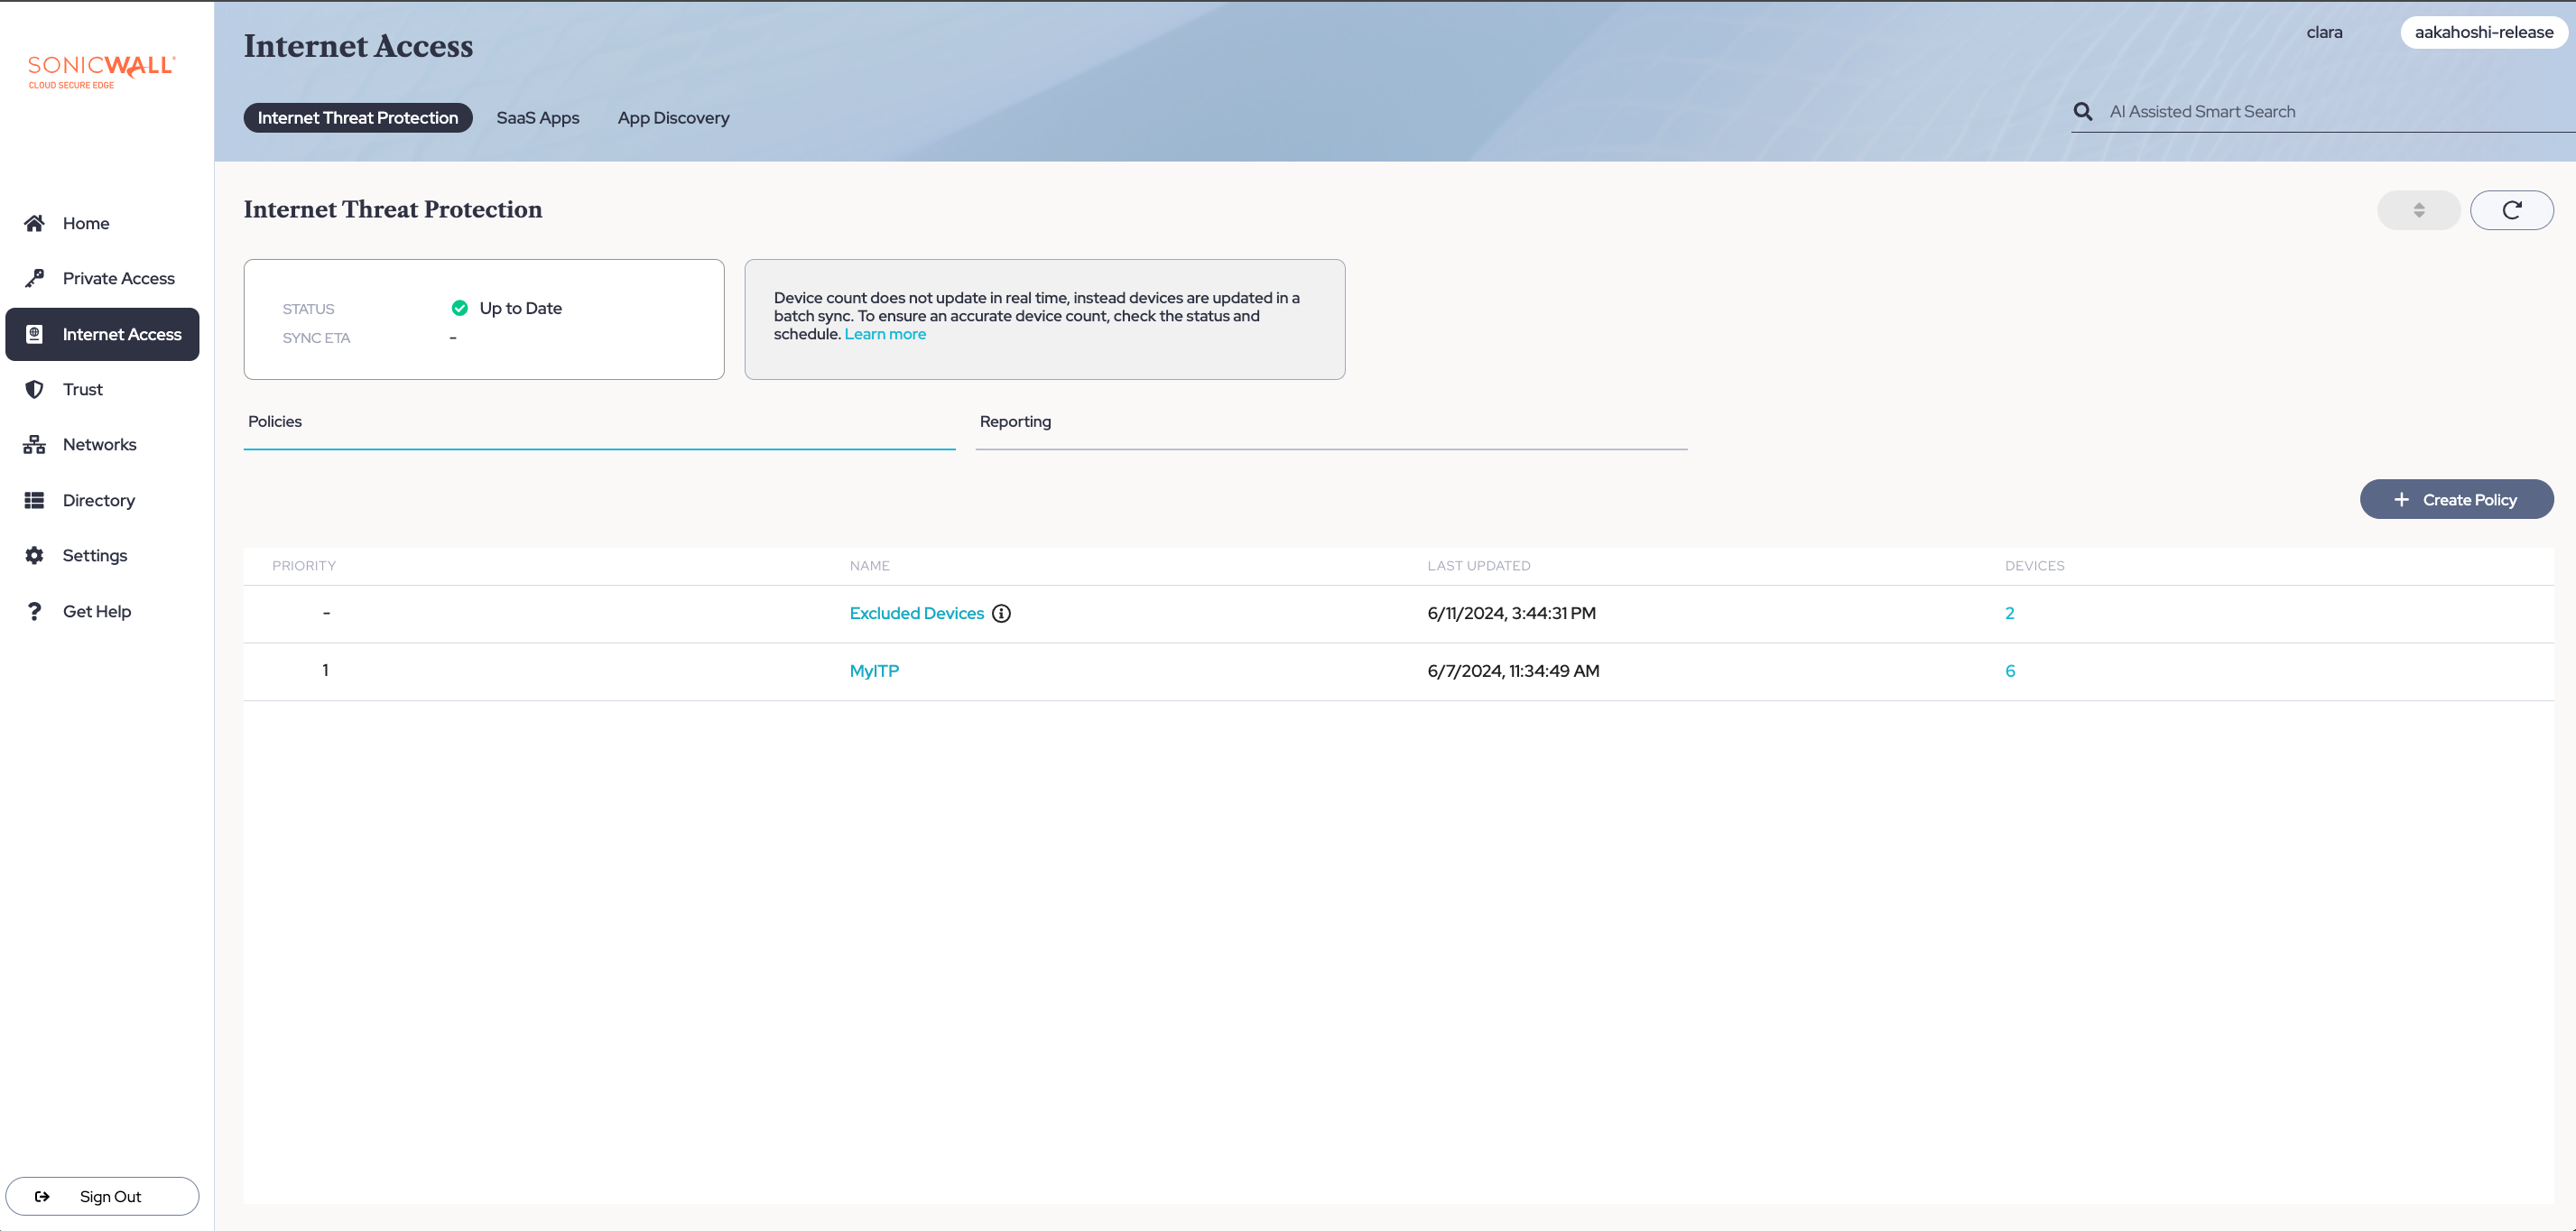
1.1 Navigate from Internet Access > Internet Threat Protection.
1.2 Select + Create Policy.
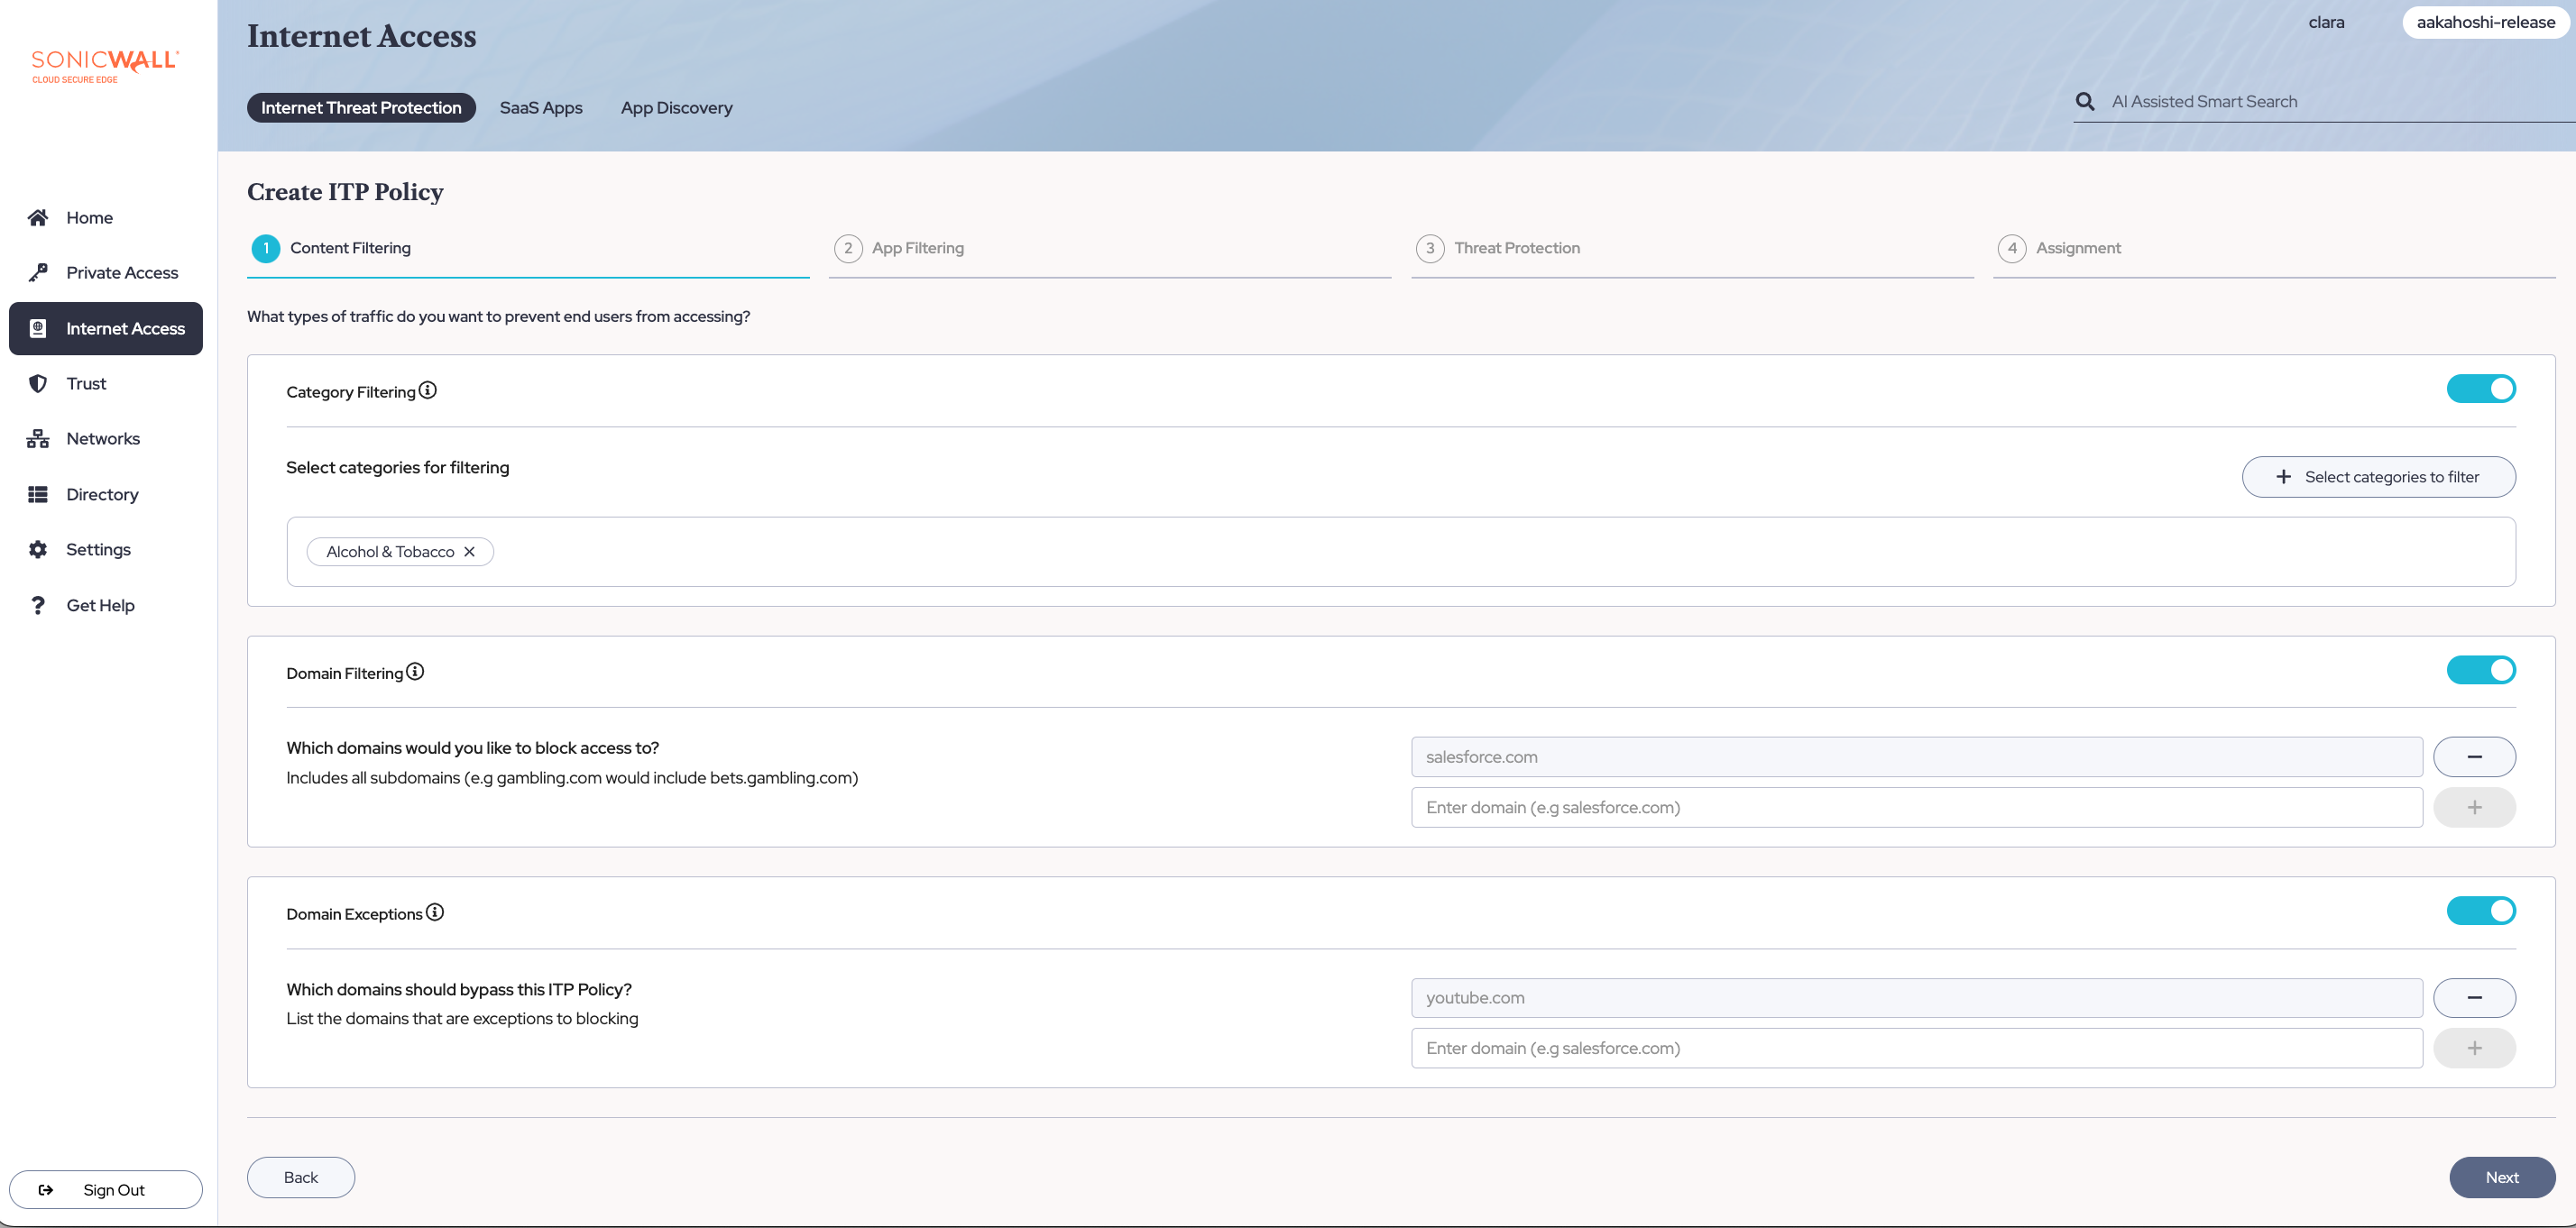
Step 2: Configure Content Filtering, Domain Blocking, and Domain Exceptions
2.1 Select which categories of content you want to block your end users from accessing by toggling on Category Filtering, selecting + Select categories to filter, and selecting categories from the dropdown menu. To remove an added category, select the x beside the category name.
2.2 Select which domains you want to block your end users from accessing by toggling on Domain Filtering, and then entering the domain name. To block more than one domain, select the + beside the domain name field.
2.3 Select which domains you want to configure as exceptions to your ITP policy by toggling on Domain Exceptions, and then entering the domain name. To add more exceptions, select the + beside the domain name field.
Note: If needed, private domains can also be added as domain exceptions.
2.4 Optional: Toggle on Geo-Blocking if you want to block access to IP ranges associated with specific countries. Use the + Select countries button and select countries from the drop-down menu. To remove selected countries, select the x adjacent to the country’s name.
Note: To use Geo-Blocking, admins require an SIA Advanced license for their org.
2.5 Select Next.
Step 3: Configure App Filtering and App Exceptions
3.1 Select which apps you want to block your end users from accessing by toggling on Application Filtering, selecting + Select Apps, and selecting or entering the specific apps you want blocked.
3.2 Select which apps you want to add as exceptions from this ITP policy by toggling on Application Exceptions, selecting + Select Apps, and selecting or entering the specific apps you want to except from the policy.
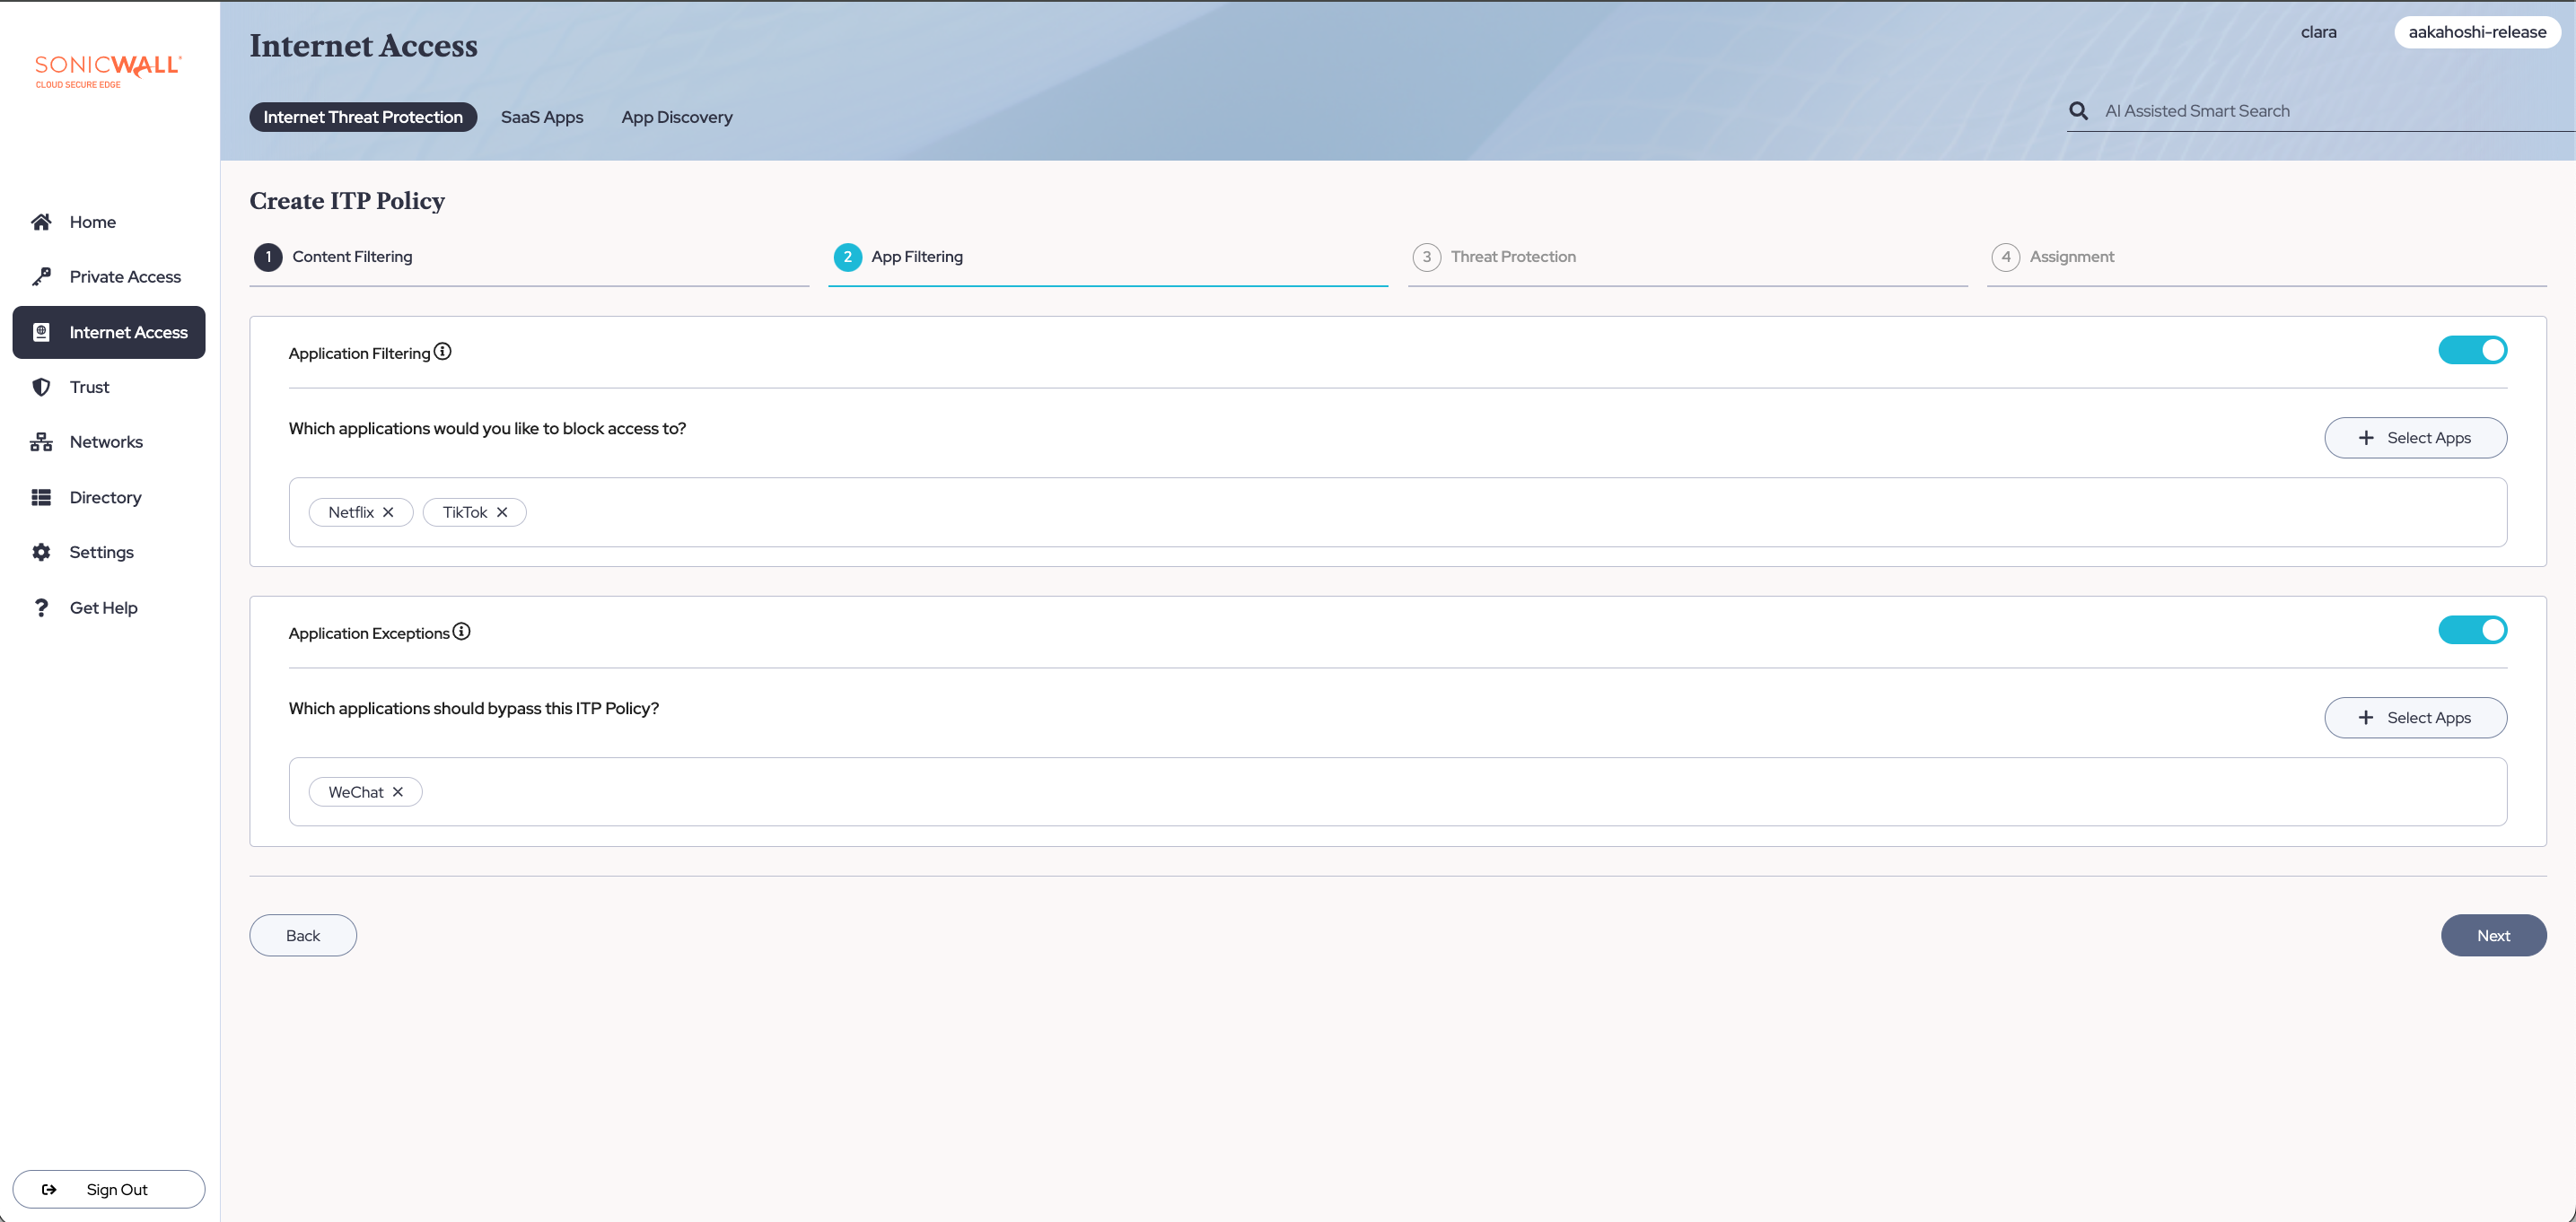
3.3 Select Next.
Step 4: Review Threat Protections
4.1 Under the Threat Protection tab, review which threat categories are blocked by default for your devices. To learn more about the threat, hover above the info icon.
Note: These are common threat categories that are always toggled on to ensure user protection. These cannot be toggled off.
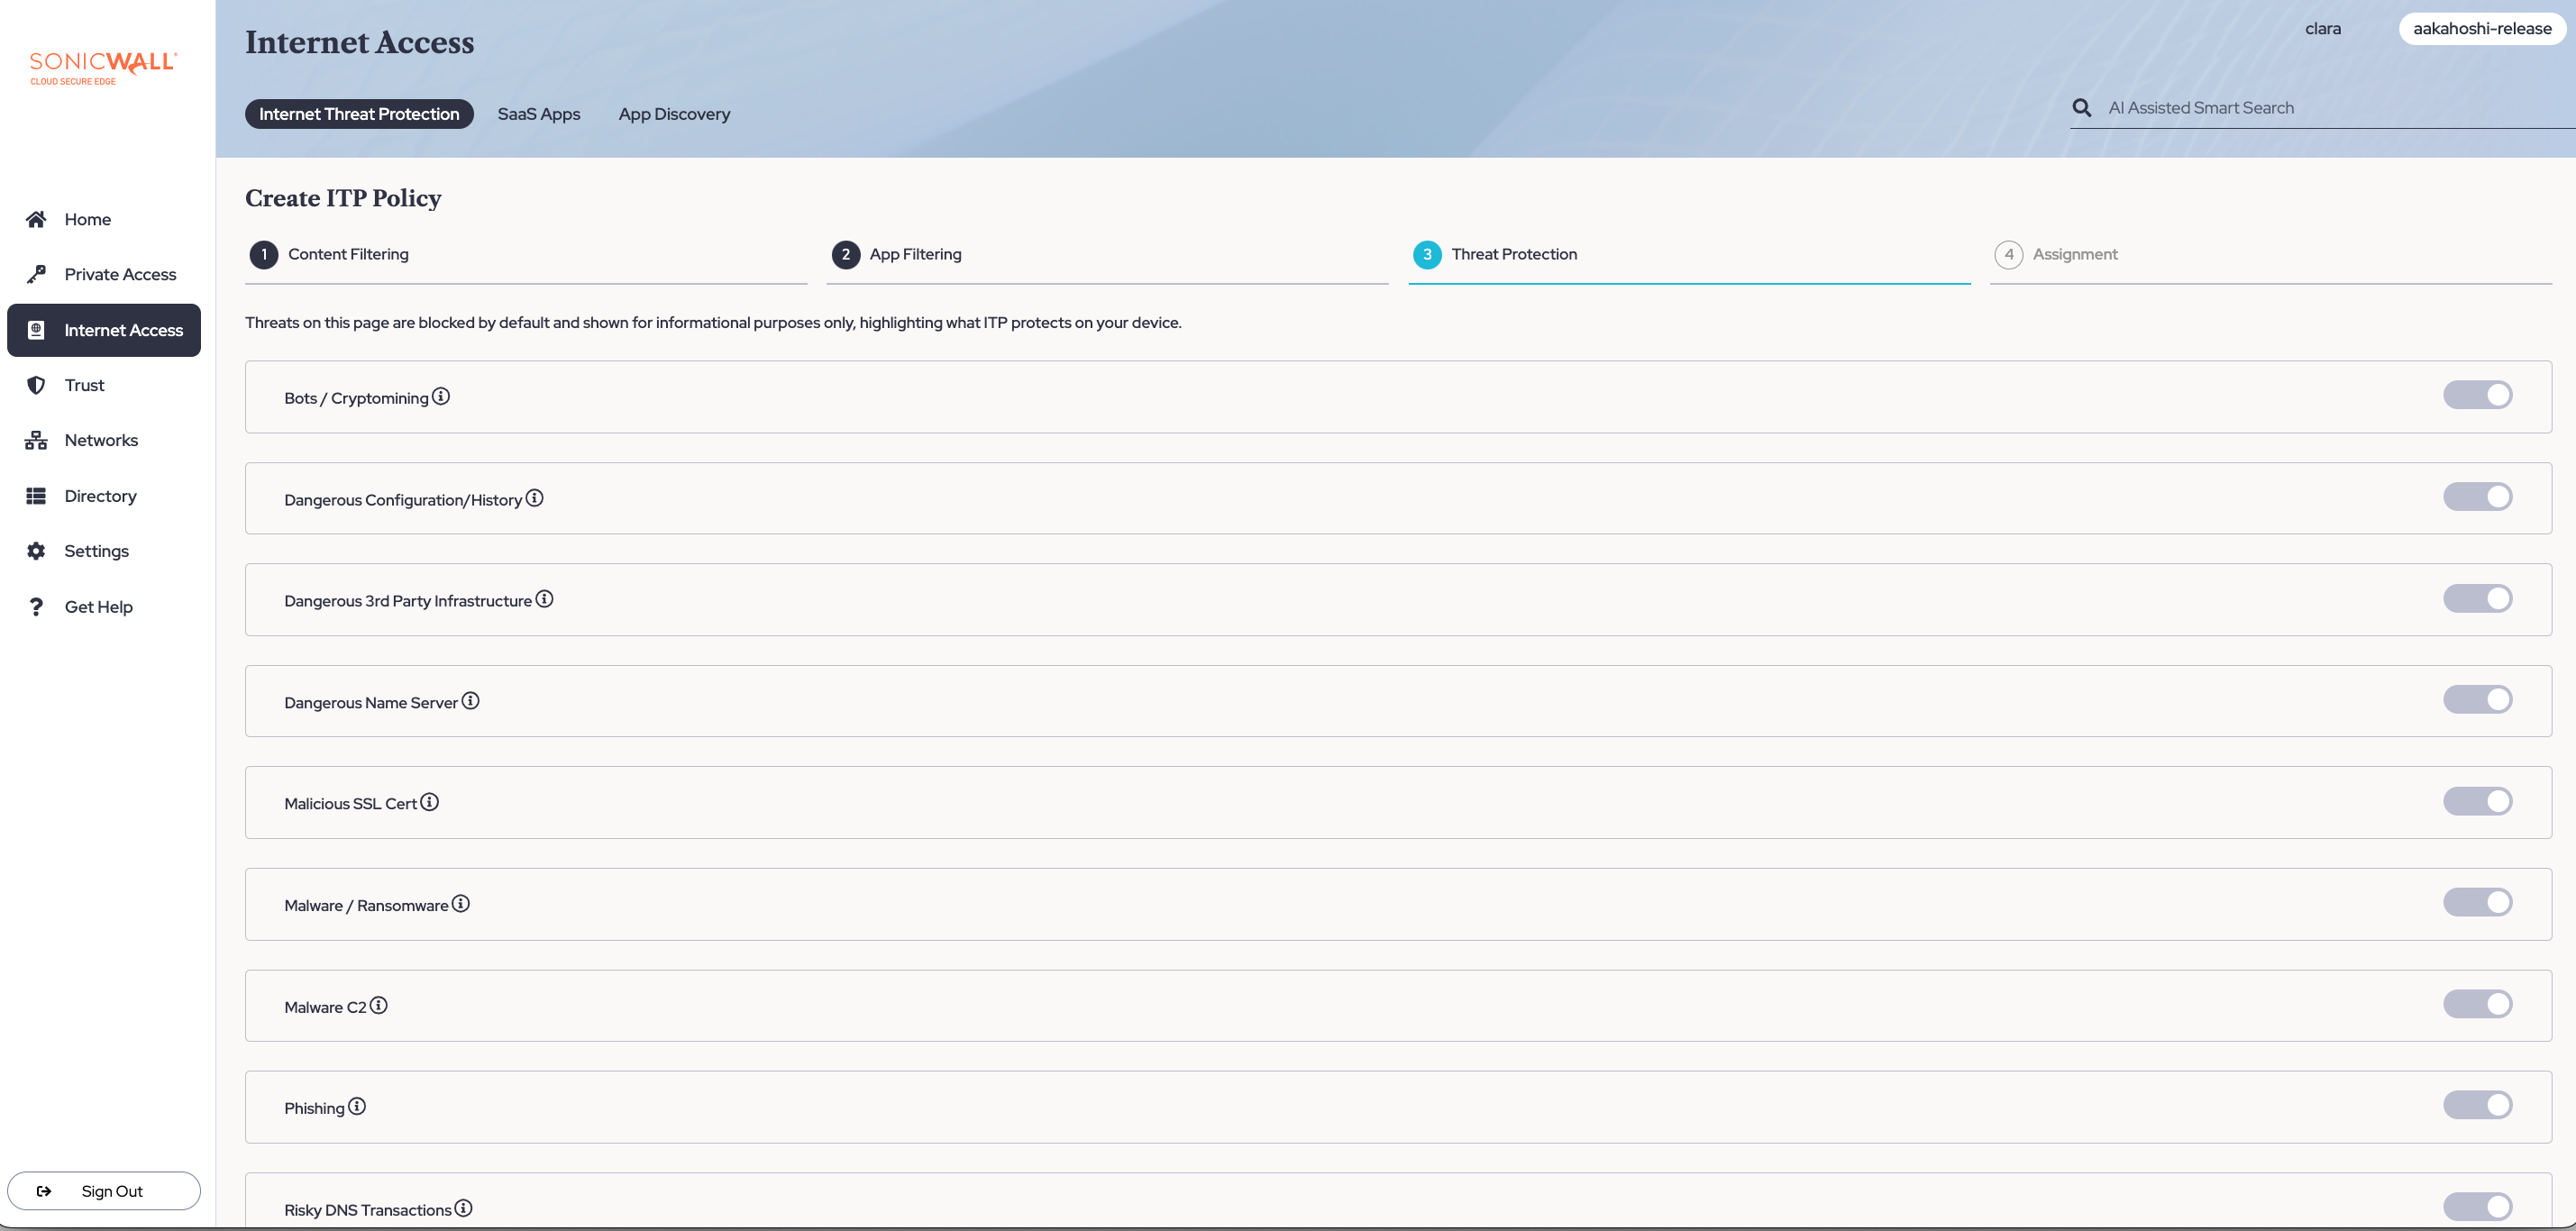
4.2 Select Next.
Step 5: Assign the ITP policy to devices in your org
5.1 Name your ITP policy and add an optional description.
5.2 Attach one or more Role(s) to assign your ITP policy to.
5.3 Enter custom messaging for your ITP block page.
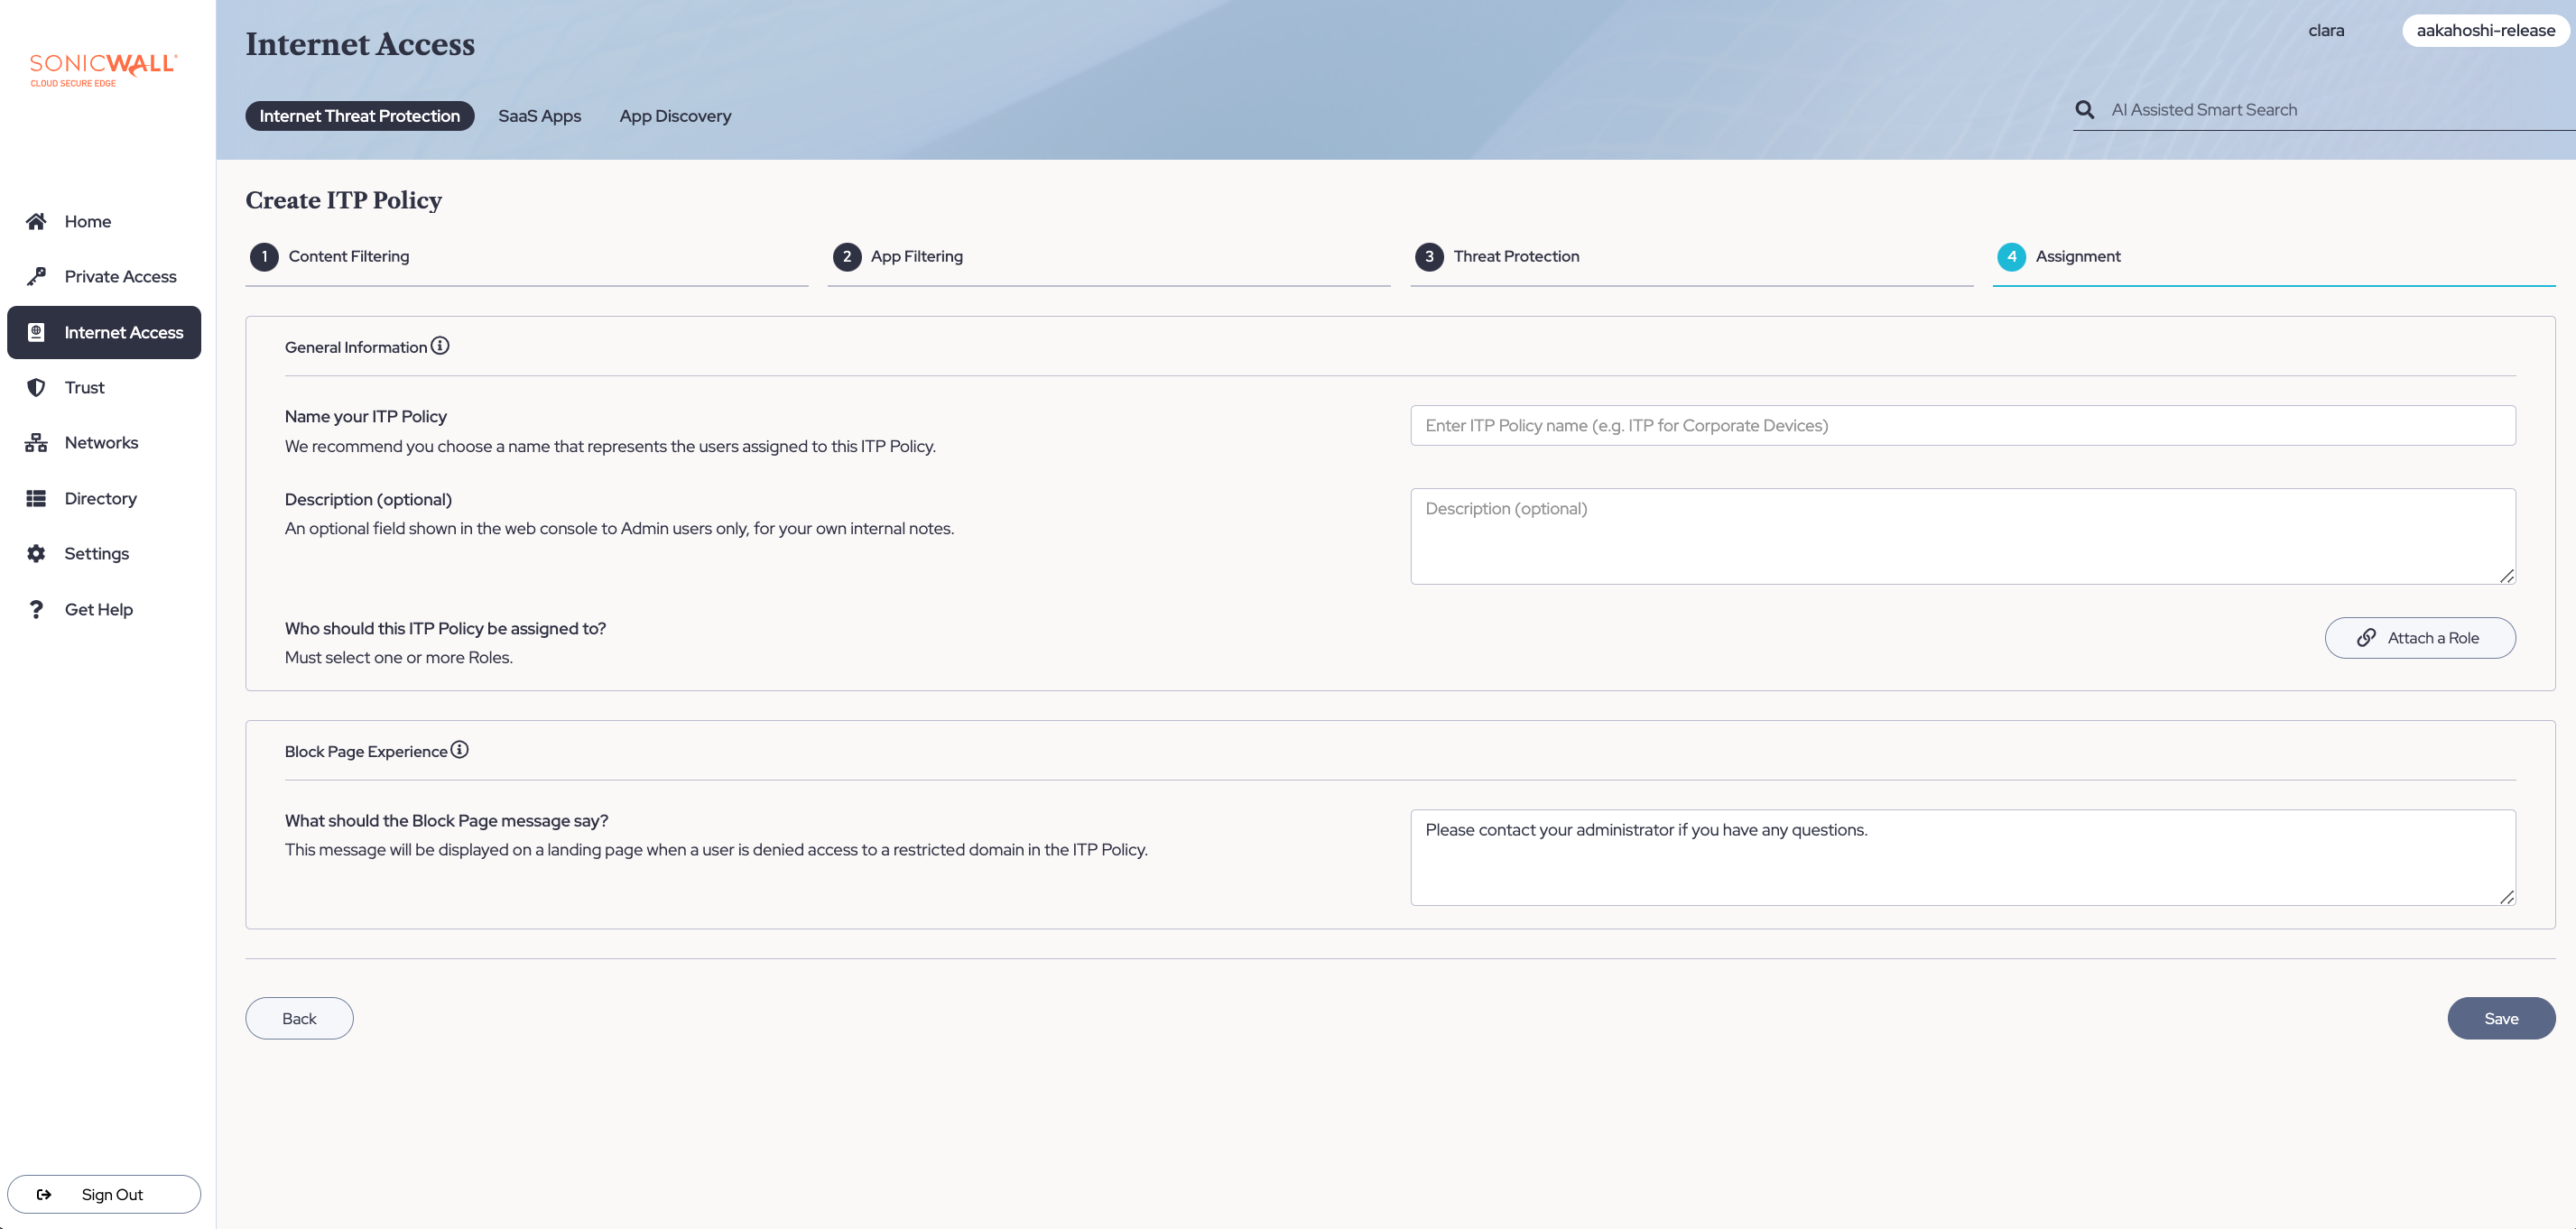
5.4 Select Save.
Edit or Delete an ITP Policy
In the Command Center, navigate from Internet Access > Internet Threat Protection. From your list of ITP policies, select the Name of one you want to edit or delete.
Edit
1. To edit, select the pencil icon in the top right corner of the ITP policy page.
2. Adjust your toggles under Threat Protection, Content Filtering, or Assignment.
3. Select Save.
Delete
1. To delete your ITP policy, select the trash icon in the top right corner of the ITP policy page.
2. A modal will pop up, double-checking if you want to delete your policy. Select Delete.
Prioritizing ITP Policies
Devices are not required to have an ITP policy associated with them; however, each device can only have one policy active at a time. ITP policies can be prioritized: higher priority policies will take precedence when two or more policies apply to one device (i.e., a device with multiple Roles and separate ITP policies applicable to each Role).
Exclude Users from ITP Policies
The exclude ITP policy (i.e., Excluded Devices) is always the highest priority and cannot be re-prioritized or deleted. The exclude policy will by default include a role called Mobile Devices that cannot be removed.
1. In the Command Center, navigate from Internet Access > Internet Threat Protection.
2. In your list of ITP policies, select the default Excluded Devices policy, and attach whichever Roles you want to be excluded from all ITP policies.
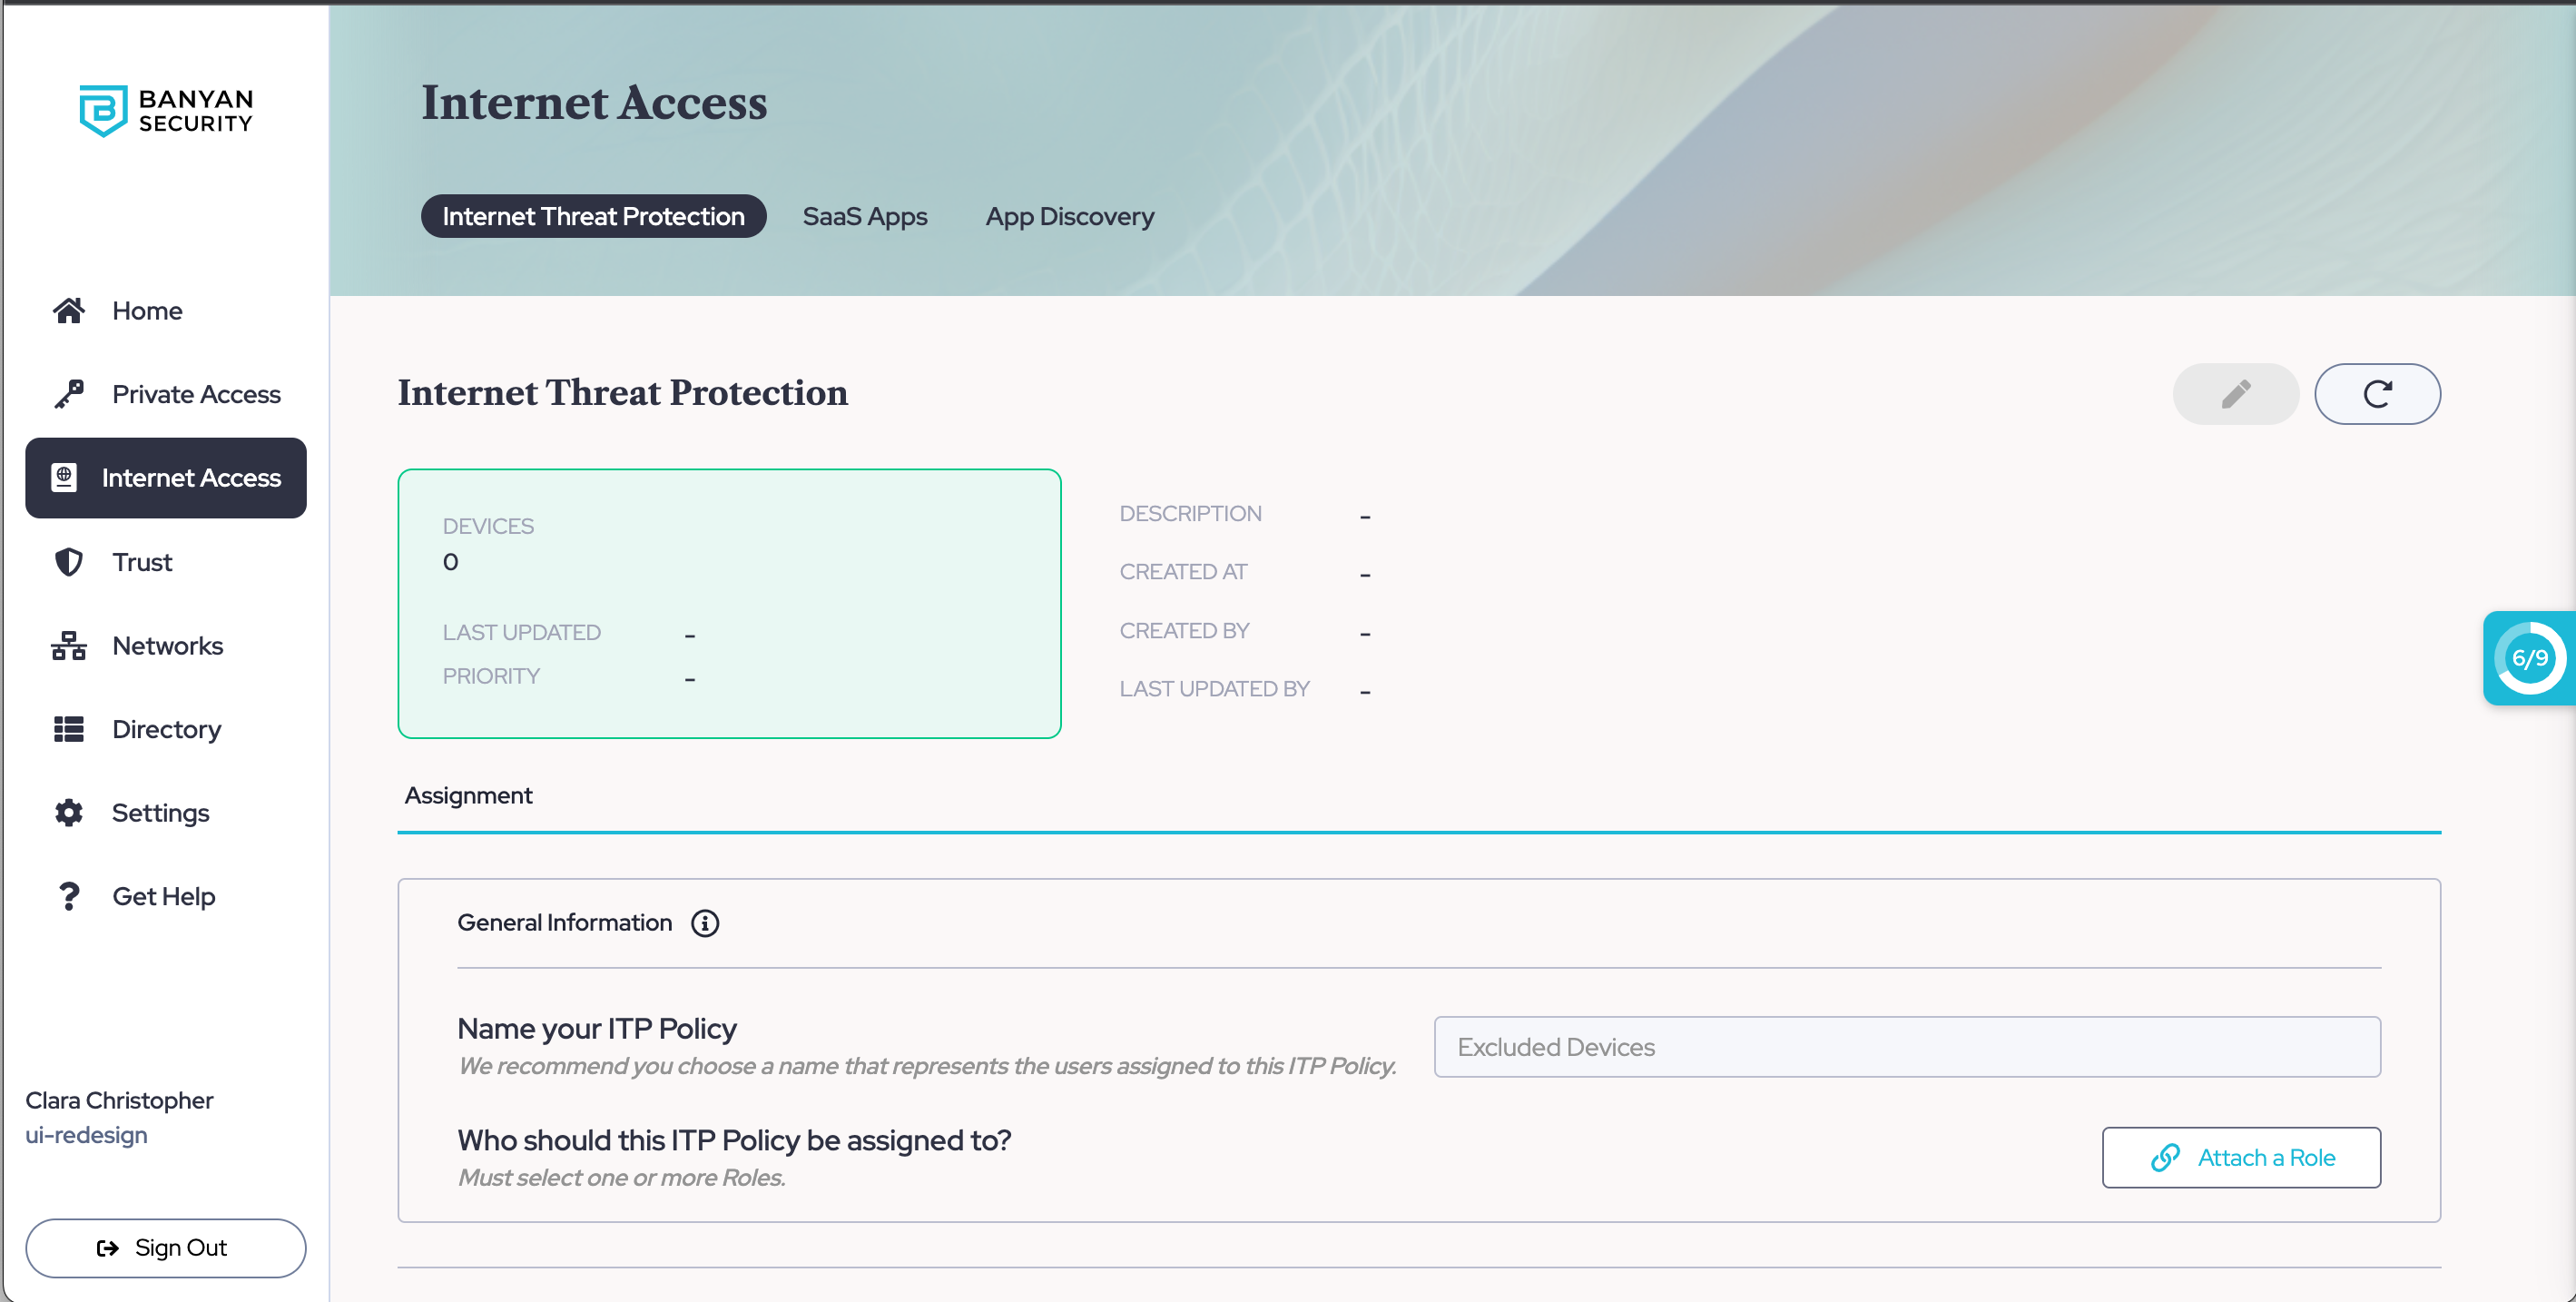
3. Select Save.
How to prioritize ITP policies
1. In the Command Center, navigate from Internet Access > Internet Threat Protection.
2. Select the Reorder button in the top right corner of the page (i.e., the button with an up and down arrow).
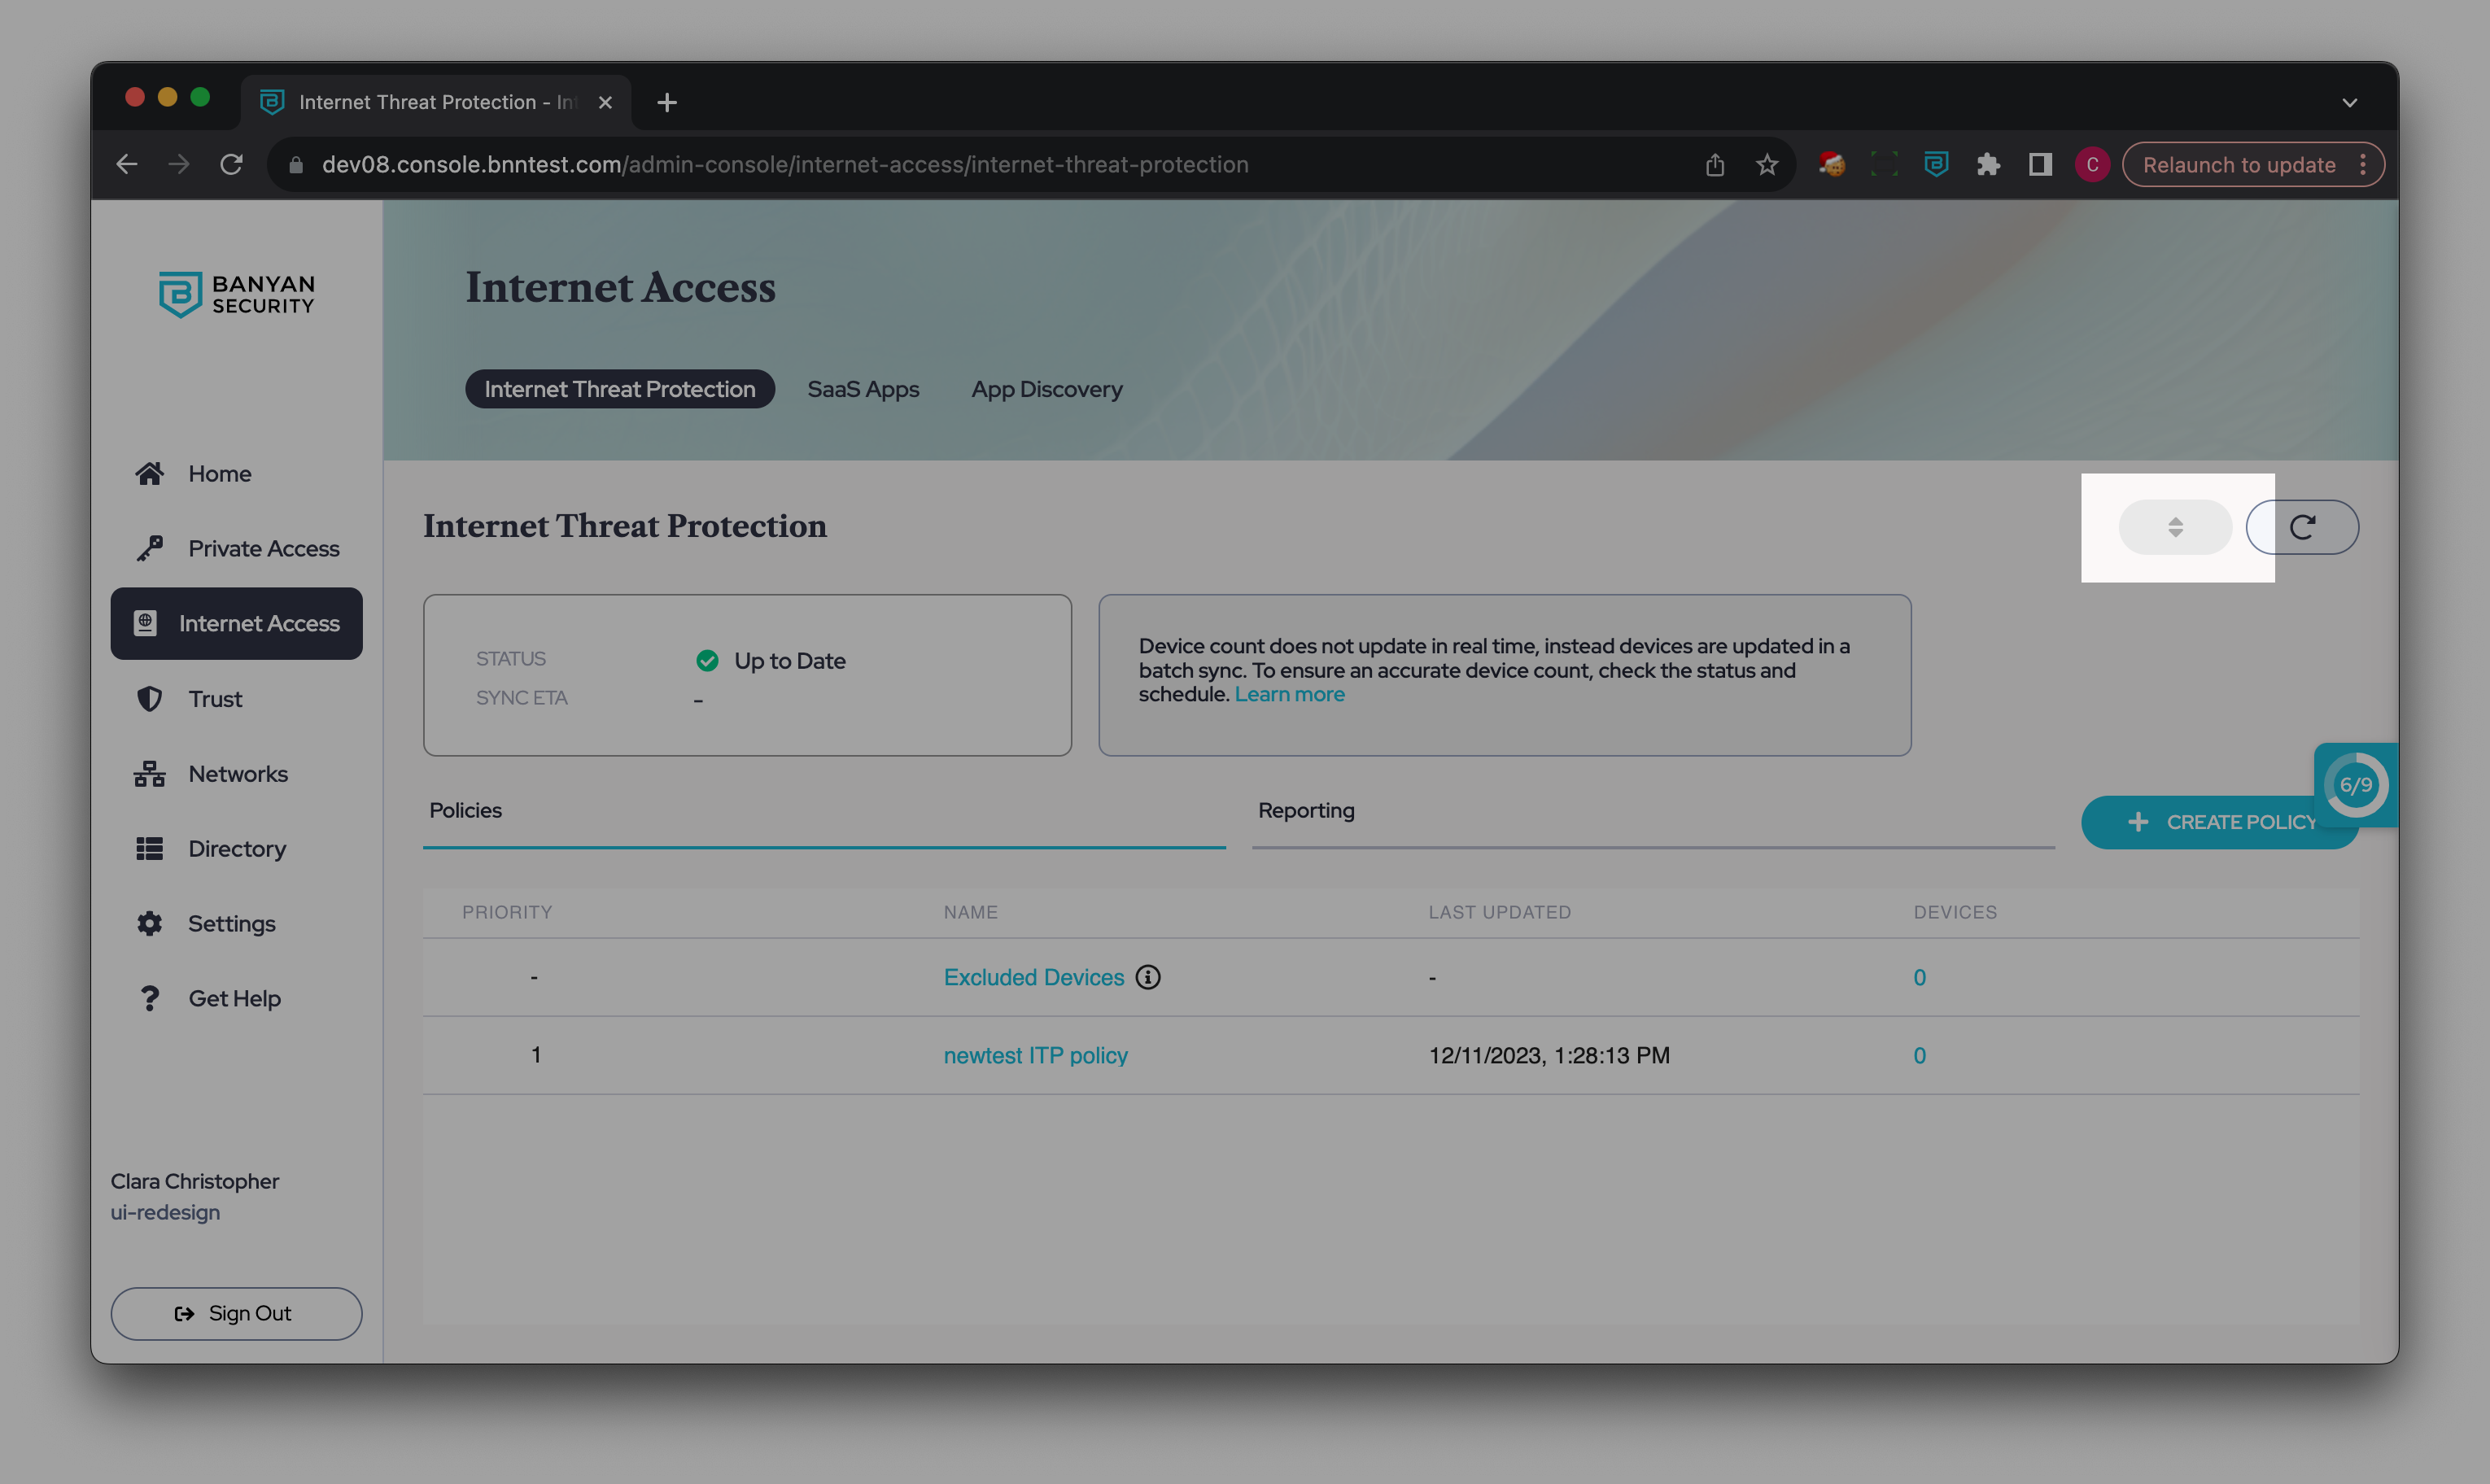
3. Drag your ITP policies into your preferred order of priority, where 1 is the highest priority.
4. Select Save.
ITP policy sync status
When ITP policy assignments are edited or policies are re-prioritized, the console does not typically reflect these changes immediately; for larger environments with many devices, syncs tend to take longer, and updates are only reflected in the console when CSE completes the next sync.
CSE’s sync status indicates whether the ITP policies page in the console is up-to-date or in progress. If a sync is in progress, then an ETA will also be available, so that admins can expect when ITP policy updates will be reflected in the console.
If the ITP policy sync status fails to complete, contact SonicWall CSE support.
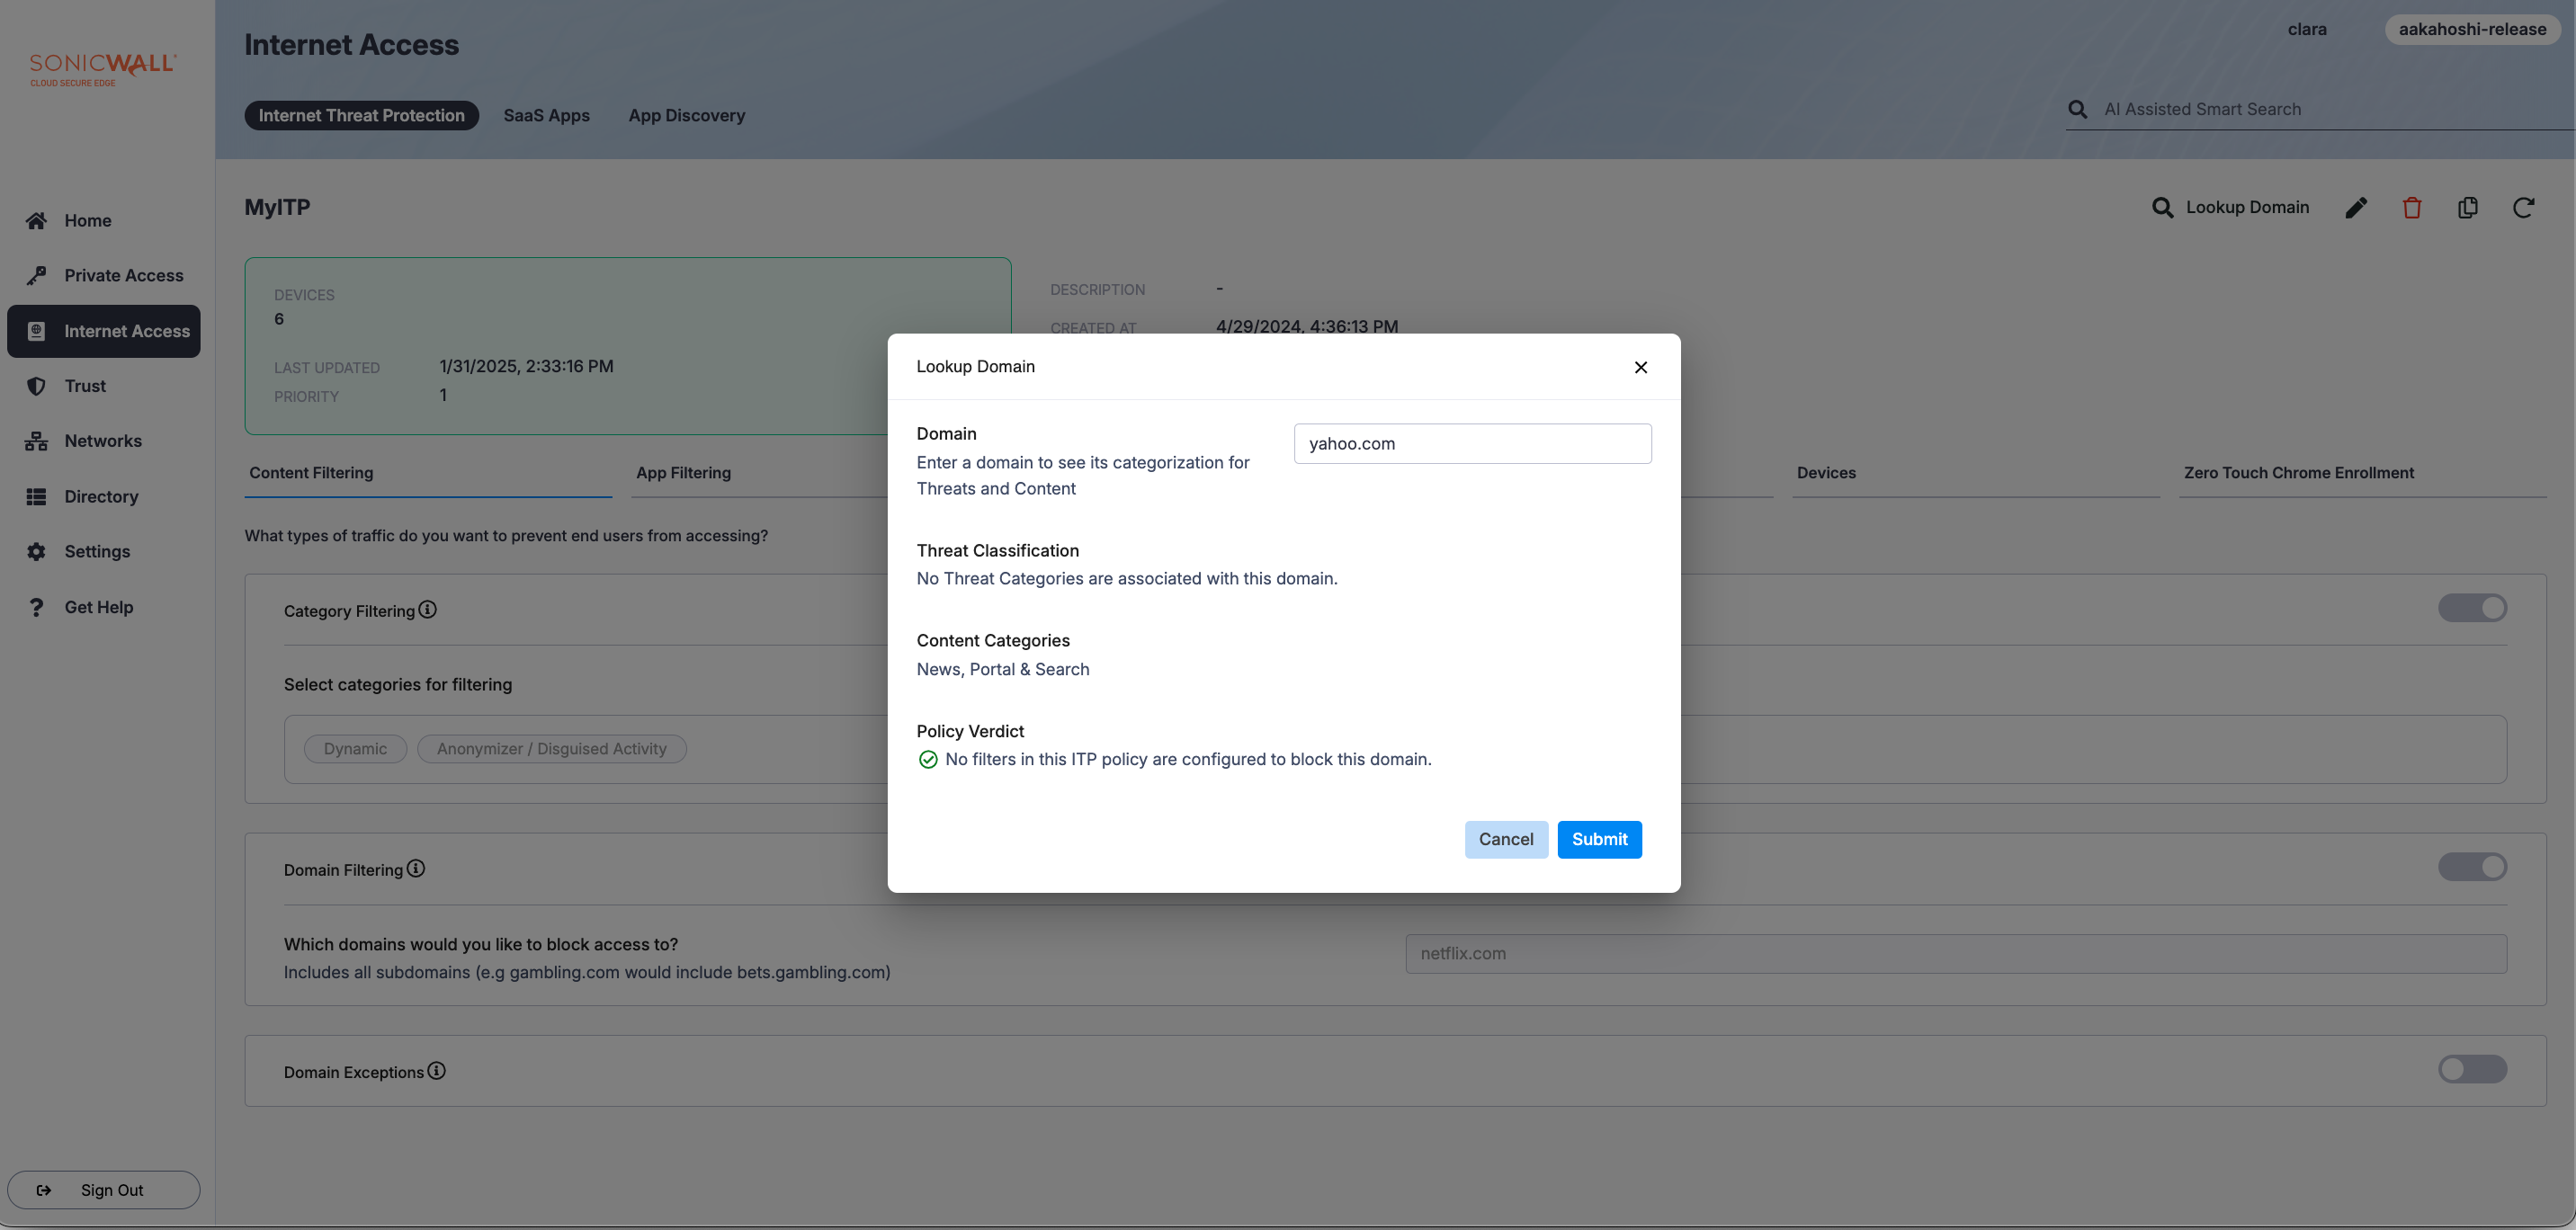
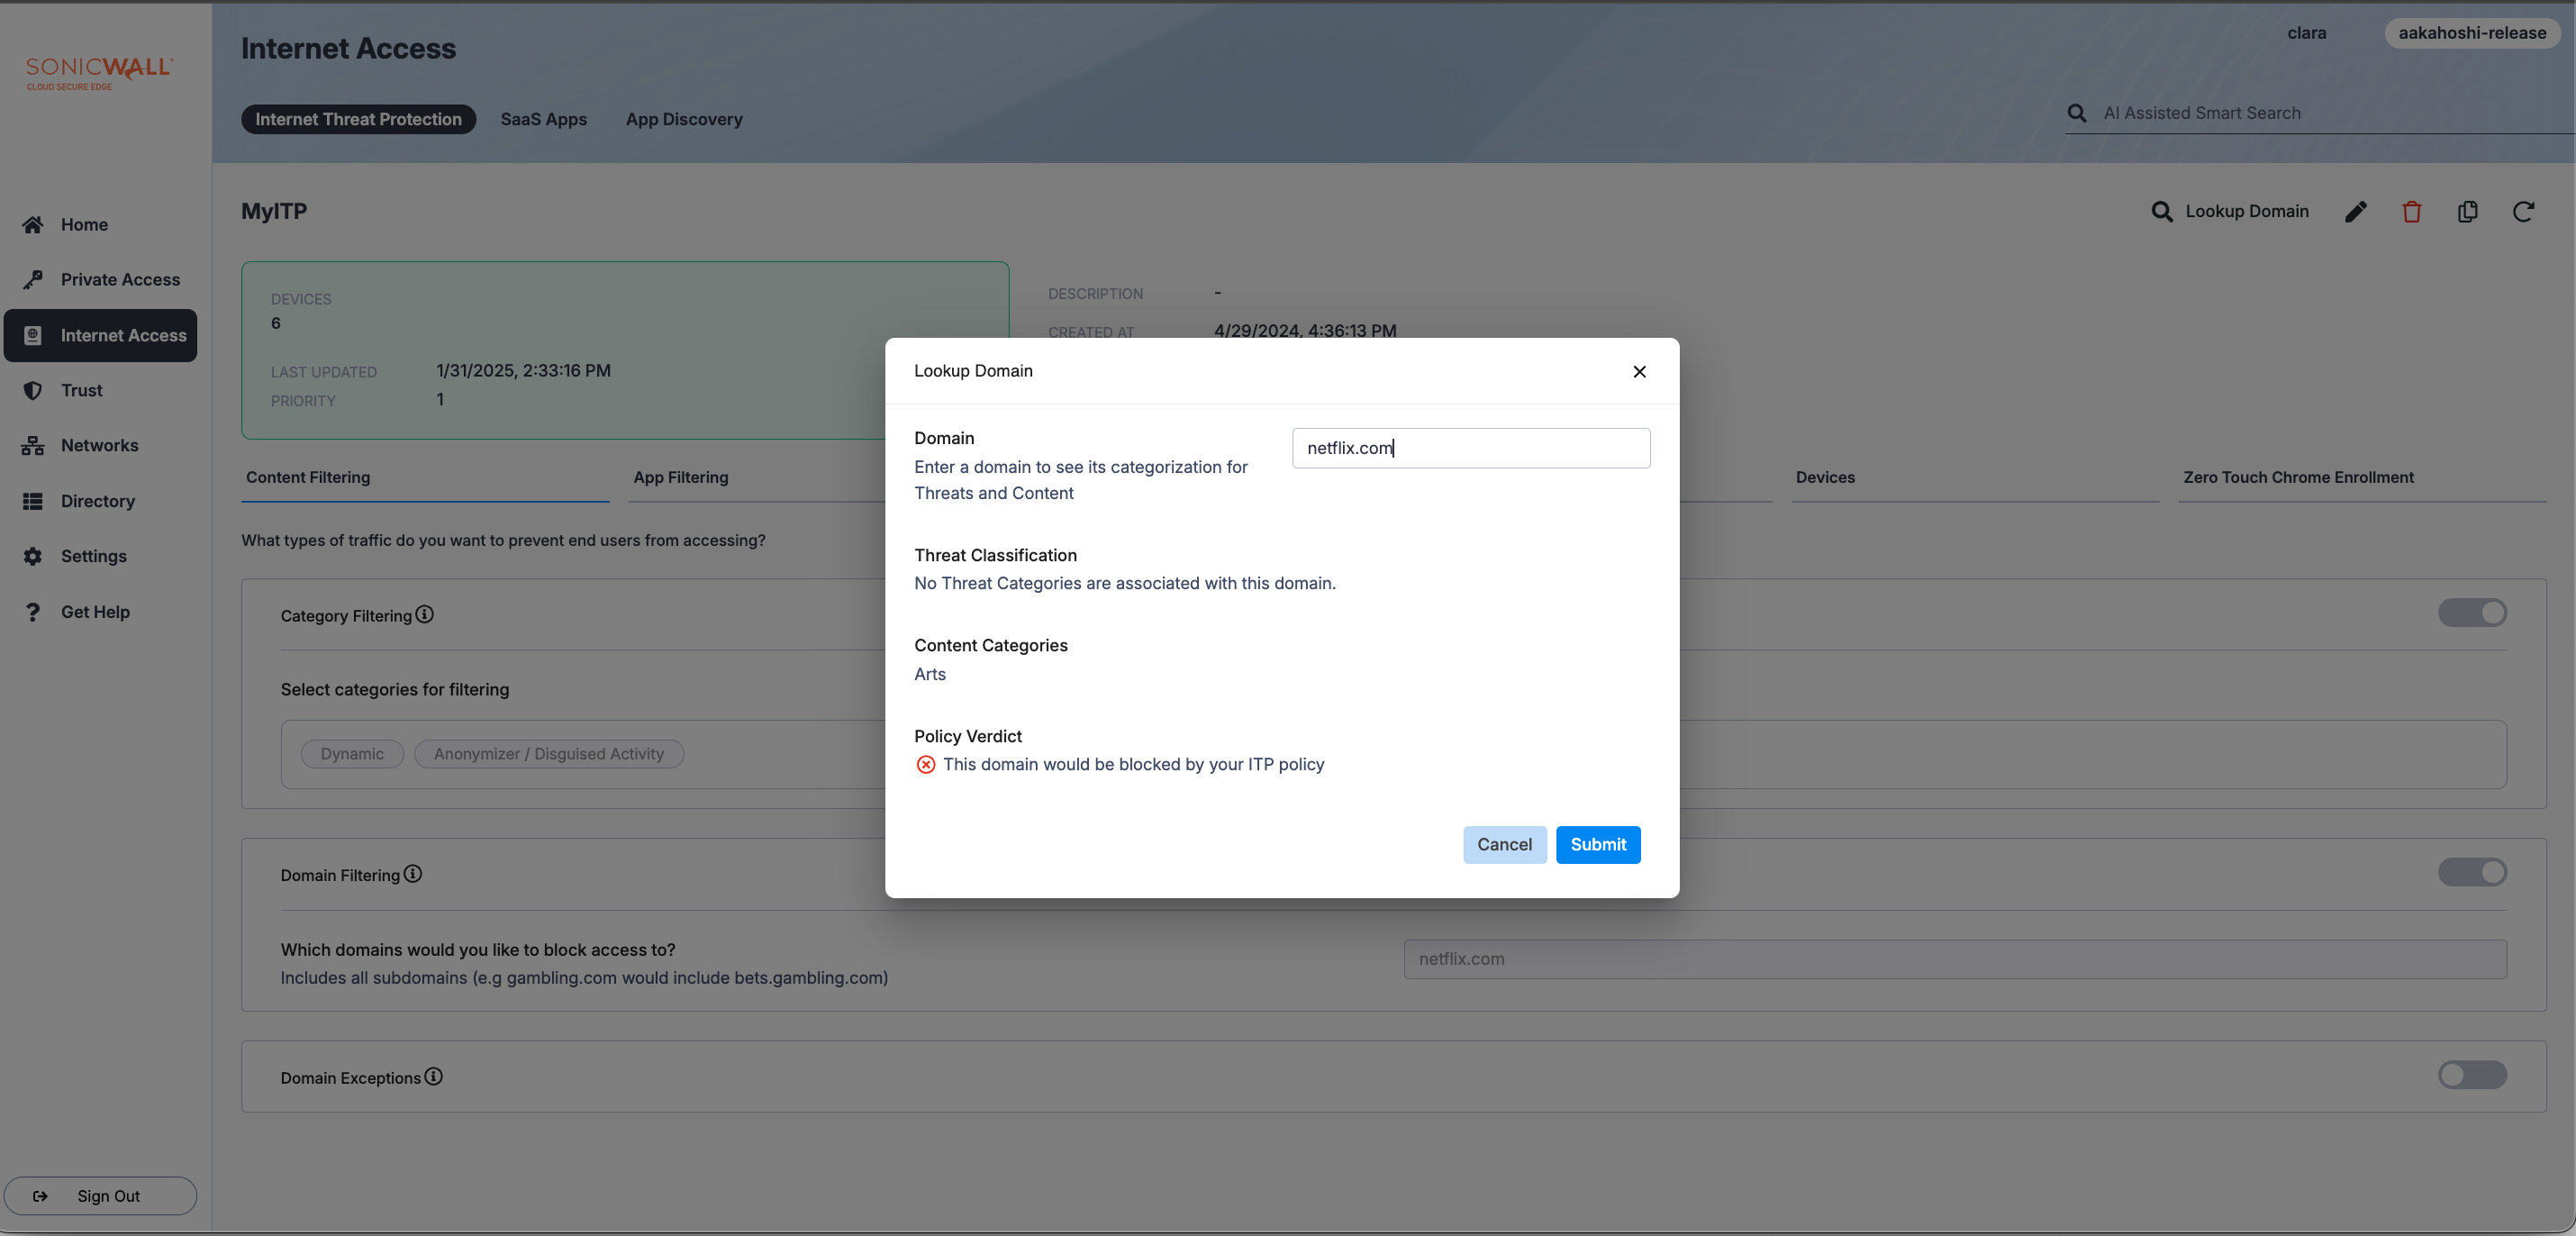
Lookup Domain
Lookup Domain allows admins to view which Content Categories and Threat Classification a given domain falls under. It also offers a Policy Verdict, indicating whether your ITP policy is configured to block or allow the searched domain. Lookup Domain is available as a feature for those who have enabled Internet Threat Protection in CSE.
To use Lookup Domain, navigate to an Internet Threat Protection (ITP) policy in the Command Center.
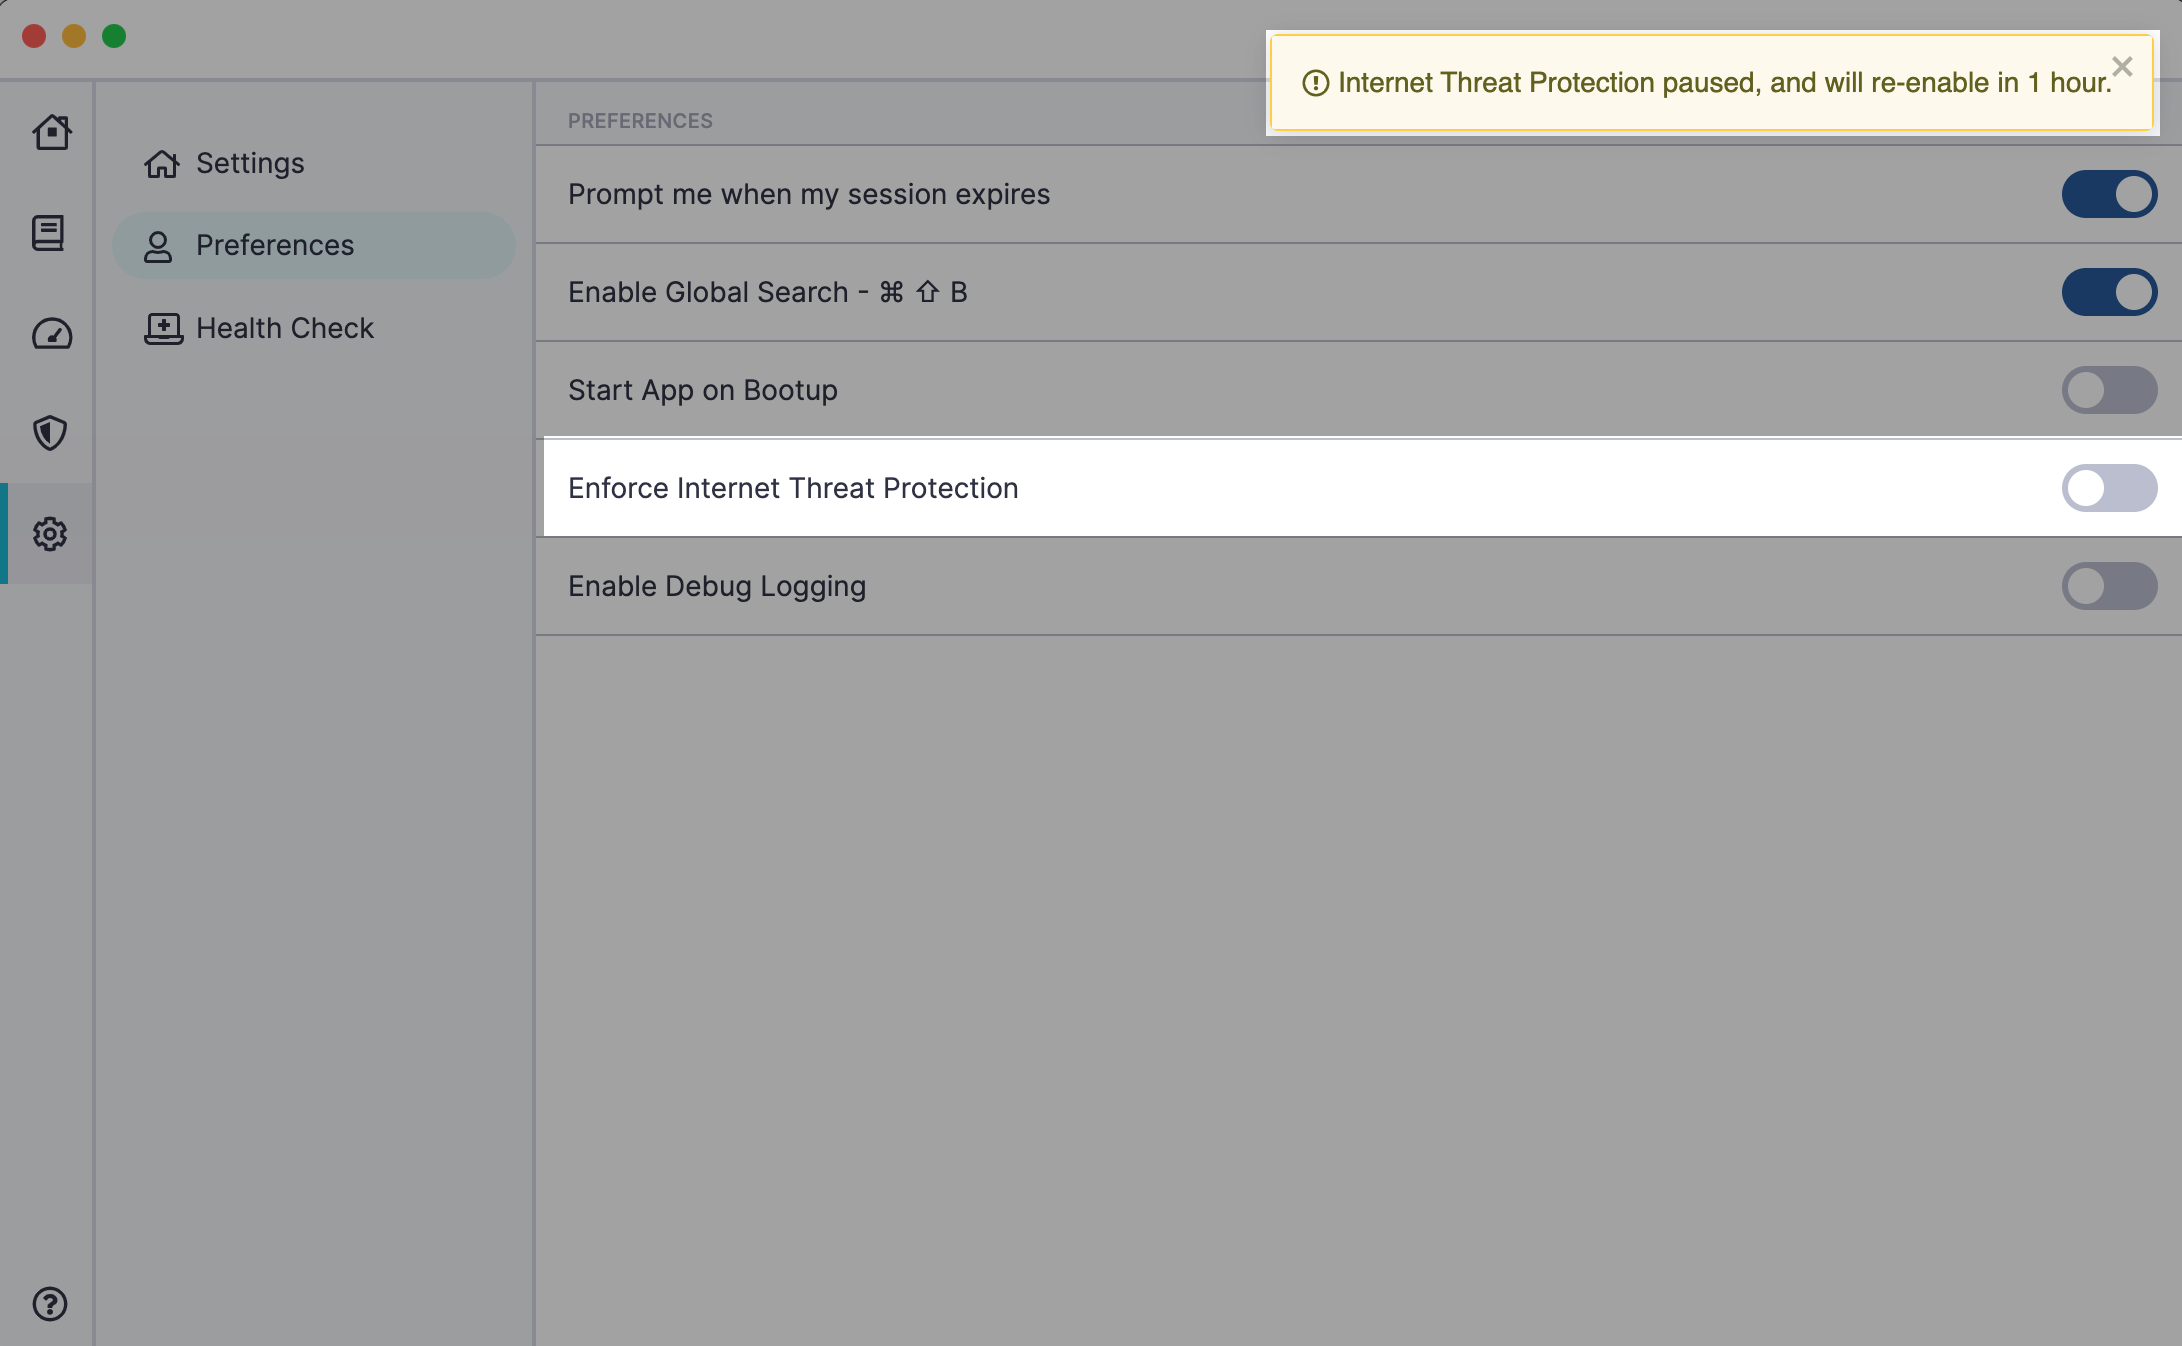
Disabling ITP
If an ITP policy is disabled by an end user in their device’s app, it will automatically be re-enabled after 1 hour. CSE generates logs detailing when the ITP policy was disabled and when it was re-enabled. These logs can be found under Events in the Command Center.