Deploy a Modern VPN with Device Trust Capabilities
How to navigate through Banyan’s Modern VPN onboarding flow
- Updated on Oct 07, 2024
- 5 minutes to read
-
Contributors

Overview
This document reviews how to set up a modern VPN (called a Service Tunnel in Banyan) while onboarding.
In the Service Tunnel model, Banyan allows registered and verified devices to access an org’s private network via the modern, cryptographically secure VPN, WireGuard.
Service Tunnel can be distinguished from standard VPNs in two important ways:
- It can connect remote users to specified segments of a private network (rather than connecting remote users to a whole private network)
- It enforces device trust.
Steps
Step 1: Select the modern VPN path
Deploy a Modern VPN with Device Trust Capabilities

Step 2: Configure your Connector
2.1 Select Configure Connector.
2.2 Enter your Connector Name.
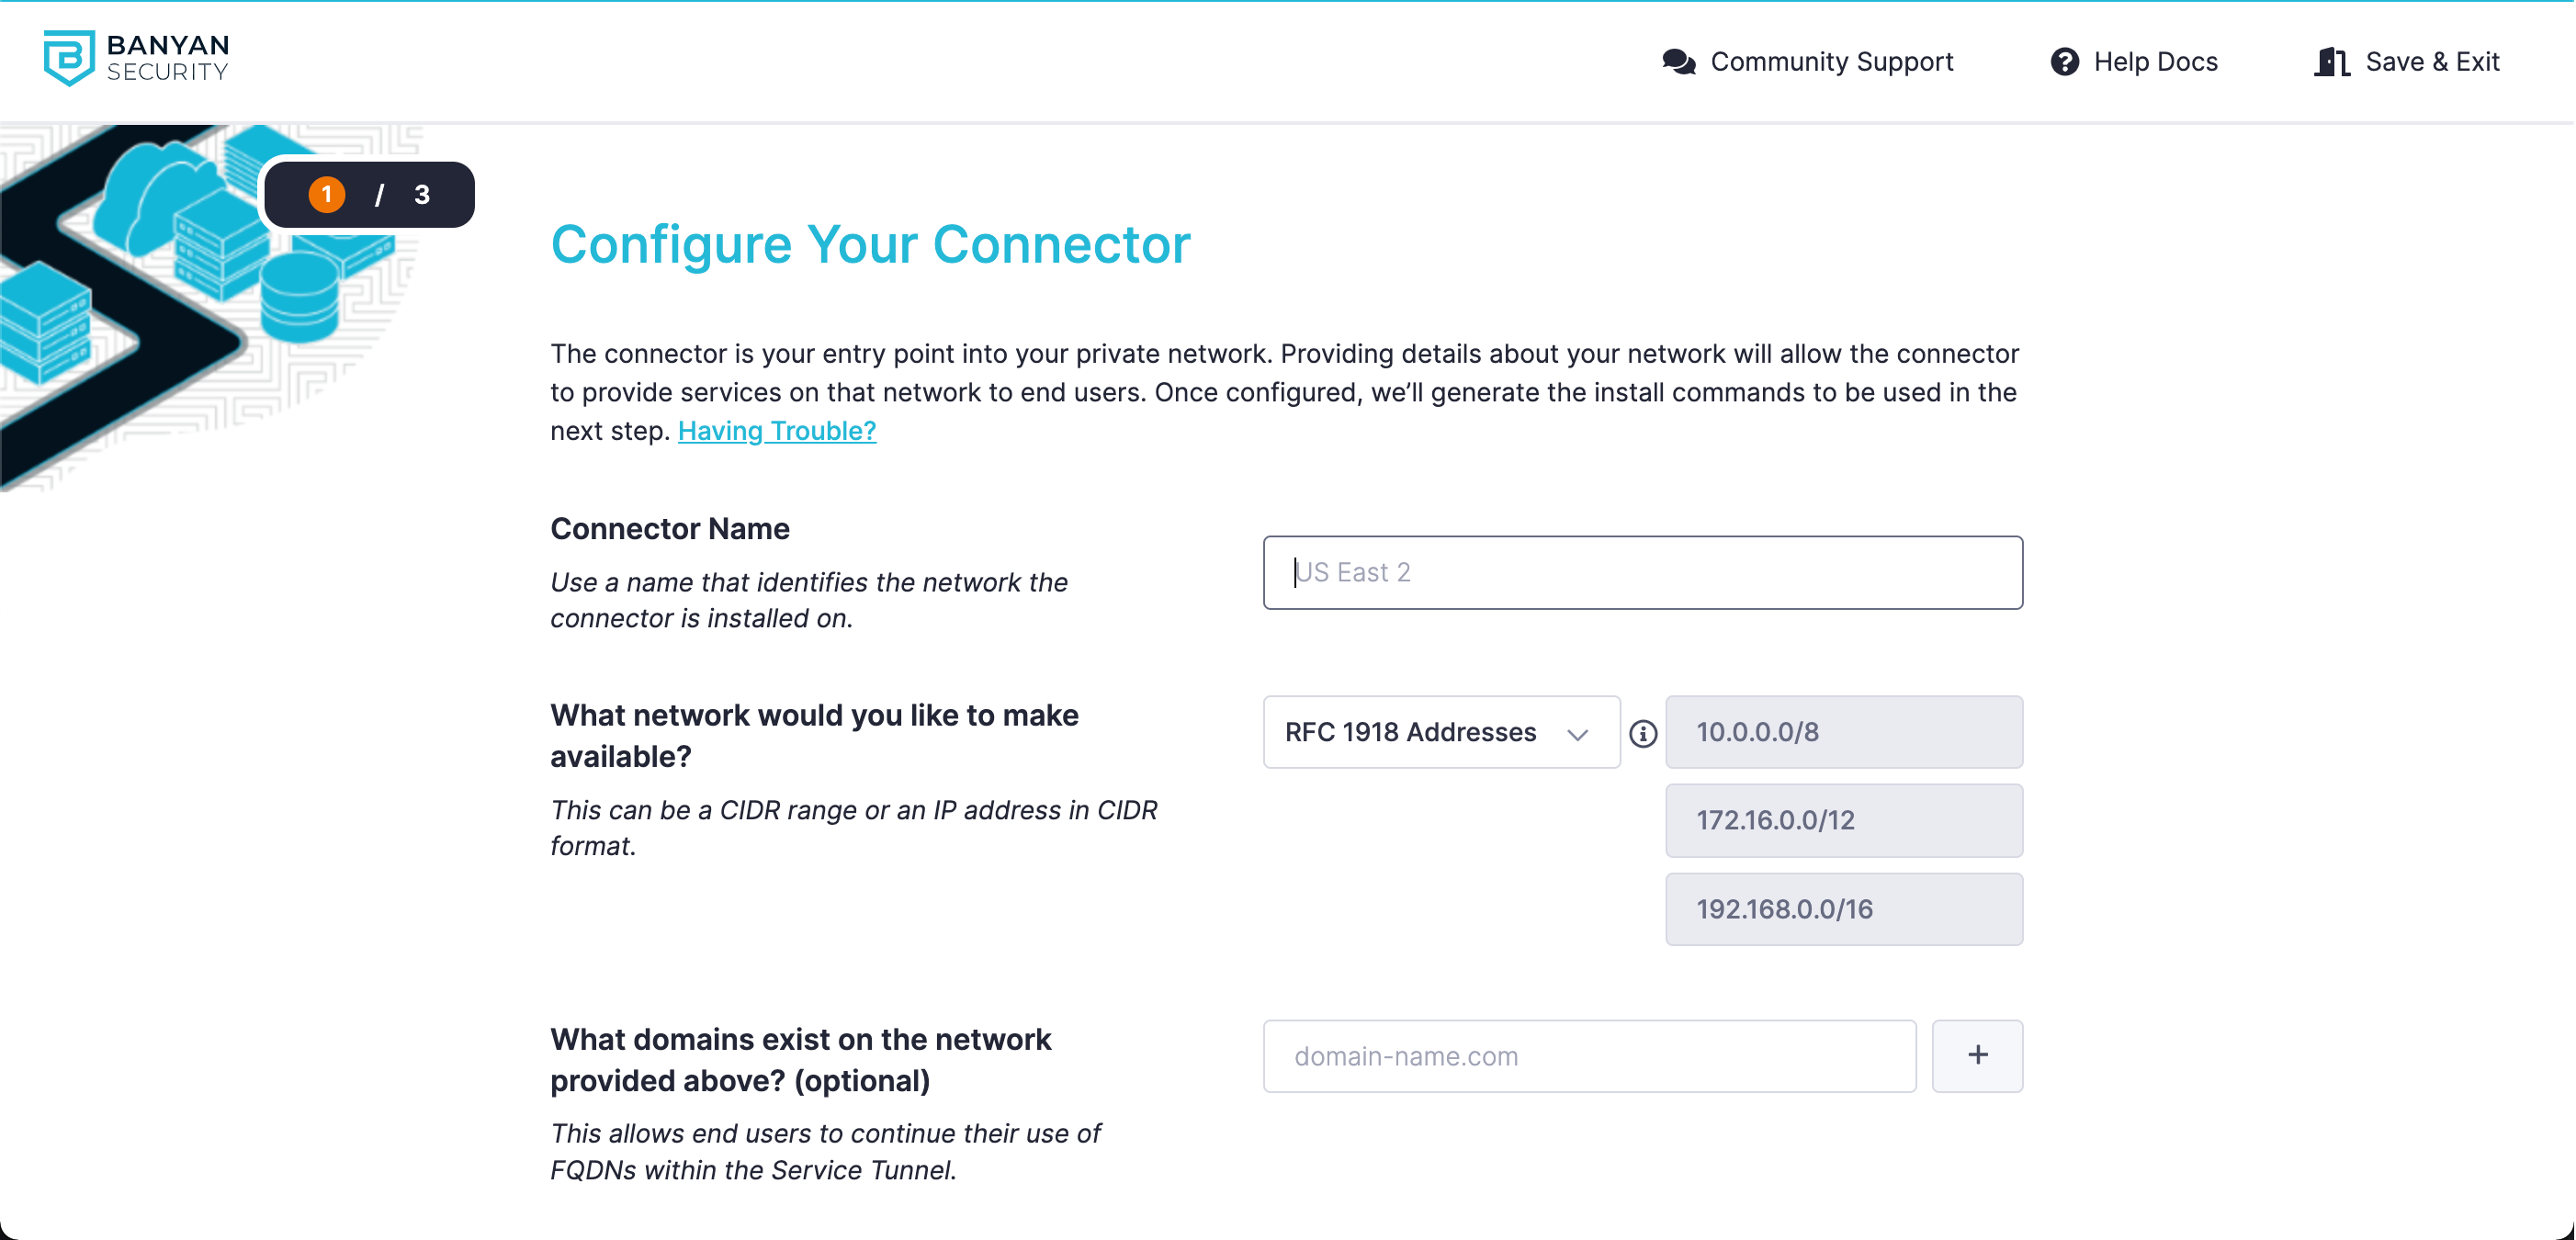
2.3 Enter the network CIDR range on which you want your Connector to be available.
The Connector is the component that will enable remote access to your internal network. The CIDR Range determines which parts of your internal network will be exposed to remote users. The default RFC-1918 Addresses encapsulate the entire private address range. If you would like to limit this range, you can choose to set a Custom CIDR. Note that the custom range must be a subset of the RFC-1918 addresses.
2.4 Configure Private Domains (optional)
If you have a private DNS, you can enter the domains that will resolve so that endusers can continue to access resources via a domain name while accessing this network remotely.
Step 3: Install your Connector
The Connector can be installed directly on any Ubuntu or Red Hat server, or via Docker on any machine. The machine on which you choose to install the Connector must have access to your internal network, and it must be capable of making outbound HTTPS (port 443) connections and UDP connections, to reach Banyan’s Global Edge Network (ports in the range of 30000 - 32767).
3.1 Follow the instructions in Onboarding to install your Connector.
3.2 Once your Connector is installed, select Test Connection to verify that the Connector has started up successfully and can connect to Banyan’s Global Edge Network.
Step 4: Publish a Service Tunnel
A Service Tunnel is Banyan’s solution for providing encrypted network connectivity to network segments.
Policies can be applied to your Service Tunnel. When applied, these policies enforce authorization rules that specify which clients and what corresponding Trust Level can access protected corporate resources.
4.1 On the Publish Your Service Tunnel page, enter a Service Tunnel Name.
4.2 Set access permissions by selecting which devices (and corresponding Trust Levels) will be able to access your Service Tunnel.
By default, your org comes with two policies: AllUsersAndDevices-Tunnel and HighAndMediumTrustedDevices-Tunnel.
-
If you select HighAndMediumTrustedDevices-Tunnel, Banyan will evaluate the device’s Trust Level before allowing any end user access to you Service Tunnel. If the user’s device Trust Level is not Medium or High, the user will be prevented from accessing your internal network.
-
Alternatively, select AllUsersAndDevices-Tunnel if you don’t need to evaluate the device’s security posture before granting access to your network.
4.3 Publish your Service Tunnel.
Step 5: Access resources on your network from a trusted device
At this point, you can securely access your private internal network from any macOS, Windows, Ubuntu or Red Hat-trusted device. Follow the instructions to download and install the Banyan Desktop App, and connect to the Service Tunnel you created:
5.1 Download and install Banyan’s desktop app.
5.2 Open the Banyan desktop app, and enter your org’s Invite Code and follow the prompts to register your device.
5.3 On the homepage of the desktop app, connect to your Service Tunnel by selecting the blue ‘Power’ button.
5.4 Connect to a resource in your network.
Step 6: Invite other admins or end users to your org
At this point, you can invite other admins to help you configure your org, through the Command Center. You can also invite end users and give them access to your private networks and services.
To do this, complete Onboarding by selecting Explore the Banyan Console, and complete the following steps:
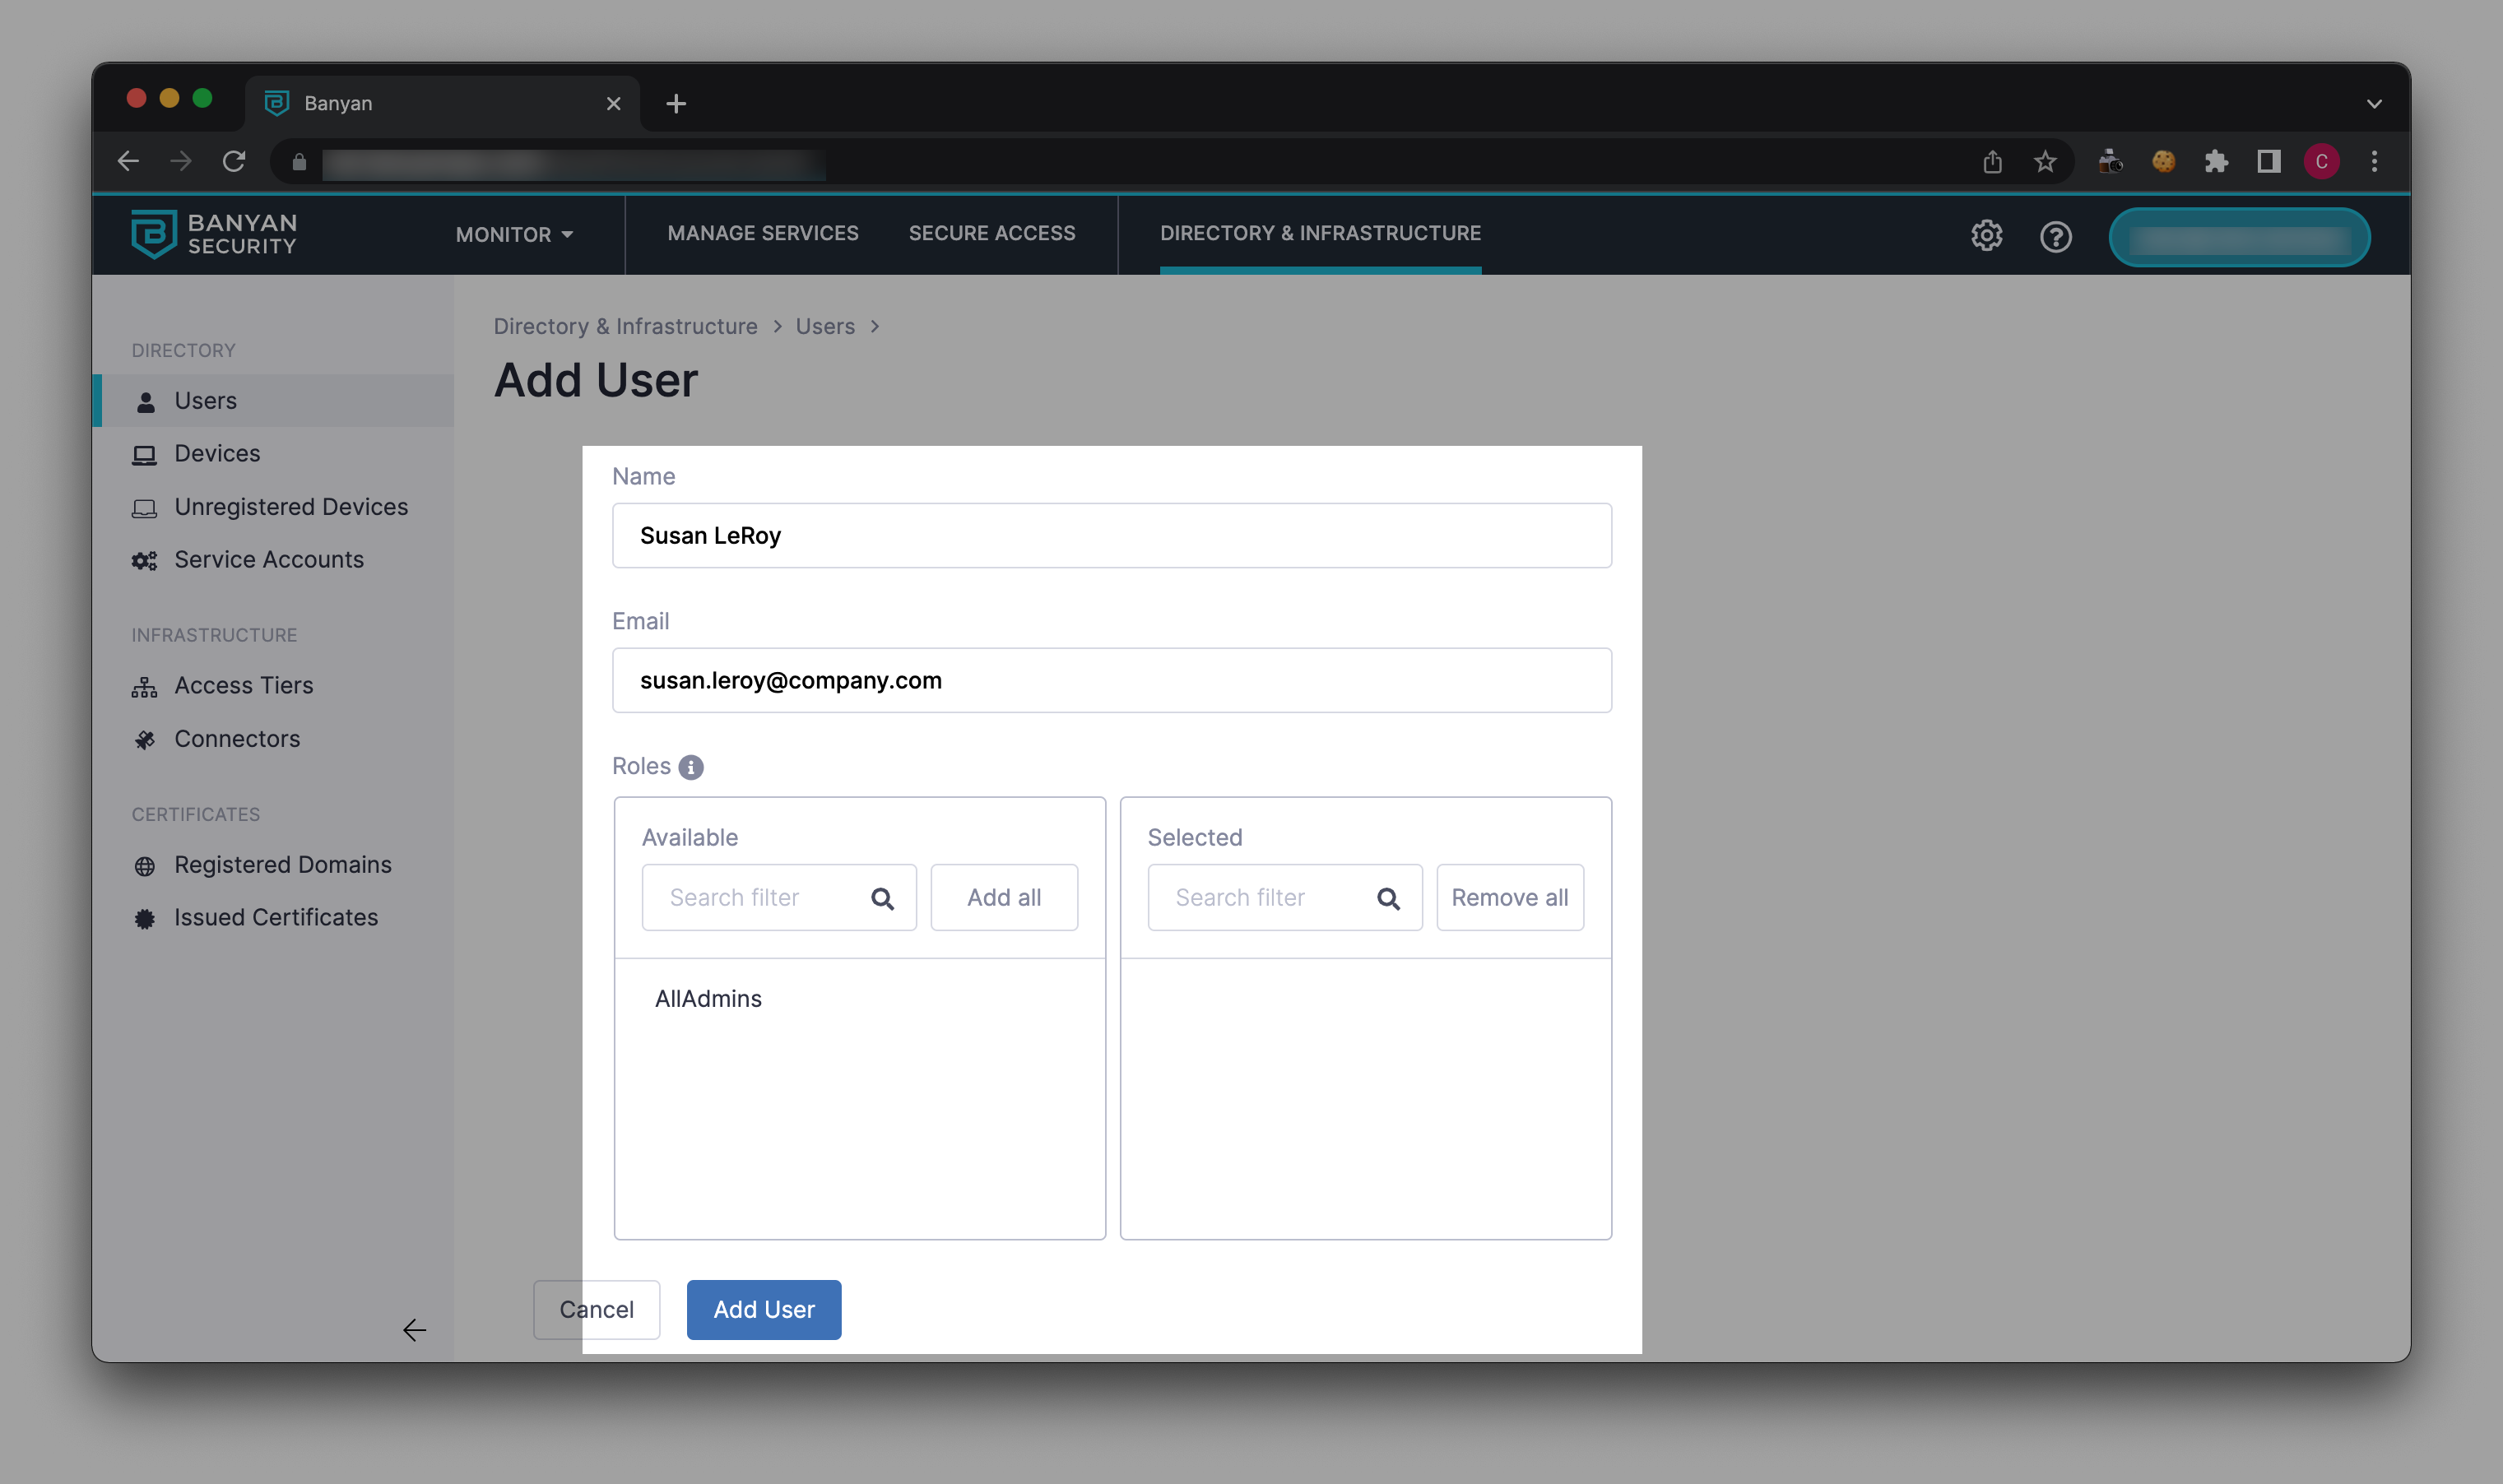
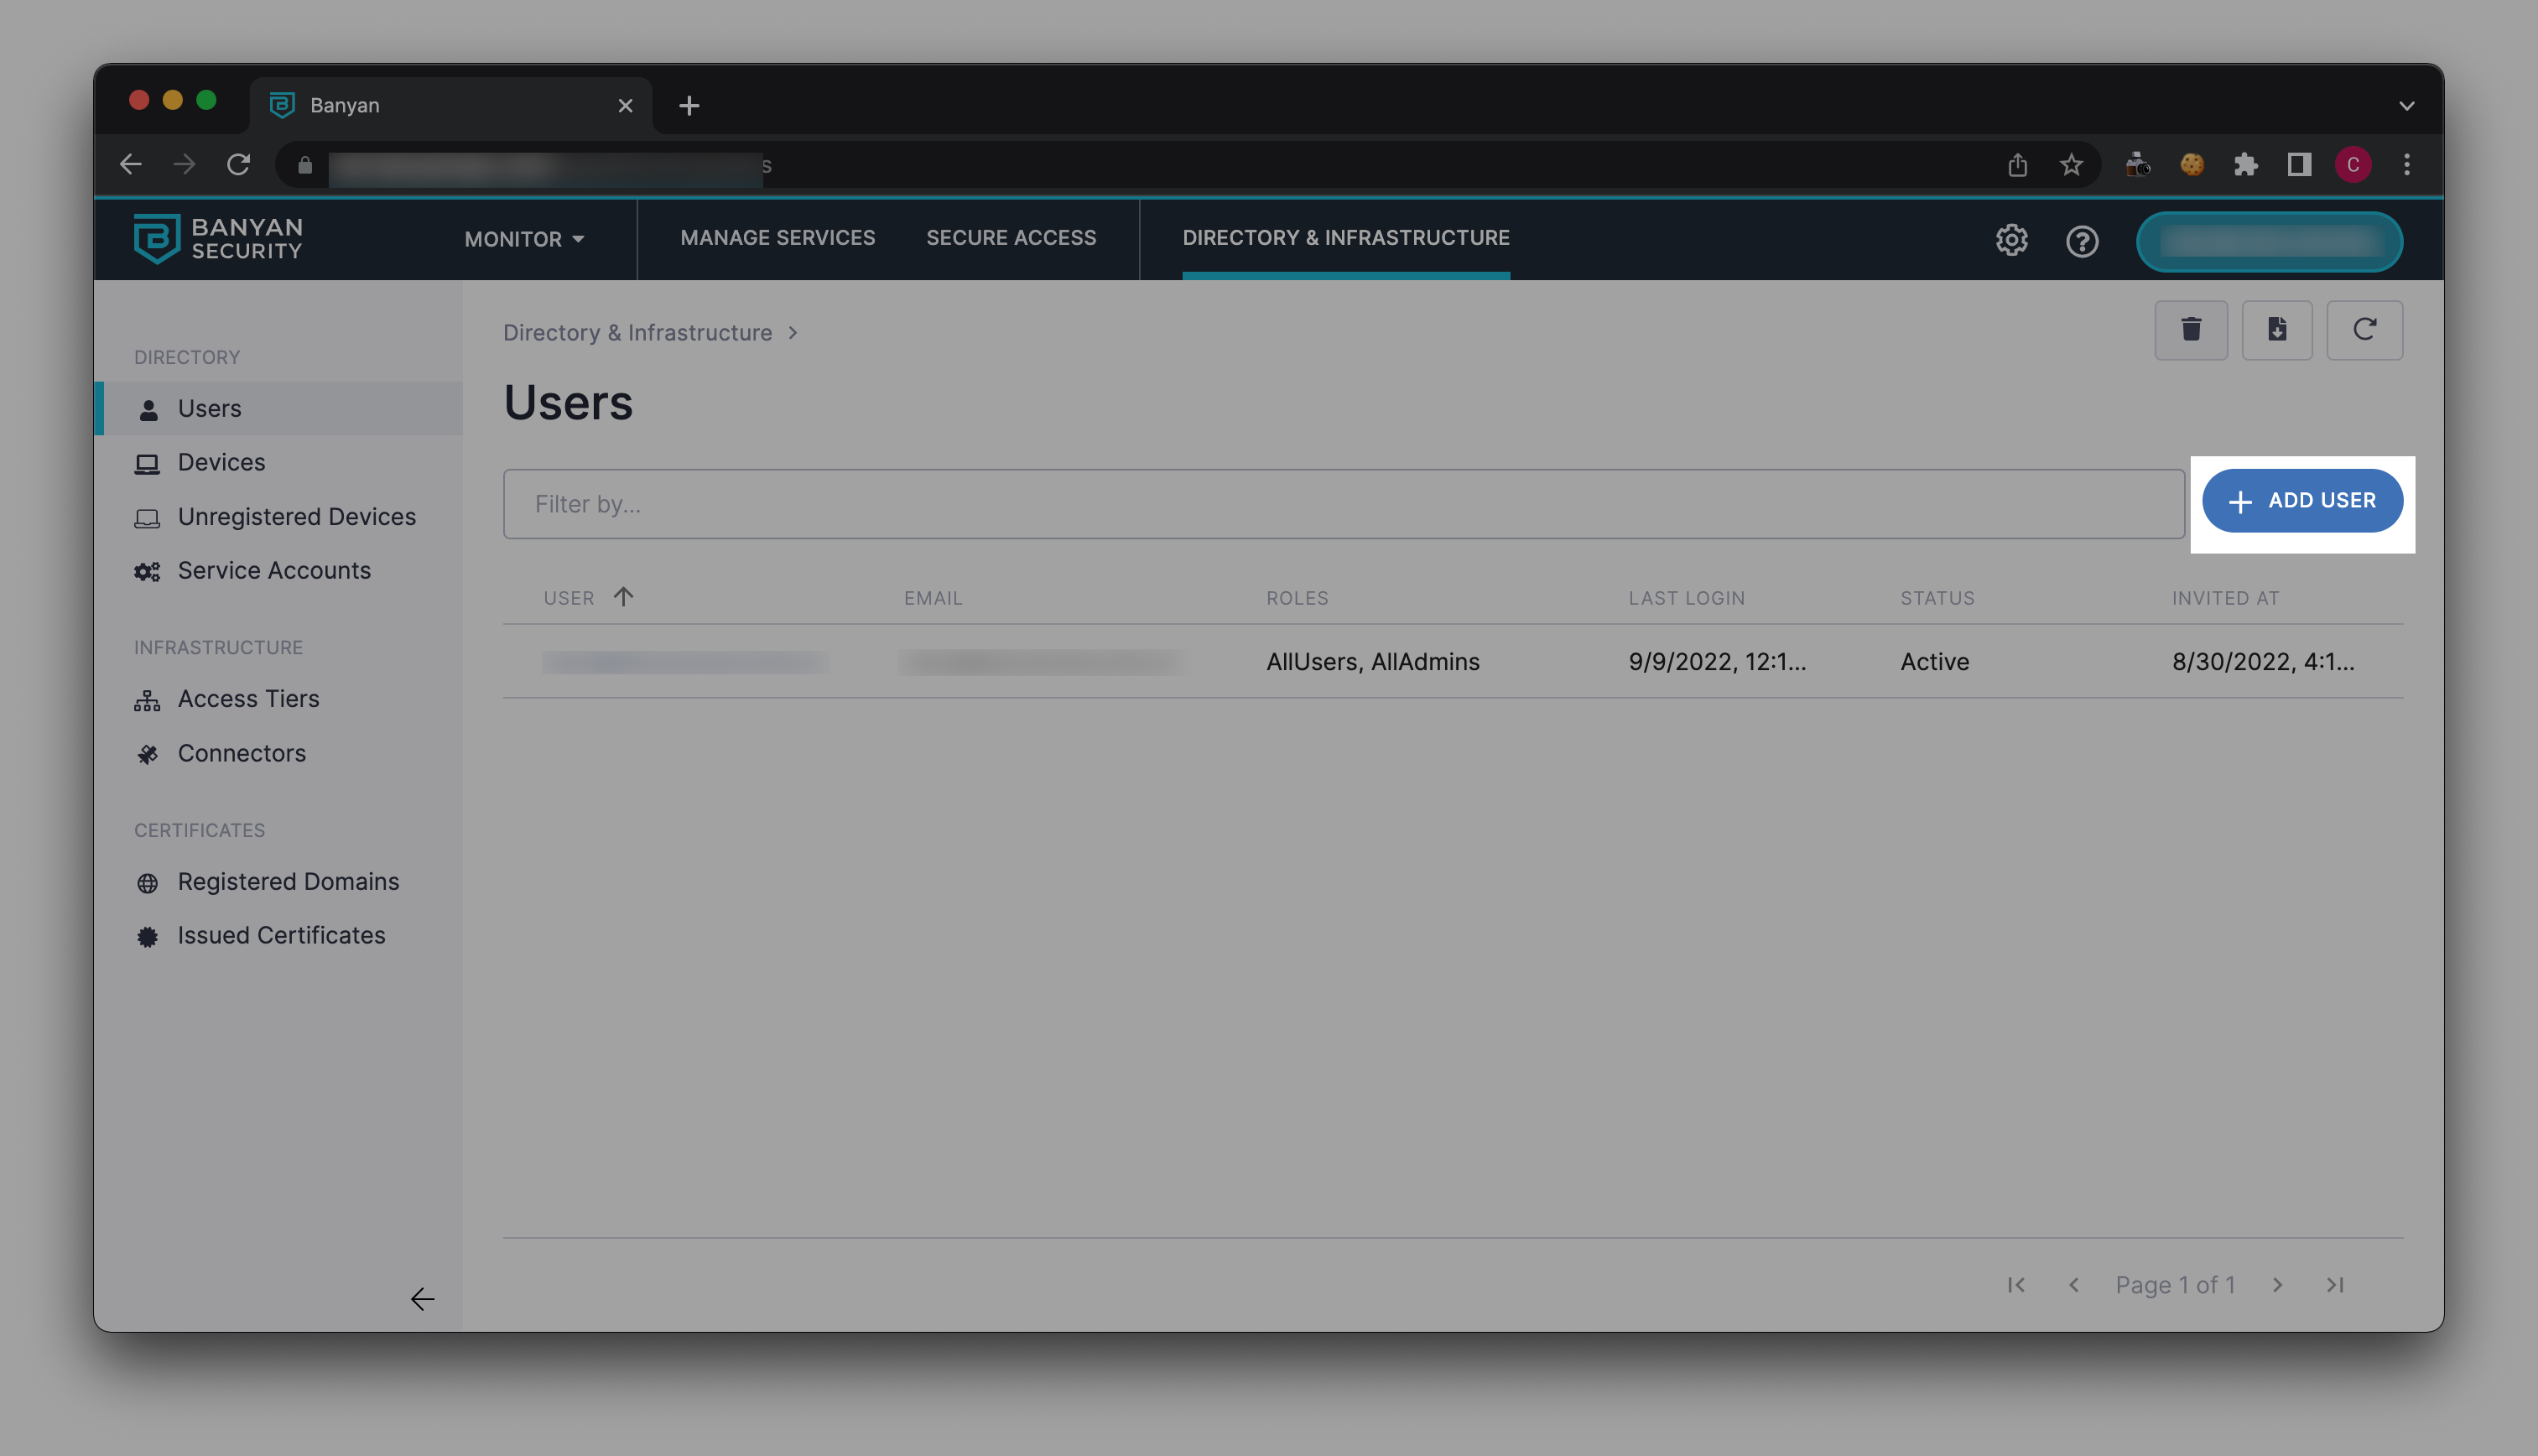
6.1 In Banyan’s Command Center, navigate from Directory & Infrastructure > Users, and select Add User.
6.2 Enter the new user’s Name and Email in their respective fields.
6.3 Under Roles, select a role from the Available category. This will transfer your selected role to the Selected category.
6.4 Select Add User.