Enabling System for Cross-domain Identity Management (SCIM) for end users that use Okta
How to automate updates to user identity information in SonicWall Cloud Secure Edge (CSE)
- Updated on Sep 09, 2024
SCIM Overview
Historically, when a user was assigned to the desktop app via their org’s SCIM provider, the Command Center was unaware of that user’s existence until the user logged into SonicWall Cloud Secure Edge. SonicWall used Just-in-time (JIT) provisioning to update the Command Center’s directory of users, so that when a user logged into CSE for the first time, the user would then be visible in the CSE directory.
The System for Cross-domain Identity Management (SCIM) is a protocol that allows CSE to receive updates about its users from a SCIM provider (typically an IDP), without users needing to first log into CSE. When enabled, SCIM communicates which users are assigned to the desktop app at a given time, keeping the list of users inside the CSE up-to-date. This offers admins a more seamless experience when assigning roles, policies, or services to users, since there’s more accurate reporting on the existence of users in CSE.
This doc lays out the steps required to enable SCIM for your end users using Okta as an IDP.
Pre-requisites
- A SAML-configured desktop app in Okta
Note: Admins will need to convert their existing OIDC connection to Okta to a SAML connection to Okta in order for SCIM to work.
Steps to enable SCIM in SonicWall Cloud Secure Edge
Step 1: Enable SCIM in your Cloud Secure Edge org
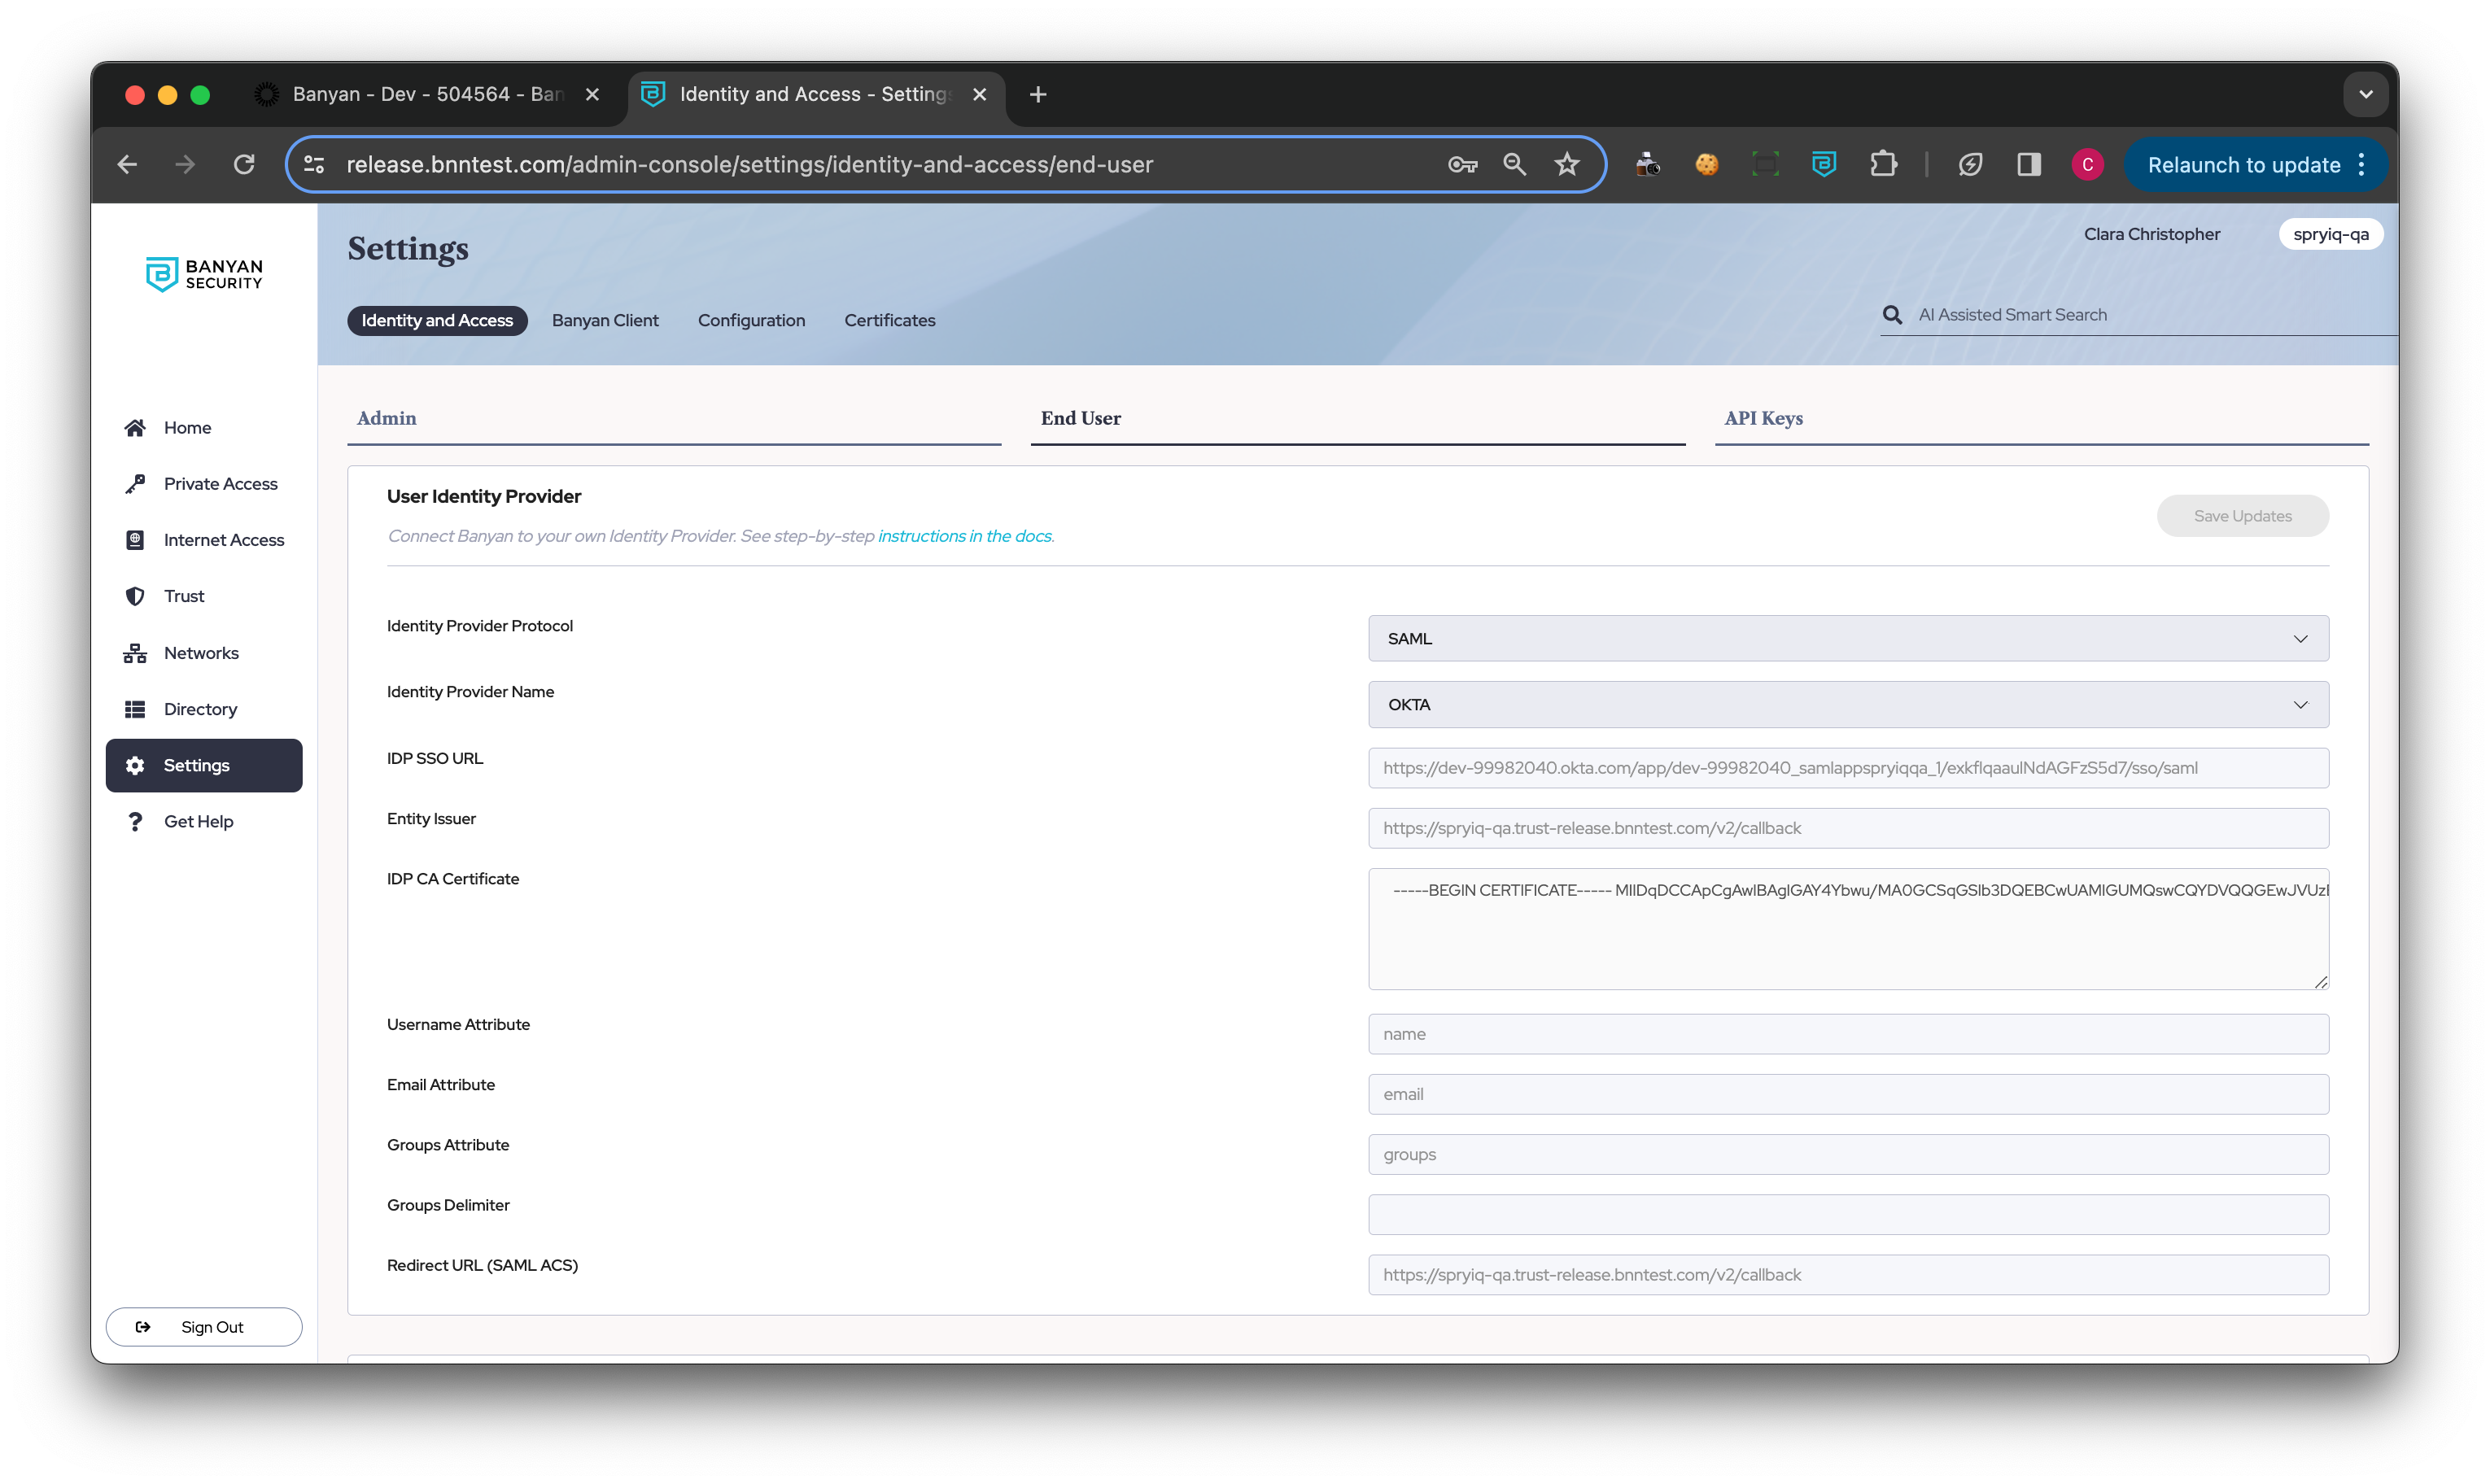
1.1 Navigate from Settings > Identity and Access > End User tab > SCIM Provisioning in the Command Center.
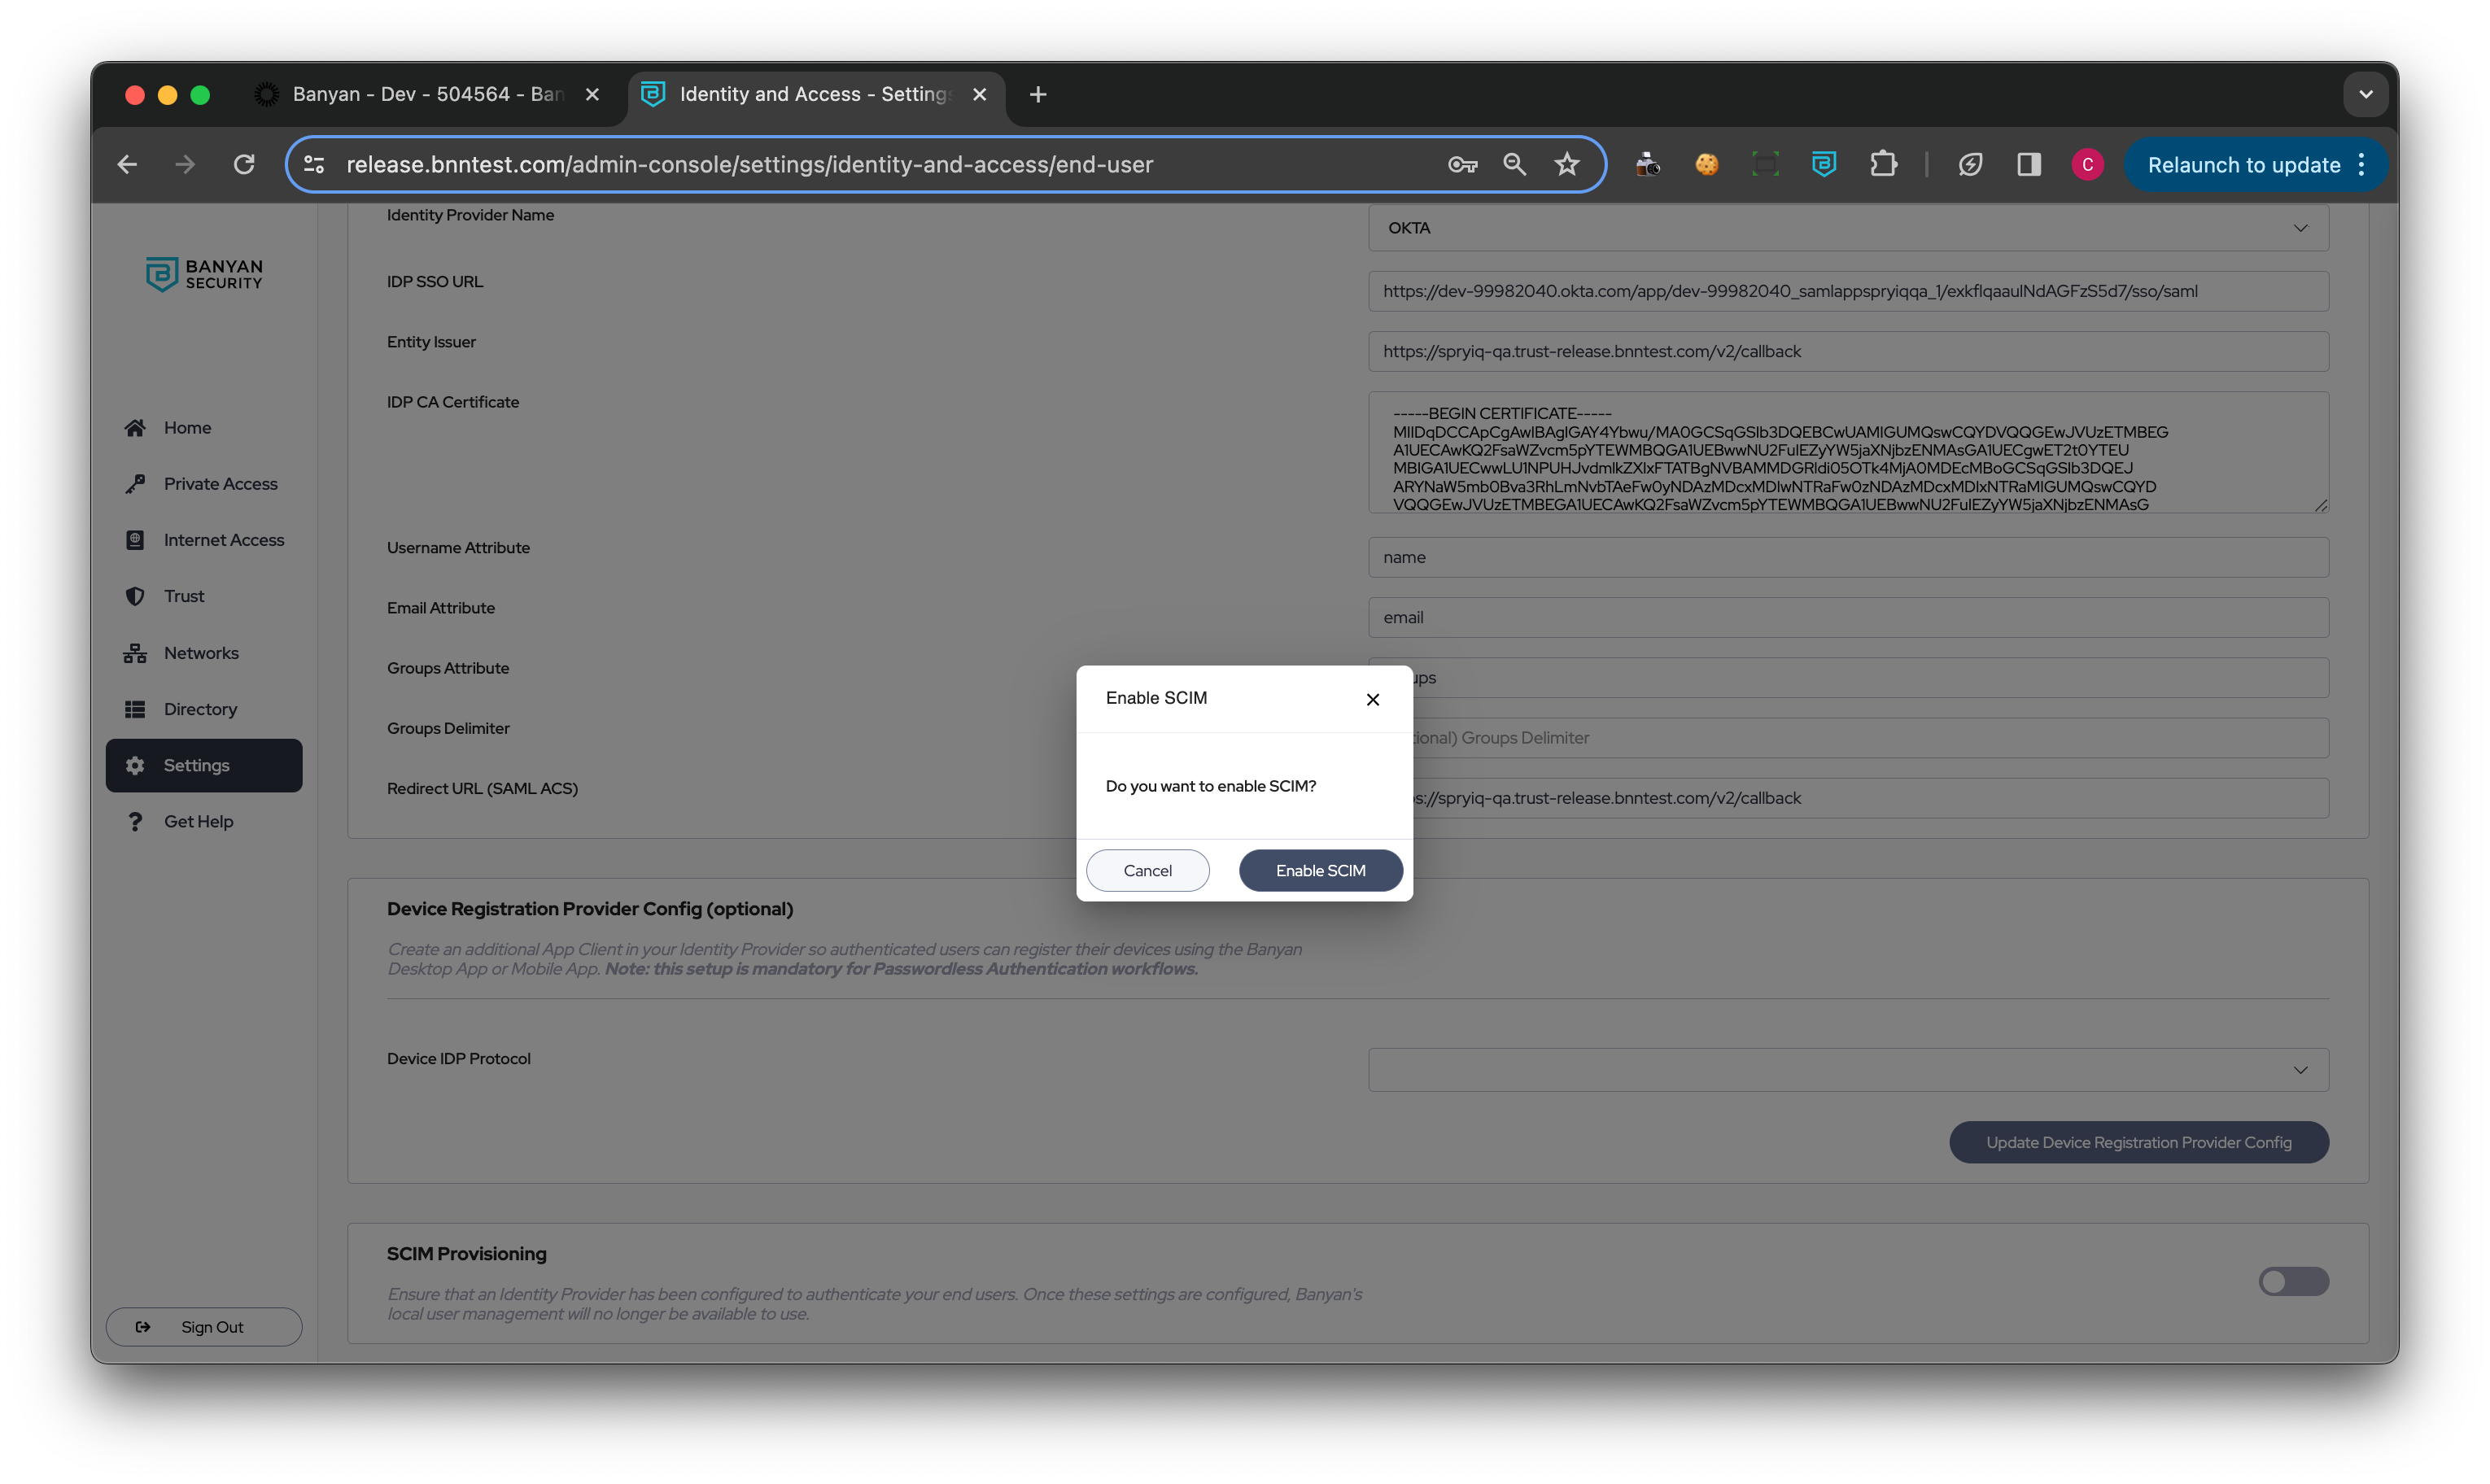
1.2 Toggle on SCIM Provisioning.
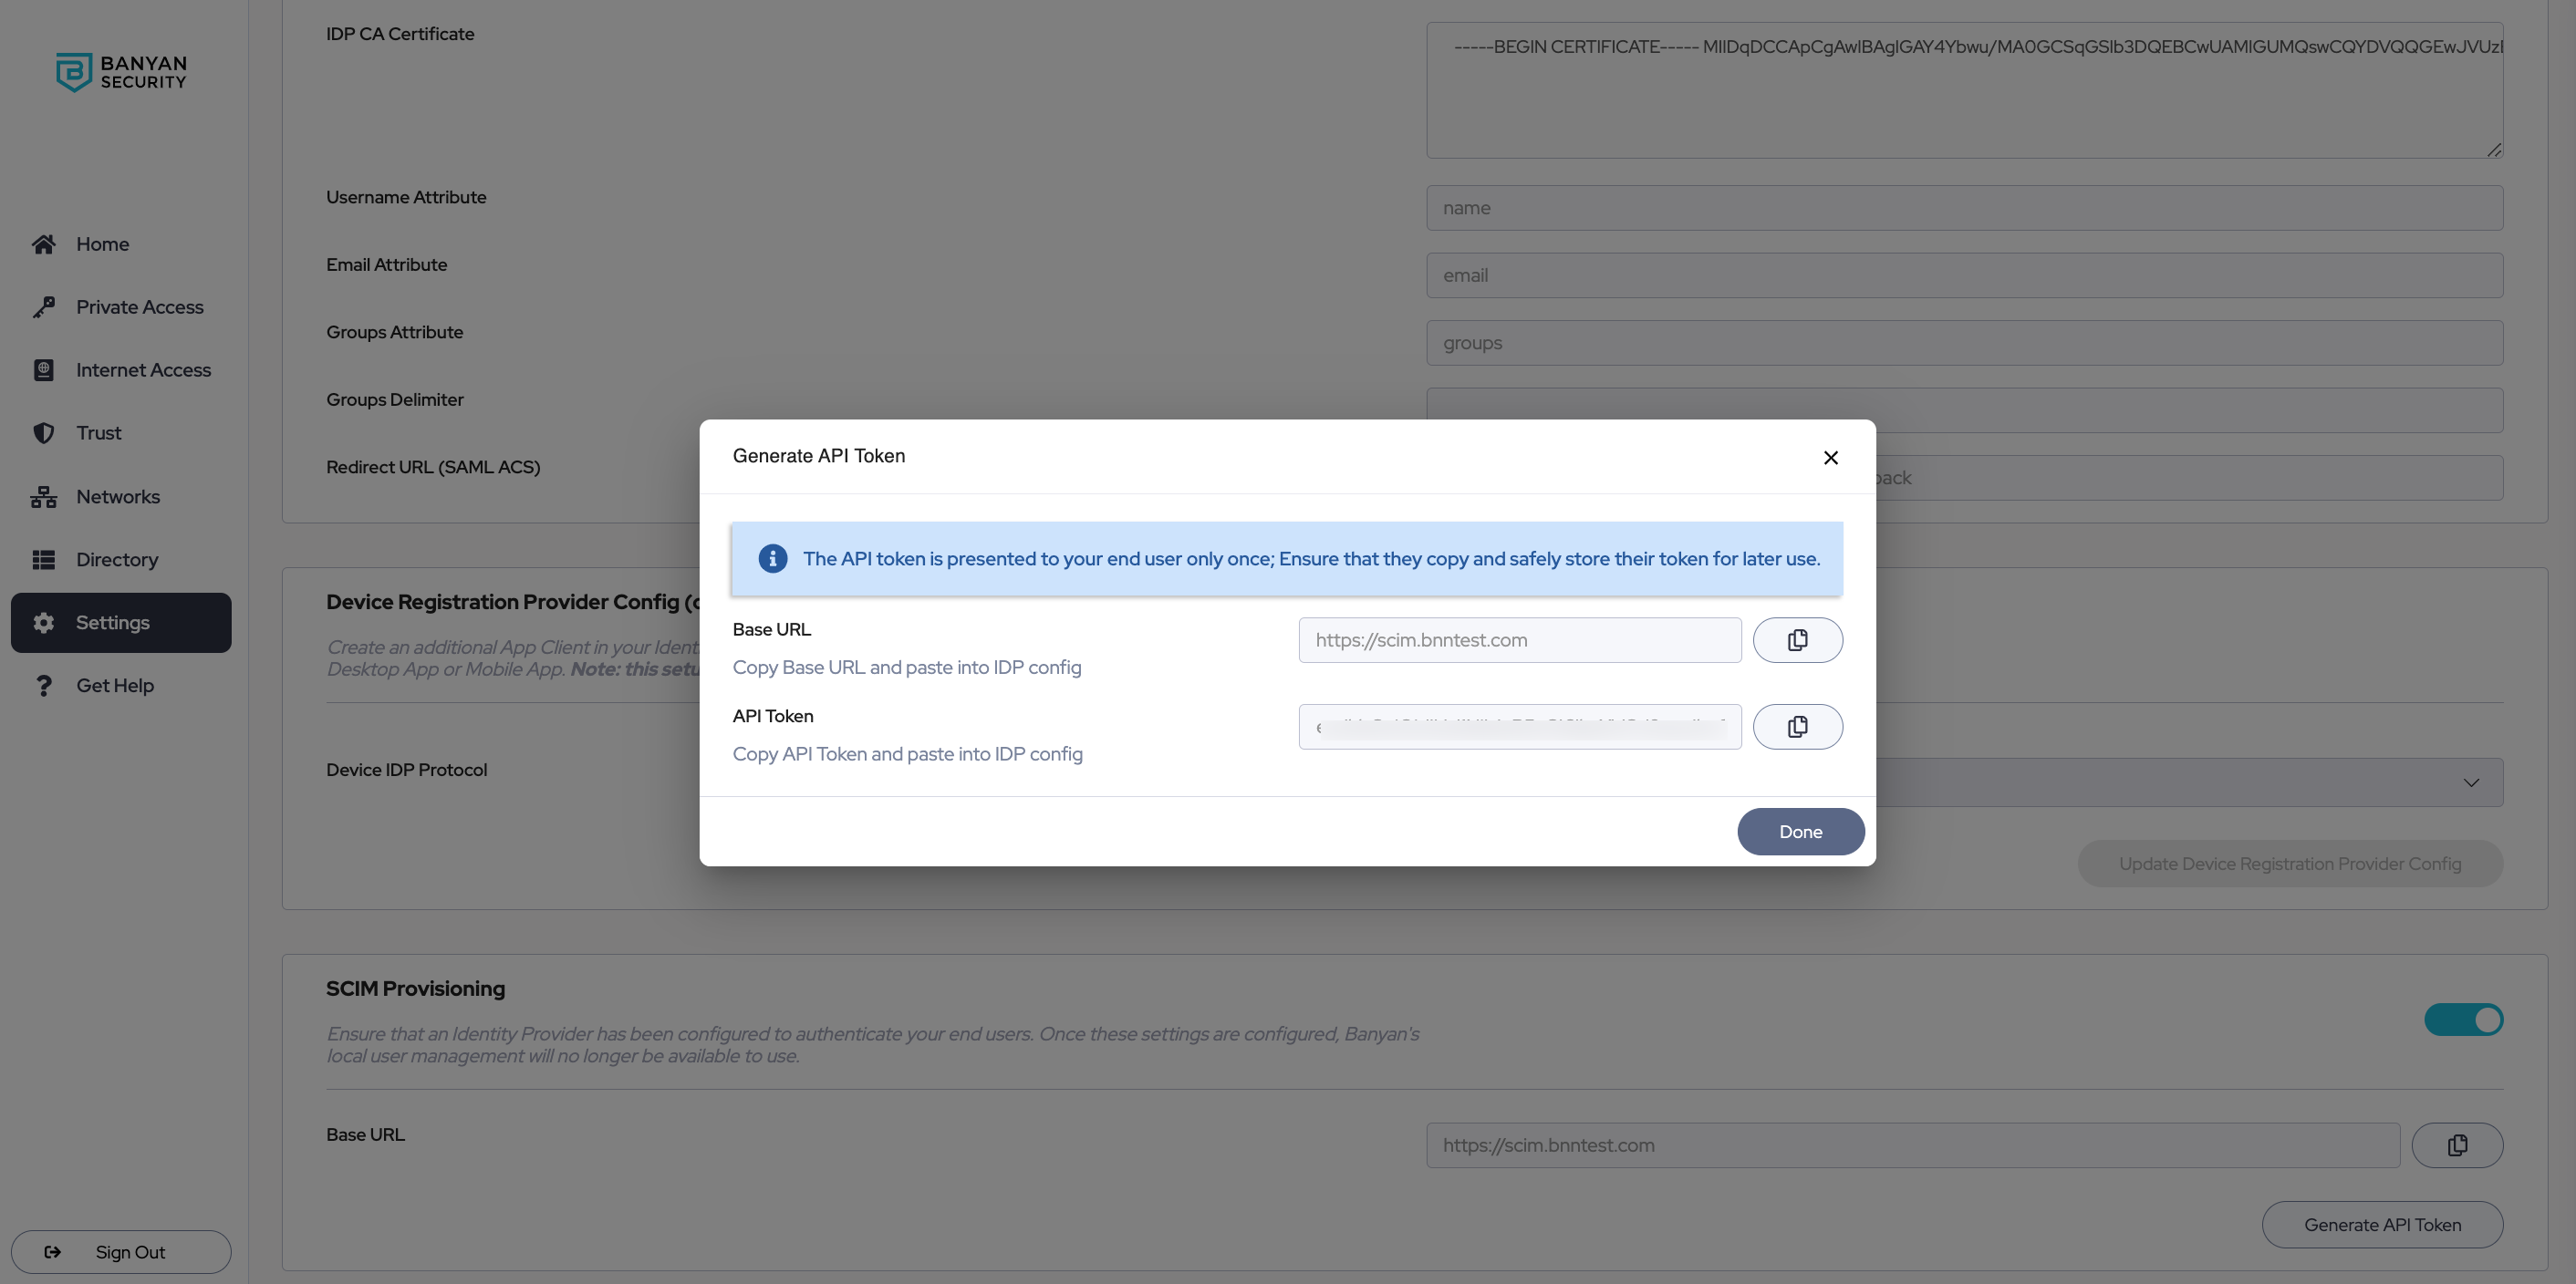
1.3 Generate an API token; copy the generated API token and store for later use in Step 3.4.
Note: A maximum of 2 API tokens can be generated at once.
Step 2: Enable SCIM on the desktop app in your Okta admin portal
2.1 In your Okta admin portal, navigate to Applications and select the Banyan SAML app.
2.2 Navigate from General > App Settings, and select Edit.
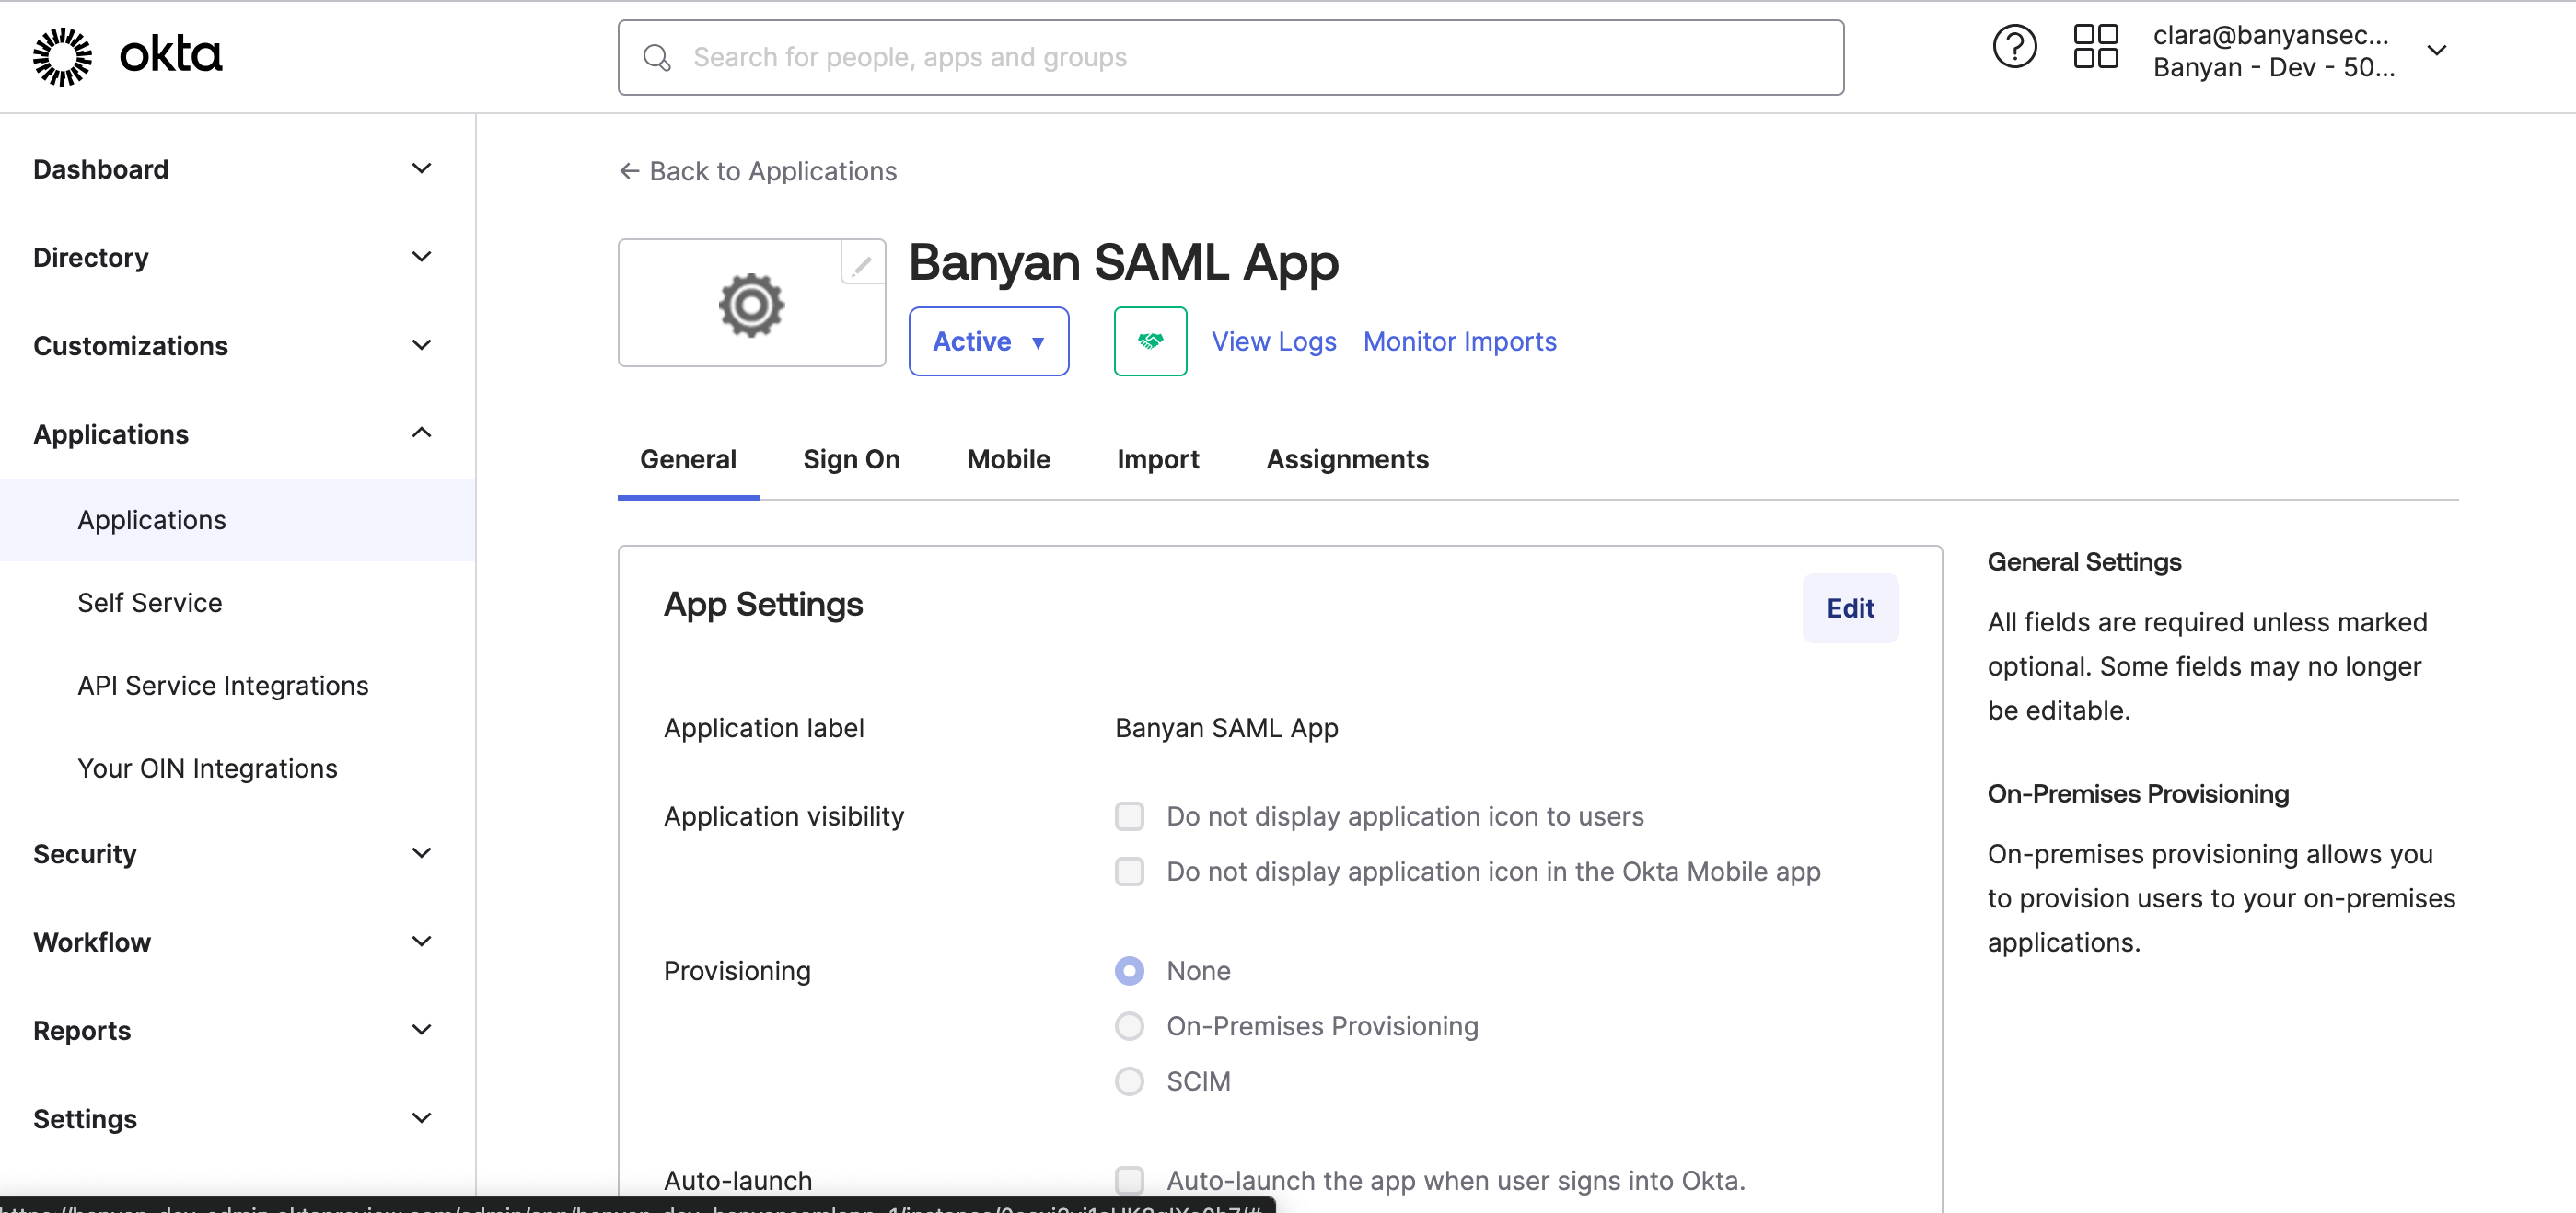
2.3 Enable SCIM provisioning, and Save.
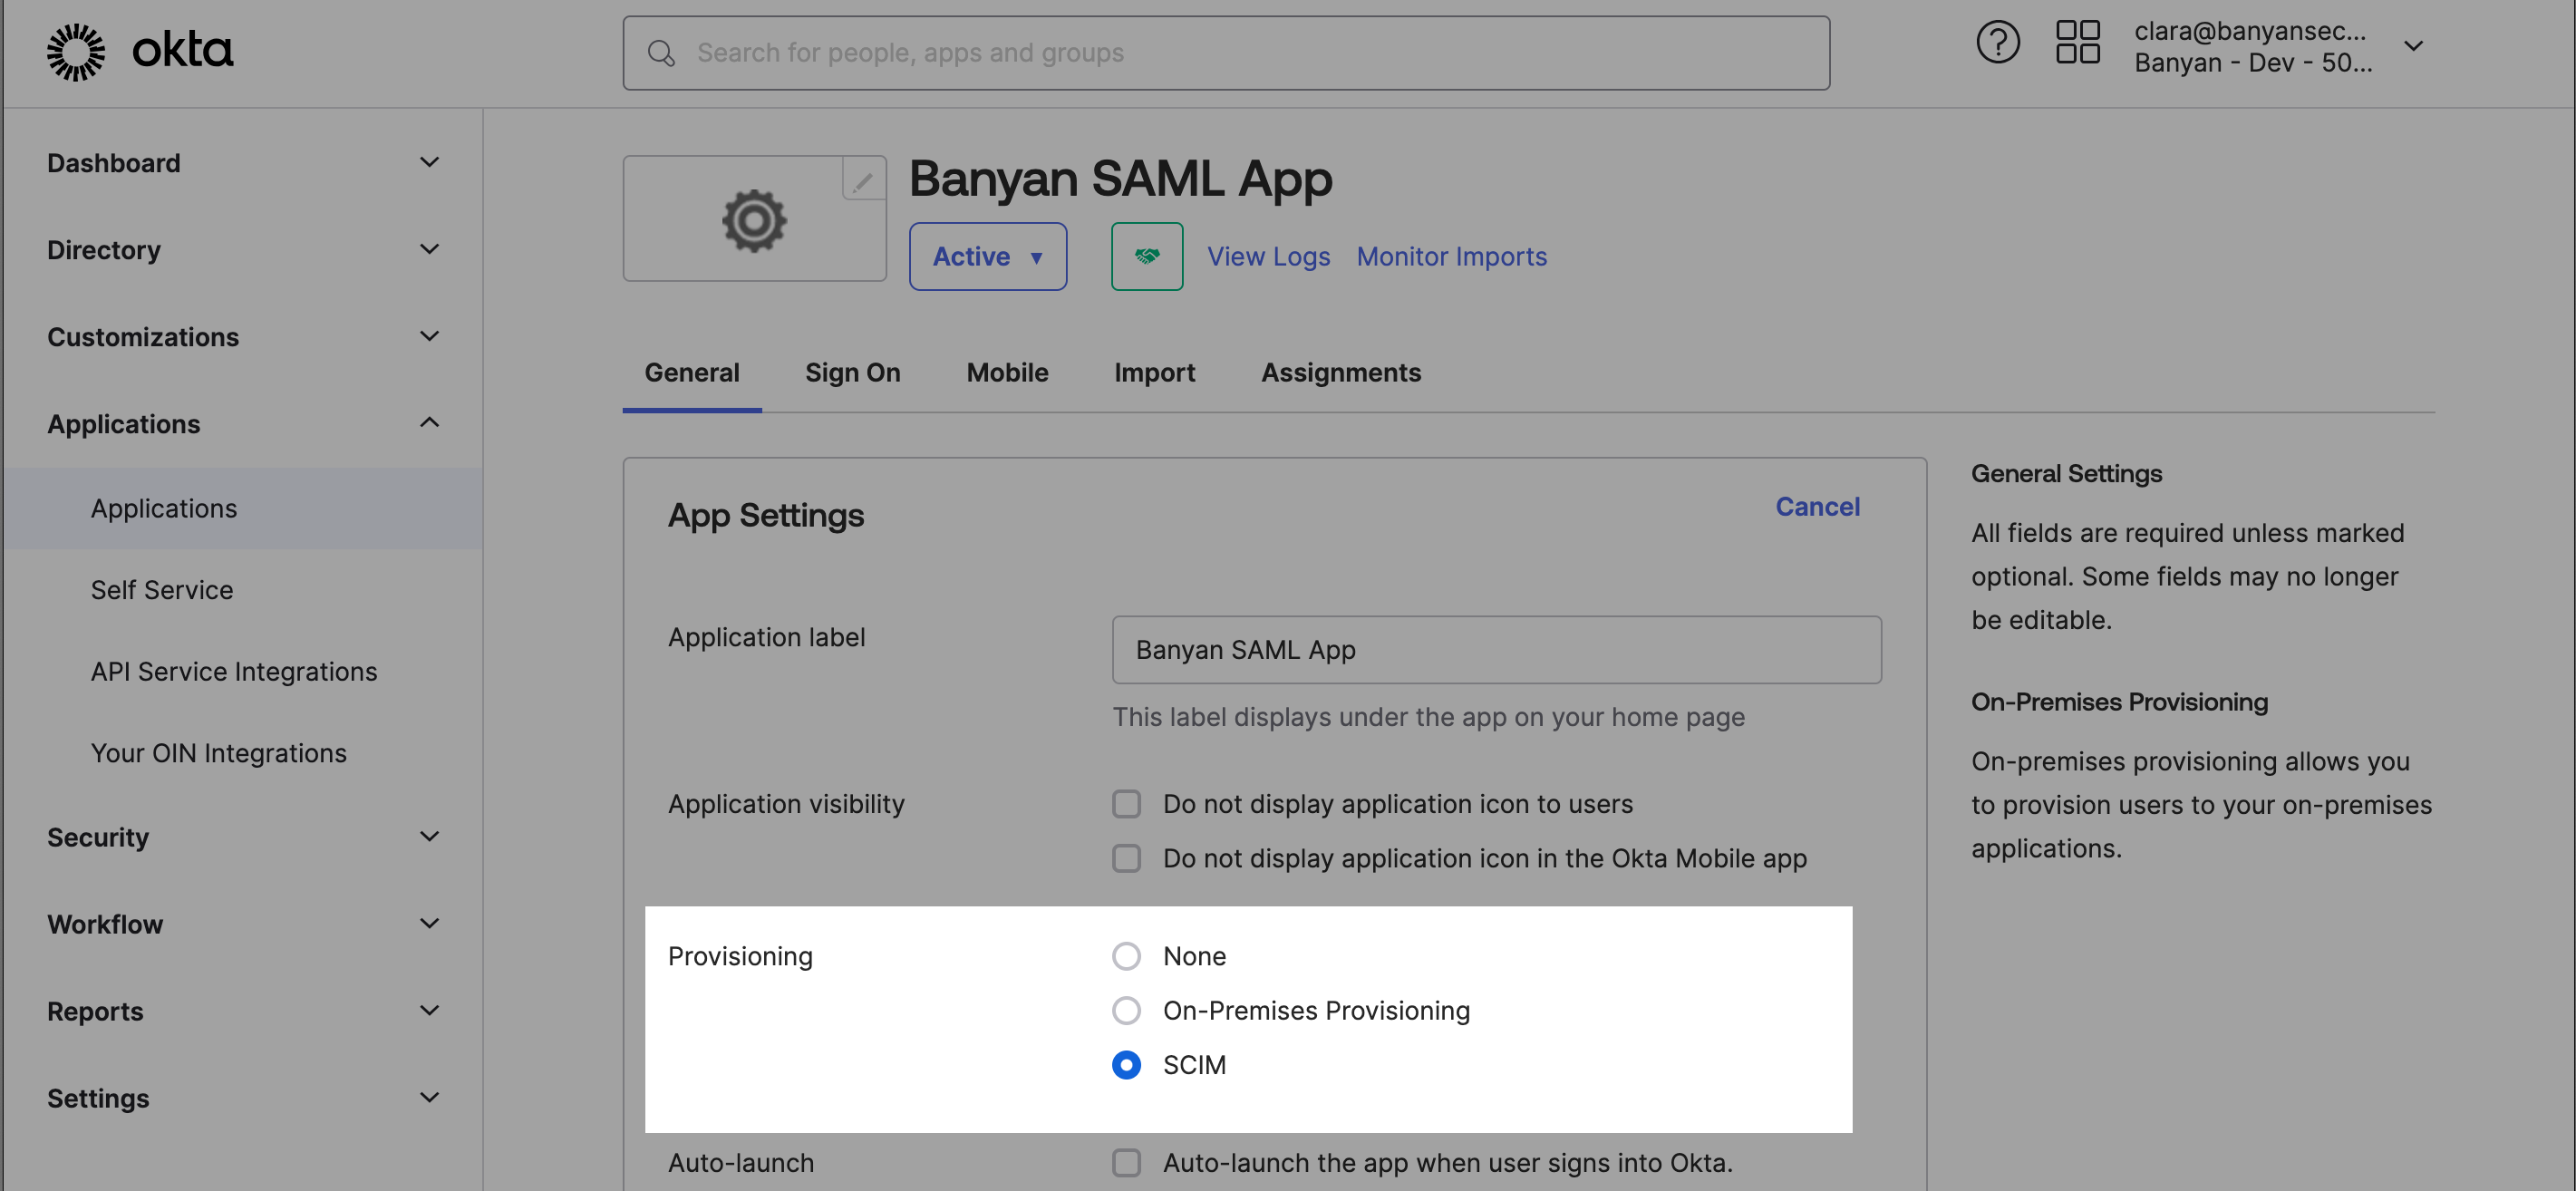
Step 3: Configure SCIM for the desktop app in your Okta admin portal
3.1 Navigate to Provisioning, and select Edit.
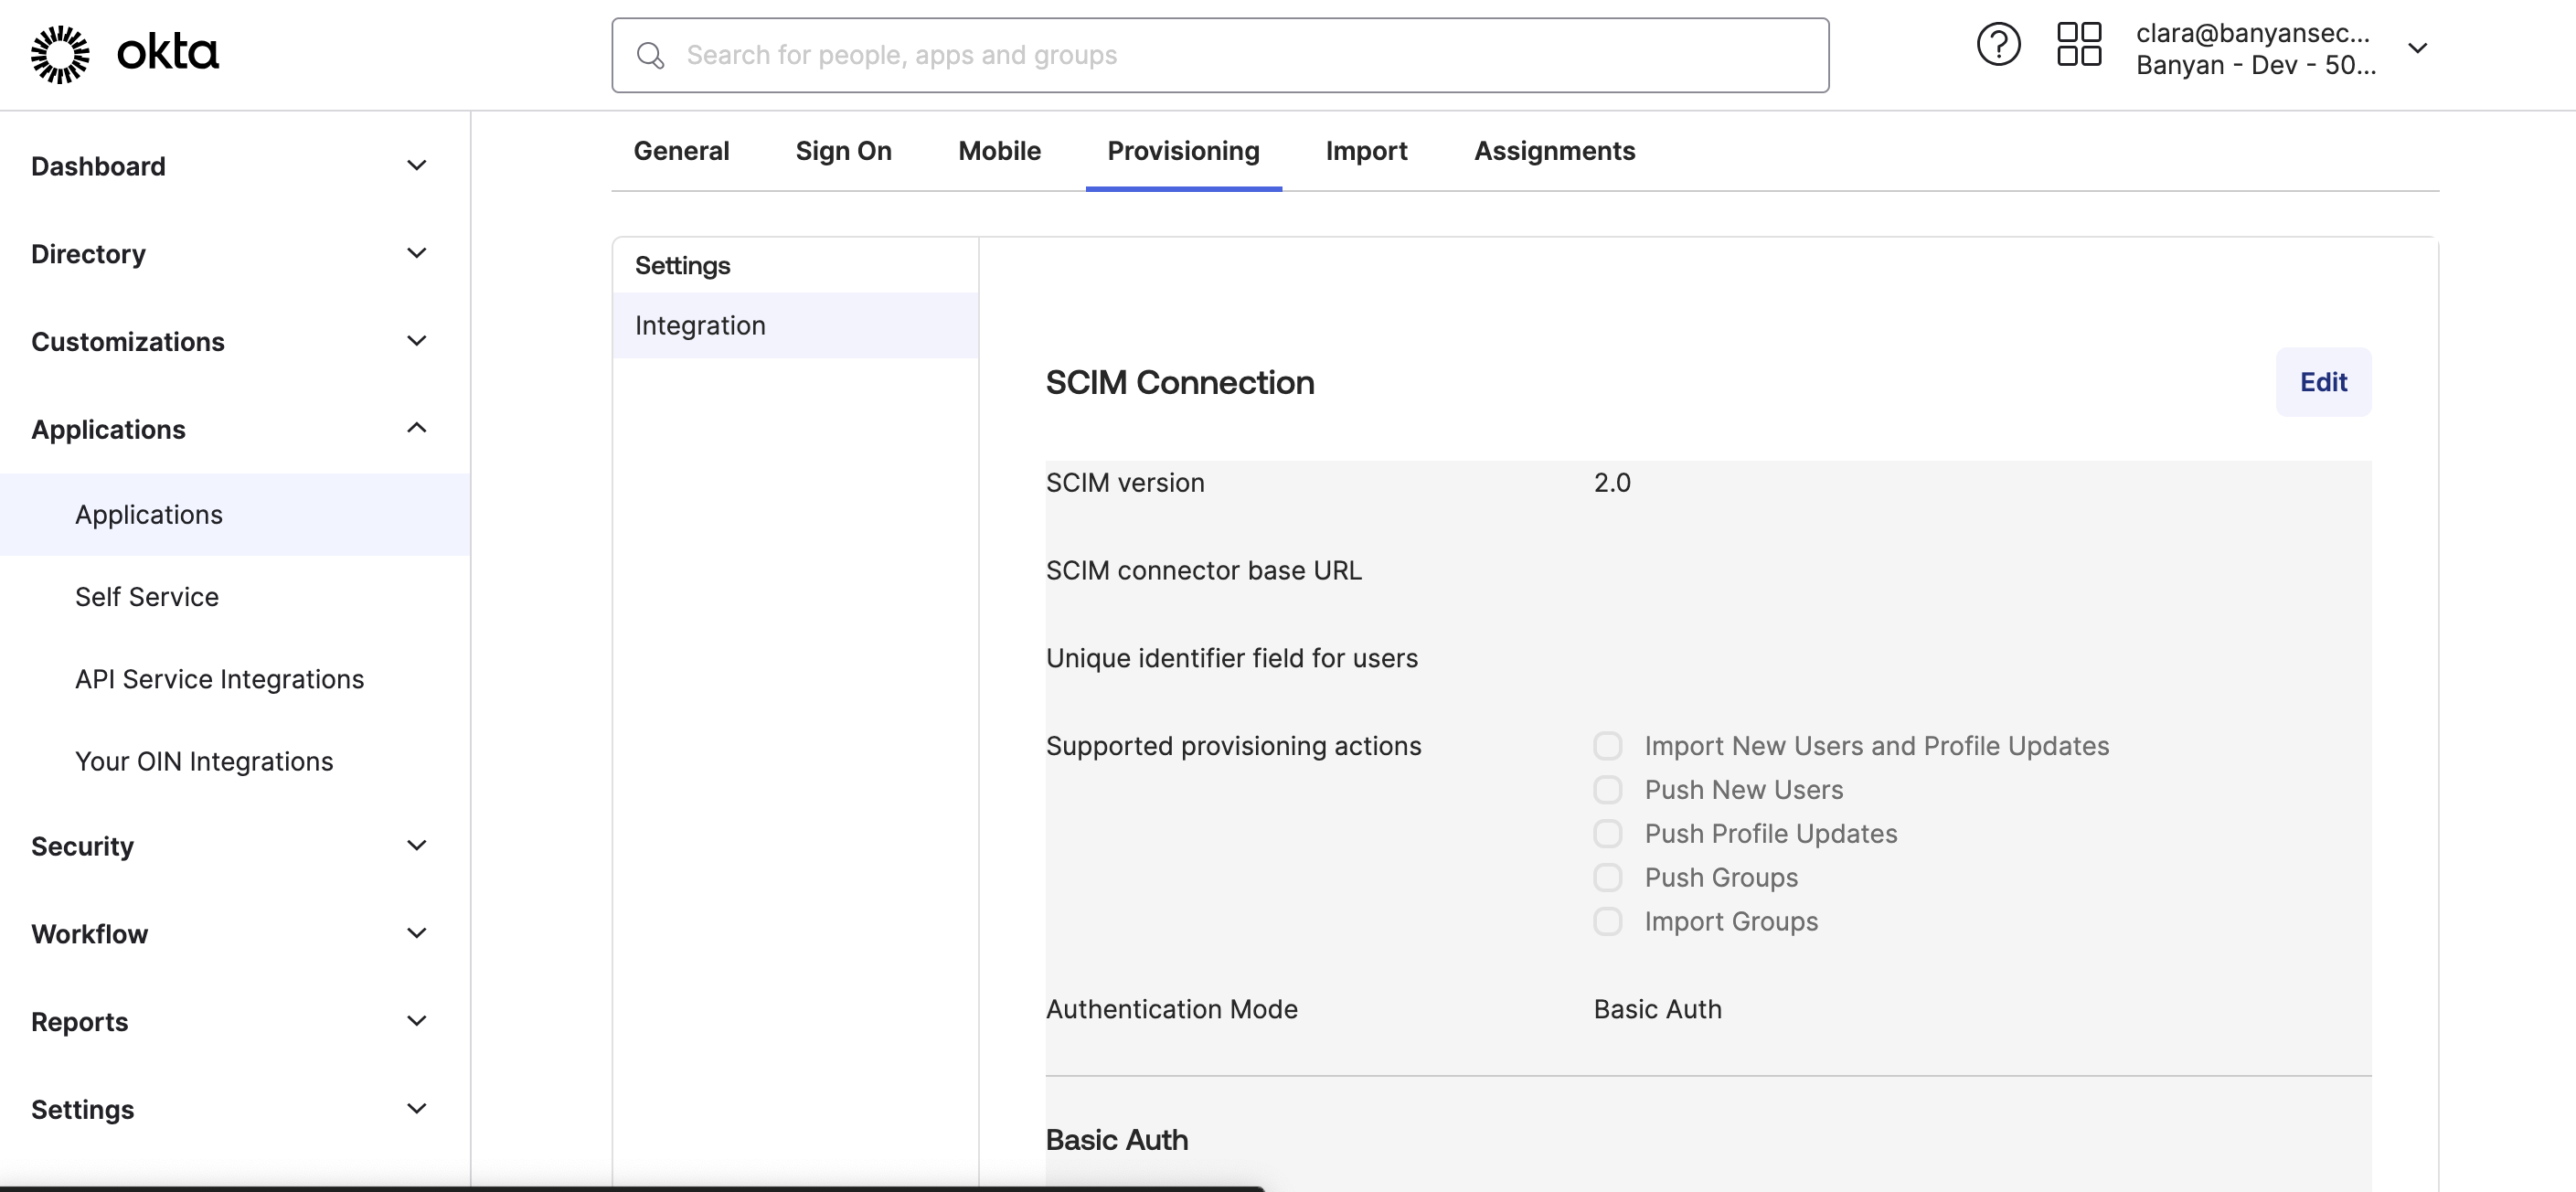
3.2 Select Create Users, Update User Attributes and Deactivate Users, and Save.
3.3 Under Provisioning > Integration, paste the Base URL (generated in the Command Center in Step 1) into the SCIM connector base URL field (in Okta).
3.4 Copy the API token (also generated in the Command Center in Step 1) and paste into the Authorization field in Okta.
3.5 Ensure that Unique identifier field for users is set to email.
3.6 Ensure that Authentication Mode is set to HTTP Header.
3.7 Ensure that Import New Users and Profile Updates is not selected; this sends updates from Banyan to Okta.
3.8 Ensure that Push New Users and Push Profile Updates are selected.
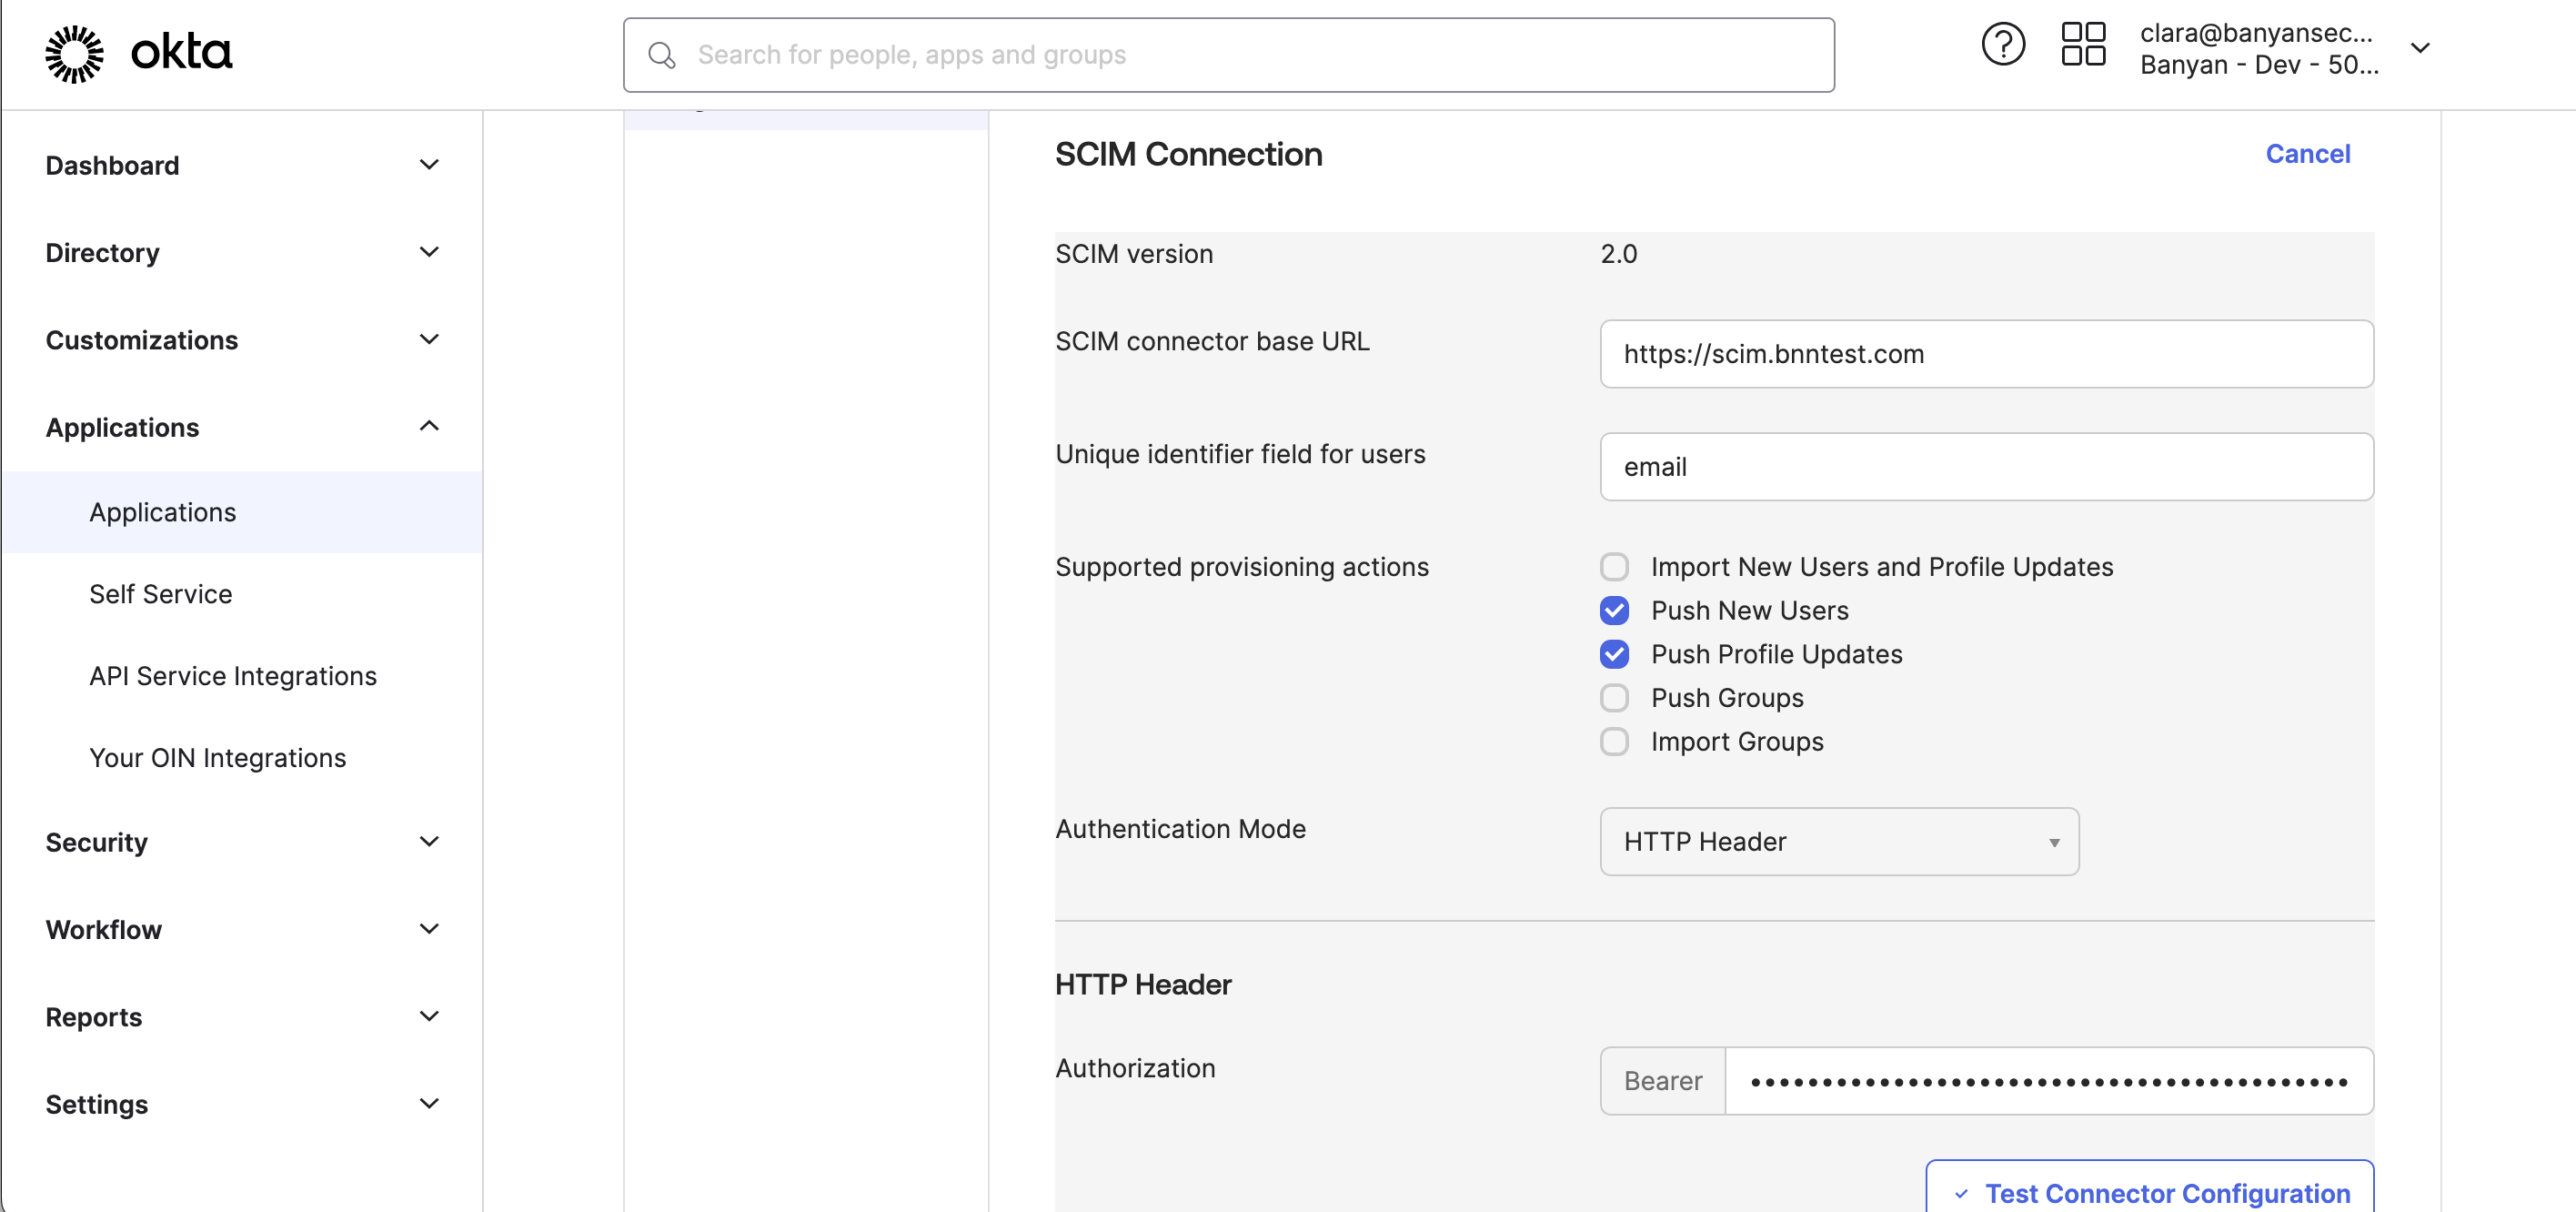
3.9 Select Test Connector Configuration, and then Save.
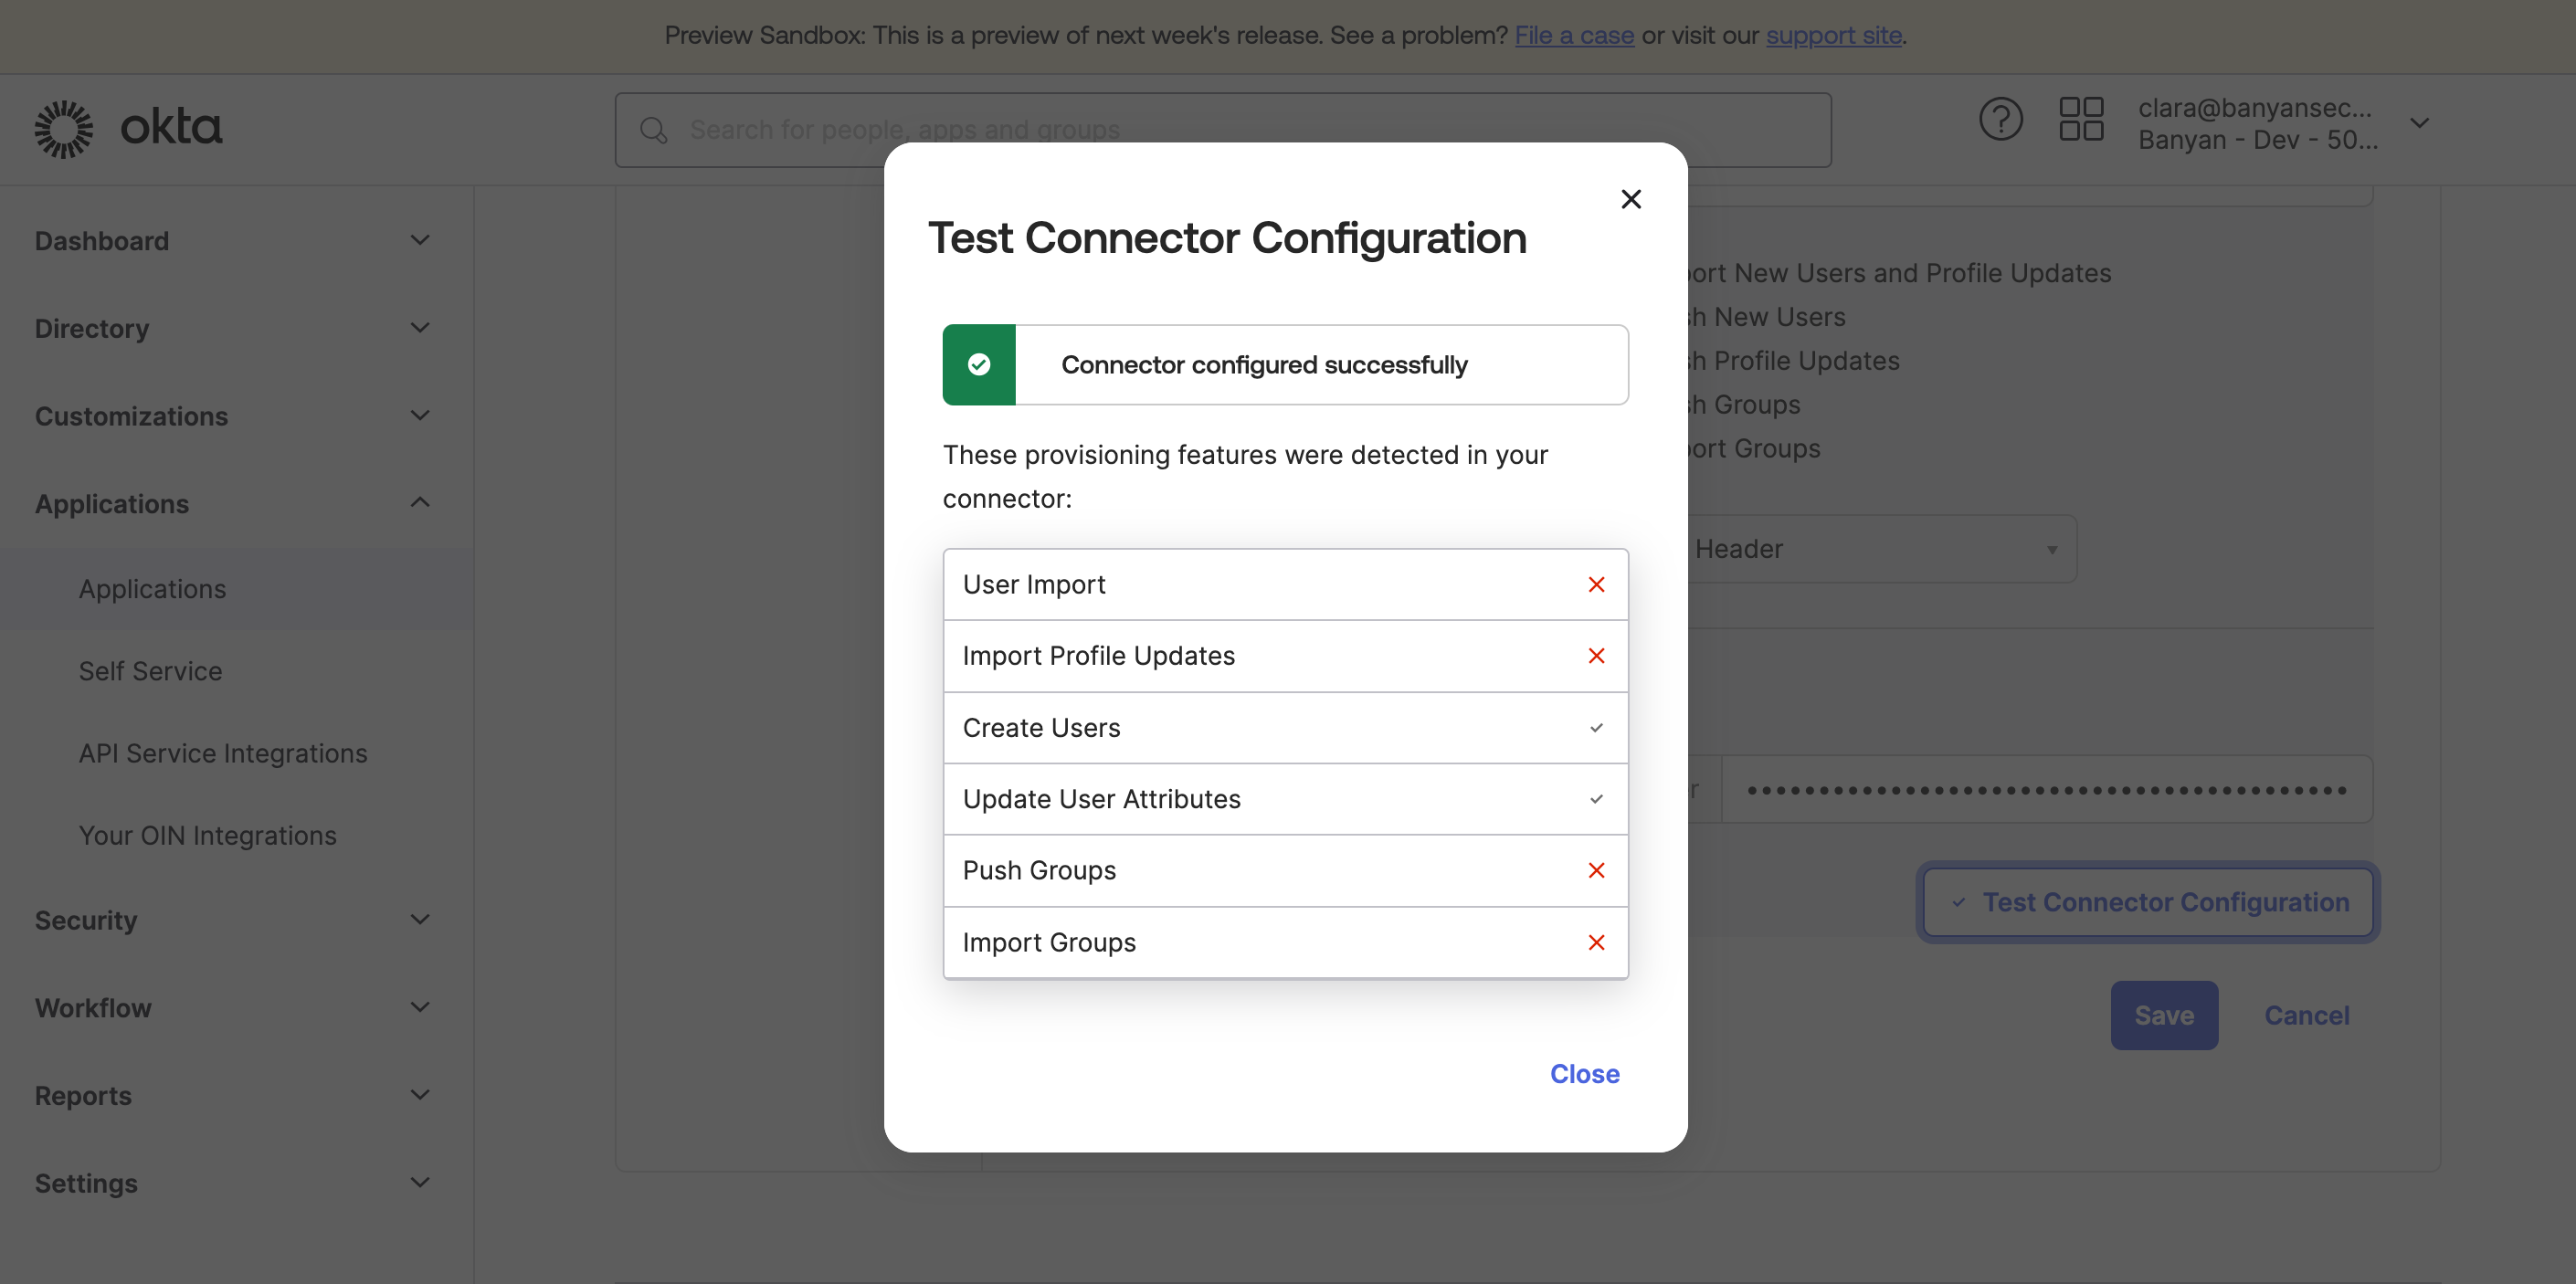
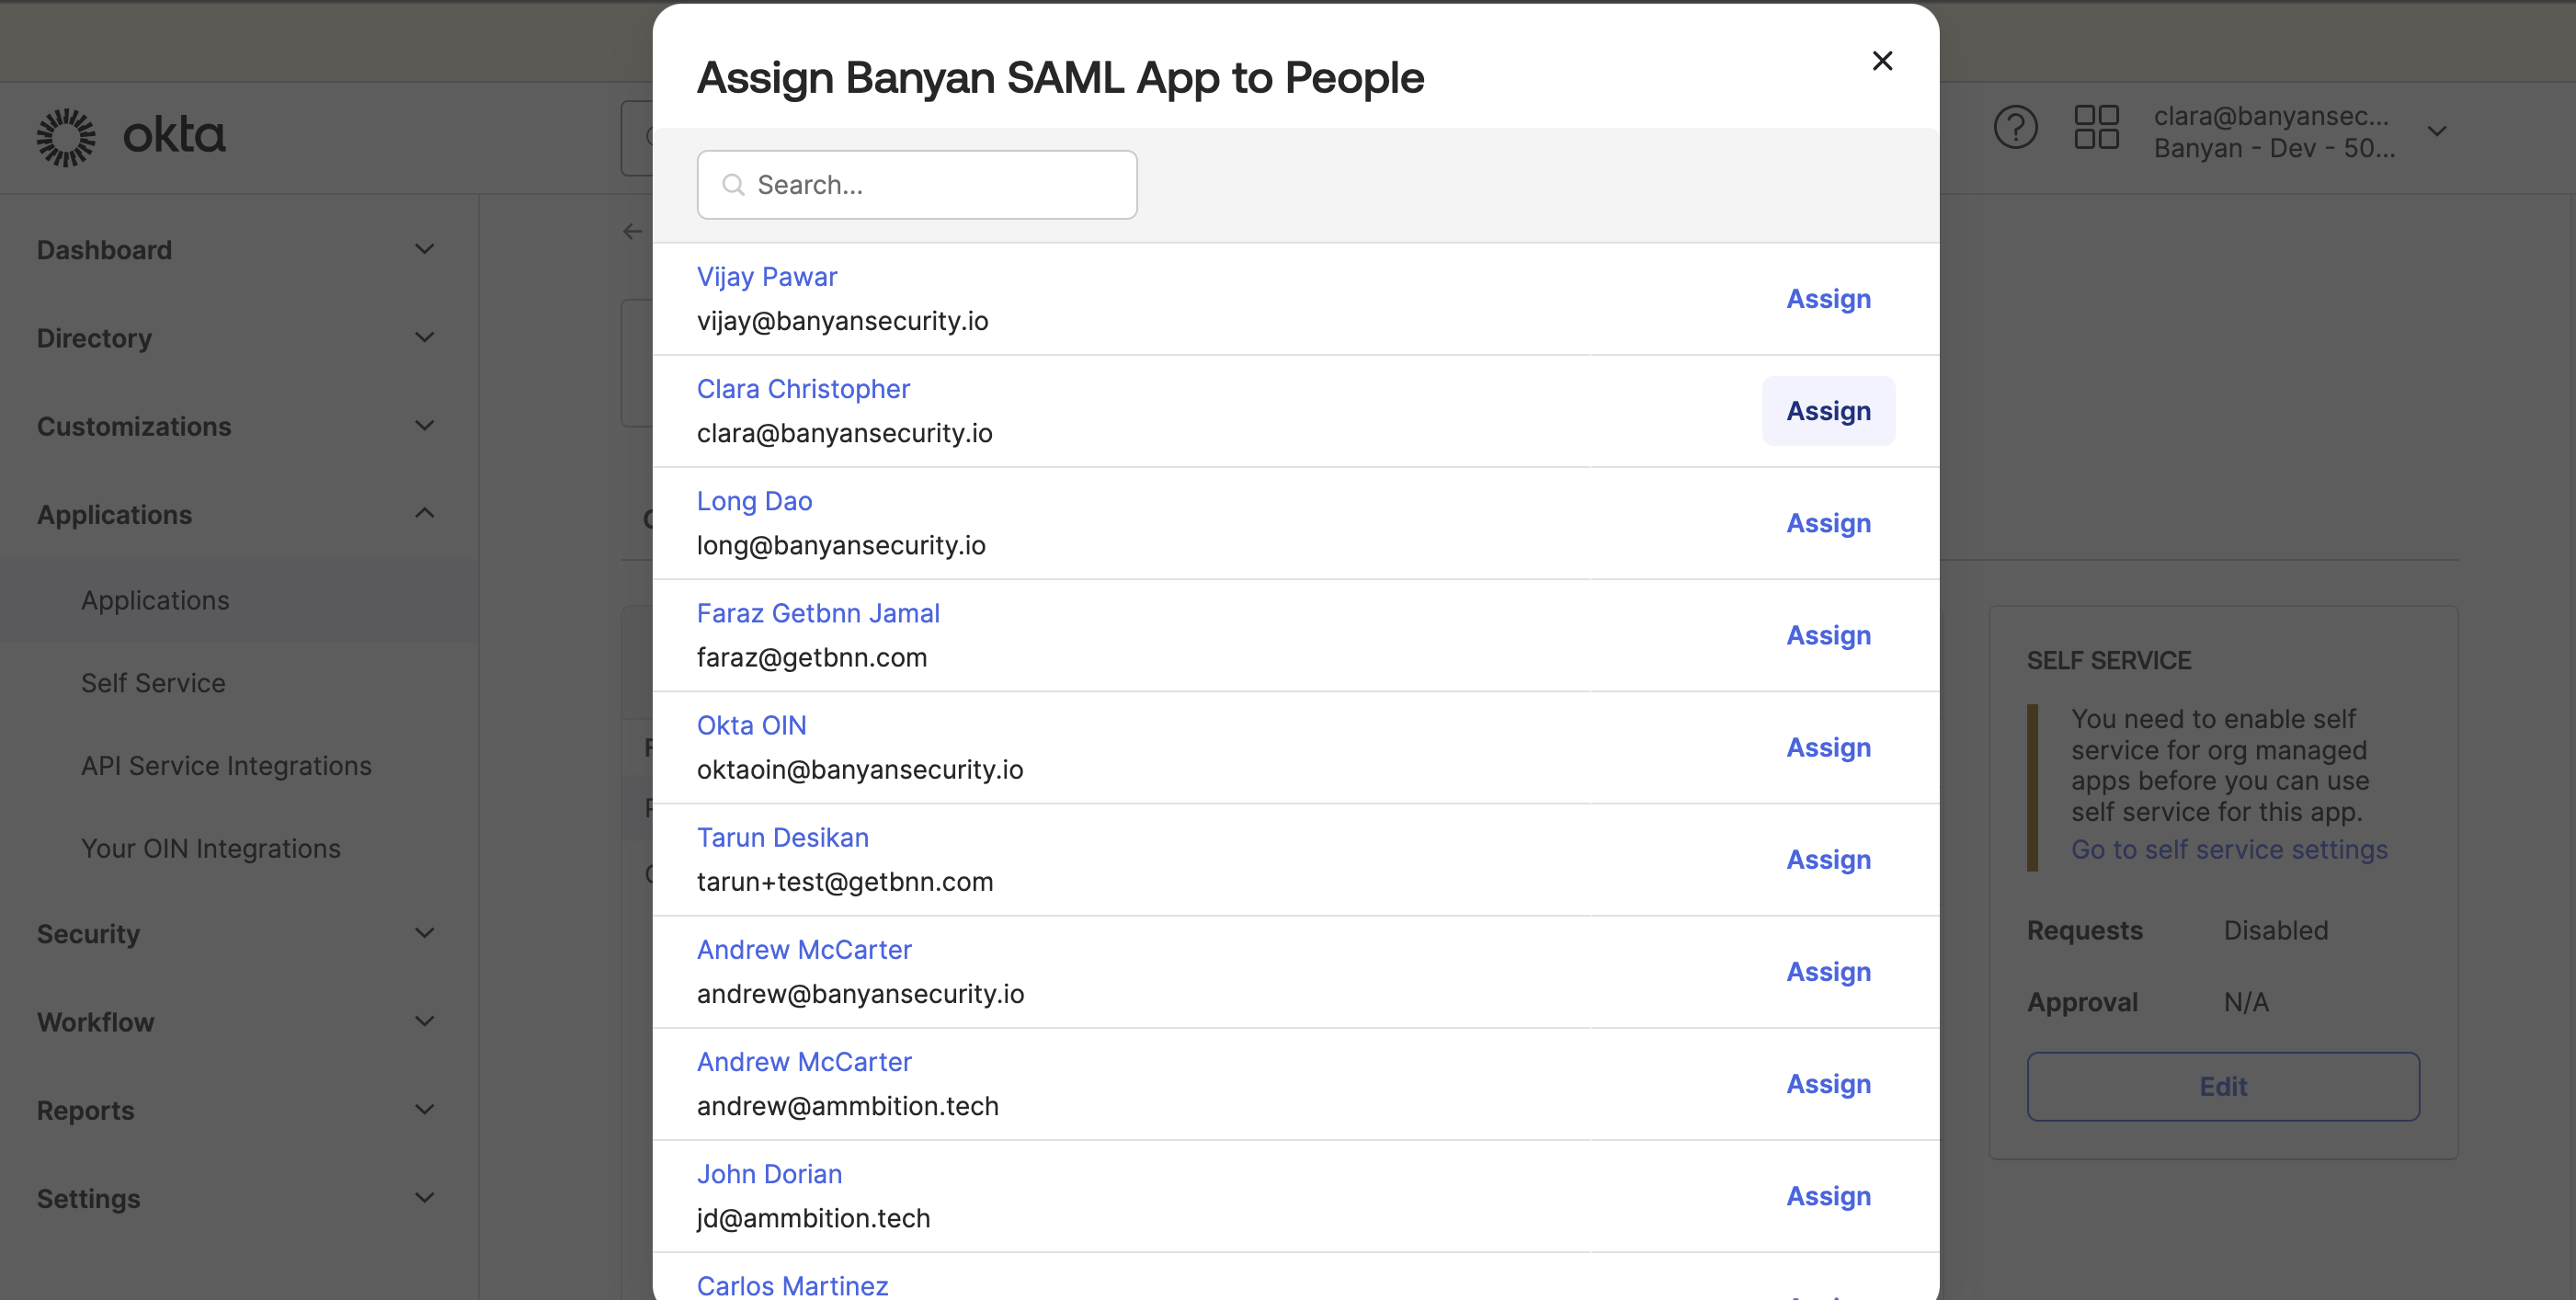
3.10 Under Assignments on the desktop app in Okta, assign a new user to the desktop app. This user will now appear in your directory of users in CSE, without the user having to log into CSE.
