Configure Entra ID Device Registration to manage your directory of users
- Updated on Dec 18, 2024
Pre-requisites
In order to set up this integration, you need the following privileges:
- administrative access to Entra ID;
- the ability to add a new Enterprise Application.
Steps
Step 1: Add CSE Device Registration as an app in Entra ID
1.1 In your Entra admin center, navigate from Applications > Enterprise Applications.
1.2 Select + New application, and then select Create your own application. This will generate a pop-out window on the right side of the webpage. In the What’s the name of your app? field, enter “CSE Device Registration”.
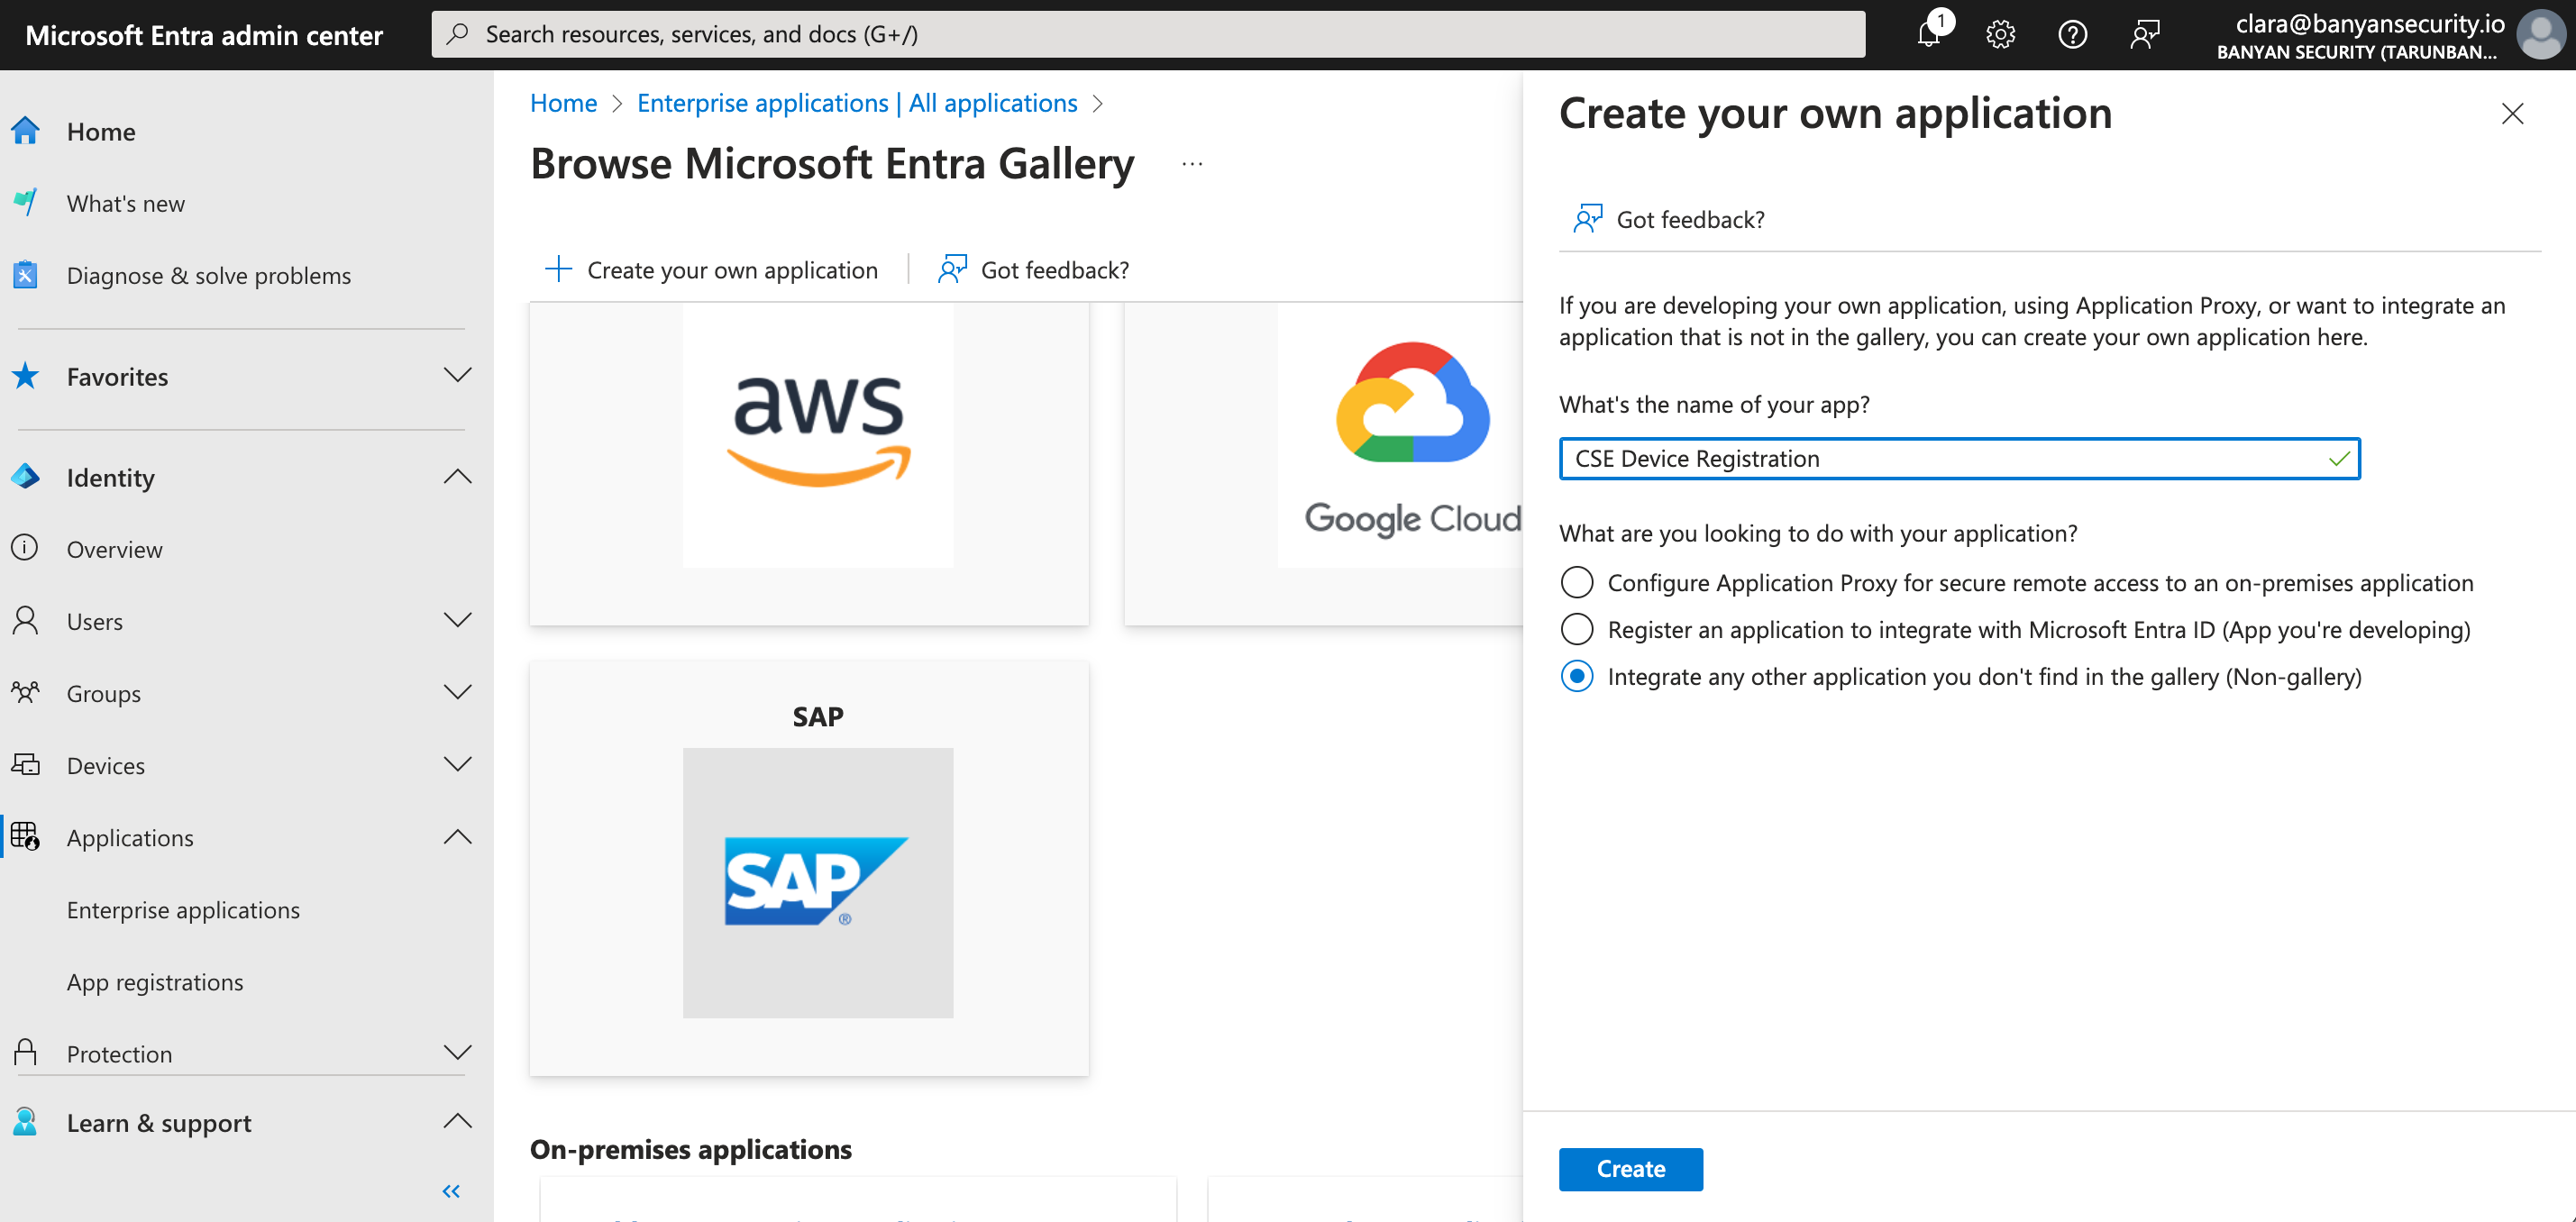
1.3 Select Integrate any other application you don’t find in the gallery (Non-gallery).
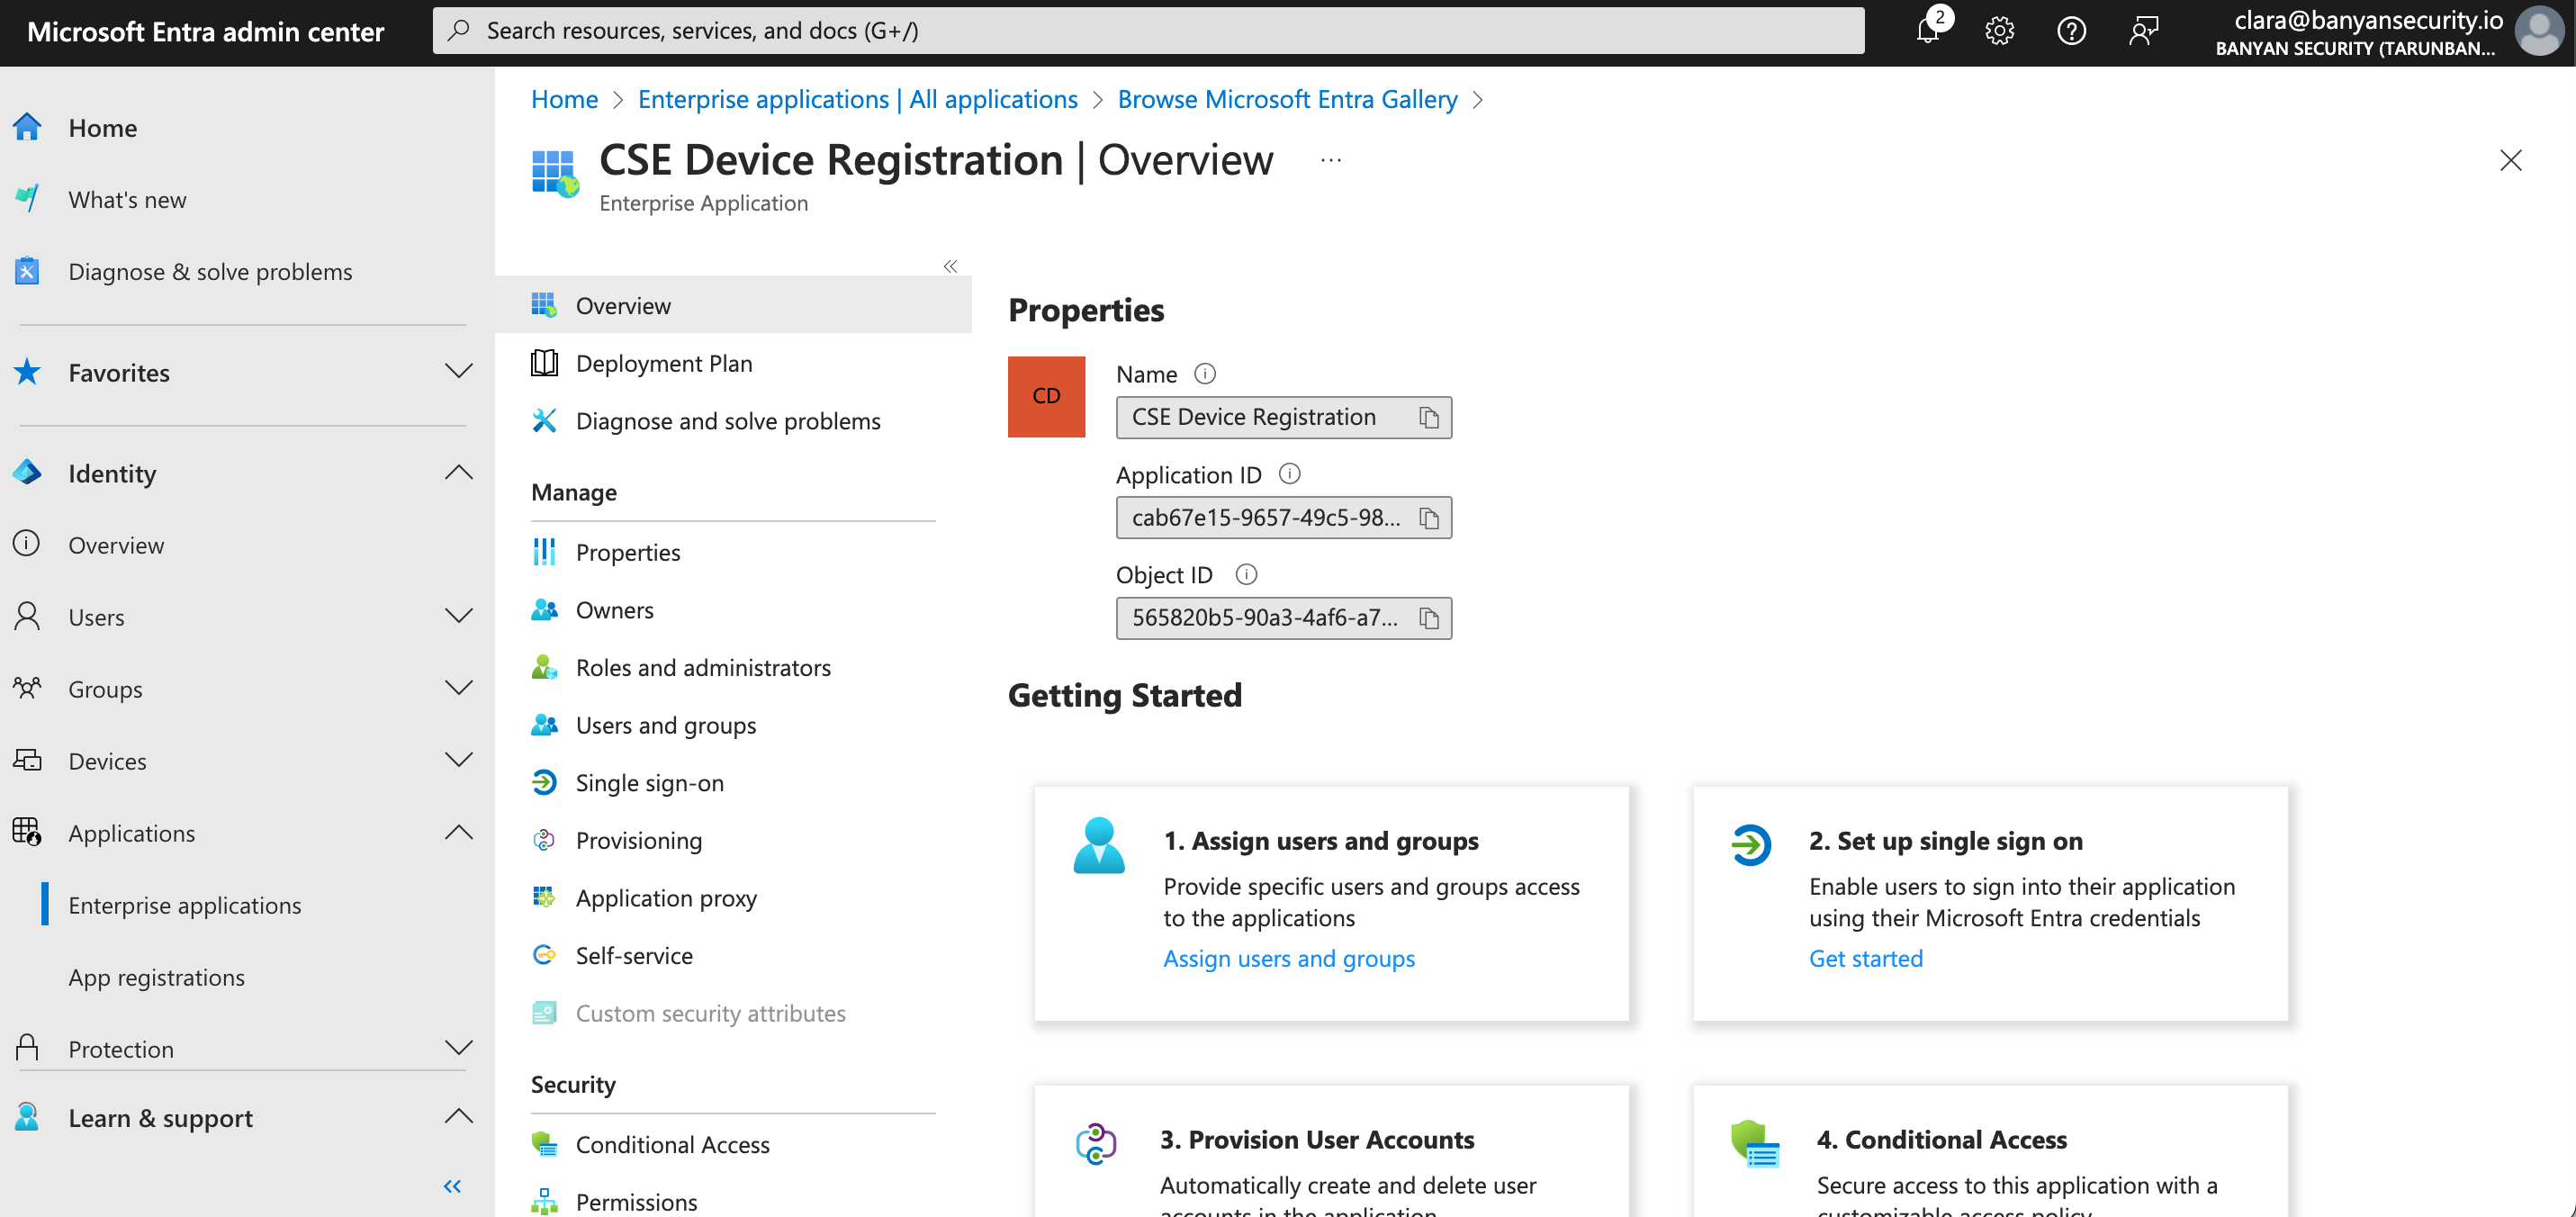
1.4 Select Create. This will navigate you to the new Overview page of the app you just added (i.e., CSE Device Registration).
Step 2: Assign users and groups
2.1 Under Getting Started, select Assign users and groups.
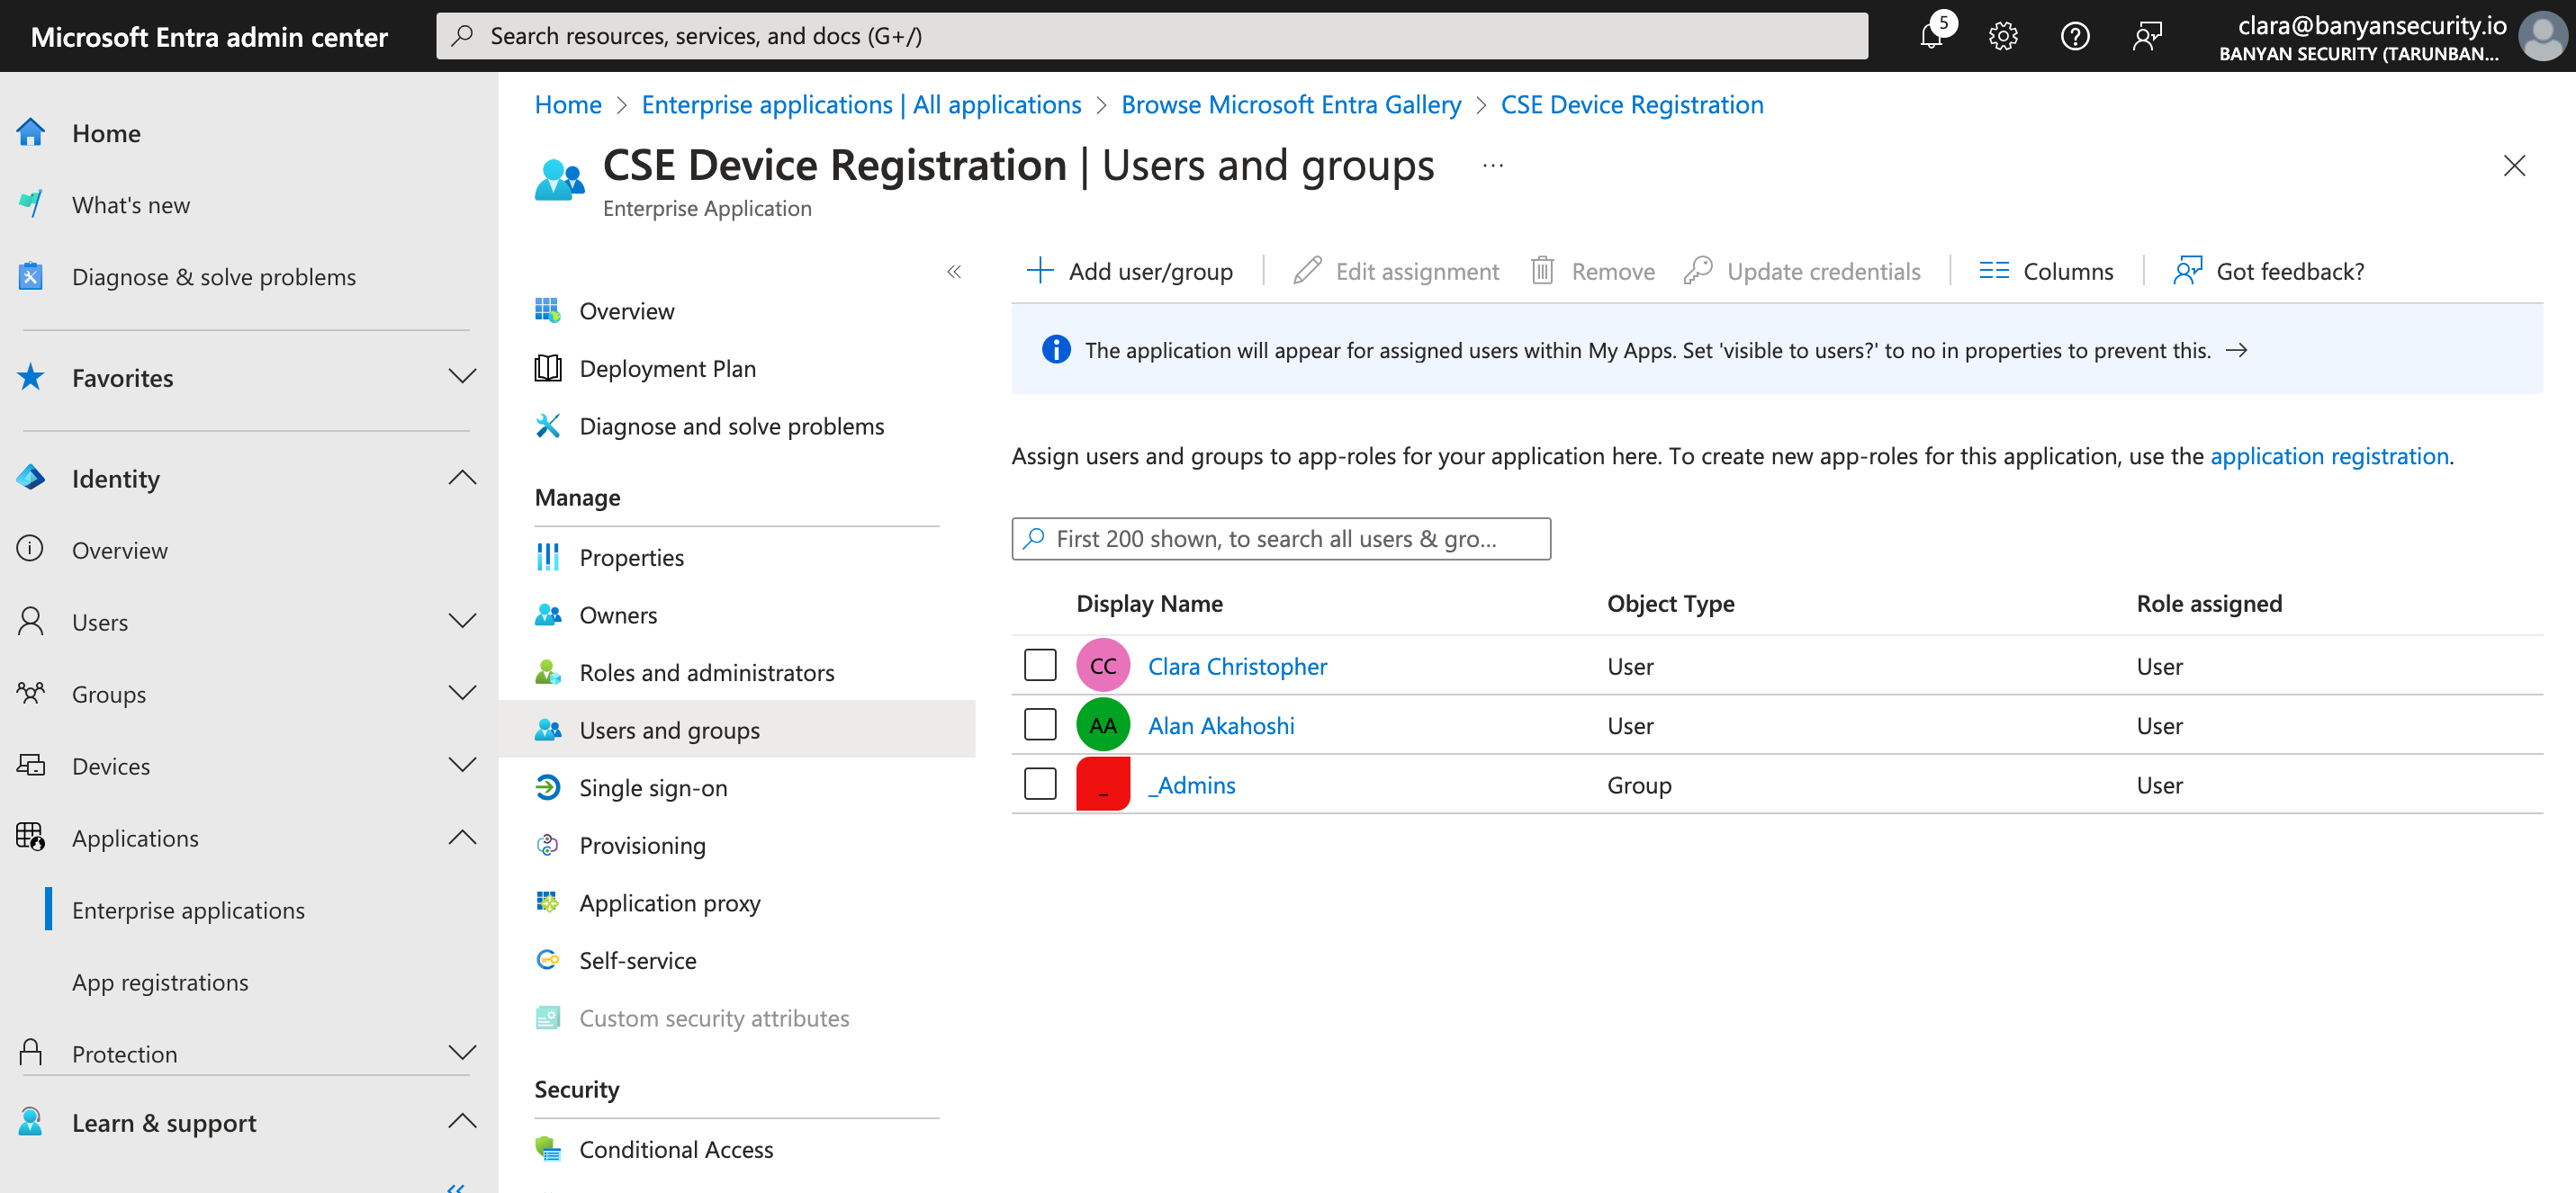
2.2 Select + Add user / group, under Users and groups, select None Selected. This will generate a list of users and groups that you can select from. Then select a role to associate with your selected user or group. Finally, select Assign.
Note: Group synchronizing is currently unavailable for SCIM provisioning with Entra ID. Ensure that you are only adding users (and not groups) if you plan to enable SCIM for Entra ID.
Step 3: Set up single sign-on
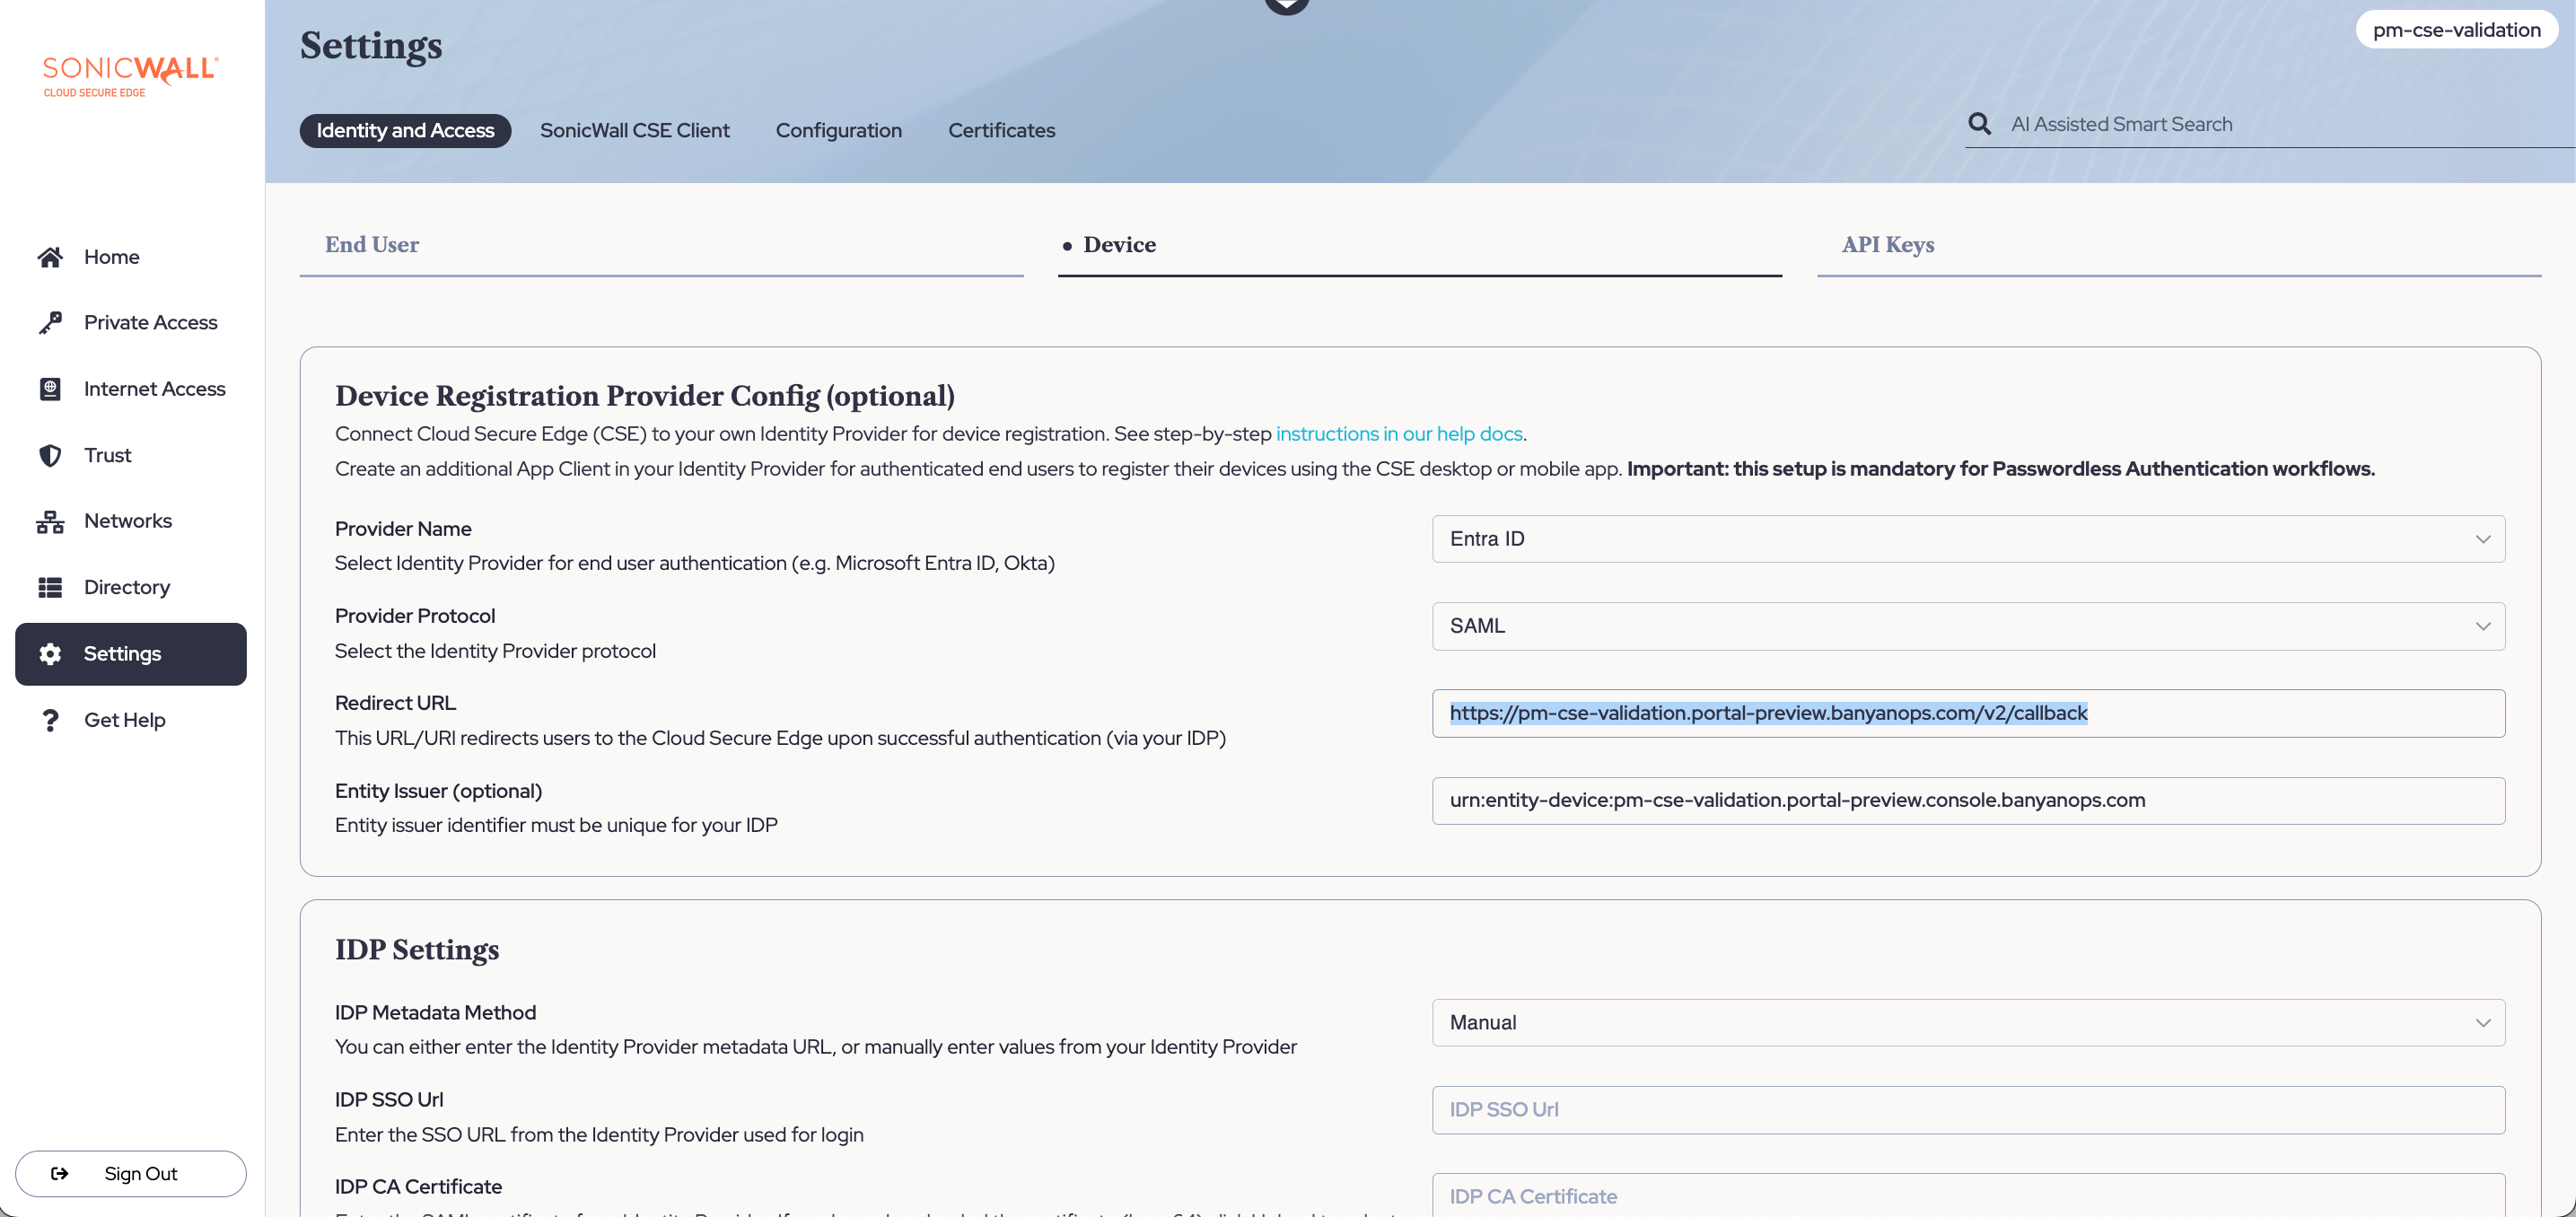
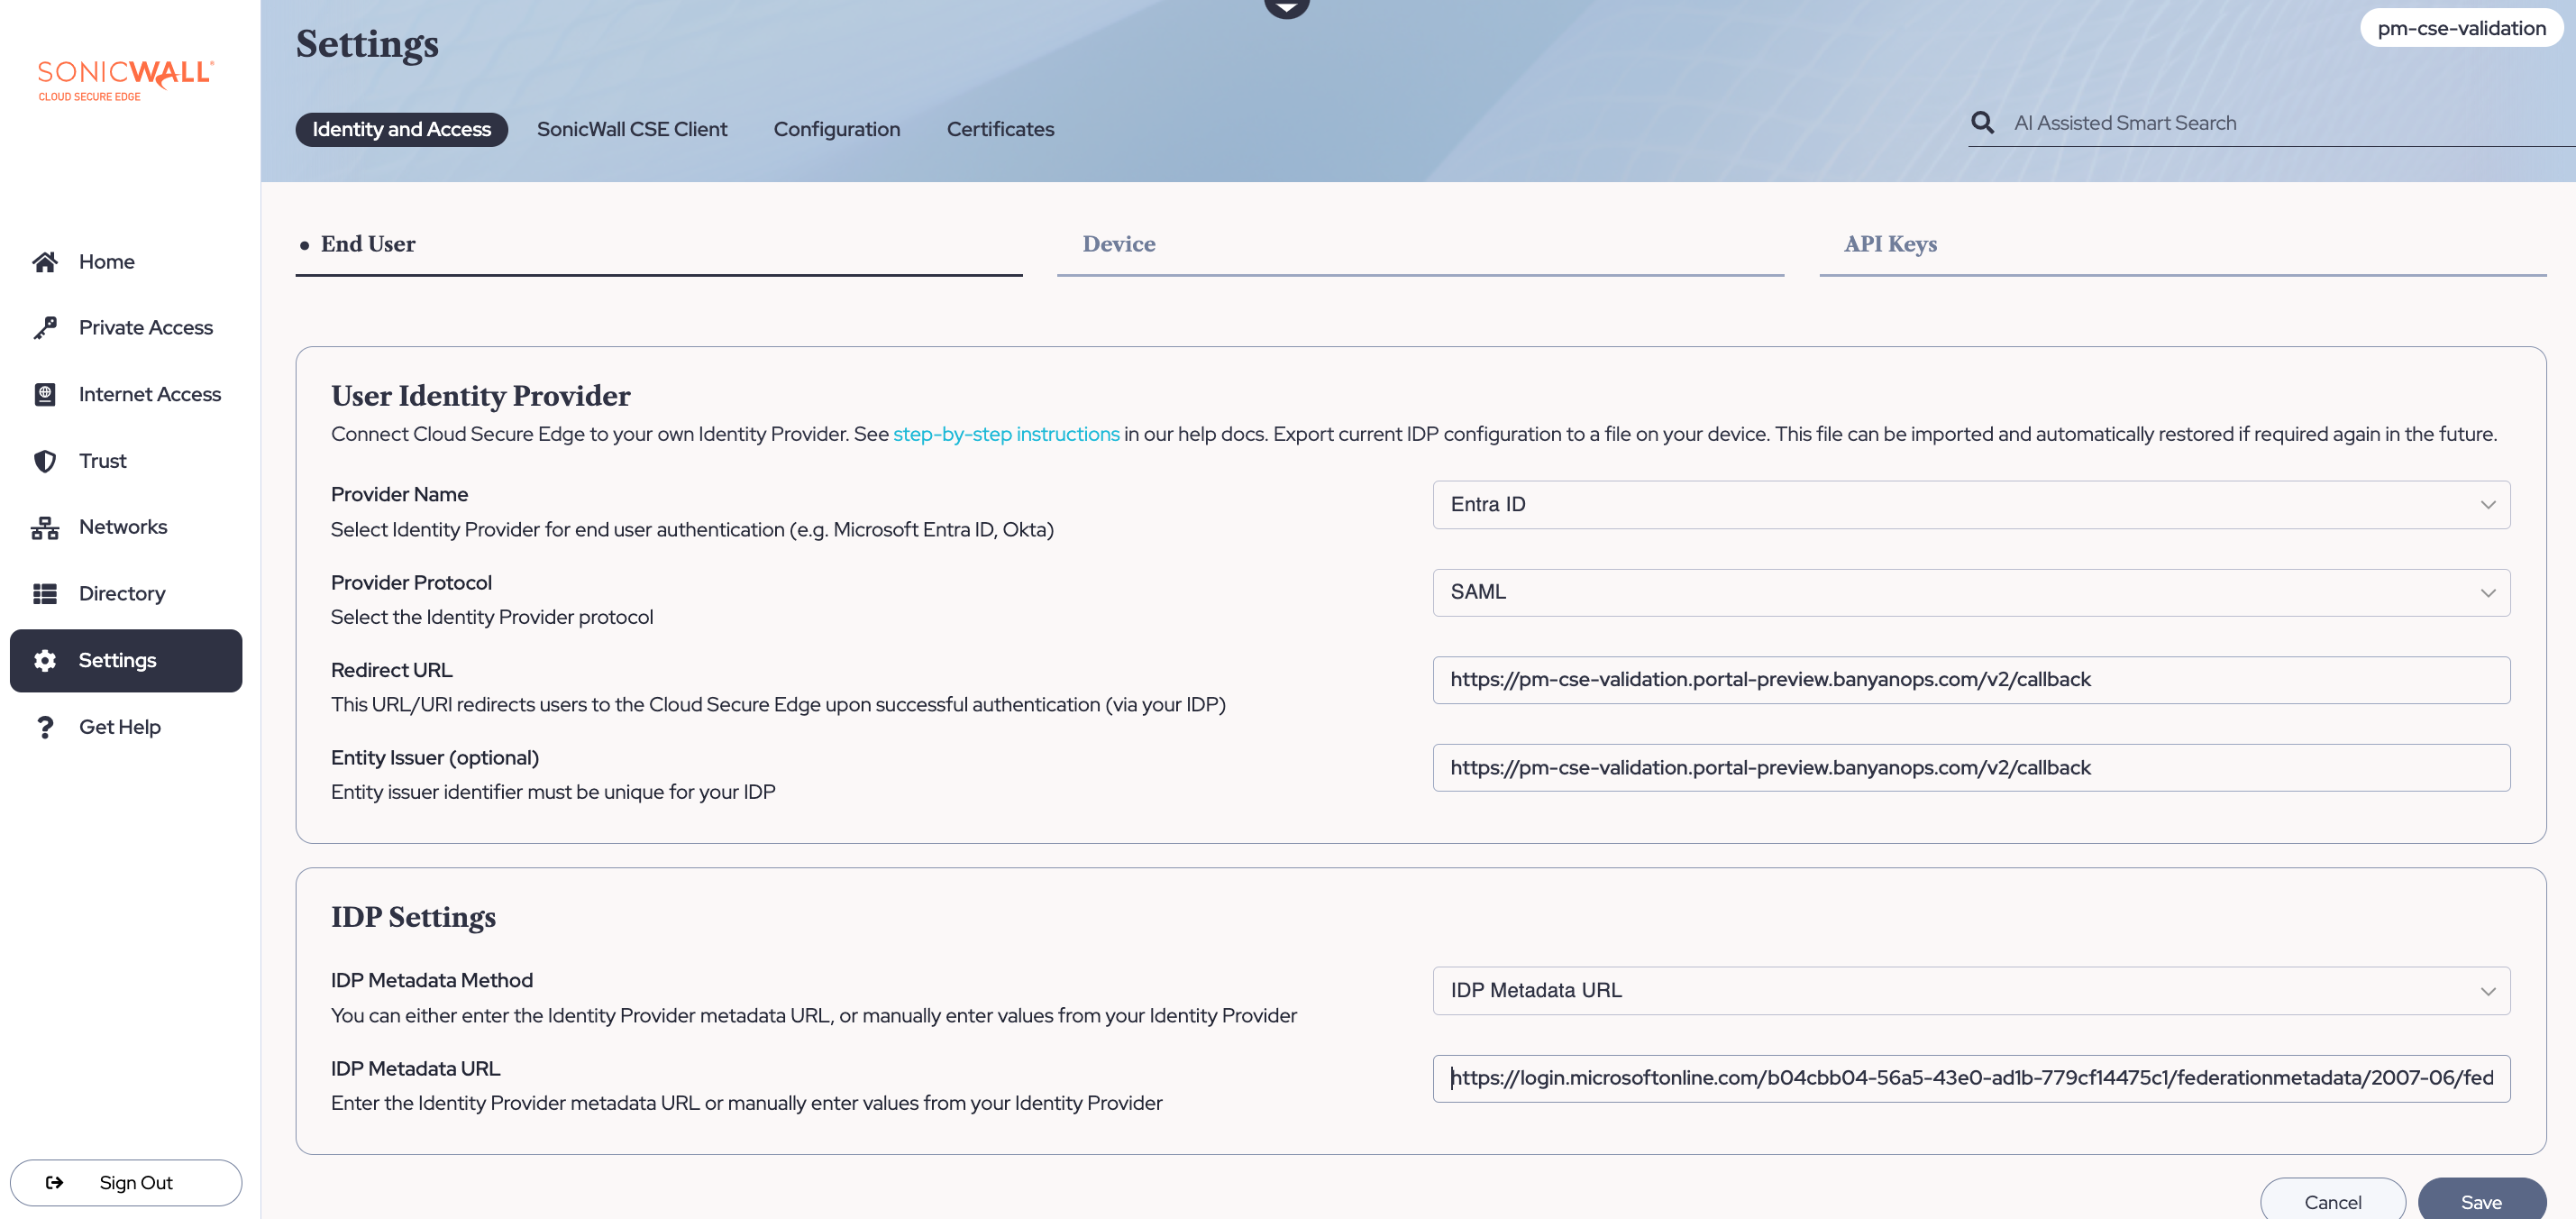
3.1 In the Cloud Secure Edge Command Center, navigate from Settings > Identity and Access > Device. Select Edit (i.e., the pencil icon in the top right corner), and then under the Provider Name, select Entra ID from the dropdown menu.
3.2 Select SAML as the Provider Protocol.
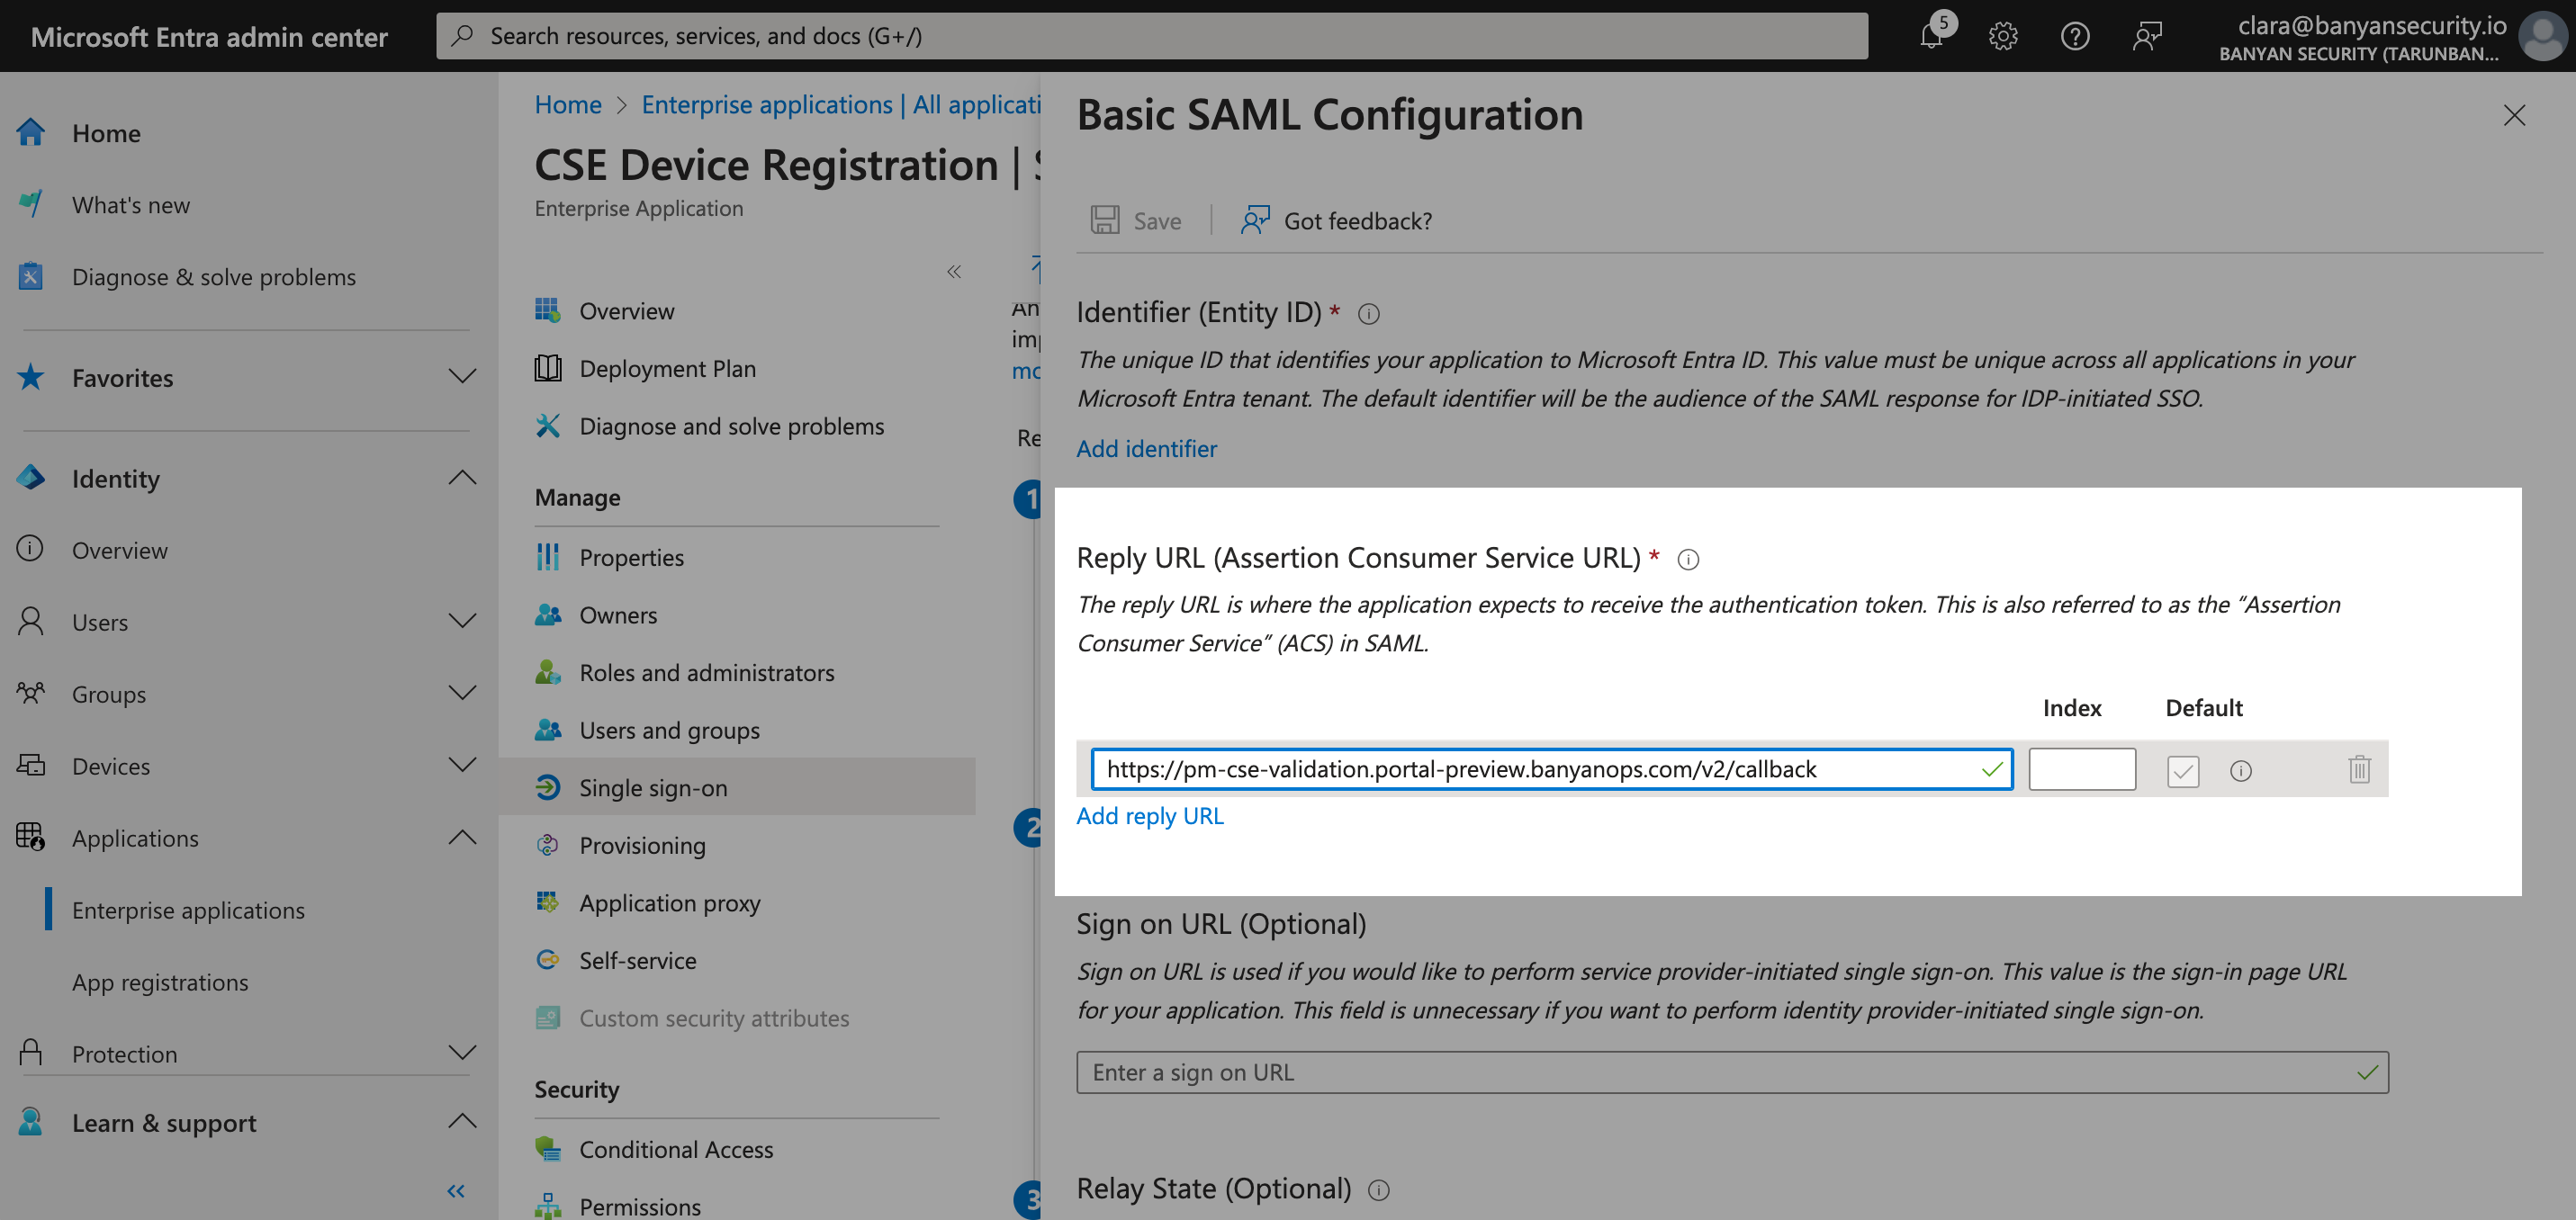
3.3 Copy the Redirect URL field value.
Example: https://org-name.portal-preview.banyanops.com/v2/callback
3.4 In your Entra admin center, select Set up single sign-on (under Manage in the Enterprise Application’s navigation bar on the left). Under Select a single sign-on method, select the SAML tile.
3.5 Select Edit on the Basic SAML Configuration, and then select Add reply URL.
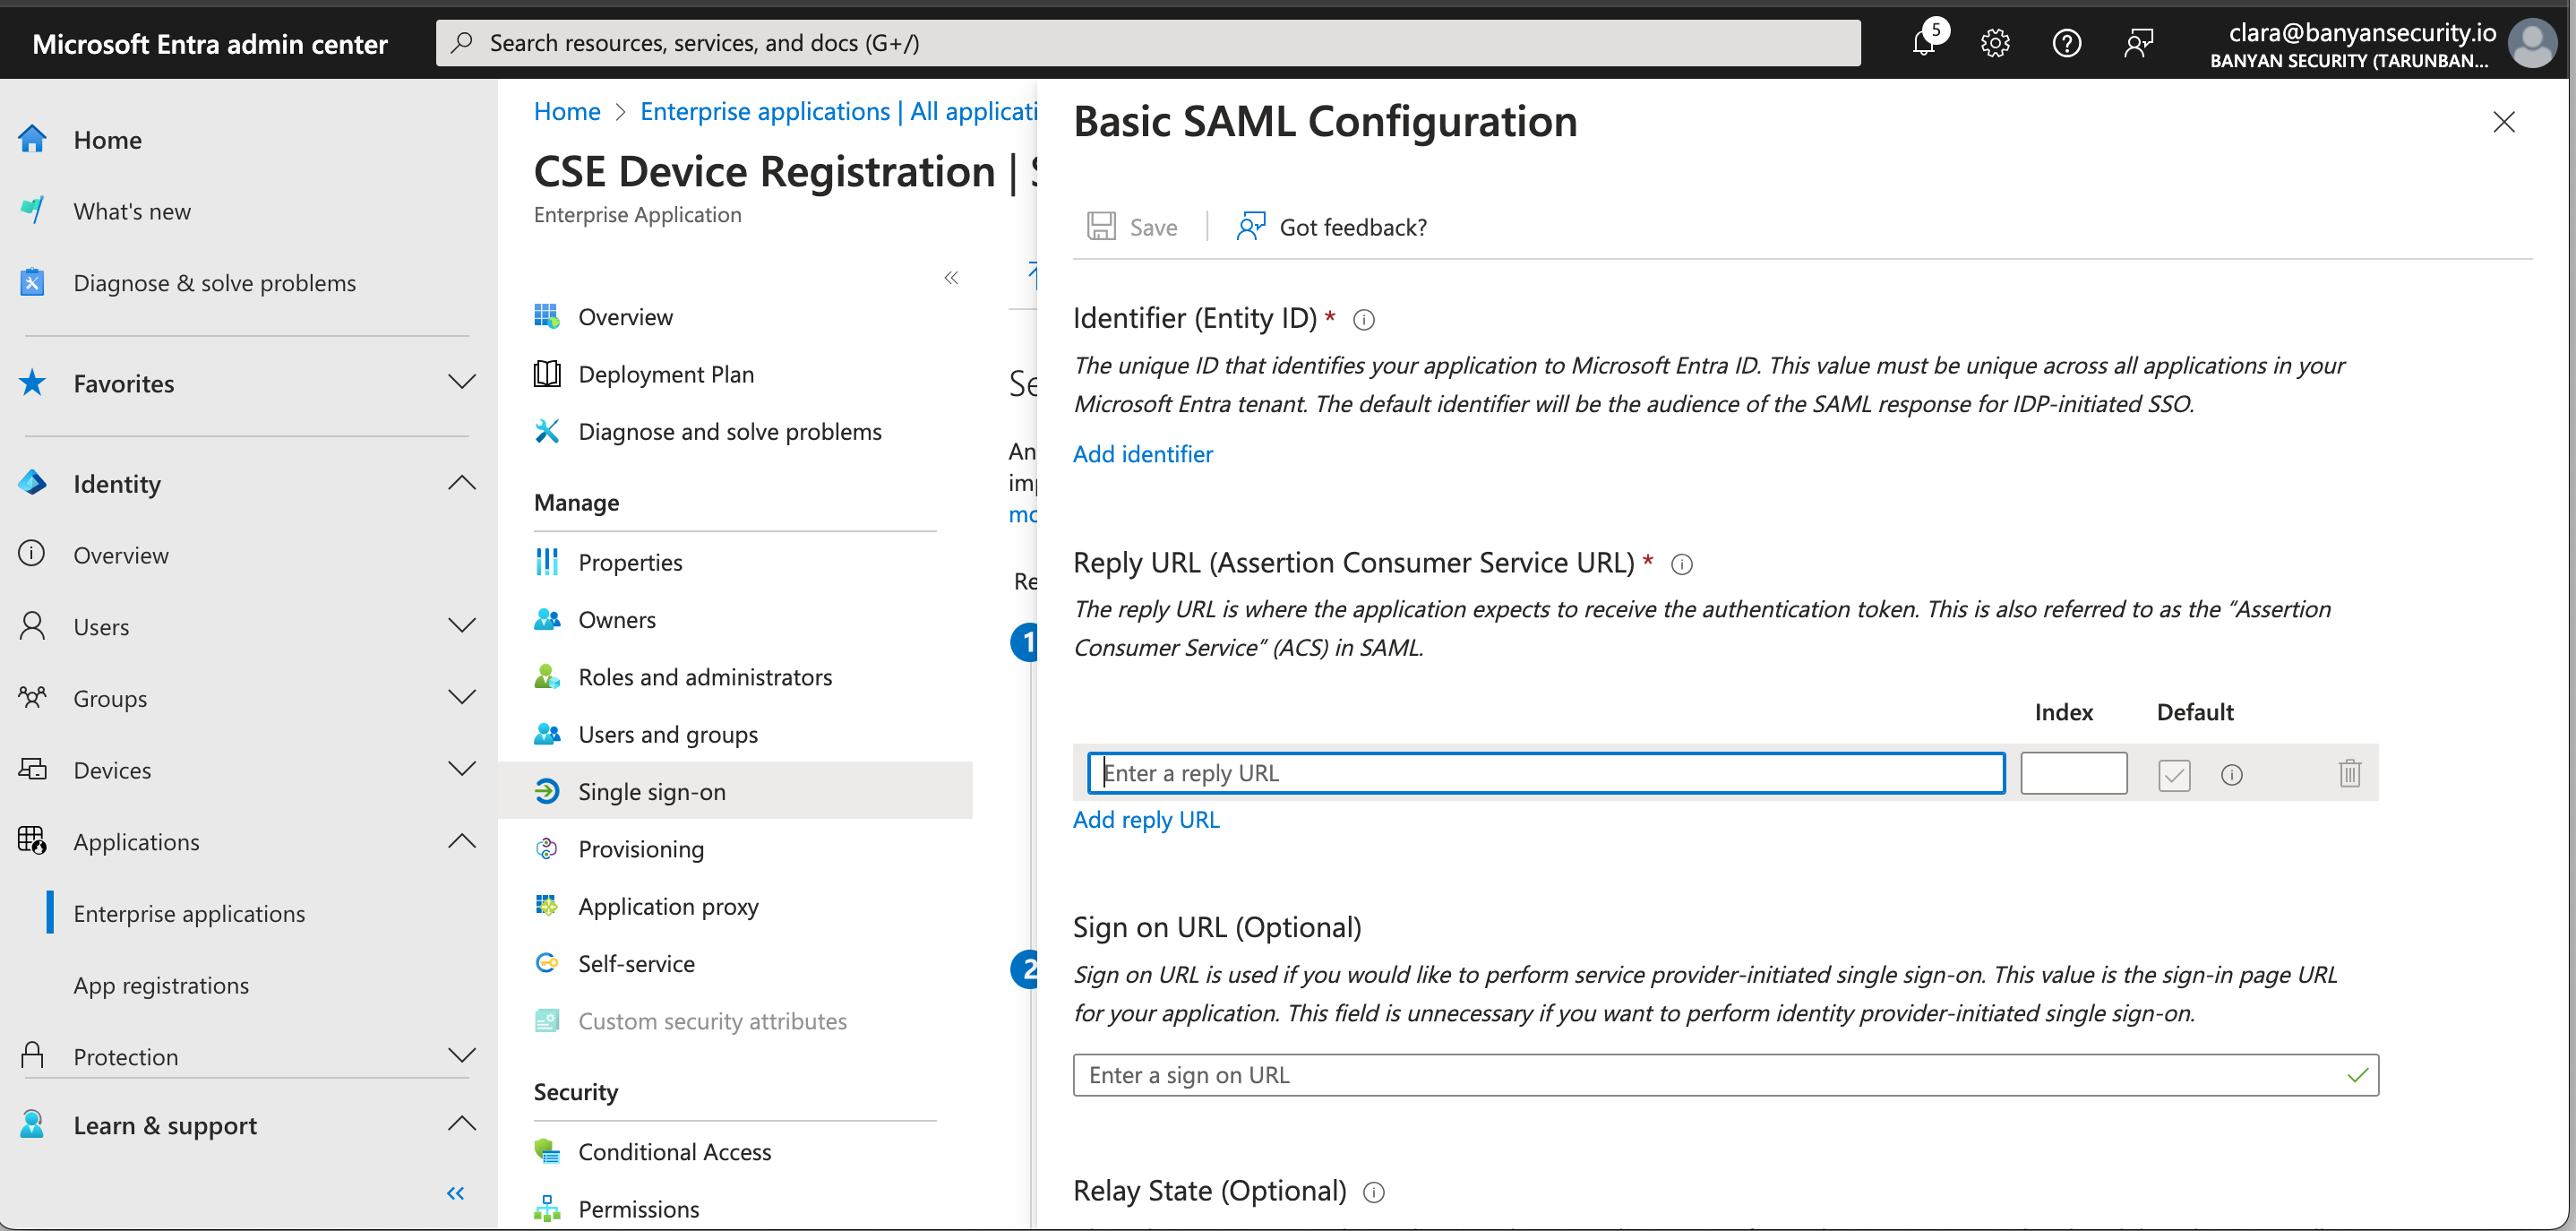
3.6 Paste the Redirect URL value (from the Cloud Secure Edge Command Center, copied in Step 3.3) into the Reply URL field in Entra ID.
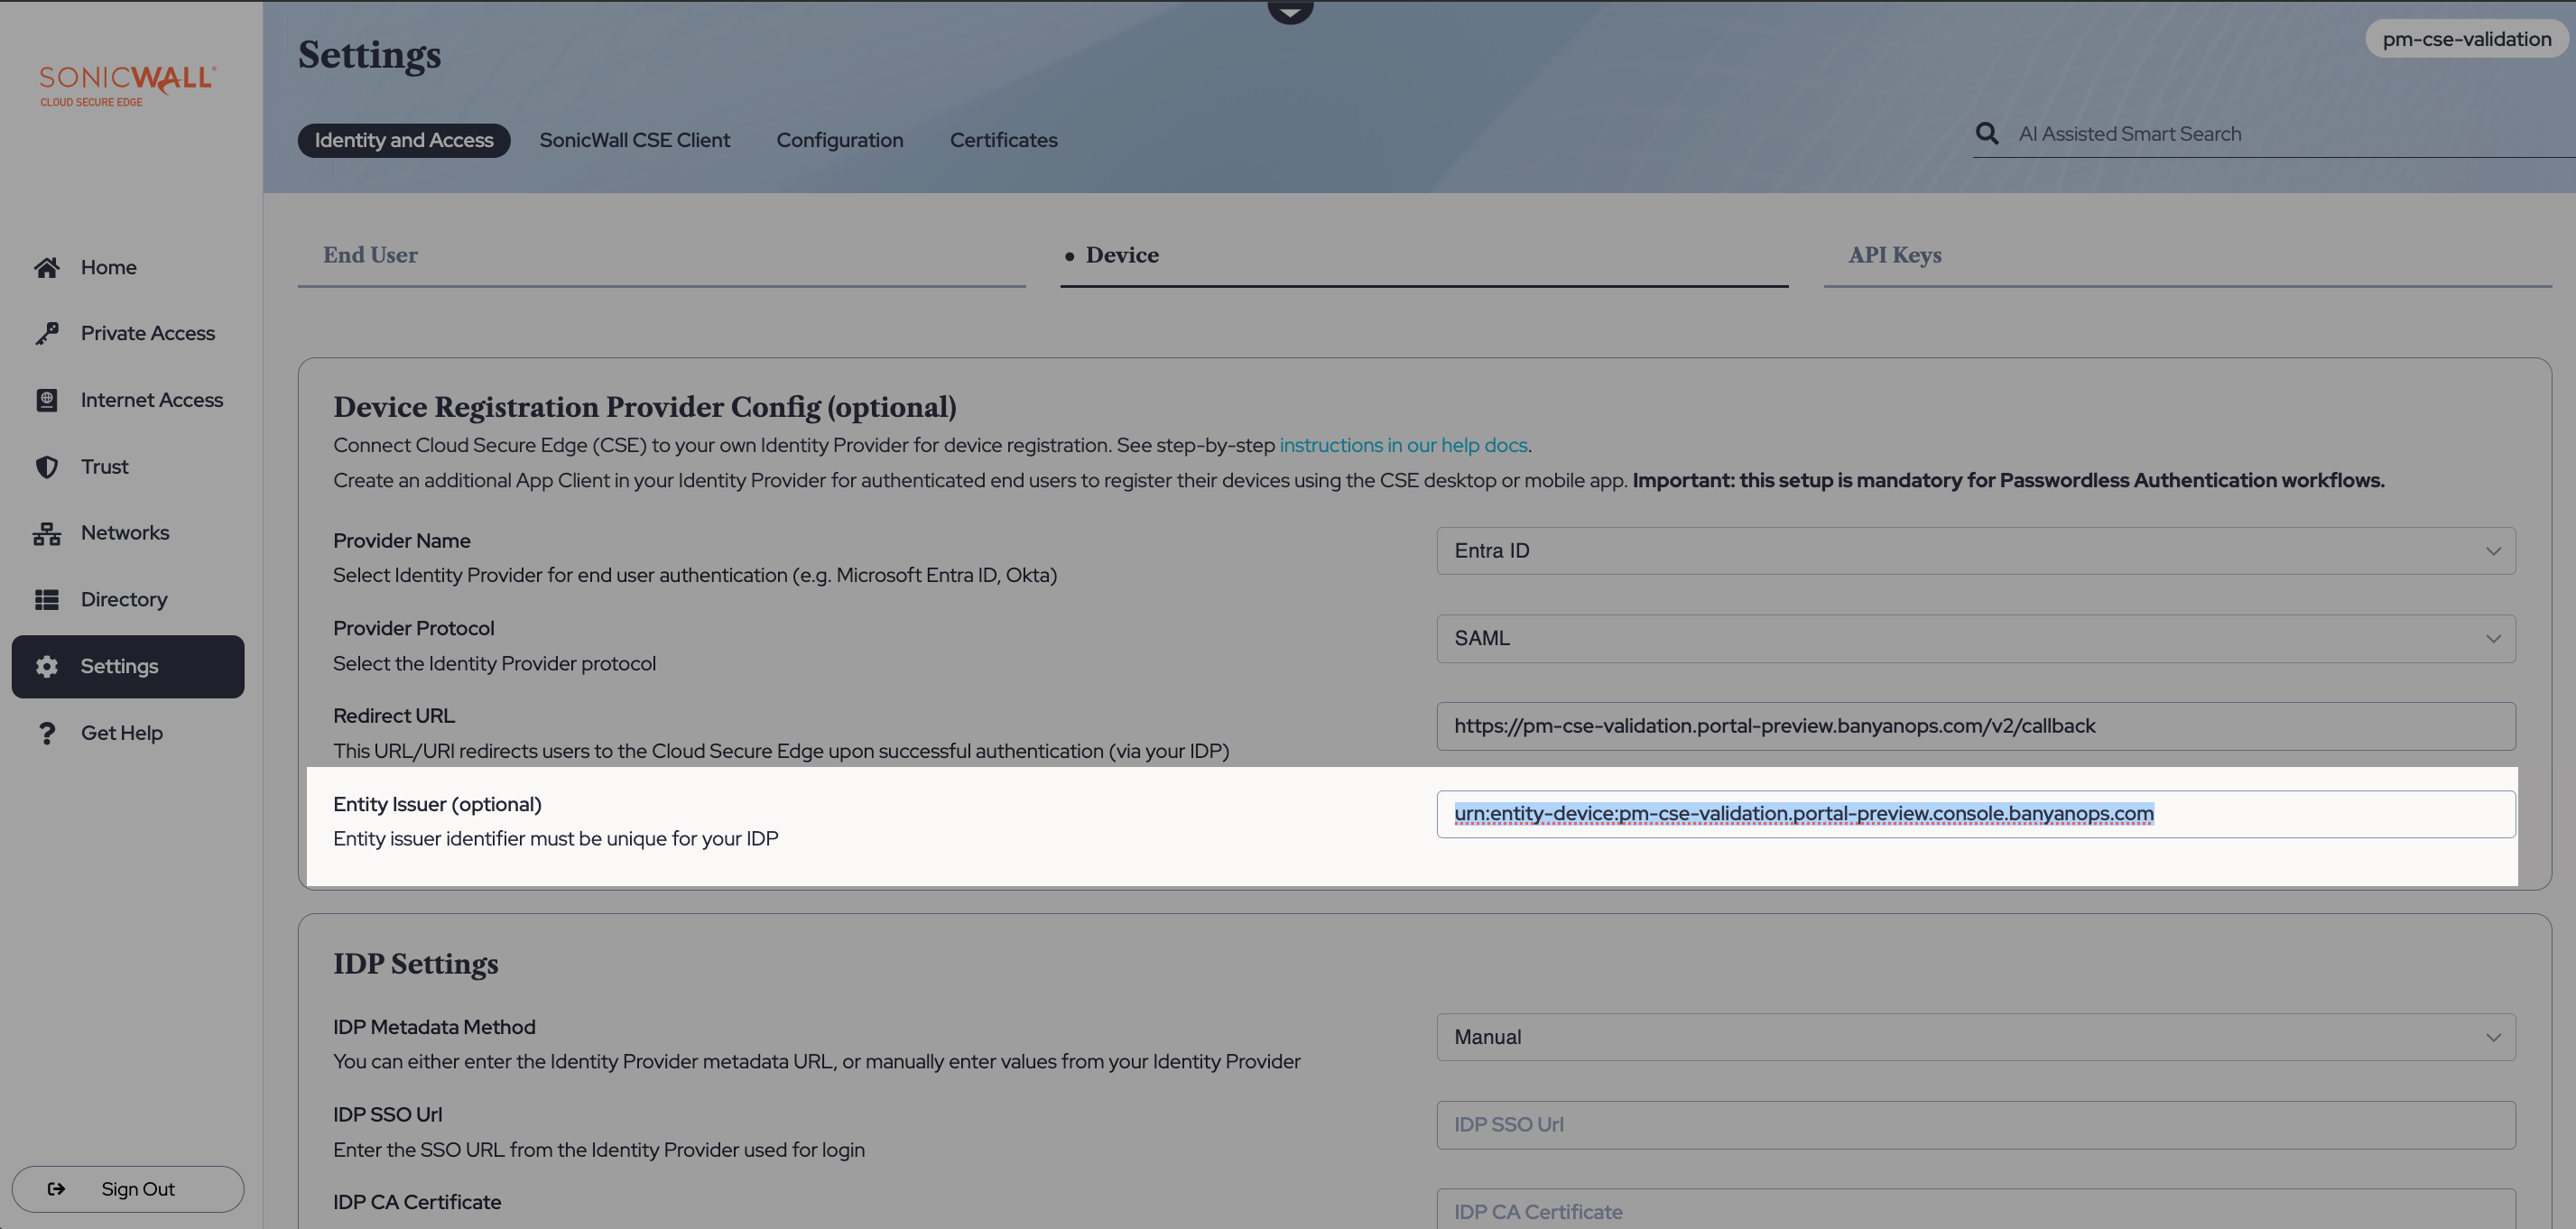
3.7 Back in the Cloud Secure Edge Command Center (under Settings > Identity and Access > Device, with Entra ID selected as the Provider Name and SAML selected as the Provider Protocol), copy the Entity Issuer.
3.8 In your Entra admin center under Basic SAML Configuration, select Add identifier and then paste the Entity Issuer value (from Step 3.7) into the Identifier field in Entra ID.
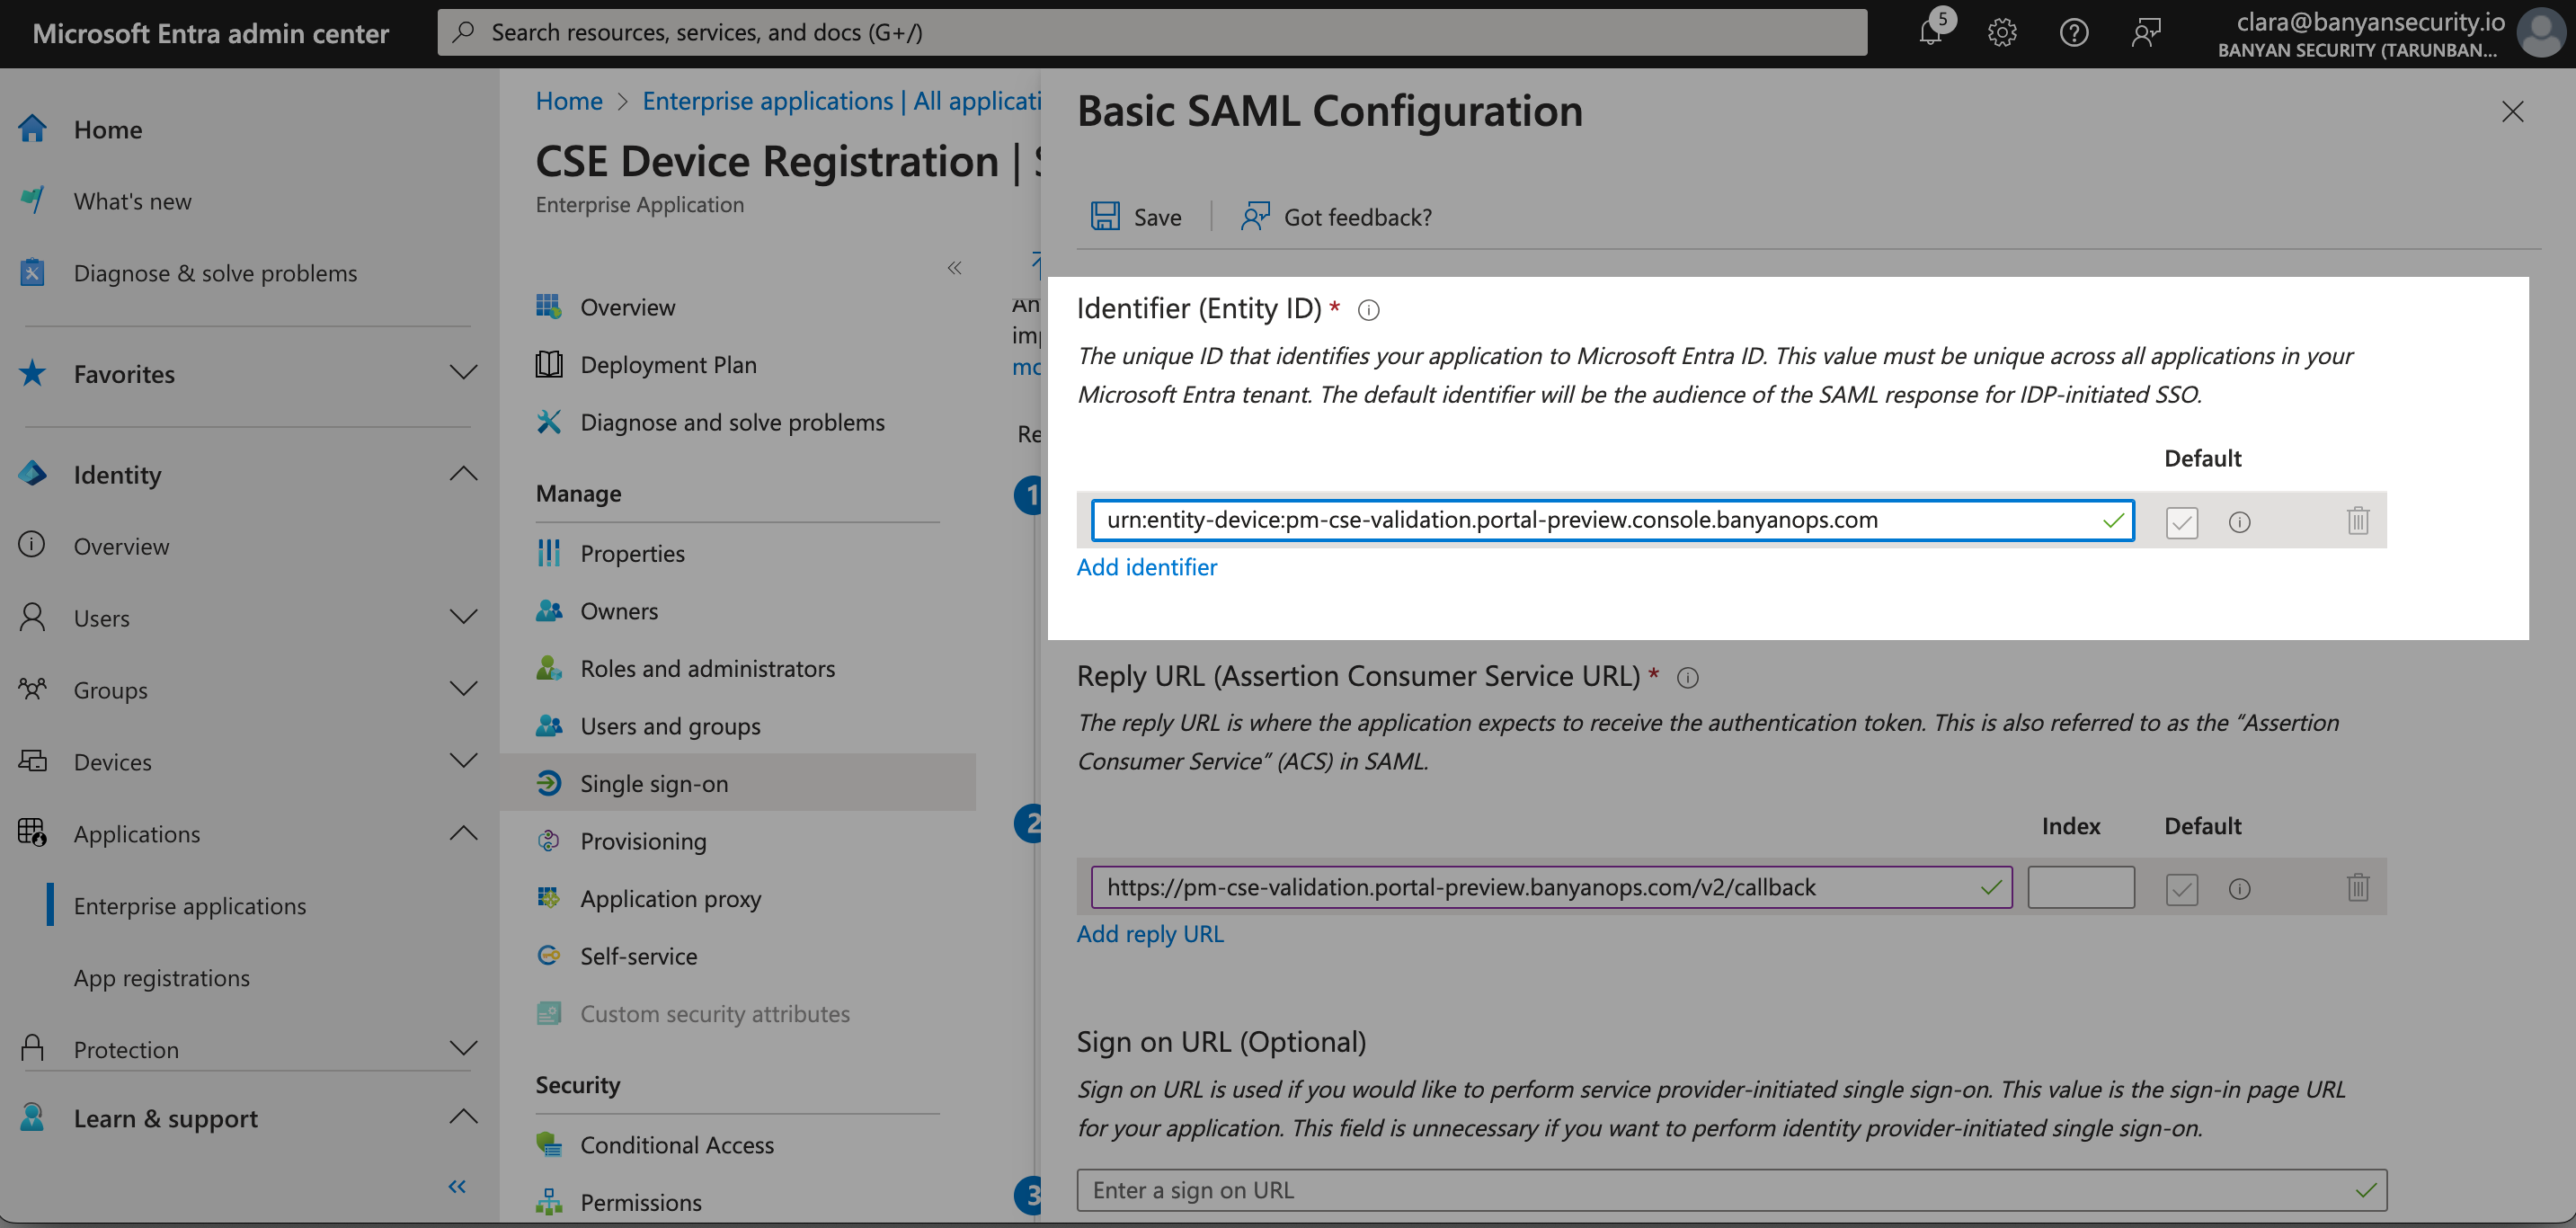
3.9 Save.
3.10 In your Entra admin center, navigate to Attributes and Claims (Manage > Single sign-on > Attributes & Claims), and select the Edit icon.
3.11 Select Add new claim.
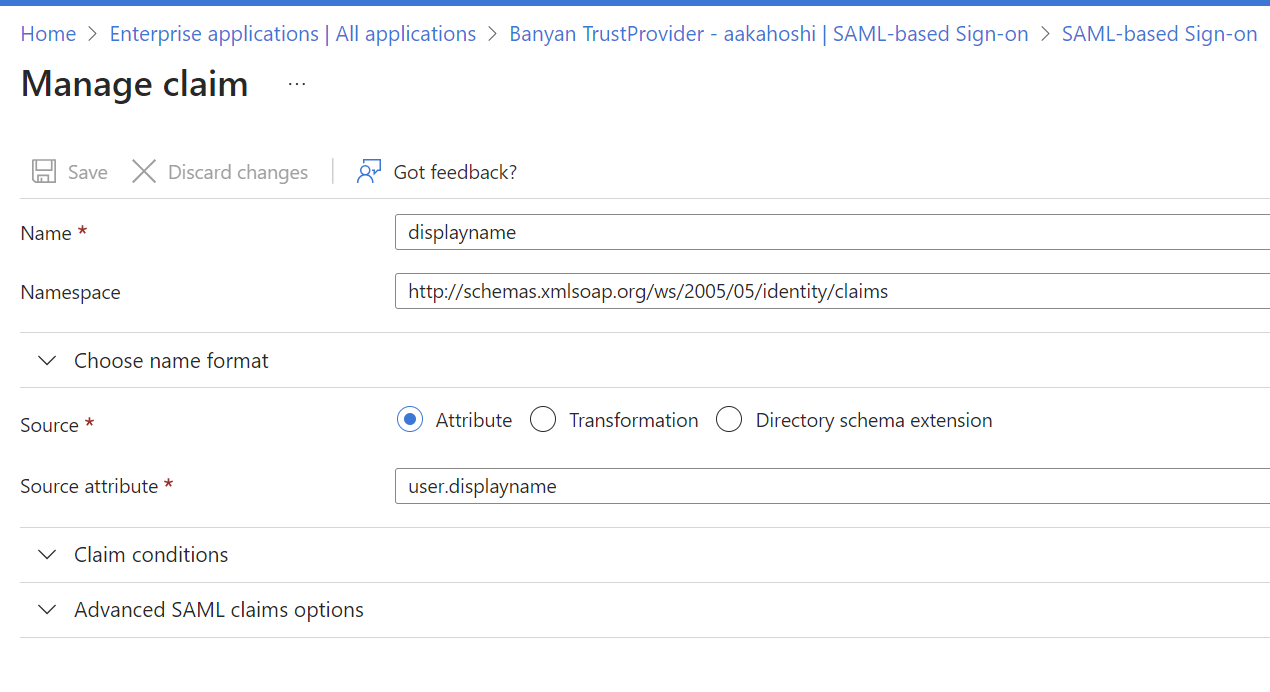
3.12 In the Name field, enter displayname. In the Namespace field, enter http://schemas.microsoft.com/identity/claims. Under Source, check Attribute, and in the Source attribute field, enter user.displayname.
3.13 Save.
3.14 Select Add a group claim: This will generate a pop-out window on the right side of the webpage. In the Group Claims pop-out window, select All groups as groups returned in the claim, and then select sAMAccountName as the Source Attribute.
3.15 Save.
3.16 Under SAML Certificates, copy the App Federation Metadata URL. Navigate to your Entra ID IDP device registration config page in the CSE Command Center: ensure that under IDP Settings, IDP Metadata URL is selected. Paste the copied App Federation Metadata URL (from the Entra admin center) into the IDP Metadata URL field in the CSE Command Center.
3.17 Save your device registration configuration in Cloud Secure Edge.
Note: The IDP metadata is evaluated daily. If there are any changes to the CSE Device Registration app in Entra ID, CSE picks up the changes via the metadata URL and applies these changes to your IDP configuration in the CSE Command Center.