Set Up Auto-Configuration for Entra ID (Azure AD)
Manage your directory of users by setting up an API auto-configuration for authentication
- Updated on
Entra ID is Microsoft’s cloud-based identity and access management service, which authenticates your employees to access protected resources. SonicWall integrates with your organization’s Entra ID SSO to authenticate users that need access to Cloud Secure Edge services.
Pre-requisites
- Administrative access to Azure Portal and Entra ID
Steps
Step 1: Set up User Identity Provider in CSE
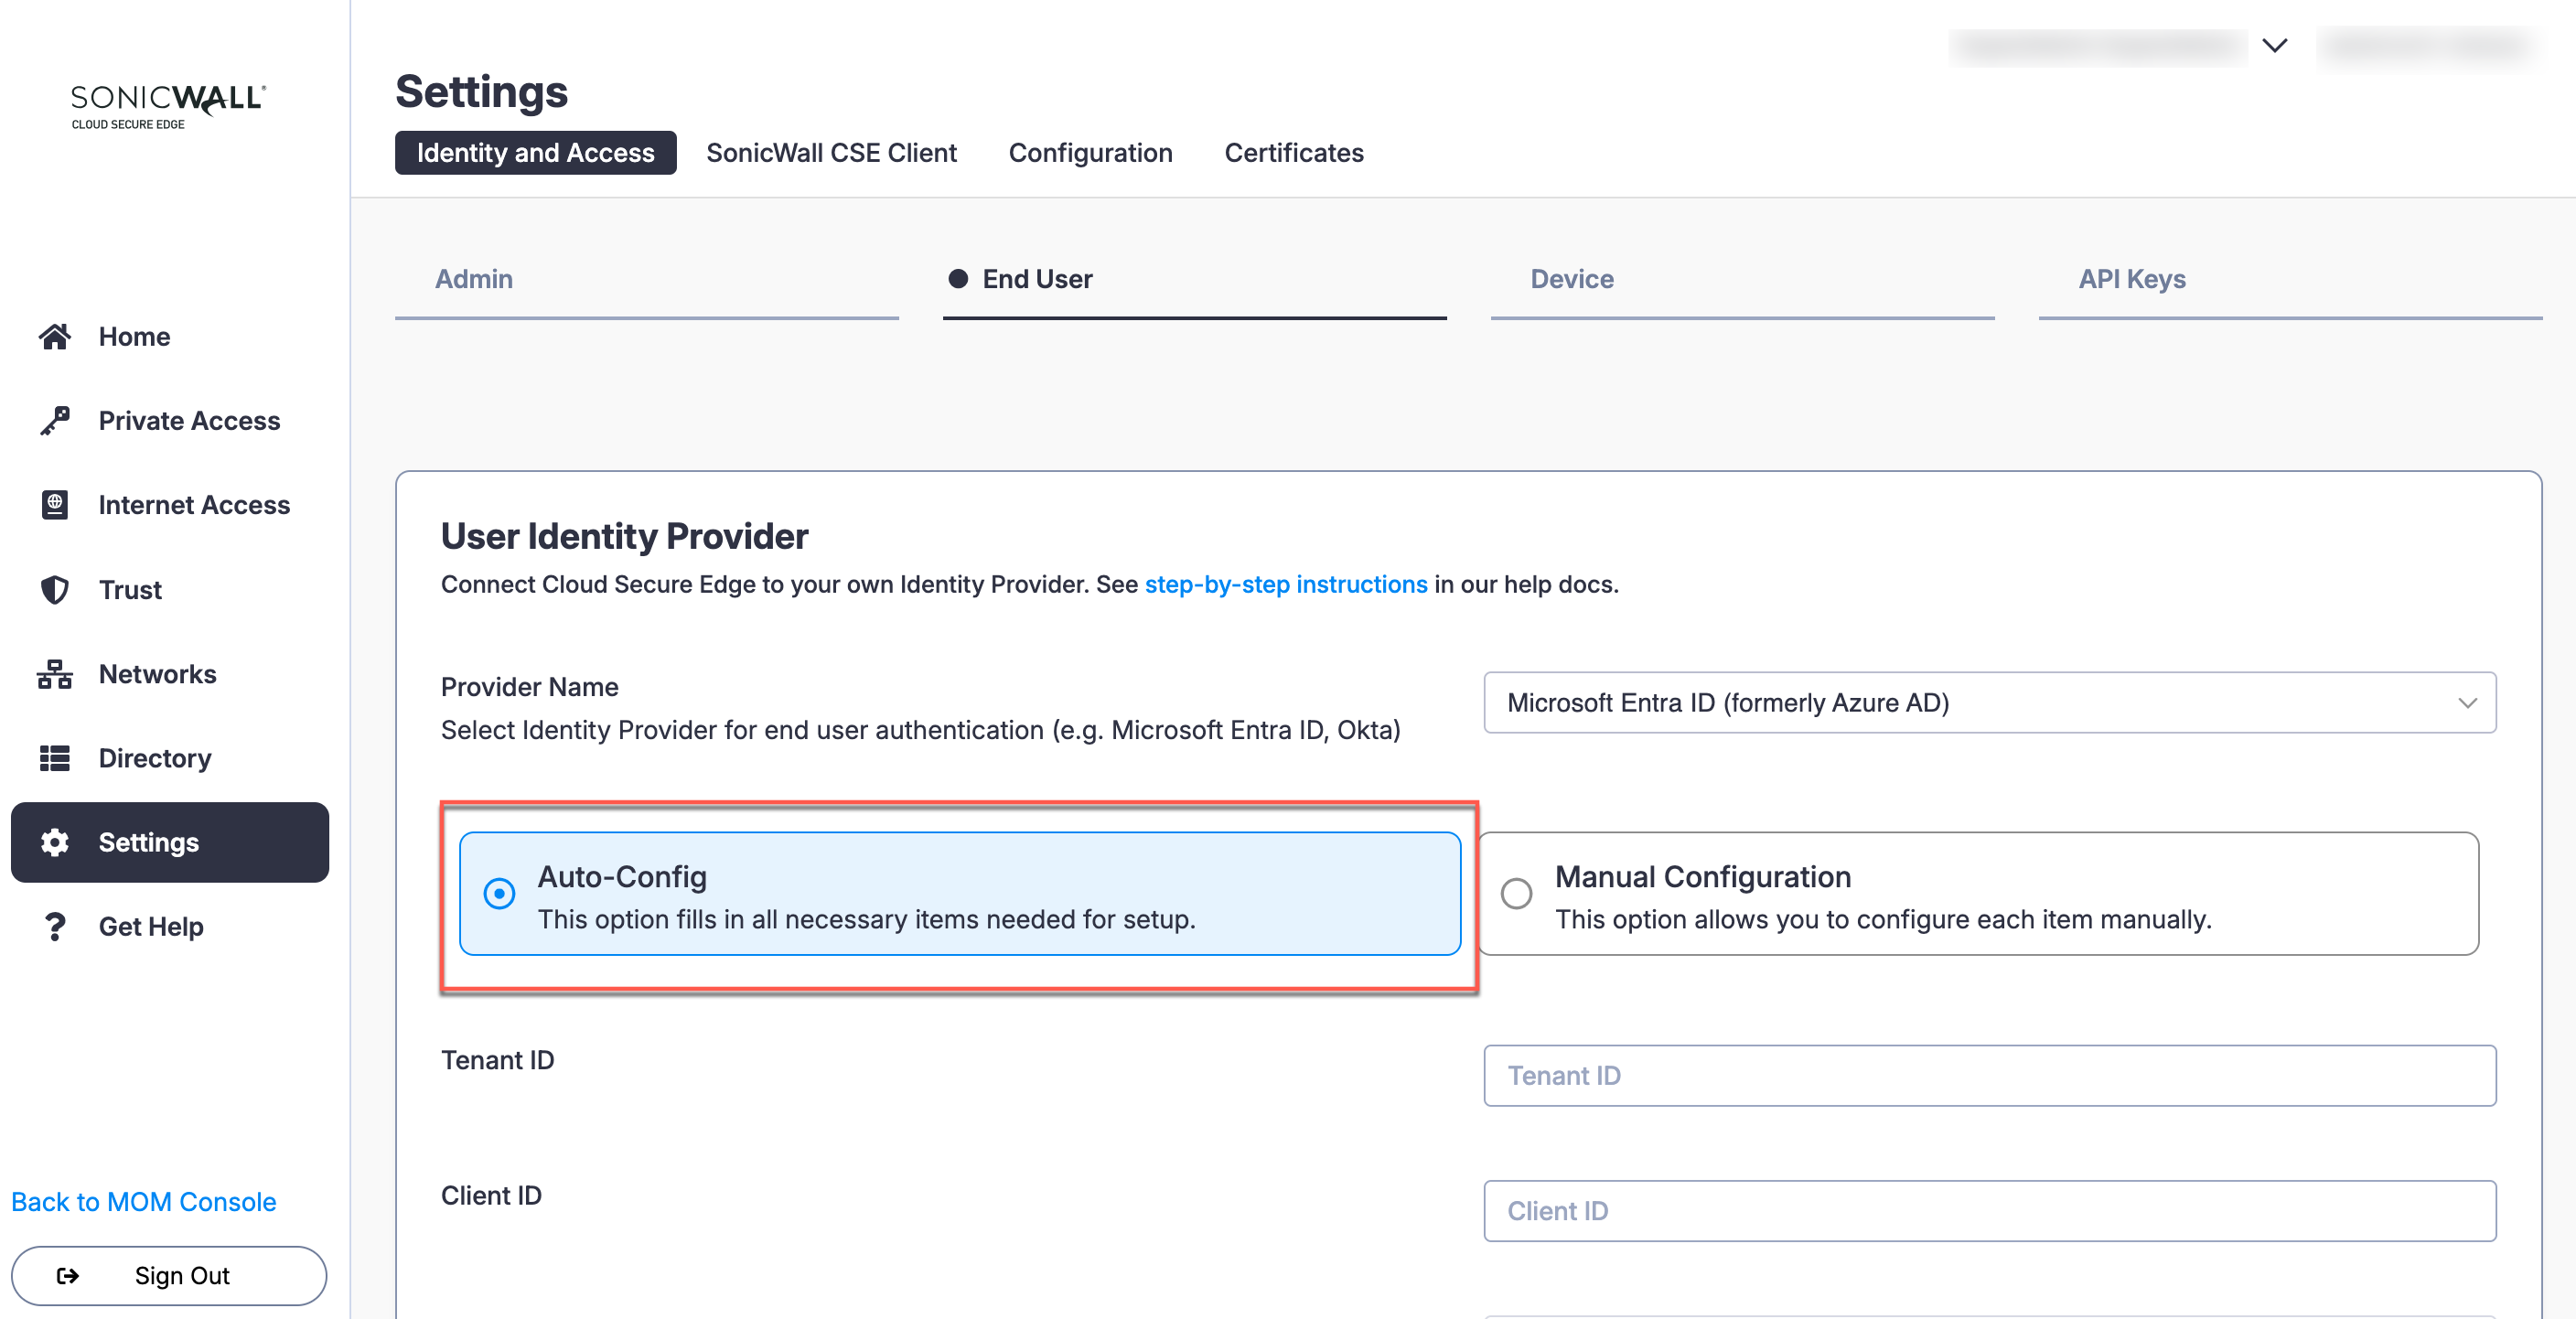
1.1 In the CSE Command Center, navigate from Settings > Identity and Access > End User.
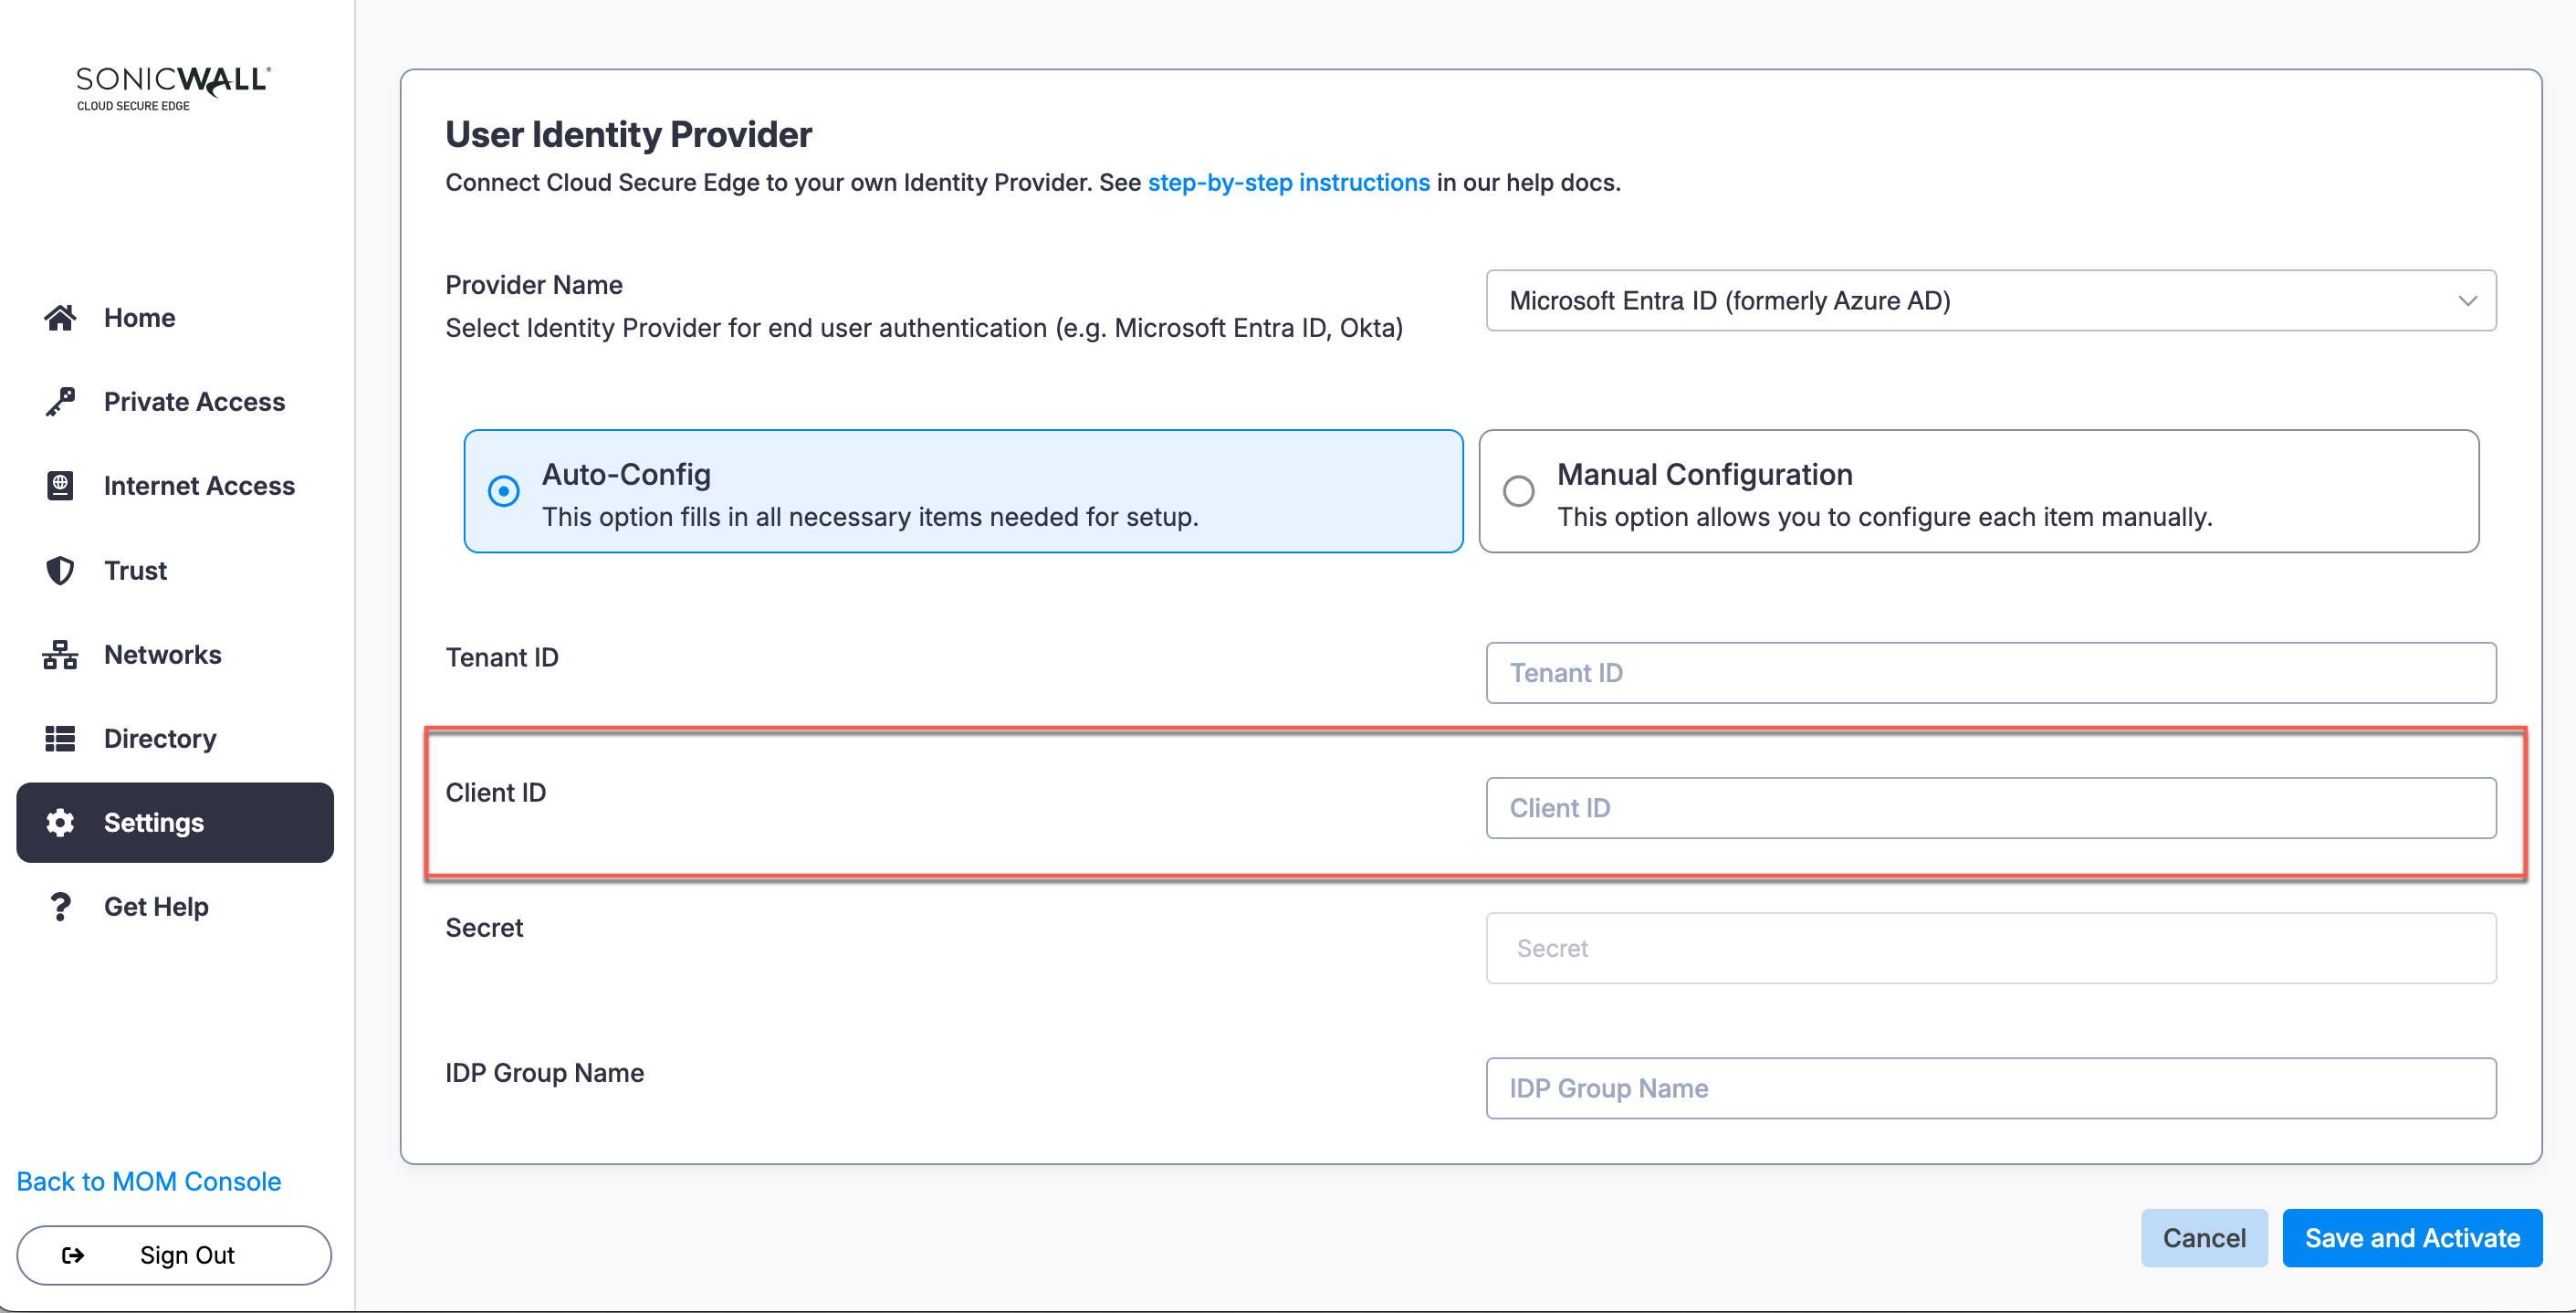
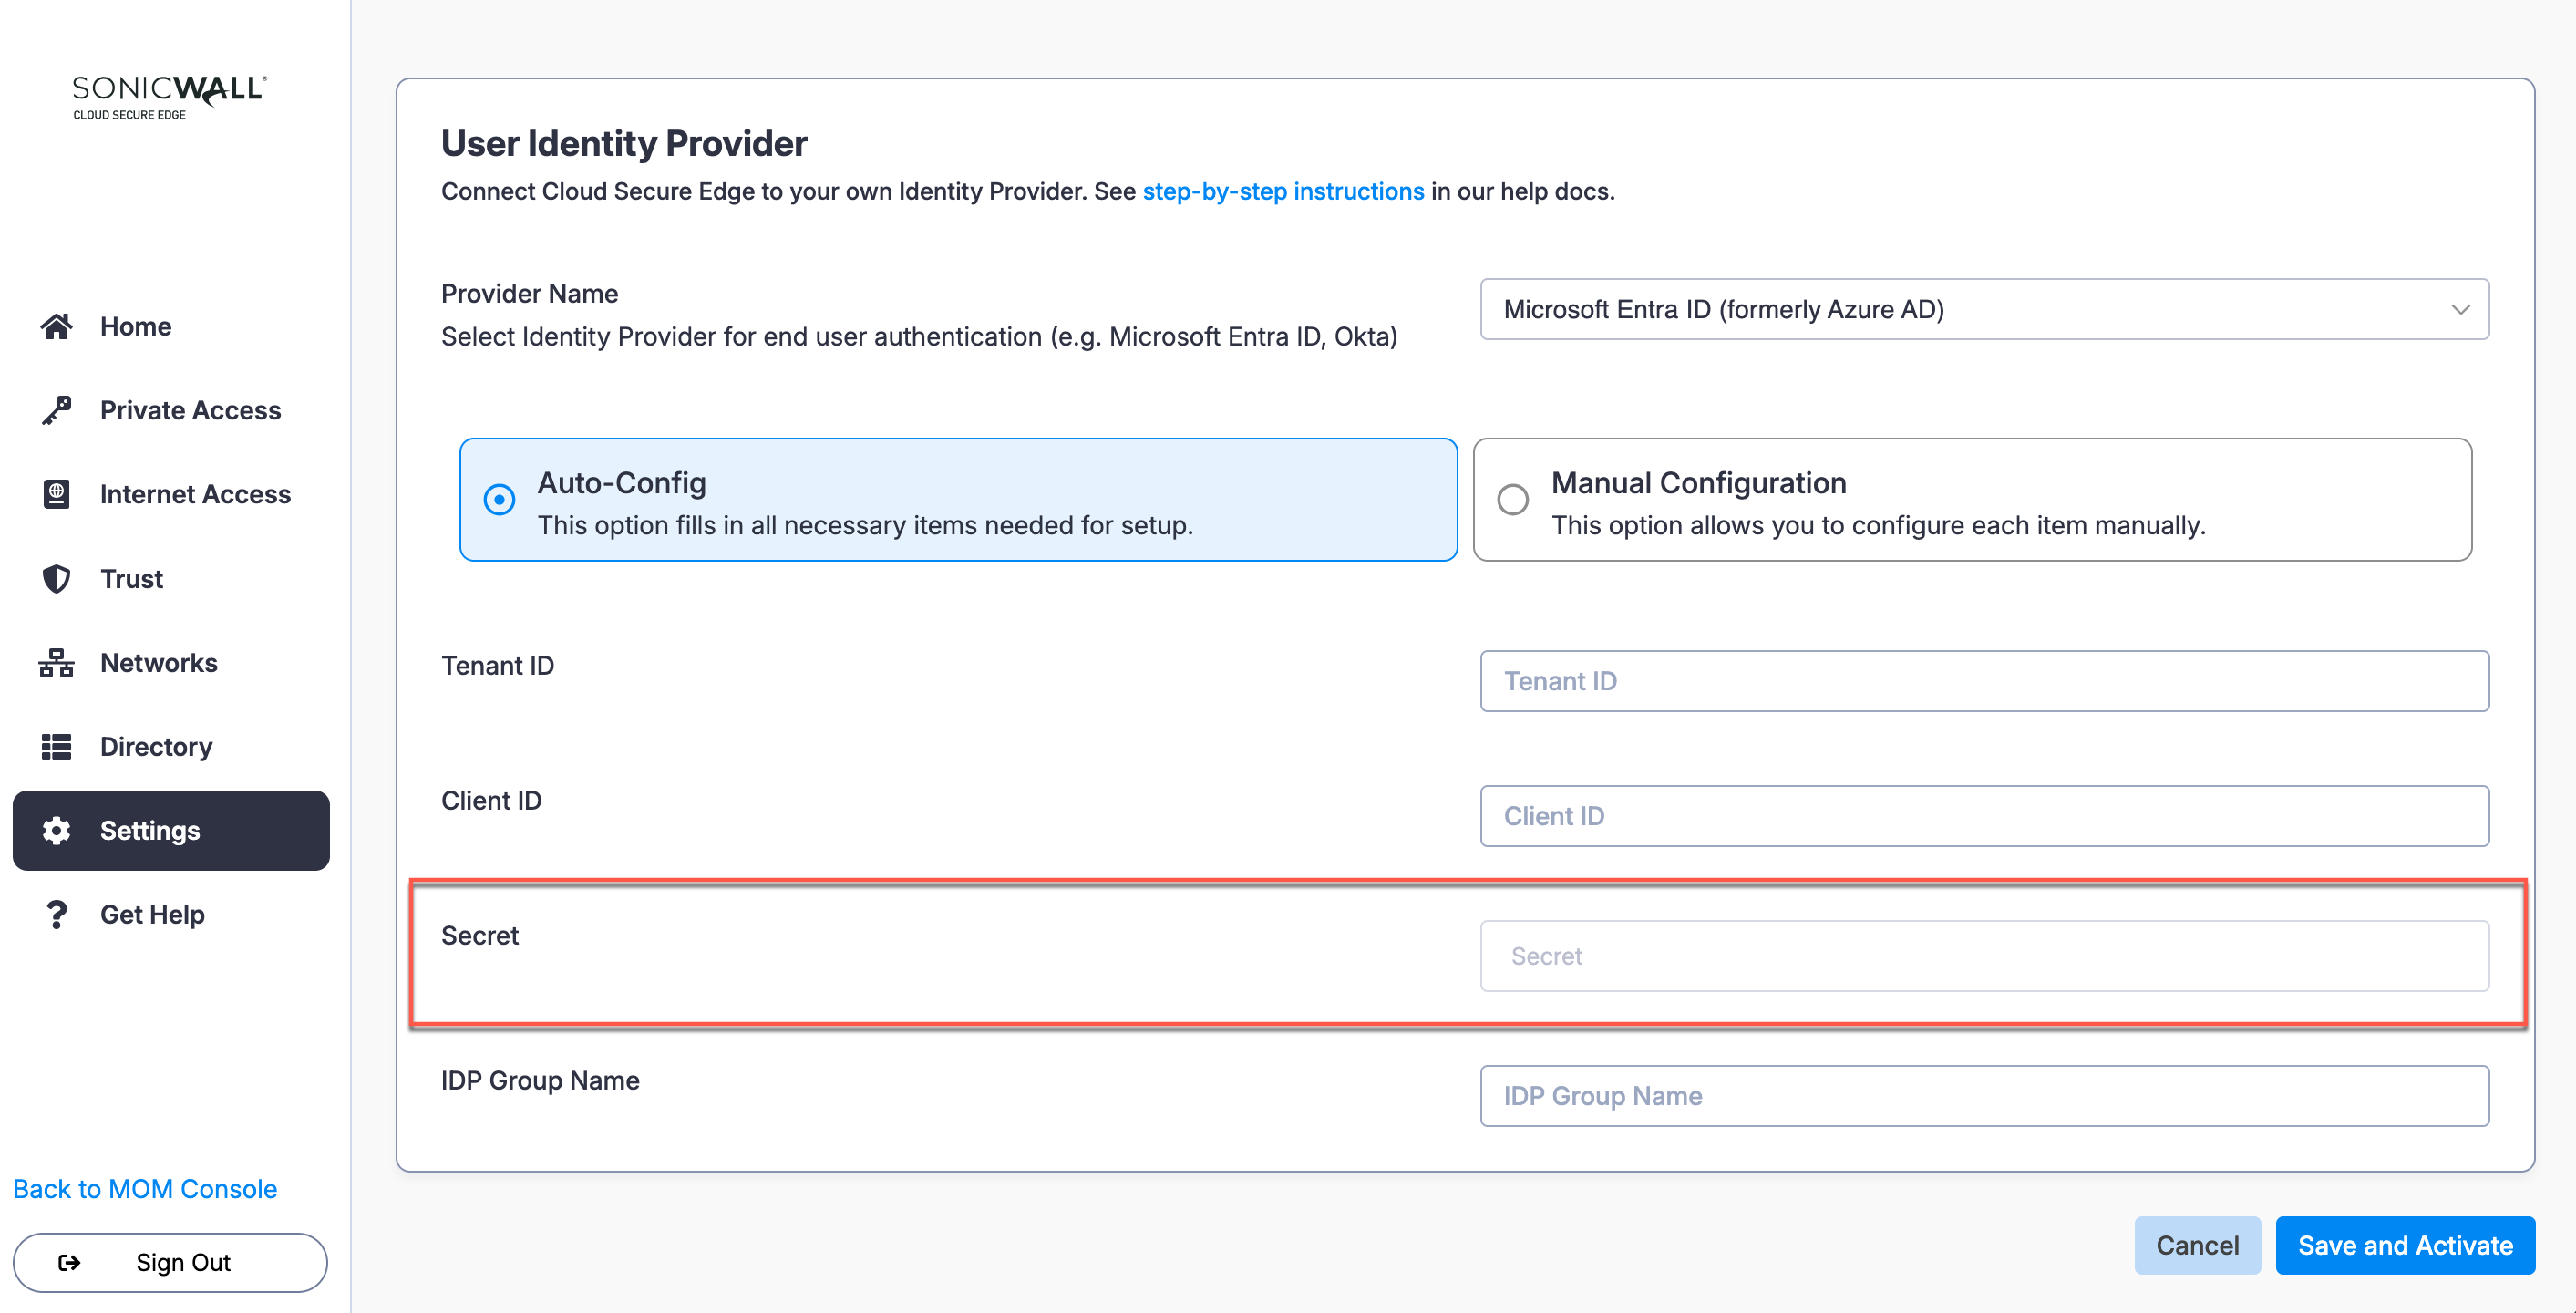
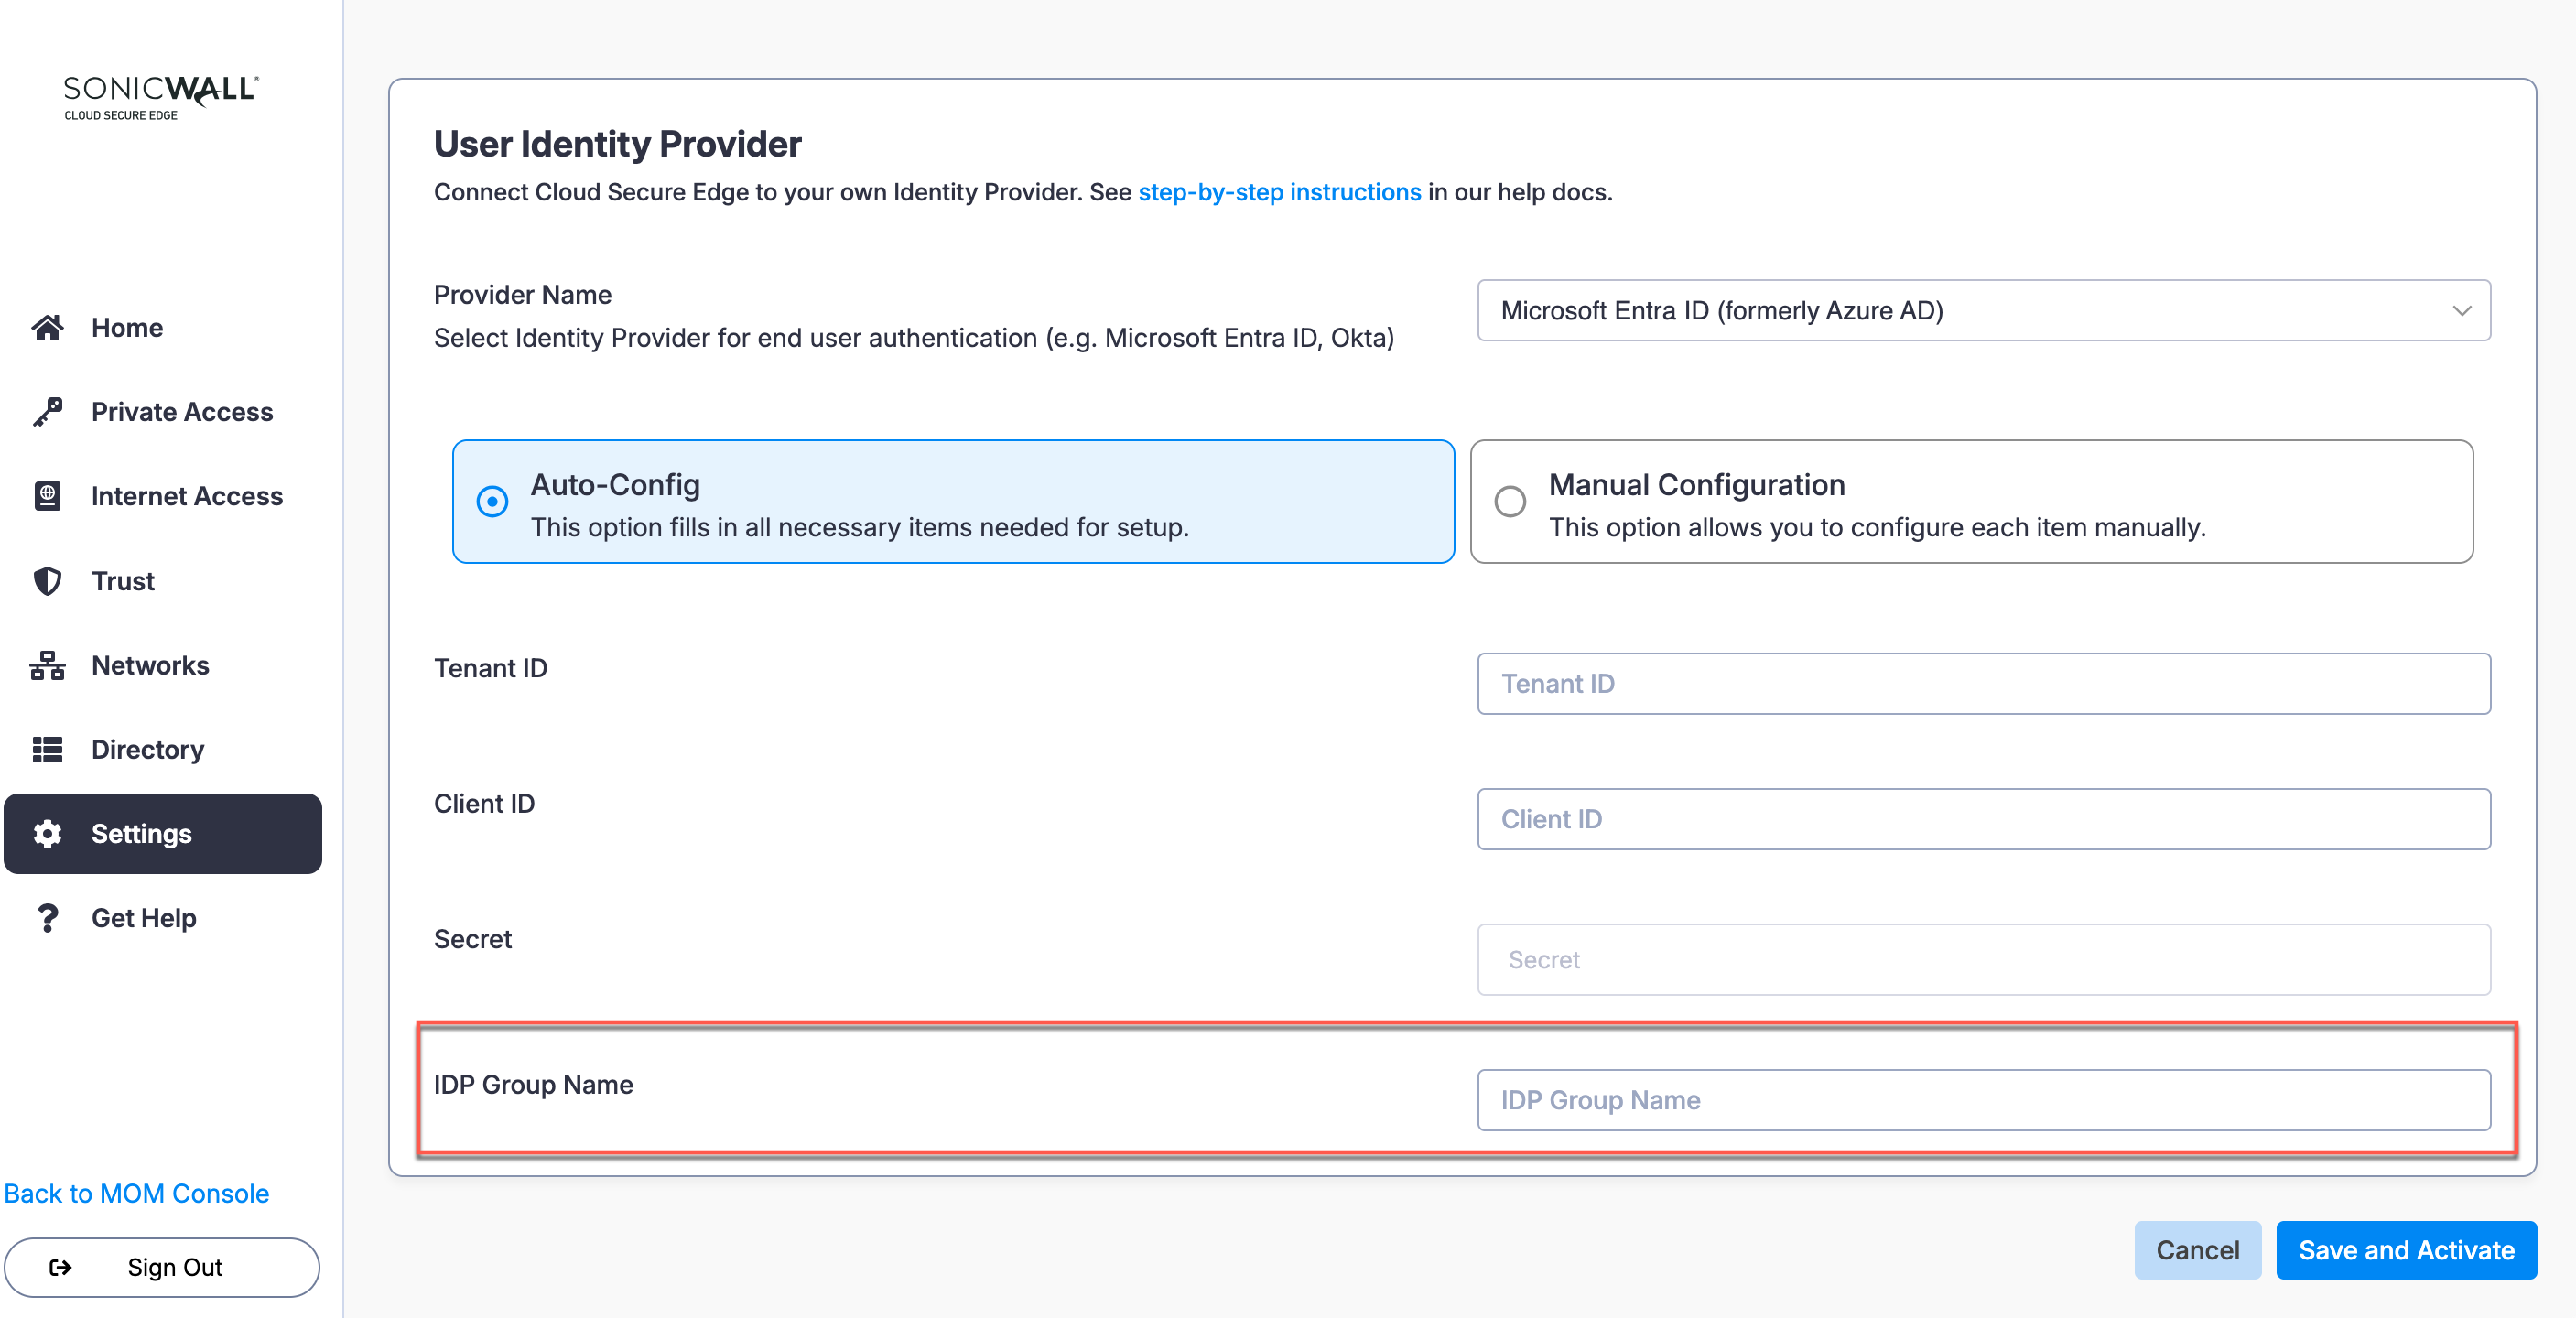
1.2 Under Provider Name, select Microsoft Entra ID (formerly Azure AD).
1.3 Select the Auto-Config option.
Note: If you want to set up Entra ID using the Manual Configuration option, see this doc.
Step 2: Fetch API Auto-Config Details from your Microsoft Azure Portal to complete CSE IdP Config
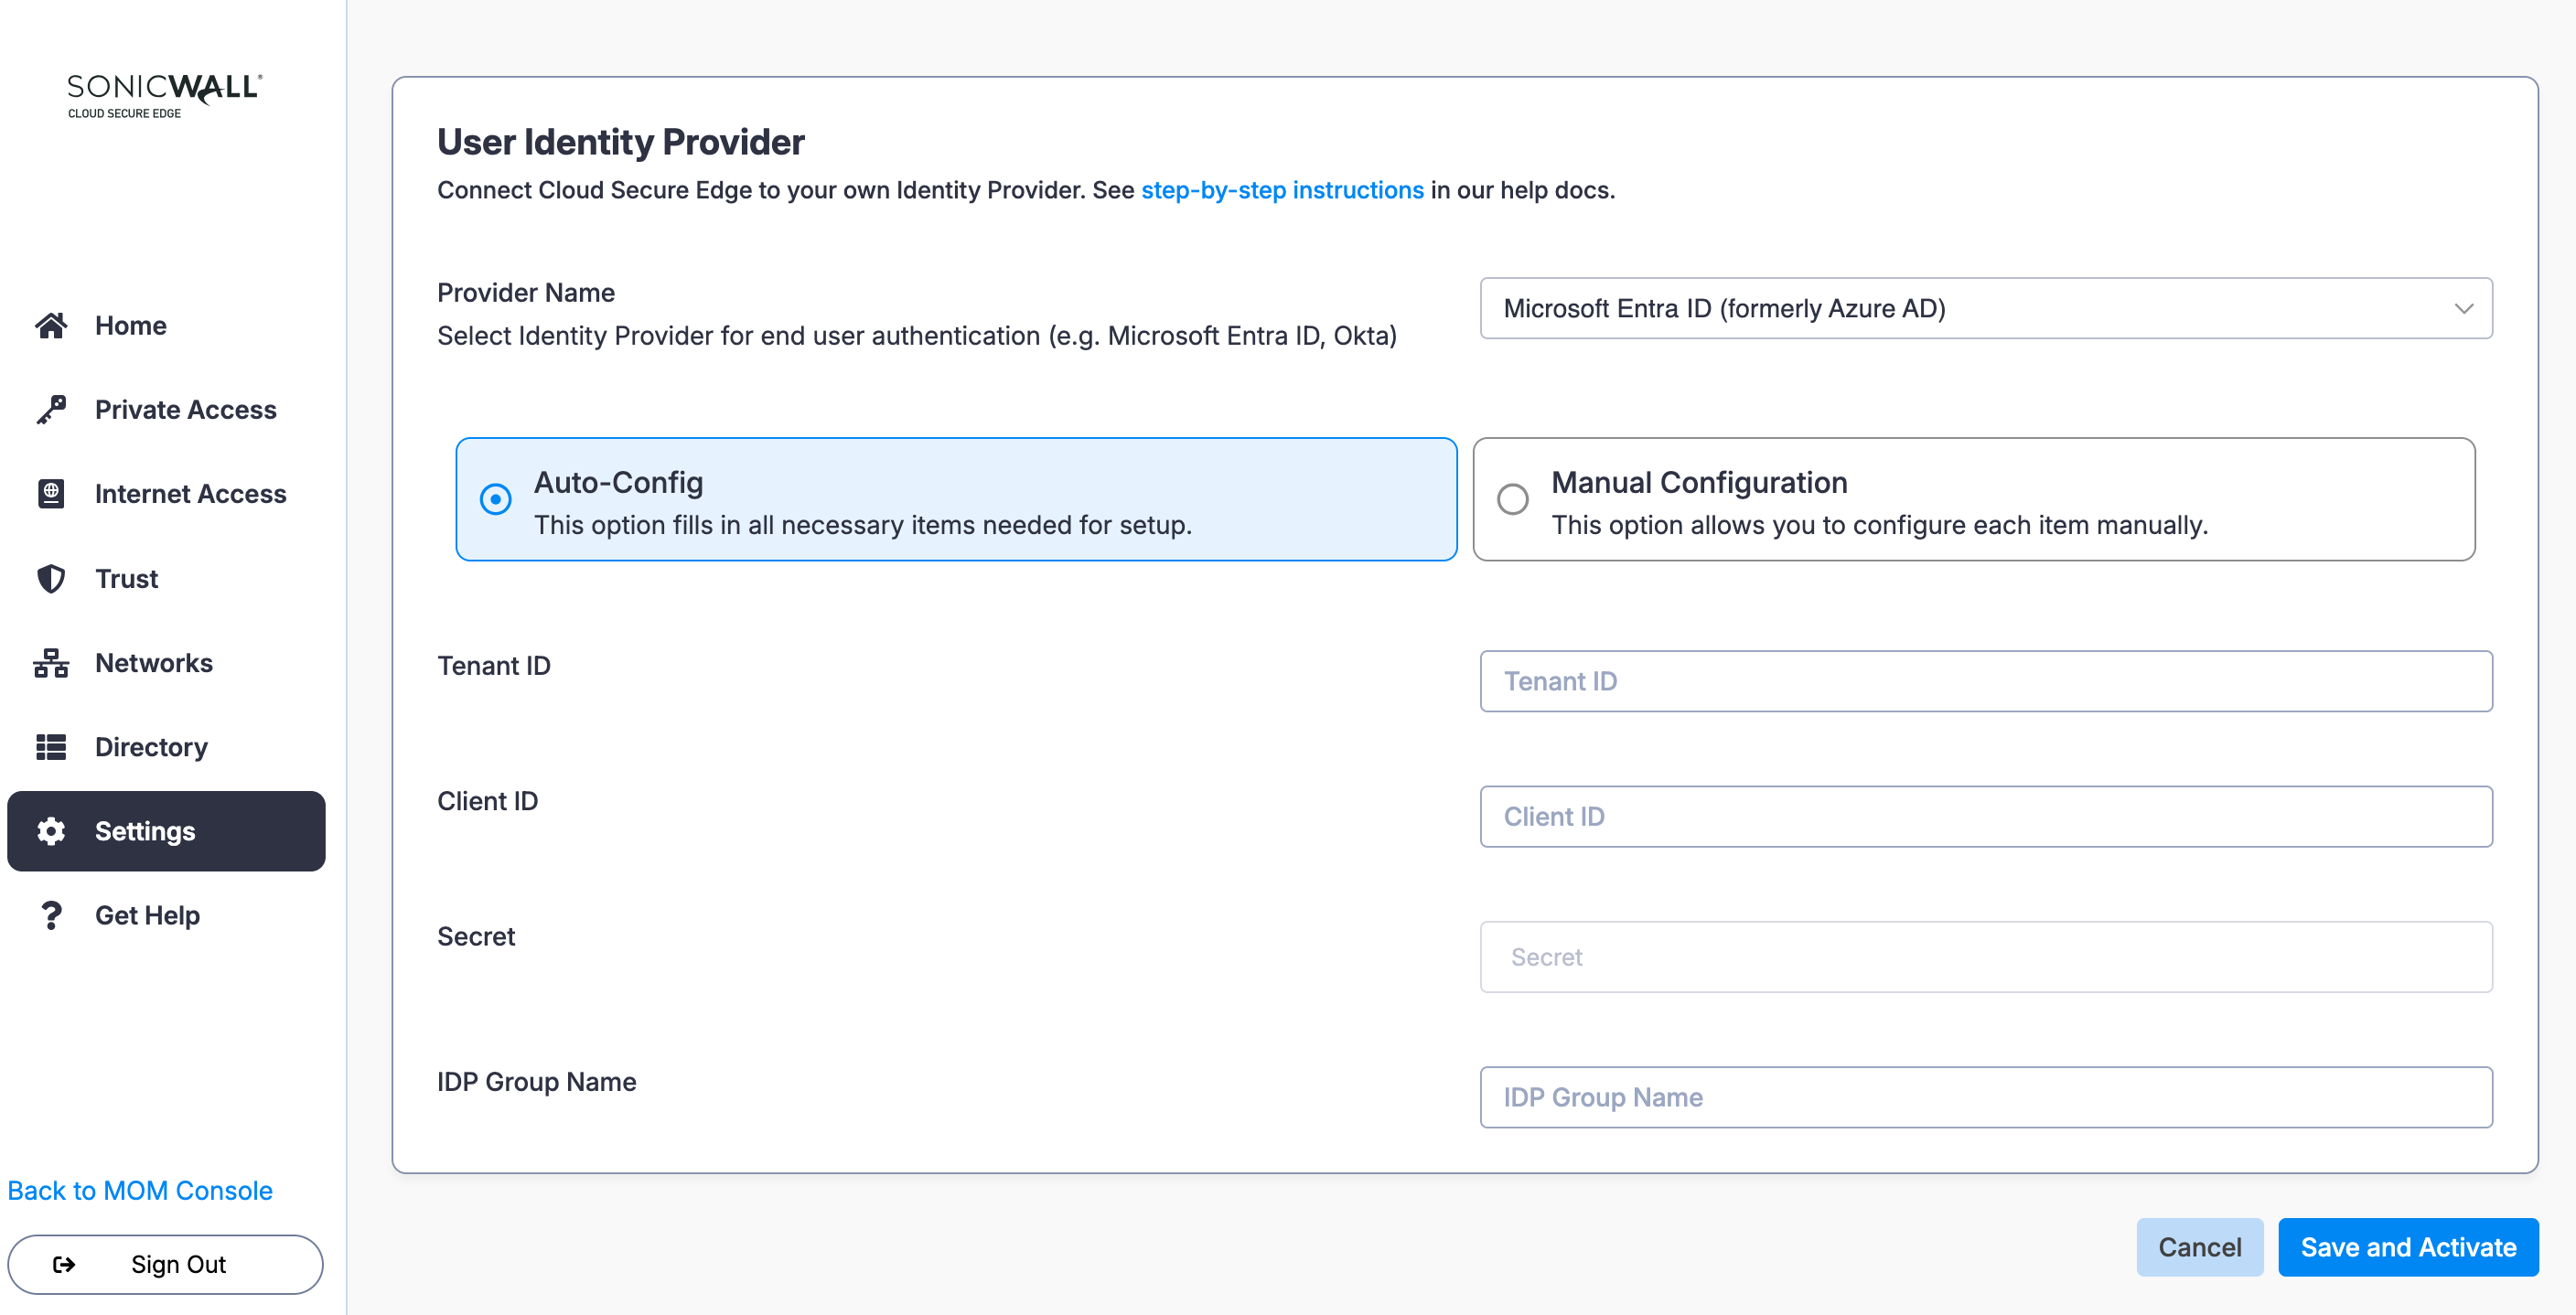
Configure CSE Tenant ID
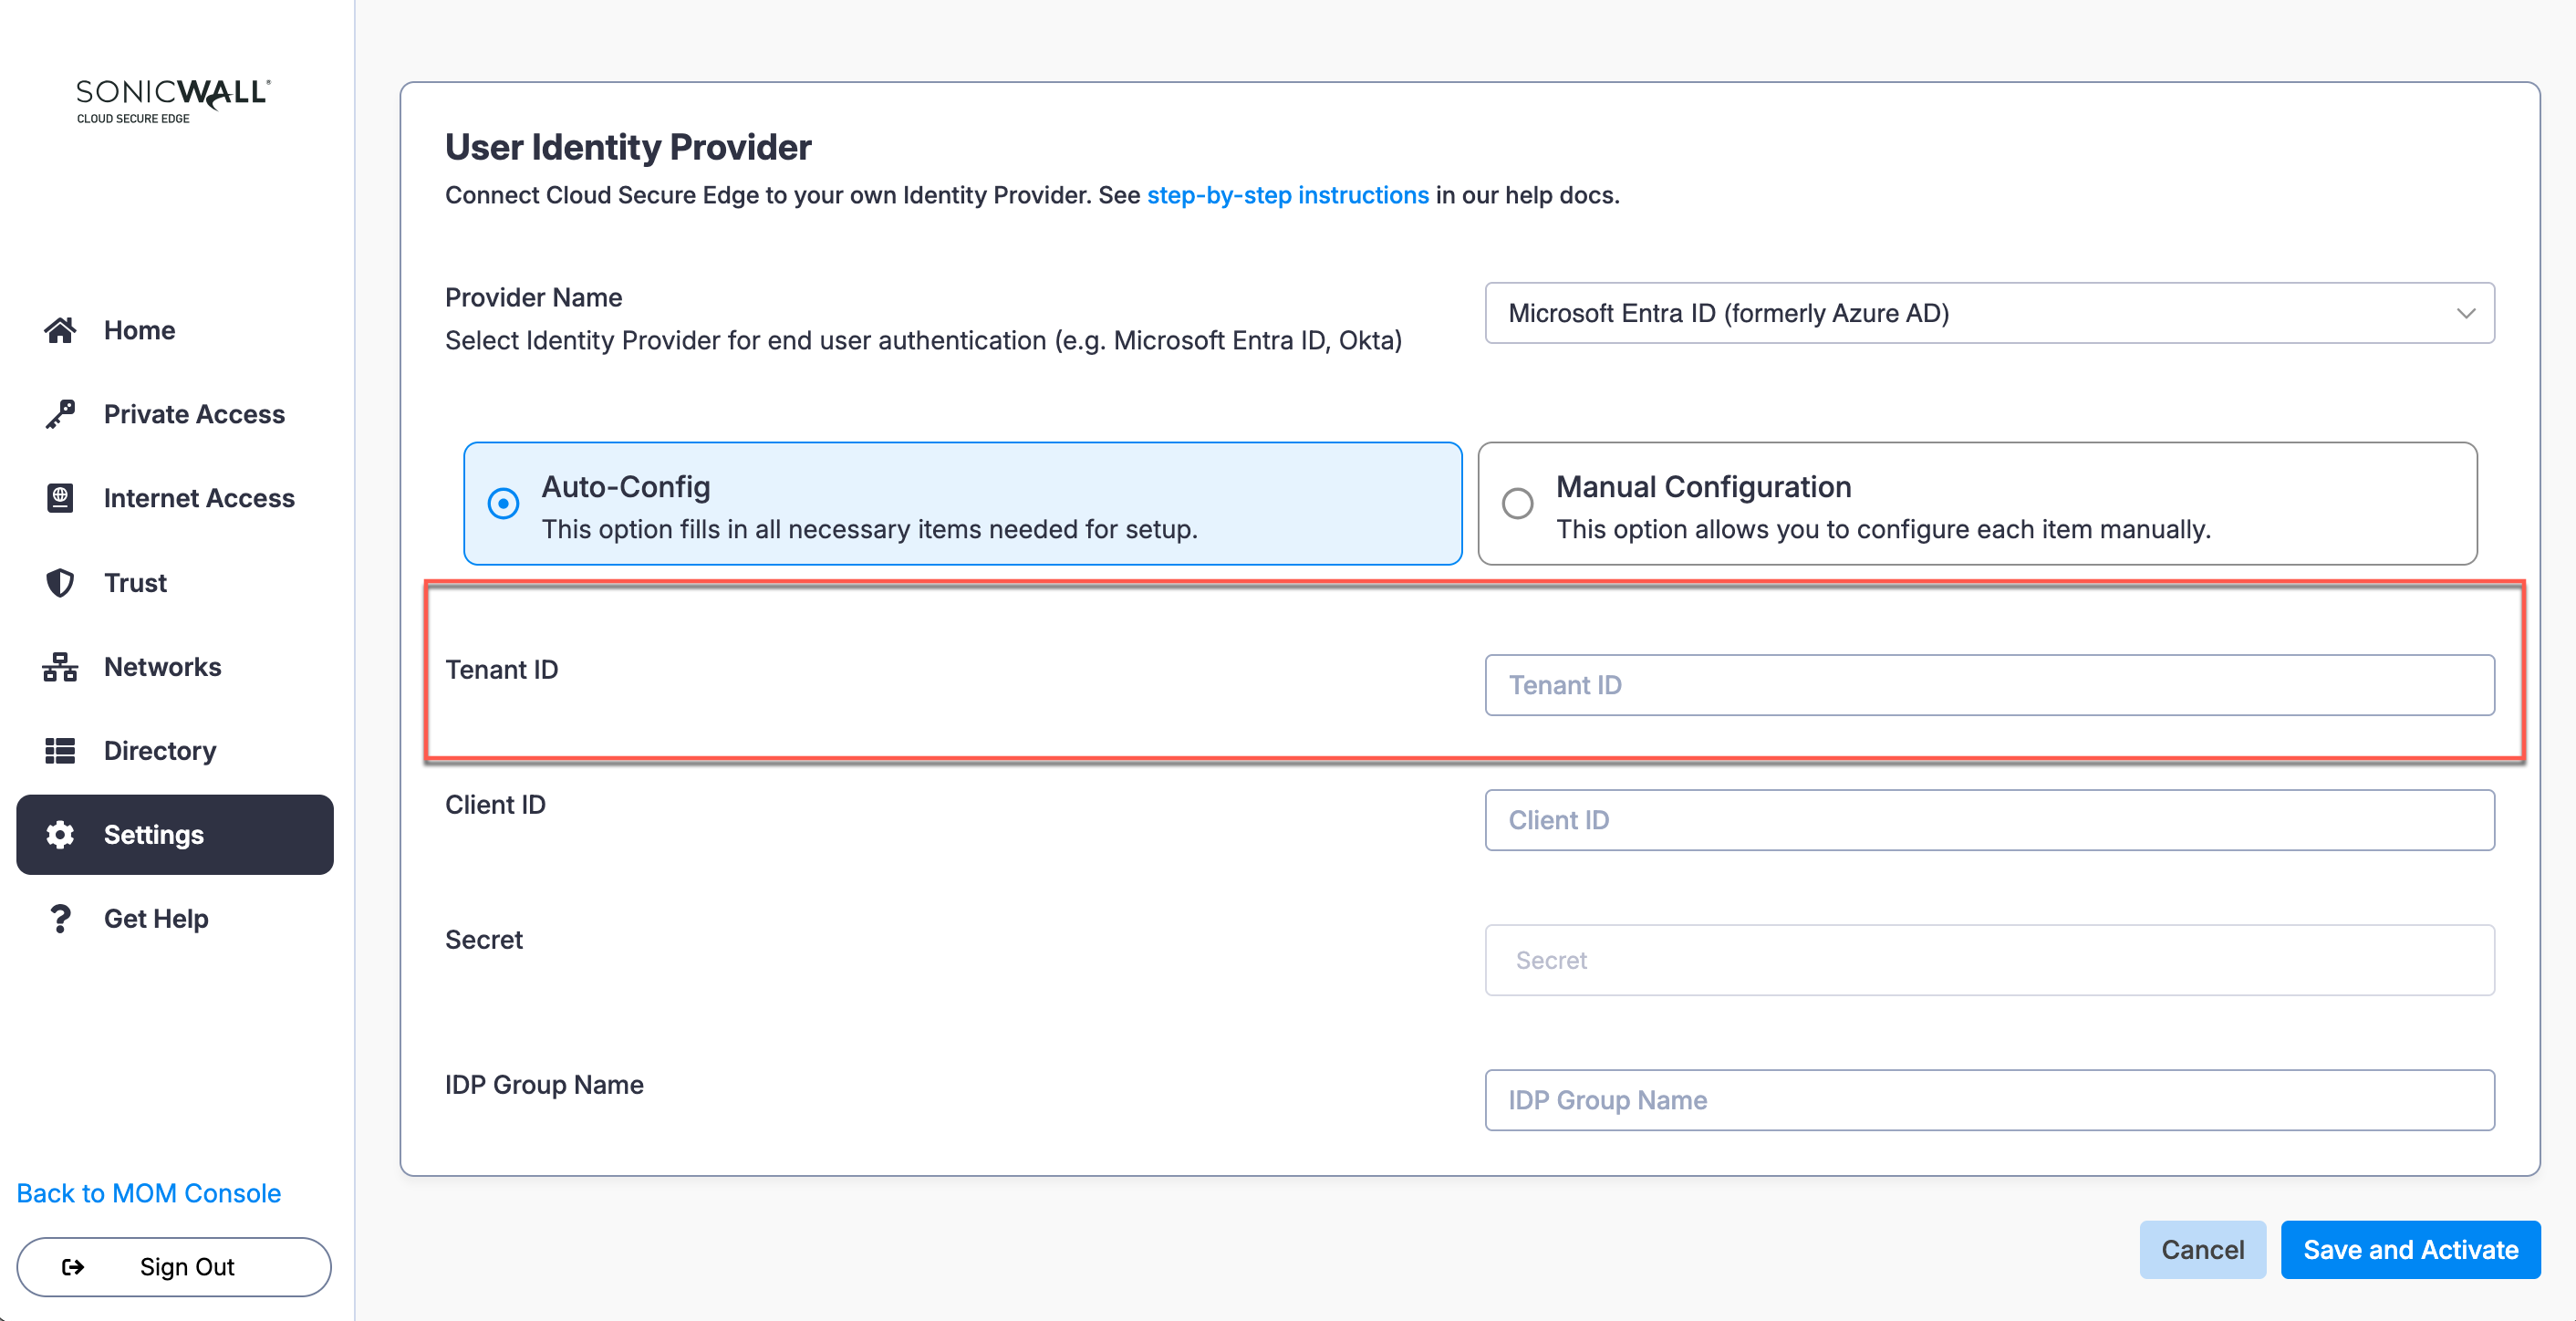
The Tenant ID is the unique identifier for your Entra ID instance.
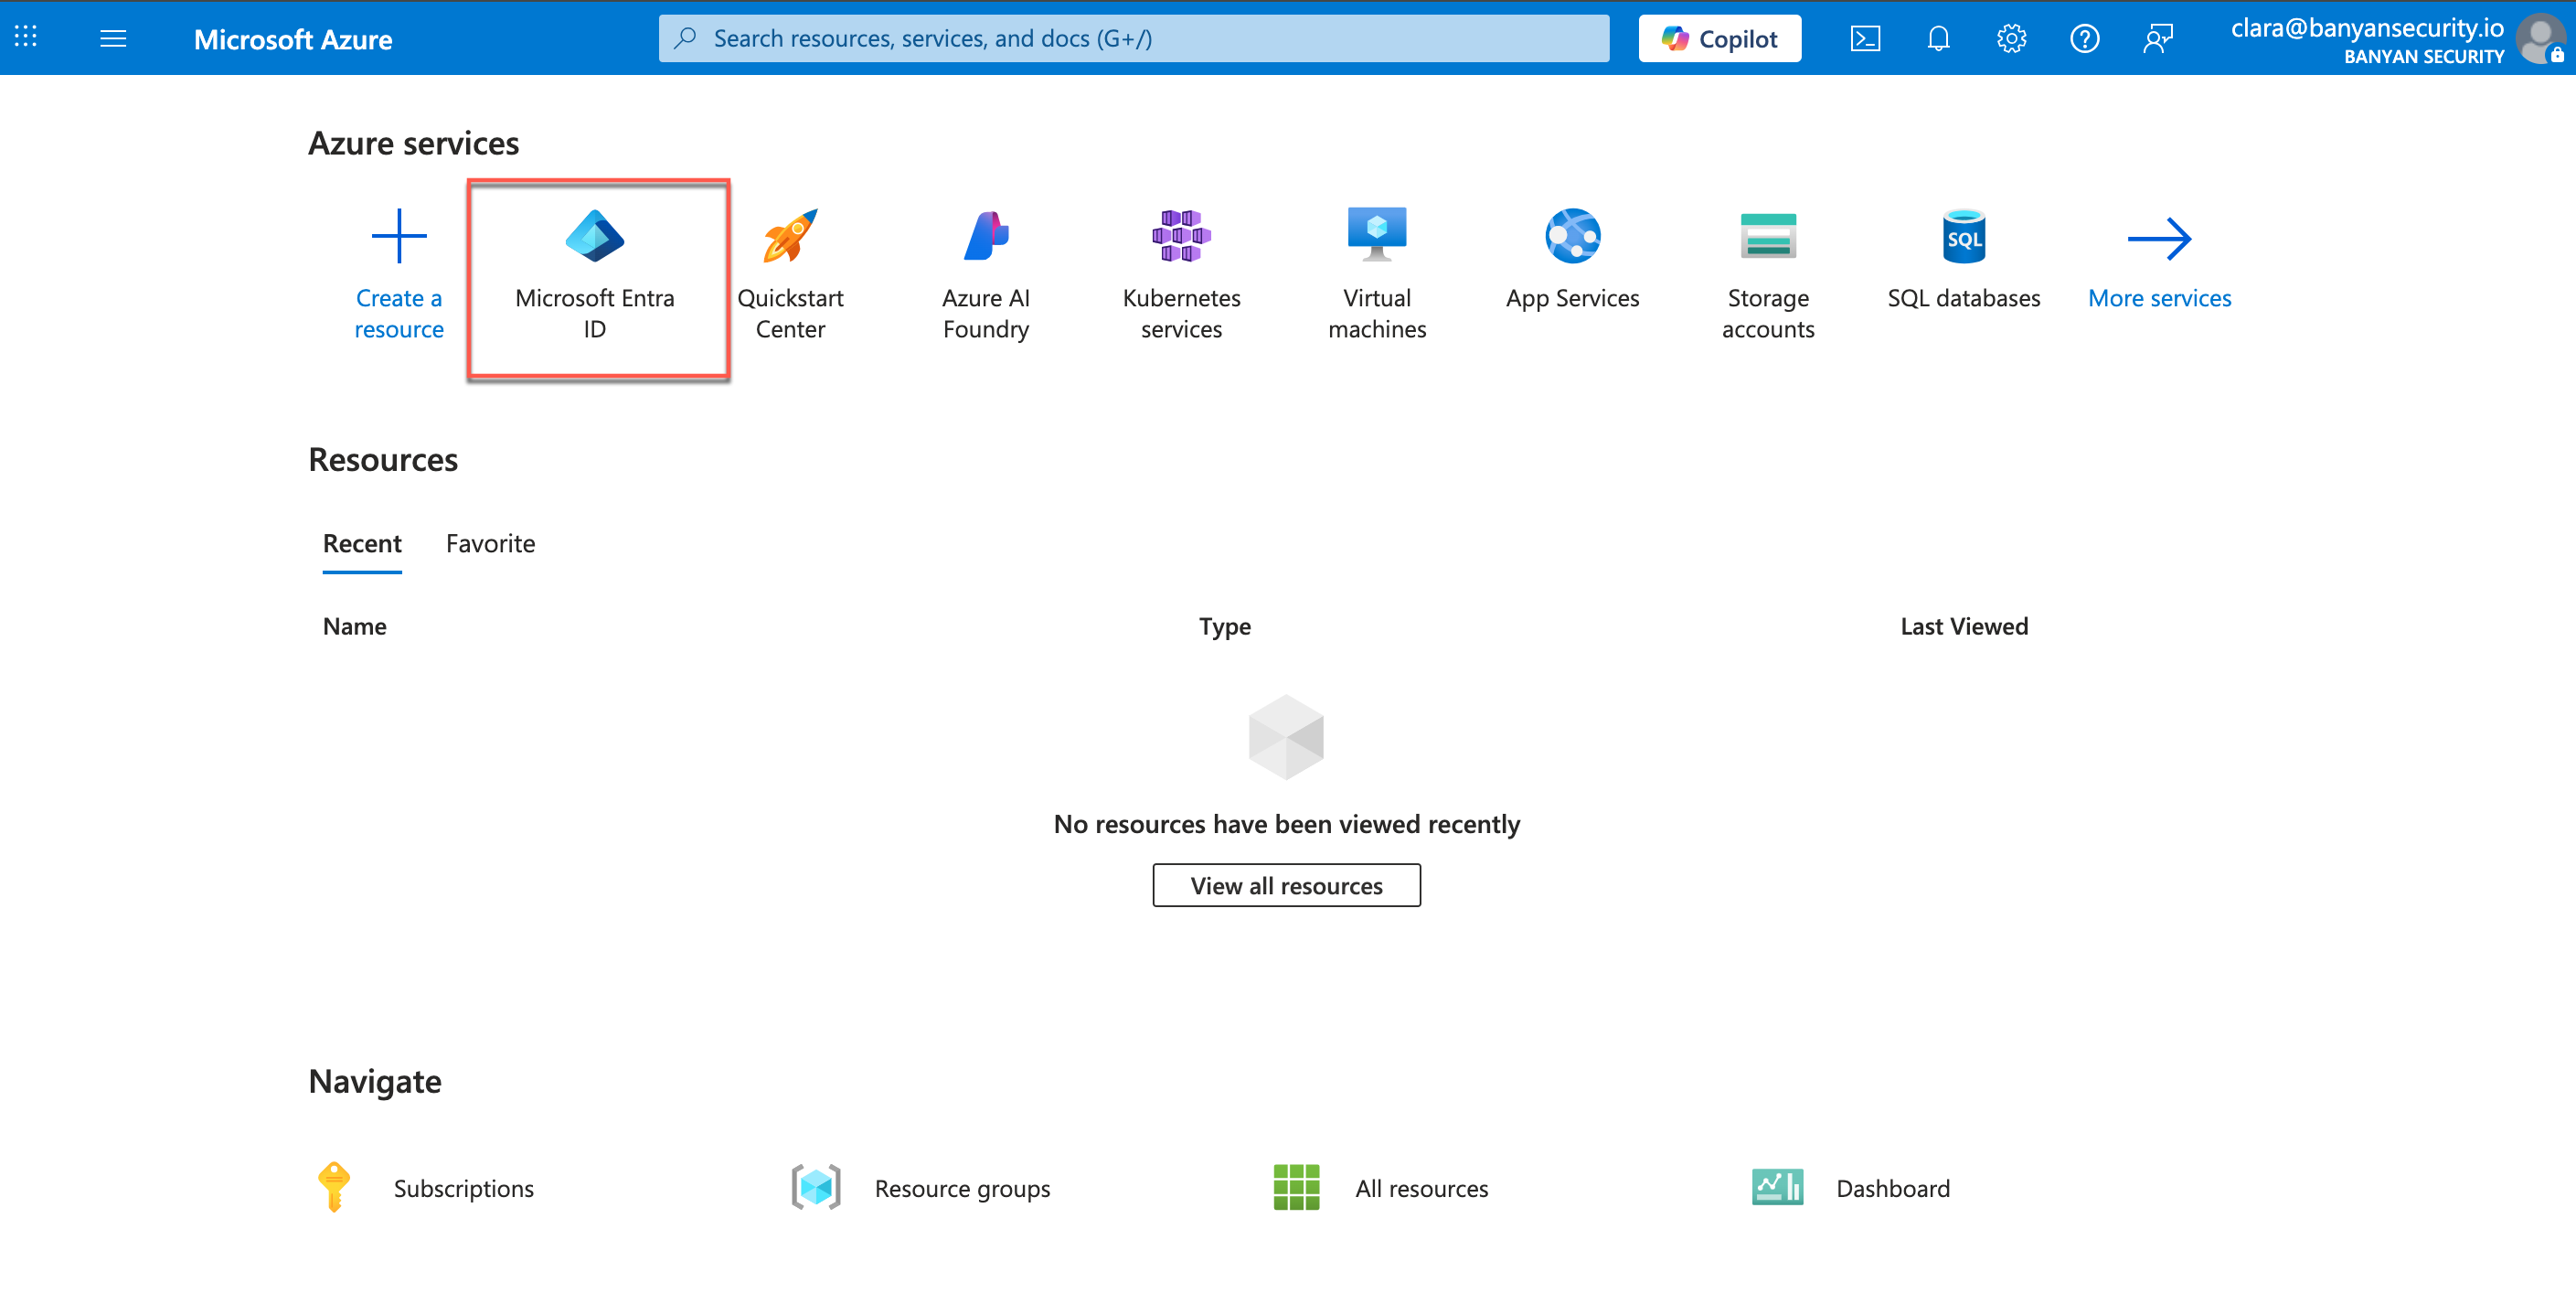
2.1 Navigate from Microsoft Azure Portal > Microsoft Entra ID. Copy the Tenant ID, and paste it into the Tenant ID field in CSE.

Configure Client ID
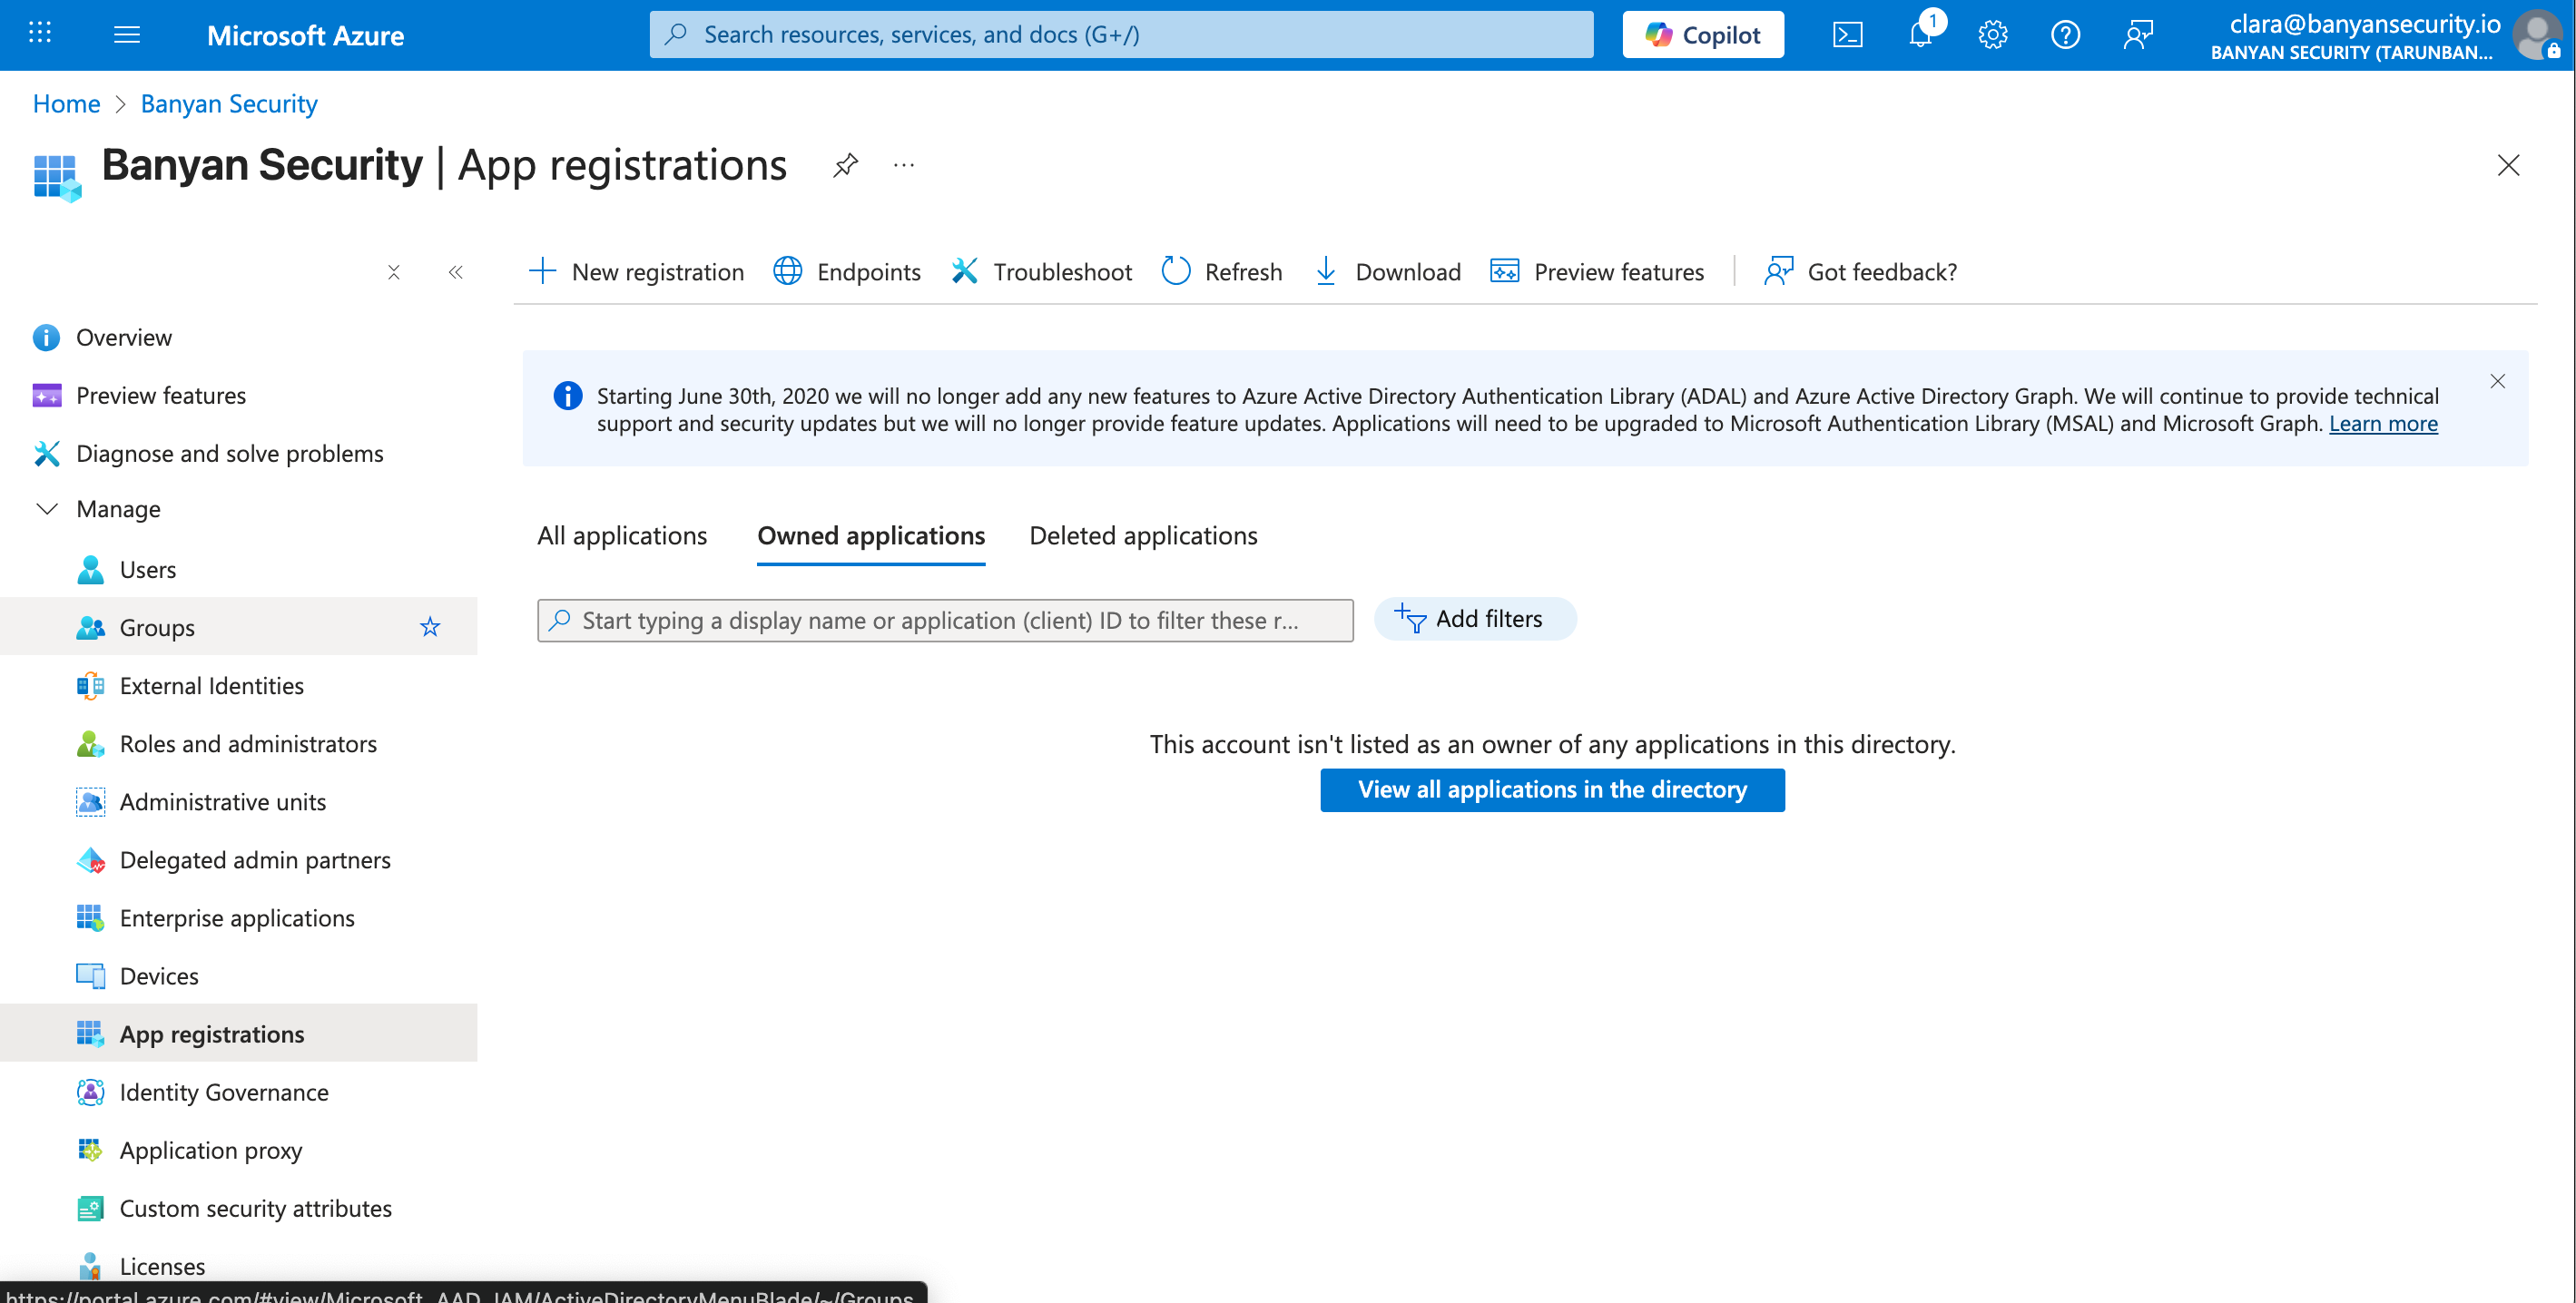
2.2 Navigate from App registrations > + New registration.
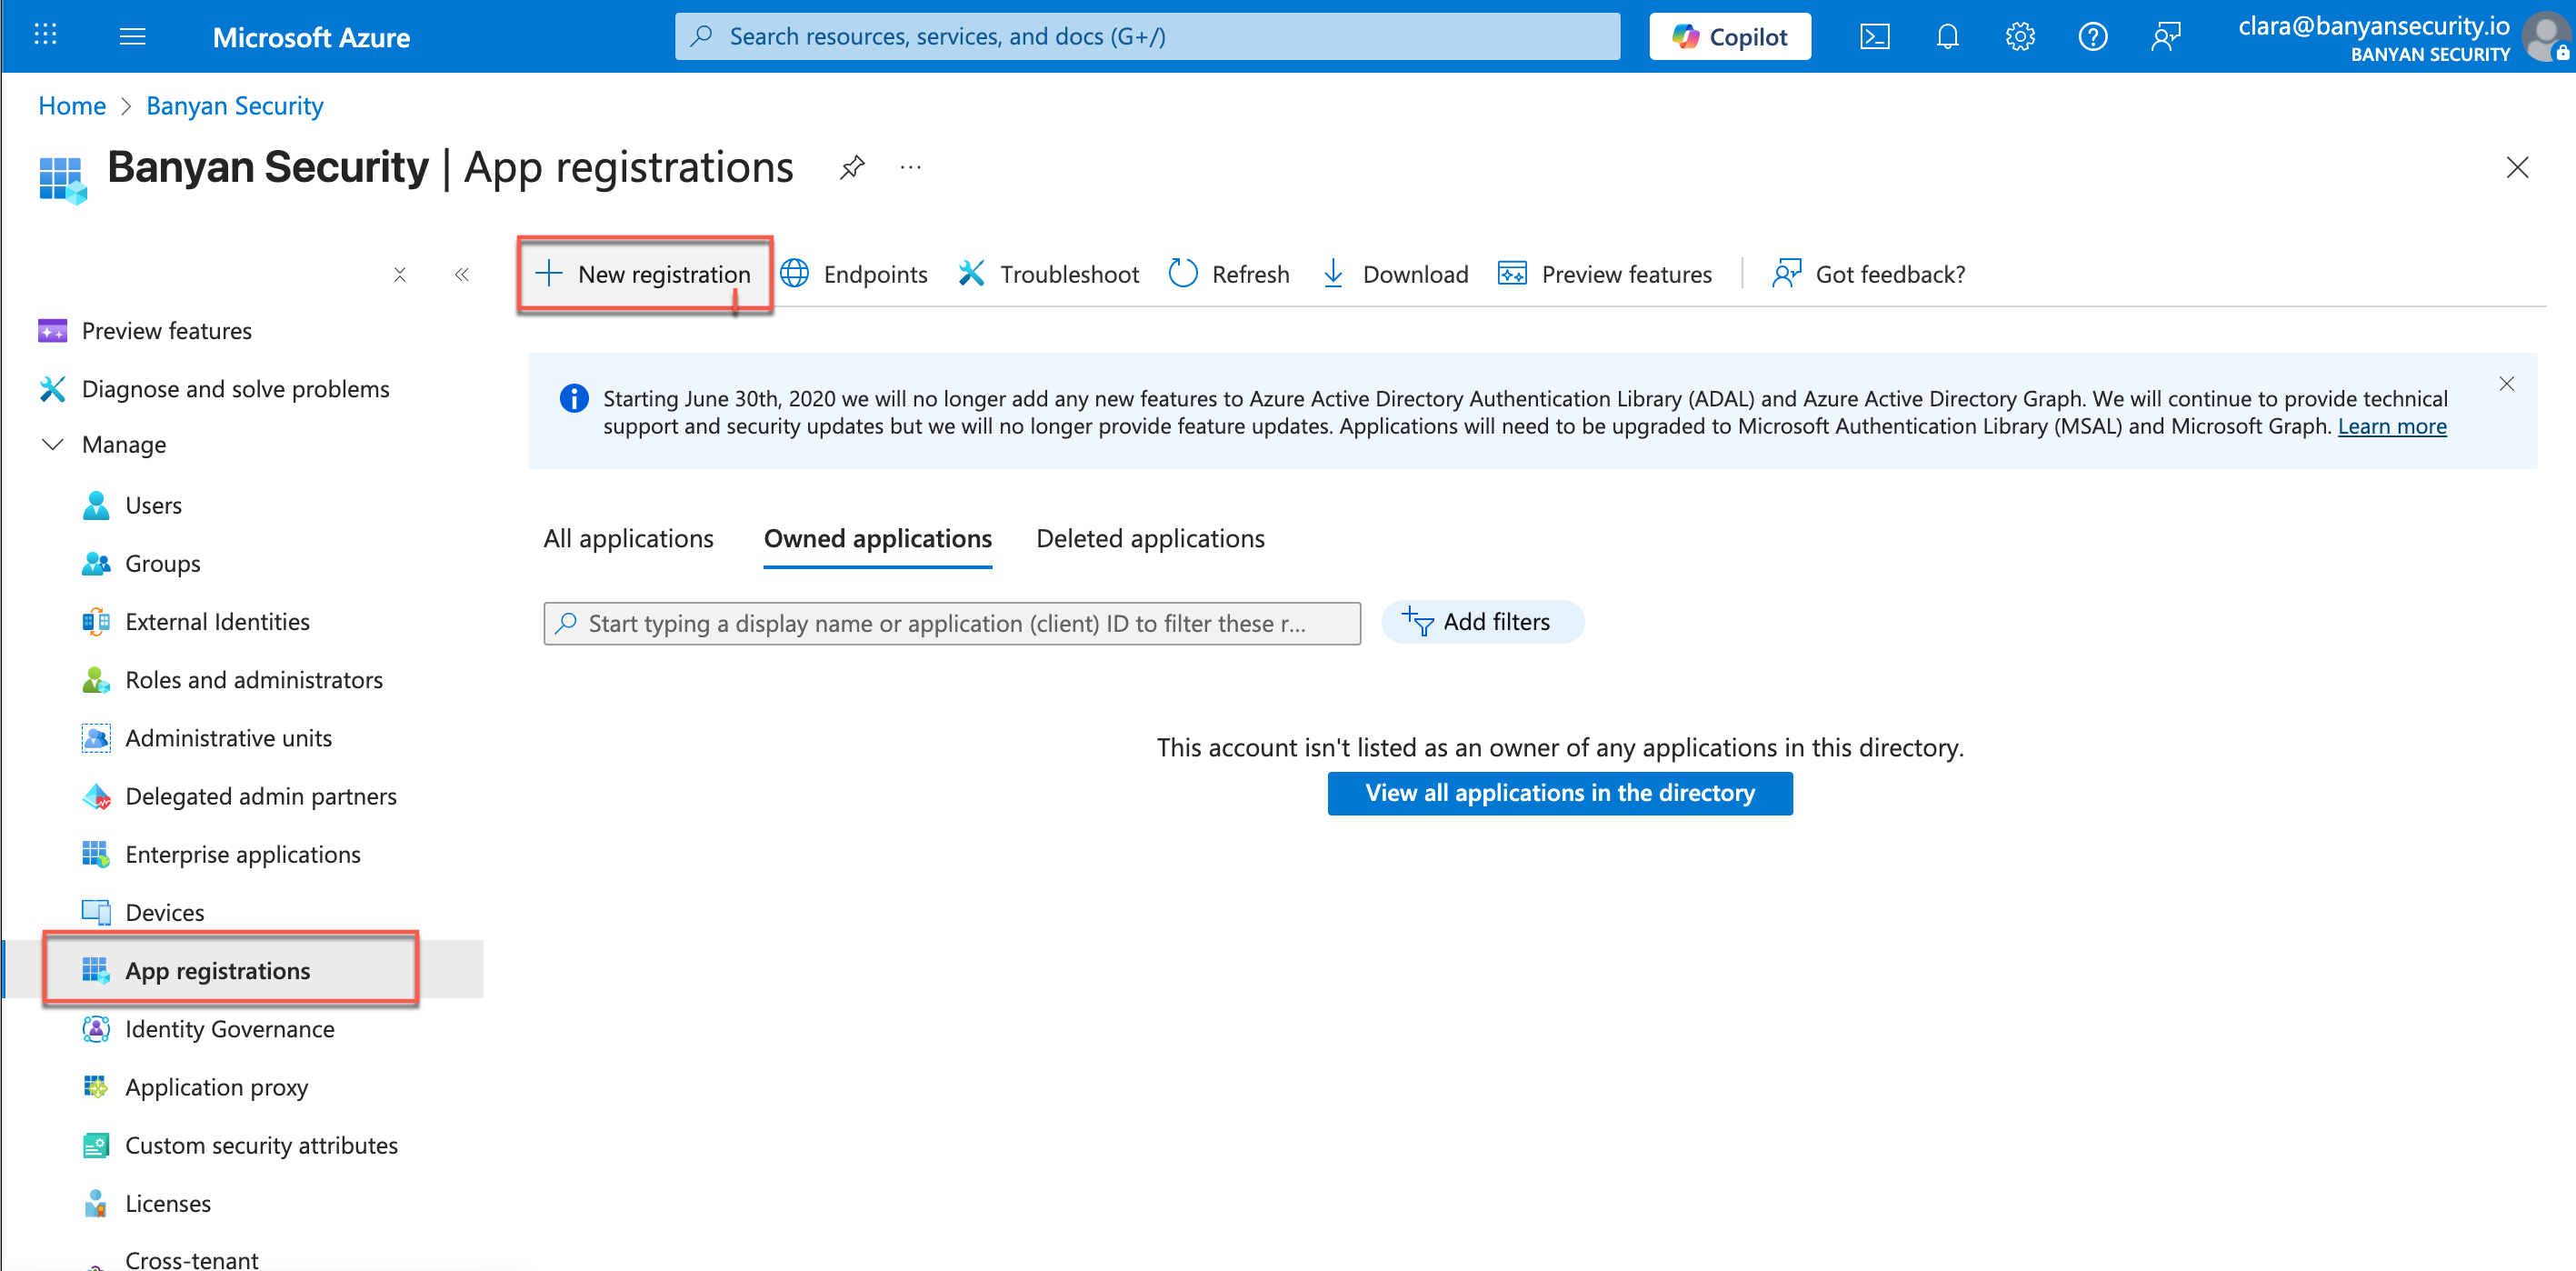
2.3 Enter a Name for your app (i.e., CSE API Auto Config).
2.4 Under Supported account types, select the single tenant access option.
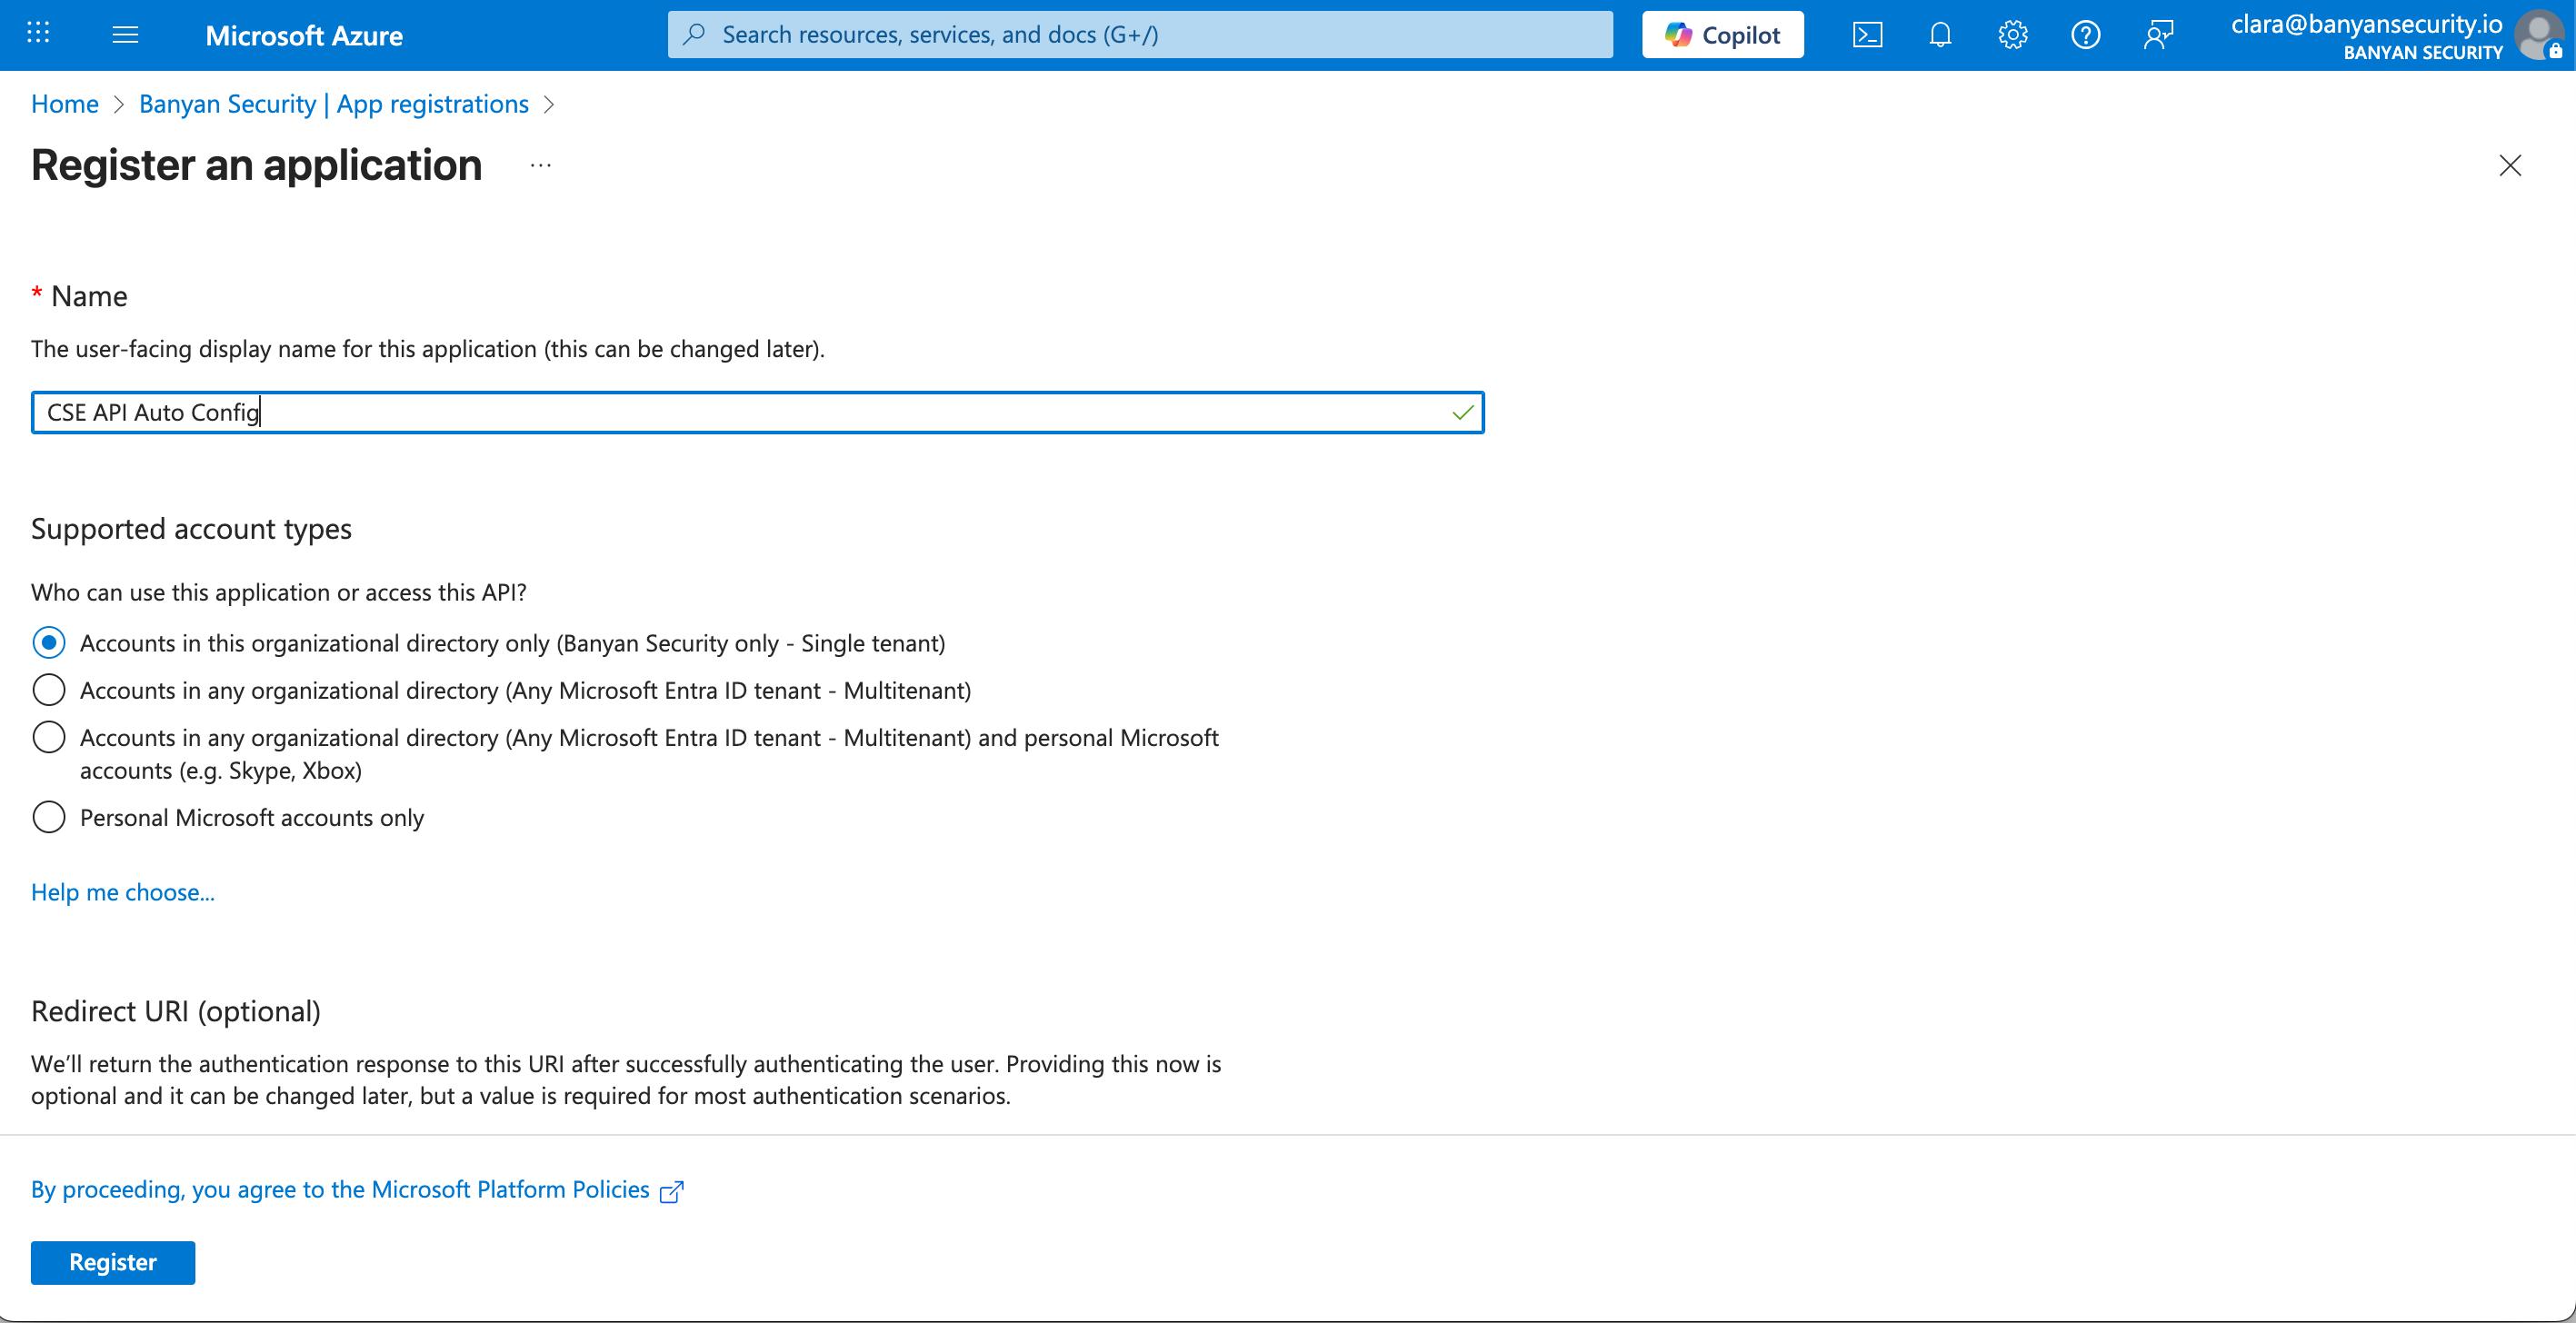
2.5 Select Register.
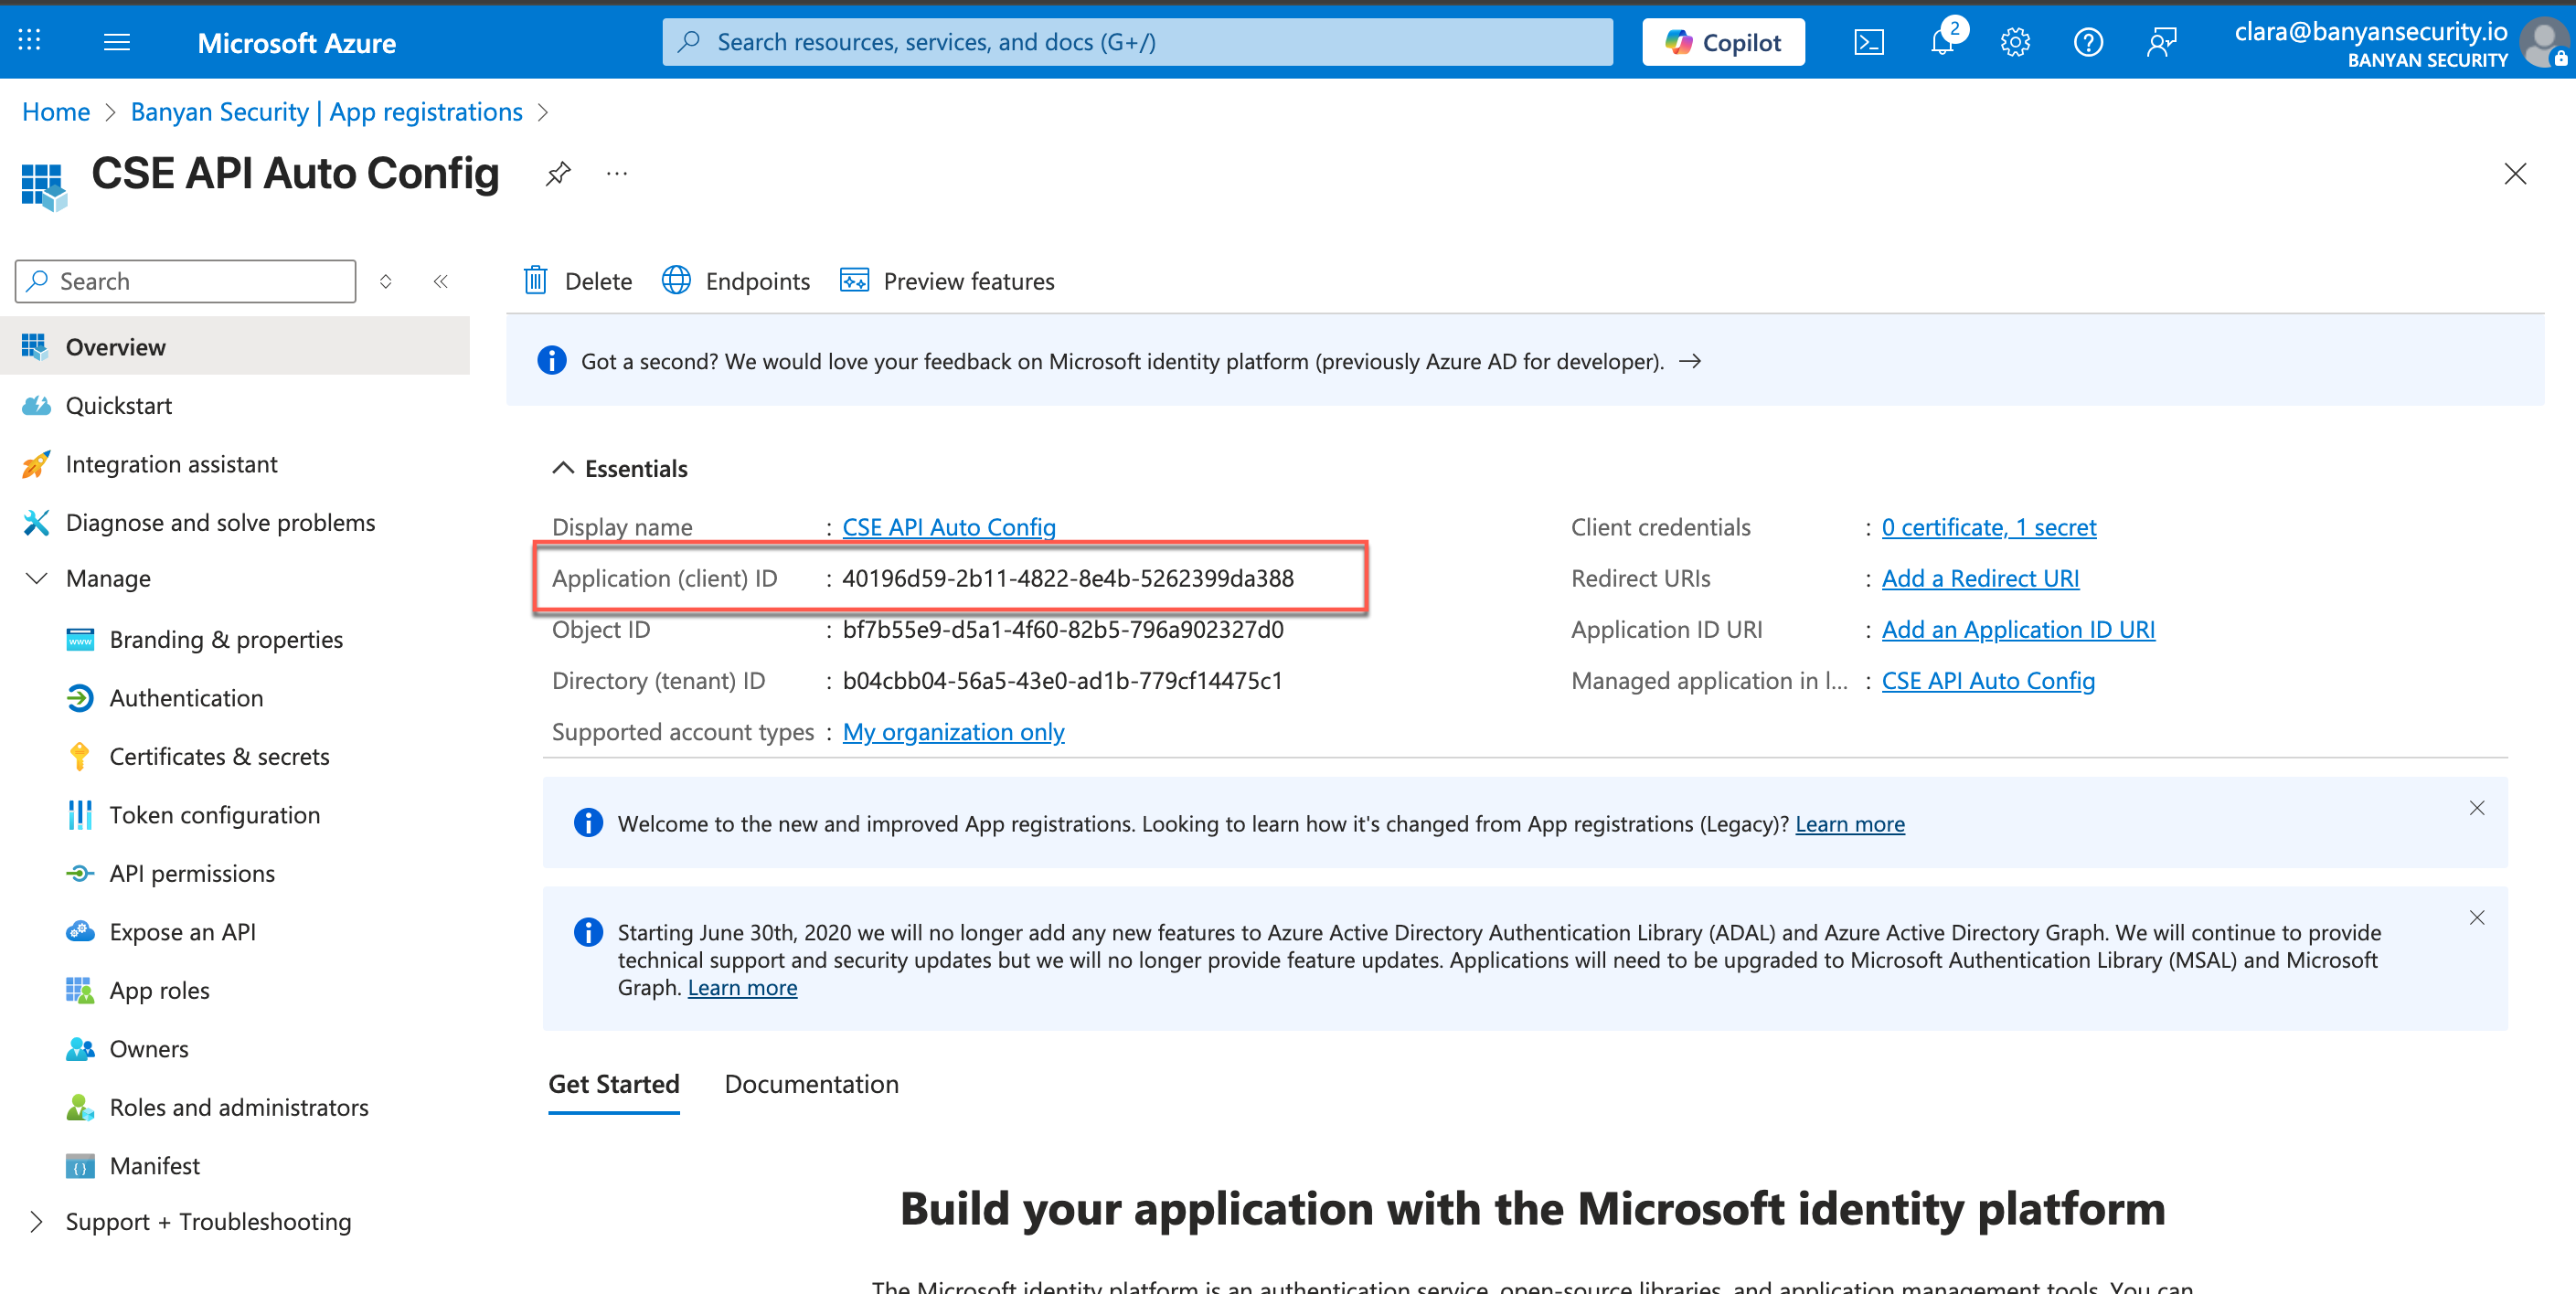
2.6 Navigate to the newly-registered app’s Overview page.
2.7 Copy the Application (client) ID, and paste this value into the Client ID field in CSE.
Configure Secret
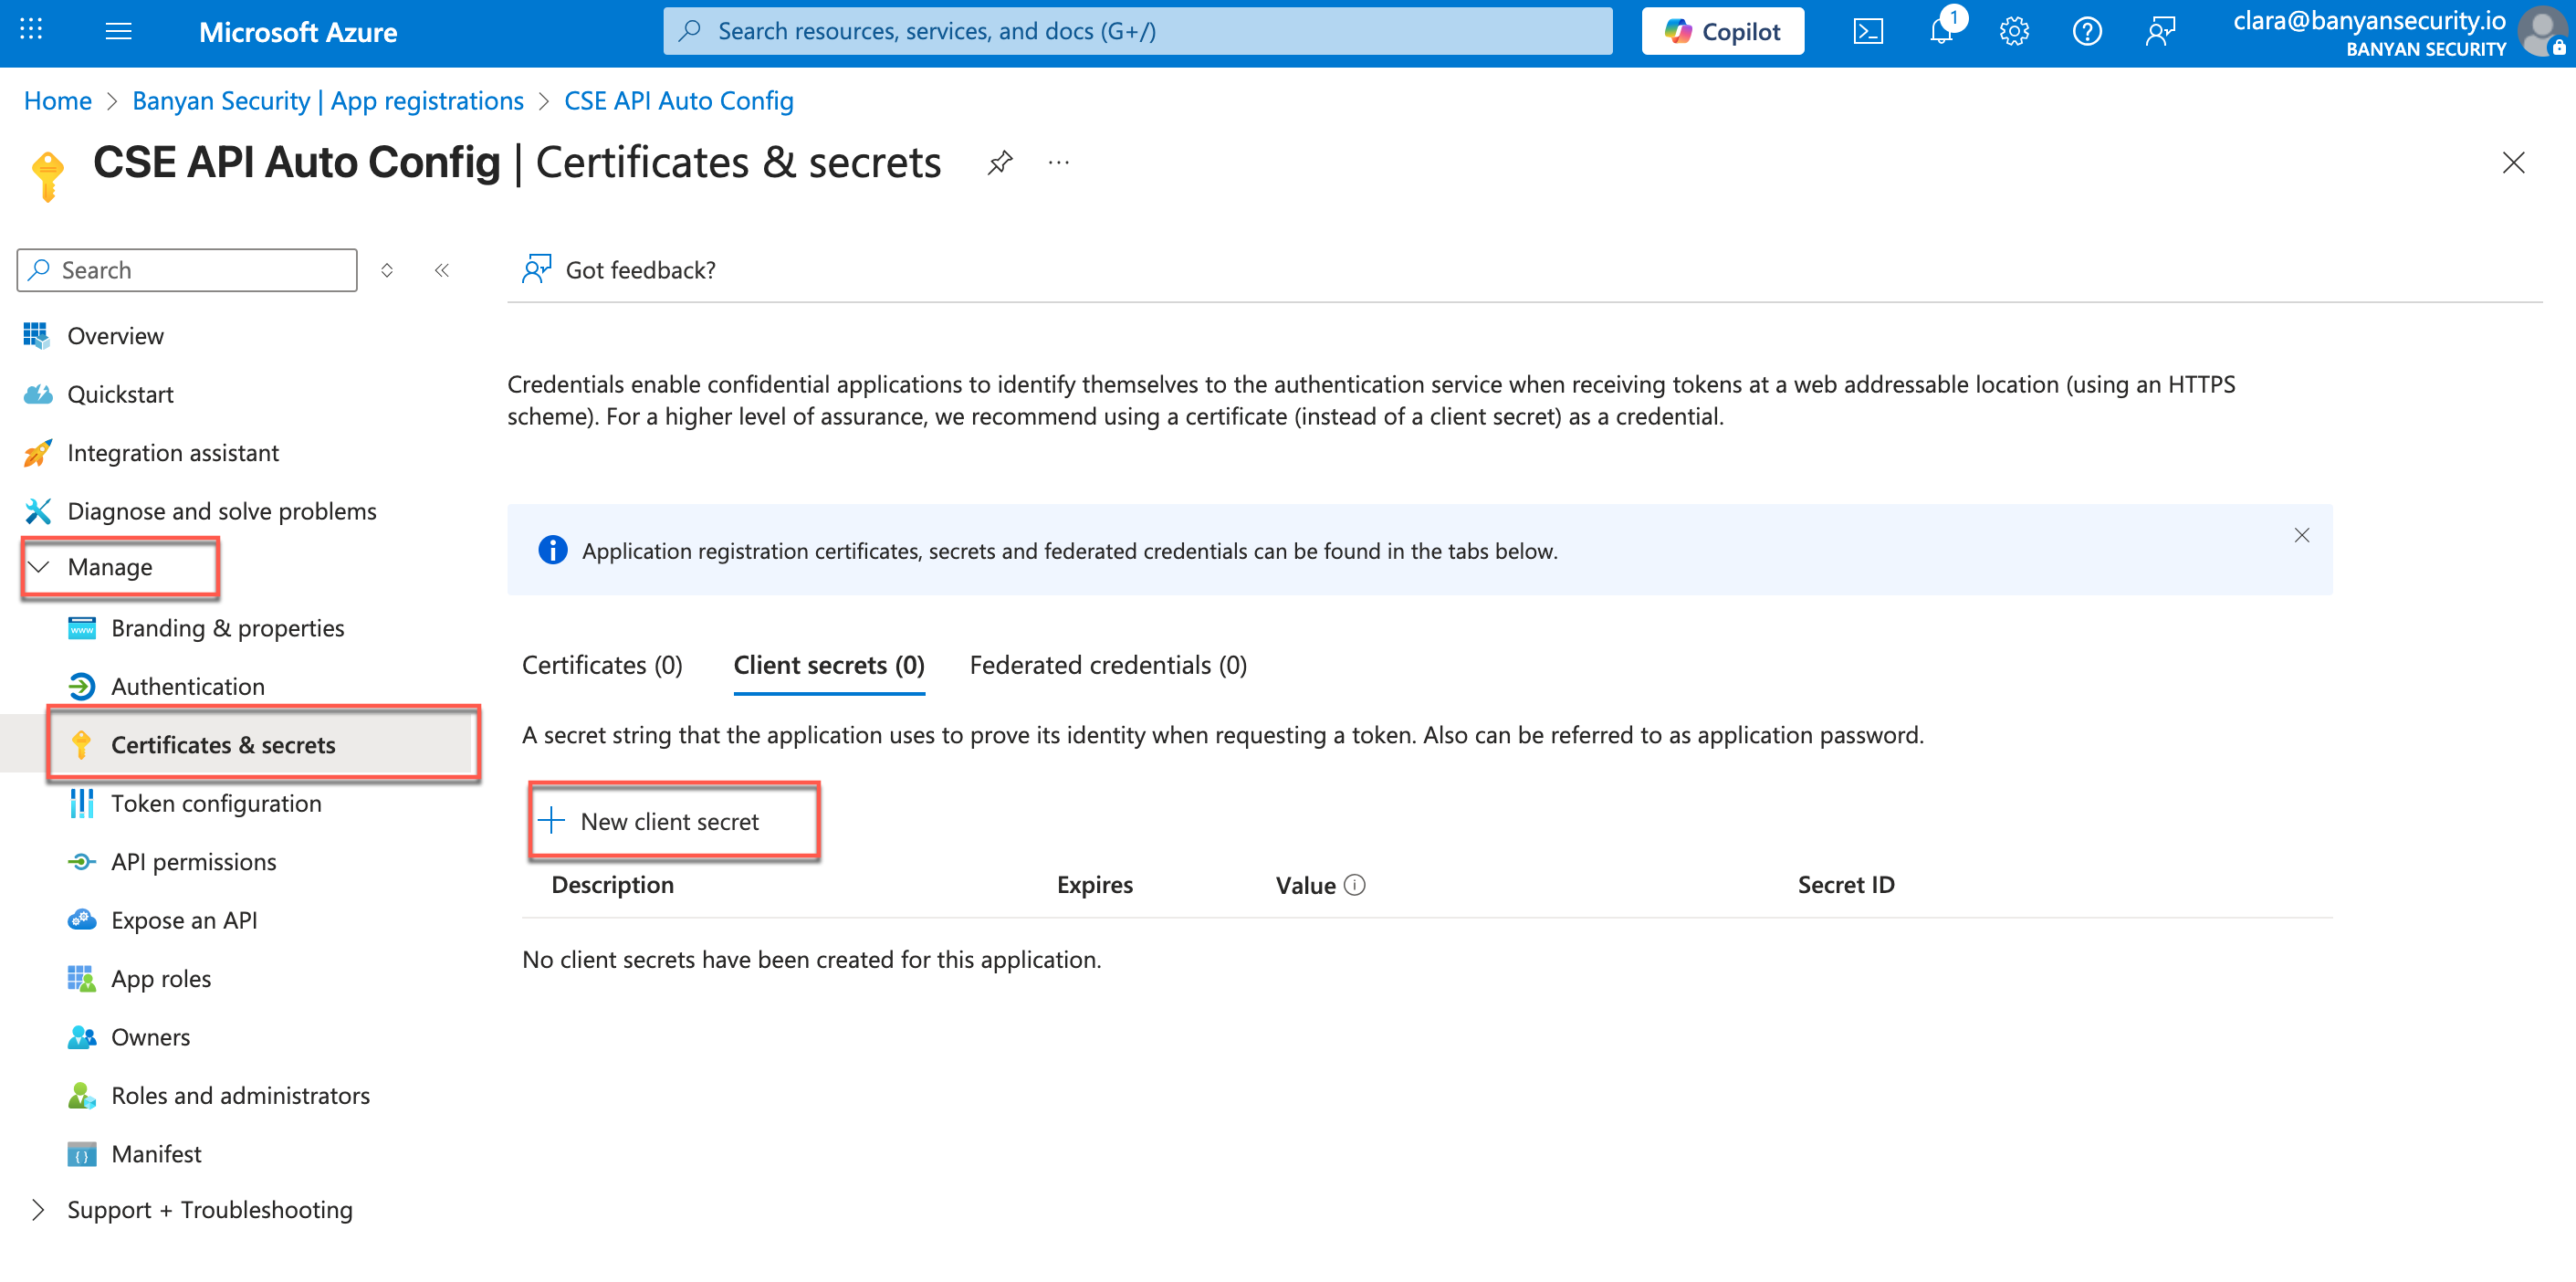
2.8 Navigate from from Manage > Certificates & secrets, and select + New client secret.
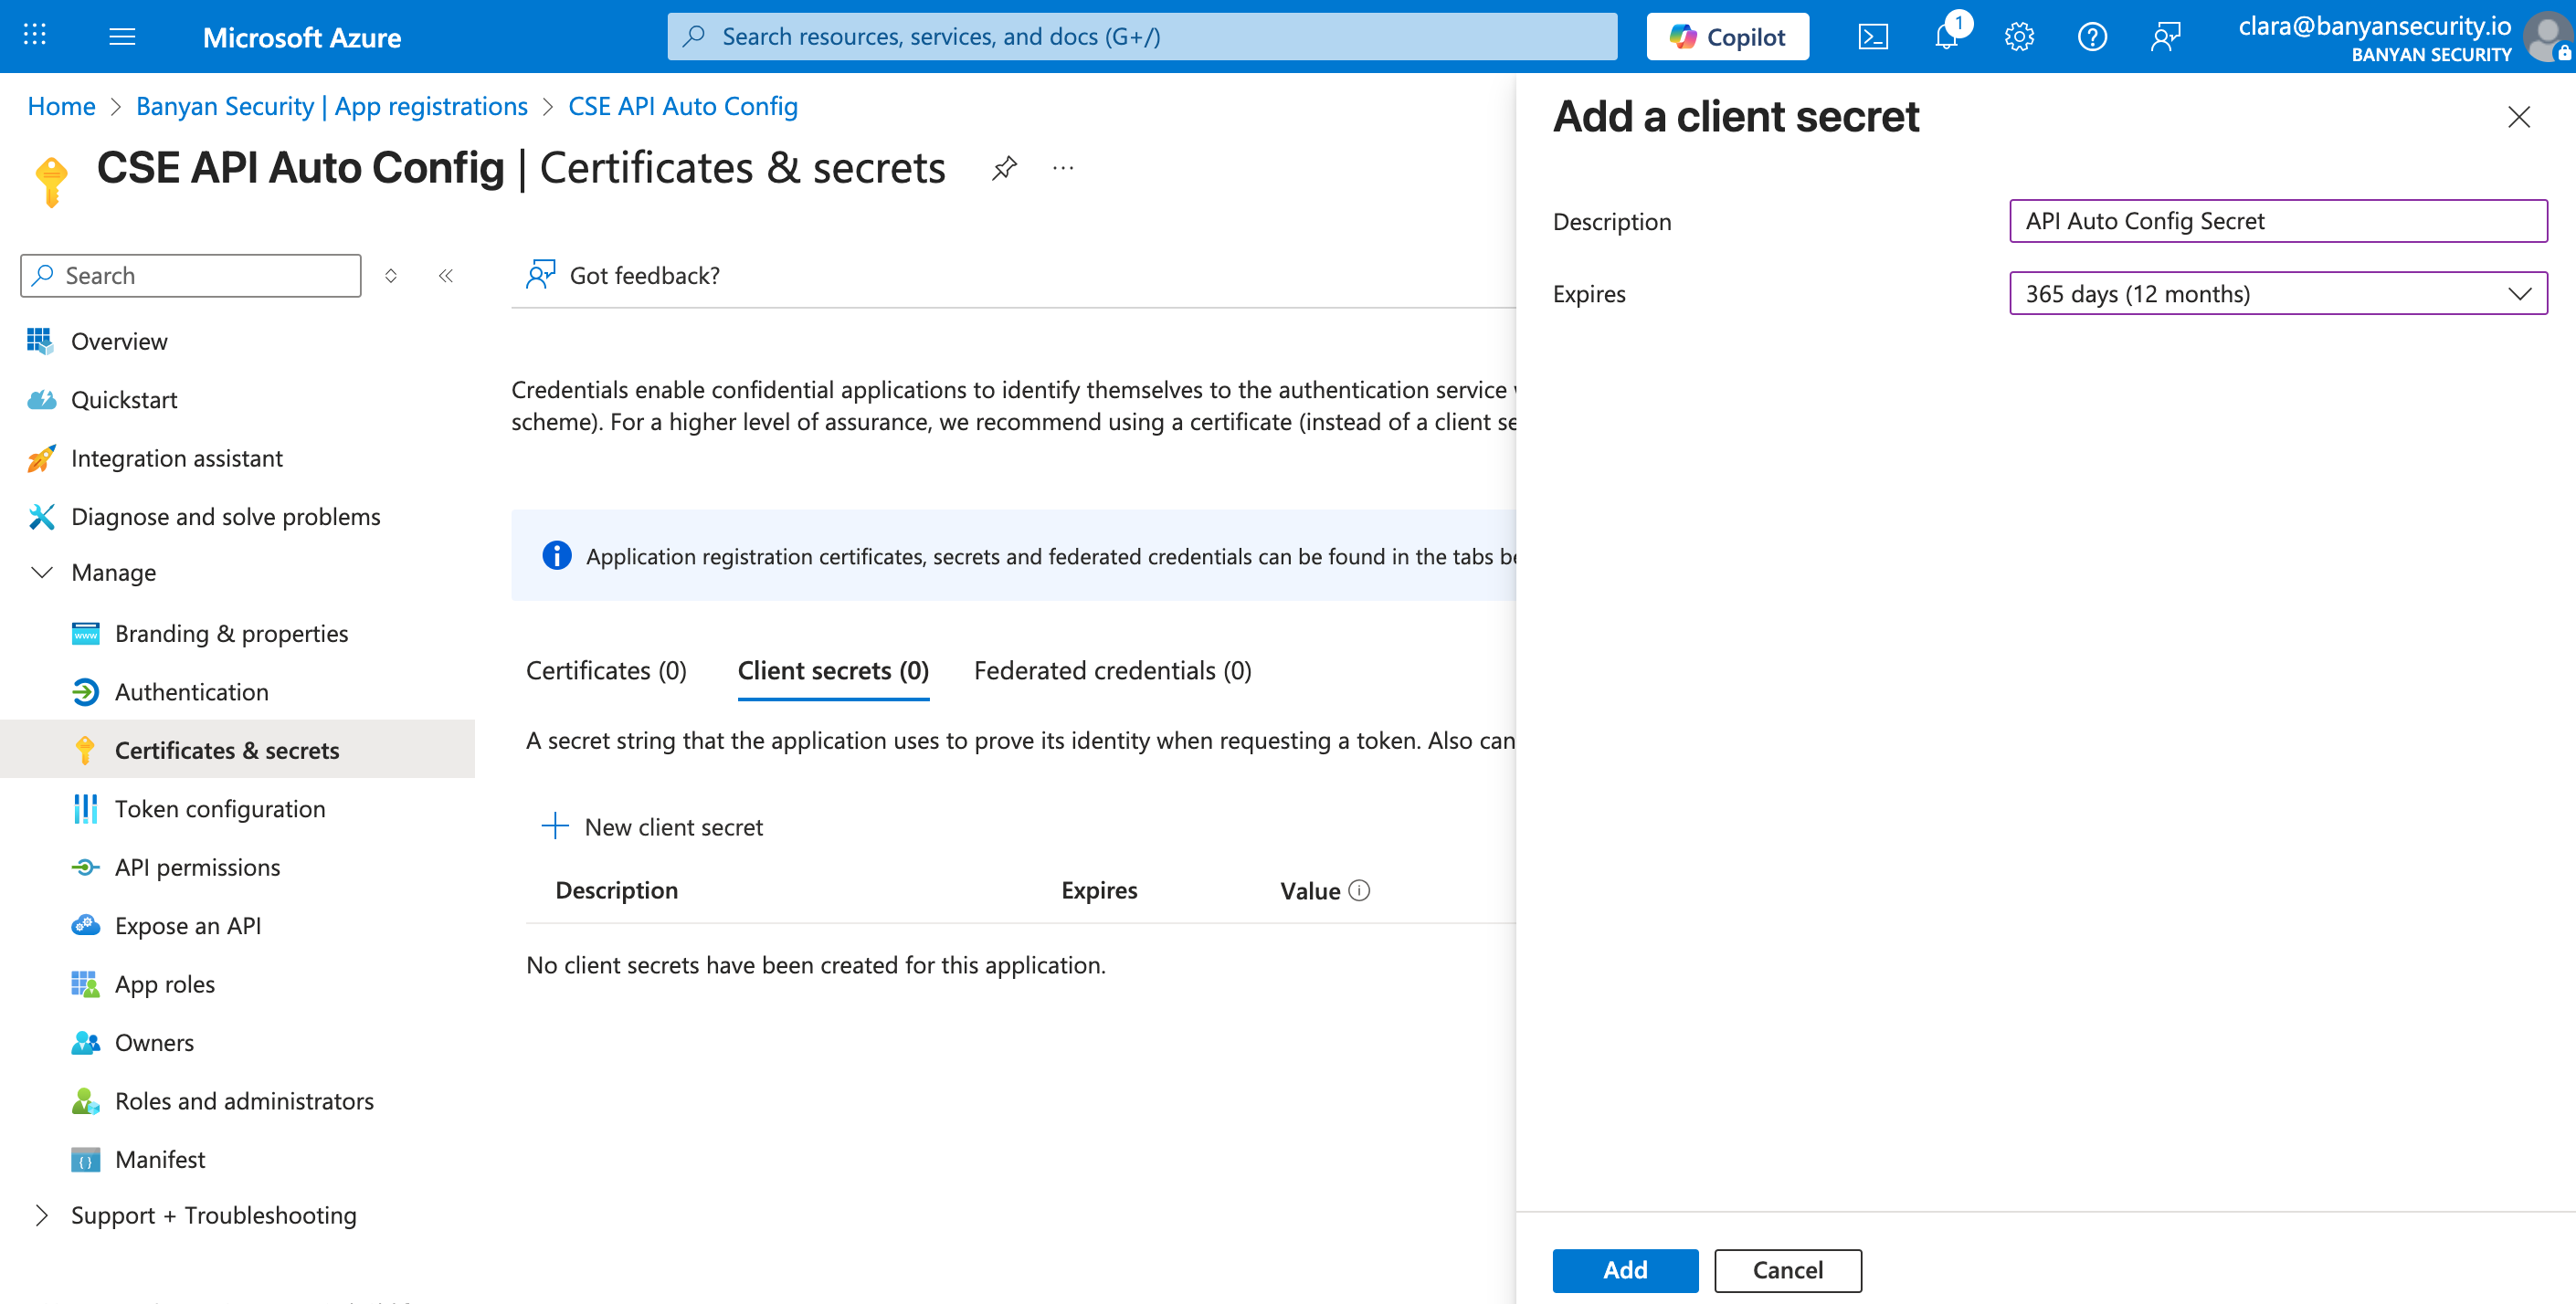
2.9 Under Add a client secret, enter API Auto Config Secret in the Description field.
2.10 In the Expires menu, select 365 days (12 months).
2.11 Then select Add.
2.12 Under Certificates and secrets, the new client secret will be listed. Copy its Value, and paste this value into the Secret field in CSE.
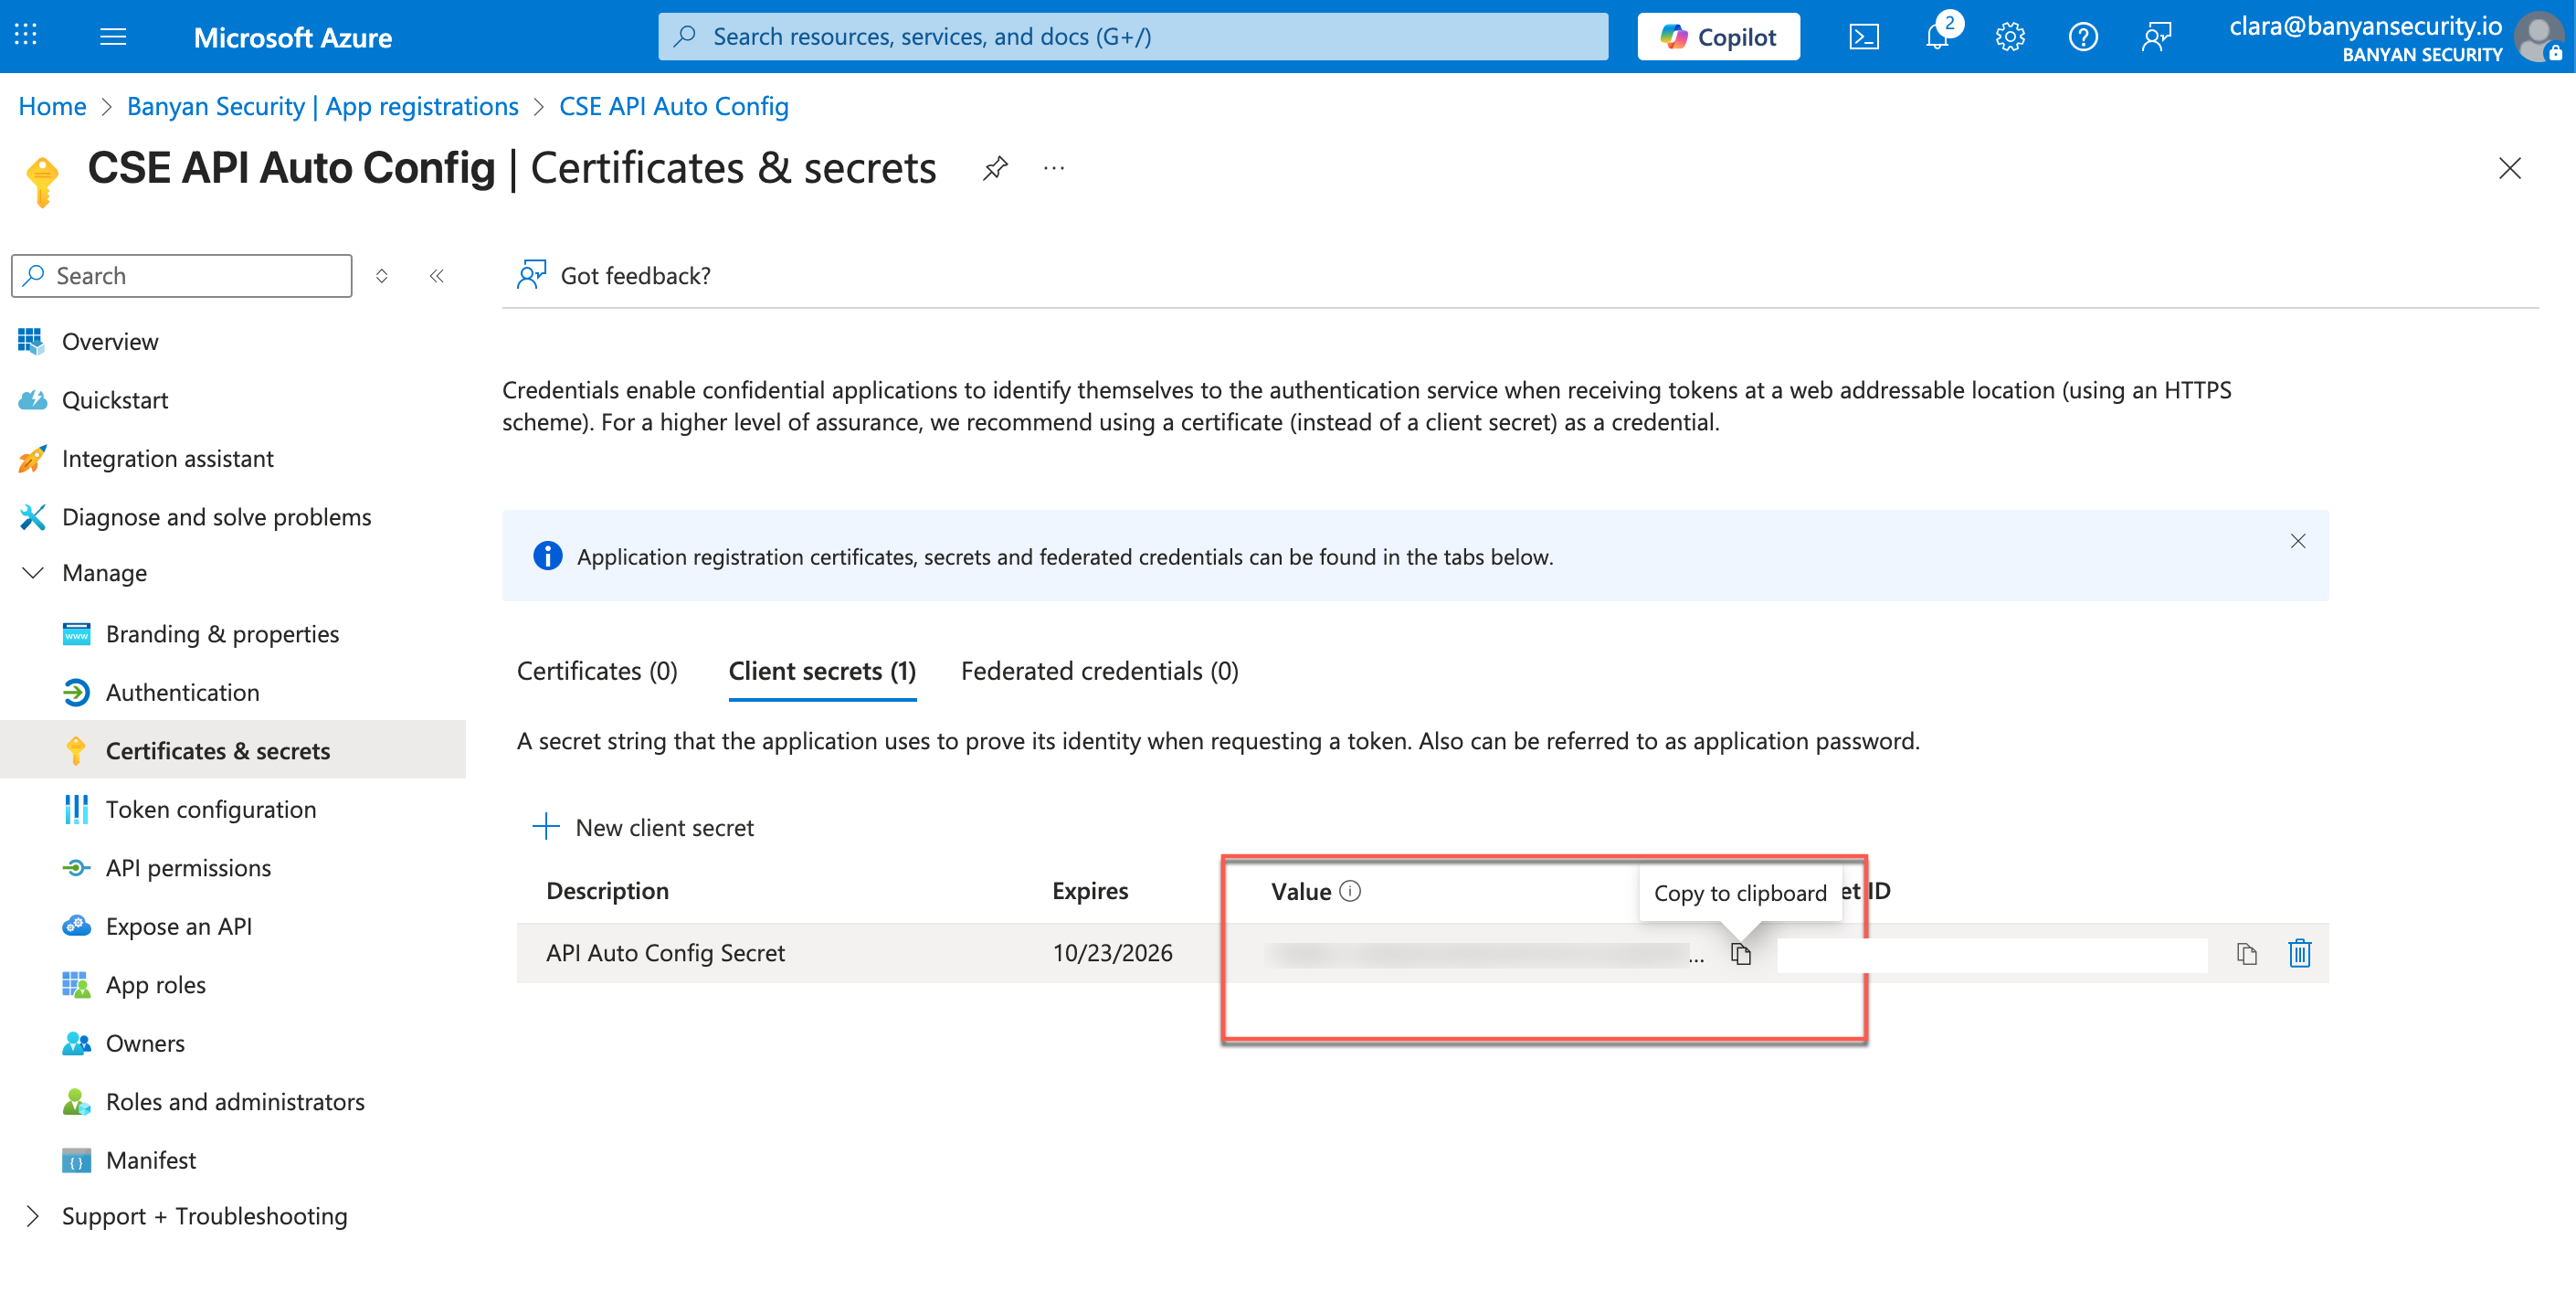
Note: The API Value won’t be visible after you exit this page; Save it in a secure location on your device.
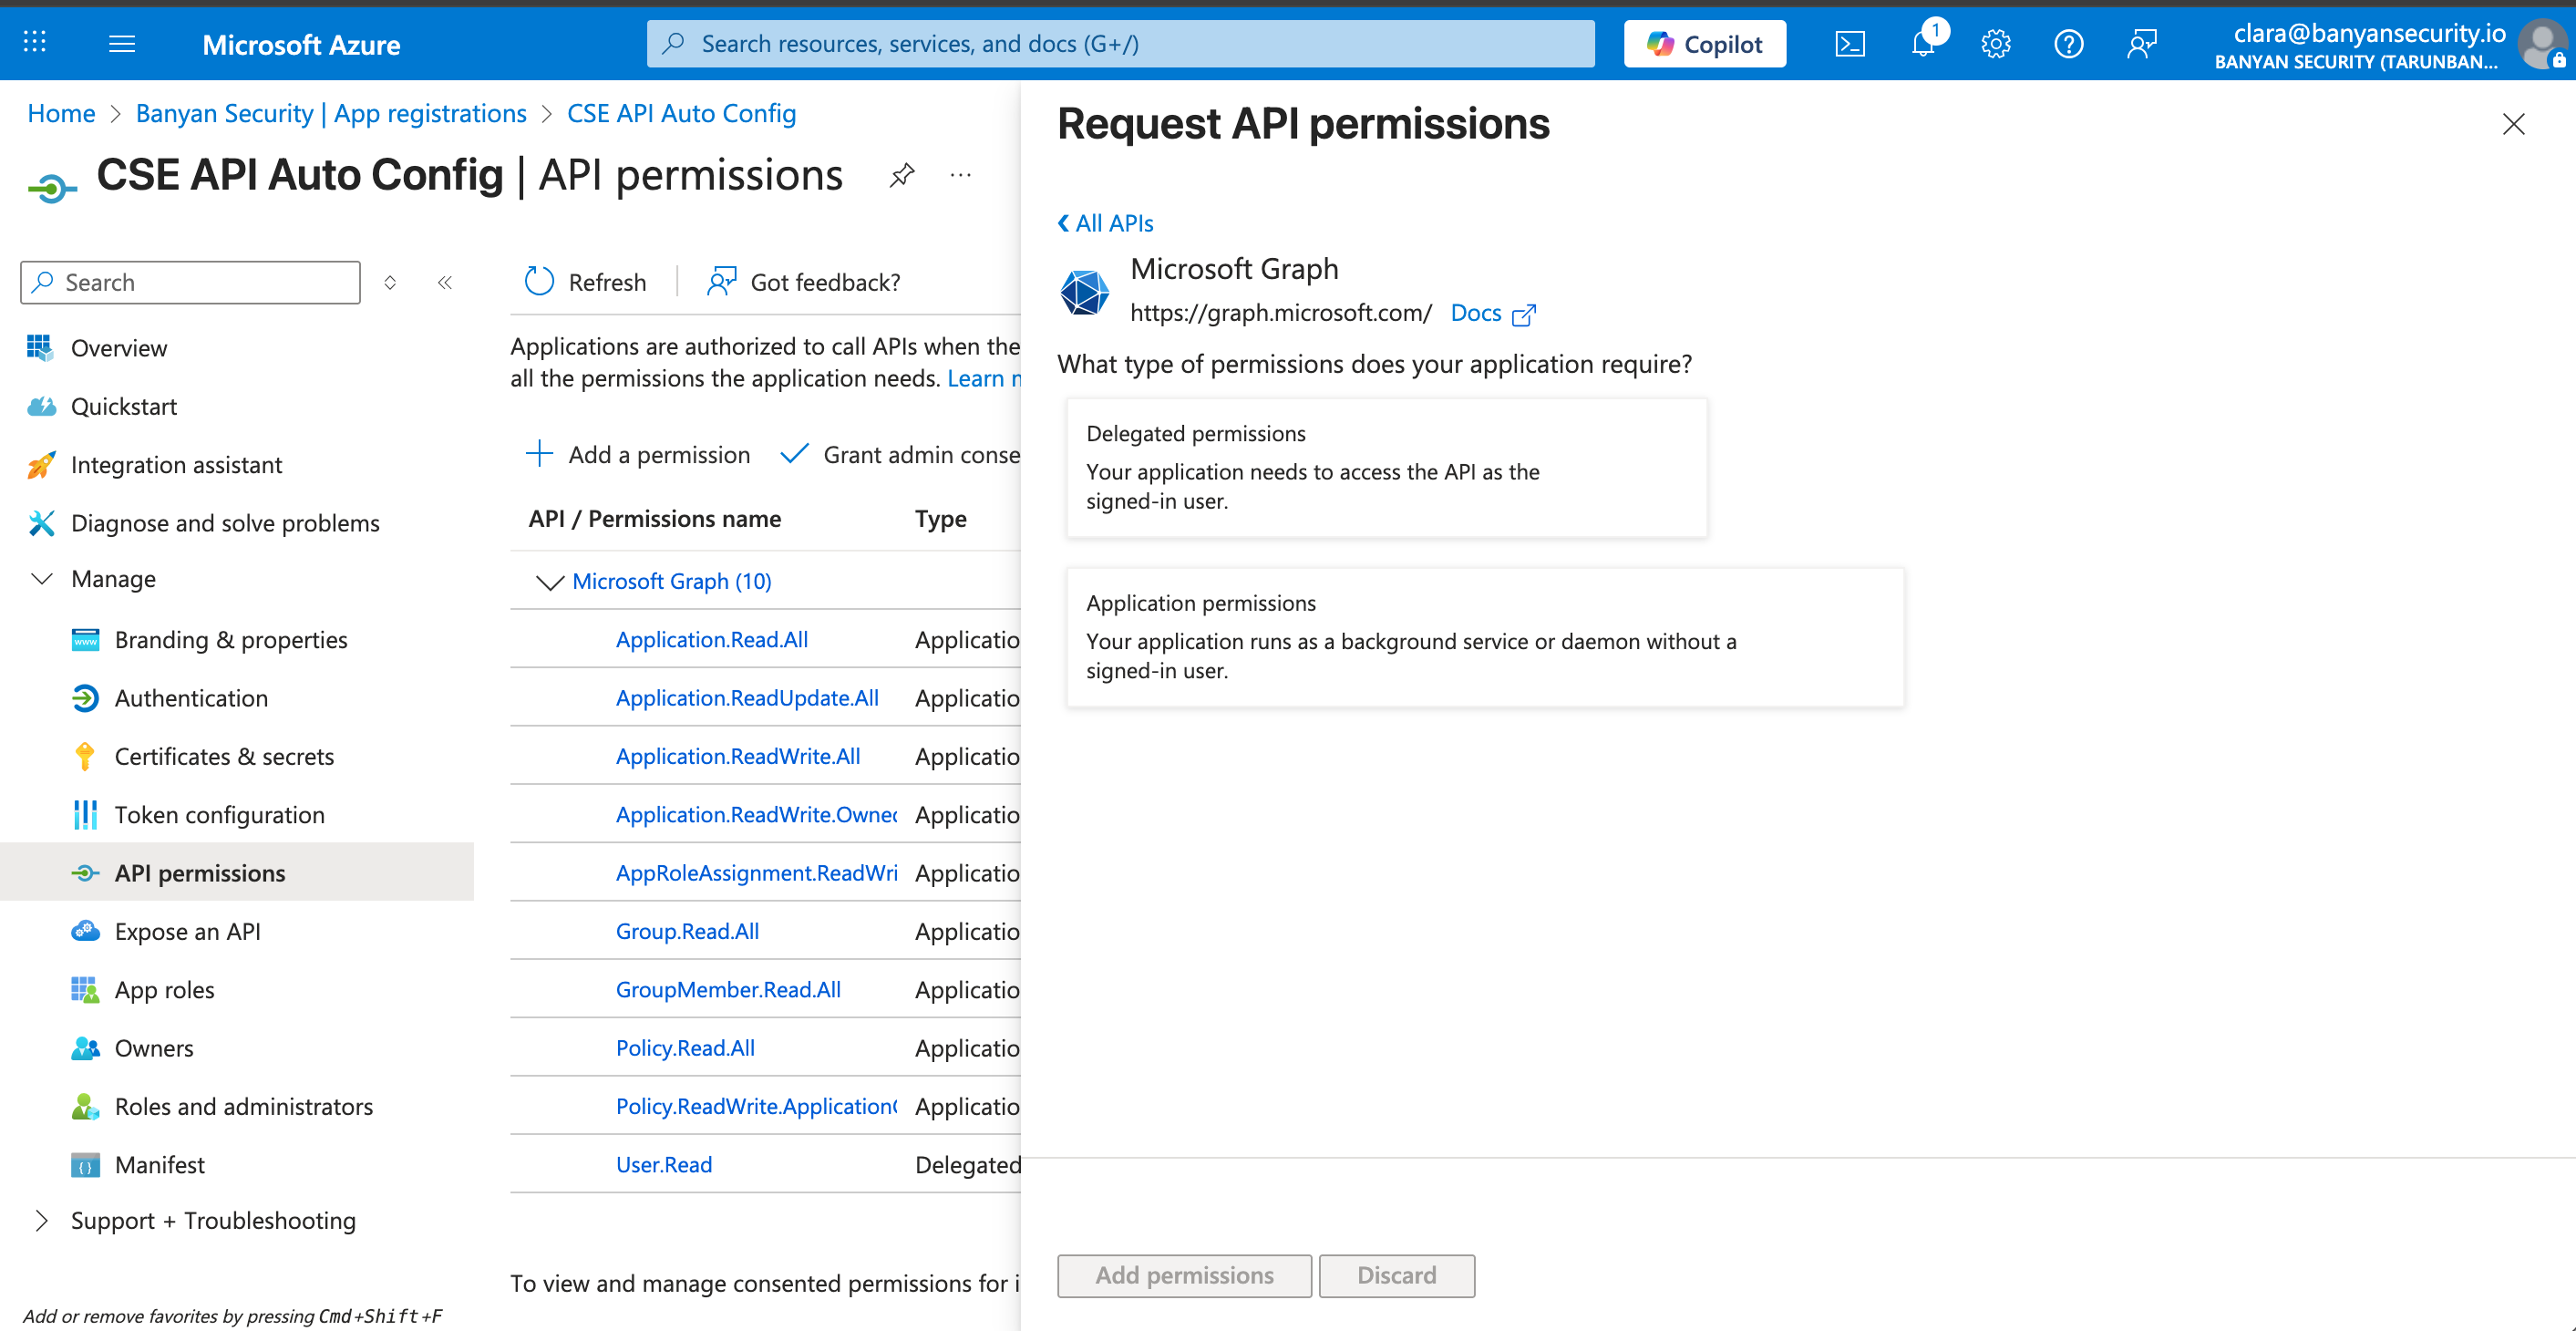
2.13 Navigate to API permissions, then select + Add a permission.
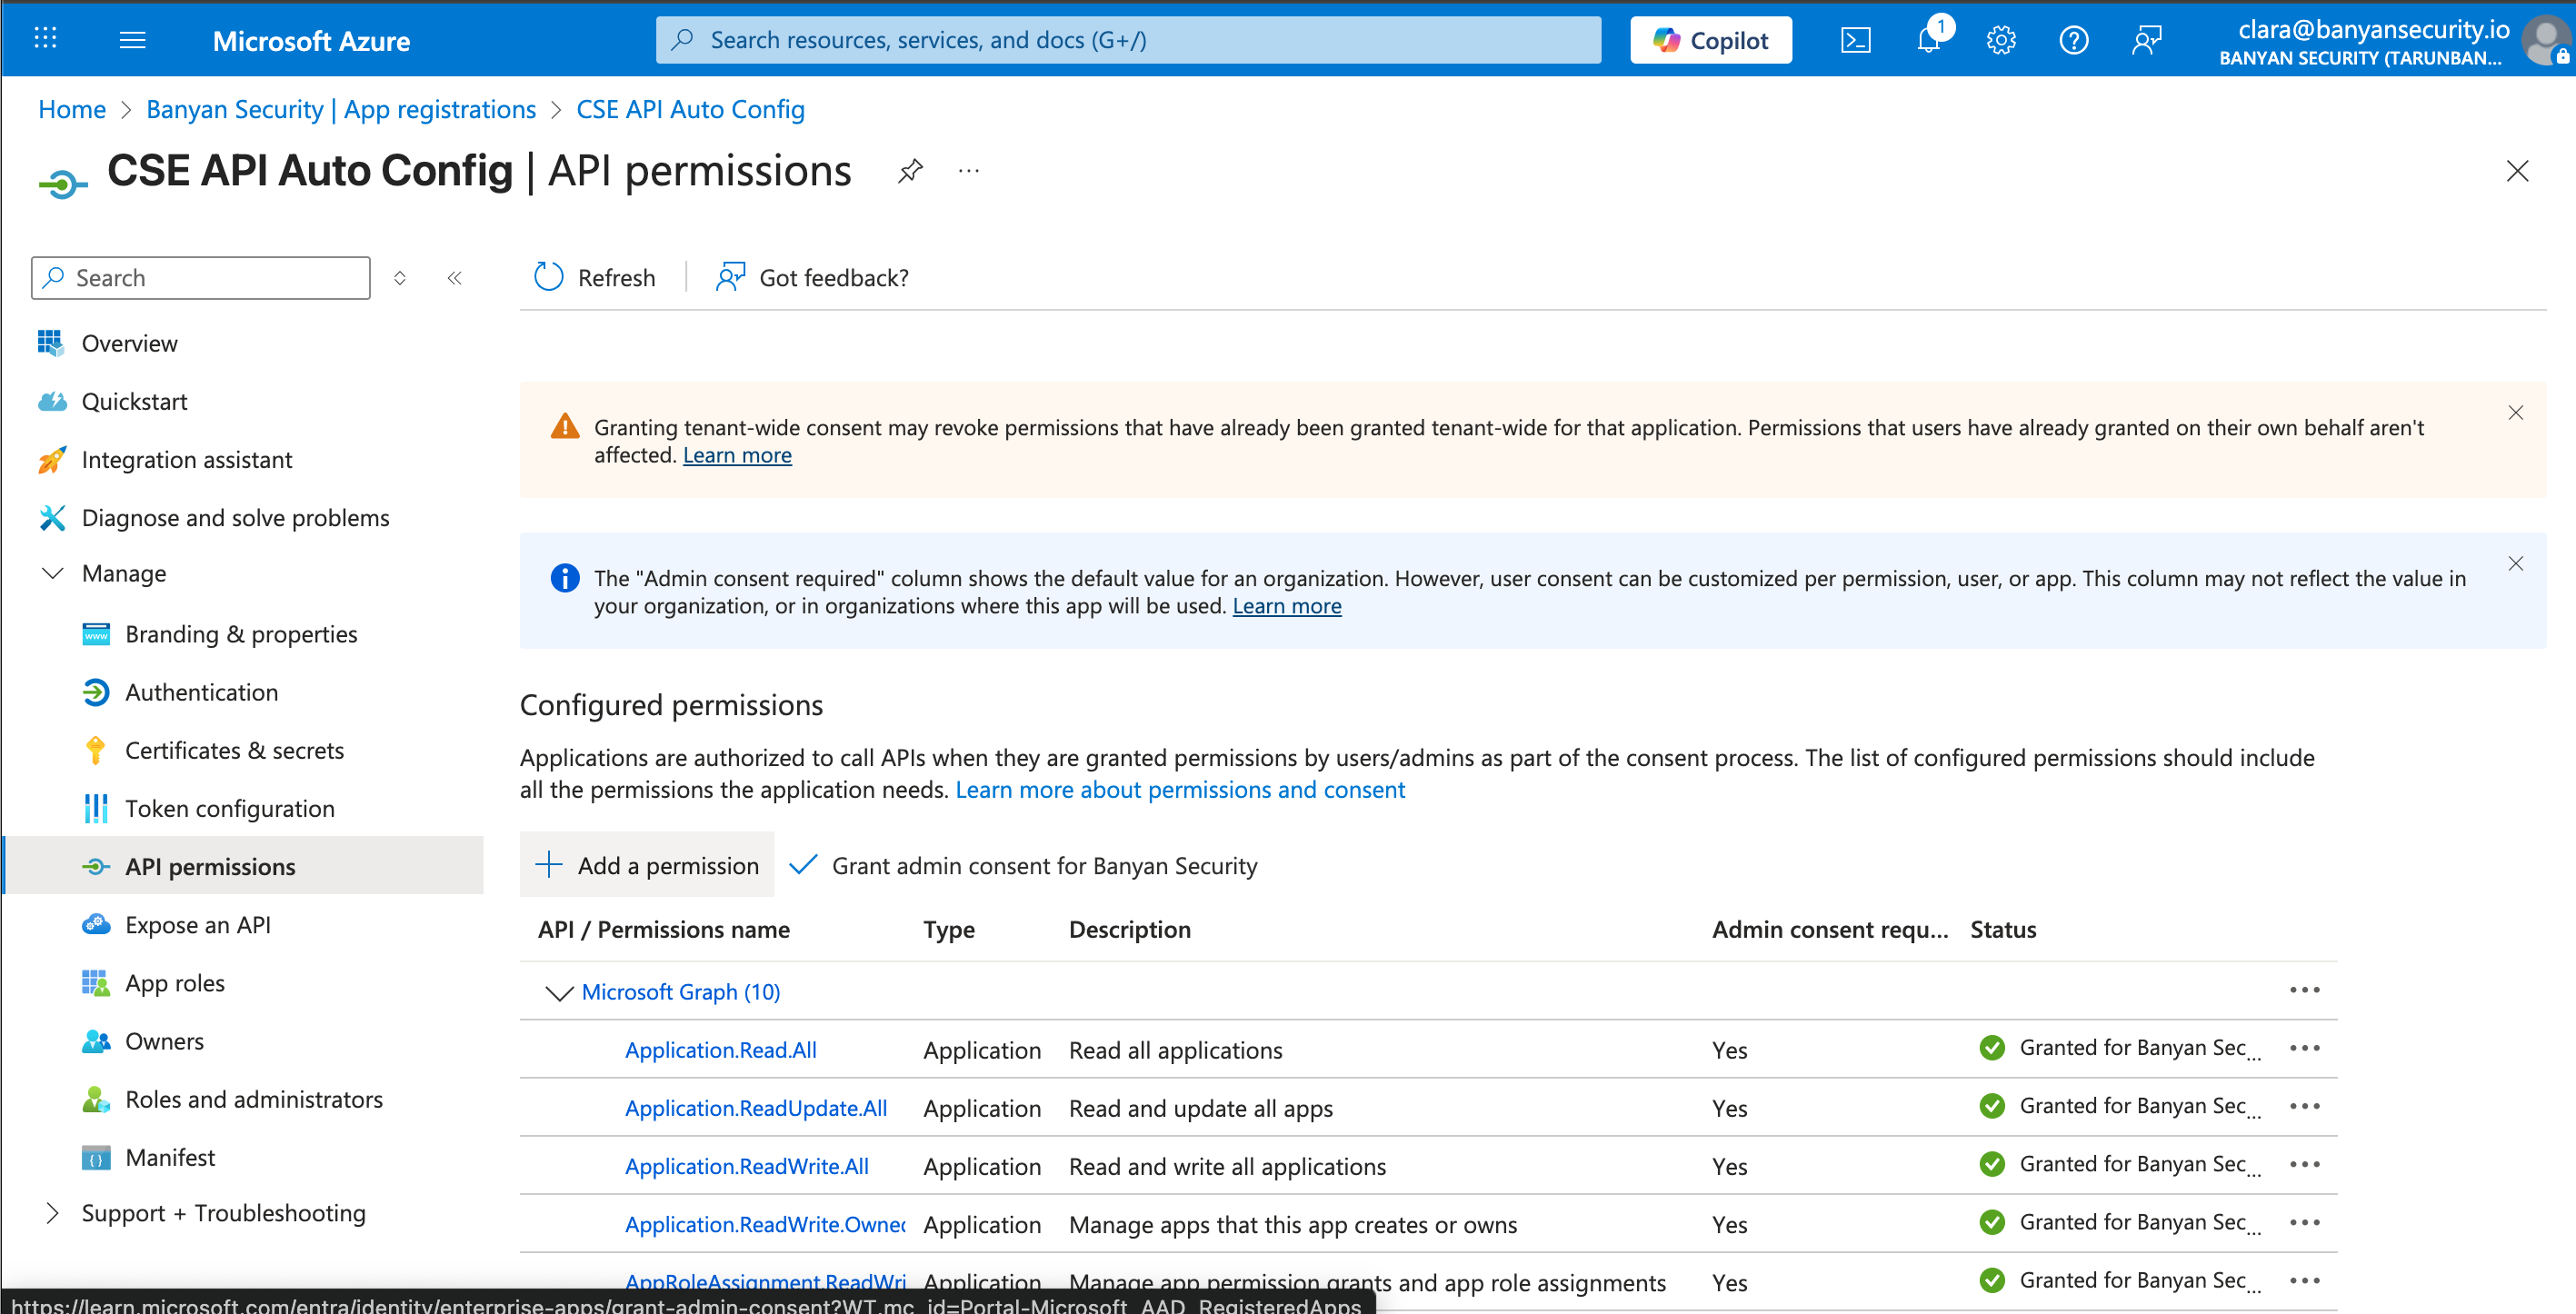
2.14 Select Microsoft Graph, and then select Application permissions.
2.15 In the Select permissions menu, search for and enable the following permissions:
Application.Read.AllApplication.ReadWrite.AllApplication.ReadUpdate.AllApplication.ReadWrite.OwnedBy(for SCIM)AppRoleAssignment.ReadWrite.AllGroup.Read.AllGroupMember.Read.AllPolicy.Read.AllPolicy.ReadWrite.ApplicationConfigurationUser.Read
2.16 Select Grant admin consent for your org, and then select Yes.

Configure IdP Group Name
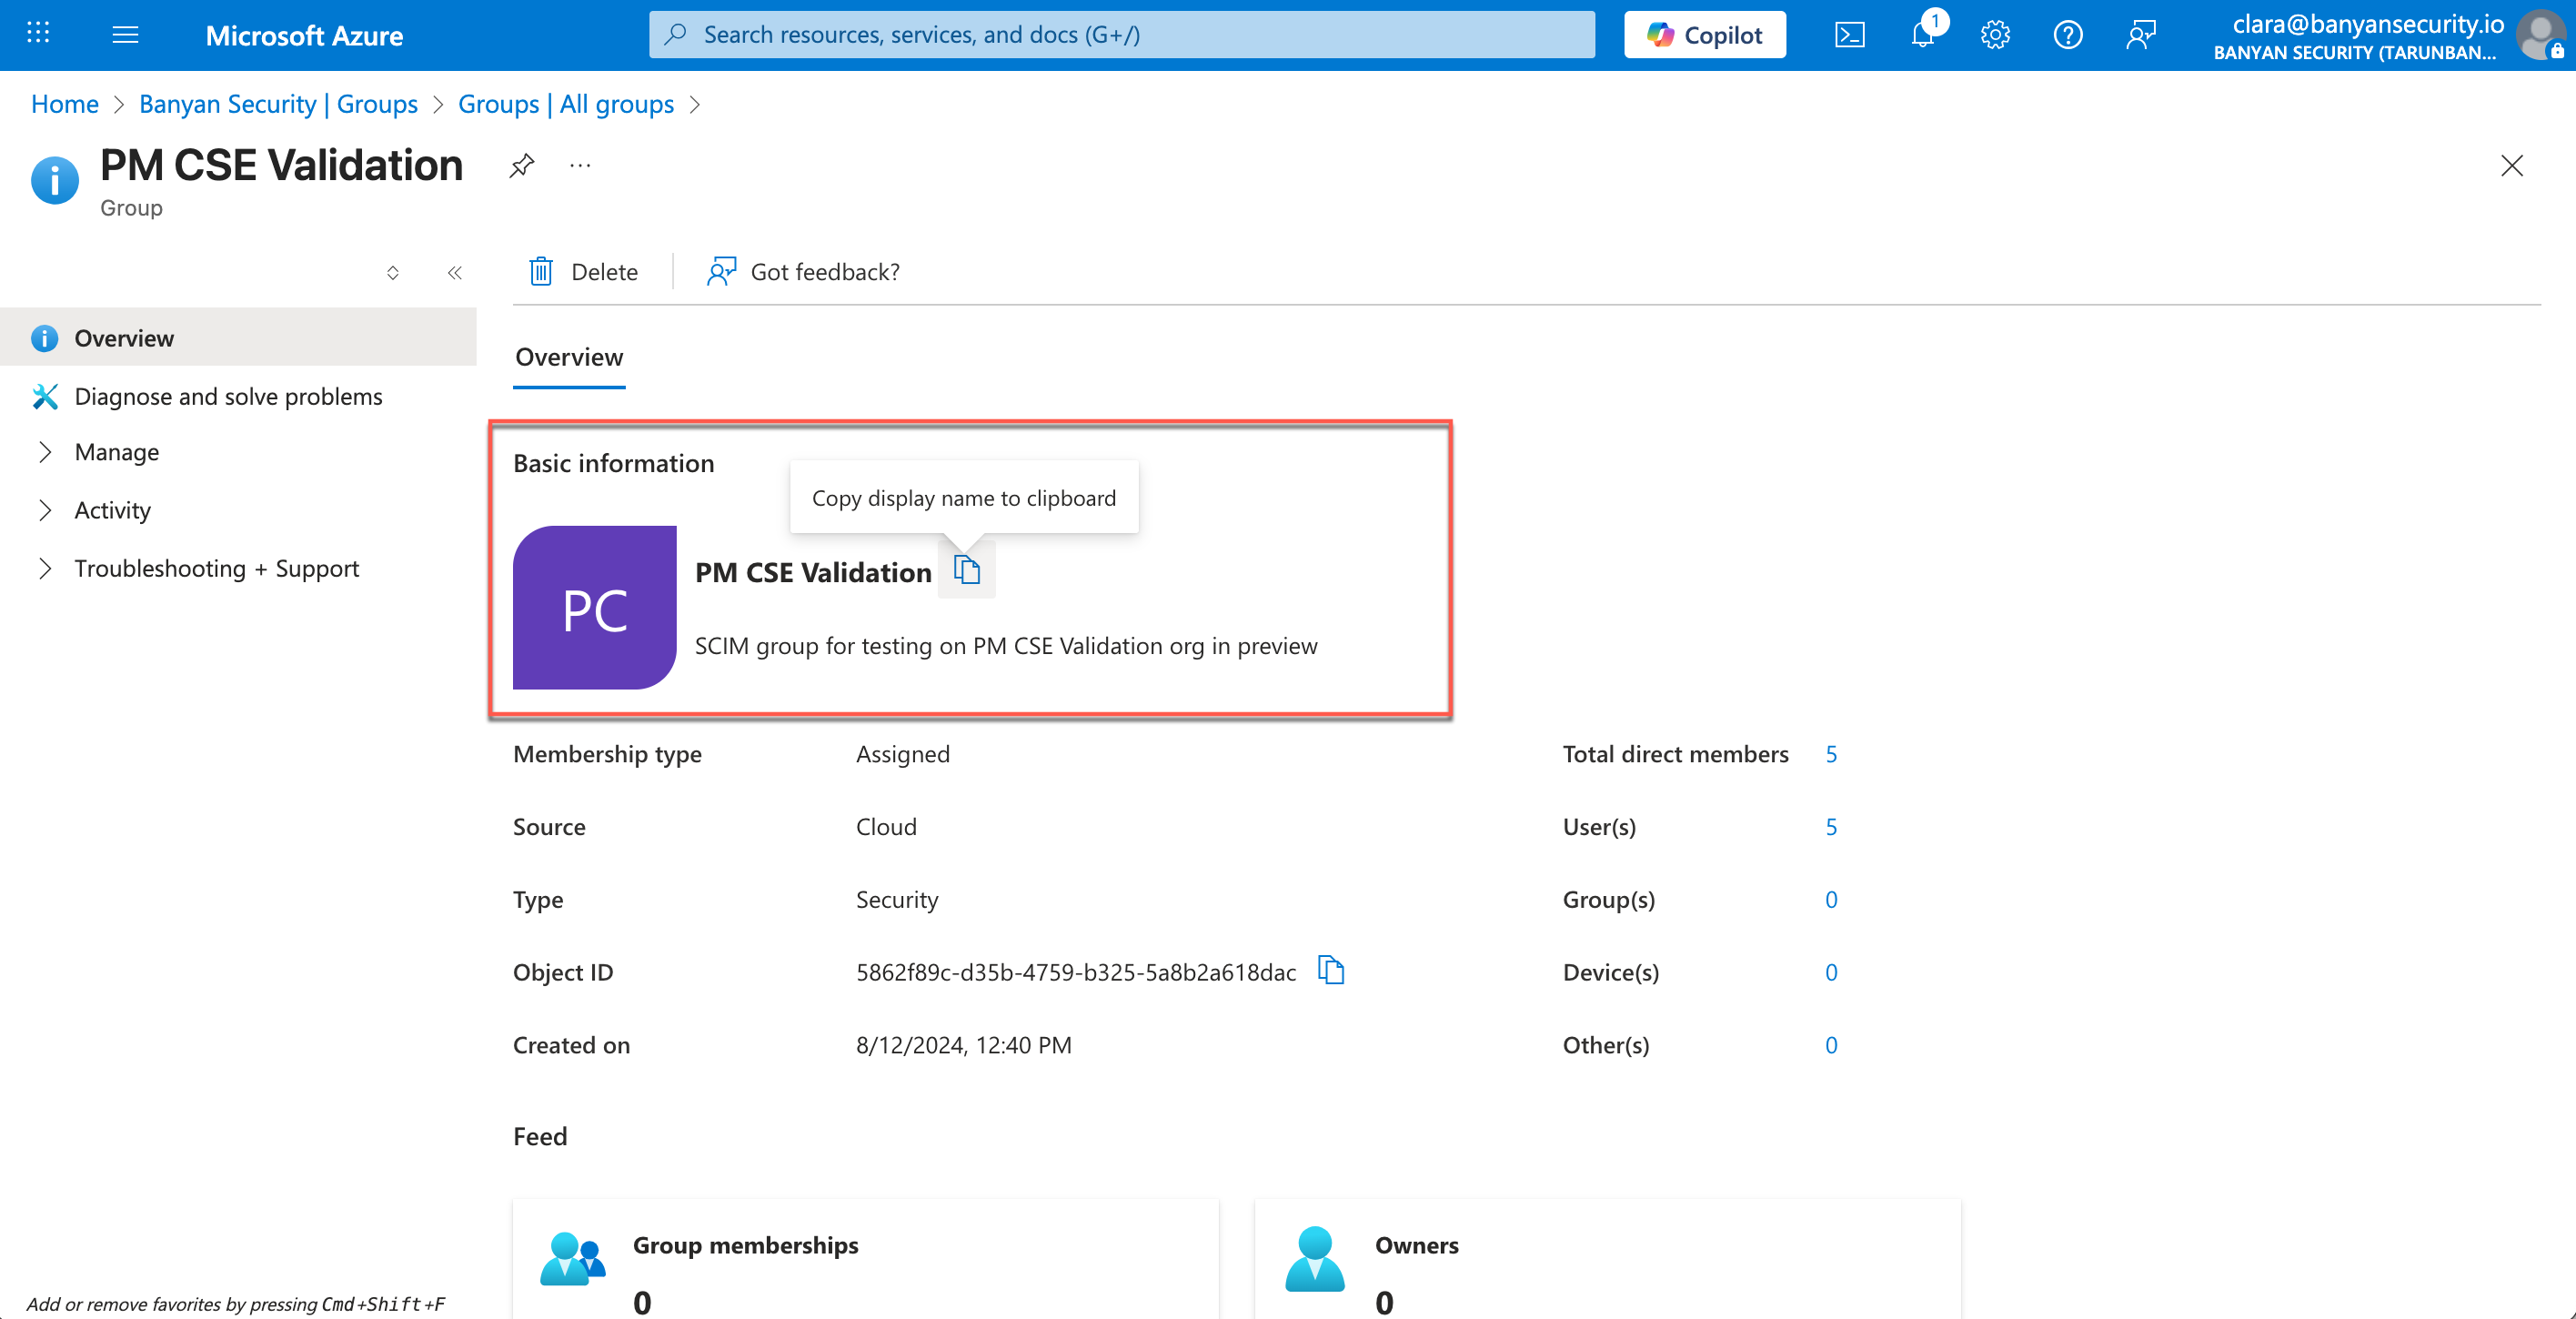
2.17 Navigate from Azure Portal > EntraID > Groups > All groups. Select a group you want to configure over to CSE.
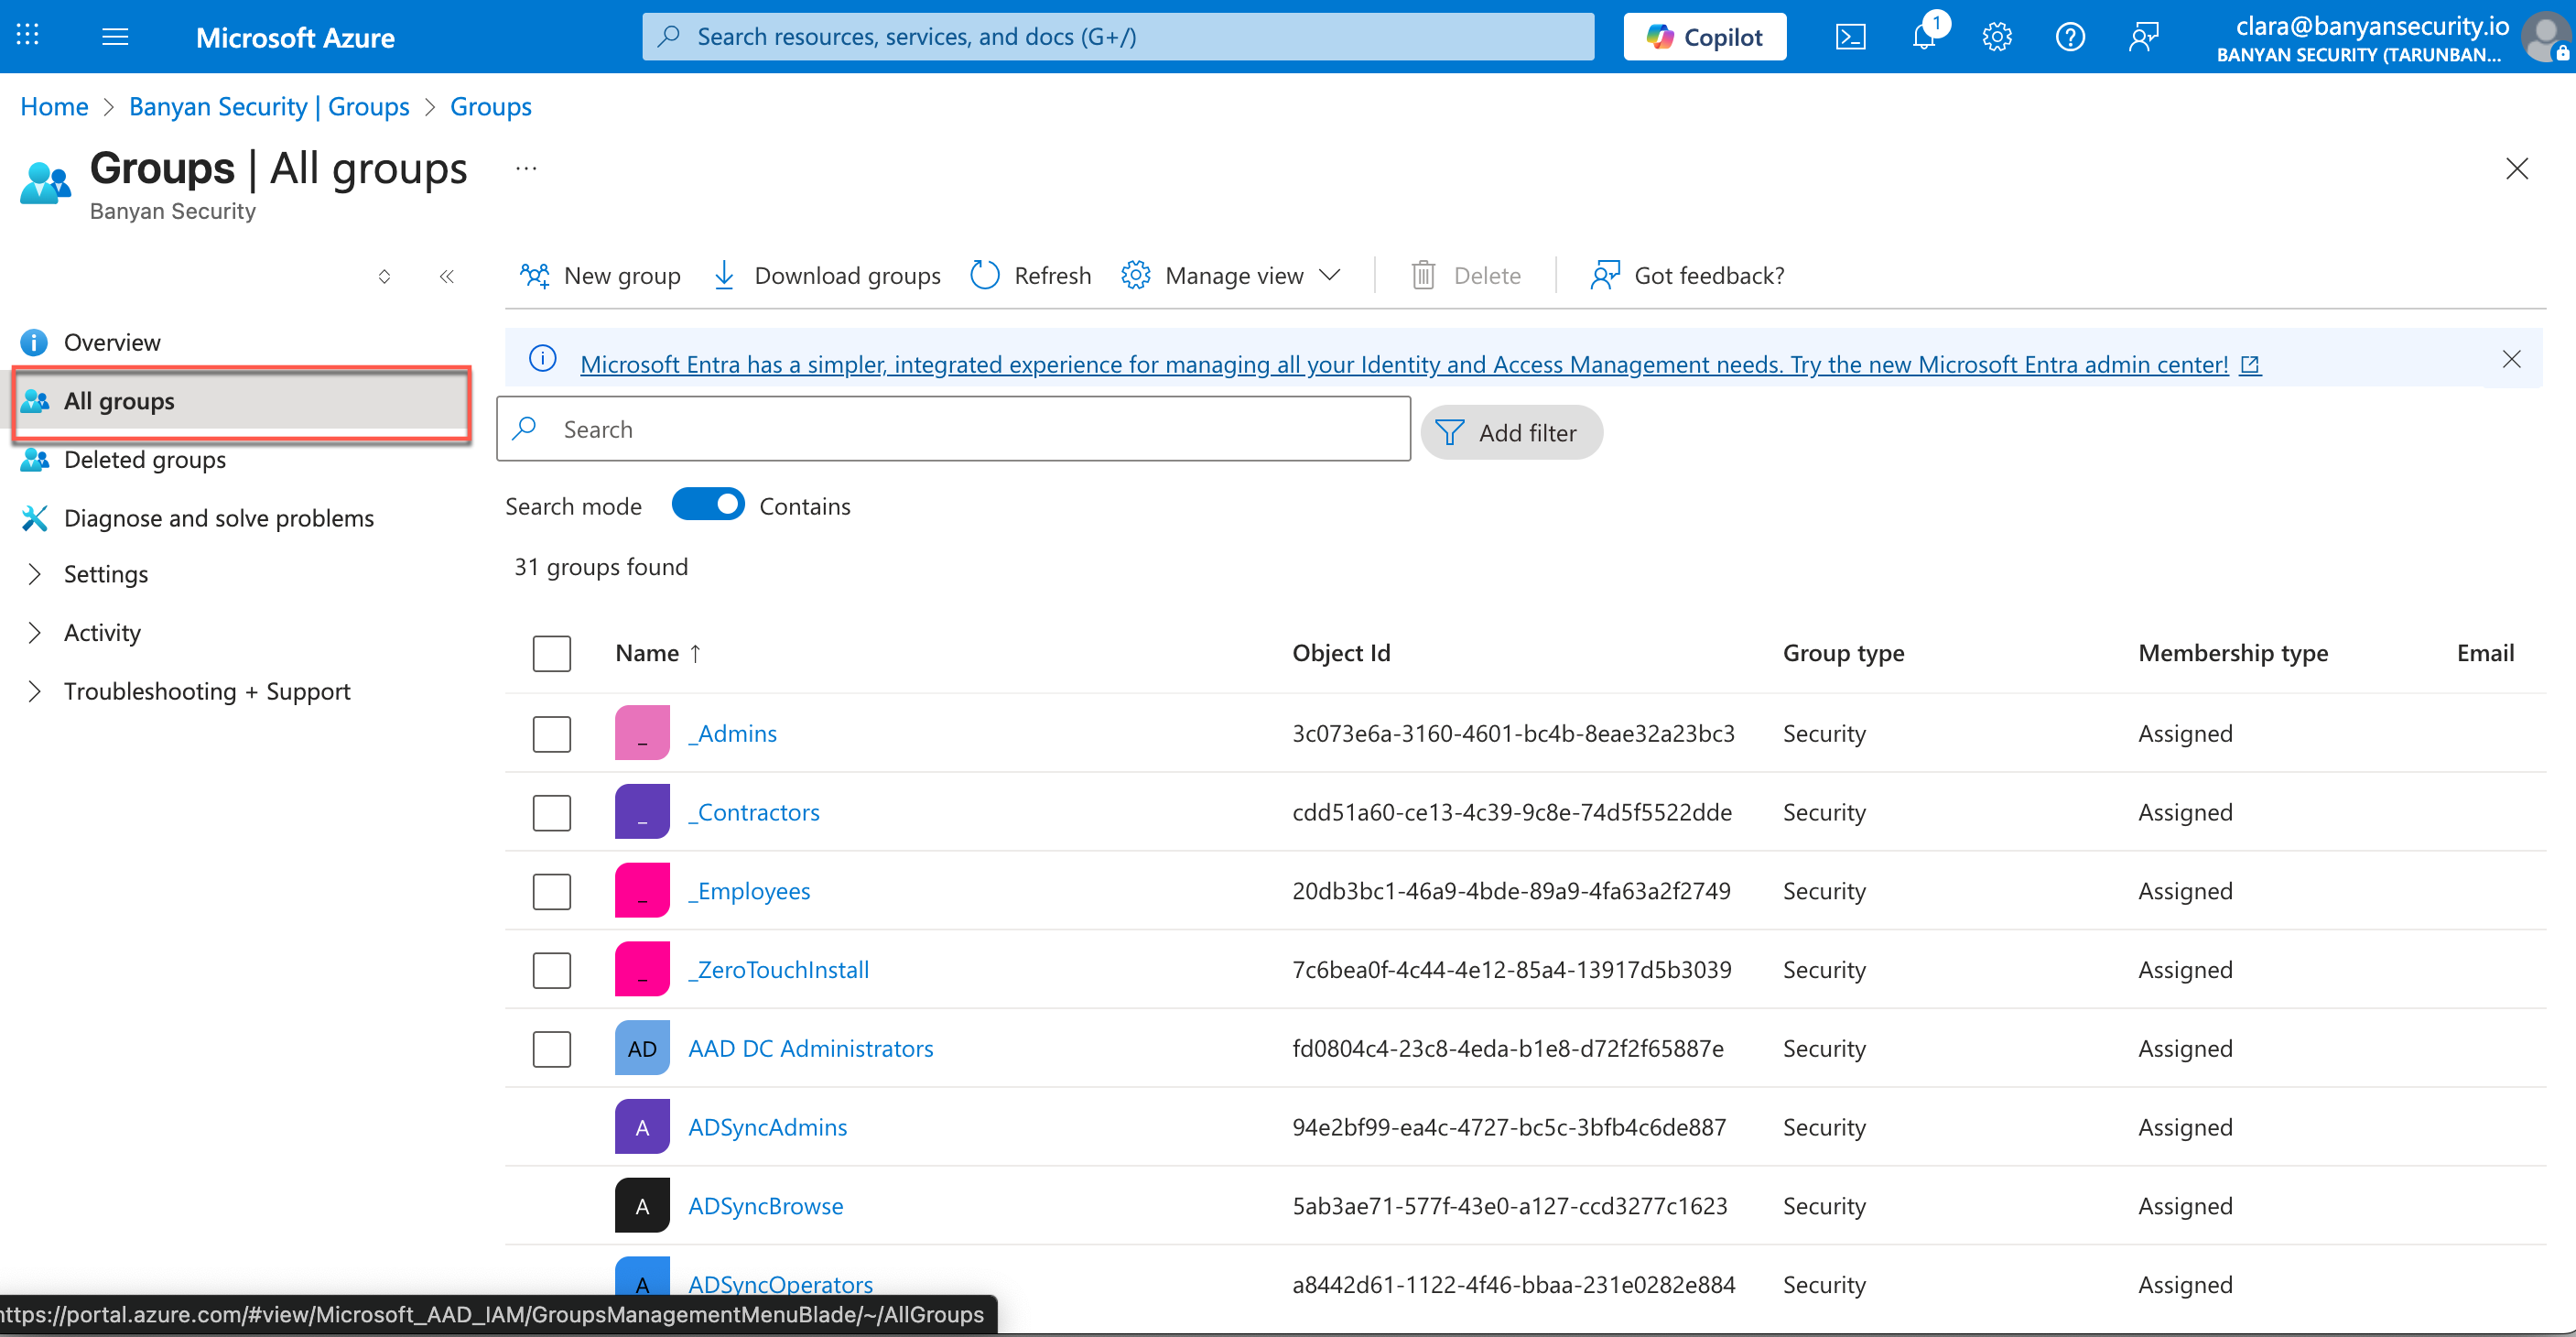
2.18 Copy the group name, and paste into CSE’s IDP Group Name field.
2.19 Select Save and Activate to save your User Identity Provider API Auto-Configuration in CSE.
Step 3: Authentication Policies
3.1 Optional: Toggle on Force Re-authentication on every login so that users in your org must enter their credentials each time they log into the CSE app or access a federated SaaS app.