Install Banyan Shield
Manually installing Shield for an Org
- Updated on May 22, 2024
Note: If your organization uses a Managed Shield hosted by Cloud Secure Edge’s Software-As-A-Service, you do not need to install Shield yourself. Instead, use the Command Center to create and check your clusters.
Pre-install Checklist
-
Ensure you have an organization and account set up on the Command Center
-
Shield is distributed as a set of Docker containers; run it on a Linux Host with a recent version of Docker
-
You can run Shield on any machine with connectivity to both the Enforcement Components (Netagent, Access Tier) and the Controller
-
If you’re using a Cluster Manager, we recommend you run Shield on your Cluster Manager master machines
Install
# download and unzip the files
wget https://www.banyanops.com/netting/deploy-shield-ca-1.57.0.tar.gz
tar zxvf deploy-shield-ca-1.57.0.tar.gz
cd deploy-shield-ca-1.57.0

# update start-shield-ca.sh to have the right parameters
#   ORG_NAME=               # organization name, available in your Web Console
#   ORG_ID=                 # a 32-char string available in your Web Console
#   CM=none                 # set to none
#   CNAME=                  # pretty name for your cluster
#   TLSNOVERIFY=false       # set to false
#   GROUPTYPE=              # metadata about cluster, ex: prod, test, stage
#   RESTARTPOLICY=unless-stopped  # set to unless-stopped
#   BANYAN_URL=https://net.banyanops.com:443/api_server_host_v1  # set to your Controller URL

vi start-shield-ca.sh

# you can now start shield
./start-shield-ca.sh

# to stop shield (and in general, use this to cleanup containers, etc.)
./stop-shield-ca.sh
The first time you run Shield, you might want to generate a brand new self-signed Root CA key-pair. You can generate a new Root CA key-pair so by starting up shield with ./start-shield-ca.sh true.
Verify Installation
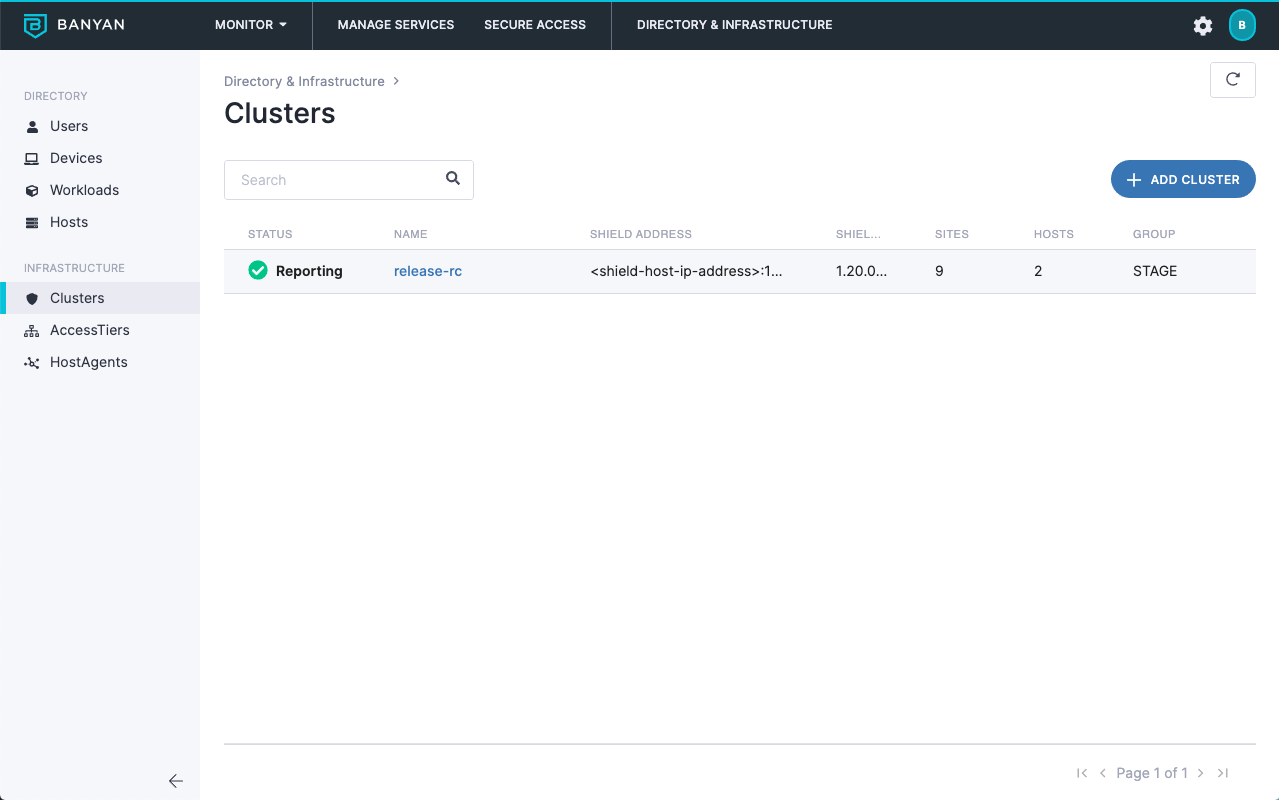
Once Shield starts up correctly, you can view its details in the Directory & Infrastructure > Infrastructure > Clusters section of the Command Center.

Directory & Infrastructure - Clusters
Configuring your Internal Certificate Authority
By default, Shield uses a self-signed BNN Root CA that serves as the Issuing CA. The BNN Root CA key-pair is stored the file system on the Shield Host VM in the deploy-shield-ca-0.X.Y/etc/banyan-ca/ folder.
You can generate a new self-signed BNN Root CA key-pair at any time by running ./start-shield-ca.sh true.
You can instead use your organization’s Private Certificate Authority. Overwrite the ca.pem and ca_key.pem files in the etc/banyan-ca/ path with your Private CA’s certificate and private key respectively.
To pick up any new CA settings, you have to stop and then start Shield.
Production Deployment - Scaling Shield
Follow these steps to ensure Shield is ready for production deployment.
1. Right-size the Shield Host for your cluster environment
Ensure Shield has enough CPU and Memory to manage the Netagent deployed on hosts across your cluster.
The table below provides a rough estimate for the size of your Shield Host for typical cluster setups.
| Number of Hosts | Containers per Host | Links per Container | Recommended CPUs | Recommended RAM |
|---|---|---|---|---|
| <100 | < 5 | < 10 | 2 | 8GB |
| 100 - 500 | 5 - 10 | 10 - 20 | 4 | 16GB |
| 500 - 1000 | 10 - 20 | 20 - 40 | 8 | 32GB |
If you have >1000 hosts, we recommend you set up a second Shield for your cluster.
2. Ensure the Shield Host restarts upon failure
The Shield agent only has “soft” state and the CSE architecture is robust to Shield failures. Configure the Shield Host to restart upon host failure so that Shield is never unavailable for a long period of time.
Please note that in Kubernetes environments, the Shield Pod is pre-configured to restart.
3. High-availability multi-region Shield deployment
Shield can be deployed in ultra-high availability mode across multiple regions and availability zones. You can utilize Autoscaling Groups as well as Hot Spare architectures. Please contact us for specific details.
Production Deployment - Upgrading Shield
To upgrade a running Shield with a new version, follow these steps.
-
Make a note of the files used by Shield
Files used by Shield Purpose start-shield-ca.shShield settings, Controller location, OrgID etc/*Issuing CA key-pair The auth token used to communicate with the Controller is stored in
$LOGDIR/shield/token.json;LOGDIRis set instart-shield-ca.shto typically be$HOME/.banyan. You don’t need to touch this file. -
Download new Shield, untar it and copy over files and settings
We often add new settings to Shield, so please take note of those.
Copy over the files and settings used by current running Shield to the new Shield version.
-
Stop current running containers and start up the new version
 cd $old_shield_path
 ./stop-shield-ca.sh

 cd $new_shield_path
 ./start-shield-ca.sh