Certificate Authentication for PostgreSQL
Leverage SonicWall Cloud Secure Edge (CSE) short-lived x509 Certificates to manage end user access to PostgreSQL servers, including access control and audit logging
- Updated on Jan 08, 2025
Overview
It’s often quite difficult to manage and share passwords and accounts between developers for database access. By leveraging CSE’s Mutually Authenticated TLS (MTLS) flows for TCP services, and combining that with Certificate-Based authentication using short-lived x509 certificates, it’s possible to provide your end users VPN-free zero-trust database access regardless of their network location.
Since the Cloud Secure Edge (CSE) automatically provisions short-lived x509 certificates for your users when they log in, it natively provides the ability to authenticate and authorize users against PostgreSQL Databases. This gives end users the ability to connect to PostgreSQL Databases without a VPN, authenticate against the database directly through the Desktop App, and authorize users with native PostgreSQL access control.
The CSE database access mechanism works seamlessly with the Mutually Authenticated TLS (MTLS) mechanism, letting you choose one or both capabilities based on your needs.
How It Works
With CSE, you modify your PostgreSQL server to require client certificates signed by your CSE (formerly Banyan) Root CA, which can be obtained from the Command Center.
The PostgreSQL Client connection flow using CSE login certificates leverage the in-build client-certificate authentication mechanism that PostgreSQL provides, but also wraps the connection in an MTLS tunnel for complete VPN-free access.
Steps
Setting up VPN-free access to a PostgreSQL Database is very similar to the setup process followed to secure a TCP service, as described in Notes on Securing TCP Services.
Then, there are a few additional steps to enable CSE Client Certificate Authentication:
- 1. In the Command Center, retrieve the CSE Root CA
- 2. Provision a Server Certificate
- 3. Modify PostgreSQL for SSL and Client Certificate Authentication
- 4. Connect to PostgreSQL using the PostgreSQL Client
1. Retrieve the CSE Root CA
We will use CSE’s ability to provision short-lived x509 certificates for end users (called login certificates) to authenticate with the PostgreSQL Database.
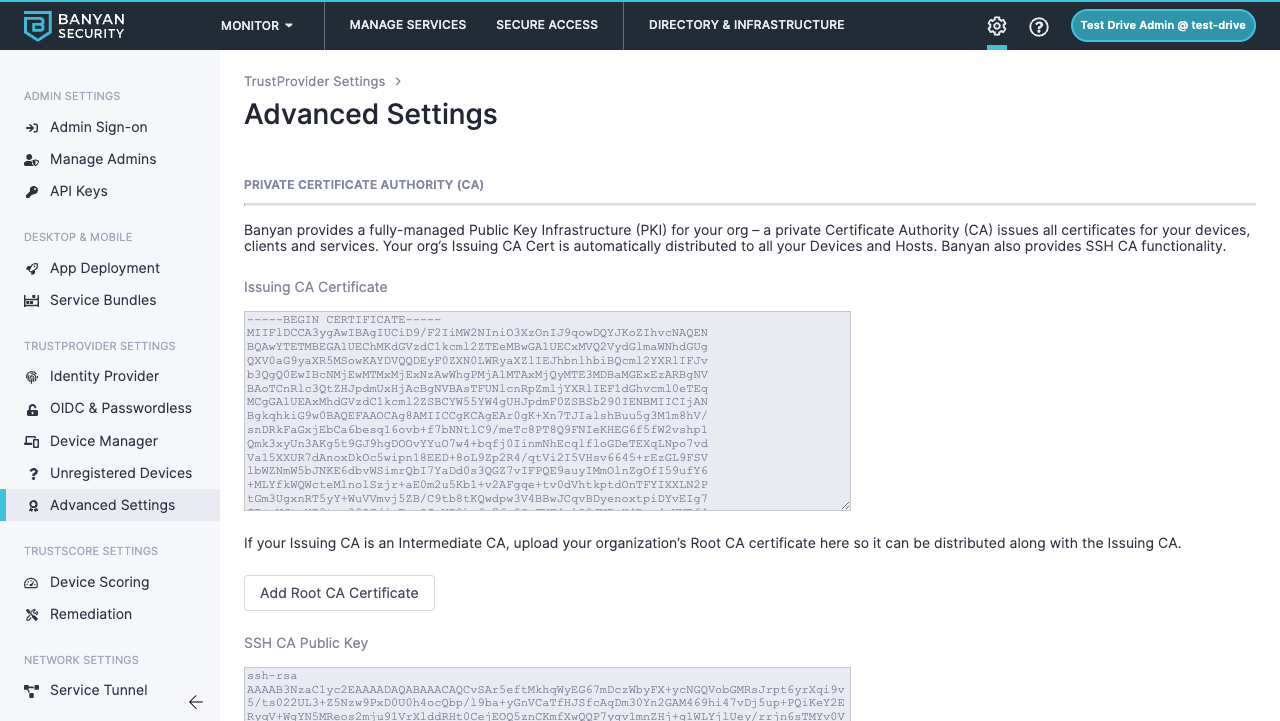
Navigate to Settings > TrustProvider Settings > Advanced Settings and copy the Issuing CA Certificate to your PostgreSQL Server Host at /etc/ssl/certs/banyan-ca.crt. This will be used in later steps.

2. Provision a Server Certificate using Let’s Encrypt
In order for the PostgreSQL Client to verify your server’s identity, you will need to obtain a certificate through Let’s Encrypt.
CSE will soon provide the ability to provision server certificates through Command Center, removing the need to obtain a certificate through let’s encrypt.
3. Modify PostgreSQL for SSL and Client Certificate Authentication
At this point you should have the following certificates present on the PostgreSQL Server Host:
/etc/ssl/certs/banyan-ca.crt/etc/ssl/certs/postgresql-server.crt/etc/ssl/certs/postgresql-server.key
And they should be owned by the postgres user on the host:
$ sudo chown postgres:postgres /etc/ssl/certs/banyan-ca.crt /etc/ssl/certs/postgresql-server.crt /etc/ssl/certs/postgresql-server.key
$ sudo chmod 0600 /etc/ssl/certs/postgresql-server.key
Next, you’ll need to modify your PostgreSQL configuration file, named postgresql.conf. This can often be found at /etc/postgresql/POSTGRESQL_VERSION/main where POSTGRESQL_VERSION is the installed PostgreSQL version. You will need to configure this file to tell PostgreSQL to require clients to connect over TLS and where to look for the CSE CA:
#...
ssl_cert_file = '/etc/ssl/certs/postgresql-server.crt'
ssl_key_file = '/etc/ssl/certs/postgresql-server.key'
ssl_ca_file = '/etc/ssl/certs/banyan-ca.crt'
#...
Next modify the pg_hba.conf file to require client-certificate authentication as well as TLS connections:
# TYPE  DATABASE        USER            ADDRESS                 METHOD

# ...
hostssl all             all             all                     md5 clientcert=1
# ...
With this configured it may be required to restart your postgresql process. This can often be done by running sudo systemctl restart postgresql.
4. Connect to PostgreSQL using the PostgreSQL Client
Ensure your end users install the latest desktop app and register their device.
Once the TCP Service is defined, your end users will see it in their desktop app.
When the user clicks Connect, the Desktop App will launch the banyanproxy in TCP Mode, on the specified port (we recommend 5432 for PostgreSQL).
The user can now use the PostgreSQL Client (psql) to access the Database by using their Login Certificate. In this example we’ve set the port to 5432, and are connecting to the default database as the root user:
bash
psql "host=127.0.0.1 port=5432 user='root' dbname=default sslmode=verify-full sslcert='/Users/shivanshvij/Library/Application Support/banyanapp/login-cert.pem' sslkey='/Users/shivanshvij/Library/Application Support/banyanapp/login-key.pem'
The PostgreSQL Database will validate the CSE-issued short-lived login certificate to allow database access.
Audit logs
You can grab granular logs of authorized accesses and unauthorized attempts. Instructions coming soon!